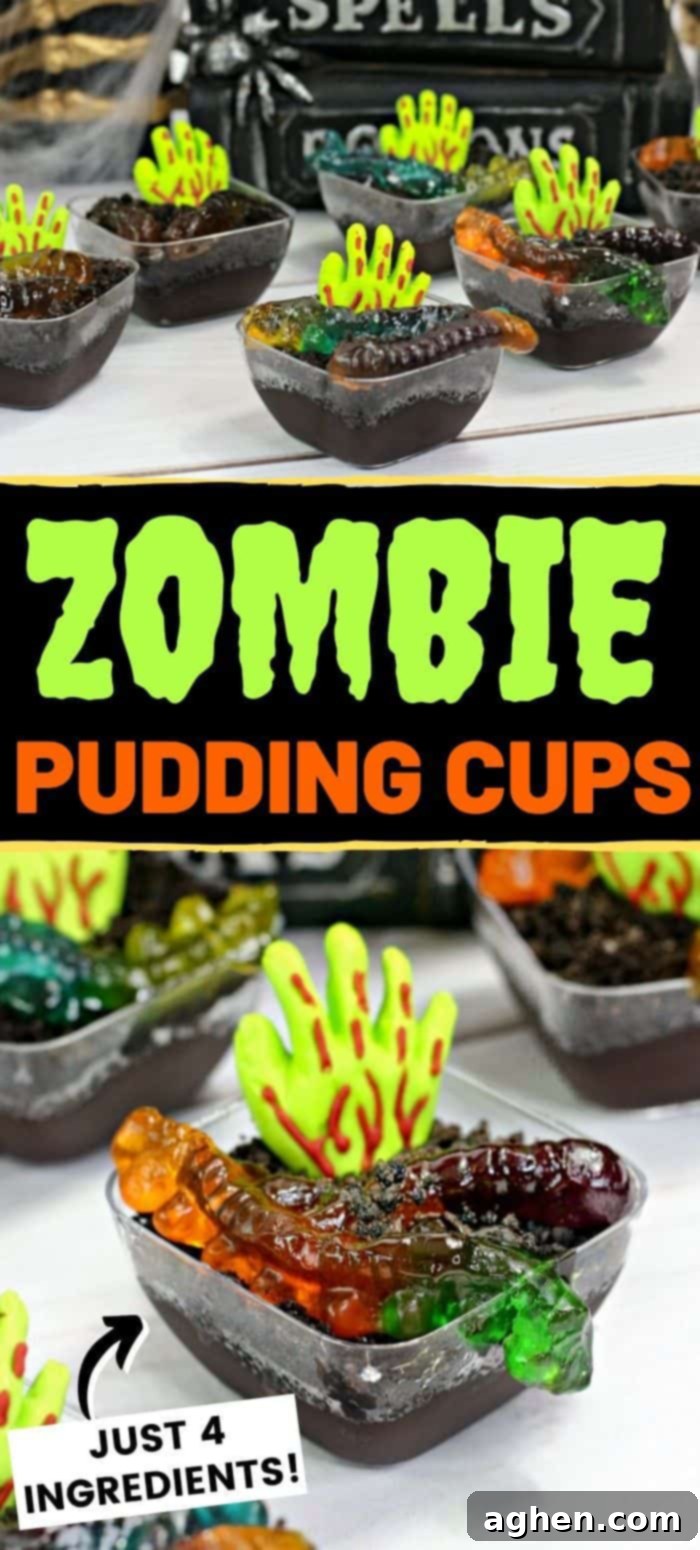
Spooky & Easy 5-Minute Zombie Halloween Pudding Cups: The Ultimate Party Treat
As the leaves begin to turn and a crisp chill fills the air, it can only mean one thing: October is officially here, and Halloween is just around the corner! It’s the perfect time to start planning your ghostly gatherings and, of course, your spine-chilling treats. If you’re on the hunt for a show-stopping yet incredibly simple Halloween dessert, look no further than these Zombie Halloween Pudding Cups. They’re a ghoulishly delightful twist on the classic dirt and worms pudding, transforming a beloved childhood favorite into a creepy-crawly spectacle that will be the talk of your Halloween party.
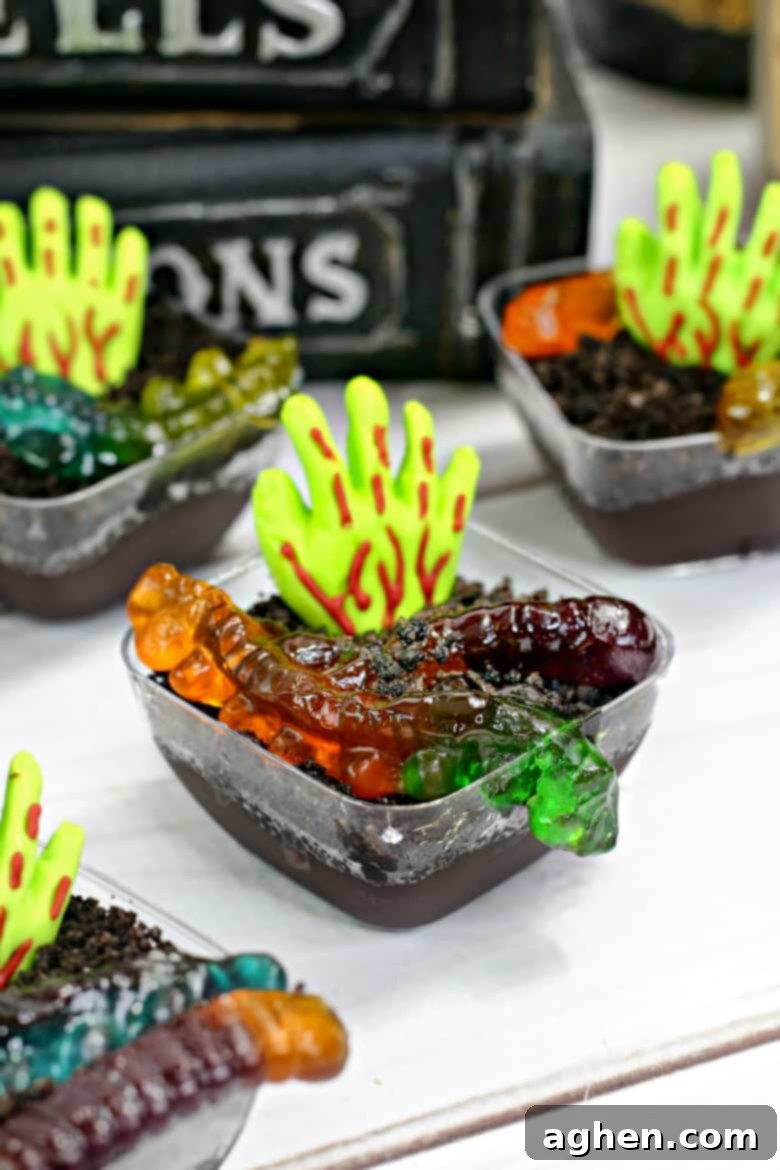
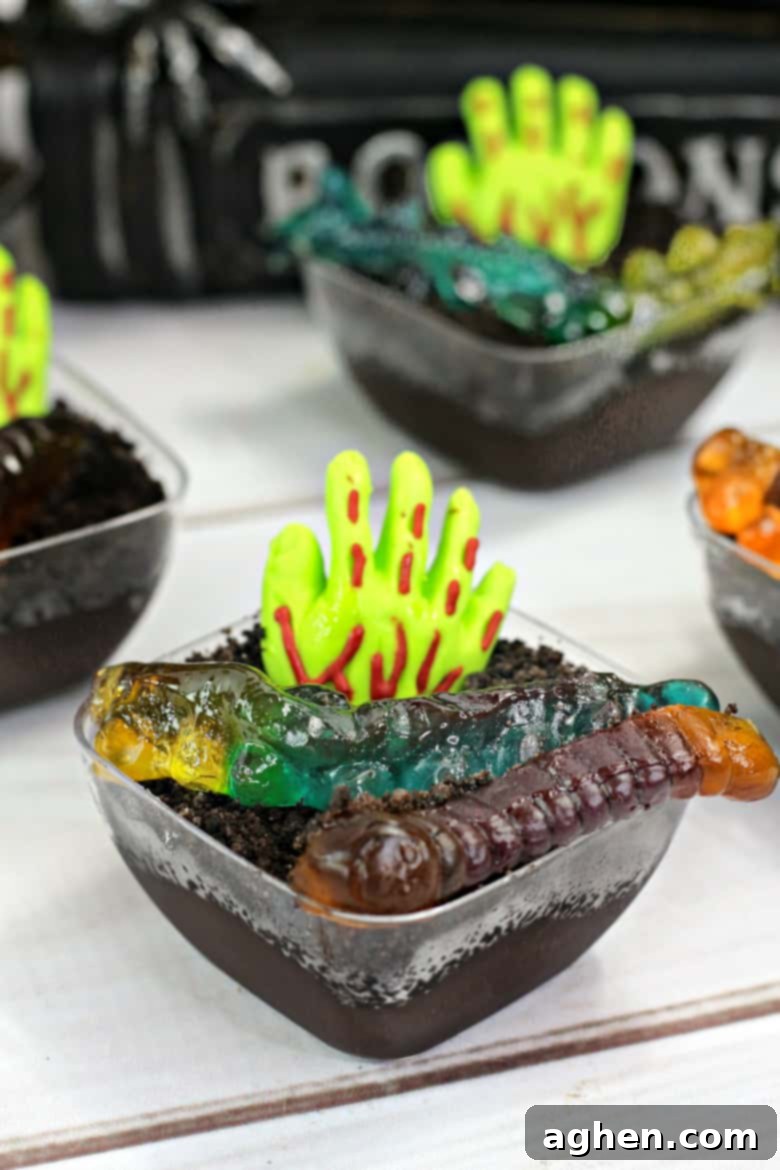
What makes these pudding cups truly special? Not only are they visually striking, with eerie candy zombie hands seemingly rising from their chocolate pudding graves, but they also come together in just 5 minutes with only 4 simple ingredients! This means less time stressing in the kitchen and more time enjoying the spooky season with your loved ones. Whether you’re hosting a big Halloween bash or just looking for a fun activity with the kids, these zombie-themed treats are guaranteed to bring smiles and maybe a few delightful shivers.
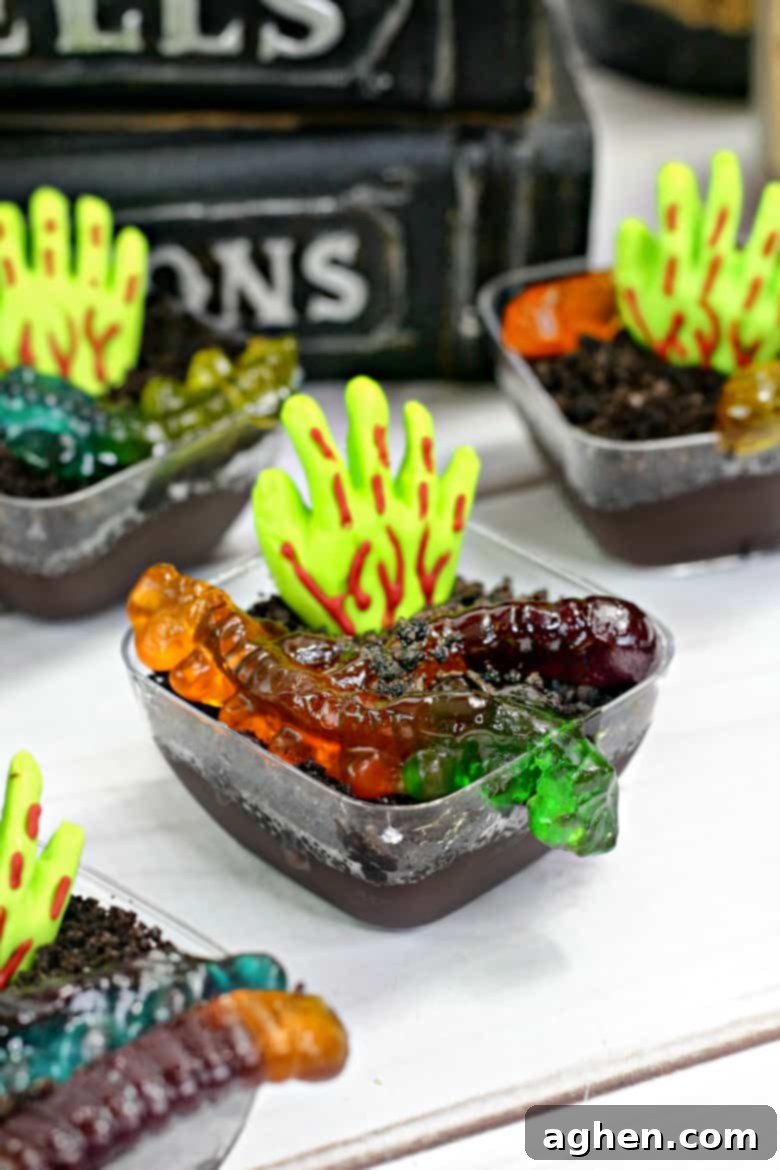
The beauty of this recipe lies in its simplicity. It’s so straightforward that even the youngest aspiring ghouls and goblins can lend a hand in the kitchen. Kids will absolutely love crushing the OREO cookies to create the “dirt” and, of course, placing the candy zombie hands and gummy worms. Imagine their excitement as they watch these creepy, sugary appendages push through the “earth,” as if reaching for brains! Eek – it’s a delightful kind of scary!
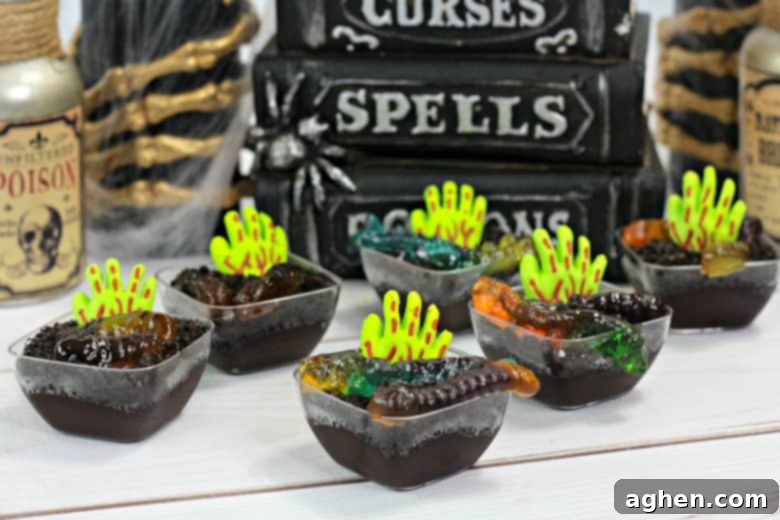
Beyond being easy and fun to make, these individual pudding cups are perfect for any Halloween party recipe. Serving treats in individual portions not only looks appealing but also makes for easy distribution and ensures everyone gets their own spooky serving without any fuss. They’re a hygienic and convenient option for any gathering, big or small. If you’re looking for more easy Halloween dessert ideas to complement your zombie treats, be sure to check out this sweet and salty Halloween Chex Mix recipe, a spooky Halloween bark recipe, or these adorable Frankenstein Rice Krispie Treats.
Zombie Pudding Cups: The Quick & Easy Recipe
Rating: 5 out of 5 stars (based on 4 votes)
Zombie Pudding Cups
Author: Jaclyn
Prep Time: 5 mins
Total Time: 5 mins
Chocolate Halloween pudding cups with zombie hands coming out of the dirt!
Servings: 6
Pin Recipe
Equipment
- Mini Dessert Cups
Ingredients
Instructions
- Spoon your prepared chocolate pudding into mini dessert cups until each cup is about 3/4 full. This creates the dark, rich “earth” from which your zombies will rise.
- Next, add a generous layer of finely crumbled OREO cookies over the pudding. This is your spooky “dirt” layer. For best results, use a food processor to crush your OREOs, including the cream filling, until they resemble fine soil.
- Finally, top each cup with a creepy candy zombie hand, positioning it as if it’s clawing its way out of the grave. Scatter a few mini gummy worms on top, making them look like they’re wiggling through the dirt.
Notes
For a fun (and strictly 21+) adult Halloween treat, consider soaking your gummy worms in sour apple pucker for 24-48 hours before assembling the pudding cups. This adds a boozy kick and an extra layer of “pucker” to your spooky dessert!
Why These Zombie Pudding Cups Are a Must-Make This Halloween
These aren’t just any pudding cups; they’re a miniature edible graveyard, brimming with fun and fright! Here’s why they’ll be an instant hit:
- Unbeatably Fast: In the rush of Halloween preparations, a 5-minute dessert is a lifesaver. No baking, no complex steps – just assemble and serve!
- Minimal Ingredients: With just four core ingredients, you likely already have most of them in your pantry, making last-minute prep a breeze.
- Kid-Friendly Fun: This recipe is perfect for getting children involved in the kitchen. They’ll love crushing OREOs and arranging the spooky toppings, fostering creativity and excitement.
- Visually Striking: The sight of zombie hands emerging from “dirt” is undeniably creepy and utterly captivating. It’s a fantastic conversation starter and a memorable treat for any Halloween gathering.
- Perfect for Parties: Served in individual cups, they offer convenient portion control, reduce mess, and are ideal for grab-and-go party snacks.
- A Spooky Twist: Elevating the classic dirt and worms concept with a zombie theme adds an extra layer of Halloween spirit that both kids and adults will appreciate.
Crafting Your Creepy-Crawly Creations: A Step-by-Step Guide
Let’s dive a little deeper into making these eerie-sistible treats:
The Foundation: Rich Chocolate Pudding
For the “earth” layer, a good quality chocolate pudding is key. You can opt for convenience with pre-made, single-serving chocolate pudding cups (which also serve as their own serving vessel in a pinch!), or quickly whip up a batch from a mix. If you prefer to go the homemade route, a rich, dark chocolate pudding will provide the perfect contrast for your brighter candy toppings. Ensure your pudding is well-chilled and set before assembling to prevent a soupy mess.
The “Dirt”: Crushed OREO Magic
OREO cookies are the gold standard for “dirt” in pudding cup recipes, and for good reason! When crushed, they mimic the appearance and texture of rich, dark soil perfectly. You can crush them by placing them in a Ziploc bag and using a rolling pin, or for ultimate ease, a food processor will do the trick in seconds. Make sure to crush them fine enough to resemble dirt, but a few larger crumbs can add to the realistic texture. Don’t remove the cream filling – it adds to the flavor and helps bind the “dirt” slightly.
Rising from the Grave: Ghoulish Zombie Hands
The candy zombie hands are what truly bring these pudding cups to life (or rather, undeath!). These novelty candies are typically available in party supply stores, candy shops, or online leading up to Halloween. Look for ones that are mostly flat or have a stick for easy insertion into the pudding. Position them strategically so they look like they’re just breaking through the surface of the “dirt,” adding that wonderfully spooky element.
Wriggling Wonders: Gummy Worms
No dirt cup is complete without a few creepy crawlies! Mini gummy worms are ideal as they fit perfectly into the dessert cups without overpowering the zombie hand. You can drape them over the zombie hands, or let them peek out from the “dirt” layer. A mix of colors can add a vibrant, playful contrast to the dark pudding and cookies.
Tips for the Ultimate Spooky Presentation
- Use Clear Cups: Opt for clear mini dessert cups or small glass jars to allow guests to fully appreciate the layered “dirt” and “pudding” effect.
- Add Gravestone Cookies: For an extra graveyard touch, use rectangular shortbread cookies or Milano cookies, decorated with edible marker to look like gravestones, and stick them upright in the pudding.
- Edible Moss: A sprinkle of green coconut (tinted with food coloring) can act as “moss” for an even more realistic graveyard look.
- Serve on a Spooky Tray: Arrange your zombie pudding cups on a dark, ominous-looking tray or a platter decorated with fake spiderwebs and plastic spiders to enhance the creepy ambiance.
- Chilling Effect: For a dramatic display, place the pudding cups around a bowl of dry ice (exercising extreme caution and ensuring proper ventilation), creating a mystical, smoky effect that will amaze your guests.
Variations to Sink Your Teeth Into
While the classic chocolate and OREO combination is fantastic, don’t be afraid to experiment with these ghoulish goodies:
- Alternative Pudding Flavors: Swap chocolate pudding for vanilla, white chocolate, or even a green-tinted pistachio pudding for a different “swamp” effect. Pumpkin spice pudding could also add a seasonal twist!
- Different “Dirt” Options: If OREOs aren’t your preference, try crushed graham crackers, chocolate wafer cookies, or even crumbled chocolate brownies for a richer “soil.”
- Beyond Zombie Hands: Other Spooky Toppers: Can’t find zombie hands? Use candy corn, candy eyes, plastic spiders (for decoration only, of course!), or even ghost-shaped marshmallows to top your cups.
- Adult-Friendly Zombie Shots (21+): As mentioned in the recipe notes, infusing gummy worms in sour apple pucker or even a clear vodka for 24-48 hours can create a truly “spirited” adult version. Ensure these are clearly labeled and kept separate from the kid-friendly versions.
Hosting a Halloween Party? These are Perfect!
These individual zombie pudding cups are tailor-made for Halloween parties. Their single-serving nature means less mess, easier serving, and perfectly portioned treats for each guest. They are quick to prepare in batches, allowing you to create enough for a large crowd without spending hours in the kitchen. Plus, their unique appearance makes them an instant hit, fitting right into any spooky theme from a haunted graveyard to a zombie apocalypse party.
More Easy Halloween Treat Ideas to Explore
If these Zombie Pudding Cups have sparked your creative Halloween spirit, you might enjoy exploring other easy and fun recipes to complete your festive spread:
- Halloween Chex Mix: A delightful blend of sweet and salty, perfect for munching during a scary movie marathon or as a party snack.
- Halloween Bark: A versatile and customizable treat made with melted chocolate and your favorite Halloween candies, easily broken into spooky shards.
- Frankenstein Rice Krispie Treats: Adorable and simple to decorate, these green monsters are a playful addition to any Halloween dessert table.
Conclusion: Get Ready for a Ghoulishly Good Time!
These 5-minute Zombie Halloween Pudding Cups are a testament to how easy and fun holiday baking (or rather, assembling!) can be. With minimal effort and maximum spooky impact, they are sure to be a highlight of your Halloween celebrations. So gather your ingredients, enlist your little monsters, and get ready to create a dessert that’s both delicious and delightfully disturbing. Happy Halloween, and happy haunting!

Did You Make This Recipe?
Share your spooky creations with us! Tag @crayonsandcravings on Instagram, and make sure to follow us on Pinterest @crayonsandcravings for even more inspired recipes and ideas!
Pin Recipe
Leave A Review
Pin for Later:
