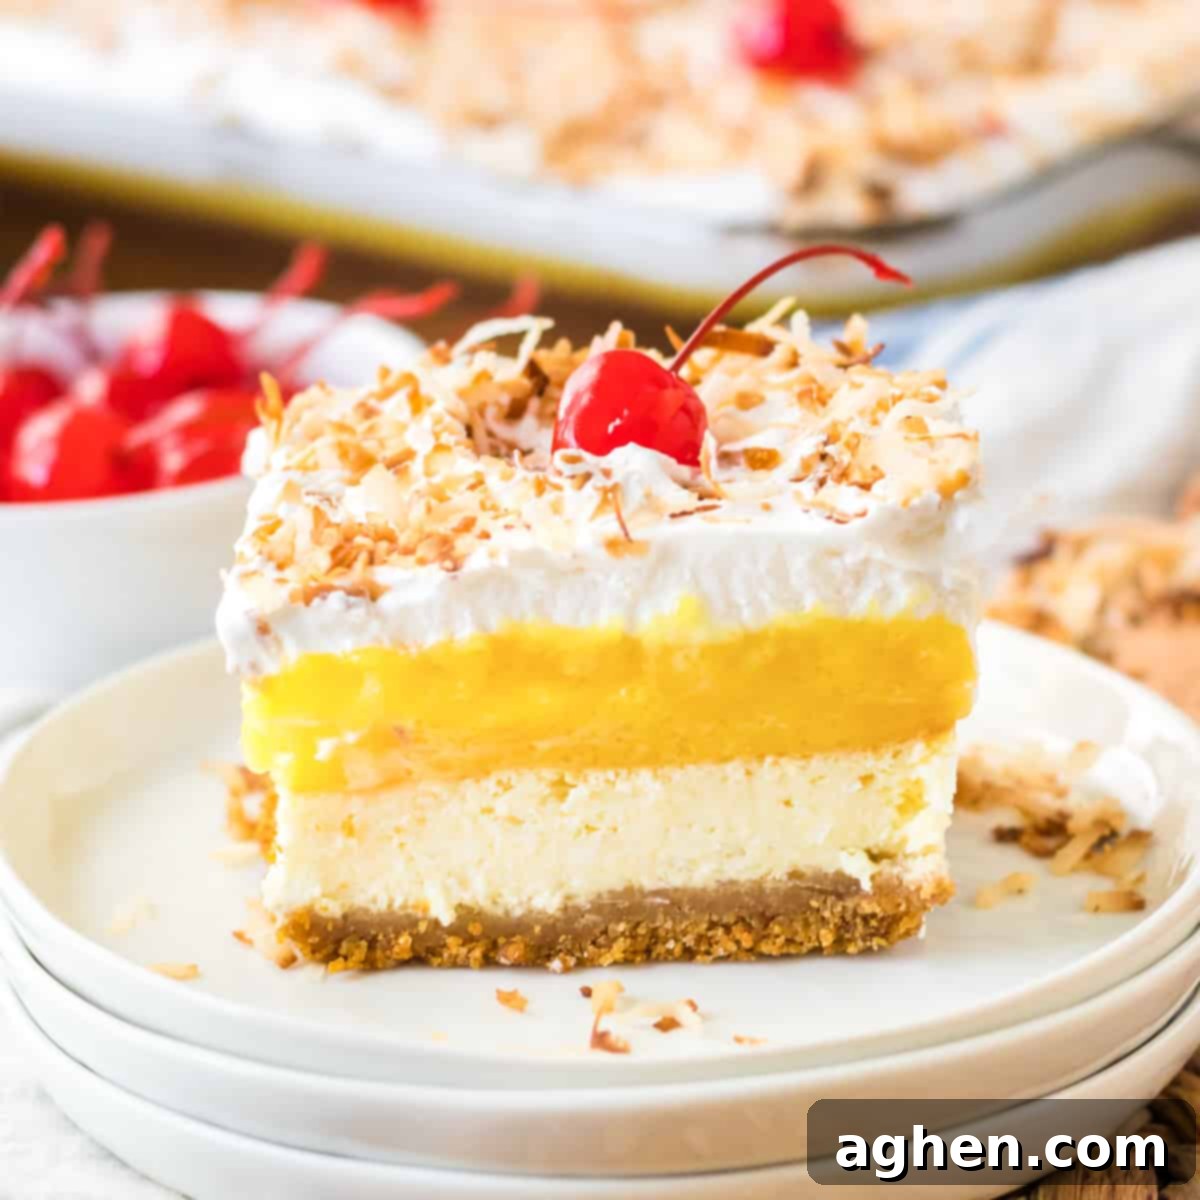
The Ultimate Pina Colada Lush Recipe: Your Dreamy Tropical No-Bake Summer Dessert
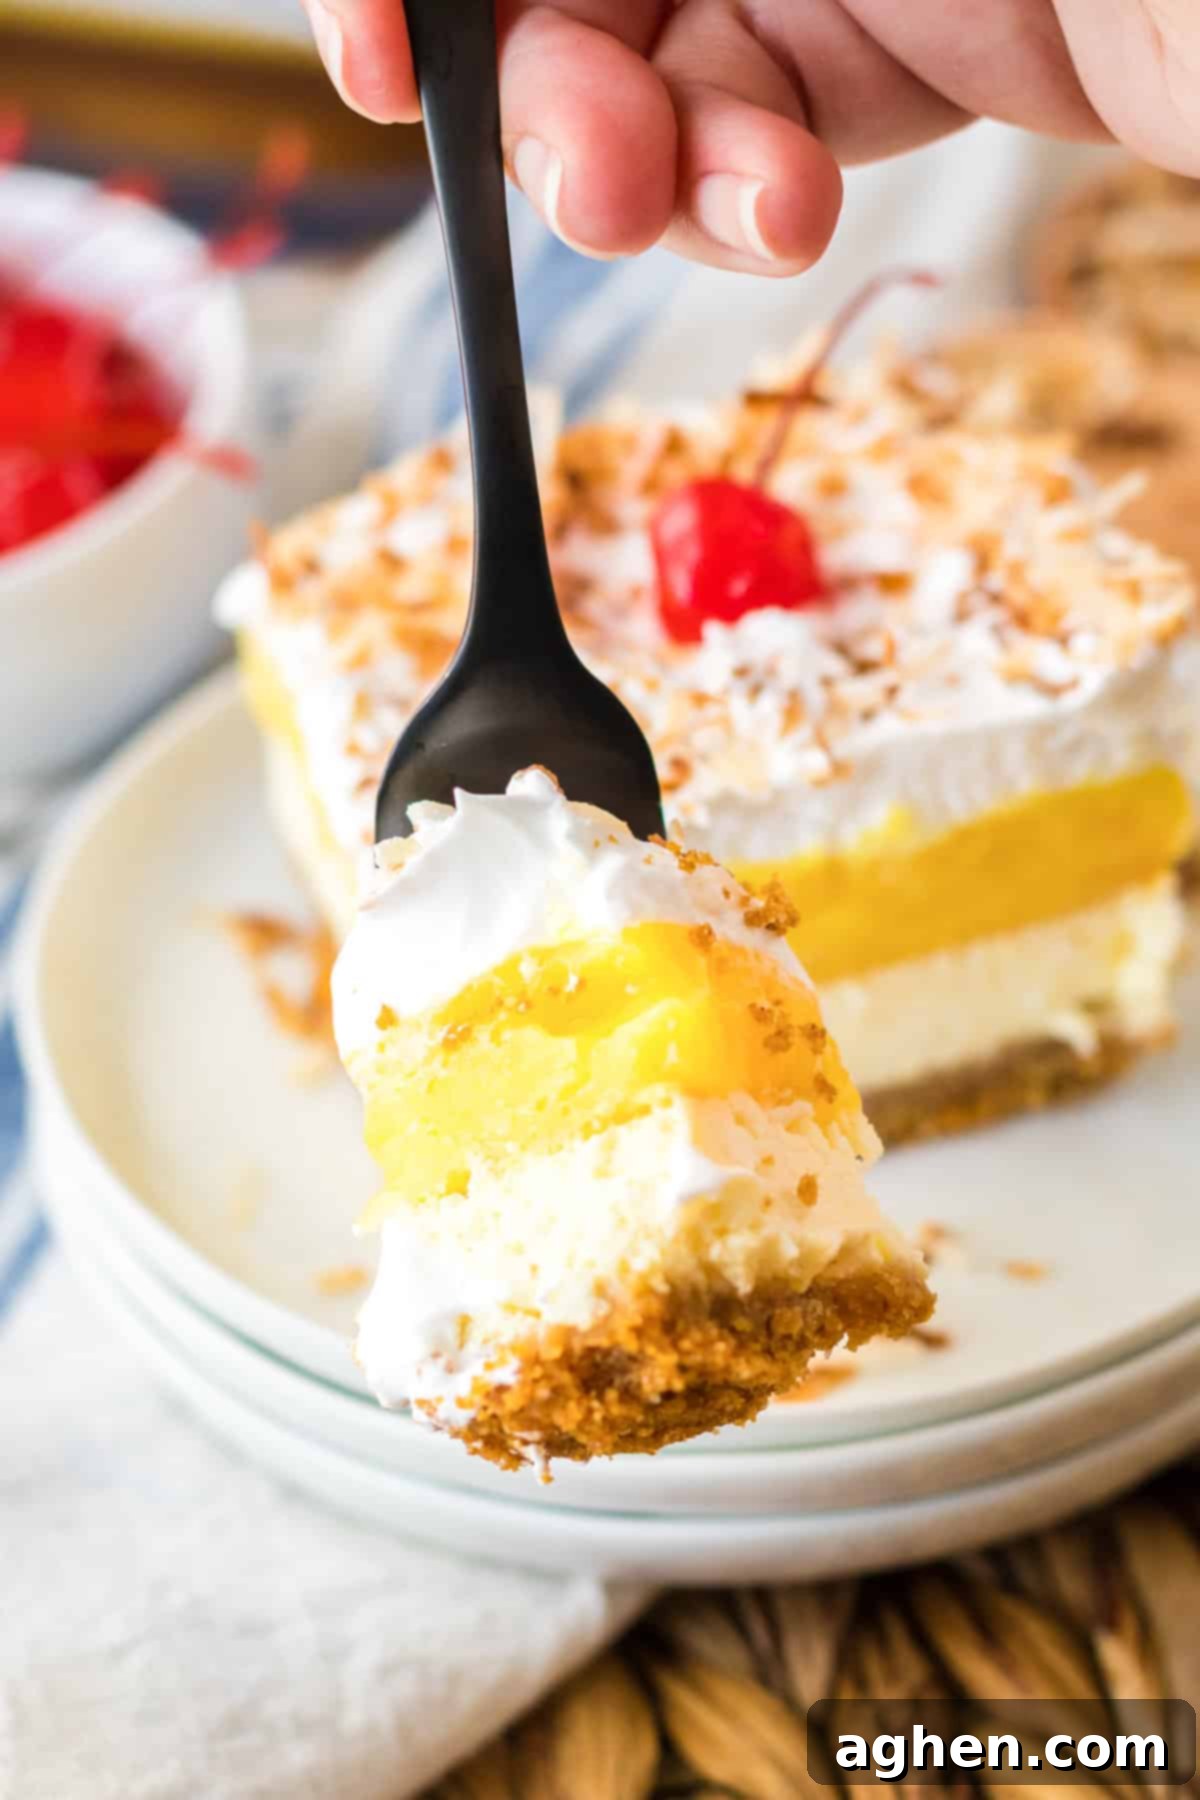
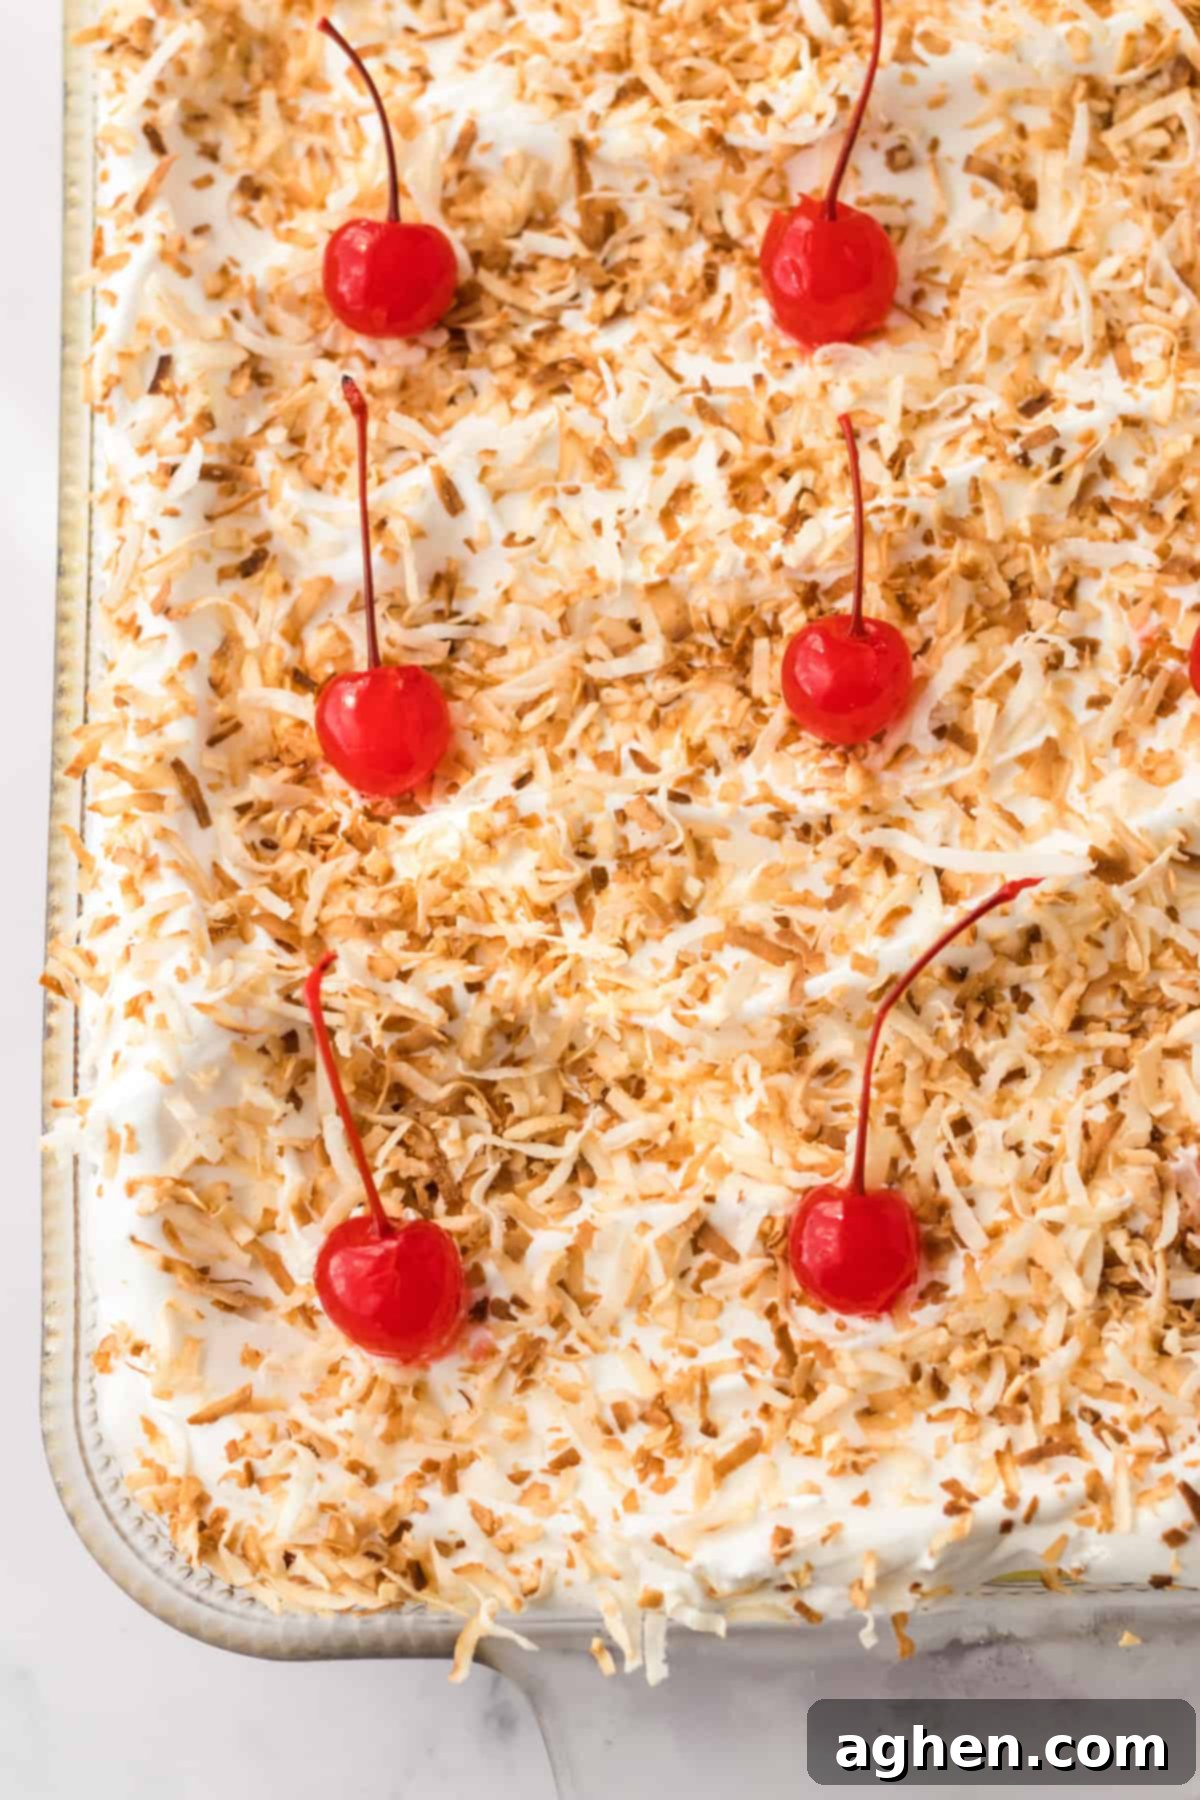
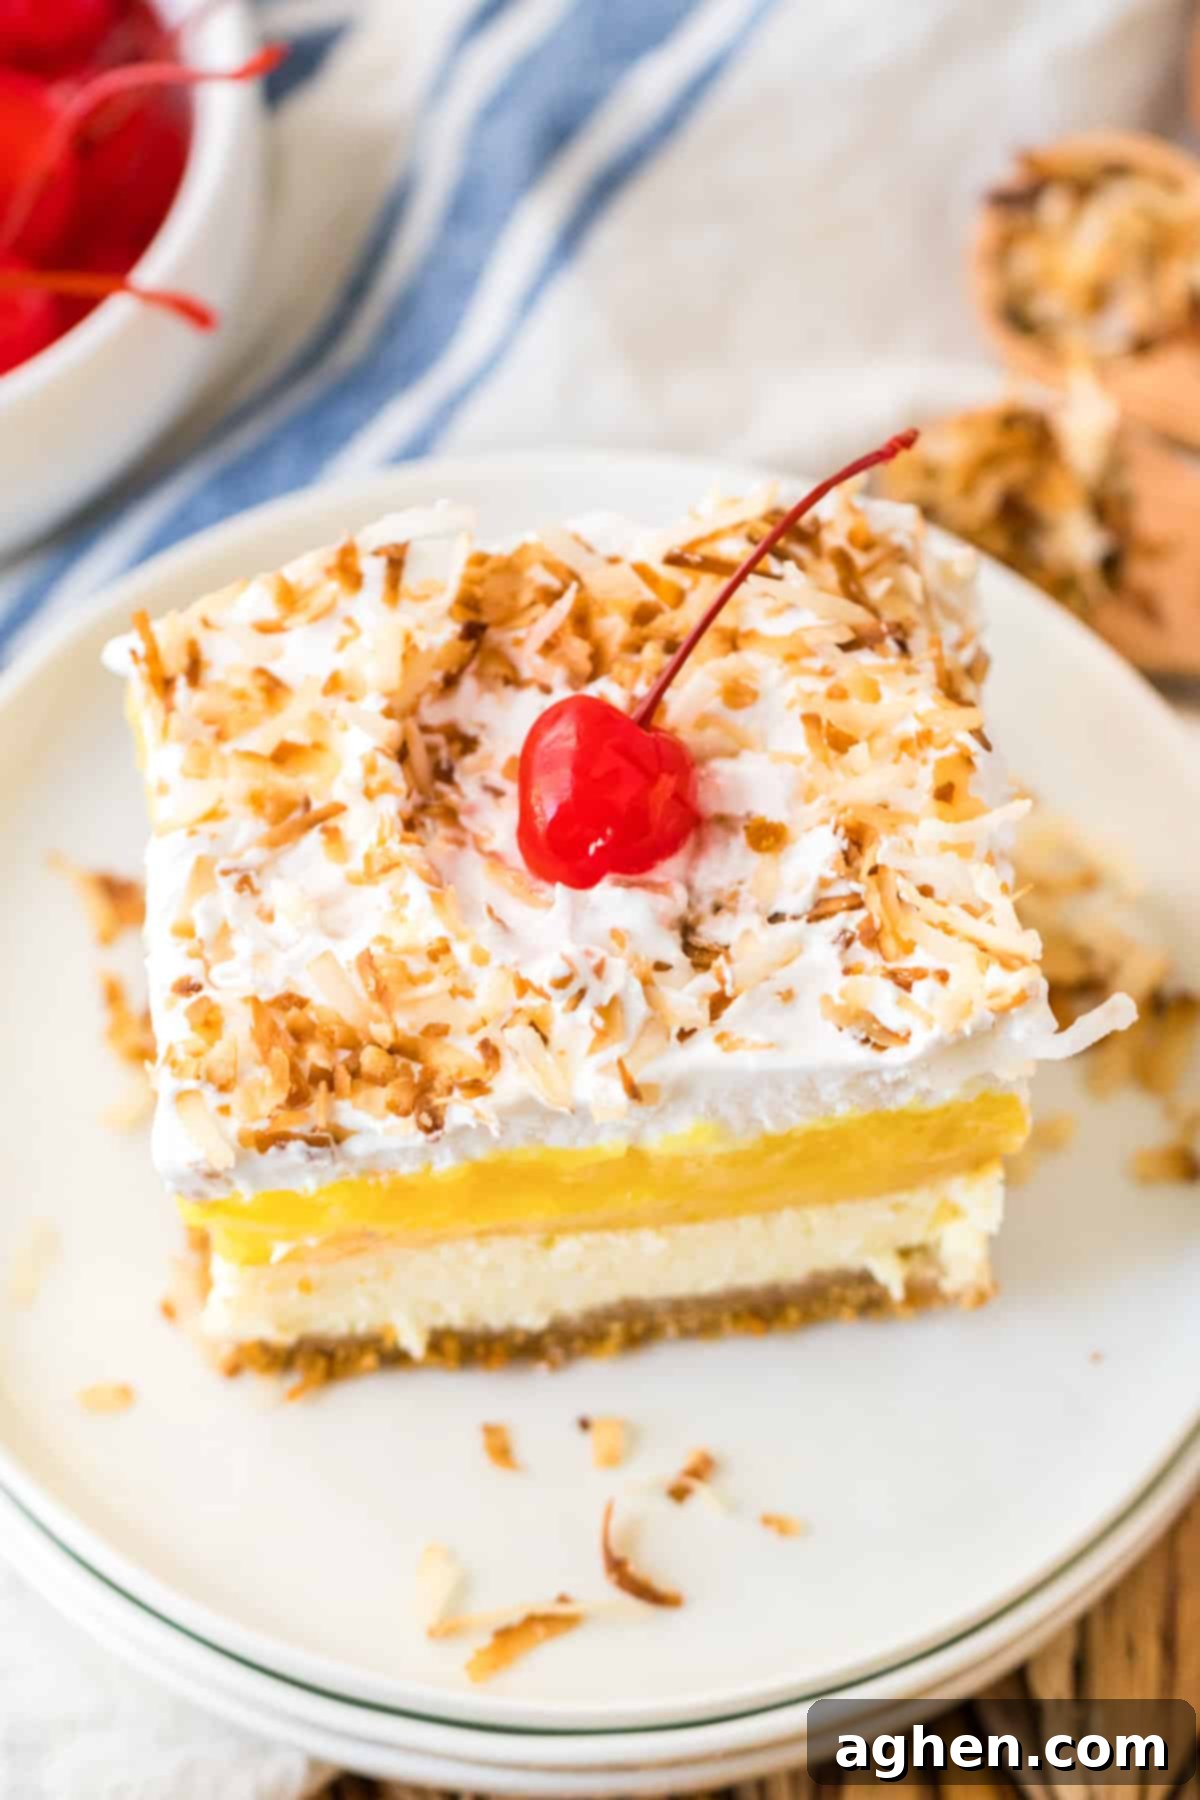
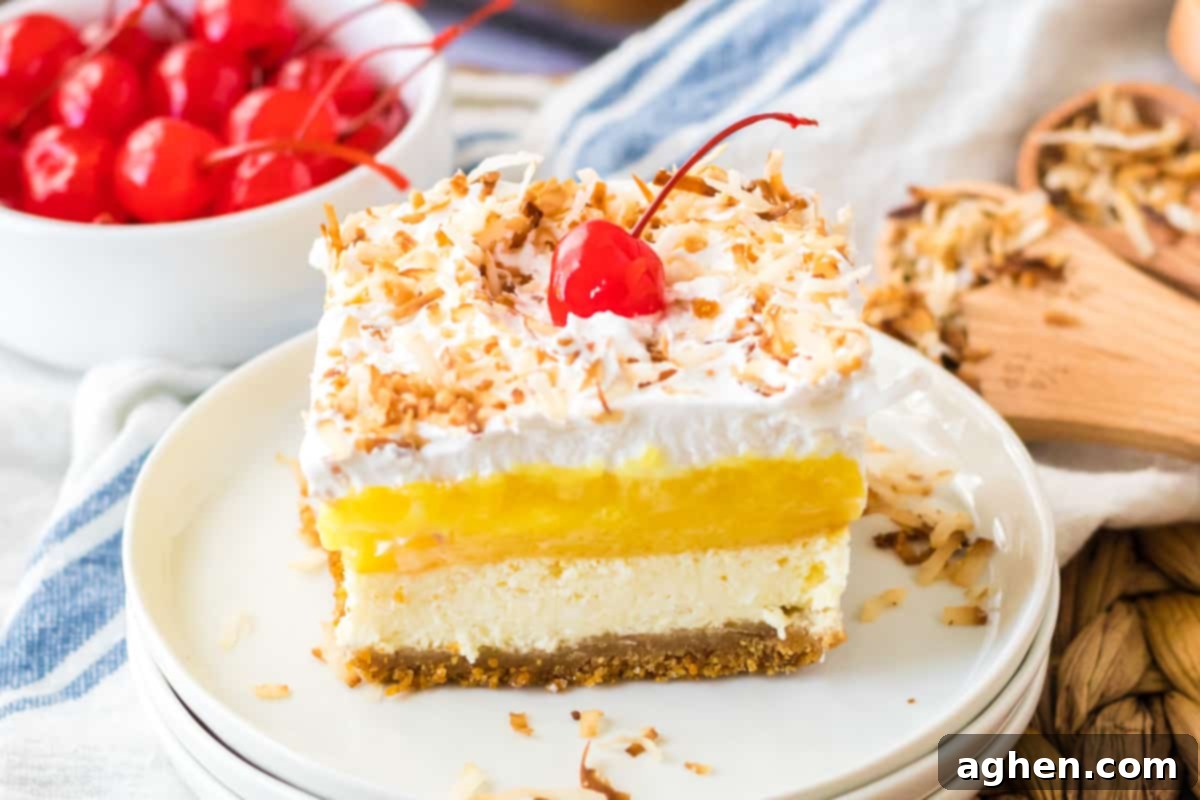
Get ready to whisk yourself away to a sun-drenched beach with every spoonful of this incredible Pina Colada Lush! This dessert is more than just a sweet treat; it’s a vibrant, layered masterpiece that perfectly captures the essence of a tropical getaway. Imagine a buttery, crunchy graham cracker crust providing the perfect foundation for a rich, creamy coconut cheesecake layer. On top of that, a luscious, bright pineapple filling adds a burst of fruity tang, all crowned with a fluffy whipped topping, toasted coconut flakes, and a vibrant maraschino cherry. It’s truly the ultimate dessert for all your summertime cravings and a guaranteed crowd-pleaser!
If you love easy, delightful layered desserts, be sure to also check out my lemon lush with graham cracker crust for a zesty twist or this amazing no-bake blueberry delight for another fruity favorite. These recipes offer similar ease and deliciousness, perfect for any occasion.
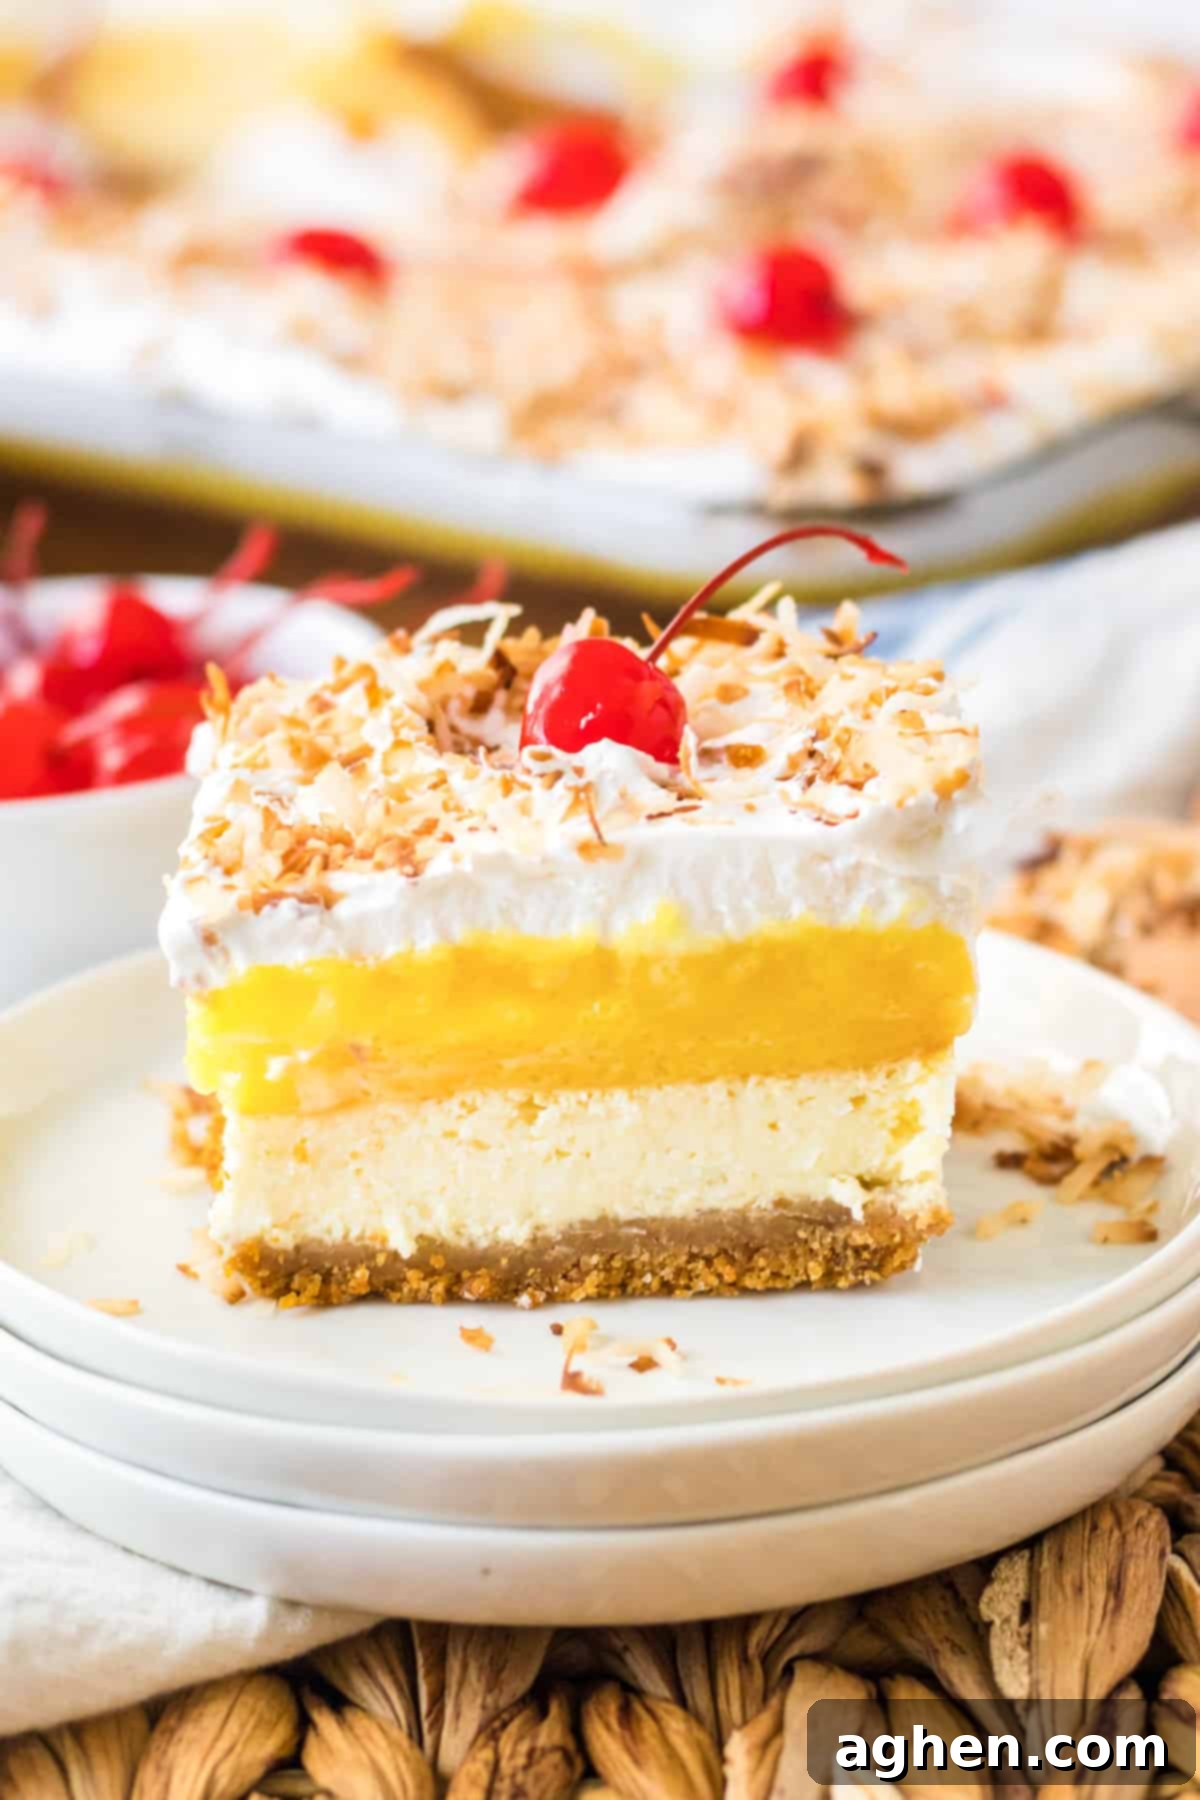
Are you craving a taste of the tropics right in your own home? This Pina Colada Lush is a sweet, cool, and creamy dessert that will have you dreaming of island breezes all year long. It’s a symphony of textures and flavors, combining the satisfying crunch of a buttery graham cracker crust with the silky smoothness of coconut cheesecake and the bright, tangy sweetness of pineapple. Each bite is like a mini-vacation, a slice of paradise that’s surprisingly easy to create in your very own kitchen.
This pineapple coconut dessert is incredibly versatile and perfect for a wide range of occasions. Whether you’re hosting a lively summer BBQ, bringing a show-stopping dish to a church potluck, or simply looking for a delightful family treat, these Pina Colada bars fit the bill perfectly. One of its greatest advantages is that you can prepare this stunning layered dessert a day ahead of time. This means less stress on the day of your event, allowing you to kick back, relax, and enjoy the party while your spectacular dessert chills to perfection. Be warned: these tropical bars are so irresistible, your guests will definitely be coming back for seconds!
Now, let’s dive into the irresistible tropical flavors that make this creamy summer dessert an absolute must-try.
Why You’ll Love This Pina Colada Lush
- Tropical Flavor Escape: The combination of coconut, pineapple, and a hint of rum (if you choose to add extract) perfectly replicates the beloved Pina Colada cocktail, delivering a refreshing and exotic taste experience.
- Irresistible Layers: From the crunchy graham cracker base to the creamy cheesecake and fruity pineapple, each layer offers a unique texture and flavor that builds to a harmonious whole.
- Perfect for Summer: Served chilled, this lush dessert is incredibly refreshing on a hot day. It’s lighter than a heavy cake but still wonderfully decadent.
- Make-Ahead Friendly: The ability to prepare this dessert a day in advance makes it ideal for entertaining, freeing up your time on the day of your event. The flavors even meld and deepen with time!
- Crowd-Pleasing Appeal: With its vibrant appearance and universally loved flavors, this Pina Colada Lush is always a hit at parties, potlucks, and family gatherings.
- Simple to Make: Despite its impressive appearance, this recipe is surprisingly straightforward, with clear steps that even novice bakers can follow with confidence.
Ingredients for Pina Colada Bars
This section provides detailed ingredient notes, essential tips for choosing the right products, and useful substitution options. For all precise measurements, ingredients list, and complete instructions, please refer to the printable recipe card located at the very end of this post.
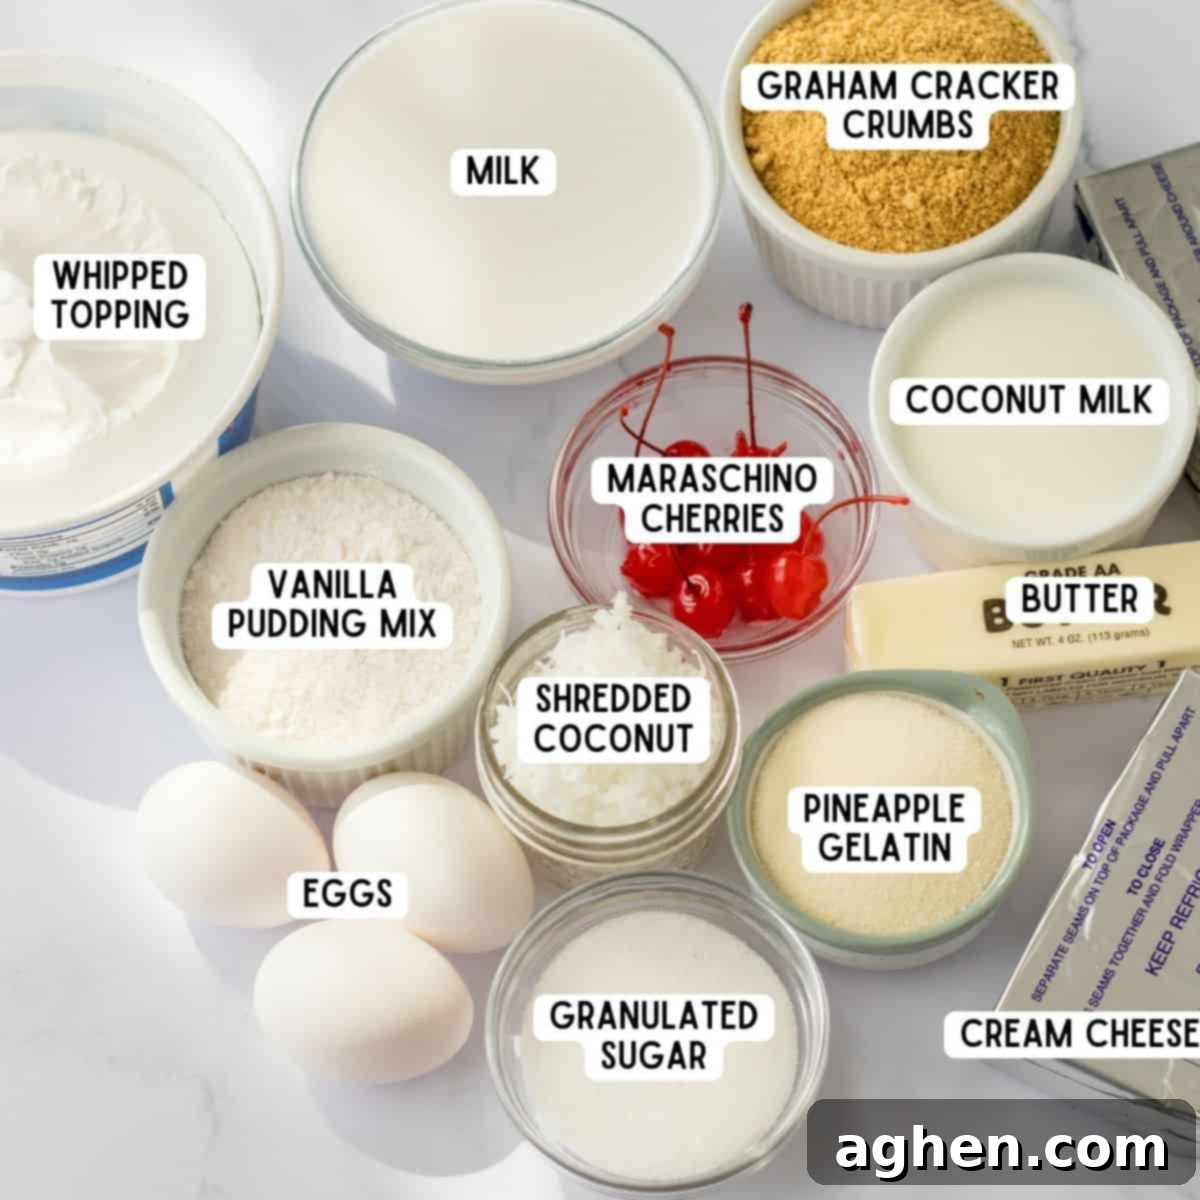
- Graham Crackers — These form the classic, buttery, and slightly sweet foundation of our lush dessert. Crushing them finely ensures a cohesive and delicious crust. You can either buy pre-crushed crumbs or crush whole crackers yourself using a food processor or a Ziploc bag and a rolling pin for a fun, hands-on approach.
- Granulated Sugar — Sugar plays a dual role, adding essential sweetness to both the crunchy graham cracker crust and the rich, tangy cheesecake layer. It balances the flavors beautifully.
- Butter — While many desserts call for unsalted butter, for this recipe, I actually recommend using salted butter. The hint of salt helps to cut through the overall sweetness of the dessert, creating a more balanced and complex flavor profile. No matter which you choose, ensure it’s fully melted before combining it with the graham cracker crumbs. This is crucial for binding the crust together and infusing it with that irresistible rich, buttery taste.
- Cream Cheese — This is the star of our decadent cheesecake filling, providing that signature creamy texture and a delightful, slightly tangy flavor. For the best results and a firm set, always opt for full-fat cream cheese. I do not recommend using Neufchatel (light cream cheese) as it contains more water and less fat, which can result in a softer, less flavorful, and less stable cheesecake layer. Make sure it’s at room temperature for easy blending.
- Coconut Milk — Essential for that authentic tropical taste! It infuses the cheesecake filling with a rich, luscious coconut flavor and contributes to its smooth consistency. Use full-fat canned coconut milk for the best flavor and texture, typically found in the Asian foods aisle.
- Eggs — The eggs are key in the cheesecake layer, acting as a binding agent that helps the filling set properly during baking. Ensure they are also at room temperature to blend smoothly into the cream cheese mixture, preventing lumps.
- Sweetened Shredded Coconut — You’ll incorporate this into the cheesecake filling for an added burst of coconut flavor and texture. Plus, a portion will be toasted and sprinkled over the top as a garnish, adding a beautiful golden color and an even deeper, nutty coconut aroma.
- Pineapple Gelatin — This vibrant ingredient, combined with the instant pudding, creates our delightfully fruity and refreshing pineapple layer. You can use a specific “Island Pineapple” Jell-O brand or any generic pineapple-flavored gelatin mix available at your local grocery store.
- Water — Boiling water is used to fully dissolve the pineapple gelatin, ensuring a smooth and lump-free fruit layer.
- Instant Vanilla Pudding Mix — This is crucial for creating the cool, creamy texture of the pineapple layer that sits perfectly over the baked cheesecake. It blends seamlessly with the dissolved gelatin. It’s vital to use instant pudding mix, not the cook-and-serve variety, for this no-bake component of the recipe.
- Milk — Used to whisk up the instant vanilla pudding mix, giving it its creamy consistency. Any type of milk (whole, 2%, or even a non-dairy alternative) will work, but whole milk will yield the richest result.
- Whipped Topping — Light, airy, and fluffy, a thawed store-bought whipped topping like Cool Whip is my go-to for the final layer. Ensure it’s completely thawed in the refrigerator before use. Alternatively, if you prefer, a batch of homemade stabilized whipped cream works wonderfully and adds an extra touch of gourmet freshness.
- Maraschino Cherries — These iconic red cherries are not just for a pop of color and extra sweetness; they complete the classic Pina Colada aesthetic! A bright maraschino cherry on top gives this dessert the unmistakable feel of the tropical drink it’s named after, making each slice even more appealing.
Equipment You’ll Need for Piña Colada Lush Cake
Having the right tools at hand can make the baking process smoother and more enjoyable. Here are some essential pieces of equipment that will come in handy while you’re making this fantastic coconut pineapple lush cake:
- Deep 9×13 Pyrex Baking Dish: A sturdy glass baking dish is ideal for layered desserts. The “deep” aspect is important here to accommodate all the delicious layers without overflowing.
- Whisk: Essential for combining dry ingredients, dissolving gelatin, and whipping pudding to a smooth consistency.
- Hand Mixer (Electric): This will be your best friend for achieving perfectly fluffy cream cheese and sugar, and smoothly incorporating other ingredients into the cheesecake filling.
- Measuring Cups and Spoons: Accurate measurements are crucial in baking, especially for getting the right consistency for each layer.
- Mixing Bowls (Various Sizes): You’ll need a few bowls – one for the crust, one for the cheesecake filling, and separate ones for preparing the gelatin and pudding for the pineapple layer.
- Spatula or Offset Spatula: Useful for evenly spreading the crust, cheesecake, pineapple filling, and whipped topping. An offset spatula makes spreading smooth layers much easier.
- Small Skillet: For toasting the shredded coconut to a beautiful golden brown, enhancing its flavor and aroma.
How to Make Pina Colada Lush
This section provides a clear, step-by-step guide with descriptive instructions and accompanying photos to help you successfully create this delicious dessert. For the full, printable recipe, complete with precise measurements and nutritional information, please see the comprehensive recipe card below.
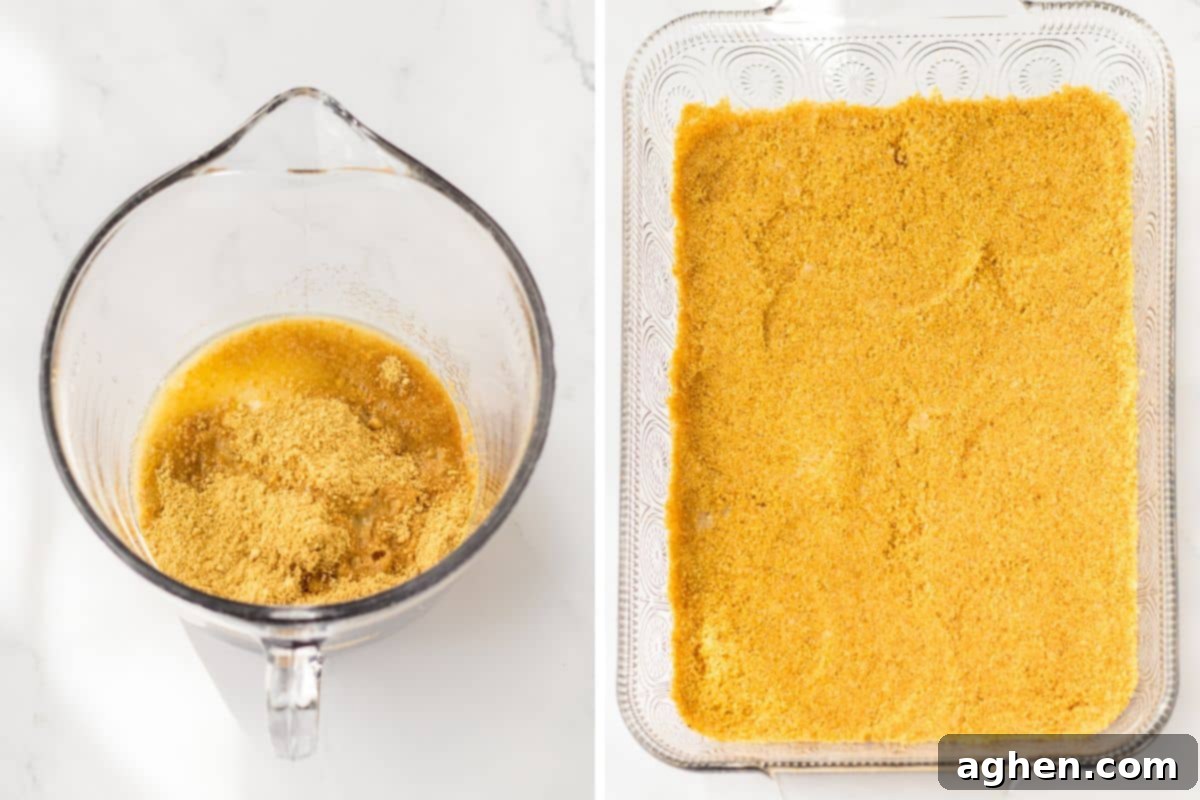
Step 1 – Prepare the crust: Begin by coating a 9×13-inch baking dish with a nonstick cooking spray to prevent sticking and ensure easy serving later. In a medium-sized mixing bowl, combine the finely crushed graham cracker crumbs, granulated sugar, and melted butter. Mix these ingredients thoroughly until the crumbs are evenly moistened and resemble wet sand. Transfer this mixture to your prepared baking dish. Using the bottom of a glass or your fingers, firmly and evenly press the mixture into the bottom of the dish to form a compact crust. Bake this crust in a preheated oven at 325°F (160°C) for approximately 12 minutes, or until it turns lightly golden brown and fragrant. Once baked, remove it from the oven and set it aside on a wire rack to cool completely. This cooling step is essential before adding the next layer.
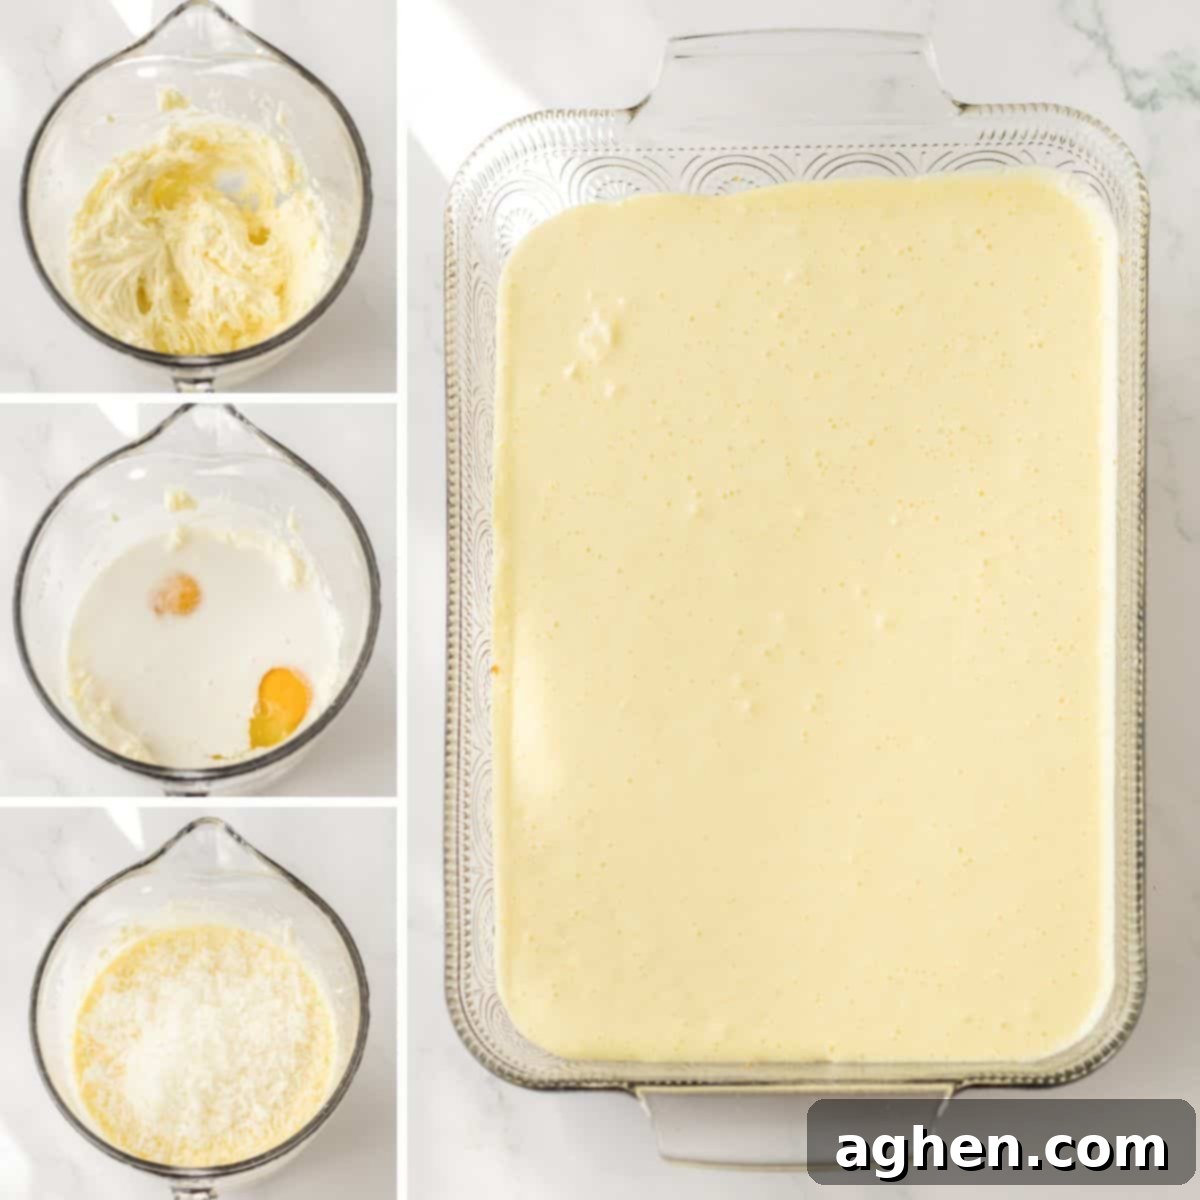
Step 2 – Make the cheesecake filling: In a large mixing bowl, using an electric hand mixer, beat the softened cream cheese and granulated sugar together until the mixture is light, fluffy, and completely smooth – no lumps allowed! This may take a few minutes. Reduce the mixer speed to low and gradually add the coconut milk and eggs, mixing just until they are fully incorporated. Be careful not to overmix at this stage. Finally, gently fold in the shredded coconut using a spatula. Spread this creamy coconut cream cheese mixture evenly over the cooled graham cracker crust. Bake in the same preheated oven (still at 325°F / 160°C) for 40-45 minutes, or until the edges are slightly puffed and the center still has a slight jiggle (like set gelatin). This indicates it’s perfectly cooked. Once baked, let the cheesecake cool completely on a wire rack at room temperature, then transfer it to the refrigerator to chill for at least 2 hours. This chilling time is vital for the cheesecake to firm up properly.
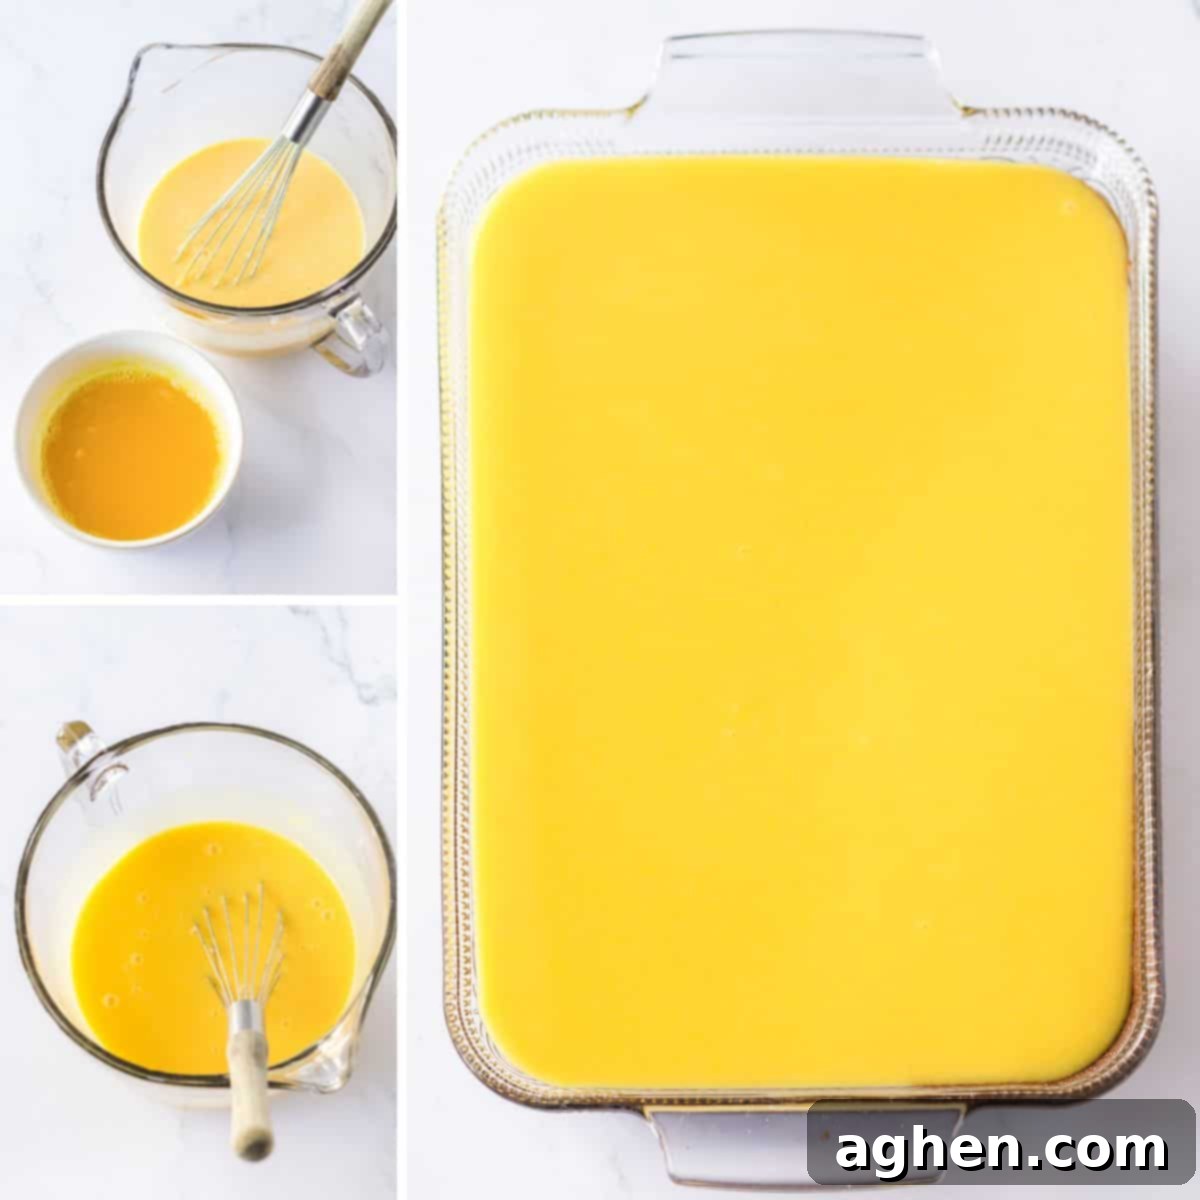
Step 3 – Prepare the pineapple layer: In a small, heatproof bowl, whisk together the pineapple gelatin powder with boiling water until the gelatin is completely dissolved and no granules remain. Set this mixture aside to cool slightly. In a separate, large mixing bowl, whisk the instant vanilla pudding mix with cold milk for precisely 2 minutes. The mixture will begin to thicken. Once the gelatin mixture has cooled a bit (it shouldn’t be hot enough to curdle the pudding), pour it into the large bowl with the vanilla pudding, whisking continuously until both are thoroughly combined and the mixture is smooth and vibrant. Carefully pour this pineapple-pudding mixture over the thoroughly chilled cheesecake layer in your baking dish, spreading it out evenly with a spatula. Return the dish to the refrigerator to chill further while you prepare the final topping.
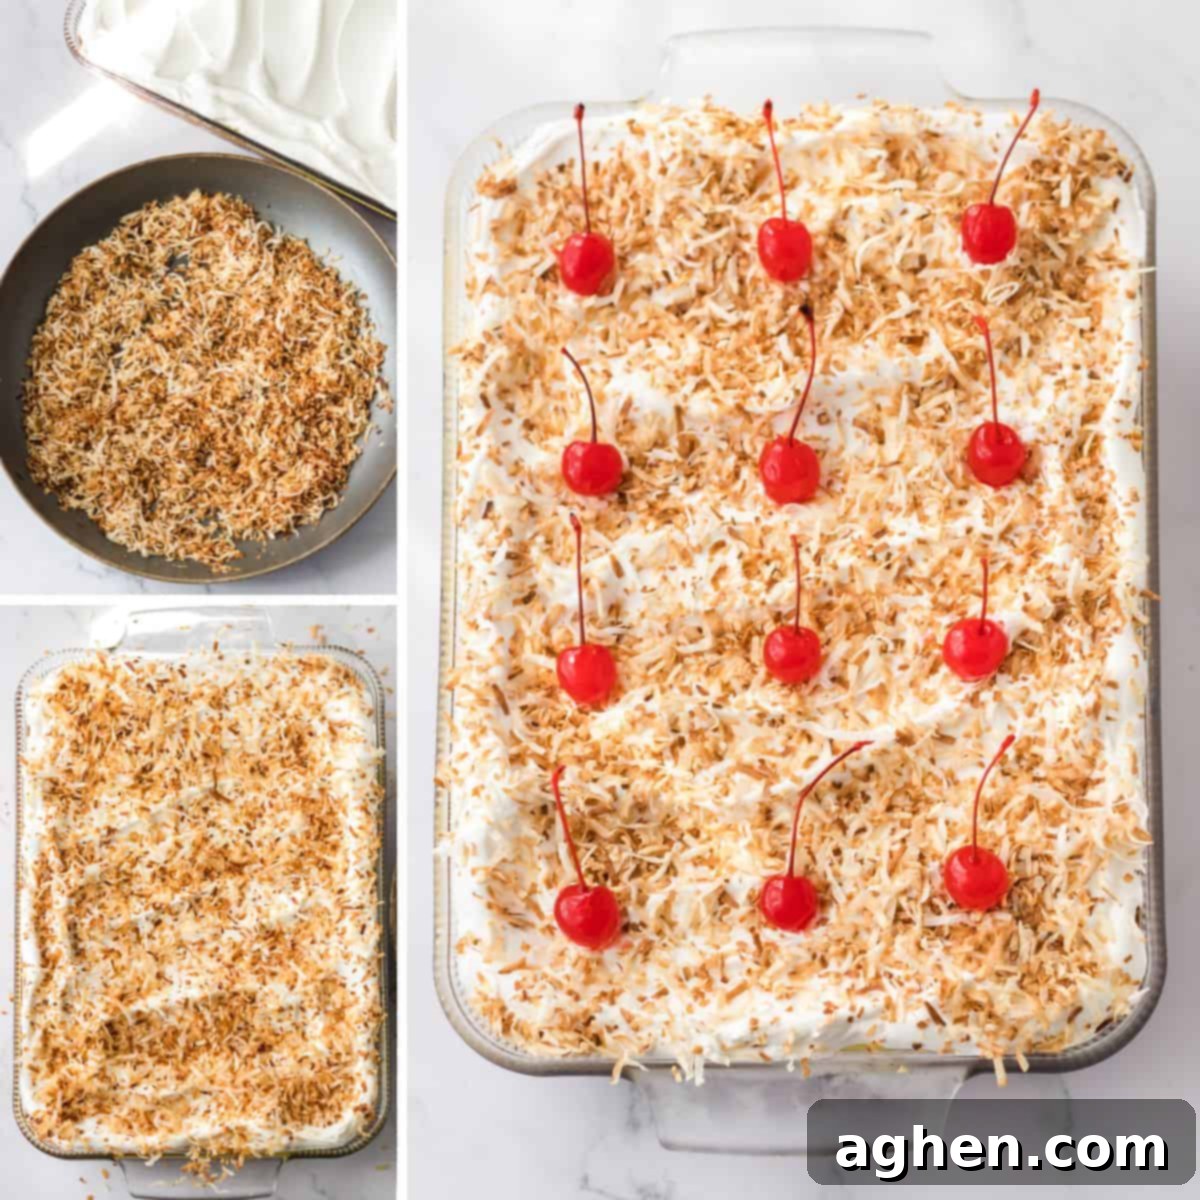
Step 4 – Add your toppings: To toast the shredded coconut, spread 1 cup of sweetened shredded coconut in a dry (no oil needed) skillet over medium-low heat. Stir constantly to prevent burning, cooking until the coconut turns a beautiful golden brown and becomes wonderfully fragrant. This usually takes just a few minutes, so watch it closely! Remove the toasted coconut from the pan immediately to a plate to cool. Once the dessert has chilled sufficiently (the pineapple layer should be set), remove the dish from the refrigerator. Evenly spread the thawed whipped topping over the set pineapple layer. Generously sprinkle the cooled toasted coconut over the whipped topping. Finally, artfully arrange the maraschino cherries on top for that classic Pina Colada finish. Return the entire dish to the refrigerator to chill for at least another 2 hours, or ideally overnight, before slicing and serving. This extended chilling time ensures all layers are perfectly set and the flavors have fully melded.
Storage and Freezing Tips for Your Pina Colada Lush
Proper storage is key to enjoying your delicious Pina Colada Lush for as long as possible. Here’s how to keep it fresh and flavorful:
Refrigerator: To maintain its fresh taste and delightful texture, cover any leftover Pina Colada Lush with plastic wrap, ensuring it’s sealed tightly around the edges of the dish. Alternatively, transfer individual slices or the entire remaining dessert to an airtight container. Store it in the refrigerator for up to 3 days. The flavors often deepen and become even more harmonious after a day or two in the fridge!
Freezing: For the best taste and texture experience, I highly recommend enjoying this tropical dessert lasagna fresh and well-chilled from the refrigerator. While it’s possible to freeze this dessert, please be aware that the texture may undergo some changes upon thawing. The whipped topping might become a bit watery, and the cream cheese layer could slightly alter its consistency. If you must freeze it, cover the dessert very tightly with several layers of plastic wrap, followed by a layer of aluminum foil, or place it in a freezer-safe airtight container. It can be frozen for up to 3 months. When you’re ready to enjoy it, thaw the frozen lush in the refrigerator overnight before serving. This slow thawing process helps minimize any textural changes.
Layered Pina Colada Dessert Recipe Tips and Tricks
Achieving the perfect layered dessert is all about a few key techniques. Here are some expert tips and tricks to ensure your Pina Colada Lush turns out beautifully every time:
- Room Temperature Ingredients are Your Friend: This is a golden rule for many baking recipes, and it’s especially true for the cream cheese and eggs in your cheesecake layer. Remember to bring your cream cheese and eggs to room temperature before you start mixing. This ensures they blend smoothly and effortlessly with the sugar and other ingredients, preventing any undesirable lumps in your creamy filling. If you’re pressed for time, you can cut the cream cheese into small cubes and let it sit at room temperature for about 15 minutes, or gently warm the eggs in a bowl of warm water for 5-10 minutes.
- Don’t Overbake the Cheesecake: A common mistake with cheesecakes is baking them until they are completely firm. The cheesecake layer is done when the outer ring appears slightly puffed and relatively firm, while the inner circle still has a gentle jiggle, similar to gelatin, when you delicately shake the baking dish. Don’t worry, this is normal! The cheesecake will continue to set and firm up significantly from residual heat as it cools on the counter, and then further in the refrigerator. Overbaking can lead to a dry, cracked cheesecake.
- Chill for Perfection: Patience is a virtue when it comes to layered desserts! For the absolute best results, allow the Pina Colada Lush bars to chill in the refrigerator overnight (at least 8 hours). This extended chilling period is crucial for several reasons: it allows all the layers to fully set and firm up, making them incredibly easy to slice into clean, beautiful squares. More importantly, it gives the tropical flavors ample time to meld and deepen, resulting in a more harmonious and delicious dessert experience.
- Evenly Press the Crust: A firm and even crust is the foundation of your dessert. Use the bottom of a flat-bottomed glass or a measuring cup to press the graham cracker mixture firmly and uniformly across the bottom of the pan. This prevents crumbling when serving.
- Clean Slices: For neat and tidy servings, use a sharp knife and wipe it clean with a warm, damp cloth after each cut. This prevents the layers from sticking to the knife and ensures every slice looks as good as it tastes.
Additions and Variations to Customize Your Pina Colada Lush
This Pina Colada Lush recipe is a fantastic base, but don’t hesitate to get creative and customize it to your liking! Here are some delicious additions and variations to try:
- Craft a Custom Cookie Crust: While a graham cracker crust is classic, you can easily substitute it for a different cookie. Instead of graham crackers, try making a cookie crumb crust using Golden Oreos (filling removed for a less sweet crust) or vanilla wafers. Shortbread cookies also make a delightful, buttery base. Simply crush them and combine with melted butter as you would with graham crackers.
- Skip the Coconut (for non-fans): If coconut isn’t your favorite, you can absolutely make this dessert without it! Replace the coconut milk in the cheesecake layer with an equal amount of heavy cream for a rich, dairy-based flavor. Then, simply omit the shredded coconut from both the cheesecake filling and the topping. You’ll still get a delicious pineapple-vanilla lush.
- Amplify the Pineapple Flavor: For a more intense pineapple experience, consider adding a small can of well-drained crushed pineapple (about ½ cup) to the cheesecake filling or even gently folding it into the pineapple gelatin layer before it sets. For a stunning garnish, replace the maraschino cherries with fresh pineapple chunks, rings, or wedges on top of the dessert bars.
- Introduce a Nutty Crunch: For an additional layer of texture and a delightful nutty flavor, sprinkle a handful of finely chopped walnuts, pecans, or even macadamia nuts (for an extra tropical touch!) over the whipped topping along with the toasted coconut.
- Infuse with Rum Extract: To truly mimic the cocktail, add a splash (about 1-2 teaspoons) of rum extract to the cheesecake layer. This will enhance that authentic Pina Colada flavor without introducing alcohol. You could also add a very small amount to the pineapple layer if you desire.
- Experiment with Pudding Flavors: While vanilla pudding is a great neutral base, you can infuse even more tropical goodness by swapping it for a different instant pudding mix. Try instant coconut cream pudding mix for an intensified coconut flavor, or even a banana cream pudding for a new tropical twist.
- Add a Zesty Lime Twist: For a bright, tangy counterpoint, grate a little lime zest into the cheesecake layer or sprinkle some over the whipped topping. A tiny squeeze of fresh lime juice can also elevate the pineapple layer.
Pina Colada Cheesecake Bars FAQ
Absolutely! While a graham cracker crust is traditional and wonderfully complements the tropical flavors, you have many delicious alternatives. You could make a crust from crushed shortbread cookies, vanilla wafers, or even as suggested in our variations, Golden Oreos. The key is to crush them finely and combine them with melted butter to form a cohesive base.
Don’t worry, this is often a sign that you did it *right*! The center of the cheesecake should still have a slight jiggle when it comes out of the oven, much like firm jello. Cheesecake continues to cook and set from residual heat as it cools on the counter, and then firms up completely during the chilling process in the refrigerator. If it’s completely firm when you remove it from the oven, it’s likely overbaked.
A “lush” dessert is a delightful, typically no-bake (or partially baked) layered dessert characterized by several distinct components. It usually starts with a crumbly crust (often made from cookies or graham crackers), followed by a creamy layer which might be a cheesecake or pudding mixture. Next comes another layer, often fruit-based or with gelatin, and it’s always topped off with a generous layer of whipped topping. Lush desserts are served chilled, making them a consistently popular and refreshing choice for potlucks, picnics, and all kinds of summertime gatherings.
Yes, absolutely! This Pina Colada Lush is an excellent make-ahead dessert, which is one of its many charms. In fact, the flavors truly benefit from mingling and deepening overnight. Simply assemble the entire dessert, cover the pan tightly with plastic wrap (and optionally foil for extra protection), and let it chill in the refrigerator until you’re ready to serve. This makes it perfect for entertaining as it frees up your time on the day of your event.
For the pineapple *layer*, it’s generally not recommended to use fresh pineapple directly with gelatin. Fresh pineapple contains enzymes that can prevent gelatin from setting properly. If you want to use fresh pineapple, you’d need to cook it first to deactivate these enzymes, or simply use it as a garnish on top of the finished dessert.
The key to a non-crumbly crust is to ensure your graham cracker crumbs are finely crushed and that the melted butter is thoroughly mixed in. Most importantly, you need to press the mixture very firmly and evenly into the bottom of your baking dish. You can use the bottom of a flat glass or a measuring cup for this. Baking it for 10-12 minutes also helps to set the crust, creating a sturdy foundation.
More Refreshing Summer Dessert Recipes to Beat the Heat
When the sun is blazing and you need to cool down, these fantastic fruity desserts will come to your rescue! Perfect for summer gatherings, these recipes are designed to be light, refreshing, and incredibly delicious.
- No Bake Strawberry Cheesecake Bars — A delightful recipe featuring a cool, creamy strawberry cheesecake layer nestled over a classic graham cracker crust. So incredibly refreshing and easy to make without ever turning on the oven!
- Old-Fashioned Strawberry Pretzel Salad — This unique dessert, despite its name, is a sweet and savory sensation. With its salty pretzel crust, creamy middle layer, and a vibrant strawberry gelatin top, it’s always a massive hit at summer potlucks and family reunions.
- Marshmallow Fruit Salad — A super quick and easy dessert that comes together in just 10 minutes! This colorful salad is bursting with a variety of fruity flavors and fluffy marshmallows, making it a light and sweet side dish or dessert perfect for any summer occasion.
Pina Colada Lush
Author: Jaclyn
Equipment
-
9×13 baking dish
Ingredients
Crust
- 1 ½ cups graham cracker crumbs
- ¼ cup granulated sugar
- 6 Tablespoons butter melted
Cheesecake filling
- 16 ounces cream cheese room temperature
- ½ cup granulated sugar
- 1 cup coconut milk
- 3 large eggs room temperature
- ¾ cup sweetened shredded coconut
Pineapple layer
- 6 ounces pineapple gelatin
- ⅓ cup boiling water
- 6.8 ounces instant vanilla pudding mix
- 2 ½ cups milk
Topping
- 1 cup sweetened shredded coconut
- 8 ounces whipped topping thawed
- 12 maraschino cherries
Instructions
For the crust
-
Preheat the oven to 325℉ and coat a 9 x 13 baking dish with non-stick cooking spray.
-
In a medium bowl, mix together the graham cracker crumbs, sugar, and melted butter. Press the mixture firmly into an even layer in the bottom of the baking dish.
-
Bake until just golden, about 12 minutes. Remove from the oven and set aside.
For the coconut cheesecake layer
-
In a large bowl, use an electric mixer to beat the cream cheese and sugar together until light and fluffy. With the mixer on low, add the coconut milk and eggs and mix until combined. Stir in the shredded coconut.
-
Spread the cheesecake mixture evenly over the crust and bake until just set, about 40-45 minutes (it is okay if the middle is still a bit jiggly). Remove from oven and allow to cool to room temperature. Once cooled, chill in the refrigerator for 2 hours.
For the pineapple layer
-
In a small bowl, whisk together the pineapple gelatin and the boiling water until the gelatin is dissolved. Set aside.
-
In a large mixing bowl, whisk together the vanilla pudding mix and milk for 2 minutes. Whisk the pineapple gelatin into the vanilla pudding until completely combined.
-
Pour the pineapple mixture evenly over the chilled cheesecake layer. Return to the refrigerator to chill while you toast the coconut.
For the topping
-
Place 1 cup of shredded coconut in a dry pan. Heat over medium-low heat, stir constantly, until the coconut is golden brown. Remove from heat and set aside.
-
Remove the pan from the refrigerator and spread the whipped topping evenly over the pineapple layer. Sprinkle with toasted coconut and top with maraschino cherries.
-
Chill for at least 2 hours, or until ready to serve.
Notes
- An extra-deep Pyrex 9 x 13 baking dish is great for layered desserts like this.
- Pineapple chunks or slices would make a great garnish, too.
- Golden Oreo crumbs can be used instead of graham cracker crumbs.
- Cover leftovers tightly with plastic wrap or transfer to an airtight container and refrigerate for up to 3 days.
Nutrition

Did You Make This Recipe?
Share it with me on Instagram @crayonsandcravings and follow on Pinterest @crayonsandcravings for even more!
Pin Recipe
Leave A Review
