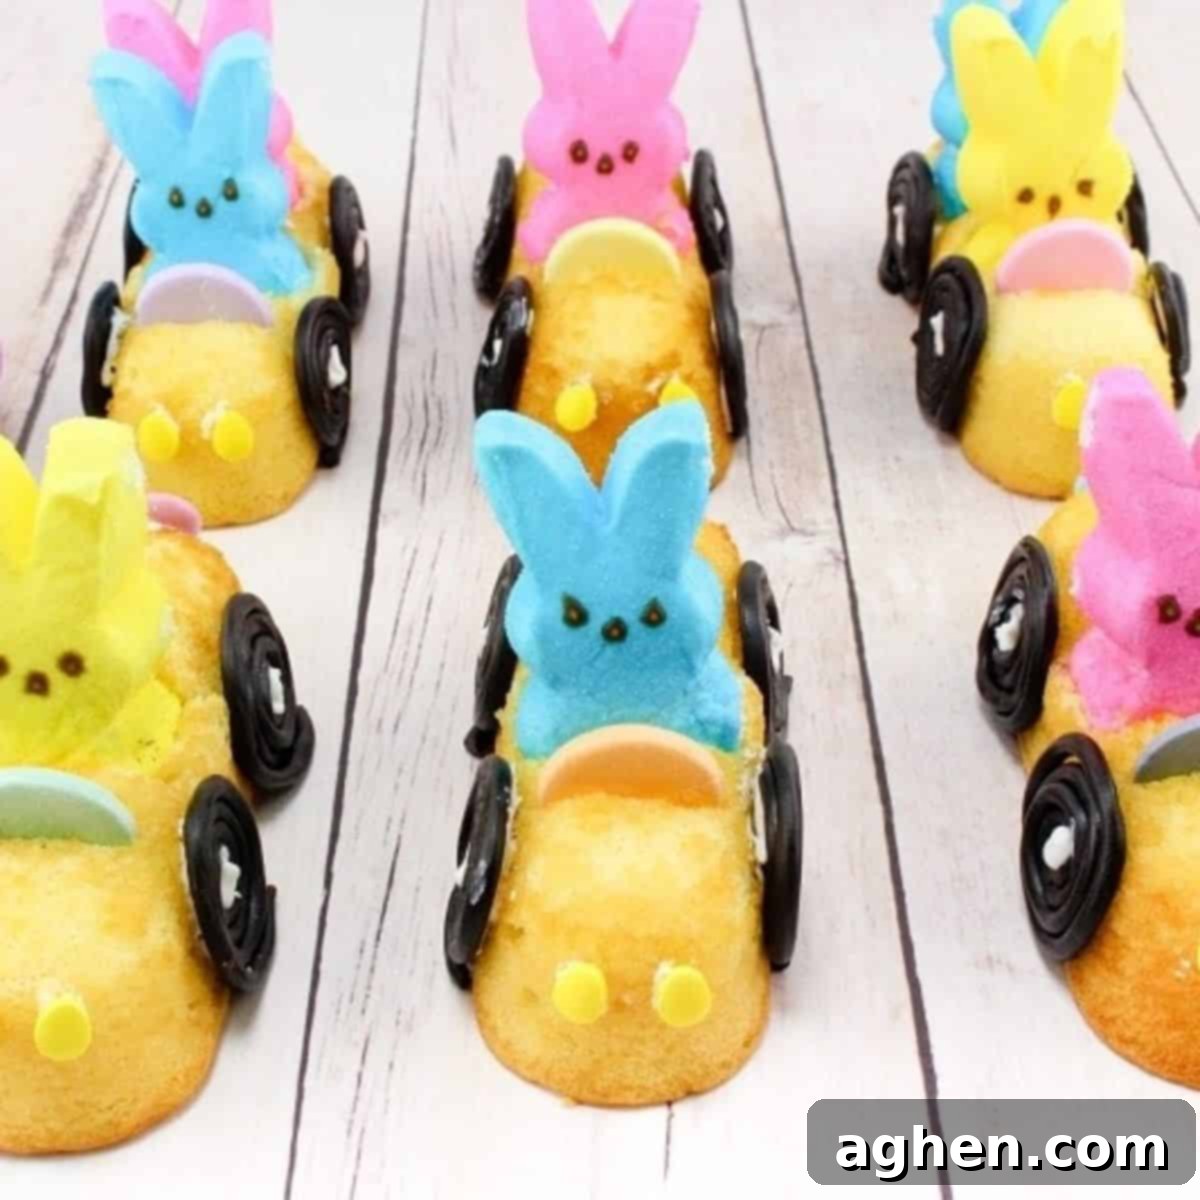
Easy & Adorable Peeps Twinkie Cars: The Perfect No-Bake Easter Dessert for Kids
Hop into spring with an irresistibly cute and incredibly simple no-bake Easter dessert that’s guaranteed to delight everyone, especially the little ones! These Peeps Twinkie Cars are the ultimate fun and festive treat, transforming ordinary Twinkies and marshmallow Peeps into adorable bunny-driven race cars ready to zoom onto your Easter party platter. Not only are they absolutely adorable with their vibrant colors and playful design, but they are also deliciously sweet, making them the perfect centerpiece or activity for your holiday celebration.
Last Easter, our Peeps Cupcakes were such a smashing success that we simply had to bring you another creative and engaging Peeps-themed treat this year. Introducing Peeps Twinkie Race Cars – a delightful project that combines the classic spongy goodness of Twinkies with the iconic charm of marshmallow Peeps. This recipe is designed to be straightforward, requiring no baking, minimal prep, and offering maximum fun for the whole family.
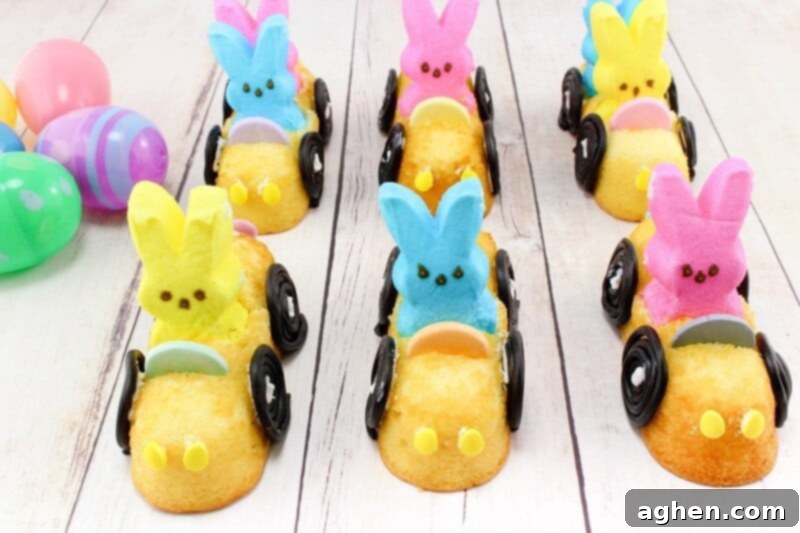
These cute Peeps race cars are truly perfect for your Easter celebration, particularly for the youngsters who will adore their whimsical appearance. I honestly can’t get over how charming they turned out! Imagine the excitement as kids discover these sweet little bunny drivers in their candy-decked vehicles. They’re a fantastic way to add a personalized touch to your dessert table and create lasting memories.
I mean, it doesn’t get much sweeter or more visually appealing than this combination of iconic treats – fluffy Twinkies, soft marshmallow Peeps, chewy licorice, crunchy Necco wafers, colorful M&M’s, and bright sprinkles. Each component comes together to create a delightful symphony of textures and flavors that will have everyone reaching for another “bunny mobile.”
Assembling these Bunny Peep Mobiles is surprisingly simple, making it an ideal activity for even the youngest helpers. The step-by-step directions provided below will guide you through each stage, ensuring a smooth and enjoyable crafting process. Be sure to get the little ones involved in putting them together; it’s a wonderful, fun, and edible family Easter activity that fosters creativity and brings smiles to everyone’s faces.
Twinkie Peep Car Ingredients: Everything You Need for Your Edible Race Track
This section provides detailed ingredient notes, essential tips for selection, and helpful substitution options to ensure your Peeps Twinkie Cars are perfect. All exact measurements and step-by-step instructions are available in the printable recipe card at the end of this post.
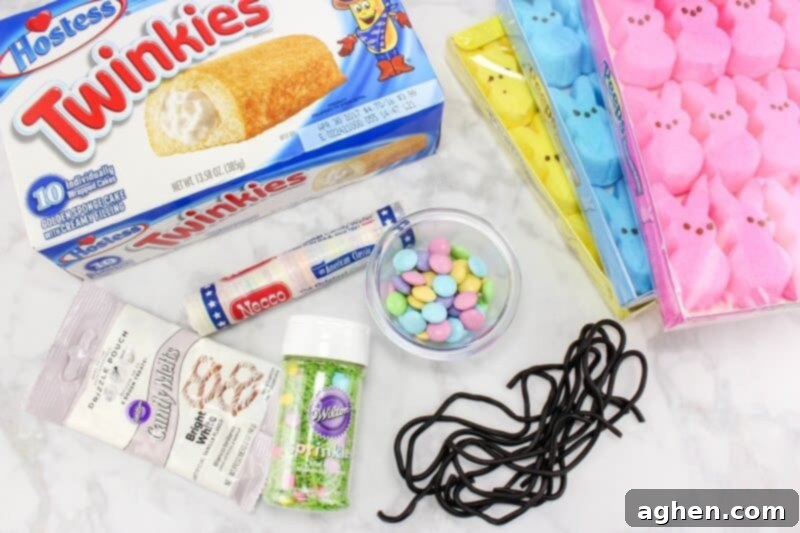
- Twinkies: The classic golden sponge cake provides the perfect “car” body. Their uniform shape and creamy filling make them an ideal base for this fun treat. Any brand of cream-filled sponge cakes will work if you can’t find Twinkies.
- Marshmallow Peeps Bunnies: These iconic Easter candies are the adorable drivers of our Twinkie cars. Opt for pastel colors to enhance the spring theme. While bunny shapes are traditional for Easter, you can certainly use Peeps chicks or other seasonal shapes if you prefer.
- Black Licorice Ropes: These create the perfect realistic-looking tires for your cars. Look for softer, pliable licorice ropes for easier rolling. If you’re not a fan of black licorice laces, you can easily substitute them with mini chocolate cookies (like mini Oreos or chocolate wafers) for the wheels instead.
- White Candy Melts: Also known as white melting chocolate or a white Wilton candy pouch. This is your edible “glue” that will hold the various candy decorations in place. White is a versatile color, but you could also use brightly colored candy melts to add an extra pop of color to your cars.
- Necco Wafer Candies: These delightful, pastel-colored wafers are perfectly sized to act as the steering wheels for your Peeps. Their flat, round shape makes them easy to attach. A mini pretzel twist could also be used for a more rustic look or a different flavor profile.
- M&M Candies: These vibrant chocolate candies serve as the adorable “taillights” or other decorative accents. Regular M&M’s work wonderfully, but the pastel colors of the Easter M&M’s are especially perfect for capturing that delightful Spring holiday vibe.
- Confetti Sprinkles: Specifically, you will use small, round yellow confetti sprinkles to create the car’s headlights. Their bright color adds a lovely detail. Feel free to experiment with other small, round candies or even silver dragees for a different headlight effect.
How to Make Peeps Twinkie Cars: Step-by-Step Guide
This section provides a detailed, step-by-step guide with corresponding photos to help you create these charming Peeps Twinkie Cars. For the complete printable recipe with precise measurements, please refer to the recipe card found further down this page.
Step 1: Prepare the Twinkie Base
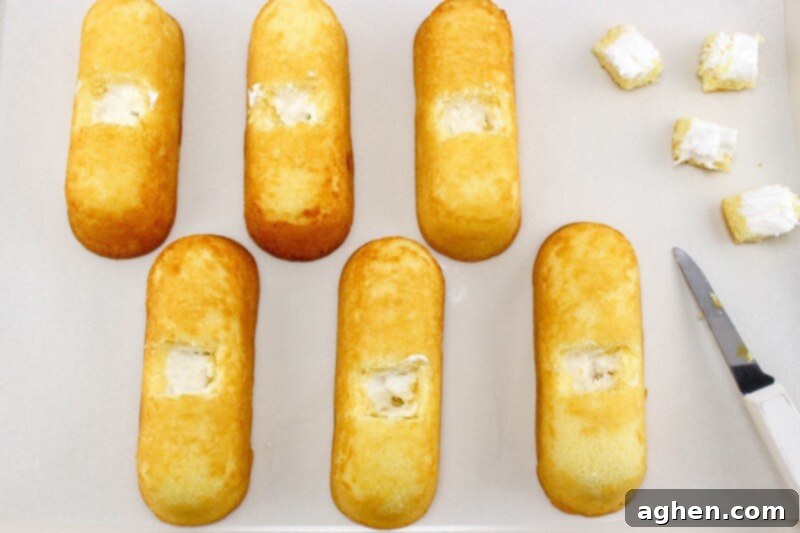
Carefully cut a small rectangular chunk out of the top center of each cream-filled Twinkie. Be mindful not to cut all the way through the bottom or the sides of the cake, as you need to create a “seat” for your Peep. Gently remove these cut-out pieces; we will be using the delicious cream filling from them later as an edible adhesive for some of the decorations.
Step 2: Trim the Peeps
Next, take each marshmallow Peep bunny and carefully cut off approximately one-fourth of its bottom. This step is crucial as it creates a flat base, allowing the Peep to sit securely and stably within the cut-out section of its Twinkie car, preventing it from toppling over.
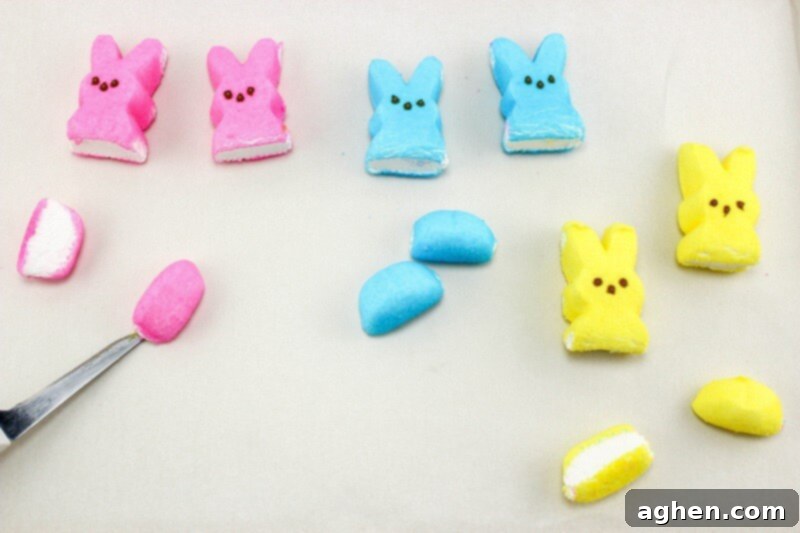
Step 3: Position the Peeps and Steering Wheels
Gently place the trimmed Peeps into the holes you created in the Twinkies. Once the Peep is in place, make a small, shallow slit in the Twinkie directly in front of the bunny. This slit will serve as the perfect spot to insert a Necco wafer, which will act as the steering wheel for your Peep car.
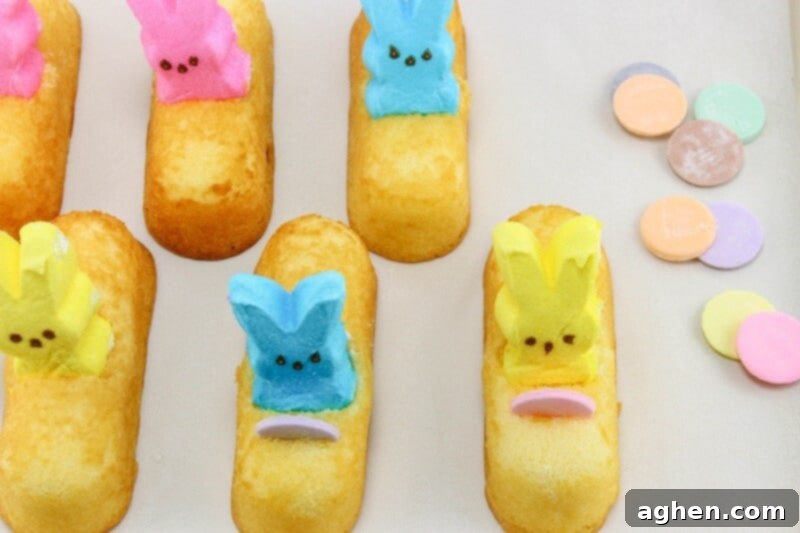
Step 4: Add Headlights
Now, retrieve the small amount of Twinkie cream filling that you reserved from Step 1. This filling will serve as a wonderful edible “glue.” Dab a tiny bit of this filling onto the front of each Twinkie car, then carefully attach two yellow confetti sprinkles (from your Easter sprinkles mix) to create the bright and cheerful headlights.
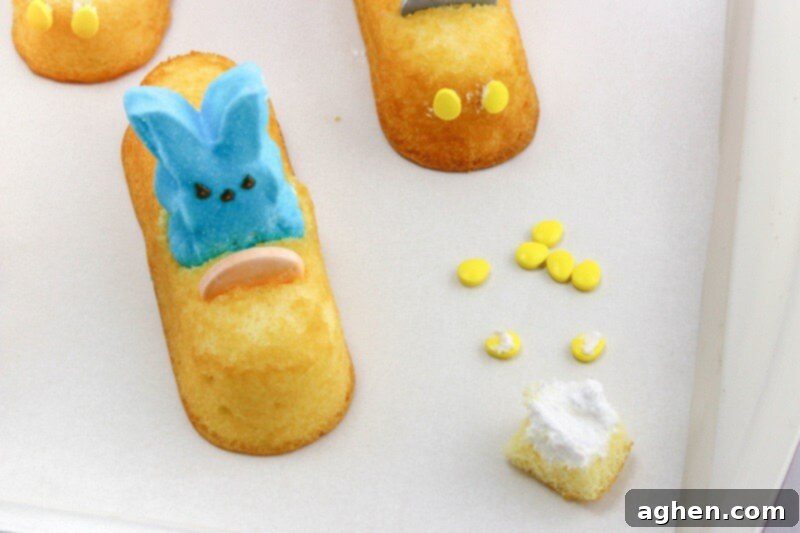
Step 5: Create the Licorice Wheels
To form the car wheels, take individual pieces of black licorice rope. Dip your fingers lightly in water and gently roll the licorice between your palms. This wets the licorice slightly, making it more pliable and easier to coil into a tight, circular “tire” shape. Roll each piece into a neat spiral. Once rolled, set these licorice wheels aside for a few minutes to allow them to dry and hold their shape.
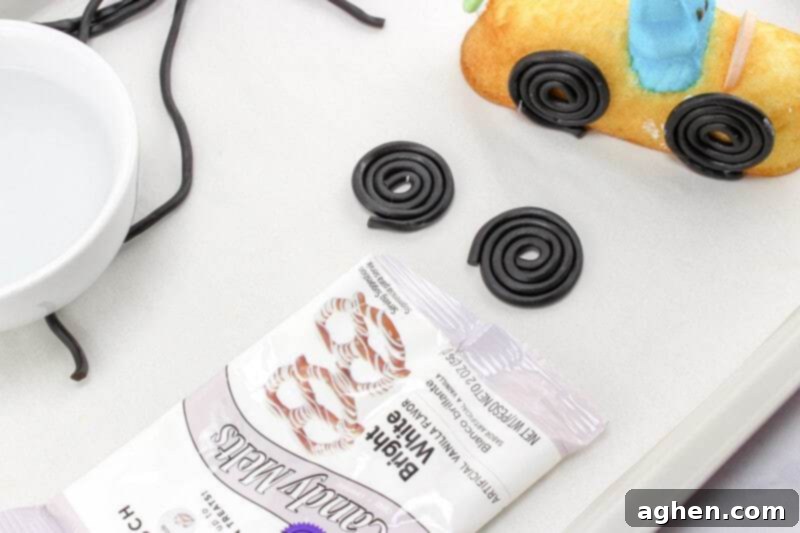
Step 6: Attach the Wheels
Following the package directions, heat your white candy melts or white melting chocolate until smooth and fluid. This melted candy will be your strong adhesive for the wheels. Using a small spoon or a piping bag with a small hole, apply a dab of melted candy to the back of each licorice wheel, then firmly press four wheels onto the sides of each Twinkie car, two on each side. Allow them to set for a few minutes until the candy has hardened enough to secure the wheels.
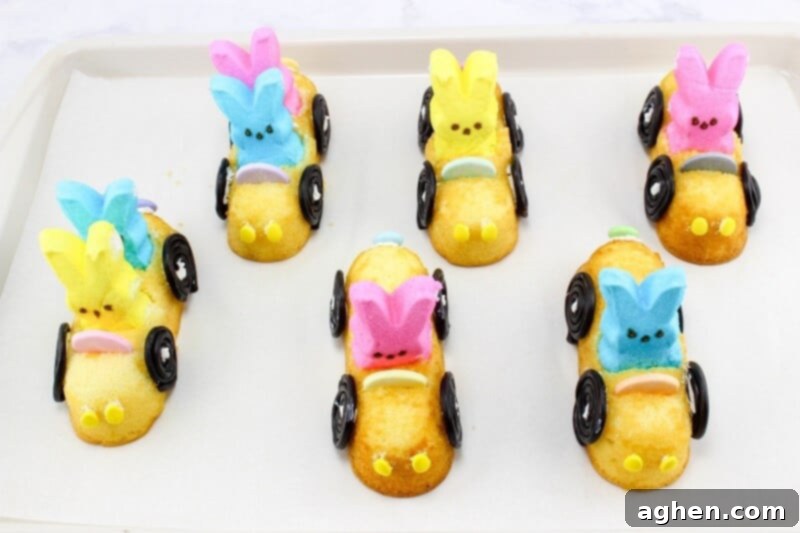
Step 7: Final Touches & Serve
Finally, using the remaining melted candy melts (you can use a small candy pouch or a piping bag for precision), “glue” one M&M candy onto the back of each Peep bunny race car. This M&M will serve as a cute little taillight or a decorative accent. Once all the candies are attached, allow the Twinkie Peeps cars to sit undisturbed for a bit to ensure all the melted candy fully sets. Once firm, your delightful Twinkie bunny cars are ready to serve! Enjoy these charming treats and have a very Happy Easter!
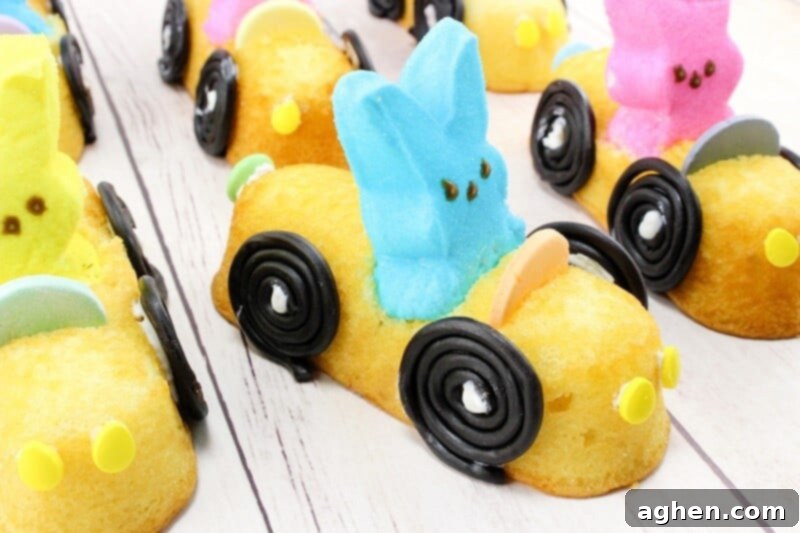
Tips for Success and Making Ahead
To ensure your Peeps Twinkie Cars turn out perfectly and to make your Easter preparation even smoother, keep these helpful tips in mind:
- Get Kids Involved: This is an excellent recipe for young chefs! Assign age-appropriate tasks like placing the Peeps, attaching sprinkles, or rolling licorice (with adult supervision). It’s a fun way to create family memories.
- Chilling for Stability: After assembling, you can place the Peeps Twinkie Cars in the refrigerator for about 10-15 minutes. This helps the melted candy melts set quickly and ensures all the components are firmly attached before serving.
- Uniform Cuts: When cutting the opening in the Twinkies and trimming the Peeps, try to make your cuts as uniform as possible. This will help your “drivers” sit neatly and the “cars” look consistent.
- Melting Candy Melts: When melting your candy melts, follow package instructions carefully. Overheating can cause them to seize or become too thick. If they seem too thick, you can add a tiny amount of coconut oil or vegetable shortening (about ½ teaspoon per cup) to thin them slightly.
- Creative Attachments: If you don’t have candy melts, a thick frosting or even a dab of leftover Twinkie filling can work in a pinch for attaching smaller candies like headlights and taillights.
Fun Variations for Your Peeps Twinkie Cars
While the classic Peeps Twinkie Cars are adorable, don’t hesitate to get creative and customize them! Here are some fun variations:
- Different Peeps: Don’t limit yourself to bunny Peeps! Use chick Peeps, or even seasonal Peeps from other holidays (like ghosts for Halloween or pumpkins for fall) for different themed vehicles.
- Alternative Wheels: Instead of licorice, try mini chocolate chip cookies, Oreo thins, or chocolate-covered pretzels for different types of wheels.
- Colorful Cars: Use different colored Twinkies (if available) or tint your white candy melts with food coloring to create a fleet of vibrant cars.
- Personalized Drivers: Use edible markers to draw faces or customize your Peeps for a truly unique touch.
- Extra Decorations: Add racing stripes with colored icing gel, attach mini chocolate chips as hubcaps, or use different types of sprinkles for a unique car design. Gummy candies can also be used for creative details.
- “Road” Display: Serve your cars on a platter decorated with green frosting for grass, chocolate cookies for dirt roads, or blue frosting for a water track!
Serving and Storage Suggestions
These Peeps Twinkie Cars are best enjoyed fresh, but they can be made a day in advance. Store them in an airtight container at room temperature for up to 2-3 days. If your home is very warm, you might consider storing them in the refrigerator, but allow them to come to room temperature for about 15 minutes before serving for optimal flavor and texture. Serve them on a festive platter, individually wrapped as party favors, or as a fun addition to your Easter brunch dessert spread.
More Easter Treat Ideas to Sweeten Your Spring
Looking for more ways to celebrate Easter with delicious desserts and kid-friendly recipes? Use your leftover Peeps, M&M’s, and other candies to create these fantastic sweet treats that perfectly complement your Peeps Twinkie Cars:
- Easter Punch: A vibrant, kid-friendly beverage that’s as colorful and festive as your desserts. Perfect for quenching thirst during your Easter celebration!
- Easter Cookies: These delightful cookies, often adorned with pastel M&M’s, are easy to make and a fantastic way to use up any extra holiday candies. They’re soft, chewy, and perfect for cookie platters.
- Spring Flower Pretzel Bites: Sweet and salty, these bite-sized treats combine pretzels, chocolate, and M&M’s to create adorable flower shapes. They’re quick to assemble and always a crowd-pleaser.
- Bunny Oreo Balls: Transform classic Oreos into charming bunny-shaped truffles. These no-bake delights are rich, decadent, and incredibly cute, making them another excellent addition to your Easter dessert lineup.
Still looking for more Easter recipe inspiration? We have you covered with an extensive collection of 80+ Easter recipe ideas and over 30 easy Easter desserts, guaranteeing you’ll find plenty of sweet inspiration for your holiday festivities.
Easter Peeps Twinkie Cars
Author: Jaclyn
Rating: 4.74 from 15 votes
Prep Time: 30 mins | Total Time: 30 mins
Peeps mobiles are sure to be the hit of your Easter party. Not only are they absolutely adorable, but they are delicious as well!
Servings: 6
Ingredients
- 6 Twinkies
- 6 Marshmallow Peeps Bunnies
- 24 black licorice ropes
- 12 ounces White Candy Melts or white chocolate
- 6 Necco Wafers
- 6 yellow confetti sprinkles
- 6 M&M candies (pastel Easter colors recommended)
Instructions
- Cut a small chunk out of the middle of each Twinkie without cutting through the bottom or the sides. Reserve these pieces to use the filling from them later.
- Cut about a fourth off from the bottom of each Peep so they sit flat.
- Place the Peeps into the holes of the Twinkies and make a small slit in front of each Peep to insert a Necco wafer for the steering wheel.
- Take some of the Twinkie filling reserved from earlier, and use it to “glue” on 2 yellow confetti sprinkles (for headlights) onto the front of each Twinkie.
- To make the wheels, roll up a piece of the black licorice. To do this, dip your fingers in water and run the licorice between them to wet the licorice, then roll tightly into a spiral. Let those sit and dry for a few minutes.
- Heat the candy melts or melting chocolate per package directions. Use the melted candy to “glue” 4 licorice tires onto each Twinkie car.
- Finally, use the melted candy to “glue” one M&M candy on the back of each car. Allow the Twinkie Peeps cars to set until firm, then enjoy!
Nutrition
Calories: 402kcal | Carbohydrates: 69g | Protein: 2g | Fat: 12g | Saturated Fat: 9g | Cholesterol: 18mg | Sodium: 223mg | Sugar: 53g | Iron: 1mg
Did You Make This Recipe?
Share it with me on Instagram @crayonsandcravings and follow on Pinterest @crayonsandcravings for even more!
Email Recipe |
Pin Recipe |
Leave A Review
This recipe was originally published on April 5, 2017 and updated on March 10th, 2023 for improved clarity and additional tips.
