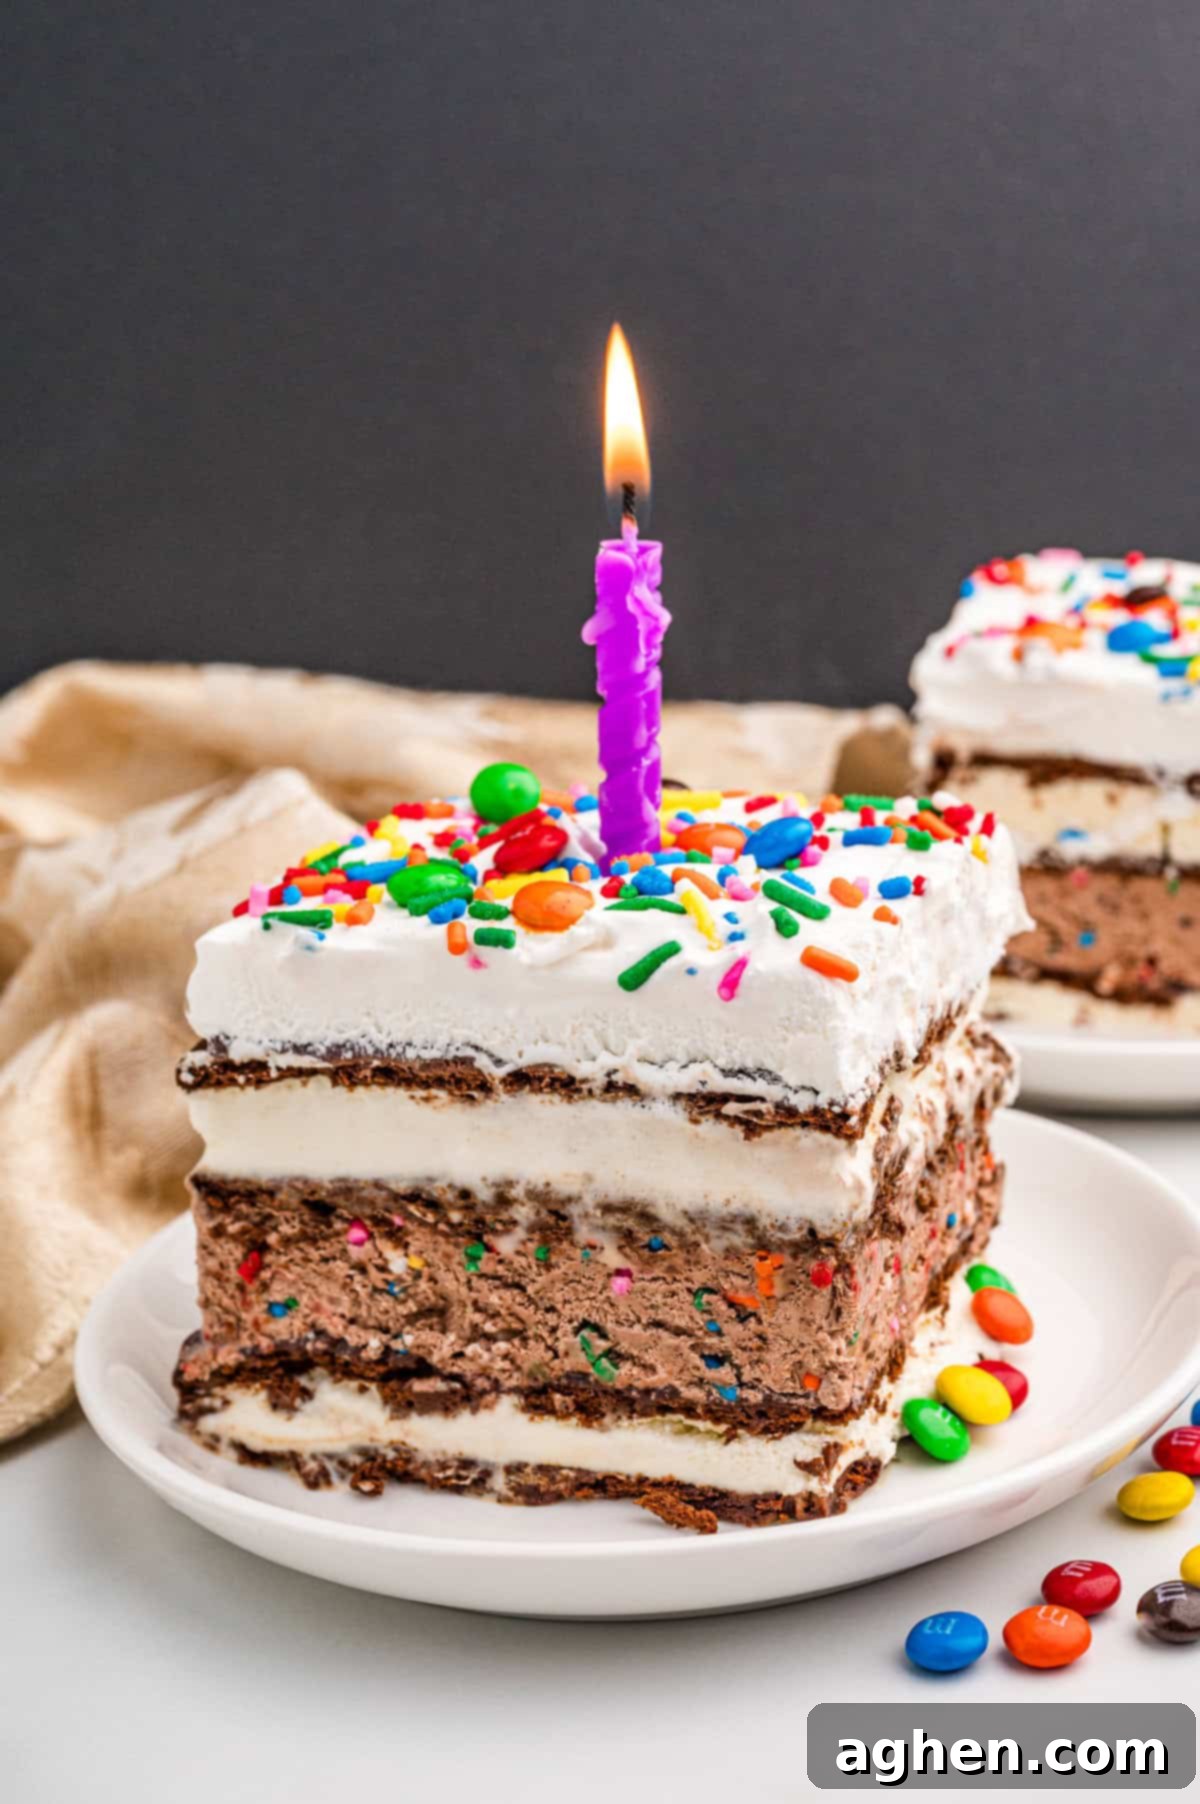
The Ultimate No-Bake Ice Cream Sandwich Cake: Your Easiest Summer Dessert!
Get ready to discover your new favorite summer dessert! This incredible ice cream sandwich cake is hands-down one of the easiest, most satisfying frozen treats you’ll ever whip up. Imagine layers of cool, creamy vanilla ice cream sandwiches, rich chocolate fudge, fluffy pudding, and a cloud of whipped topping, all coming together in just 15 minutes of active prep time. Best of all? No oven required, no stress, and a guaranteed smile on every face.
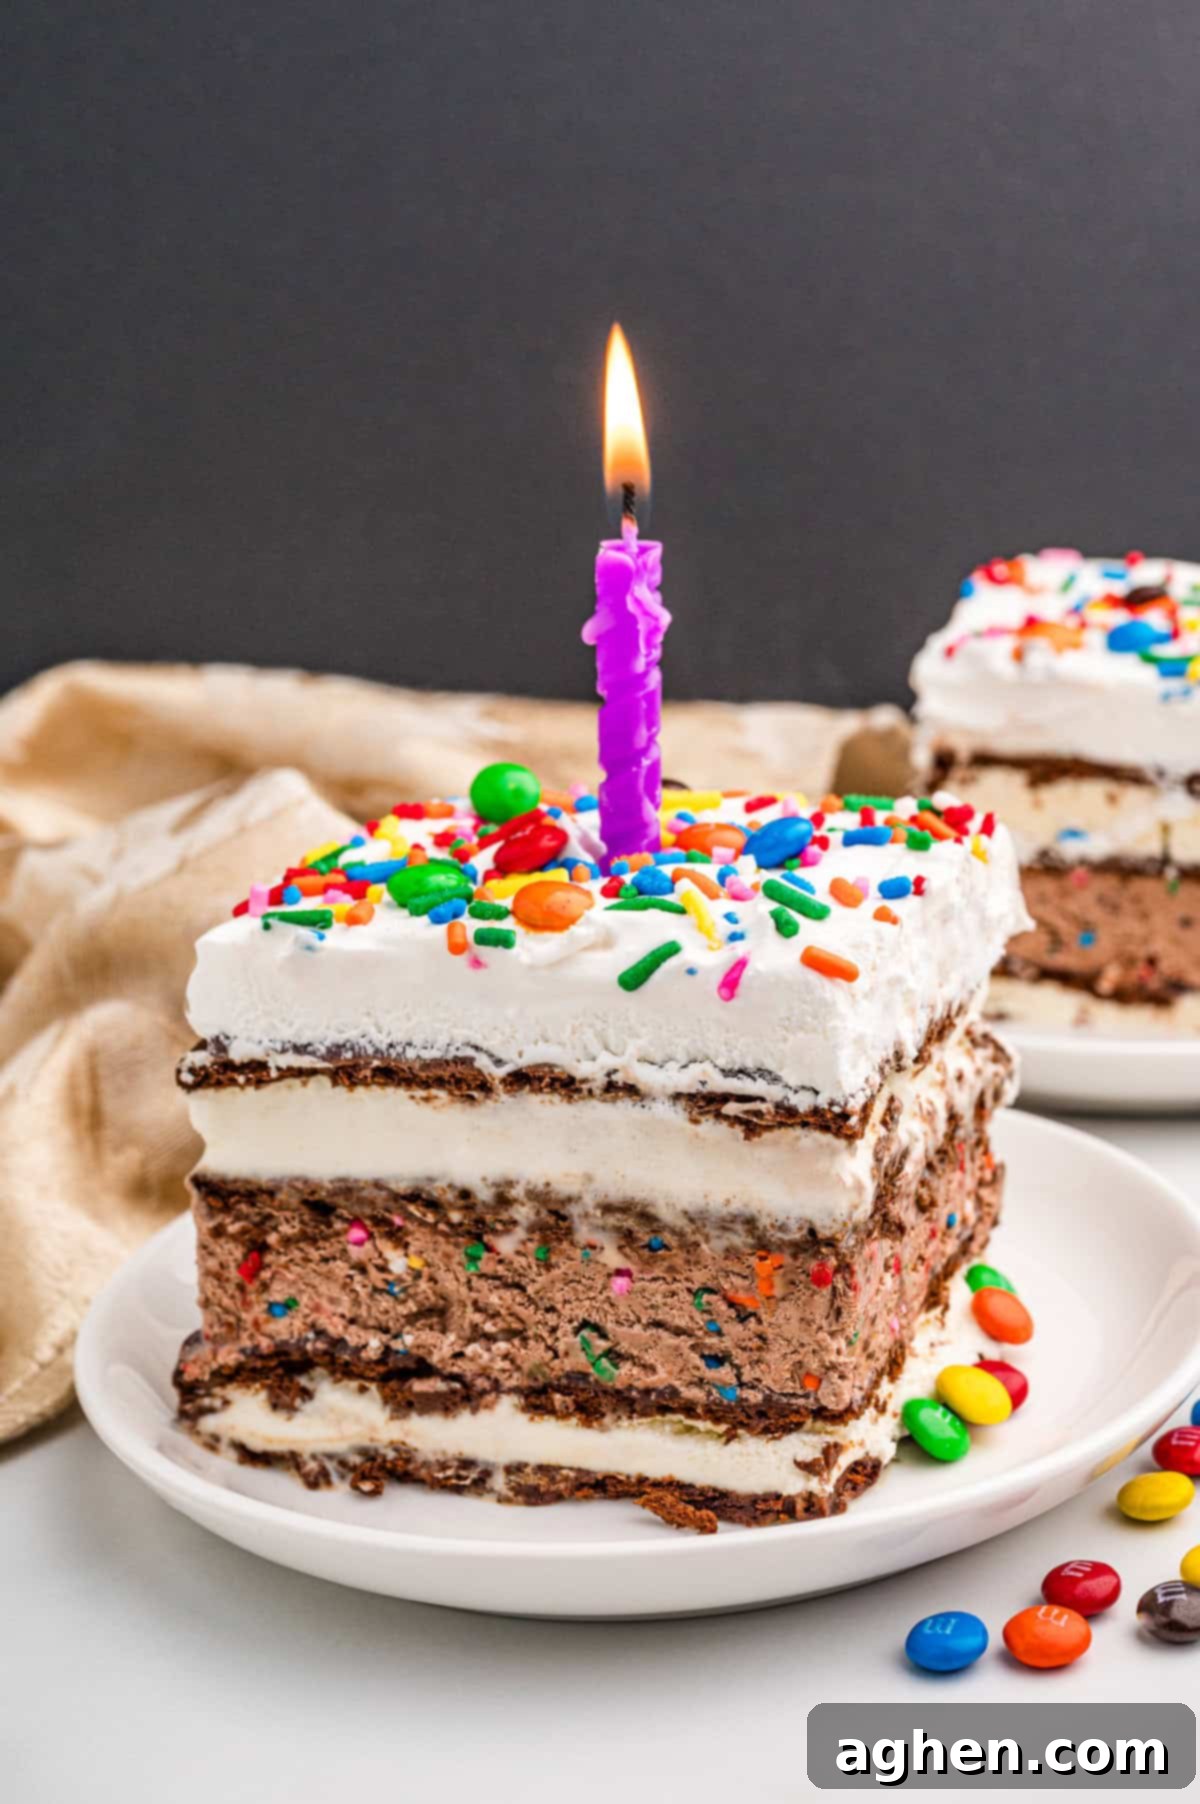
This delightful ice cream cake is my go-to for so many occasions – from festive birthday parties and lively cookouts to those spontaneous moments when we just crave something wonderfully cold and sweet. It’s a guaranteed crowd-pleaser that always disappears fast, leaving everyone asking for the recipe. Whether you’re hosting a big gathering or simply looking for a refreshing dessert to beat the heat, this easy, no-fuss treat is sure to be a massive hit with both kids and adults alike. Its simplicity makes it perfect for even novice bakers (or non-bakers!), while its decadent taste appeals to gourmet palates.
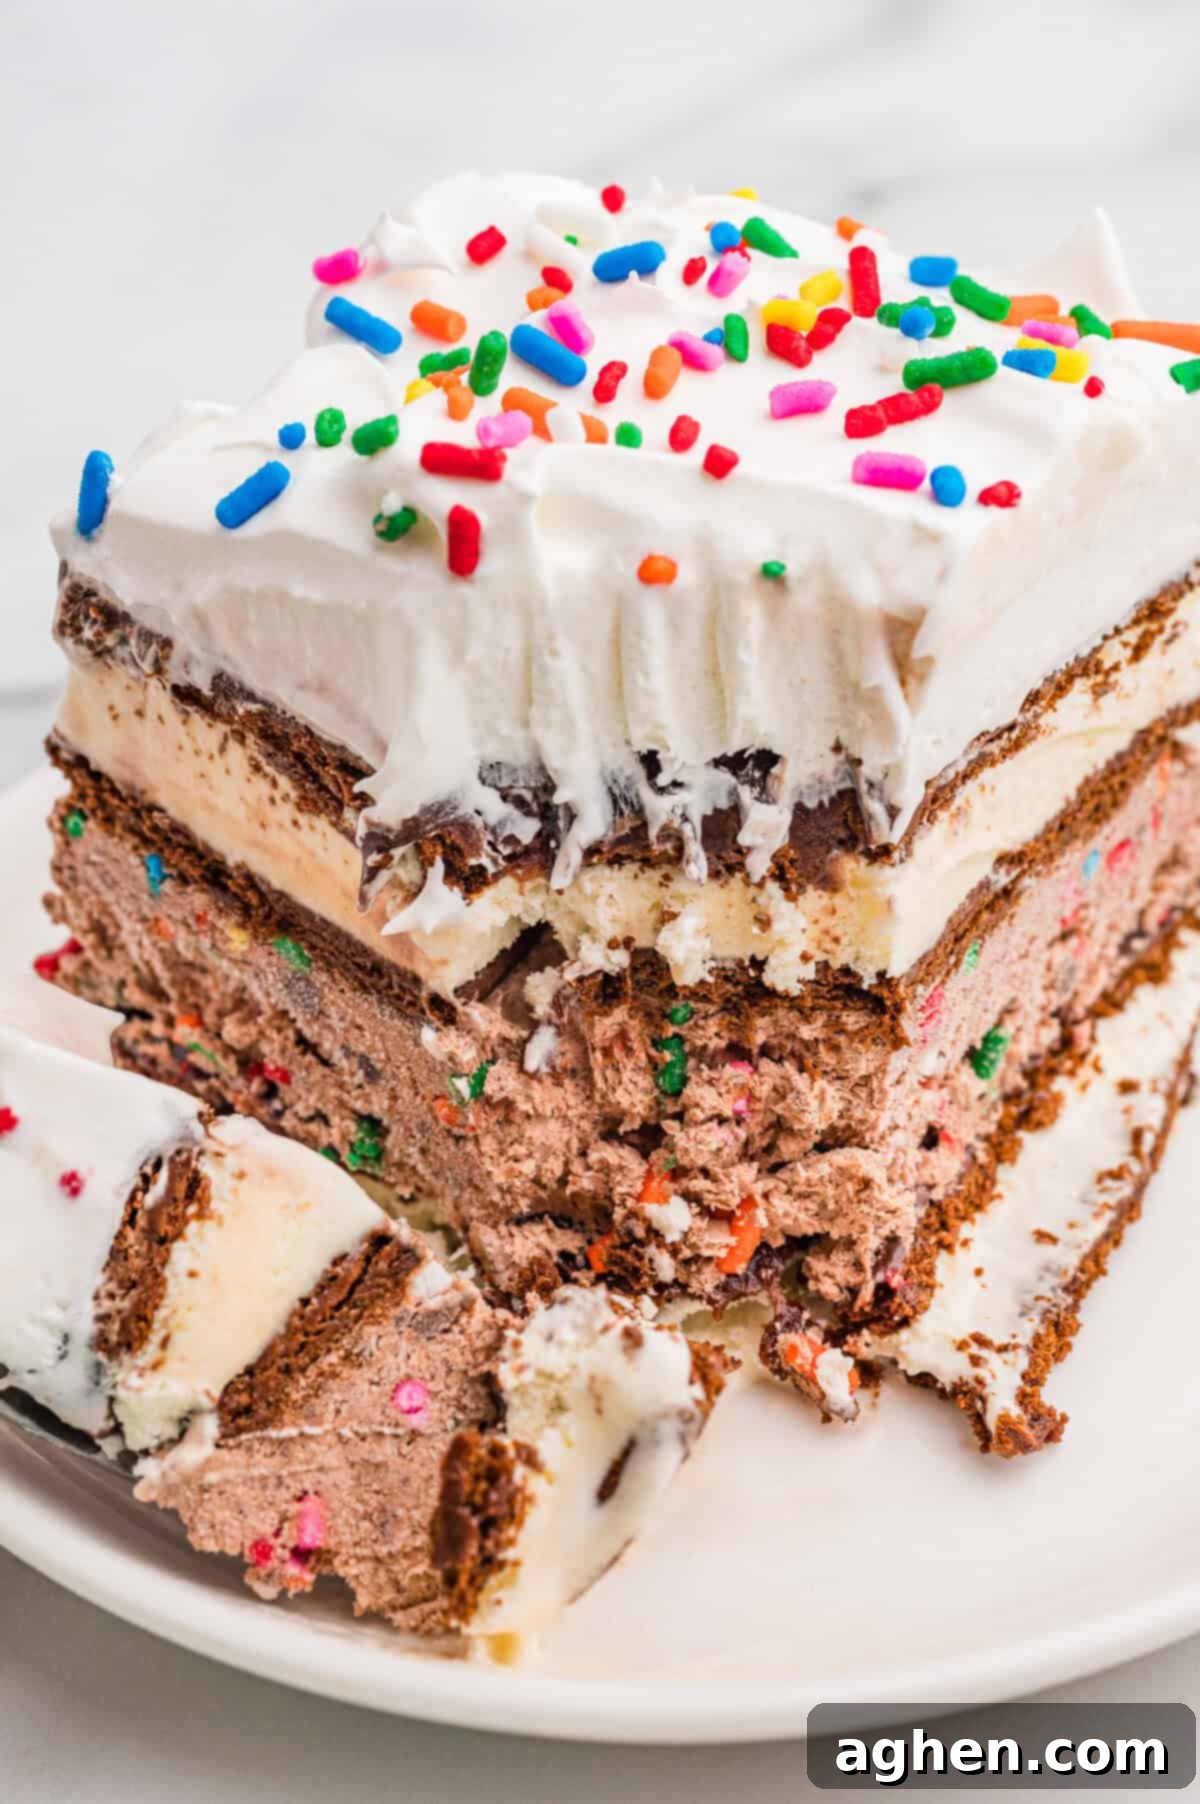
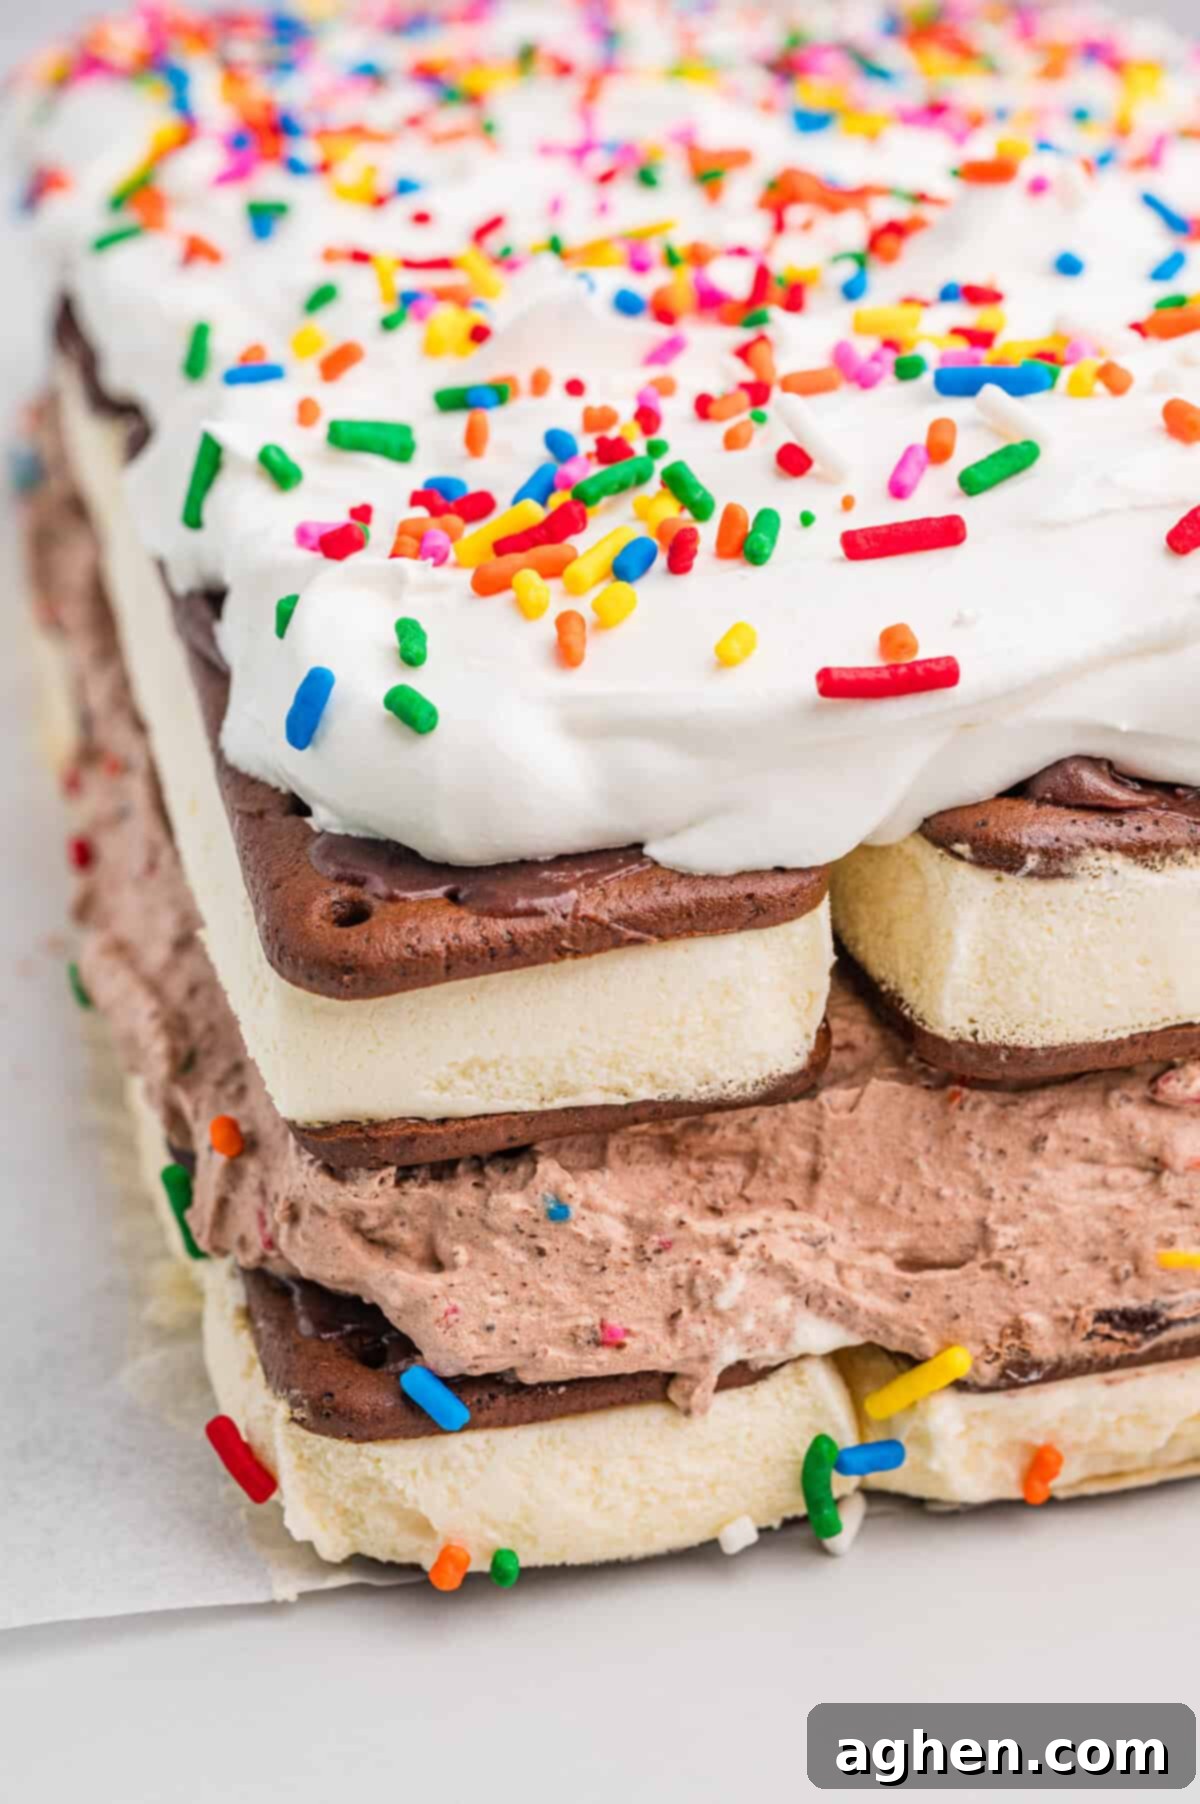
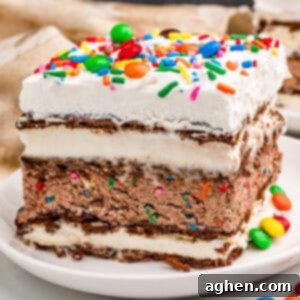
What makes this cake so irresistible? It boasts two full, generous layers of classic vanilla ice cream sandwiches, perfectly complemented by a decadent spread of rich chocolate fudge and a heavenly, fluffy chocolate pudding filling. The entire masterpiece is then crowned with a generous blanket of Cool Whip and finished with your favorite colorful toppings, making it as visually appealing as it is delicious. Each bite offers a delightful contrast of textures and temperatures – the softness of the ice cream, the slight chew of the sandwich, the smooth pudding, and the rich fudge.
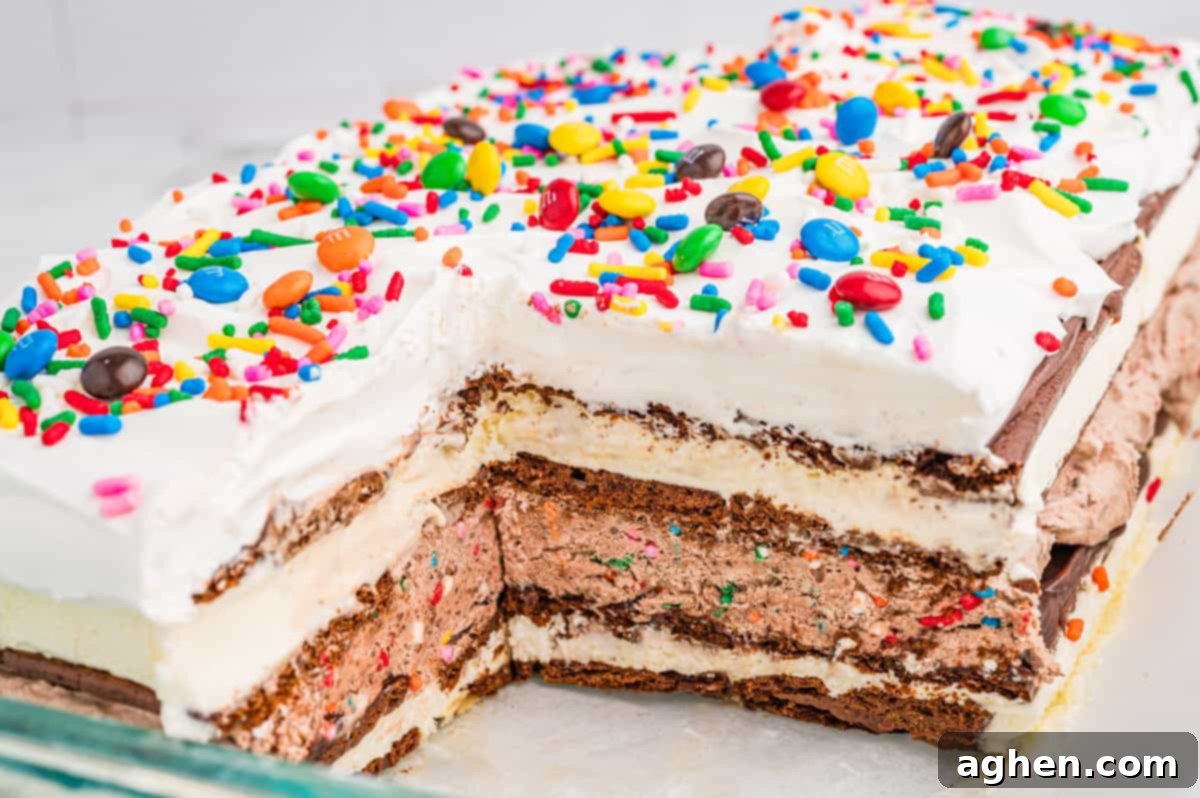
Unlike some clever concoctions like my upside-down ice cream cone cupcakes (which charmingly only look like ice cream), this cake is the authentic, frozen deal. If you’re a true fan of cool, creamy, and hassle-free no-bake desserts, you’re in for a real treat. Don’t stop here – be sure to explore more of my effortless frozen delights! You might also love my collection of no-bake pies, refreshing icebox cakes, and delightfully light fluff salad recipes for even more stress-free dessert inspiration!
Why You’ll Absolutely Love This Ice Cream Sandwich Cake Recipe
- Minimal Prep Time: This recipe demands just 15 minutes of your precious time for assembly. The rest is simply passive freezer time, allowing you to focus on other tasks or simply relax. It’s the ultimate solution for busy days when you need a show-stopping dessert without the fuss.
- The Perfect Celebration Treat: Whether it’s a birthday bash, a casual summer BBQ, or a holiday gathering, this ice cream sandwich cake fits every occasion. It’s cool, refreshing, and universally loved, making it an ideal centerpiece for any festive event.
- A Nostalgic and Fun Twist: Take a trip down memory lane with this playful dessert. It transforms classic ice cream sandwiches into an elevated, layered cake that evokes fond childhood memories while still feeling sophisticated enough for adults. It’s a fun, creative way to enjoy a timeless favorite.
- Guaranteed Crowd-Pleaser: Forget worrying about picky eaters – this cake is always a huge hit! Its combination of familiar flavors and exciting textures ensures that guests of all ages will flock to the dessert table. It’s frequently requested for potlucks, family reunions, and any get-together where deliciousness is a must.
- Endlessly Customizable: While delicious as is, this cake is also a blank canvas for your creativity. Easily adapt it with different pudding flavors, ice cream sandwich types, or an endless array of toppings to match any theme, season, or personal preference. The possibilities are truly limitless!
Essential Ingredients & Smart Substitutions
This section includes detailed ingredient notes and clever substitution options to help you master this recipe. For all precise measurements, a complete ingredient list, and step-by-step instructions, make sure to check out the printable recipe card conveniently located at the very end of this post.
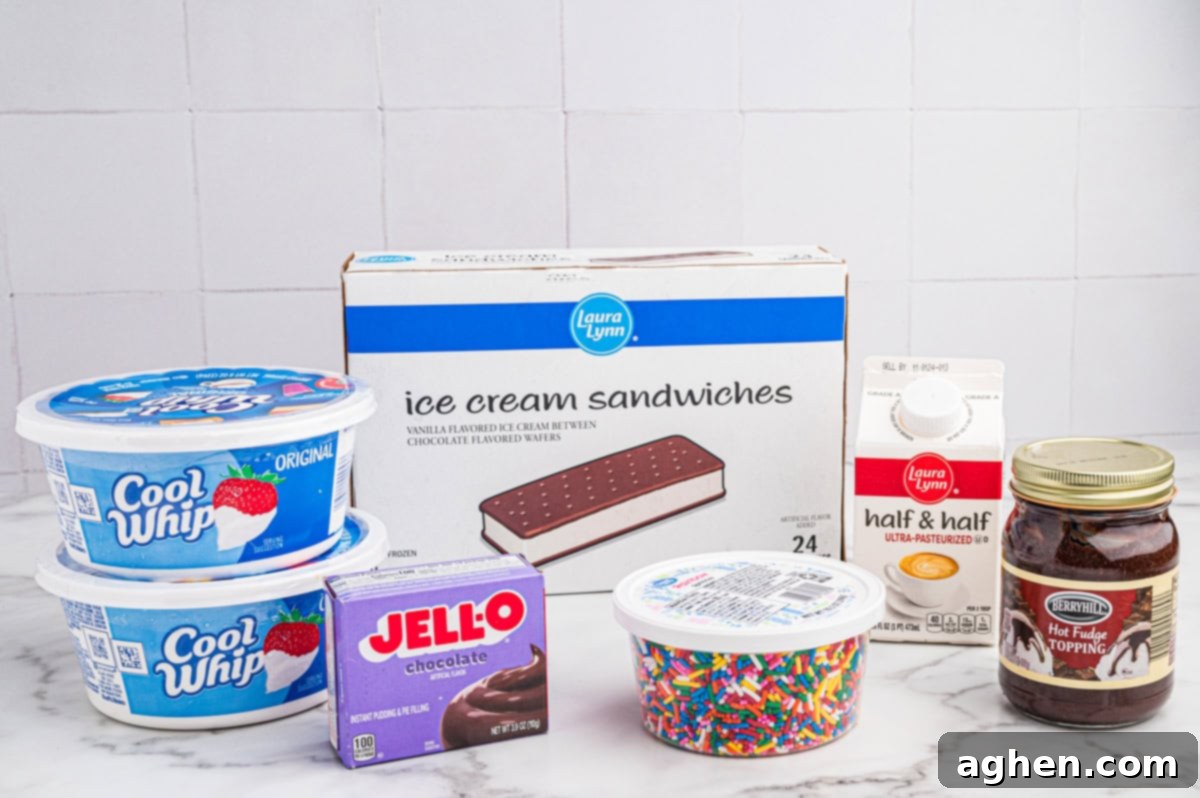
- Instant Chocolate Pudding Mix: This is a crucial ingredient, so ensure you pick up an instant pudding mix, typically found in a box. Do not confuse it with “cook-and-serve” pudding, which requires heating and will not set properly in this no-bake application. The instant variety guarantees a thick, creamy filling without any extra effort.
- Unsweetened Cocoa Powder: Adding cocoa powder to the pudding mix is a little secret to boost that rich, deep chocolate flavor. It enhances the overall chocolaty profile, making the pudding layer even more decadent than just the mix alone.
- Half and Half: This provides a lovely creamy consistency for your pudding. If you prefer, you can easily swap it for whole milk for a slightly lighter texture, or for heavy cream to achieve an even richer, more luxurious pudding layer.
- Cool Whip: Make sure your Cool Whip is completely thawed before you begin assembly. This ensures it’s light, fluffy, and easy to spread. For a homemade touch, I’ve even got a fantastic stabilized whipped cream recipe that works wonderfully as a substitute, offering a fresh, dairy-rich alternative.
- Rainbow Sprinkles: These add a fun pop of color and a delightful crunch to the pudding layer and the top of your finished cake. Feel free to use themed sprinkles (e.g., red and green for holidays, specific colors for birthdays) to customize your dessert!
- Vanilla Ice Cream Sandwiches: Opt for regular-sized ice cream sandwiches, not the mini ones, to ensure you get full, substantial layers for your cake. While vanilla is classic, don’t hesitate to experiment with other flavors if you want to create a unique variation.
- Chocolate Fudge Topping: This should be at room temperature, but it’s essential that you do not heat it up. Warming the fudge will cause it to melt the ice cream and pudding layers, compromising the cake’s structure. Keeping it at room temperature allows it to spread easily without causing any unwanted melting.
- Optional Toppings: This is where you can truly make the cake your own! Get creative with additional sprinkles, mini chocolate chips, crushed Oreos, chopped-up candy bars (like Snickers or Reese’s), M&Ms, Reese’s pieces, a drizzle of extra chocolate syrup, or even a luscious homemade caramel sauce. The more, the merrier!
Jaclyn’s Kitchen Faves
I swear by this extra deep 9×13-inch baking dish for all my no-bake desserts! Its increased depth offers ample room to perfectly fit all the luscious layers of this ice cream cake without squishing the top. Plus, it comes with a convenient lid, making it super handy for easy storage in the freezer or for transporting your masterpiece to parties and potlucks without a hitch!
How to Assemble Your Irresistible Ice Cream Sandwich Cake
This section guides you through the process with easy-to-follow step-by-step photos and detailed instructions, ensuring your ice cream sandwich cake turns out perfectly. For the complete printable recipe with precise measurements, simply refer to the recipe card found below.
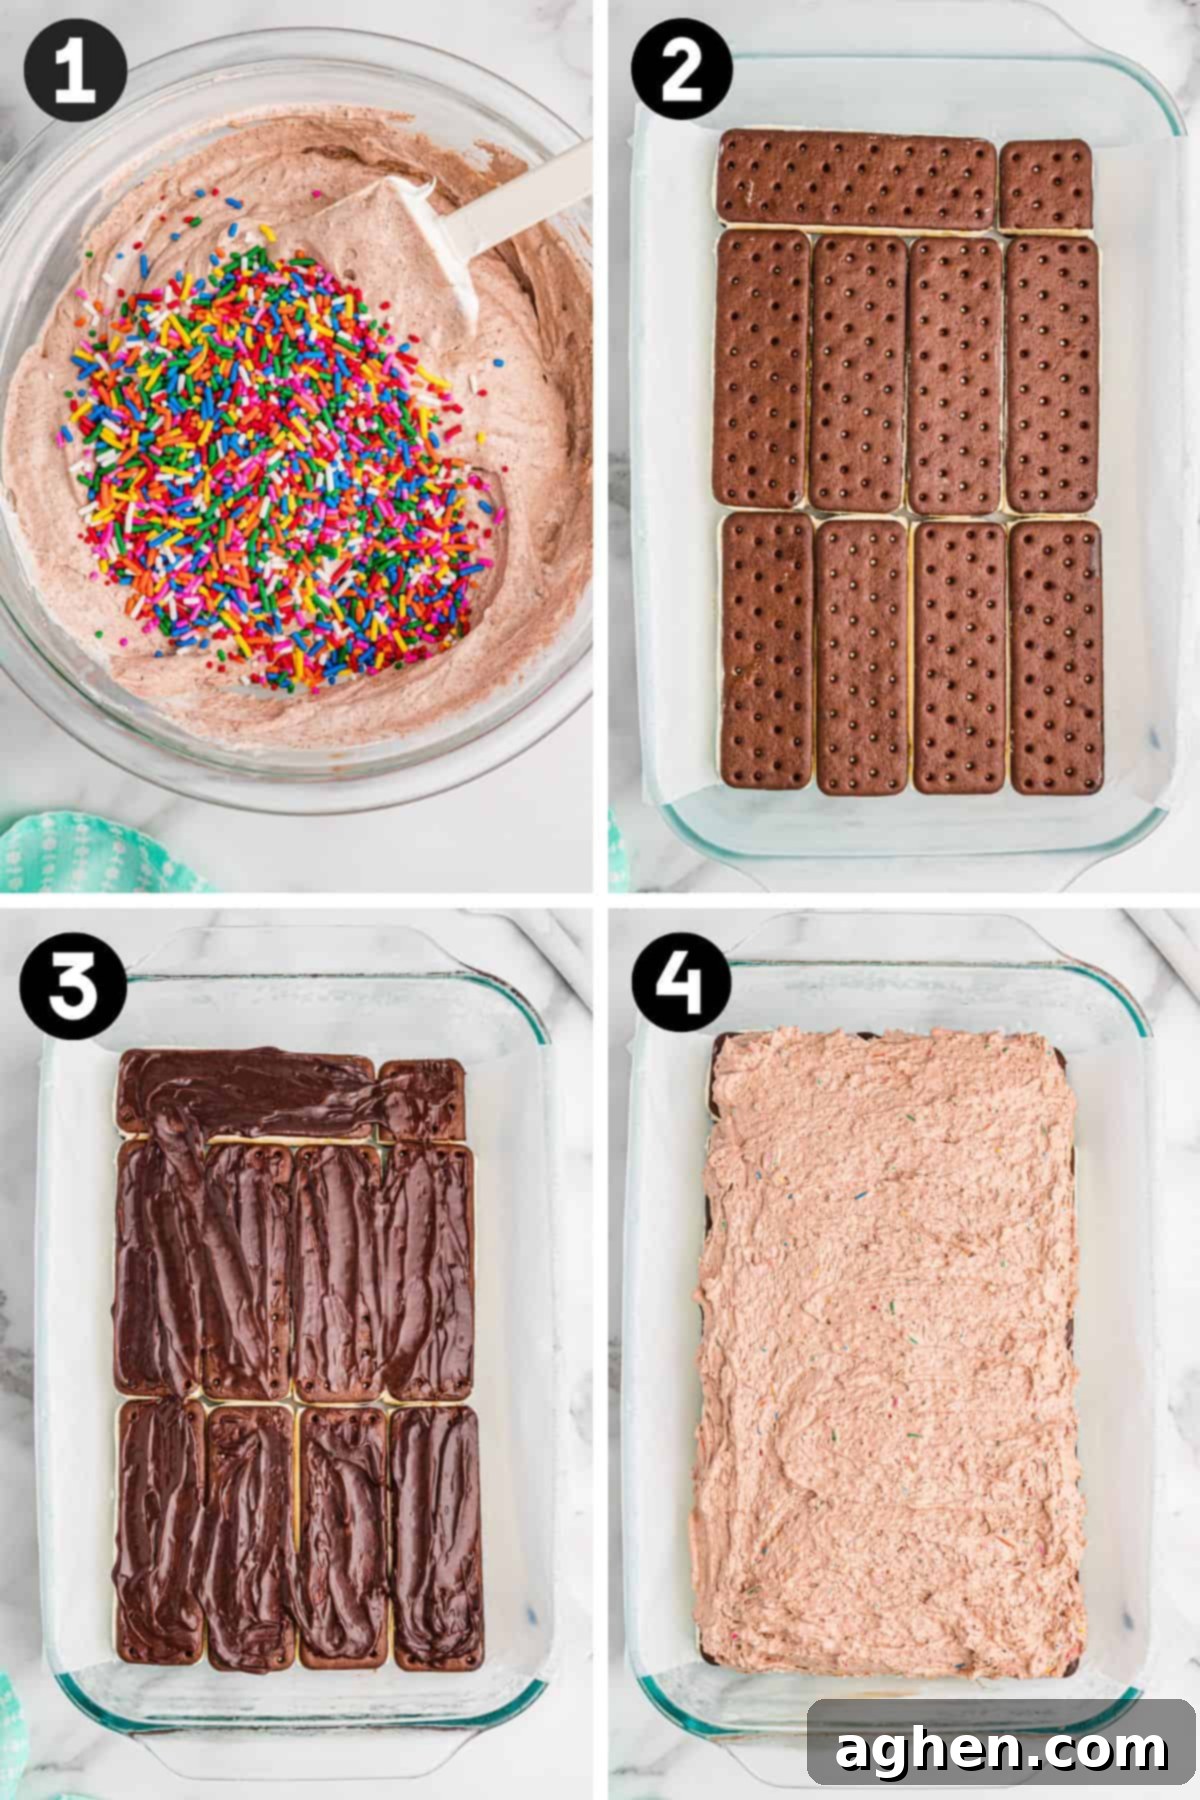
Step 1: Prepare the Pudding Mixture. In a spacious medium-sized bowl, begin by whisking together the instant pudding mix and cocoa powder until they are thoroughly combined. Gradually add the half and half, continuing to whisk vigorously until the mixture thickens to a smooth, creamy consistency. Once thickened, gently fold in half of the thawed Cool Whip (approximately 8 ounces) and a generous amount of sprinkles. This will create a light, airy, and chocolatey filling. Set this bowl aside for a moment.
Step 2: Lay the First Layer of Sandwiches. Carefully arrange a single, even layer of vanilla ice cream sandwiches across the bottom of your chosen baking dish. Think of it like a delicious puzzle! If needed, trim some of the sandwiches with a sharp knife to fit snugly and cover the entire bottom surface, minimizing any large gaps. This creates a solid foundation for your cake.
Step 3: Add the First Fudge Layer. Gently spread about half of your room-temperature chocolate fudge topping evenly over the layer of ice cream sandwiches. Ensure an even coating for a consistent burst of chocolate flavor in every bite.
Step 4: Top with Pudding and Initial Freeze. Now, carefully spread the chocolate pudding mixture you prepared earlier over the fudge layer, creating a smooth and even surface. This is a critical step for stability: immediately place the pan into the freezer to set for approximately 20 minutes. This quick freeze will help solidify the pudding layer just enough so that your subsequent layers of ice cream sandwiches don’t sink or create a messy cake.
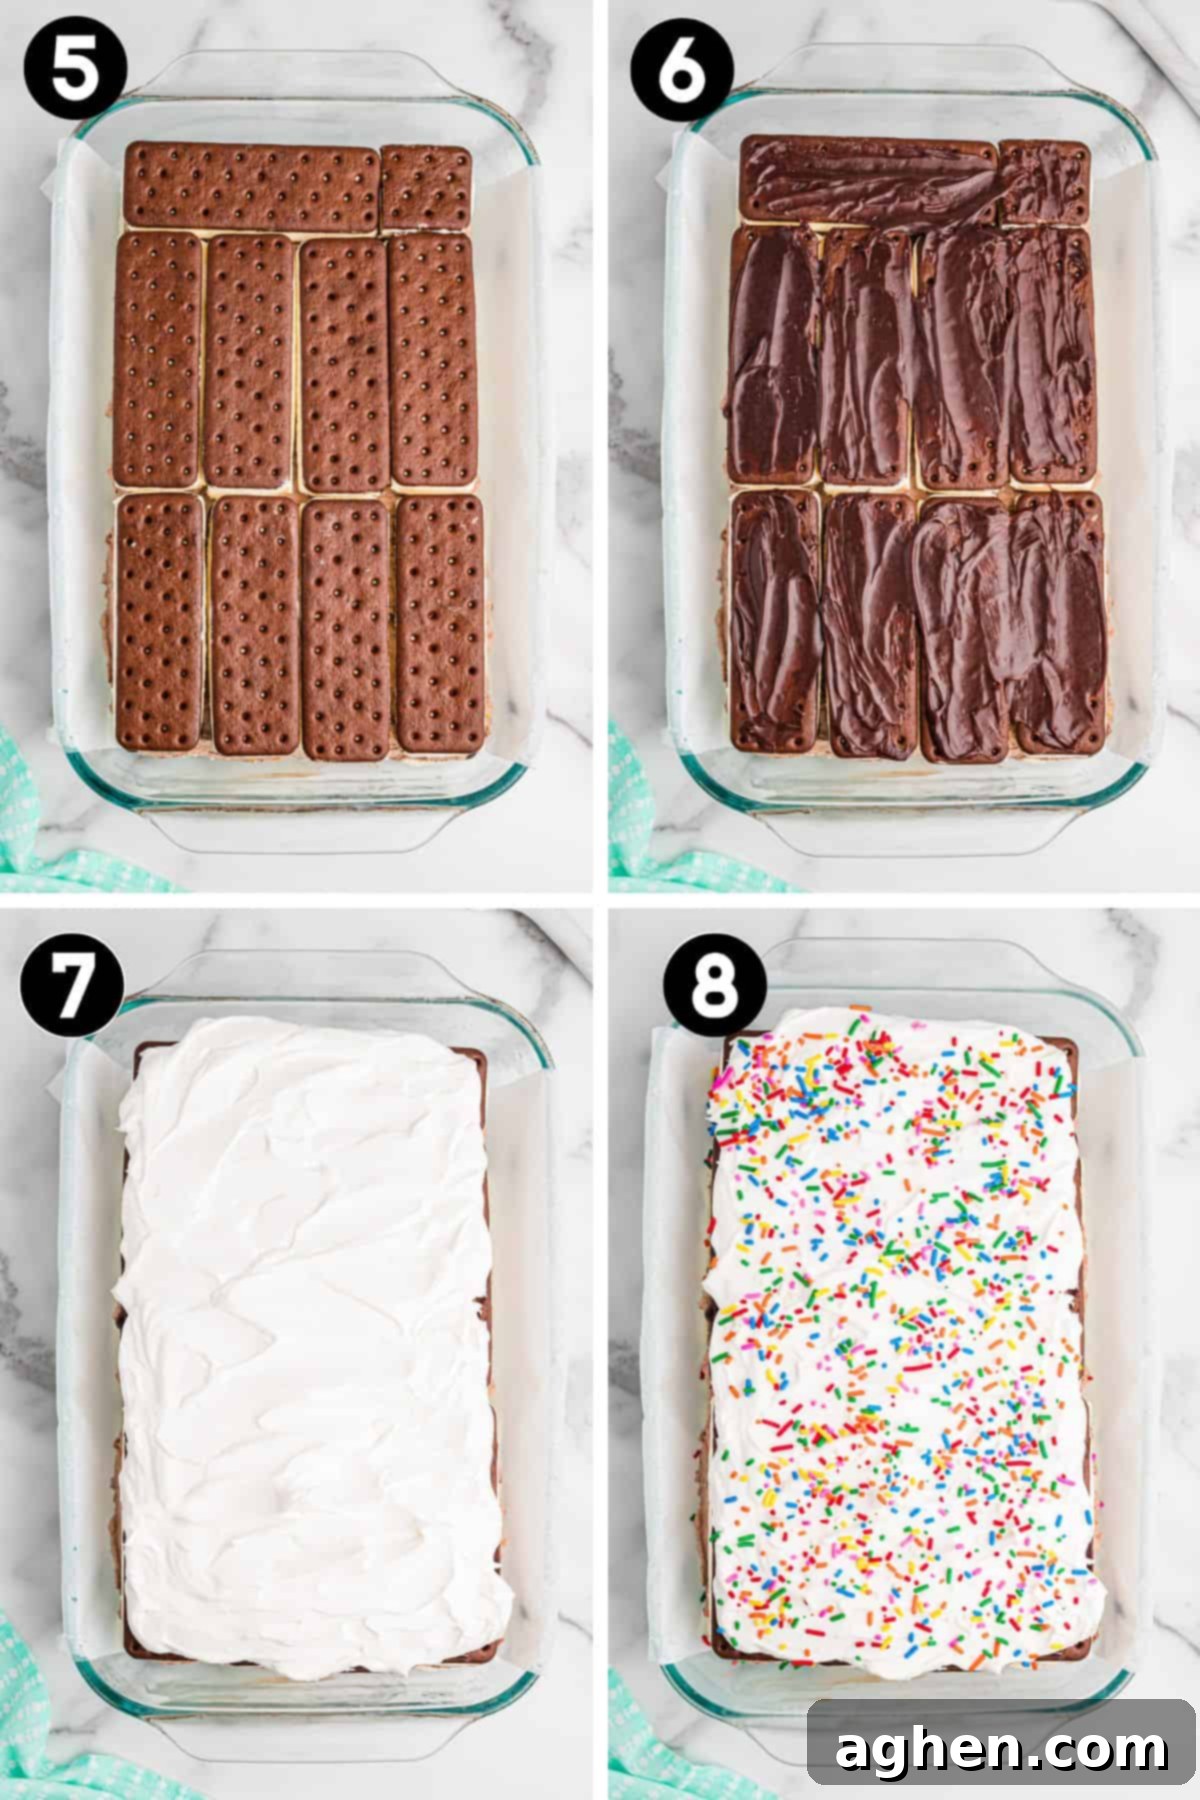
Steps 5-7: Build the Second Layer and Final Freeze. Remove the pan from the freezer. Repeat the layering process: add the remaining ice cream sandwiches to form a second, even layer. Then, spread the rest of the chocolate fudge topping over these sandwiches. Finally, generously spread the remaining Cool Whip over the entire cake, creating a beautiful, fluffy white top. Once all layers are complete, return the pan to the freezer. Allow it to firm up completely for at least two hours (or preferably longer, up to overnight) to ensure the cake is well-set and easy to slice.
Pro Tip for Perfect Presentation:
I highly recommend using an extra deep 9 x 13-inch dish for this recipe. Its added depth will prevent your ice cream cake from being squished when you cover it with a lid or plastic wrap, preserving that beautiful, fluffy whipped topping. If a regular 9 x 13-inch pan is all you have available, a smart workaround is to add the final Cool Whip layer just about 30 minutes before you plan to serve. During those last 30 minutes, leave the ice cream cake uncovered in the freezer to set up without any risk of crushing the topping.
Step 8: Final Touches and Serving. Just before you are ready to serve this magnificent dessert, it’s time for the grand finale – adding your favorite toppings! Sprinkle generously with extra rainbow sprinkles, or get creative with chopped nuts like pecans, peanuts, almonds, or walnuts for added texture. You can also adorn it with crushed Oreo cookies, mini M&M candies, chopped candy bars, or a drizzle of caramel or chocolate syrup. Once decorated, slice into generous portions and enjoy your deliciously cool creation immediately!
Storage Solutions for Your Ice Cream Cake
To keep any leftover ice cream sandwich cake fresh and delicious, store it covered with a tightly fitting lid, plastic wrap, or aluminum foil. Ensure it’s sealed well to prevent freezer burn and keep unwanted odors out, then place it back in the freezer. Proper covering is essential to maintain its texture and flavor.
For even more convenient serving and storage, you can slice the remaining cake into individual portions. Wrap each slice tightly with plastic wrap, then place them in an airtight freezer-safe container or bag. Stored this way, individual pieces can be kept frozen for up to about 2 months, making it easy to grab a single serving whenever a craving strikes!
Pro Recipe Tips for Success
- Work Quickly: Ice cream melts rapidly, especially in warm kitchens! To prevent your sandwiches from turning into a soggy mess, have all your ingredients measured, thawed (if needed), and ready to go before you even start layering. Speed is your friend here!
- Line Your Pan for Easy Release: For a clean lift and perfect slices every time, line your baking dish with parchment paper, leaving an overhang on the sides. This creates “handles” that allow you to effortlessly lift the entire cake out of the pan before slicing, making presentation a breeze.
- Always Have Extra Sandwiches Ready: A standard 9×13 Pyrex dish typically accommodates about 19 regular-sized ice cream sandwiches. However, different brands or slightly larger cake pans might require more. It’s always a good idea to buy a few extra just in case, ensuring you can perfectly cover each layer without gaps.
- Freeze Between Layers: Don’t skip that initial 20-minute freeze after the first pudding layer! This crucial step allows the pudding to set just enough, preventing subsequent ice cream sandwich layers from sinking into the soft filling. It’s key for structural integrity and clean layers.
- Add Toppings Last-Minute: To ensure your toppings retain their best texture and vibrant appearance, add candies, sprinkles, and drizzles just before serving. This prevents them from becoming soggy, discolored, or losing their crunch in the freezer over time.
- Make Ahead for Stress-Free Entertaining: This dessert is an absolute dream for party planning as it can be fully prepped and frozen up to 48 hours in advance. This allows the cake to properly set and ensures it’s perfectly chilled and ready to impress your guests exactly when you need it.
Exciting Recipe Variations to Try
This ice cream sandwich cake is incredibly versatile, inviting you to experiment with different flavors and ingredients to create new favorites. Here are a few delicious ideas:
- Swap the Pudding Flavor: Unleash your creativity by swapping out the chocolate pudding. Imagine a vanilla ice cream sandwich cake with creamy vanilla pudding (simply omit the cocoa powder), or try a decadent butterscotch, banana, or even white chocolate pudding mix for a delightful change of pace.
- Chocolate and Strawberries Dream: For a fruity twist, use Neapolitan ice cream sandwiches. Drizzle fresh strawberry topping or a homemade strawberry sauce between the layers for bursts of berry flavor. Garnish the top with fresh sliced strawberries and a few chocolate shavings for an elegant touch.
- Peanut Butter Lover’s Delight: Transform this into a rich peanut butter version! Swirl creamy peanut butter (or a peanut butter-flavored pudding) between the ice cream sandwich layers. Top with chopped chocolate peanut butter cups, a sprinkle of roasted peanuts, or even crushed pretzels for a salty-sweet crunch.
- Mint Chocolate Chip Extravaganza: Use mint chocolate chip ice cream sandwiches! You can easily swap the chocolate pudding for a vanilla or even a mint-flavored instant pudding. Top with crushed Thin Mints or chocolate syrup for an extra minty kick.
More Irresistible No-Bake Dessert Recipes
If you loved the ease and deliciousness of this ice cream sandwich cake, you’ll definitely want to explore these other fantastic no-bake dessert options from my kitchen:
- Root Beer Float Pie: A nostalgic and incredibly refreshing pie that tastes just like your favorite fizzy drink!
- Lemon Ice Box Cake: Bright, zesty, and perfectly tart, this creamy lemon cake is a delightful treat for any season.
- Fried Ice Cream Dessert: All the flavors of a classic fried ice cream, without any actual frying! Crunchy, sweet, and cool.
- Mason Jar Ice Cream: Individual servings of homemade ice cream, perfect for customization and easy portion control.
Ice Cream Sandwich Cake
Author: Jaclyn
15 minutes
2 hours
20 minutes
2 hours
35 minutes
12
Saved!
Ingredients
-
1
(3.9 oz)
instant chocolate pudding mix -
1
Tablespoon
unsweetened cocoa powder -
1
cup
half-and-half -
16
oz
Cool Whip
thawed and divided -
½
cup
rainbow sprinkles -
19
vanilla ice cream sandwiches
regular size -
½
cup
hot fudge topping
at room temperature, do not warm up, divided -
optional toppings
additional sprinkles, M&Ms, chopped-up candy bars, caramel sauce, chocolate sauce, etc
Instructions
-
Line a 9 x 13 inch baking dish (see note below) with parchment paper, leaving an overhang on the sides for easy lifting. Set aside.
-
In a medium bowl, whisk together the instant pudding mix and cocoa powder until well combined. Add the half-and-half and continue to mix until the pudding thickens to a smooth consistency. Gently fold in half of the thawed Cool Whip (8 ounces) and your rainbow sprinkles. Set this mixture aside.
-
Arrange a single, even layer of vanilla ice cream sandwiches across the bottom of your prepared dish. Trim sandwiches as needed with a knife to cover the bottom completely, ensuring there are no large gaps. (For most 9×13 dishes, this is about 2 rows of 4 sandwiches, plus an additional 1 and ⅓ sandwiches to fill any remaining space).
-
Spread ¼ cup of the room-temperature fudge topping evenly over the first layer of ice cream sandwiches.
-
Carefully add the chocolate pudding mixture you prepared, spreading it into an even layer over the fudge and sandwiches.
-
Place the dish in the freezer for at least 20 minutes. This crucial step allows the pudding to set slightly, preventing the next layer of ice cream sandwiches from sinking into it.
-
Remove the pan from the freezer and repeat the layering process: add a second layer of ice cream sandwiches, followed by the remaining ¼ cup of hot fudge sauce, spread evenly.
-
Finally, spread the remaining Cool Whip evenly over the top layer of fudge, creating a smooth and fluffy finish.
-
Return the cake to the freezer and freeze until completely firm, which will take at least 2 hours. For best results and easier slicing, an overnight freeze is recommended.
-
Just before serving, generously top with additional sprinkles and any other desired toppings (such as chopped candy bars, M&Ms, a caramel drizzle, chocolate sauce, etc.). Using the parchment paper overhang, carefully lift the cake out of the dish onto a cutting board. Slice into portions and serve immediately to enjoy this cold, creamy delight!
Notes
Nutrition
Calories: 477kcal
|
Carbohydrates: 72g
|
Protein: 7g
|
Fat: 19g
|
Saturated Fat: 9g
|
Polyunsaturated Fat: 3g
|
Monounsaturated Fat: 5g
|
Cholesterol: 31mg
|
Sodium: 341mg
|
Potassium: 253mg
|
Fiber: 1g
|
Sugar: 47g
|
Vitamin A: 377IU
|
Vitamin C: 0.2mg
|
Calcium: 145mg
|
Iron: 1mg

Did You Make This Recipe?
Share it with me on Instagram @crayonsandcravings and follow on Pinterest @crayonsandcravings for even more!
Pin Recipe
Leave A Review
