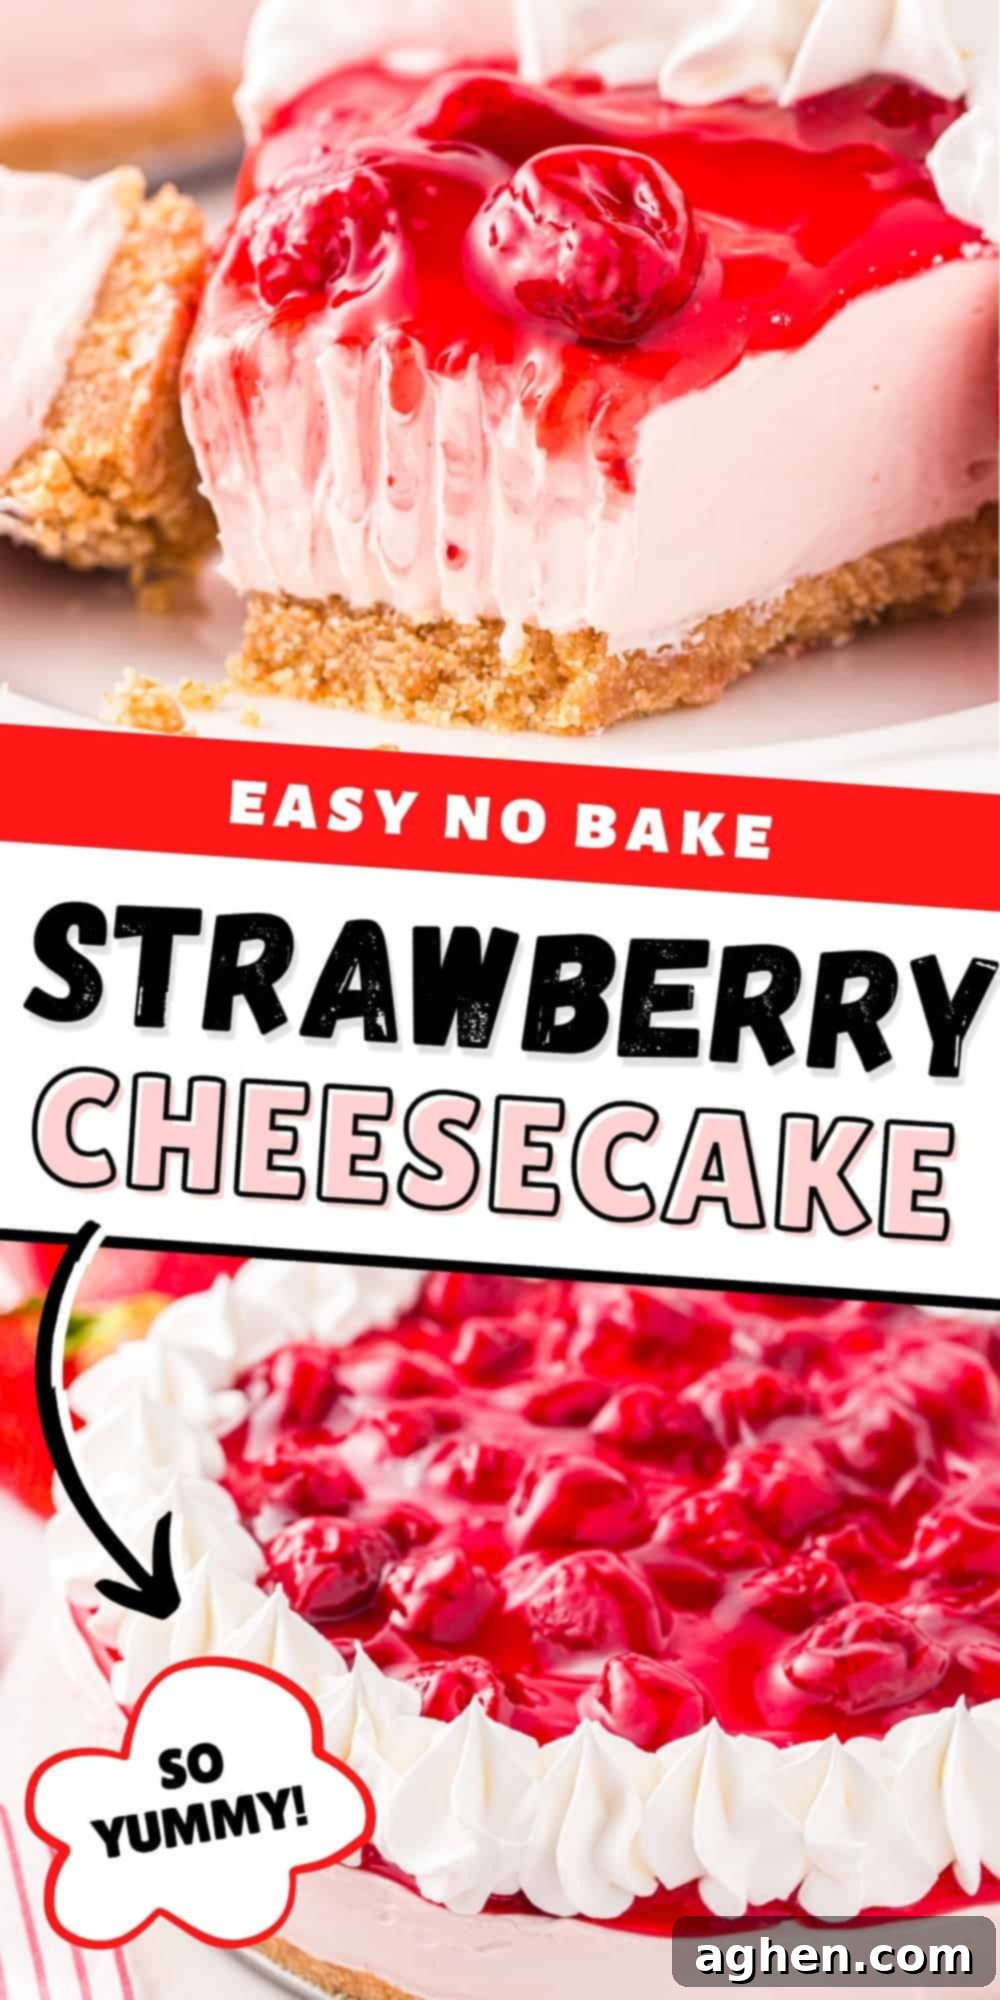
Easy No-Bake Strawberry Cheesecake: The Perfect Refreshing Summer Dessert
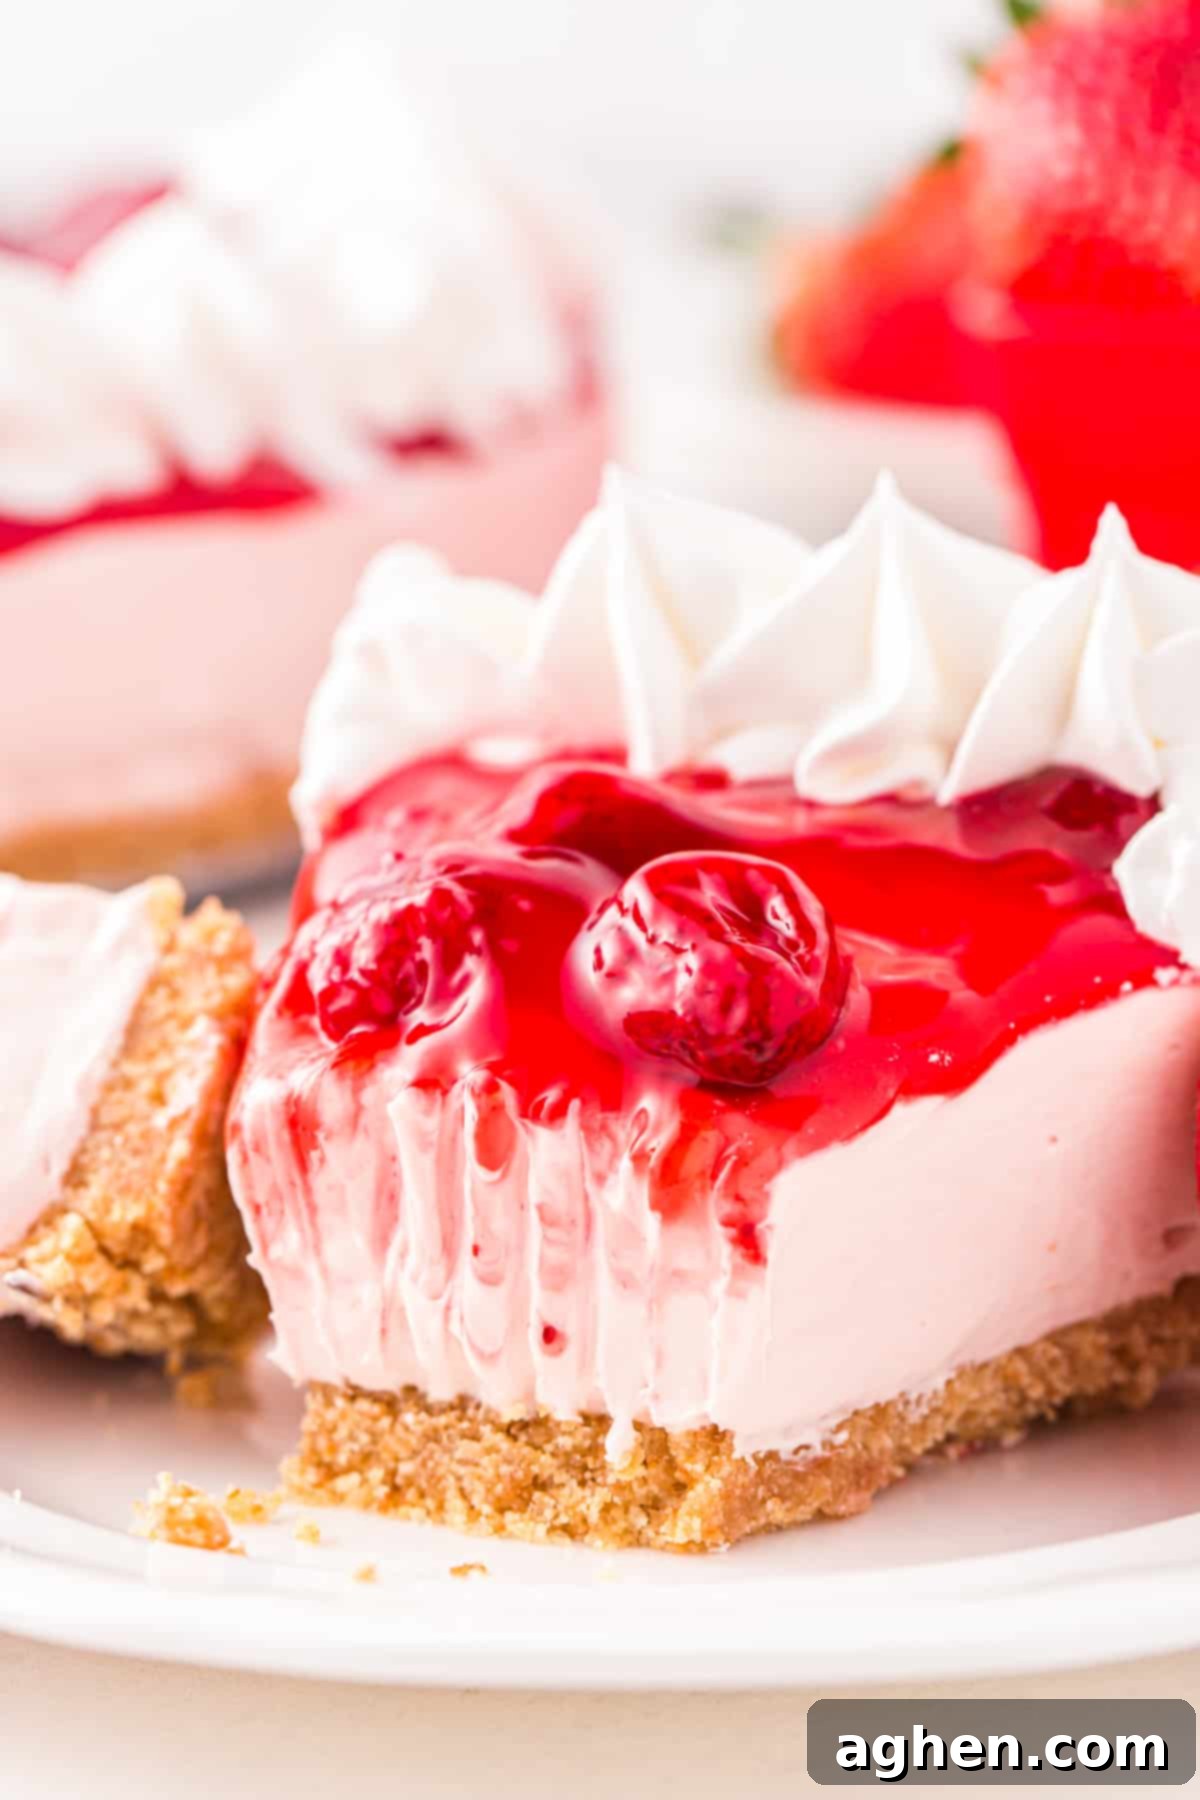
Craving a delightful dessert that requires absolutely no baking? Look no further than this incredibly easy and utterly delicious No-Bake Strawberry Cheesecake! This recipe combines a crisp, buttery vanilla wafer crust with a light, fluffy cream cheese filling, bursting with strawberry jam flavor, and finishes it off with a generous layer of sweet strawberry pie filling and airy whipped topping. It’s a guaranteed crowd-pleaser that’s especially perfect for those warm months when turning on the oven is the last thing you want to do.
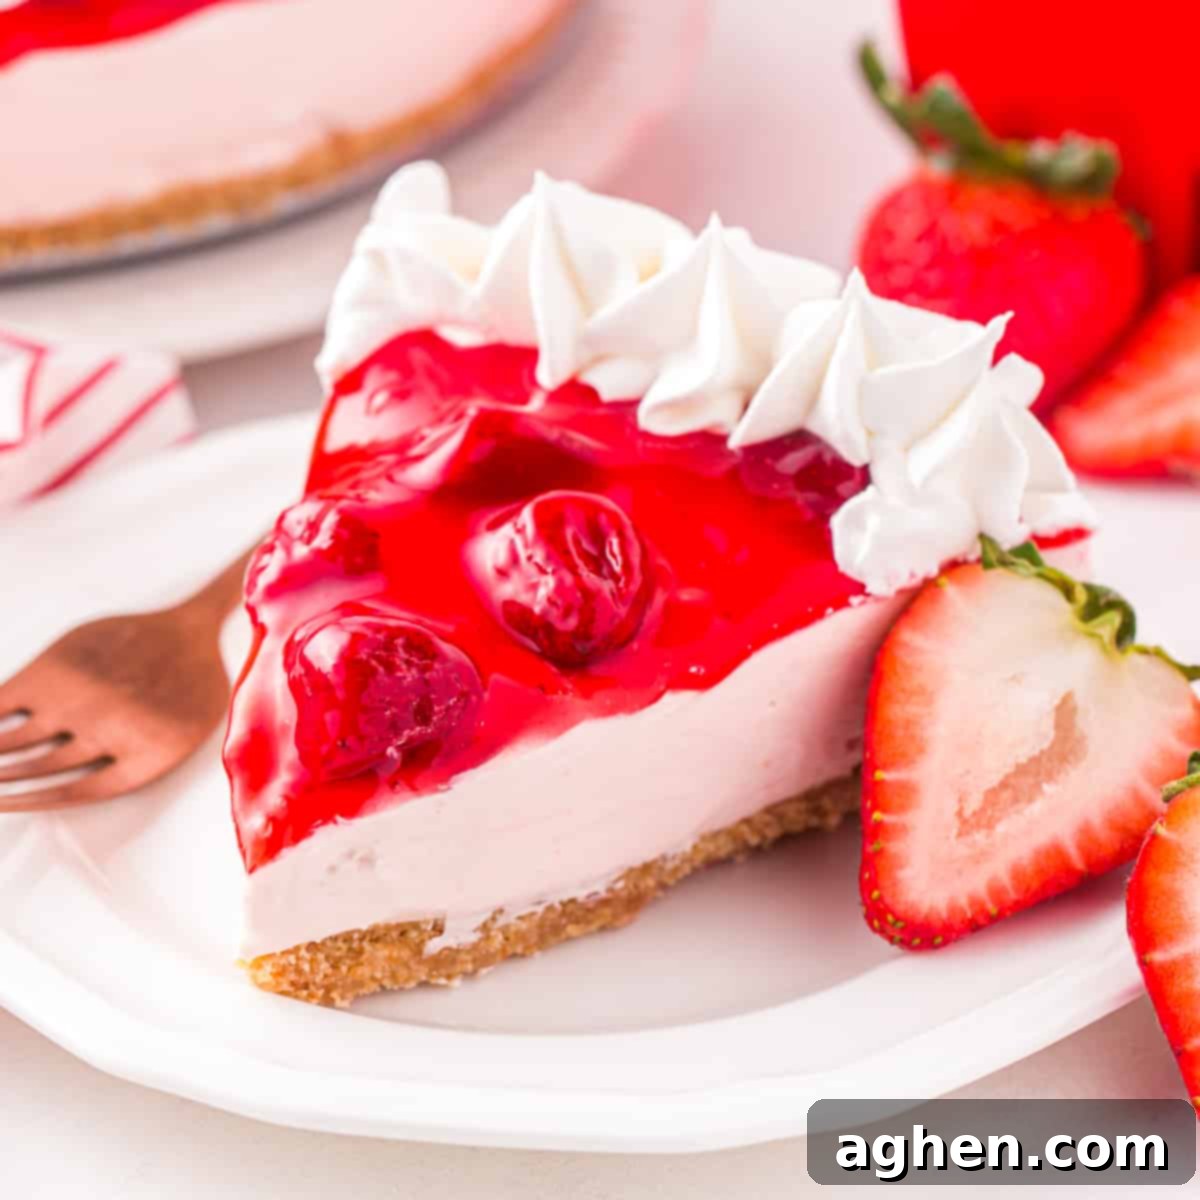
Similar to other beloved no-bake treats like no-bake strawberry jello pie, banana pudding pie, and no-bake strawberry cheesecake bars, this no-bake strawberry cheesecake recipe is celebrated for its incredible ease and abundance of fresh strawberry taste. It truly shines during the warmer months, offering a refreshing escape from heavy, oven-baked desserts. Beyond summer, its beautiful red and pink hues make it an excellent choice for special occasions like Valentine’s Day, anniversaries, or even holiday gatherings.
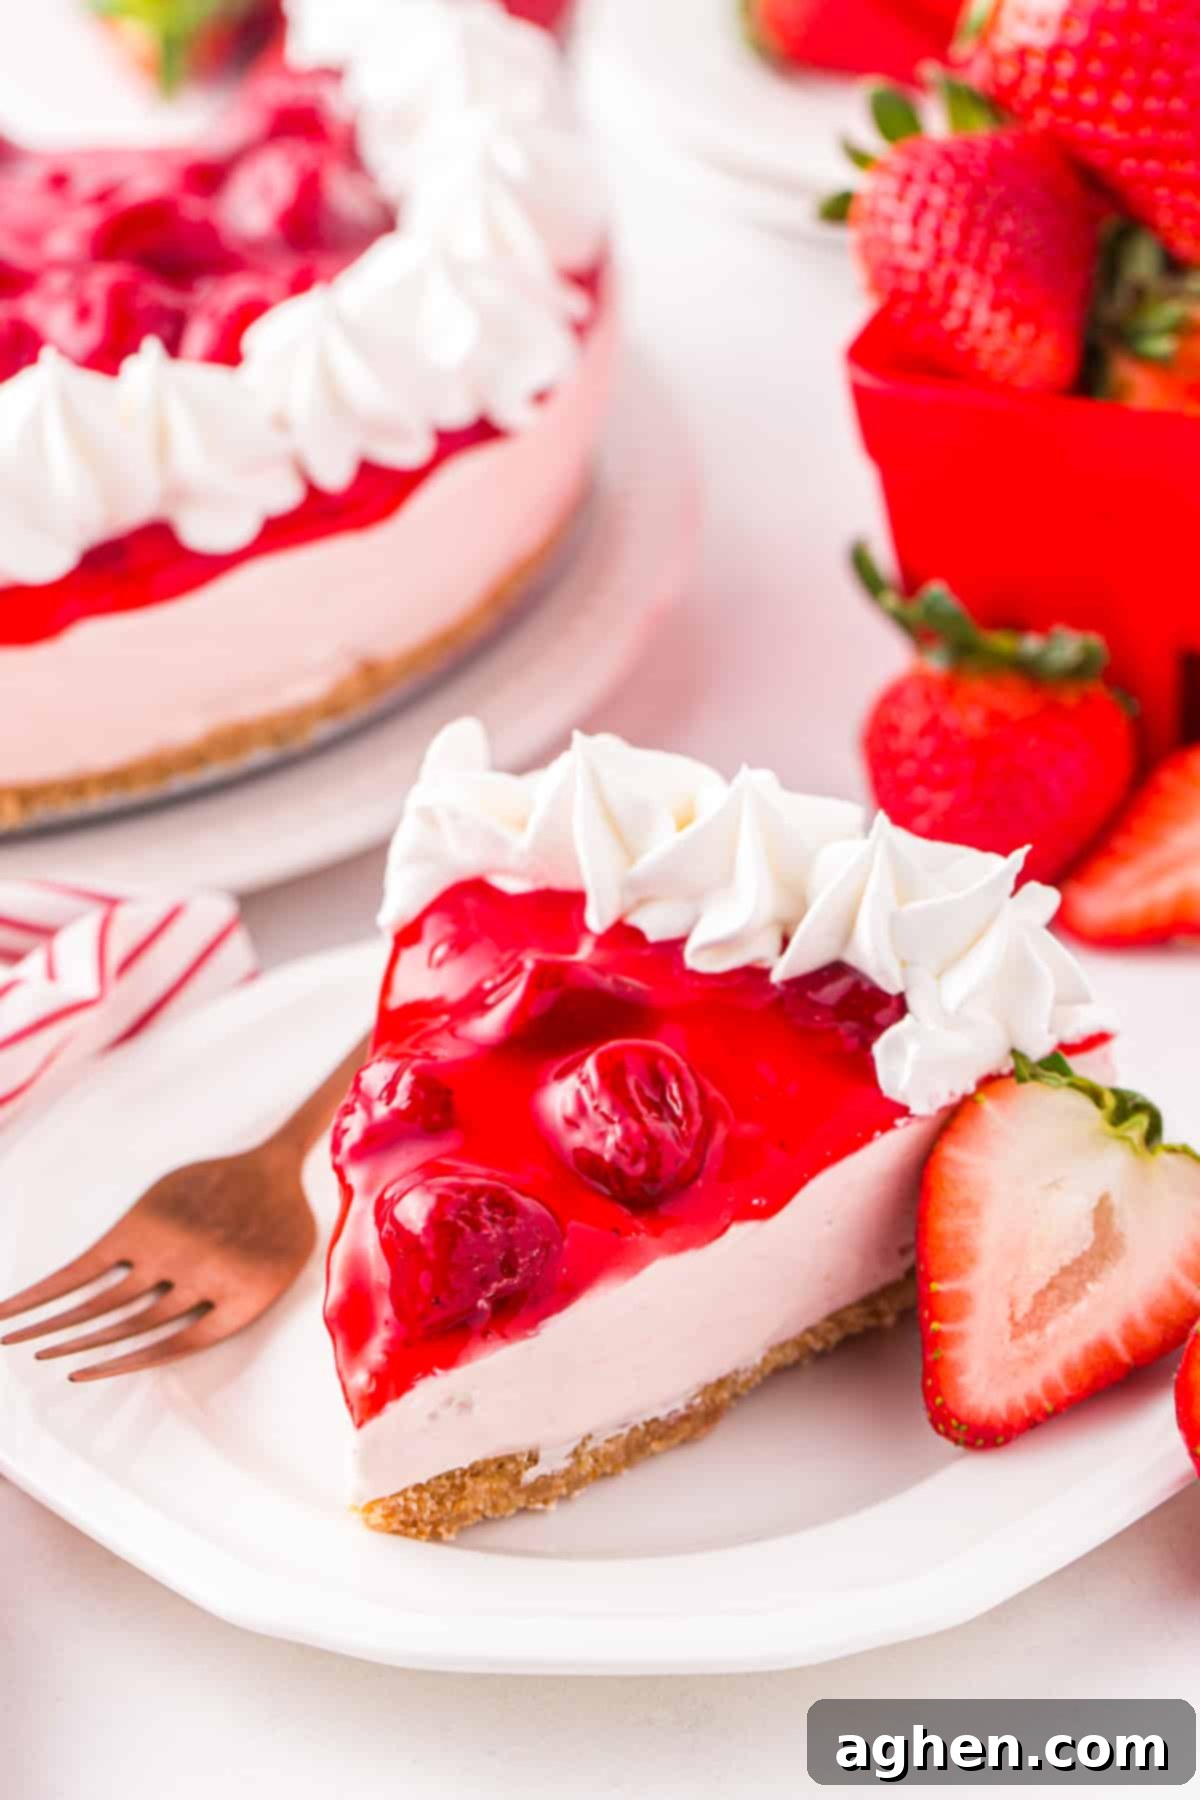
Why You’ll Adore This No-Bake Strawberry Cheesecake Recipe
This dessert isn’t just easy; it’s a triumph of flavor and convenience. Here’s why it’s destined to become a staple in your recipe collection:
- Effortless Preparation: Skip the oven entirely! This recipe comes together quickly with minimal active time, making it perfect for busy schedules or when you want a show-stopping dessert without the fuss.
- Irresistibly Refreshing: The light, airy cream cheese filling and vibrant strawberry layers provide a cool and refreshing experience, especially delightful on a hot day.
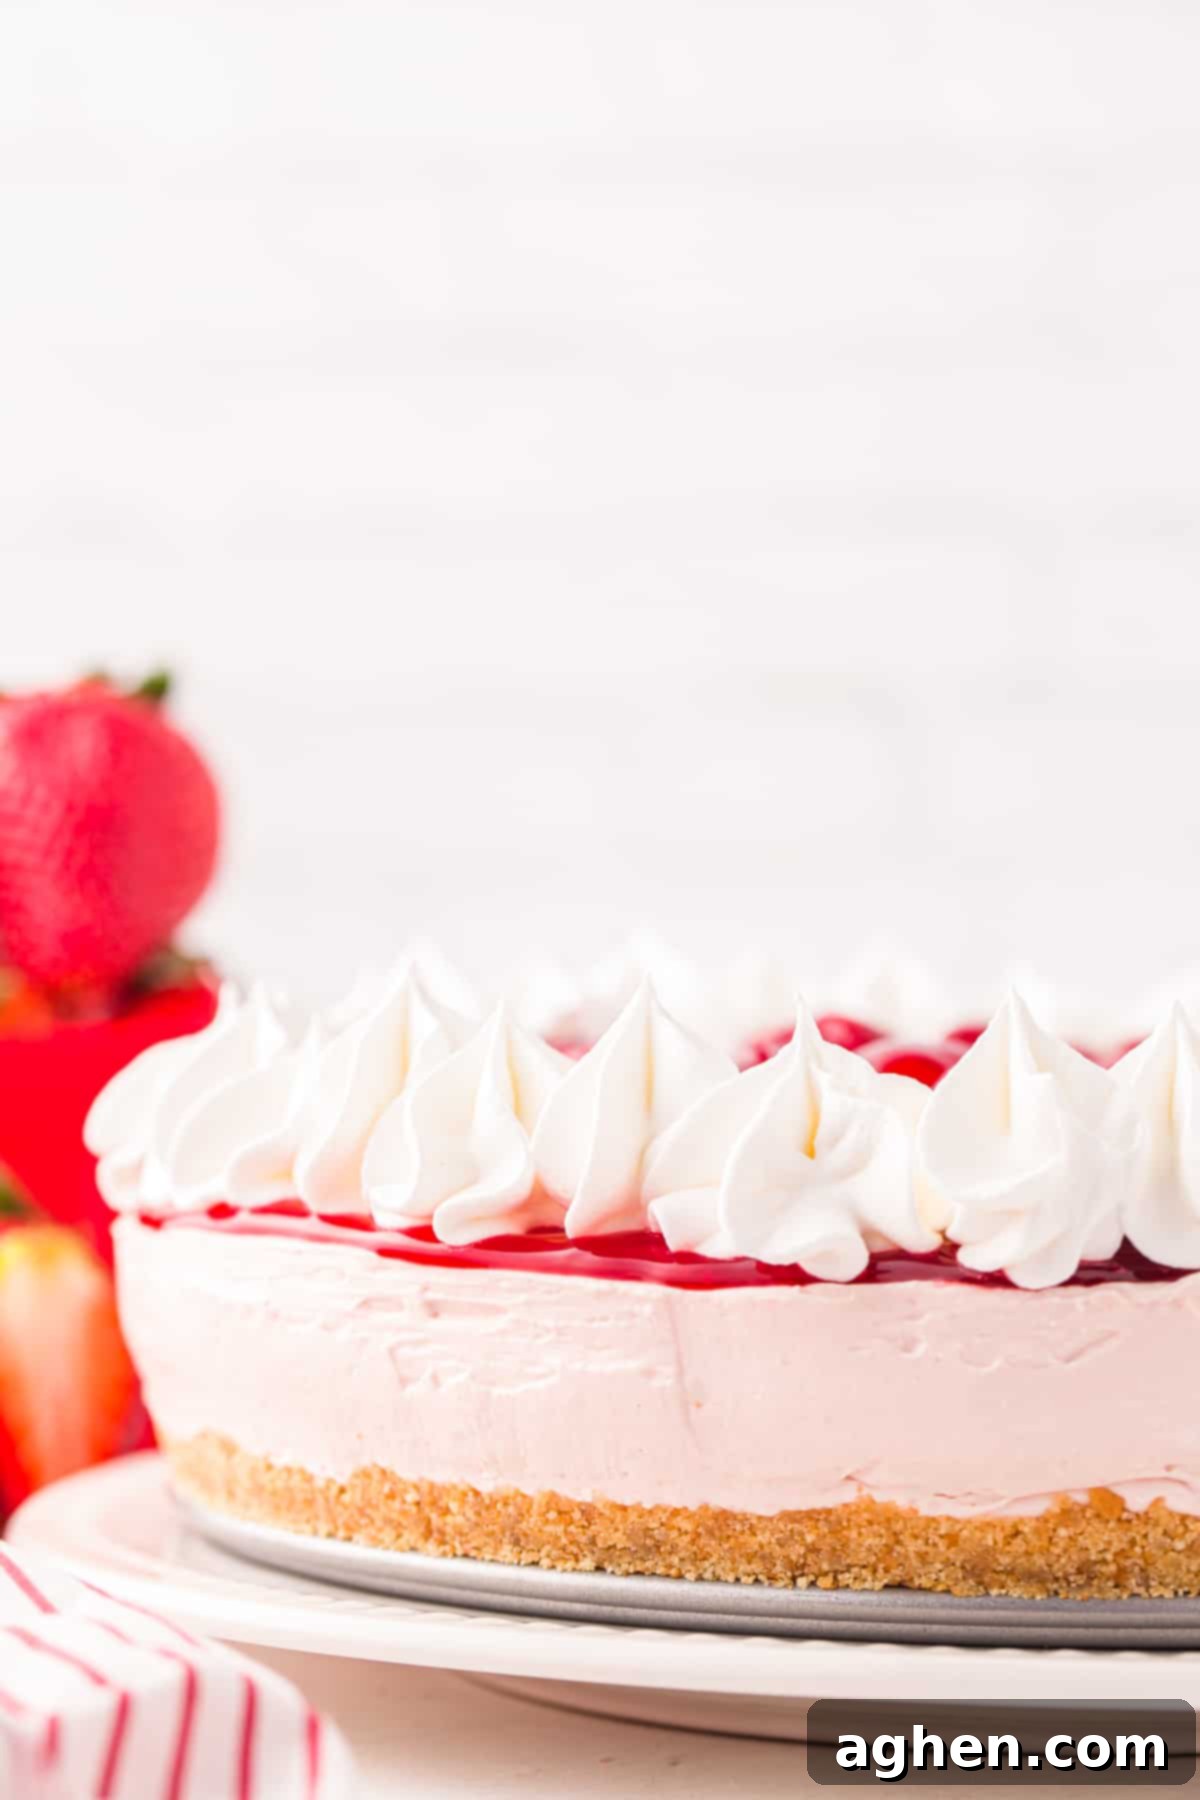
- Vibrant and Visually Stunning: The beautiful red, pink, and white layers make for an eye-catching presentation that will impress your guests. It’s a feast for both the eyes and the palate!
- Versatile for Any Occasion: While it’s a summer superstar, its charming colors and delightful taste make it suitable for holiday celebrations, birthdays, potlucks, or just a simple weeknight treat.
- Customizable: Easily adapt the crust, adjust the sweetness, or even incorporate fresh strawberries for a more homemade jam.
Looking for more sweet strawberry inspiration? Don’t miss my strawberry shortcake trifles, easy strawberry jello poke cake, and strawberry fluff salad.
Essential Ingredients for Your Strawberry Cheesecake
This section provides detailed ingredient notes and clever substitution options to help you tailor this recipe to your preferences. Find all precise measurements, ingredients, and instructions in the printable recipe card at the very end of this post.
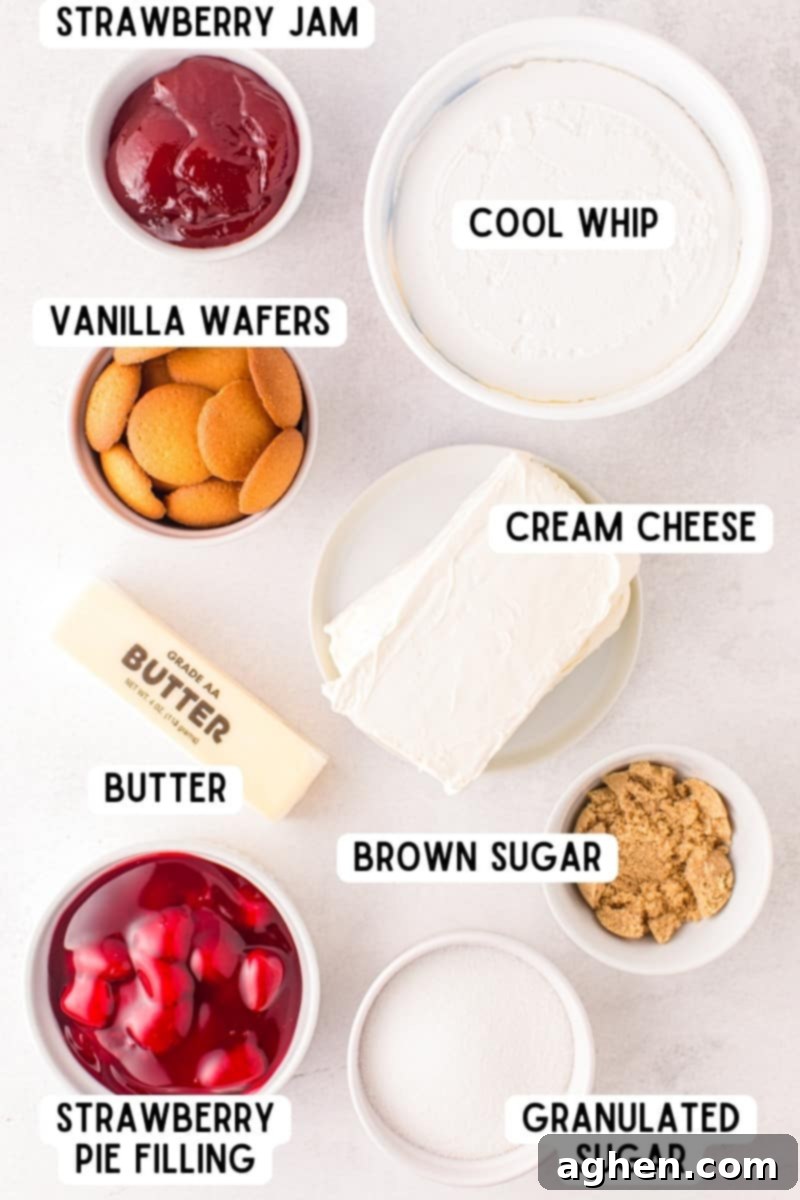
- Vanilla Wafer Crumbs: For that classic, comforting crust, we recommend Nilla wafers. They provide a delicate, slightly sweet flavor and a perfectly crumbly texture. If you prefer, feel free to switch this out for graham cracker crumbs for a more traditional cheesecake crust, or even chocolate graham crackers for a delicious twist. You’ll need approximately 55 cookies to yield about 2.5 cups of fine crumbs.
- Salted Butter: Melted salted butter is crucial for binding the crust and adding richness. If you only have unsalted butter on hand, simply add an extra pinch (about ⅛ teaspoon) of fine salt to your crust mixture to enhance the flavor and balance the sweetness.
- Brown Sugar (for the crust): This adds a lovely depth of flavor and a slight chewiness to the crust. You can certainly replace it with granulated white sugar if desired, though the crust might be slightly less rich in color and flavor.
- Cream Cheese: The star of any cheesecake! For the smoothest, creamiest filling, I always opt for full-fat Philadelphia cream cheese. Ensure your cream cheese is completely softened to room temperature before mixing to prevent lumps and achieve that irresistibly smooth consistency.
- Granulated White Sugar (for the filling): This sweetens the cream cheese filling. While you could swap it for brown sugar, be aware that it might slightly alter the color and add a more molasses-like flavor to the filling.
- Strawberry Jam: Infusing the filling with a concentrated burst of strawberry flavor and a beautiful pink hue. For an even fresher taste, you can try making your own simple strawberry syrup: dice about ¾ cup of fresh strawberries finely, then heat them in a saucepan over medium heat with a tablespoon or two of sugar, a splash of cold water, and a squeeze of lemon juice until boiling. Reduce heat and simmer, stirring often, until the strawberries break down into a syrupy consistency. Let it cool completely before using it in place of the jam.
- Strawberry Pie Filling: This provides a gorgeous, glossy topping with whole strawberry pieces. It adds another layer of sweet, fruity goodness and a striking red contrast to the pink filling.
- Whipped Topping: I typically use store-bought Cool Whip for convenience, as it holds its shape beautifully. However, you can absolutely use a store brand or, for an extra homemade touch, whip up your own fresh whipped cream. To make homemade whipped cream, beat cold heavy cream with a bit of powdered sugar on high speed using a stand mixer’s whisk attachment until stiff peaks form.
Tools and Supplies You’ll Need
Having the right tools makes the preparation process even smoother:
- 9-inch Springform Pan: Essential for easily releasing your cheesecake with clean, beautiful edges.
- Mixing Bowls: Several sizes for preparing the crust and the filling separately.
- Hand Mixer or Stand Mixer: Crucial for achieving a smooth, lump-free cream cheese filling.
- Rubber Spatula: For scraping bowls and gently folding ingredients.
- Measuring Tools: Cups and spoons for accurate ingredient amounts.
- Piping Bag and Star Tip: Optional, but highly recommended for a professional, decorative whipped topping border.
- Food Processor (optional, but recommended): For easily creating uniform vanilla wafer crumbs.
How to Craft Your No-Bake Strawberry Cheesecake: Step-by-Step
Follow these simple steps with detailed photos and instructions to create your perfect no-bake dessert. For the complete printable recipe, please refer to the recipe card at the bottom of this page.
Step 1: Prepare Your Pan. Begin by lightly spraying a 9-inch springform pan with cooking spray. This crucial step ensures your cheesecake will release cleanly and effortlessly once it’s set, preserving its beautiful presentation.
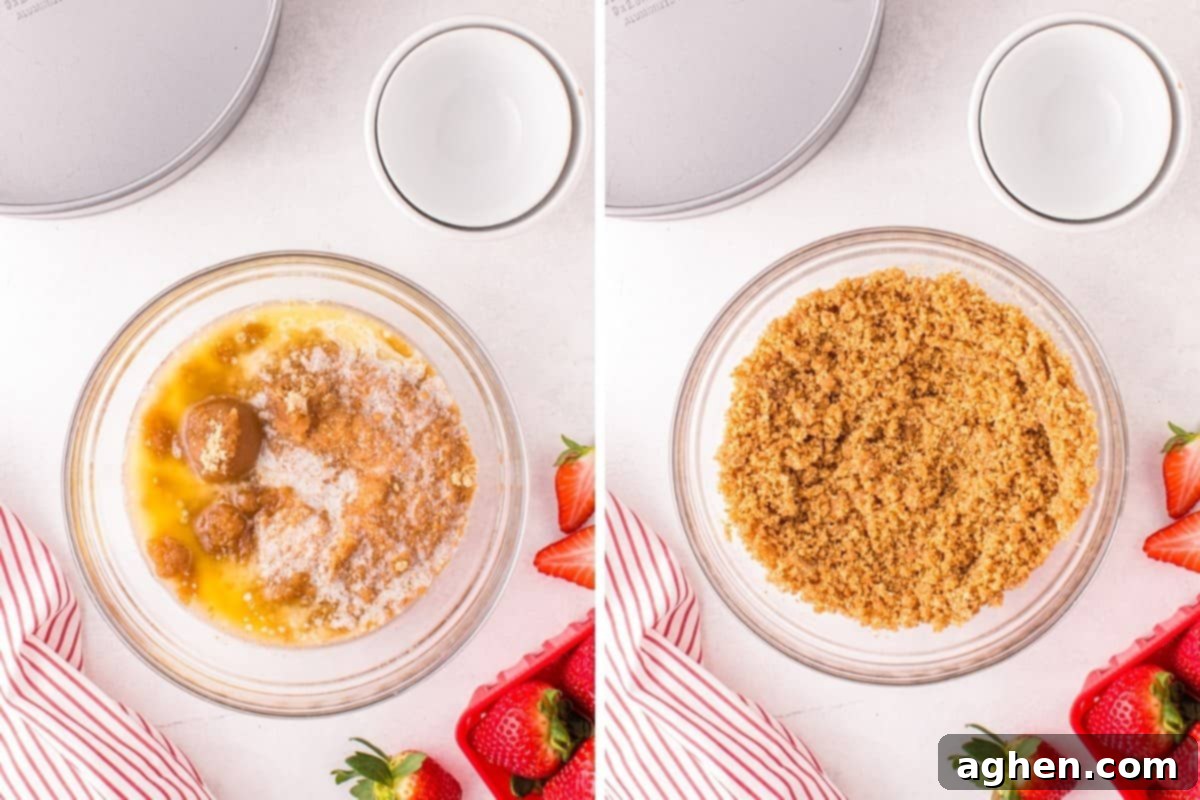
Step 2: Mix the Crust Ingredients. In a medium-sized mixing bowl, combine the finely crushed vanilla wafer crumbs, the melted salted butter, and the brown sugar. Stir these ingredients thoroughly until they are completely combined and the mixture resembles wet sand. This even coating of butter is key to a firm crust.
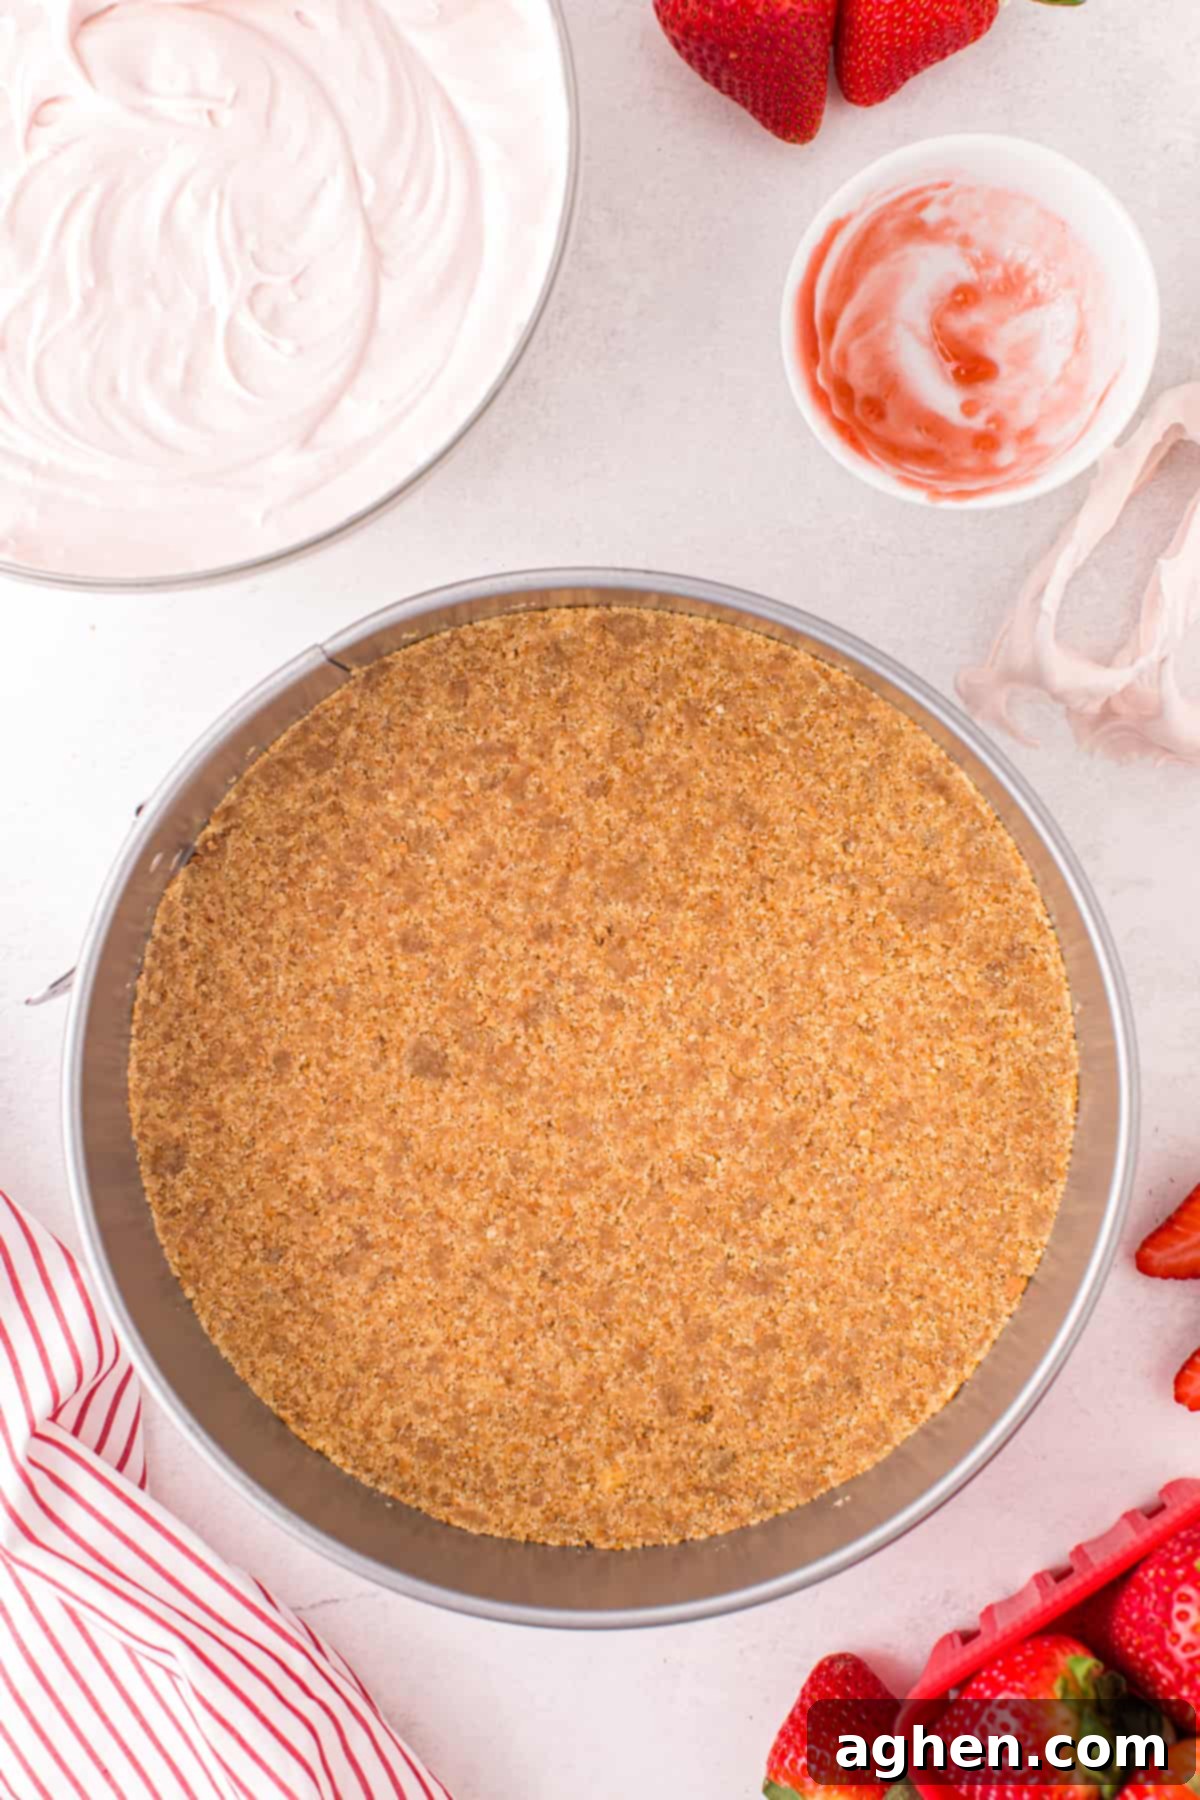
Step 3: Press the Crust. Transfer the crumb mixture into the prepared springform pan. Using the bottom of a glass or your hands, firmly and evenly press the mixture into the bottom of the pan to create a compact, stable crust. Once pressed, place the pan in the refrigerator to chill while you prepare the filling. Chilling helps the butter solidify, setting the crust in place.
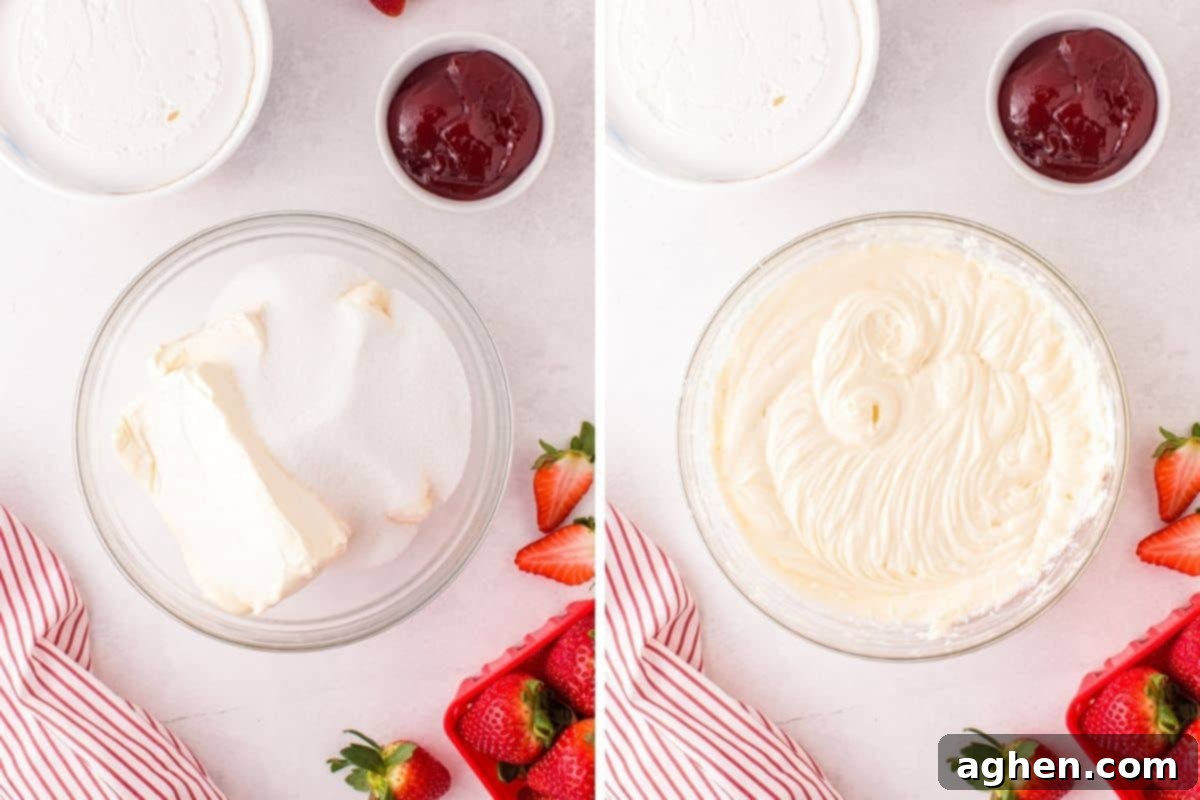
Step 4: Prepare the Cream Cheese Base. In a separate, larger bowl, use a hand mixer or a stand mixer fitted with the paddle attachment to beat the softened cream cheese and granulated sugar together. Beat on medium-high speed until the mixture is completely smooth, light, and fluffy, with no lumps visible. This can take a few minutes, so be patient for the best texture.
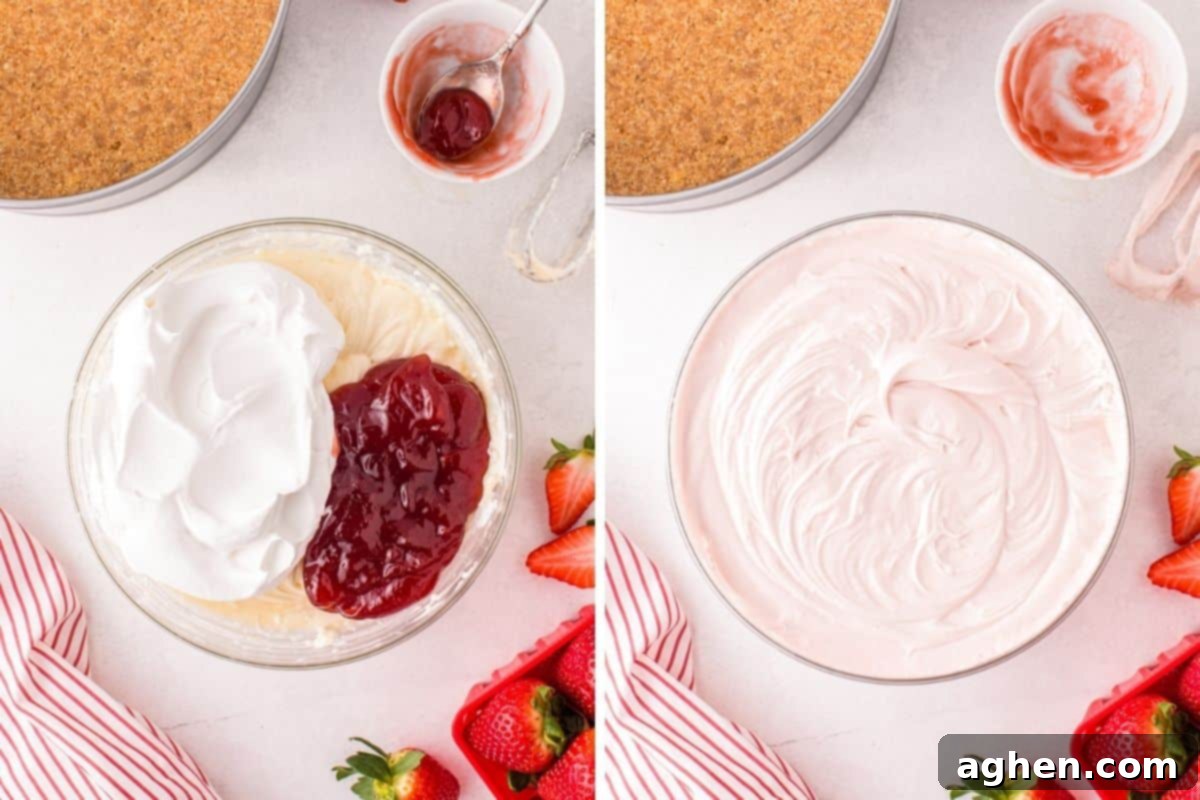
Step 5: Incorporate Flavor and Fluffiness. Gently fold in half of the container of whipped topping and the strawberry jam into the cream cheese mixture. Beat on low speed until all ingredients are just combined. Be careful not to overmix, as this can deflate the whipped topping and make your cheesecake less airy.
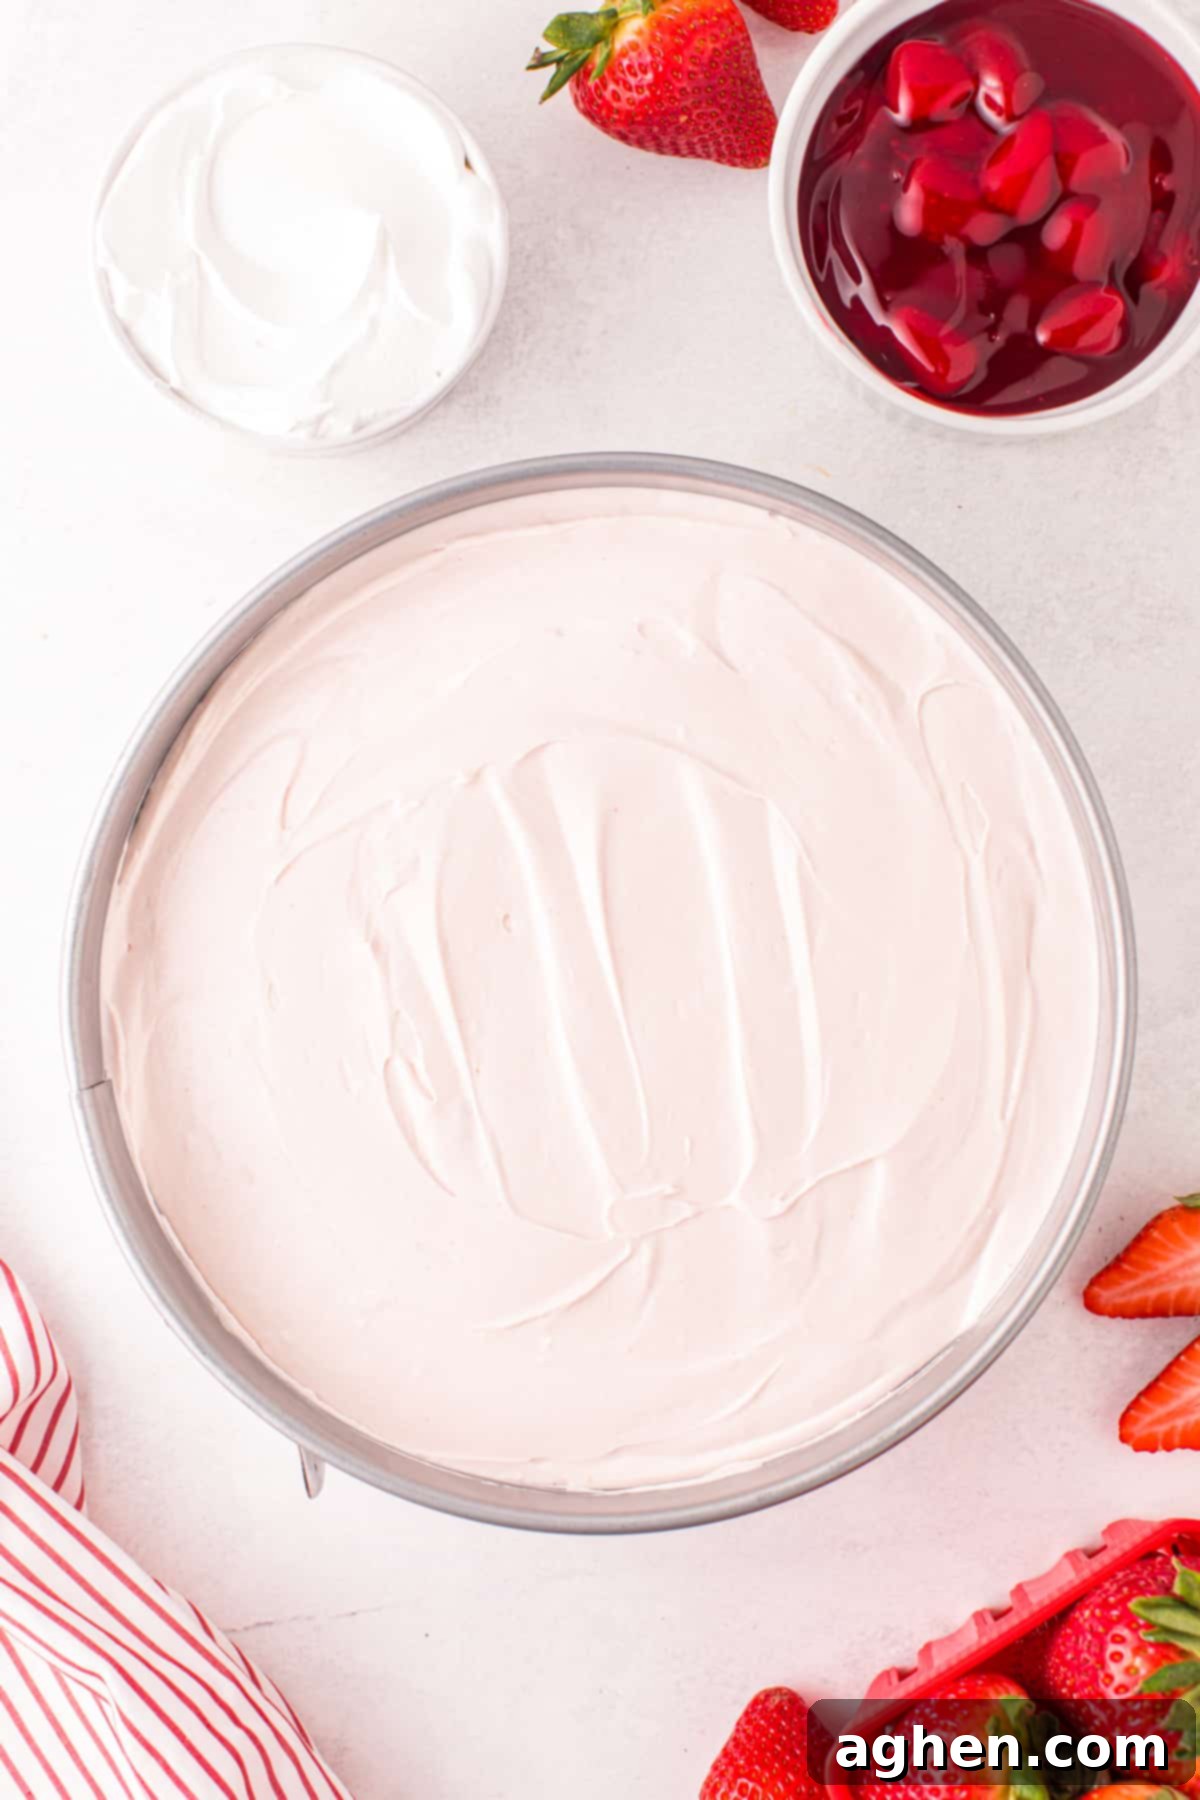
Step 6: Chill the Cheesecake. Spread the creamy strawberry cheesecake mixture evenly over the chilled crust in the springform pan. Use a rubber spatula to smooth the top. Return the pan to the refrigerator and chill for at least 3 hours, or ideally, overnight. Adequate chilling time is essential for the cheesecake to firm up completely and achieve its perfect sliceable texture.
Step 7: Release from Pan. Once the cheesecake is thoroughly set, carefully release the cake from the springform pan. To do this, run a thin knife or offset spatula around the edge of the cheesecake before unlatching and removing the side of the pan. Gently transfer the cheesecake to a serving plate or cake stand, ready for its final decorative touches.
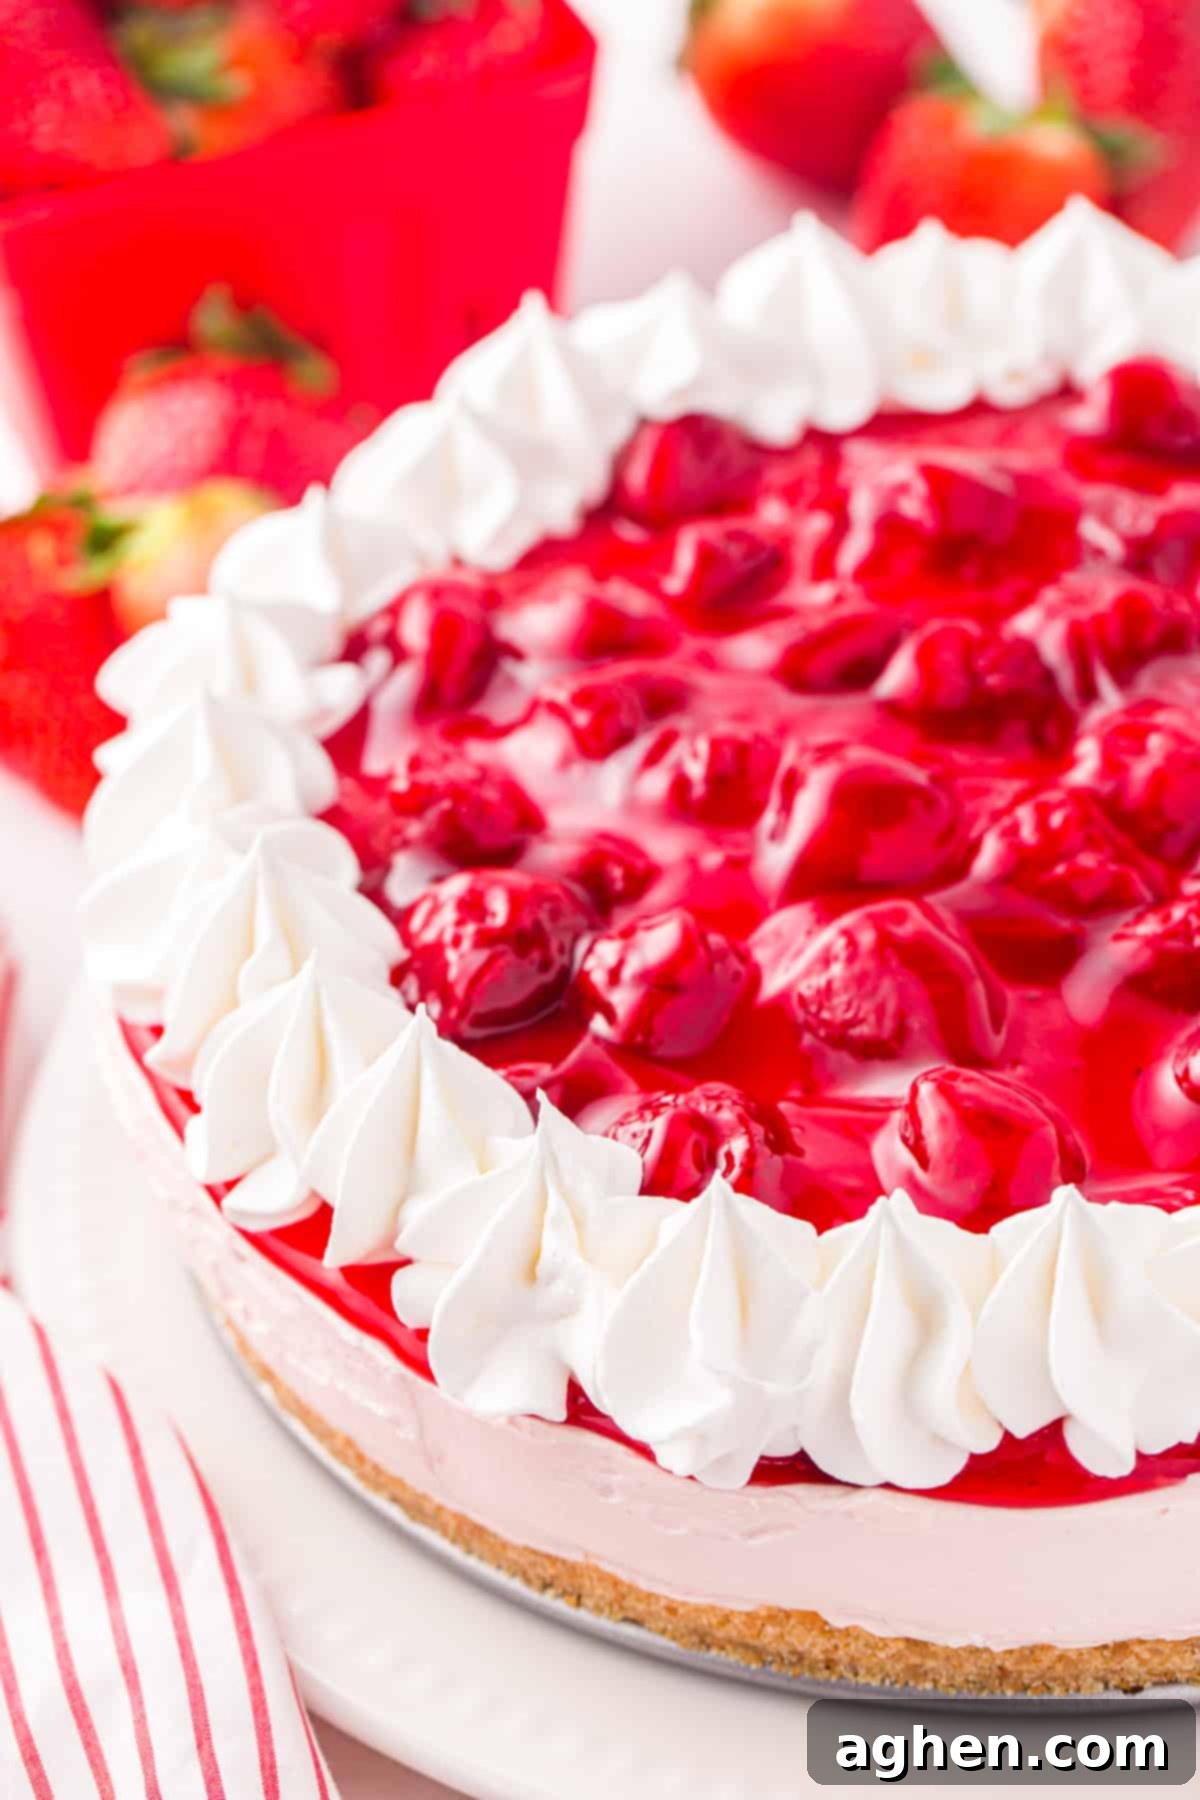
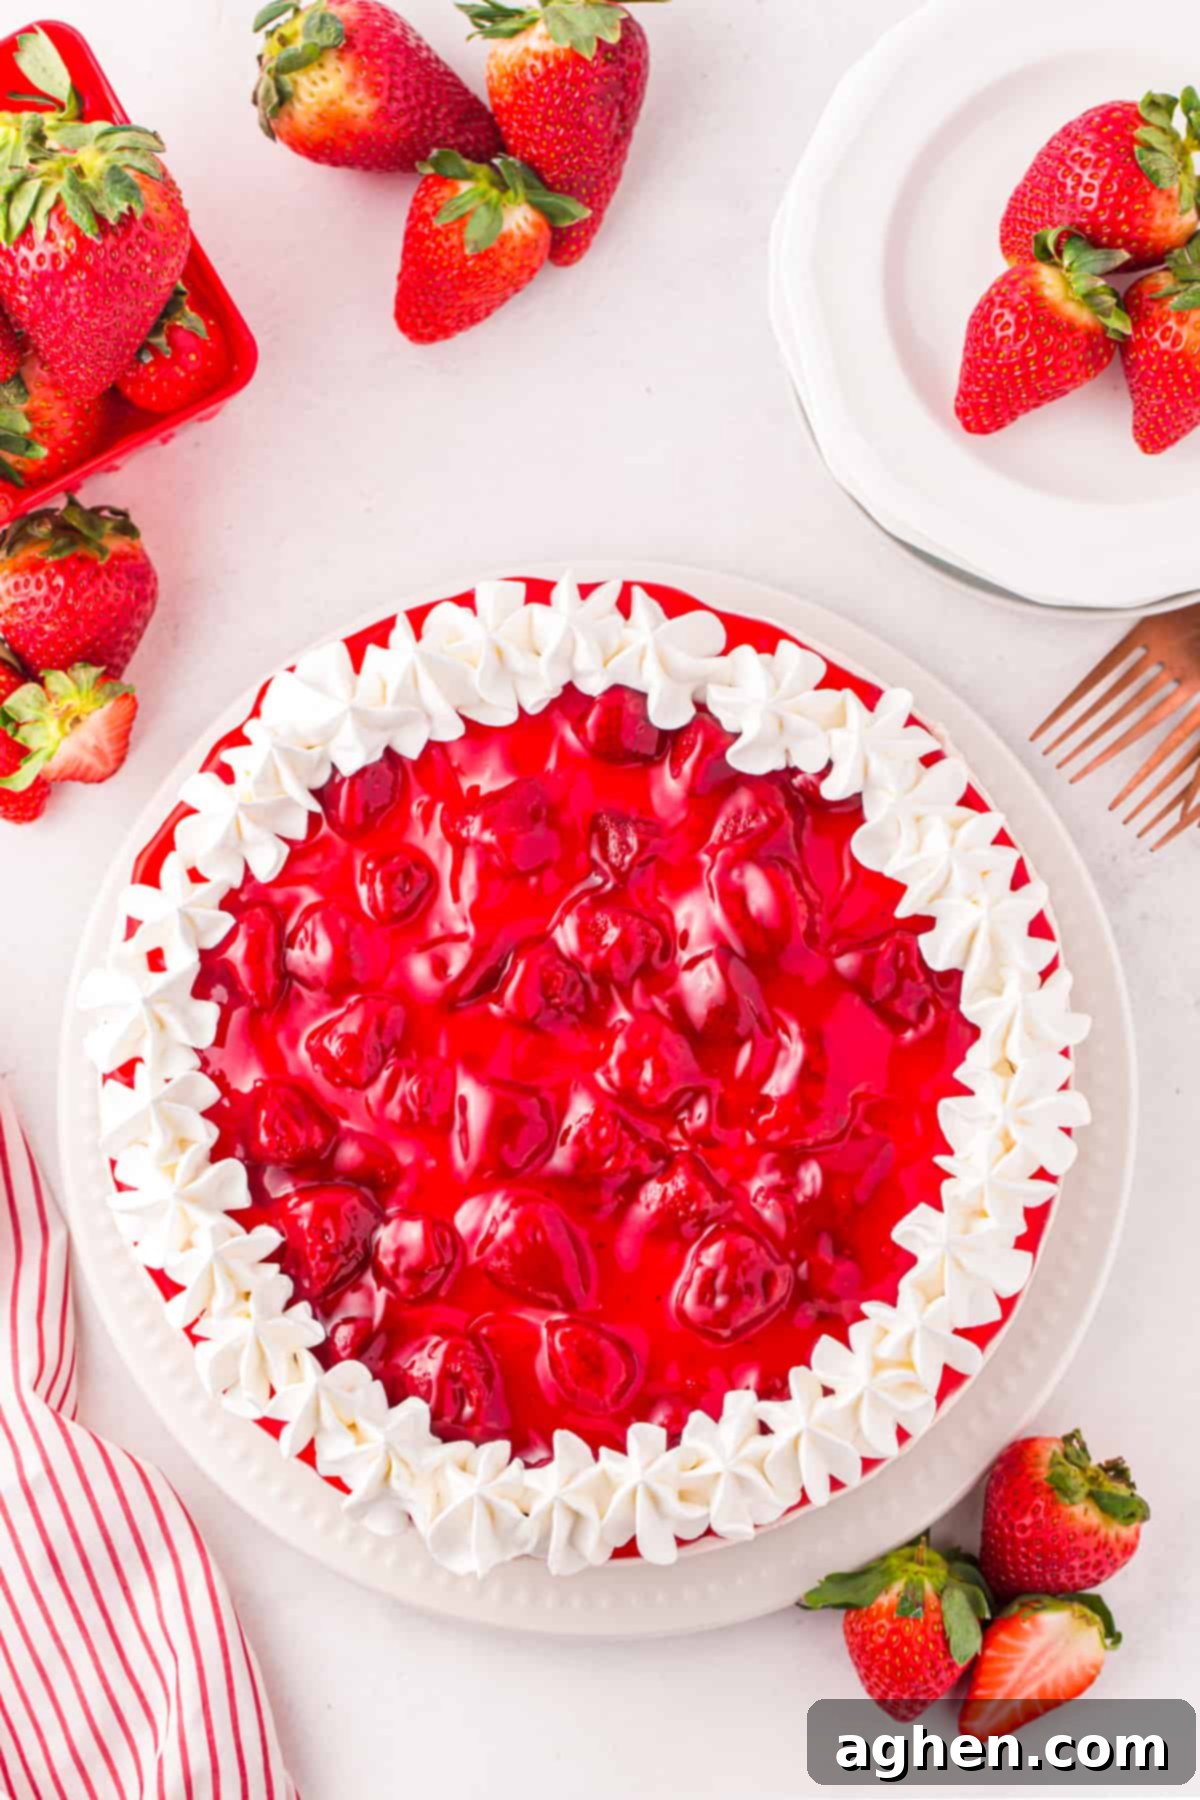
Step 8: Add the Strawberry Topping. Spoon the strawberry pie filling onto the center of the cheesecake. Using the back of a spoon or an offset spatula, carefully spread the filling into an even layer. Be mindful not to spread it all the way to the very edge, as you want to create a slight border to prevent the filling from dripping over the sides when sliced.
Step 9: Decorate with Whipped Topping. Place the remaining half container of whipped topping into a piping bag fitted with a star tip (a 1M Wilton tip is perfect for this). Pipe decorative swirls, rosettes, or florets around the edge of the cheesecake, framing the vibrant strawberry pie filling. This adds an elegant finish and an extra layer of creamy goodness before serving.
Storage Guidelines for Your Strawberry Cheesecake
Proper storage ensures your delicious no-bake strawberry cheesecake stays fresh and enjoyable for longer:
- Refrigerator Storage: Leftovers should be stored in the refrigerator. Cover the cheesecake tightly with plastic wrap or place it in an airtight container. It will maintain its best quality for up to 3 days.
- Freezer Storage: For longer storage, you can freeze this cheesecake for up to 3 months. However, it’s best to freeze it *without* the final whipped topping decoration, as whipped topping can sometimes alter its texture after freezing and thawing. Wrap the cheesecake tightly in several layers of plastic wrap, then an additional layer of aluminum foil, ensuring it’s well-sealed to prevent freezer burn. Thaw the frozen cheesecake in the refrigerator overnight before slicing and serving. Once thawed, you can then add fresh whipped topping and any additional garnishes just before serving for the best presentation and taste.
Tips for Achieving the Best No-Bake Strawberry Cheesecake
Follow these expert tips to ensure your no-bake strawberry cheesecake turns out perfectly every time:
- The Power of a Springform Pan: A springform pan is your best friend for this recipe. Its removable sides allow for easy liberation of the finished cheesecake, ensuring pristine, beautiful slices and a professional presentation. If you don’t have one, you can use a regular cake pan or baking dish, but be prepared that removing slices will be significantly more challenging, and they may not look as neat. In this case, it’s often easier to simply scoop out individual portions rather than attempting perfect cuts.
- For Superior Crumbs, Use a Food Processor: While you can crush vanilla wafers by placing them in a large plastic bag and smashing them with a rolling pin or other heavy object, a food processor yields far superior results. Pulsing the wafers in a food processor creates fine, even crumbs that pack more uniformly into a sturdy crust. This consistency is key for a well-structured base.
- Smart Food Processor Usage for the Crust: If you use a food processor for your wafer crumbs, you can continue to use it for the next step! Once the wafers are finely crumbled, simply add the melted butter and brown sugar directly into the food processor. Pulse a few more times until everything is thoroughly combined. This trick allows you to skip transferring the crumbs to a separate bowl, saving you time and cleanup.
- Room Temperature Cream Cheese is Non-Negotiable: This is a critical step for a silky-smooth filling. Always ensure your cream cheese is at soft, room temperature before you begin mixing. If it’s too cold, it will be difficult to beat smoothly with the sugar, resulting in a lumpy, less appealing texture. Plan ahead and take it out of the fridge at least an hour or two before you start.
- Don’t Overmix the Filling: Once you’ve added the whipped topping and strawberry jam, mix only until just combined. Overmixing, especially after adding the whipped topping, can cause the filling to lose its light and airy texture. Gentle folding or beating on low speed is sufficient.
- Embrace the Chill: Overnight is Best: While 3 hours of chilling will allow the cheesecake to set, this easy no-bake recipe truly shines when chilled overnight. Making it the night before your event or serving ensures it has ample time to firm up completely, allowing for cleaner slices and deeper flavor development.
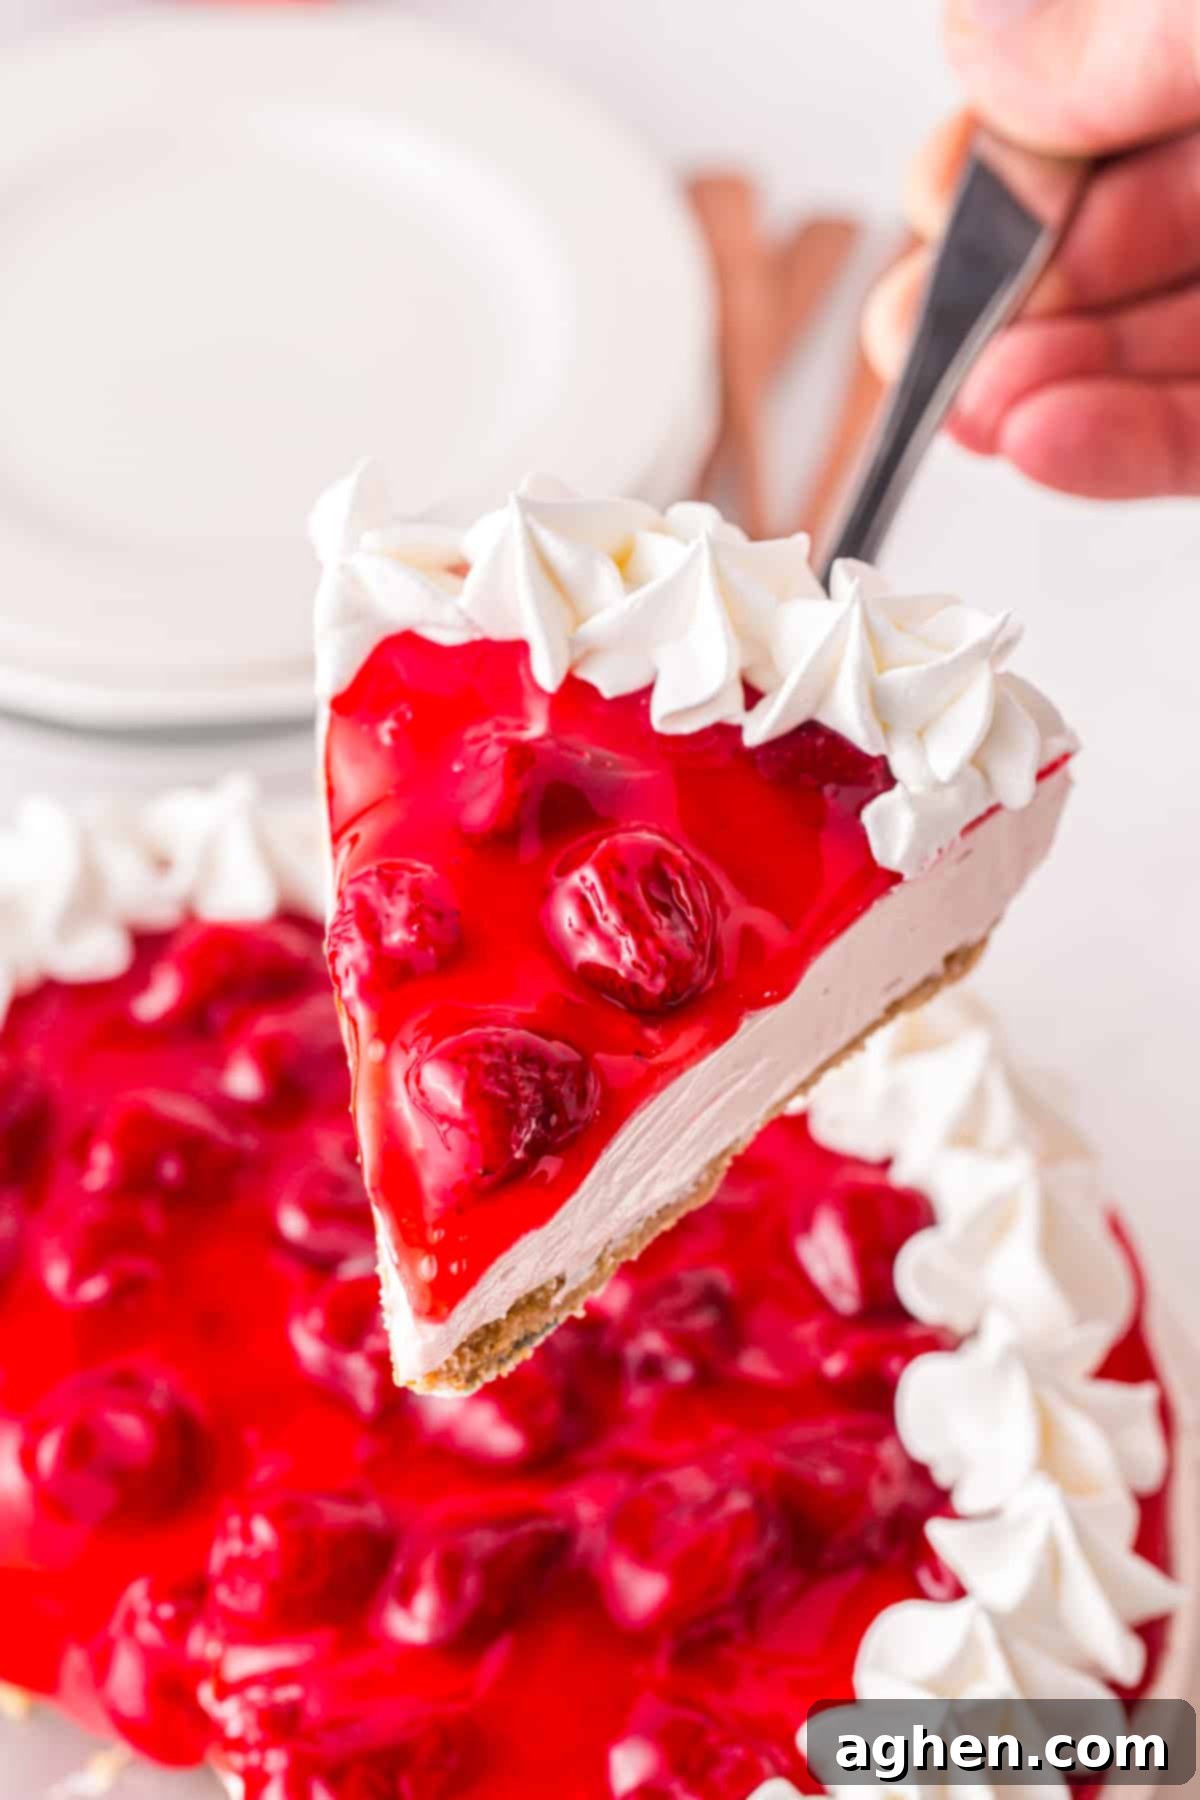
- Achieve Perfect Slices with a Hot Knife: For the cleanest, most professional-looking slices, run a sharp knife under hot water, wipe it dry, and then make your cut. Repeat this process for each slice. This technique helps the knife glide through the layers without dragging or sticking.
- Garnish for Extra Flair: Elevate your presentation with simple garnishes. Fresh strawberries, a few mint leaves, or even some white chocolate shavings can add a beautiful touch and extra flavor dimension to your finished cheesecake.
Frequently Asked Questions About No-Bake Strawberry Cheesecake
While you technically could use a store-bought, prepared graham cracker crust for ultimate convenience, I generally do not recommend it for this particular recipe. The primary reason is that this recipe yields a generous amount of delicious filling, which can be too much for the shallower sides of most pre-made crusts. This often results in overflow or a cheesecake that’s difficult to manage. Furthermore, using a prepared crust tends to make it more akin to a “no-bake strawberry pie” in terms of proportions and overall feel, rather than a substantial no-bake cheesecake. For the best result and true cheesecake experience, making the vanilla wafer crust from scratch is highly advised.
Both no-bake and classic baked cheesecakes are absolutely delicious, but they offer distinct experiences! The main difference lies in their texture. A traditional baked cheesecake typically uses eggs, is baked slowly (often in a water bath), and boasts a dense, rich, and incredibly creamy texture. A no-bake cheesecake, on the other hand, is much lighter, airier, and softer, relying on whipped topping and thorough chilling to set. Neither is inherently “better” than the other; it truly comes down to personal preference for texture and the occasion. No-bake is often preferred for its refreshing quality, ease, and suitability for warm weather.
The ideal way to soften cream cheese is to leave it on your kitchen counter for a couple of hours until it reaches room temperature naturally. However, if you’re short on time, the microwave can speed up the process! Unwrap one package of cream cheese at a time and place it in a microwave-safe bowl. Heat it for 30 seconds on high power, flipping it over halfway through (at 15 seconds). If it’s not quite soft enough after 30 seconds, add another 10-15 seconds, but be very careful not to melt it. You want it softened, not liquid, to achieve that smooth, lump-free filling.
Explore More Irresistible No-Bake Dessert Recipes
If you’ve fallen in love with the simplicity and deliciousness of this no-bake strawberry cheesecake, you’ll be thrilled to discover more easy desserts that don’t require an oven:
- No Bake Eclair Cake
- Blueberry Delight
- Easy No-Bake Peanut Butter Pie
- No Bake Cherry Cheesecake
- Fruit Pizza
- Lemon Lush
- Old-Fashioned No-Bake Cookies
- Lemon Icebox Pie
- Orange Creamsicle Lush
- 11 Easy Dessert Salads and Fluff Recipes
No Bake Strawberry Cheesecake
Author: Jaclyn
20 minutes
3 hours
3 hours
20 minutes
8
servings
Saved!
Ingredients
Crust:
- 2 ½ cups vanilla wafer crumbs ~ 70 cookies crumbled
- ½ cup 1 stick salted butter, melted
- 3 Tablespoons brown sugar
Filling:
- 3 8 ounce packages cream cheese, softened
- ¾ cup granulated sugar
- ¾ cup strawberry jam
- ½ 8 ounce container whipped topping (Cool Whip)
Topping:
- 1 21 ounce can strawberry pie filling
- ½ 8 ounce container whipped topping
Instructions
-
Spray a 9-inch springform pan with cooking spray.
-
In a medium bowl, mix the vanilla wafer crumbs, melted butter, and brown sugar until completely combined.
-
Firmly press the crumb mixture into the bottom of the springform pan to create a crust. Set in the refrigerator to chill until you have finished with the filling.
-
For the filling, use a hand or stand mixer to beat the cream cheese and sugar together in a large bowl until smooth.
-
Add in the ½ container of whipped topping and strawberry jam and beat on low speed until completely combined.
-
Spread the strawberry mixture into the springform pan atop the crust and refrigerate for 3 hours or overnight. It should be completely set.
-
Once the cheesecake has set, remove the cake from the springform pan and set on a cake plate for decorating.
-
Top the center of the cake with the strawberry pie filling. Spread evenly but don’t go all the way to the sides, or the filling will drip over the edge.
-
Place the whipped topping into a piping bag with a star tip (I used a 1M Wilton tip) and pipe decorative swirls or florets onto the edge of the cheesecake.
Notes
Chill overnight if possible. This easy no bake cheesecake recipe is best when chilled overnight. Make it the night before your event so that it has plenty of time to chill. This will ensure it sets up properly and slices nicely.
Leftovers can be refrigerated for up to 3 days.
Nutrition

Did You Make This Recipe?
Share it with me on Instagram @crayonsandcravings and follow on Pinterest @crayonsandcravings for even more!
Pin Recipe
Leave A Review
