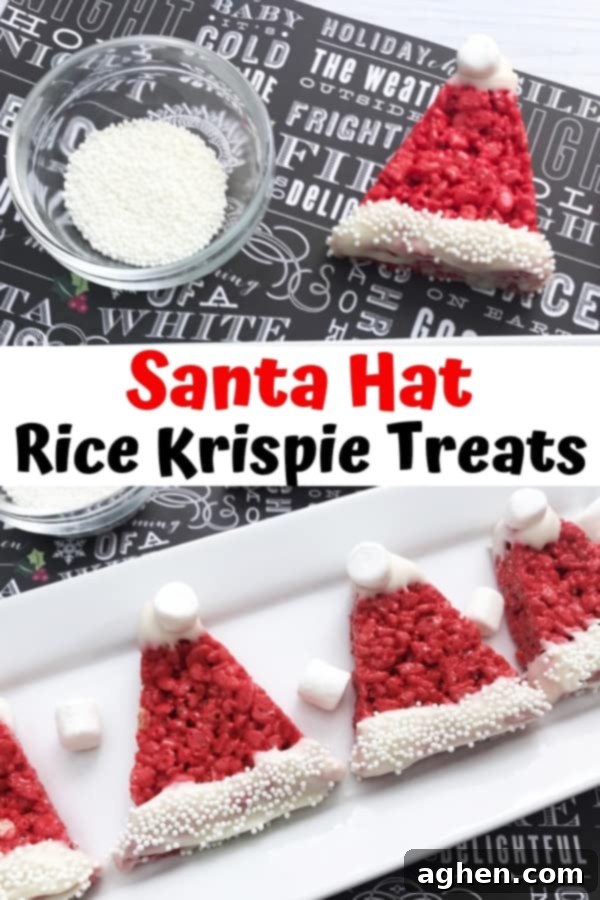
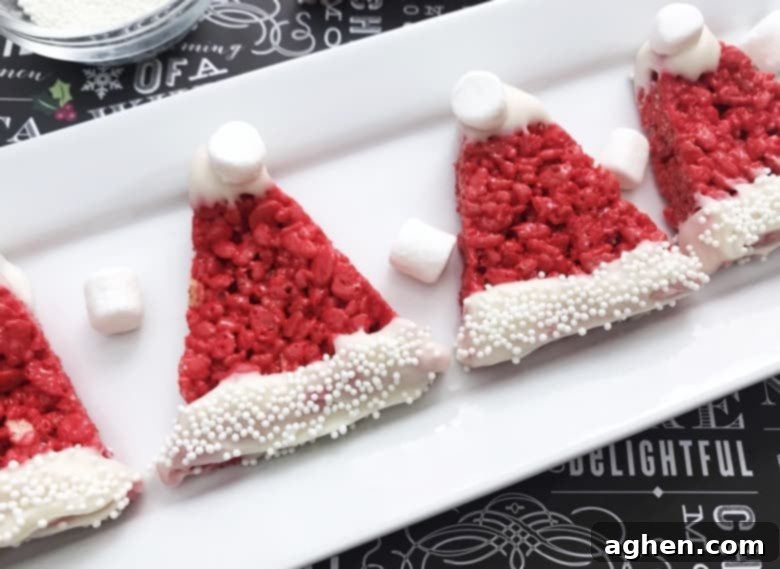
Festive Santa Hat Rice Krispie Treats: An Easy & Fun Christmas Recipe for Kids
Get ready to sprinkle some extra holiday magic into your kitchen this Christmas season with these absolutely adorable Santa Hat Rice Krispie Treats! These festive delights are not only incredibly easy to make, but they also offer a fantastic opportunity for family fun. Using a beloved, classic Rice Krispies Treat recipe as a base, we simply add a few charming decorations to transform them into miniature edible Santa hats. Imagine the joy on your children’s faces as they help create these sweet masterpieces!
If you’re looking for even more delightful Santa-themed recipe ideas to spread holiday cheer, be sure to check out these charming Santa Belly Jello Cups or these incredibly cute Santa Hat Cupcakes! Each one brings a unique, festive touch to your holiday dessert table.
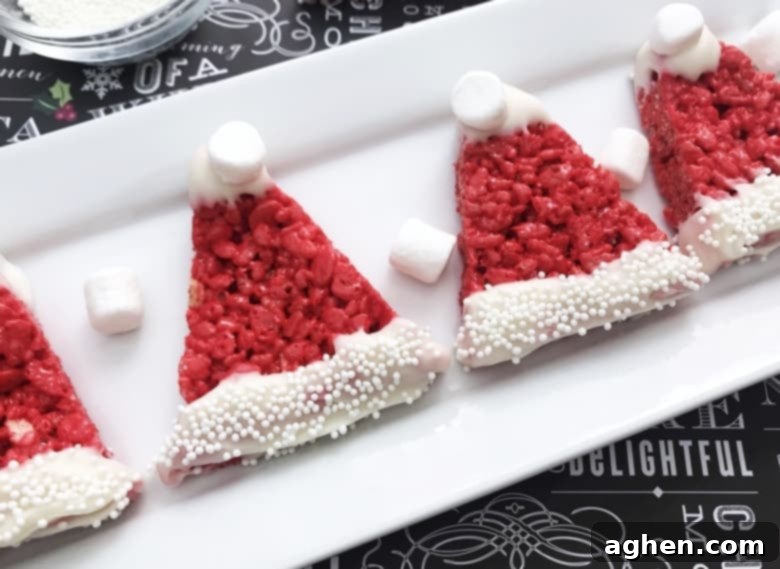
Why Santa Hat Rice Krispie Treats Are a Christmas Must-Make
Rice Krispie treats have long been a holiday favorite, and for good reason! They’re quick, require no baking, and deliver that satisfyingly chewy, sweet crunch everyone loves. But beyond their deliciousness, they offer a wonderful canvas for creativity. This Christmas, why not take your usual Rice Krispie treats from delightful to downright festive by turning them into whimsical Santa hats? It’s a simple transformation that brings an extra touch of holiday magic to a classic dessert.
Making these Santa Hat Rice Krispie Treats is more than just baking; it’s an experience. It’s an excellent way to engage your children in the kitchen, fostering their creativity, improving their fine motor skills, and teaching them to follow instructions – all while creating cherished holiday memories together. The simple steps involved make it perfect for little hands to help mix, press, and decorate, truly making it a family affair.
Psssst! Have you ever tried my recipe for the best Rice Krispie Treats ever? If you haven’t, you absolutely should! It’s the perfect foundation for any Rice Krispie Treat creation, including these festive Santa Hats.
Here at Crayons & Cravings, we’re huge fans of decorative Rice Krispie Treats! I love sharing fun and unique holiday ideas that make celebrations even sweeter. From Grinch Rice Krispie Treats that are perfect for a mischievous holiday mood, to Christmas Tree Rice Krispie Treats that stand tall and proud, there’s a theme for every festive occasion. And now, these charming Santa Hat Treats join our growing list of holiday favorites!
Making Santa Hat Rice Krispie Treats: Easier Than You Think!
You might think adding a festive design would complicate the classic Rice Krispie Treat recipe, but I assure you, these Santa Hat Rice Krispie Treats are just as easy to whip up! While there are a few extra decorative steps, nothing in this recipe is overly complicated or requires advanced baking skills. In fact, it’s designed to be simple and enjoyable for everyone.
This is precisely the type of easy Christmas recipe that’s ideal for kids to take charge of during the bustling week leading up to Christmas Day, or even over their festive break. They’ll delight in the hands-on process of mixing, shaping, and decorating these adorable treats. Beyond the fun, engaging in recipes like this is a fantastic way to spark children’s interest in cooking and baking, building confidence and culinary skills from a young age.
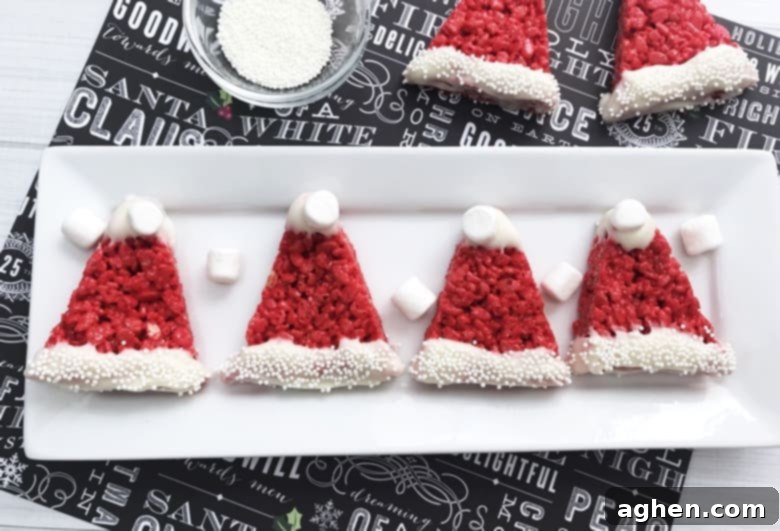
Essential Ingredients & Supplies for Your Santa Hats
Before you dive into the fun, let’s gather everything you’ll need. The ingredients list is straightforward, mostly comprising items you might already have in your pantry for traditional Rice Krispie Treats, with a few extra decorative elements:
Ingredients:
- Butter: Essential for the rich, chewy base and to prevent sticking. Using unsalted butter gives you more control over the overall sweetness.
- Mini Marshmallows: These are key! Mini marshmallows melt more quickly and evenly than larger ones, ensuring a smooth, gooey binding for your treats. You’ll need about 10 oz for the base, plus 12 extra mini marshmallows to create the iconic “pom-pom” on top of each Santa hat.
- Rice Krispies Cereal: The star of the show! Ensure your cereal is fresh for the best crisp texture.
- White Melting Chocolate (or White Candy Melts): This will create the fluffy white trim and pom-pom base of Santa’s hat. White candy melts are often preferred as they melt smoothly and set quickly, giving you a beautiful, professional finish without tempering.
- Red Gel Food Coloring: Gel food coloring is a must for achieving a vibrant, deep red color without adding excess liquid that could alter the texture of your Rice Krispie Treats. A few drops go a long way!
- White Sprinkles: These small, round sprinkles will mimic the soft, snowy texture of Santa’s fur trim.
Supplies:
- 9 x 13 Inch Pan: This standard baking pan is the perfect size for creating a batch of treats that are easy to cut into uniform shapes.
- Parchment or Wax Paper: Crucial for lining your pan, making it incredibly easy to remove the treats once they’ve set, and also helpful for pressing them down evenly.
- 3″ Triangle Cookie Cutter: While you could manually cut triangles, a cookie cutter makes the process much faster, cleaner, and ensures consistently shaped Santa hats. If you don’t have one, a sharp knife and a steady hand will work, but the cutter certainly simplifies things!
Having all your ingredients and tools ready before you start will make the process smooth and enjoyable, especially when little helpers are involved!
How to Make Adorable Santa Hat Rice Krispie Treats: Step-by-Step
Ready to transform simple Rice Krispie Treats into festive Santa hats? Follow these easy steps:
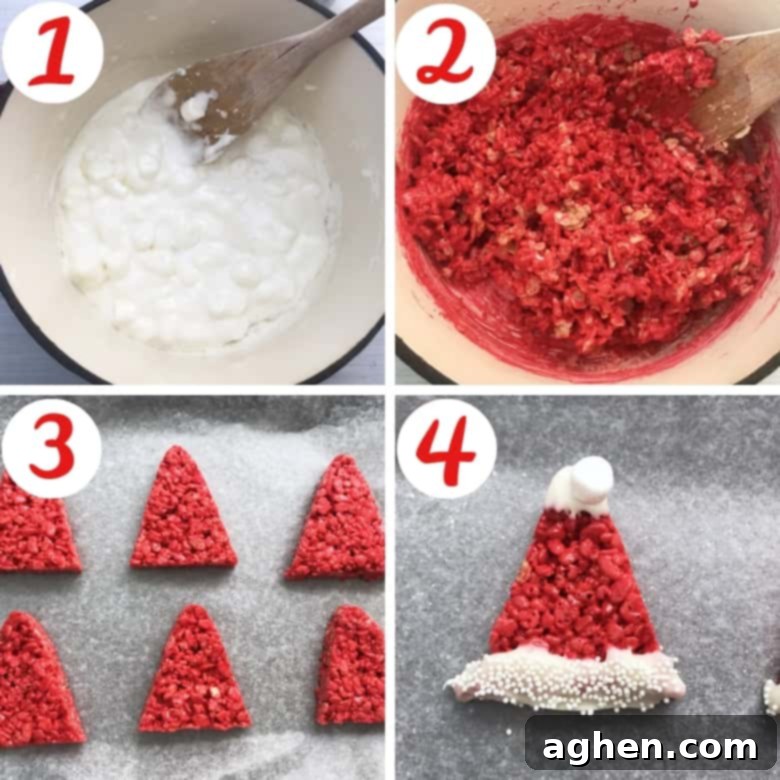
- Prepare Your Pan: First, line a 9×13 inch baking pan with parchment or wax paper, leaving an overhang on the sides. This will create “handles” to easily lift the entire slab of treats out later. Lightly grease the paper for extra non-stick insurance.
- Melt Butter and Marshmallows: In a large saucepan, melt the butter over medium-low heat. Add the 10 oz of mini marshmallows, stirring frequently until they are completely melted and smooth. Be careful not to overheat them, as this can make the treats hard.
- Add Food Coloring and Cereal: Remove the saucepan from the heat. Stir in a few drops of red gel food coloring until you achieve your desired vibrant red shade. Remember, a little gel goes a long way! Once the color is consistent, gently fold in the Rice Krispies cereal until it’s evenly coated with the red marshmallow mixture.
- Press into Pan and Chill: Pour the red Rice Krispie mixture into your prepared 9×13 inch pan. Using another piece of greased parchment paper, or your greased hands (or the back of a greased spoon!), press the mixture down evenly and firmly into the pan. Don’t press too hard, or your treats will be too dense. Place the pan in the refrigerator to chill for at least 1 hour. This crucial step helps the treats set firmly, making them much easier to cut cleanly.
- Cut into Triangle Shapes: Once chilled, lift the entire slab of Rice Krispie Treats out of the pan using the parchment paper handles and place it on a cutting board. Take your 3-inch triangle cookie cutter and cut out as many hat shapes as possible, arranging your cuts closely to minimize waste. If you don’t have a cutter, you can carefully use a sharp, greased knife to cut large rectangles, then cut those rectangles diagonally to form triangles.
- Dip in White Chocolate and Decorate: Now for the fun part! Melt your white melting chocolate or candy melts. You can do this in a double boiler for even melting, or carefully in the microwave in 30-second increments, stirring well after each interval until smooth. Dip the wide bottom edge of each red triangle into the melted white chocolate, creating the “fur trim” of Santa’s hat. Allow any excess chocolate to drip back into the bowl.
- Add Sprinkles and Marshmallow Pom-Poms: Immediately after dipping, place the chocolate-dipped hats on a sheet of parchment or wax paper. While the white chocolate is still wet, liberally sprinkle the white sprinkles onto the white rim. This creates a wonderful textured “fur” effect. Next, take a small dollop of melted white chocolate and place it on the very tip of each red hat, then immediately attach one of your reserved mini marshmallows to form the iconic pom-pom.
- Allow to Set: Let your beautifully decorated Santa Hat Rice Krispie Treats sit at room temperature or in the refrigerator until the white chocolate and marshmallow pom-poms are completely set. Once firm, they’re ready to serve and enjoy!
I genuinely hope you and your little ones have an absolute blast making and enjoying these fun and festive Christmas Rice Krispie Treats! They’re sure to bring smiles and deliciousness to your holiday celebrations.
Tips for Santa Hat Rice Krispie Treat Success
- Prevent Sticking: Always grease your pan and any tools you’ll use for pressing the mixture (like a spatula or your hands) with butter or cooking spray. This makes handling the sticky mixture much easier.
- Vibrant Red Color: For the best results, use gel food coloring instead of liquid. Gel is more concentrated and won’t add extra moisture to your treats, ensuring they remain perfectly textured. Add a few drops at a time and stir until you reach your desired shade.
- Clean Cuts: Chilling your Rice Krispie Treat slab thoroughly (at least an hour) is essential for clean, sharp triangle cuts. If your cookie cutter starts to stick, lightly grease it between cuts.
- Smooth Chocolate Dip: When melting white chocolate or candy melts, do so slowly and stir frequently to avoid burning. For microwave melting, use short bursts (15-30 seconds) and stir well each time. A smooth, warm chocolate ensures an even, beautiful “fur” trim.
- Act Quickly with Sprinkles: Sprinkles need to be applied immediately after dipping the treat into the melted chocolate, while the chocolate is still wet, so they adhere properly.
- Storage: Store your Santa Hat Rice Krispie Treats in an airtight container at room temperature for up to 3-4 days. They are best enjoyed fresh!
More Christmas Dessert Ideas for Kids
The holidays are a perfect time for baking with kids. Here are some other fantastic Christmas dessert ideas that are sure to be a hit with the little ones:
- Christmas Tree Rice Krispie Treats: Just like our Santa hats, these are a fun and edible craft, shaped and decorated like miniature Christmas trees.
- Gingerbread Men Cookies: A classic holiday staple, perfect for decorating with icing and candies – each one can have its own personality!
- Christmas Cookie Bars: Easier than individual cookies, these bars are soft, chewy, and loaded with festive sprinkles and M&Ms.
- Reindeer Bark: A delightful and super-easy no-bake treat featuring chocolate, pretzels, and candy eyes to create cute reindeer faces.
- Christmas Chex Mix: A sweet and salty snack mix, also known as “Reindeer Chow” or “Muddy Buddies,” great for gifting.
- Grinch Cake Mix Cookies: Bright green, chewy cookies with a heart in the middle, inspired by the Grinch, these are sure to make hearts grow three sizes!
- Christmas Cookie Dip: A sweet, creamy, and festive dip, perfect for serving with graham crackers, fruit, or actual cookies for a party.
Santa Hat Rice Krispie Treats
Author: Jaclyn
Equipment
-
Triangle Shape Cookie Cutter Set
-
Wilton White Nonpareils
-
Wilton Icing Colors, 8-Count
Ingredients
- 3 Tablespoons butter cut into chunks
- 10 oz + 12 mini marshmallow with 12 reserved to top Santa’s hats
- Red gel food coloring
- 6 cups Rice Krispies
- 12 oz white melting chocolate
- White sprinkles
Instructions
-
Line a 9 x 13 pan with wax or parchment paper. Set aside.
-
In a large saucepan, melt butter over medium heat. Stir in marshmallows, stirring frequently until melted. Remove from heat. Stir in cereal and a few drops red gel food coloring, stirring until well combined. Add more red food coloring if necessary to reach desired shade.
-
Pour mixture into 9 x 13 pan. Using wax or parchment paper, press mixture down evenly into pan. Place in refrigerator to chill for 1 hour.
-
Using a triangle cookie cutter, cut hats out of cooled treats, as close together as possible.
-
Melt white chocolate in double broiler or in the microwave in 30 second increments, stirring occasionally until melted. Dip the bottom of each hat into the melted chocolate, forming the rim of Sant’a hat, and allowing the excess to drip back into the bowl.
-
Place dipped hats on a sheet or parchment or wax paper, and add sprinkles to the white rim of the hat. Allow to set.
-
After the rims have set, reheat the chocolate for a few more seconds if necessary. Dip the top of each hat and immediately add a mini marshmallow. Allow to set before serving.

Did You Make This Recipe?
Share it with me on Instagram @crayonsandcravings and follow on Pinterest @crayonsandcravings for even more!
Pin Recipe
Leave A Review
Pin for Later: Save This Festive Treat Idea!
Don’t let this delightful recipe get lost in the shuffle of holiday preparations! Pin this recipe to your Christmas dessert board on Pinterest so you can easily find it whenever you’re ready to make these enchanting Santa Hat Rice Krispie Treats. It’s a perfect addition to your holiday baking arsenal, promising smiles and sweet moments for years to come.
