Spooktacular Mummy Hot Dogs: The Ultimate Easy Halloween Dinner Recipe
As the air grows crisp and the excitement for costumes and candy builds, finding the perfect Halloween dinner can sometimes be a challenge. While delightful Halloween desserts are plentiful—think enchanting mummy cookies or whimsical ghost doughnuts—a fun and festive savory meal often requires a little more creative thought. But fear not, because we’ve unwrapped the perfect solution for a busy Halloween evening: the incredibly easy and utterly fun Mummy Hot Dogs!
These adorable and undeniably delicious mummy hot dogs are a beloved Halloween tradition for many families, and for good reason! They combine the familiar comfort of classic hot dogs with the flaky, buttery goodness of crescent dough, baked until golden brown and then brought to life with playful candy eyes. Essentially, they’re super-sized pigs in a blanket, but with a wonderfully spooky twist that makes them irresistible. Whether you need a quick and satisfying dinner after a marathon of trick-or-treating or a clever, crowd-pleasing finger food for your upcoming Halloween party, these crescent roll mummies are your culinary secret weapon.
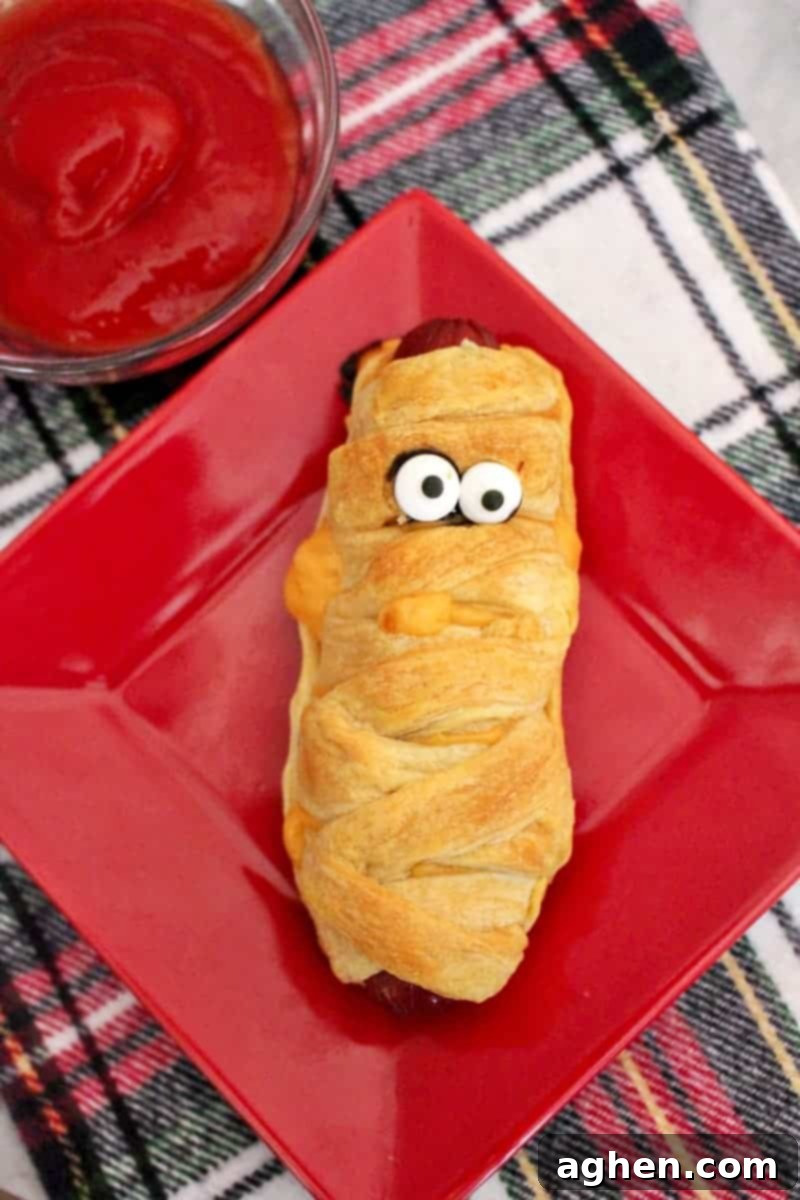
Beyond their charmingly festive appearance, the true appeal of mummy hot dogs lies in their sheer simplicity and speed. With just a handful of readily available ingredients and minimal kitchen effort, you can transform ordinary hot dogs into an extraordinary Halloween meal in under 30 minutes! They’re also incredibly versatile, fitting perfectly into various meal plans throughout the year. For example, if you love the crescent dog concept, you might also enjoy this tasty chili cheese dog bake or the satisfying crunch of homemade pretzel dogs. But for October 31st, the mummified version is undeniably the star of the show.
Why This Mummy Hot Dog Recipe is a Halloween Must-Make
If you’re still on the fence about what to serve this Halloween, here are compelling reasons why these spooky hot dogs should top your list:
- Unbelievably Easy: No complicated techniques or exotic ingredients here. This recipe is straightforward, making it perfect for even novice cooks.
- Kid-Friendly Fun: Kids love helping to wrap the “bandages” around the hot dogs, turning meal prep into an exciting Halloween activity. And, of course, they adore eating them!
- Quick Dinner Solution: From start to finish, you can have these mummy hot dogs ready in about 20-30 minutes, which is ideal for a night packed with trick-or-treating and festivities.
- Perfect Party Appetizer: Serve them whole for dinner, or slice them into smaller pieces for a fantastic, themed finger food that guests of all ages will devour at your Halloween gathering.
- Highly Customizable: Easily adapt the recipe with different types of hot dogs, a variety of cheeses, or even add a hint of spice to suit everyone’s preferences.
- Guaranteed Smiles: The visual appeal alone makes these a joyous addition to any Halloween spread, eliciting grins and giggles from everyone who sees them.
Gather Your Ingredients for Spooky Success
One of the best parts of this recipe is its short and sweet ingredient list. You likely have most of these items in your pantry or can easily find them at any local grocery store. Let’s get them ready!
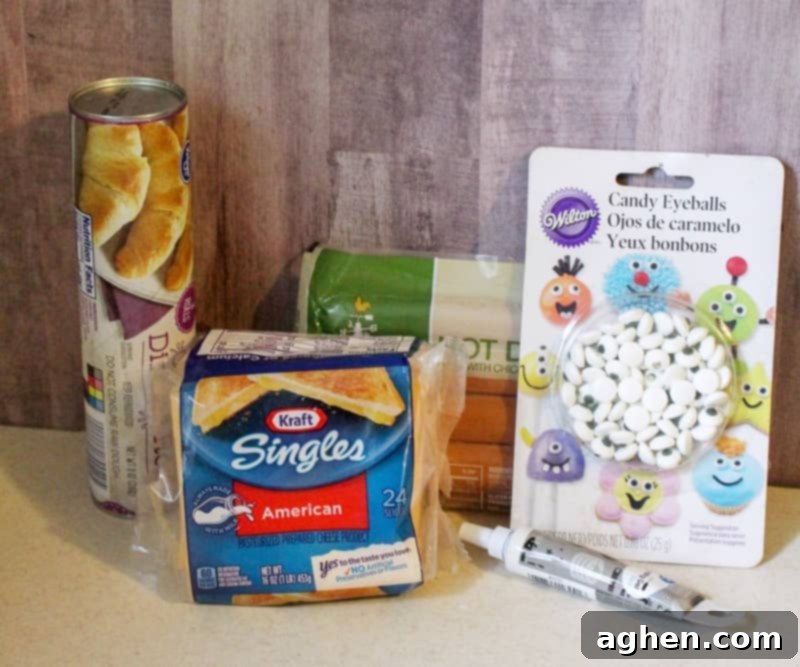
- Crescent Dough: This is the foundation of our mummy wrapping! You have a couple of options here:
- Crescent Roll Dough: Comes in triangles, usually in a can. If you use this, you’ll simply need to unroll it and firmly pinch the perforations together to form a single, rectangular sheet. This ensures a smooth surface for cutting your strips.
- Crescent Dough Sheets: Some brands offer crescent dough already rolled into a sheet, which is incredibly convenient as it eliminates the need for pinching seams. Either option works perfectly, just pick what’s easiest for you to find!
- Hot Dogs: Select your family’s preferred brand and type. Standard beef, pork, chicken, or even vegetarian hot dogs will all work beautifully. For a fun variation, consider using smaller cocktail wieners to create “mini mummy dogs” that are perfect for appetizers!
- Candy Eyes: These small, edible googly eyes are what give your mummies their undeniable charm and spooky personality. You can typically find them in the baking aisle of your grocery store, alongside sprinkles and other cake decorating supplies. If they’re out of stock locally, many online retailers (like this one) carry them. If you can’t find them, don’t fret; small dots of mustard or cream cheese can serve as improvised eyes.
- Decorating Gel: This is used as the edible “glue” to secure the candy eyes onto your baked mummy hot dogs. White or black decorating gel works best for contrast. As an alternative, a tiny dab of mustard or cream cheese can also be used.
- Cheese (Optional but Highly Recommended): For an extra layer of savory flavor and gooey goodness, we love adding a half slice of American cheese under each hot dog before wrapping. The cheese melts perfectly, creating a delicious layer. Feel free to experiment with other cheese varieties like sharp cheddar, creamy mozzarella, or even a zesty pepper jack for a little heat!
How to Make Spooky Mummy Hot Dogs with Crescent Rolls: Step-by-Step Guide
Creating these festive mummy hot dogs is incredibly straightforward, making it an enjoyable activity for the whole family. Follow these simple steps, and you’ll have a delightful Halloween dinner ready in no time!
-
Step 1: Preheat Your Oven & Prepare Your Baking Sheet. Start by preheating your oven to 375°F (190°C). As it heats, get a baking sheet ready by lining it with parchment paper or giving it a good spray with non-stick cooking spray. This will prevent your mummy hot dogs from sticking and make cleanup much easier. Set the prepared baking sheet aside.
-
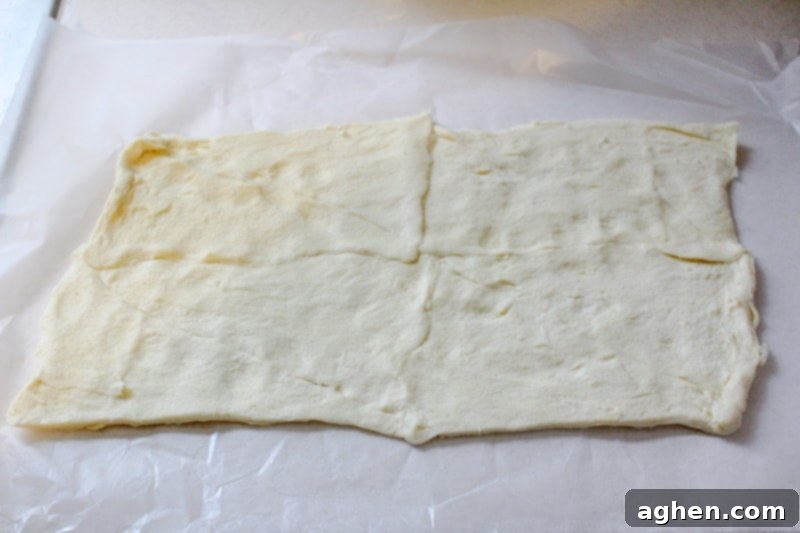
Step 2: Unroll and Flatten the Crescent Dough. On a clean, lightly floured large cutting board or a piece of parchment paper, carefully unroll your can of crescent dough. If you’re using crescent roll dough (the kind with triangles), take a moment to firmly pinch together all the seams and perforations to create one single, smooth sheet of dough. If you’re using the convenient crescent dough sheets, you can skip this pinching step!

Flattening crescent dough is the first step to creating perfect mummy wraps for your hot dogs. -
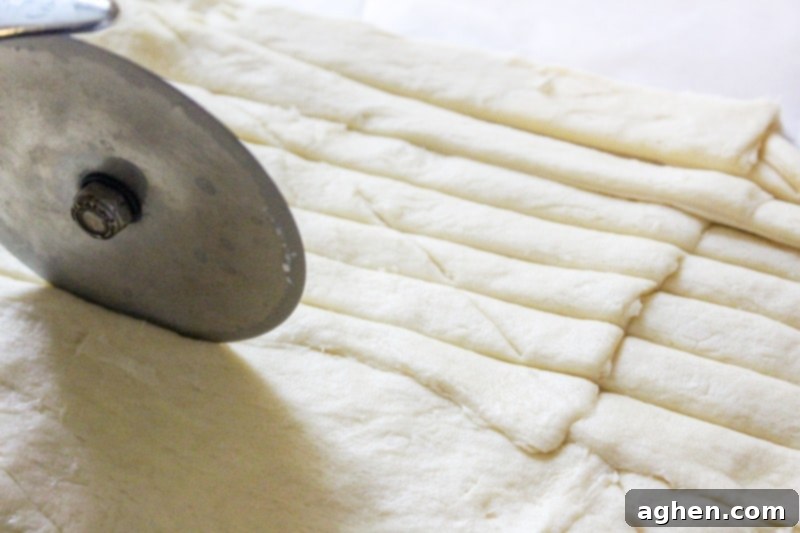
Step 3: Slice the Dough into Strips. Using a sharp knife or, for even quicker and cleaner cuts, a pizza cutter, slice your prepared crescent dough sheet into thin strips. These strips will serve as the “bandages” that wrap around your hot dogs to create the mummy effect. Aim for strips that are roughly 1/4 to 1/2 inch wide. The exact width isn’t crucial, but consistency helps with an even bake.

The decorating gel is key for securely attaching the candy eyes to your spooky mummy hot dogs post-baking. -
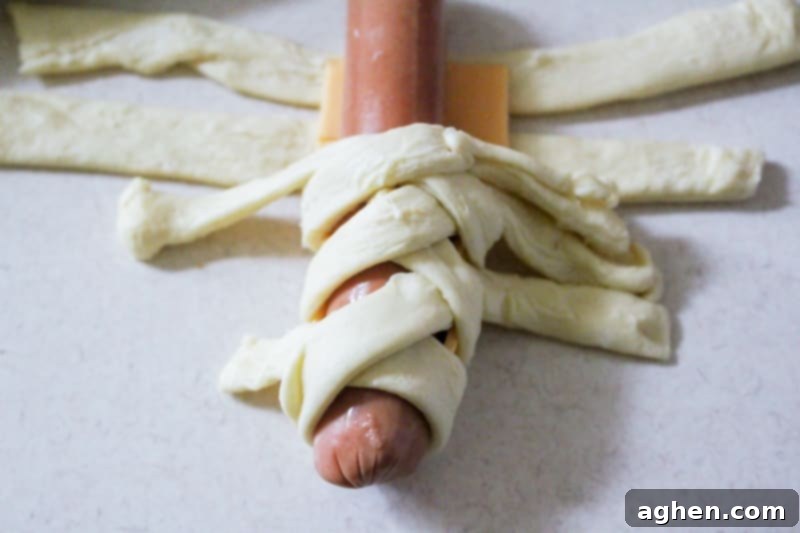
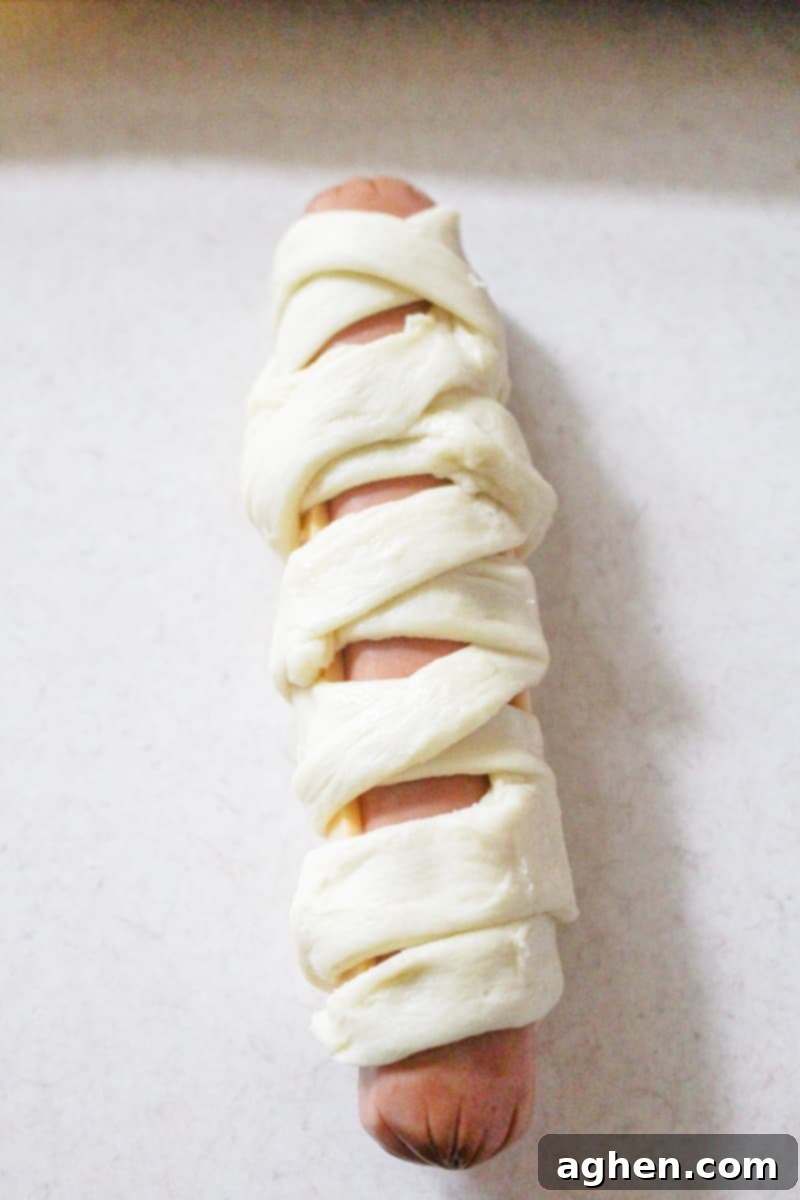
Step 4: Wrap Your Hot Dogs with Dough. Place your hot dogs on a clean work surface. If you’re adding cheese, first lay a half slice of American cheese (or your chosen cheese) under each hot dog. Now, take your crescent dough strips and begin wrapping them around each hot dog. Start at one end (leaving a small section unwrapped for the “face”) and crisscross the dough as you work your way down. Gently stretch the dough as needed to ensure it adheres and covers the hot dog and any cheese as much as possible, creating a bandaged look. Once wrapped, carefully place each hot dog seam-side down on your prepared baking sheet. Repeat this process for all remaining hot dogs.
Pro Tip for Cheesy Mummies: If you’re including cheese, make sure to wrap the dough tightly and with good overlap. Melted cheese loves to find any tiny opening to escape, so a snug wrap helps contain the gooey goodness! Don’t worry if a little does ooze out – it often bakes into a delicious crispy bit!

Master the art of wrapping to create perfectly bandaged mummy hot dogs for your Halloween feast. -
Step 5: Bake to Golden Perfection. With all your hot dogs wrapped and arranged on the baking sheet, it’s time to bake! Transfer the sheet to your preheated oven. Bake for approximately 12-16 minutes, or until the crescent dough turns a beautiful light golden brown and is puffed up. The cooking time may vary slightly depending on your oven, so keep an eye on them. Once baked, carefully remove the sheet from the oven and let the mummy hot dogs cool completely on the baking sheet or a wire rack. It’s important for them to cool down before adding the candy eyes.

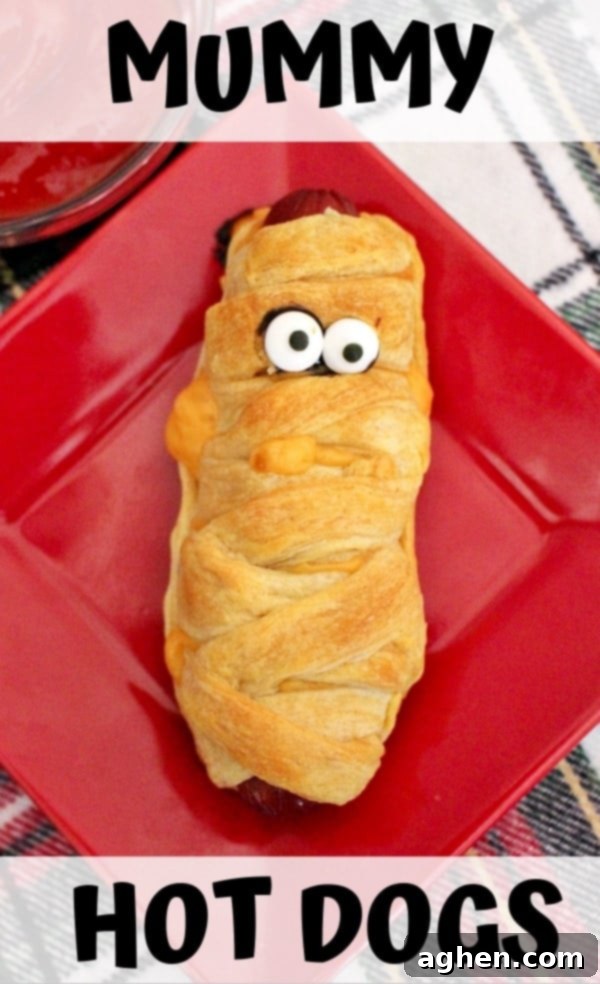
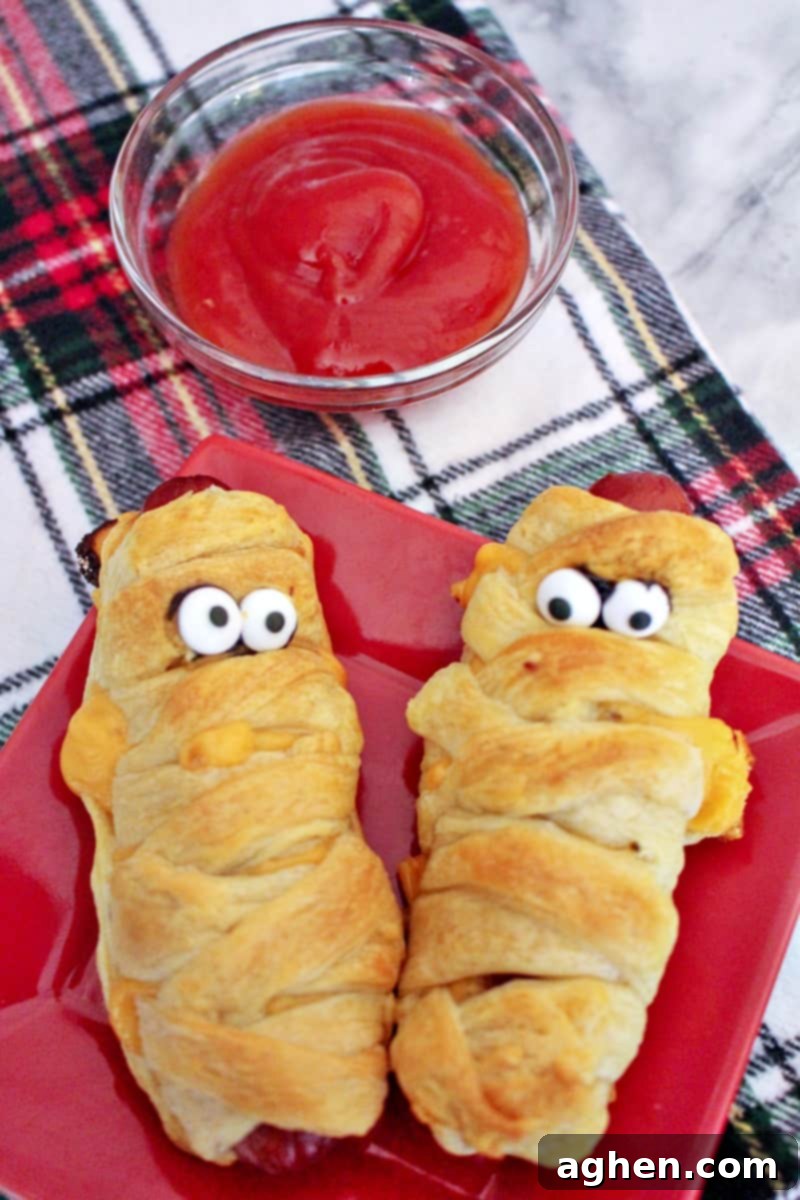
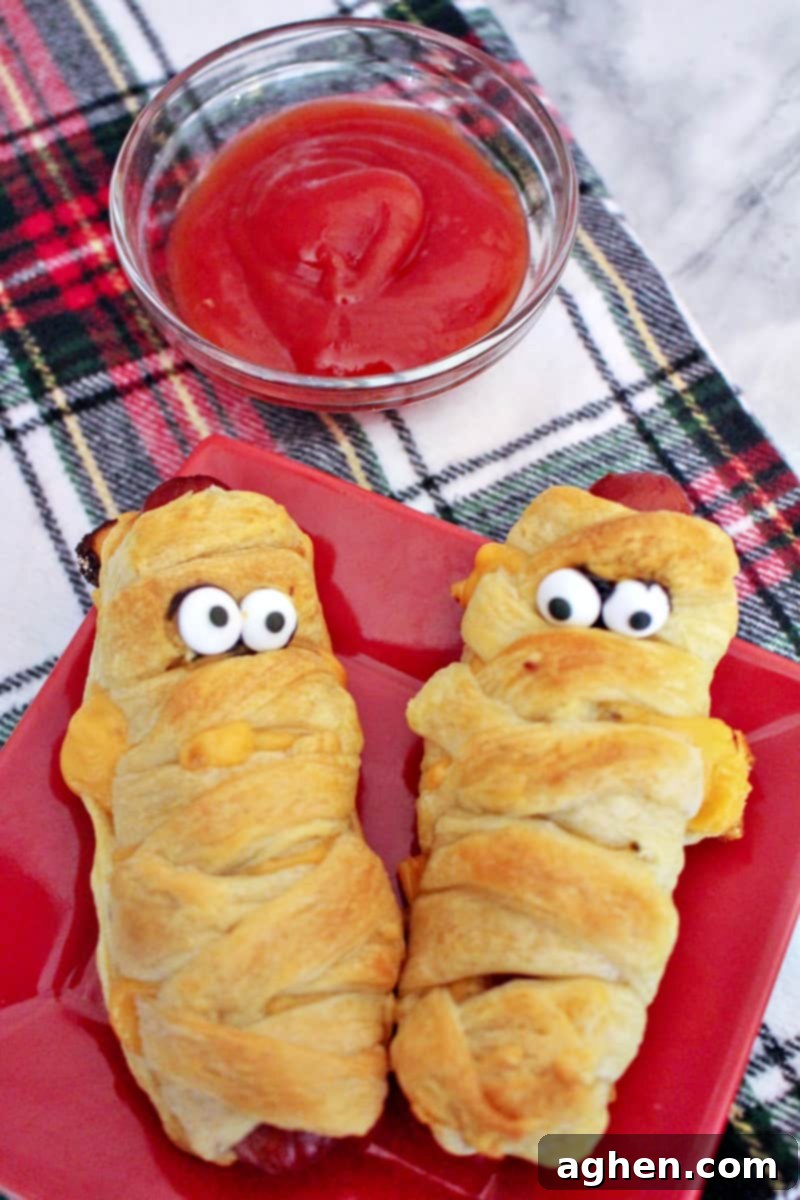
These mummy hot dogs, some featuring a cheesy surprise, are baked to a perfect golden brown, ready for their spooky transformation. -
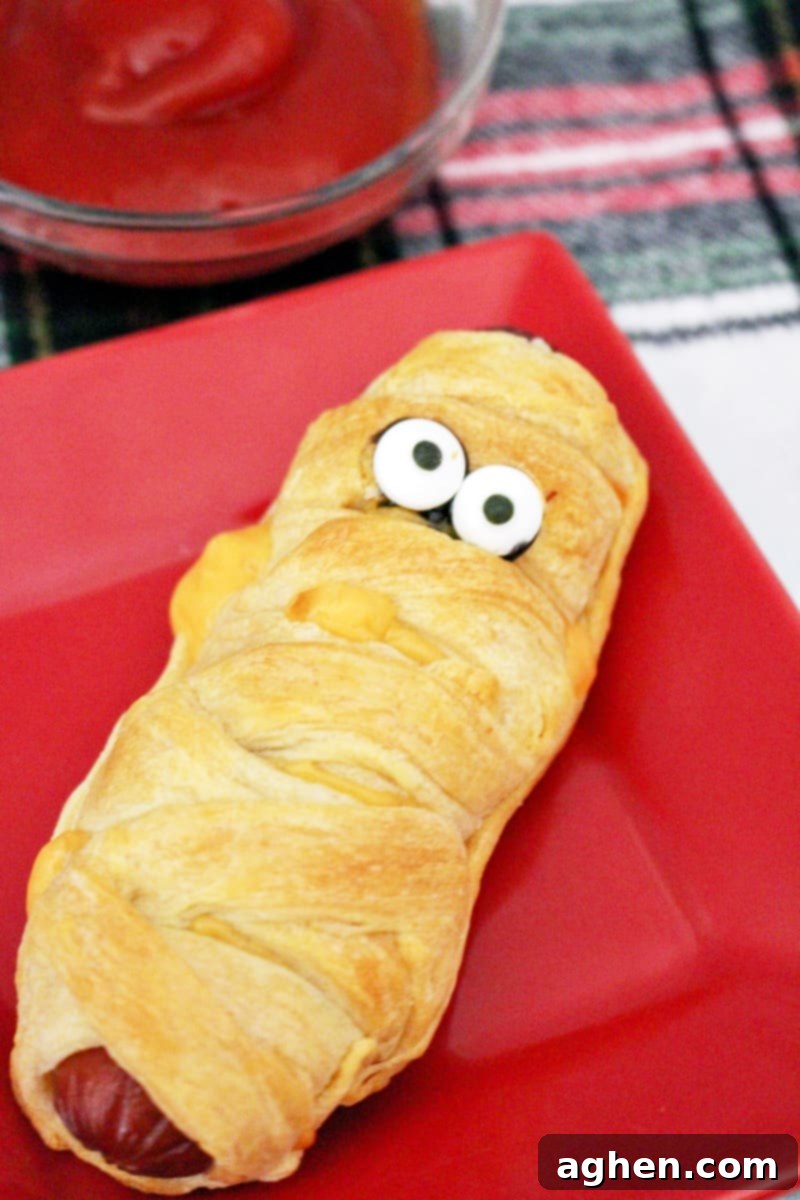
Step 6: Add the Spooky Eyes and Serve! Once your mummy hot dogs have cooled sufficiently (they don’t have to be cold, but cool enough to handle), it’s time for the most fun part! Take your decorating gel and apply a tiny dot to the back of each candy eyeball. Gently press two candy eyes onto the plain hot dog section you left exposed at the top of each mummy. The gel will act as a sticky adhesive, keeping the eyes in place. Your crescent-wrapped mummy dogs are now fully assembled and ready to be served! Offer them with classic ketchup and mustard for dipping, or get creative with a bowl of “bloody” marinara sauce or a vibrant green avocado dip for extra Halloween flair. Enjoy your spooky creations!

The final touch: candy eyes bring these crescent-wrapped mummies to life, making them irresistible for Halloween.
And just like that, you’ve conjured up a delicious, easy, and undeniably spooky Halloween dinner that’s sure to be a hit with everyone at your table. Don’t forget to complement your savory mummies with some sweet treats! We have plenty of fun Halloween desserts that are sure to delight your family and guests. We hope you enjoy this easy Halloween dinner idea, and that you and your family have a truly terrific and memorable Halloween celebration!
Storage and Reheating Tips for Mummy Hot Dogs
If you’re lucky enough to have any leftover mummy hot dogs (they tend to disappear quickly!), storing and reheating them is simple, allowing you to enjoy this festive treat for a few days after Halloween.
- Storage: Once your mummy hot dogs have completely cooled to room temperature, place them in an airtight container. They will keep fresh in the refrigerator for up to 3 days. Proper storage helps maintain their flavor and prevents the dough from drying out.
- Reheating: You have a few great options for warming up your leftovers, depending on your desired texture:
- Microwave: For the quickest reheat, place one or two mummy hot dogs on a microwave-safe plate and heat for 30-60 seconds, or until warmed through. The dough might be softer, but it’s fast!
- Oven: To best regain that lovely crispy dough, preheat your oven to 350°F (175°C). Place the mummy hot dogs on a baking sheet and heat for about 5-10 minutes, or until they are hot and the dough is lightly re-crisped.
- Air Fryer: An air fryer is an excellent choice for reheating, bringing back a great texture! Place the mummy hot dogs in a single layer in the air fryer basket (do not overcrowd) and cook at 350°F (175°C) for 3-5 minutes, shaking the basket halfway through, until they are hot and deliciously crispy.
- Freezing (Unbaked): While best enjoyed fresh, you can prep these ahead and freeze them unbaked. After wrapping the hot dogs in dough (Step 4), arrange them on a baking sheet and freeze until solid. Then, transfer the frozen mummies to a freezer-safe bag or container and store for up to 1 month. When ready to bake, place them directly from the freezer onto a prepared baking sheet and bake for an additional 5-10 minutes beyond the usual baking time, or until golden brown and cooked through.
Recipe Tips & Fun Variations for Your Mummy Dogs
While the classic mummy hot dog is perfect as is, don’t hesitate to get creative! Here are some ideas to make your Halloween hot dogs even more spectacular or to adapt them to your taste:
- Create Mini Mummy Dogs: For a delightful appetizer, use smaller cocktail sausages or cut regular hot dogs into halves or thirds. Adjust the length of your crescent dough strips accordingly. These bite-sized mummies are absolutely perfect for party platters!
- Spooky Dipping Sauces: Elevate your serving game by offering a variety of “bloody” or “ghoulish” dips. A bowl of warm marinara sauce makes for a fantastic “blood” dip. Green guacamole or pesto can serve as “monster goo,” or simply stick with classic ketchup and mustard for dipping.
- Alternative Eyes: If candy eyes aren’t available, small dots of mustard, cream cheese, or even tiny pieces of black olives can be used to create the mummy’s gaze. You can also use edible food markers to draw on simple eyes or even a little stitched mouth.
- Make it a Full Meal: Serve your mummy hot dogs alongside a simple green salad with a “cobweb” dressing (ranch or Caesar dressing with balsamic glaze drizzled in a web pattern), or some roasted “witch’s broomstick” carrot and celery sticks. French fries are always a hit too!
- Spice It Up for Adults: For those who enjoy a bit of heat, sprinkle a pinch of red pepper flakes over the cheese (if using) before wrapping, or add a thin slice of jalapeño. Using pepper jack cheese is another excellent way to introduce a spicy kick.
- Different Fillings: Experiment with other pre-cooked sausages like breakfast sausages or small Italian sausages for a different flavor profile. Just ensure they are fully cooked before wrapping to simply heat through in the oven.
More Spooky Halloween Dinner Ideas to Sink Your Teeth Into:
If you’re planning a full Halloween feast and looking for more themed dinner inspiration, these recipes pair wonderfully with your mummy hot dogs or can stand alone as a spooky main course:
- Mini Ghost Pizzas: Easy, individual pizzas cut into adorable ghost shapes, complete with olive eyes. A fun and interactive dinner for kids!
- Haunted Halloween Shepard’s Pie: A comforting and hearty classic, transformed with spooky mashed potato designs on top, perfect for a chilly October evening.
- Spider Web Taco Dip: A layered taco dip topped with sour cream intricately piped to look like a spider web. Great for an appetizer spread!
- Witch’s Brew Soup: A vibrant green soup (perhaps spinach or broccoli cheddar) served with “gross” garnishes like “eyeball” meatballs or “spider” croutons.
Mummy Hot Dogs
Author: Jaclyn
10 mins
10 mins
20 mins
Mummy hot dogs with crescent rolls make for a fun and easy Halloween dinner after a busy night of trick-or-treating.
8 mummy dogs
Ingredients
- 8 ounce crescent roll dough
- 8 hot dogs
- 4 cheese slices cut in half (optional)
- 16 candy eyes
- decorating gel
Instructions
- Preheat oven to 375 F. Prepare a baking sheet with non-stick spray or parchment paper and set aside.
- Lay out crescent dough. If using roll, pinch the seams together to form a single sheet.
- Use a knife or pizza cutter to cut the dough into long strips.
- Place hotdogs on a clean surface, with a piece of cheese under each, if desired. Wrap strips of crescent dough around each hot dog. Note: If you are making these with cheese, be sure to wrap well using enough crescent dough to keep the cheese from oozing out. If you are making these without cheese, you can wrap with the crescent dough more sparingly.
- Place wrapped hot dogs on baking sheet and bake for 12-16 minutes, or until the dough turns light golden brown. Remove from oven and allow to cool fully.
- Use a small dot of decorating gel to stick the candy eyes on the hot dogs.
- Serve with ketchup or mustard for dipping and enjoy!
Notes
Store leftover crescent dogs in an airtight container in the refrigerator for up to 3 days. Reheat in the microwave, oven, or air fryer!
Nutrition

Did You Make This Recipe?
Share it with me on Instagram @crayonsandcravings and follow on Pinterest @crayonsandcravings for even more!
Pin Recipe
Leave A Review
We truly hope this detailed guide helps you create the most spooktacular and delightful Mummy Hot Dogs for your Halloween festivities. This recipe is not just about food; it’s about creating fun memories and a festive atmosphere for your family and friends. Enjoy the process, the delicious outcome, and a very Happy Halloween from our kitchen to yours!
