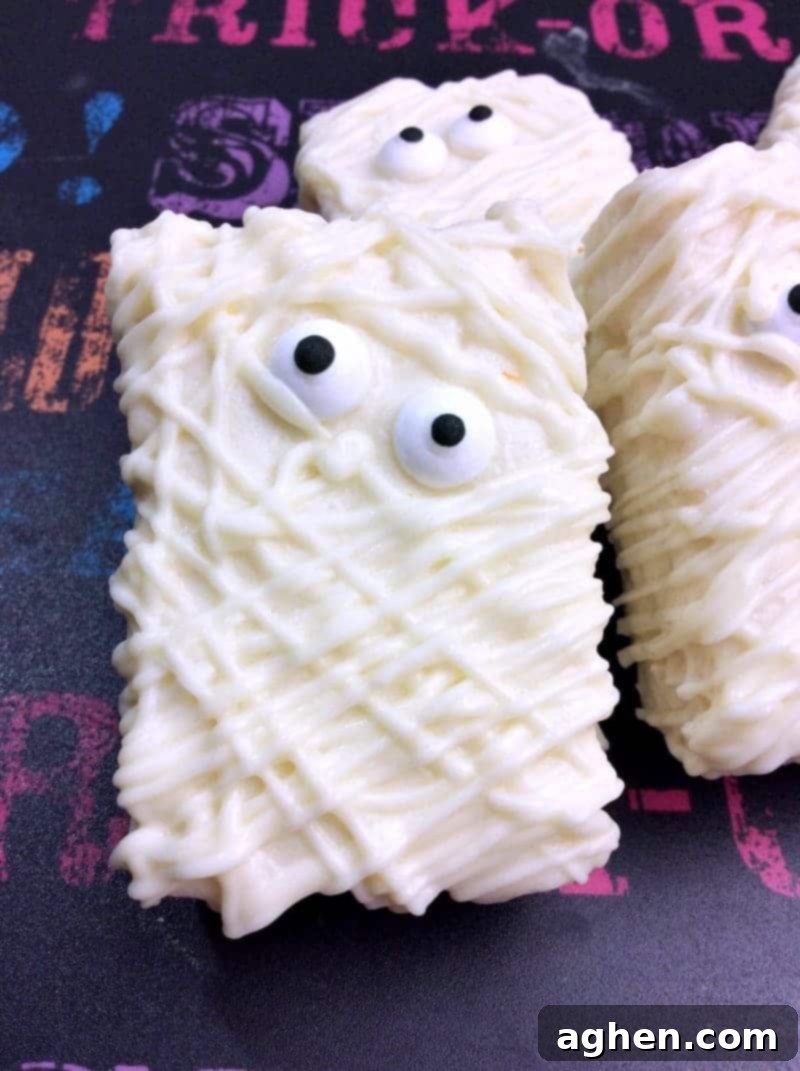
Whip Up Spooky Fun: Easy 3-Ingredient Mummy Rice Krispie Treats for Halloween
As the leaves begin to turn and a crisp chill fills the air, there’s no denying that Halloween is just around the corner! It’s a season brimming with delightful traditions – from pumpkin patch visits and carving the perfect jack-o-lantern to finding the most imaginative costumes for trick-or-treating. And, of course, no Halloween celebration is complete without an array of themed treats to delight both young and old. If you’re searching for a truly simple yet incredibly fun Halloween dessert that comes together in a flash, you’ve stumbled upon the perfect recipe!
Today, we’re diving into the enchanting world of Mummy Rice Krispie Treats. These adorable and slightly spooky delights are guaranteed to be a hit at any Halloween party, school event, or simply as a special snack for your family. What makes them truly magical? Their astounding simplicity! You only need three basic ingredients, and absolutely no baking is required, making them an ideal project for even the busiest of spooky season enthusiasts.
Forget about complicated preparations and long lists of ingredients. Our Mummy Rice Krispie Treats are designed for maximum festive fun with minimal effort. This recipe is so straightforward, it’s almost ridiculous – a testament to how easy it is to create something truly memorable for Halloween. Whether you’re a seasoned baker or just getting started in the kitchen, you’ll find this recipe incredibly approachable. Plus, getting the kids involved in the decorating process is half the fun!
For those who love the “mummy” theme, don’t stop here! We have other fantastic recipes to complete your Halloween spread. Be sure to check out our Mummy Hot Dogs with Crescent Rolls for a savory snack, and our delightful Mummy Cookies for another sweet treat. These three recipes together will make your Halloween feast unforgettable!
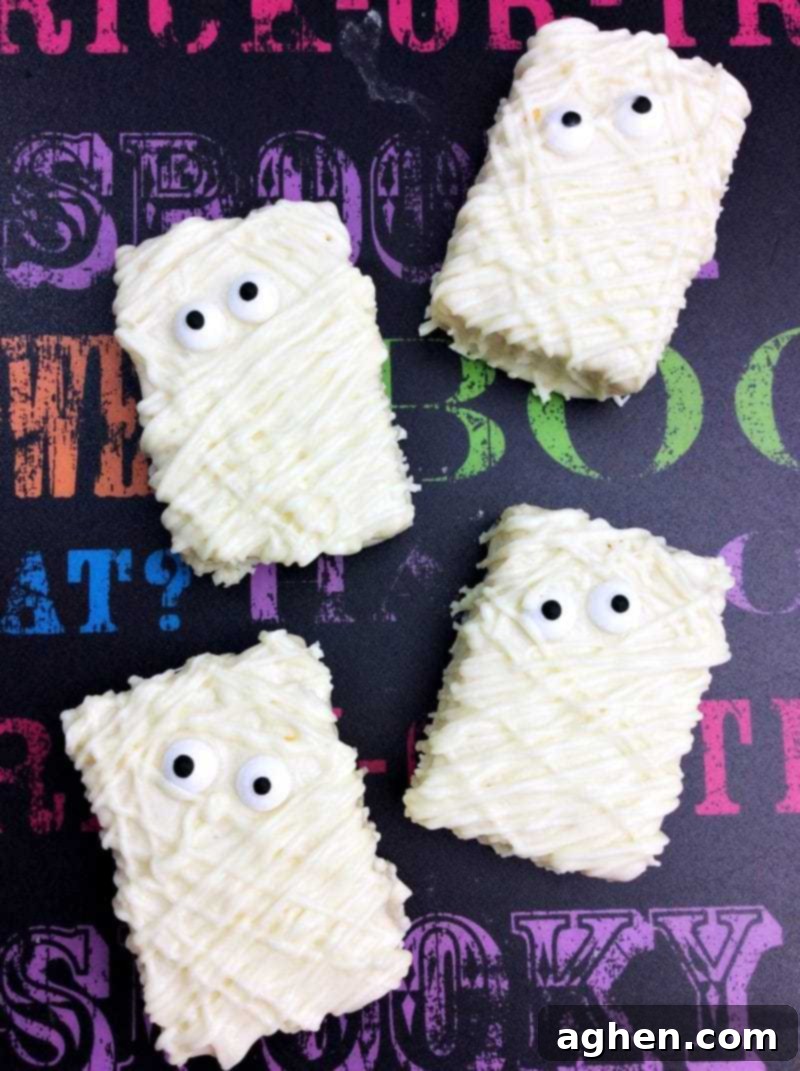
Why These 3-Ingredient Mummy Rice Krispie Treats Are Your Go-To Halloween Dessert
When it comes to Halloween treats, variety and ease are key. Our 3-ingredient Mummy Rice Krispie Treats stand out for several reasons, making them a popular choice year after year:
- Unbeatably Simple: With just three core ingredients – pre-made Rice Krispie Treats, white melting chocolate, and candy eyes – you can’t get much simpler than this. It’s perfect for last-minute party contributions or a spontaneous crafting session with the kids, allowing you to focus more on the fun and less on complex cooking.
- Absolutely No Baking Required: Skip the oven entirely! This no-bake recipe relies on readily available pre-made Rice Krispie Treats, making the process incredibly quick, mess-free, and safe for all ages to participate. This also means no preheating, no waiting, and no potential for burnt bottoms.
- Fantastic for Kids: The decorating part of these mummy treats is where the real joy lies, especially for little hands. Children can actively help dip the treats, carefully place the candy eyes to give their mummies personality, and even assist with drizzling the chocolate “bandages.” It’s a fantastic, edible craft activity that encourages creativity and fine motor skills.
- Easily Customizable: While we stick to a minimalist 3-ingredient approach for ultimate ease, these spooky treats are incredibly versatile. Feeling more adventurous? You can absolutely make your Rice Krispie Treats from scratch, just like we did for our popular Frankenstein Rice Krispie Treats. You could also experiment with different colored melting chocolates for a vibrant mummy, or add sprinkles for extra flair.
- Adorably Spooky and Themed: The mummy design is an iconic and instantly recognizable symbol of Halloween. These treats are cute enough to charm all your guests, yet perfectly spooky to fit the festive theme. They add a whimsical touch to any Halloween spread without being overly grotesque.
- Quick Set Time: Thanks to the nature of melting wafers, these treats set relatively quickly in the refrigerator, meaning less waiting and more enjoying!
Our choice to use pre-made Rice Krispie Treats is all about maximizing convenience and minimizing kitchen time. This way, you spend less time cooking and more time making memories. But remember, if a homemade base is your preference, the decorating steps remain exactly the same!
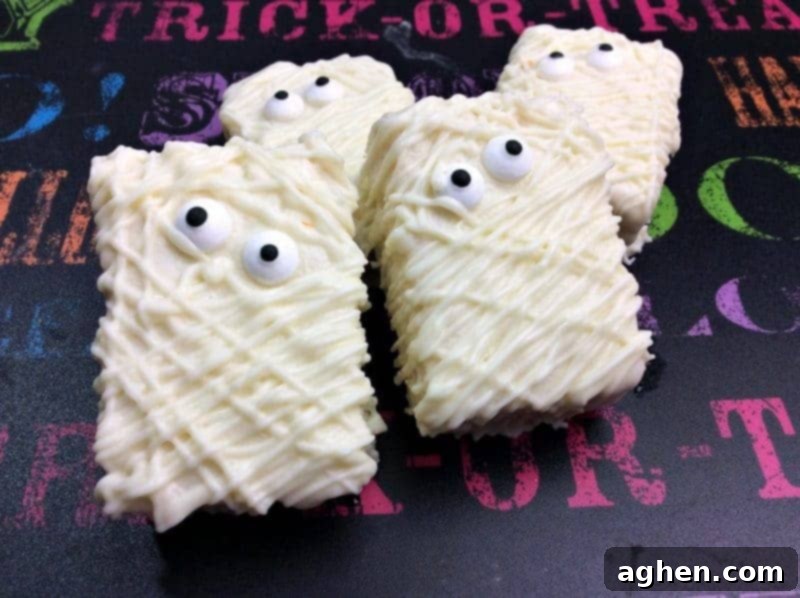
Ready to create your own edible army of mummies? Let’s gather our supplies and walk through the simple steps. This step-by-step guide, complete with photos, will ensure your Halloween treats turn out perfectly. You’ll also find a convenient printable recipe card at the very bottom of this post, so you can easily reference it while you create your spooky masterpieces!
Ingredients for Your Spooky Mummy Treats
This section details the minimal ingredients needed, along with helpful notes and potential substitution options. All precise measurements and instructions are available in the comprehensive printable recipe card at the end of this article.
- Rice Krispies Treats: You’ll need one box, typically containing 6 individually wrapped bars. We highly recommend using the pre-made variety for ultimate convenience and to keep this a truly 3-ingredient, no-bake recipe. They provide a consistent base and save valuable time. However, if you prefer a homemade touch, feel free to use your favorite Rice Krispie Treat recipe and cut them into standard bar shapes once cooled. Ensure they are firm enough to handle for dipping.
- White Chocolate Melting Wafers: One bag (approximately 10-12 ounces) of high-quality white chocolate melting wafers or candy melts will give you the best results. These are specifically designed for melting smoothly and setting quickly, creating a perfect, non-sticky coating for your mummies. While white chocolate chips can work in a pinch, they sometimes require added oil or shortening (like coconut oil or vegetable shortening) to achieve a smooth, dippable consistency without seizing. Melting wafers, available at most grocery stores, craft stores, or online in the baking aisle, are your best bet for a flawless finish. You can also purchase them easily on Amazon here!
- Small Edible Candy Eyes: Approximately 12 small candy eyes (two per treat) are essential for bringing your mummies to life! These are widely available in the baking section of most supermarkets, especially around the Halloween season. They add that perfect touch of spooky charm that makes these treats instantly recognizable and utterly irresistible. For a fun twist, you can sometimes find candy eyes in different colors like green or blue, which can add extra character to your mummies. Grab your edible eyes on Amazon!
Essential Equipment You’ll Need:
To make the process even smoother and ensure successful mummy creation, have these simple kitchen tools ready:
- Disposable Piping Bag: This tool is ideal for neatly drizzling the “mummy bandages” with precision. If you don’t have a disposable piping bag on hand, a sturdy freezer baggie with a very small corner snipped off will work just as well to create fine lines. Ensure the snip is tiny, as you can always make it larger if needed. Find disposable piping bags on Amazon.
- Cookie Sheet Fitted with Wax Paper or Silicone Baking Mat: Lining your cookie sheet is absolutely crucial to prevent the chocolate-coated treats from sticking as they set, and it makes cleanup significantly easier. Wax paper or parchment paper works perfectly for a single-use option, or consider a reusable silicone baking mat for an eco-friendly and non-stick alternative. You might need two sheets if you are making a larger batch or want to move quickly through the chilling steps. A reliable cookie sheet can be found here.
- Microwave-Safe Bowl or Double Boiler: For melting your white chocolate.
How to Make Spooky Mummy Rice Krispie Treats: Step-by-Step Guide
This section provides detailed, step-by-step instructions, complemented by photos to guide you through each stage of creating these delightful Halloween treats. For the complete, printer-friendly recipe, please refer to the recipe card located further down this page.
Creating these mummy treats is a breeze! Just follow these easy steps for a spooktacular result:
Step 1: Prepare Your Workstation
Begin by unwrapping each individual Rice Krispie Treat bar from its packaging. Lay them out evenly spaced on a cookie sheet that you’ve generously lined with either wax paper, parchment paper, or a silicone baking mat. This crucial preparation step is vital as it prevents the chocolate-coated treats from sticking to the pan as they cool and makes cleanup after your decorating session incredibly simple.
Step 2: Melt the White Chocolate Coating
In a microwave-safe bowl, melt your white chocolate melting wafers according to the package directions. Typically, this involves heating them in 30-second intervals on medium power, stirring thoroughly after each interval, until the chocolate is completely smooth and free of lumps. Alternatively, you can use a double boiler method for a more controlled and gentle melt, which helps prevent scorching. Once the chocolate is perfectly melted, dip each Rice Krispie Treat into the smooth white chocolate, ensuring it’s fully coated. Allow any excess chocolate to drip off gently before carefully placing the coated treat back onto your prepared, lined baking sheet.
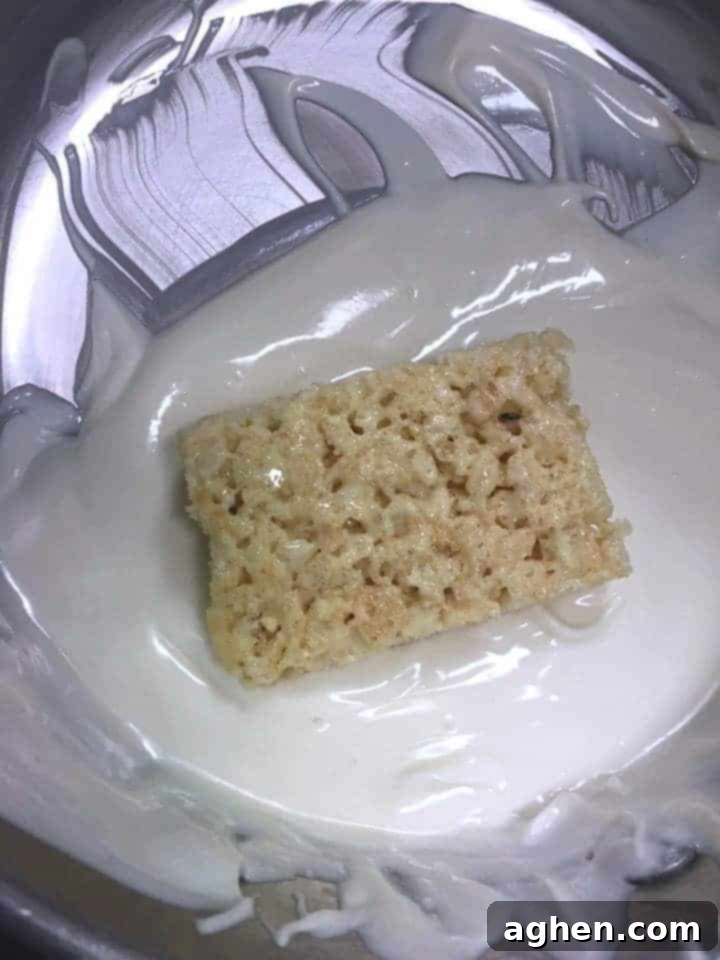
Step 3: Add the Mummy Eyes
This is where your mummies start to gain their personality! While the white chocolate coating is still wet – this is crucial so the eyes adhere properly – carefully place two small edible candy eyes onto each Rice Krispie Treat. Position them towards the upper third of the treat to create the illusion of a mummy’s face peeking out from its bandages. This is a fantastic and fun step for kids to help with – their careful placement might surprise you!
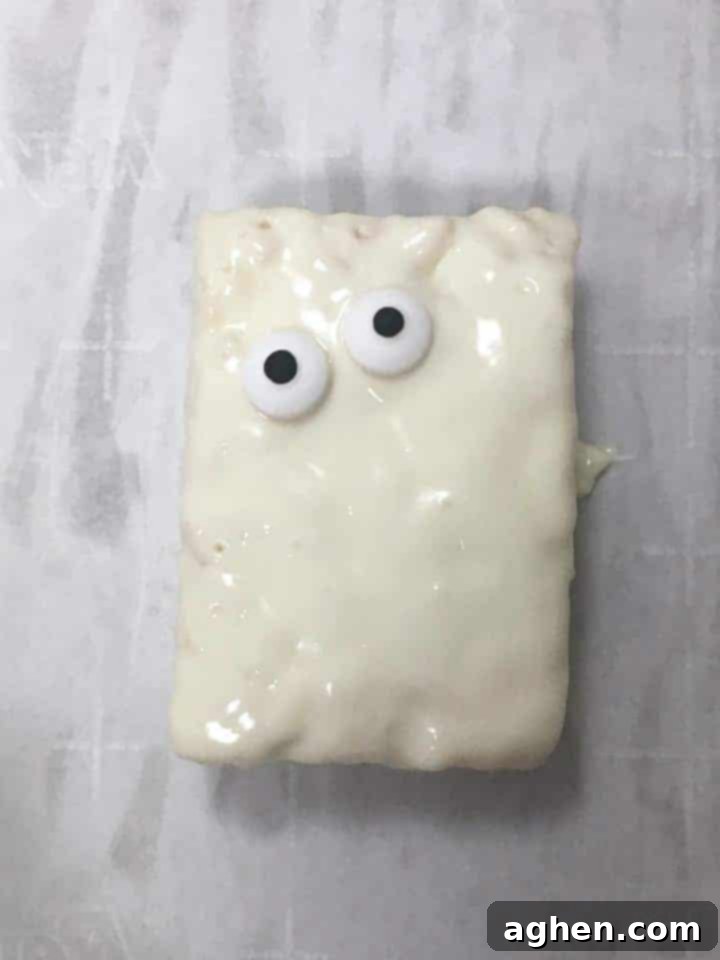
Step 4: Chill to Set the Base Layer
Once all your treats are coated with white chocolate and have their adorable (or spooky!) eyes in place, transfer the entire baking sheet into the refrigerator. Chill them for approximately 10 minutes, or until the white chocolate coating has completely set and is firm to the touch. This essential step ensures that when you proceed to apply the “bandages,” the base layer won’t smudge, melt, or mix with your mummy details.
Step 5: Create the Mummy Bandages with Drizzled Chocolate
Take any remaining melted white chocolate and scoop it into a disposable piping bag. If the chocolate has cooled and hardened while the treats were chilling, simply re-melt it for a few seconds until it’s a smooth, easily drizzled consistency again. Snip a very small corner off the tip of the piping bag (or freezer baggie) to create a fine opening – remember, you can always make it larger, but you can’t make it smaller! Remove the chilled treats from the refrigerator. Now, with a steady hand, drizzle small, irregular lines of white chocolate back and forth horizontally over each treat. Overlap the lines to create the iconic “mummy bandage” effect, ensuring the candy eyes remain partially visible, peeking through the chocolate strips.
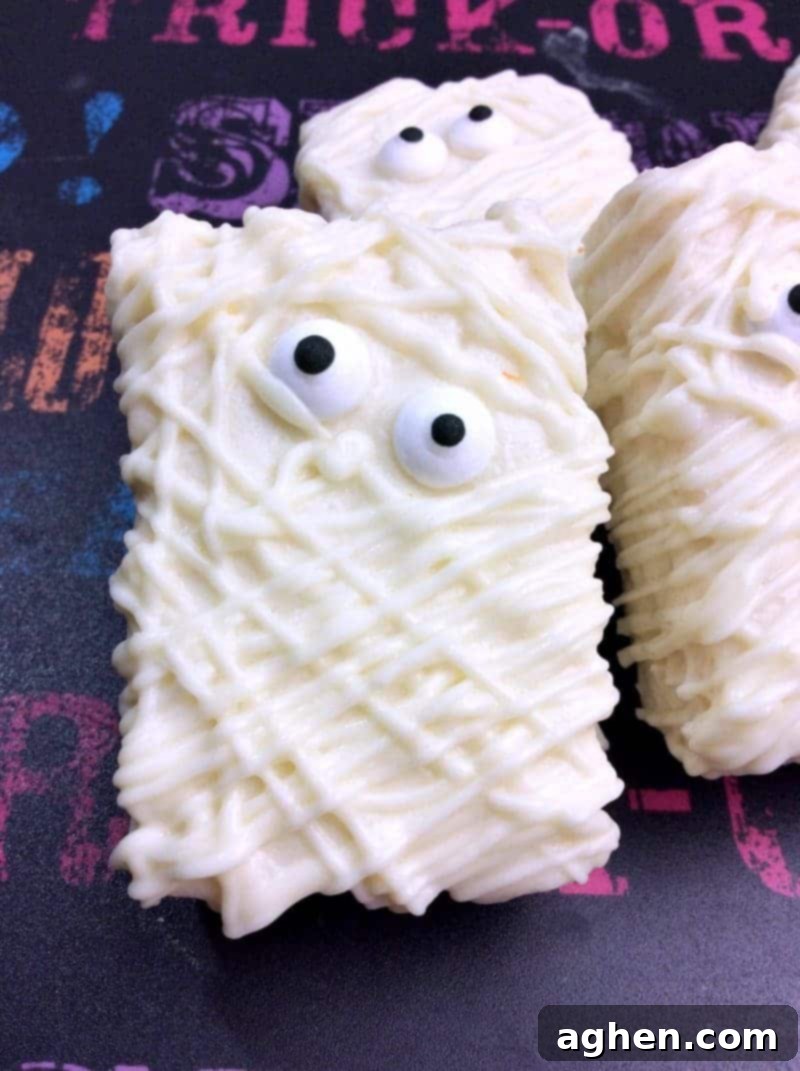
Step 6: Final Set and Serve!
Allow your newly bandaged mummy treats to sit at room temperature for a final 30 minutes. This allows the drizzled chocolate “bandages” to fully harden and set, ensuring they hold their charming shape perfectly when handled. Once firm, your adorable and delicious Spooky Mummy Rice Krispie Treats are ready to be served and enjoyed! Get ready for compliments and happy Halloween smiles. These delightful treats are perfect for any Halloween gathering. Have a Happy Halloween!
Tips & Tricks for Perfect Mummy Rice Krispie Treats
Ensure your 3-ingredient Mummy Rice Krispie Treats are an absolute success with these helpful tips and tricks:
- Melting Chocolate Mastery: When melting white chocolate, the key is to go low and slow. Avoid overheating it, as white chocolate is particularly prone to seizing and becoming a thick, lumpy mess. Always melt in short bursts (30 seconds at a time in the microwave) and stir frequently. If your chocolate seems too thick for dipping or drizzling, add a tiny bit of coconut oil or vegetable shortening (about 1/2 teaspoon per cup of chocolate) to thin it out to a more workable consistency.
- Kid Involvement is Key: This recipe is a fantastic opportunity for involving children of all ages in the kitchen! Let them take charge of unwrapping the treats, carefully placing the candy eyes (which is often their favorite part!), and even helping with the drizzling if they’re old enough and have a steady hand. It’s a fun, edible craft activity that doubles as a delicious snack.
- Optimal Storage: To maintain their freshness and delightful texture, store your finished Mummy Rice Krispie Treats in an airtight container at room temperature. They will remain delicious for up to 3-4 days. While you can refrigerate them, they tend to firm up a bit more in colder temperatures, so room temperature storage is often preferred for serving.
- Make-Ahead Magic: These easy Halloween treats are excellent candidates for making ahead of time. You can prepare them a day or two in advance of your Halloween party or event, which significantly reduces stress on the day itself. Just ensure they are stored properly to maintain their optimal freshness and appearance.
- Creative Variations:
- Homemade Treats Base: As mentioned, if you have more time or simply prefer a homemade taste, you can easily make your Rice Krispie Treats from scratch using butter, marshmallows, and Rice Krispies cereal. Simply press the mixture into a greased 9×13 inch pan, allow it to cool completely, and then cut into uniform bar shapes before dipping.
- Colored Eyes: While classic black and white candy eyes provide a timeless mummy look, don’t hesitate to experiment with different colored edible eyes, like green, red, or even googly eyes, for an extra whimsical or eerie touch.
- Different Chocolate Types: For a striking visual contrast, consider coating the entire treat in melted milk or dark chocolate first, allowing it to set, and then using white chocolate for the “bandages.” This creates a different, yet equally festive, mummy appearance.
- Sprinkle Fun: Before the final chocolate drizzle sets, you can add a touch of Halloween sprinkles for extra color and texture!
More Spooktacular Halloween Dessert Ideas
Looking to fill your Halloween dessert table with even more creative and delicious treats? We’ve got you covered! Here are some other festive recipes that are sure to be a hit and complement your Mummy Rice Krispie Treats perfectly:
- Brownie Bite Spider Treats: Creepy-crawly and utterly delicious, these little spiders are made from rich brownie bites with pretzel legs, perfect for a spooky spread.
- Ghost Doughnuts: Simple glazed doughnuts are transformed into adorable floating ghosts with just a few decorative touches of white icing and candy eyes.
- Oreo Dirt Pudding with Gummy Worms: A classic, fun, and delicious dessert layered with crushed Oreo cookies to resemble dirt and playful gummy worms – perfect for a “graveyard” theme.
- Spiderweb Cupcakes: Elegant and spooky cupcakes topped with a delicate chocolate spiderweb design, making them almost too pretty to eat!
- Bloodshot Monster Eyeball Doughnuts: For a truly ghoulish treat, these doughnuts feature a striking bloodshot eyeball design that’s surprisingly easy to create and guaranteed to grab attention.
Combine these ideas with your Mummy Rice Krispie Treats for a truly unforgettable Halloween feast that will have everyone reaching for more!
Mummy Rice Krispie Treats
Author: Jaclyn
Prep: 15 mins
Set Time: 40 mins
Total: 55 mins
Servings: 6
“3-Ingredient Mummy Rice Krispie Treats are the perfect easy-to-make Halloween treat.”
Equipment
- Piping bag or freezer bag
- Cookie sheet fitted with wax paper or a silicone baking mat
- Microwave-safe bowl or double boiler
Ingredients
Instructions
- Unwrap each Rice Krispie Treat and arrange them on a cookie sheet lined with wax paper or a silicone baking mat.
- Melt white chocolate melting wafers in a microwave-safe bowl (in 30-second intervals, stirring after each) or using a double boiler until smooth. Fully coat each Rice Krispie Treat in the melted chocolate, shaking off excess, then return to the lined cookie sheet.
- While the chocolate is still wet, carefully place two candy eyes on each treat.
- Place the cookie sheet with the coated treats into the refrigerator for about 10 minutes, allowing the chocolate to set and harden.
- Scoop any remaining melted chocolate into a piping bag (or a freezer bag with a small corner snipped off). Re-melt chocolate if it has hardened.
- Remove the chilled treats from the refrigerator. Drizzle small, horizontal lines of white chocolate back and forth over each treat, creating the “mummy bandage” effect, ensuring the eyes remain visible.
- Let the mummy treats sit at room temperature for a final 30 minutes to fully harden before serving and enjoying.
Nutrition Information (per serving)
- Calories: 348 kcal
- Carbohydrates: 46g
- Protein: 4g
- Fat: 17g
- Saturated Fat: 10g
- Cholesterol: 10mg
- Sodium: 148mg
- Potassium: 135mg
- Fiber: 0.1g
- Sugar: 37g
- Vitamin A: 14IU
- Vitamin C: 0.2mg
- Calcium: 94mg
- Iron: 1mg
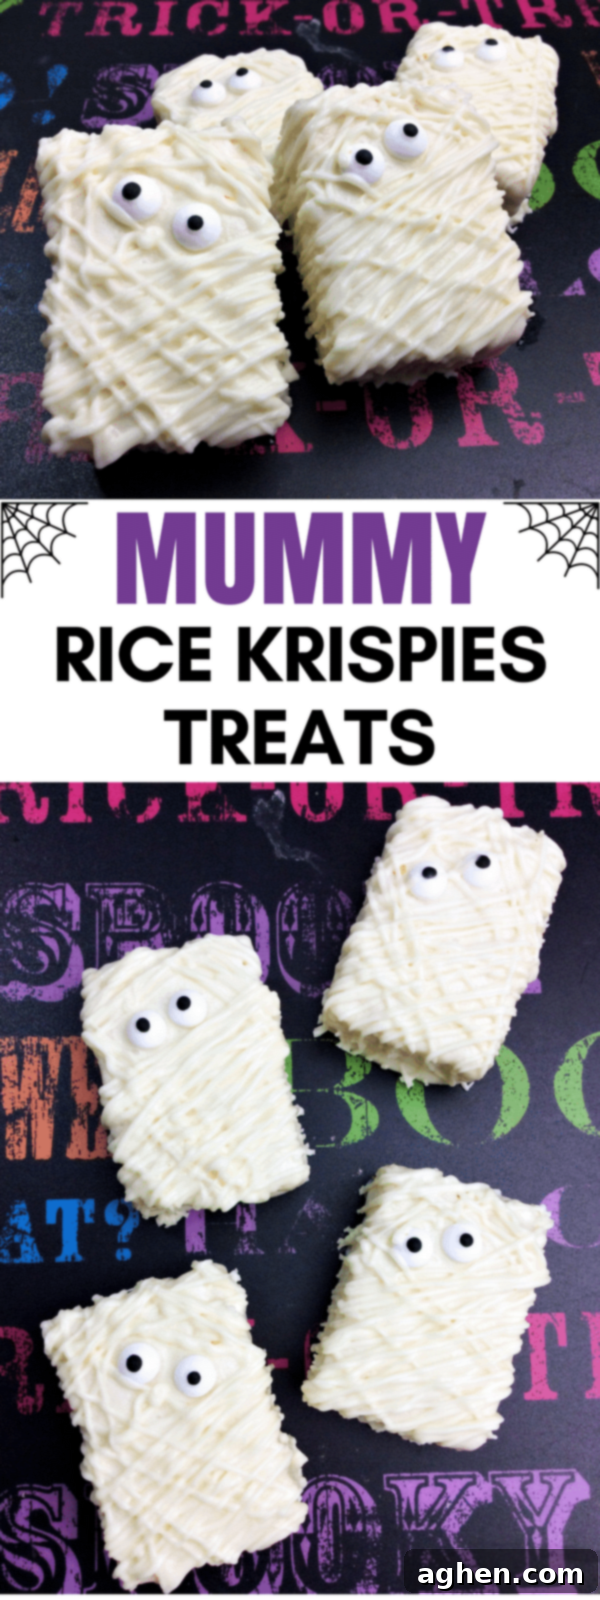
Share Your Spooky Creations!
We absolutely love seeing your culinary masterpieces and how you bring our recipes to life! If you make these incredibly easy and fun 3-ingredient Mummy Rice Krispie Treats, please share your photos with us. Your creations inspire us and our community of fellow food lovers!
Tag @crayonsandcravings on Instagram and let us see your spooky army of mummies! We can’t wait to see your unique touches and how you’ve made these treats your own. Don’t forget to follow us on Pinterest at @crayonsandcravings for a constant stream of recipe inspiration, holiday ideas, family-friendly crafts, and even more delicious desserts.
Your feedback, shares, and creations truly make our day. Thank you for being a part of our baking journey. Happy Halloween, and happy treating!
