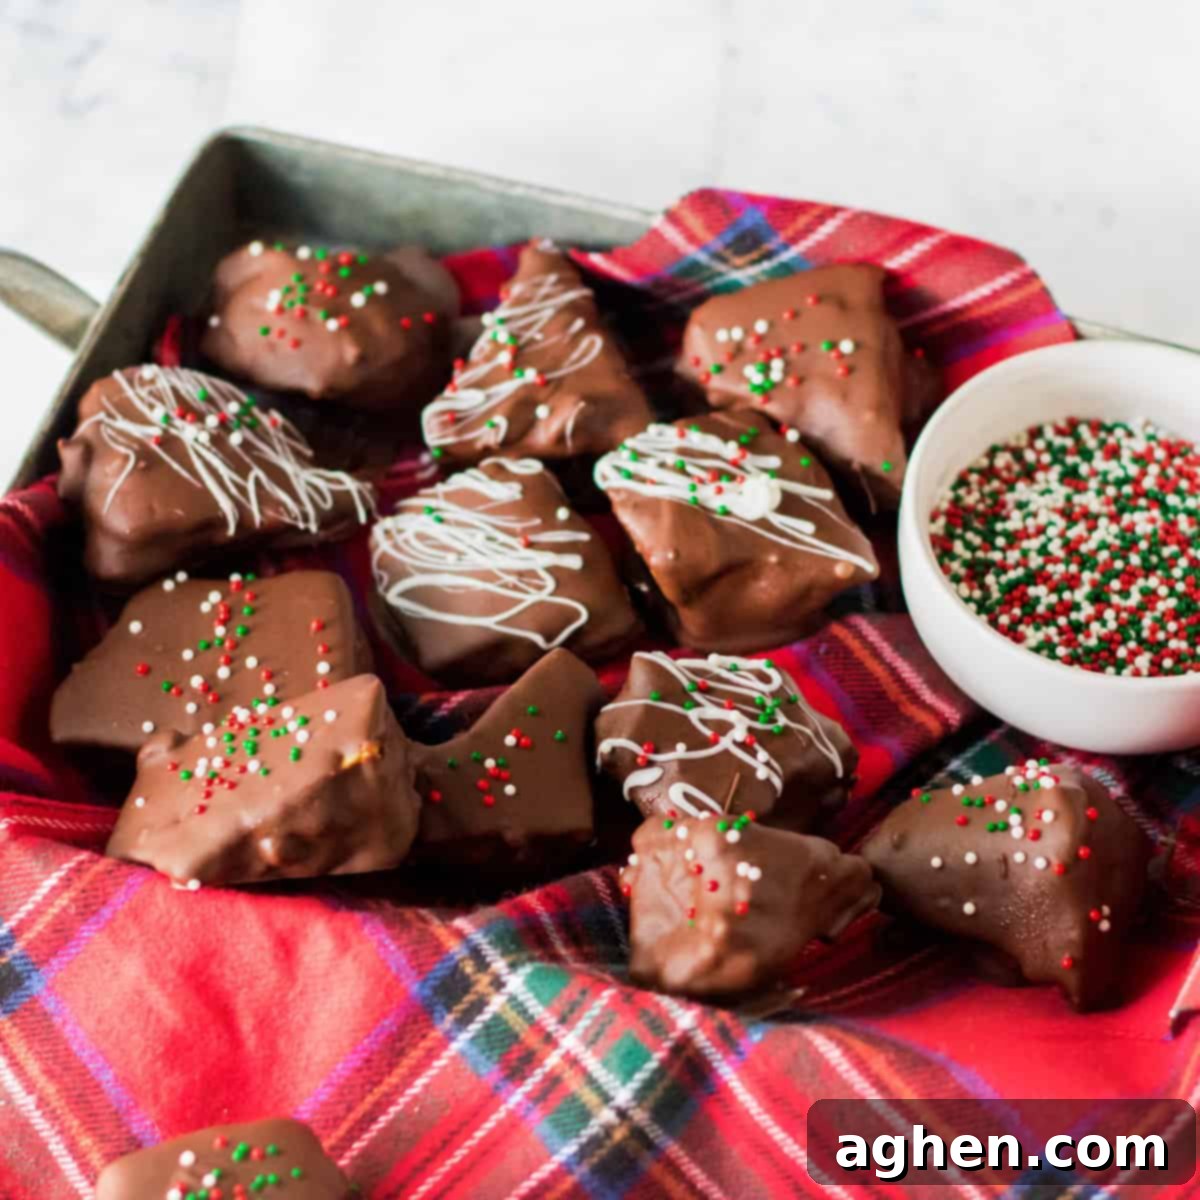
Ultimate Chocolate Covered Honeycomb Candy: Your Guide to the Perfect Crispy Homemade Treat
Prepare to discover your new favorite confection! This delightful chocolate covered honeycomb candy is a testament to the magic that simple kitchen staples can create. Utilizing a clever trick with baking soda, we transform a basic sugar syrup into an airy, brittle, and irresistibly crispy treat, reminiscent of a real honeycomb. Each piece is then lovingly dipped in rich, smooth chocolate, creating a perfect balance of textures and flavors. Whether you’re seeking an impressive homemade Christmas gift or simply an addictive indulgence for yourself, this recipe promises to deliver a truly unforgettable experience. Many even argue it surpasses other beloved confections!
Imagine turning everyday ingredients like sugar, corn syrup, honey, baking soda, and chocolate into an extraordinary delicacy. This recipe takes you on a journey to craft a confection that is not only fun and festive but also incredibly satisfying. The light, crispy texture, combined with a luxurious chocolate coating, makes it an ideal sweet treat for any occasion, especially during the holiday season. It’s an experience that rivals store-bought favorites and elevates your home baking game.

Why Homemade Honeycomb Candy is a Must-Try
If you’ve ever dreamt of recreating those iconic, crave-worthy candy bars at home, this is your chance. This particular recipe yields a treat similar to the honey-infused Butterfinger bars popular in the U.S., the delightful Cadbury Crunchie found in England, or Australia’s beloved Violet Crumble bars. But why spend a small fortune on shipping when you can achieve that same incredible taste and texture right in your own kitchen? Making it yourself means fresh, preservative-free candy tailored exactly to your preferences, and it’s surprisingly easy!
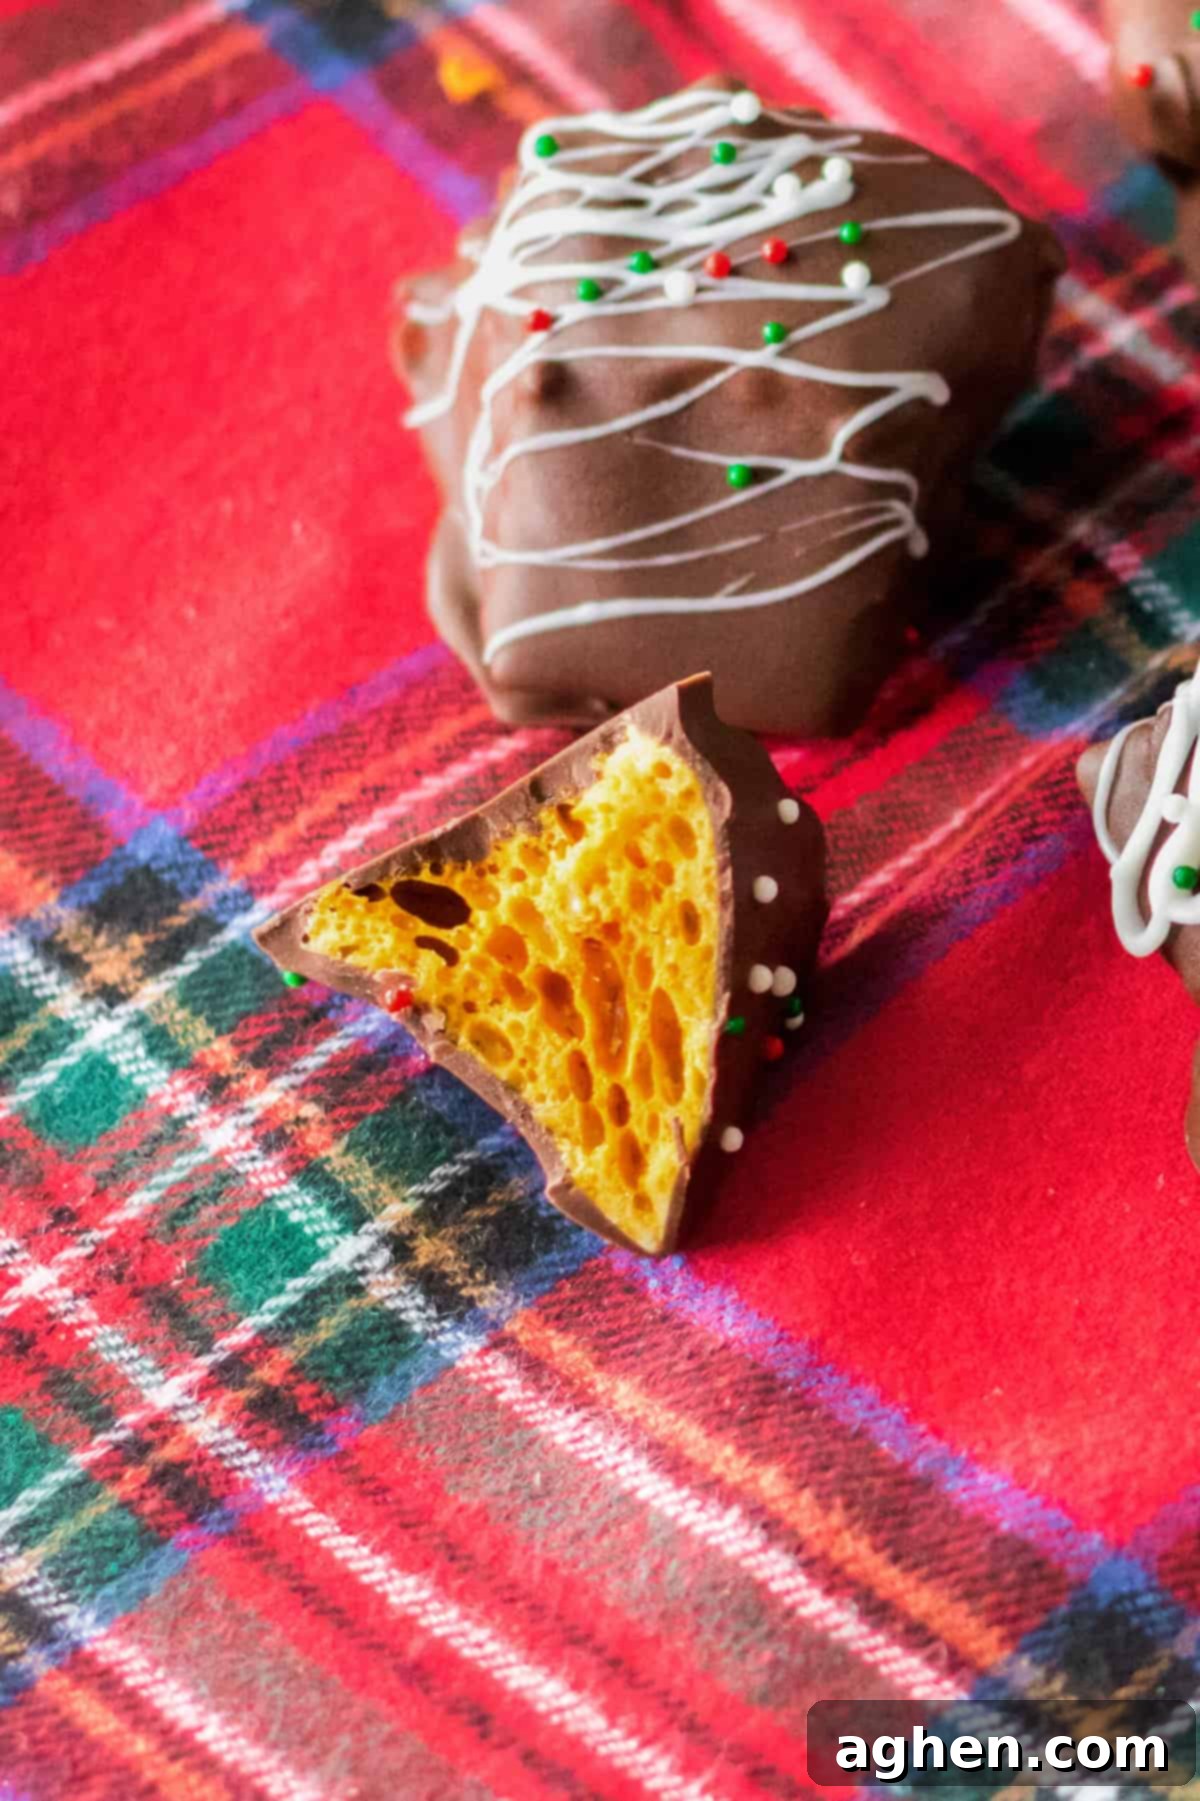
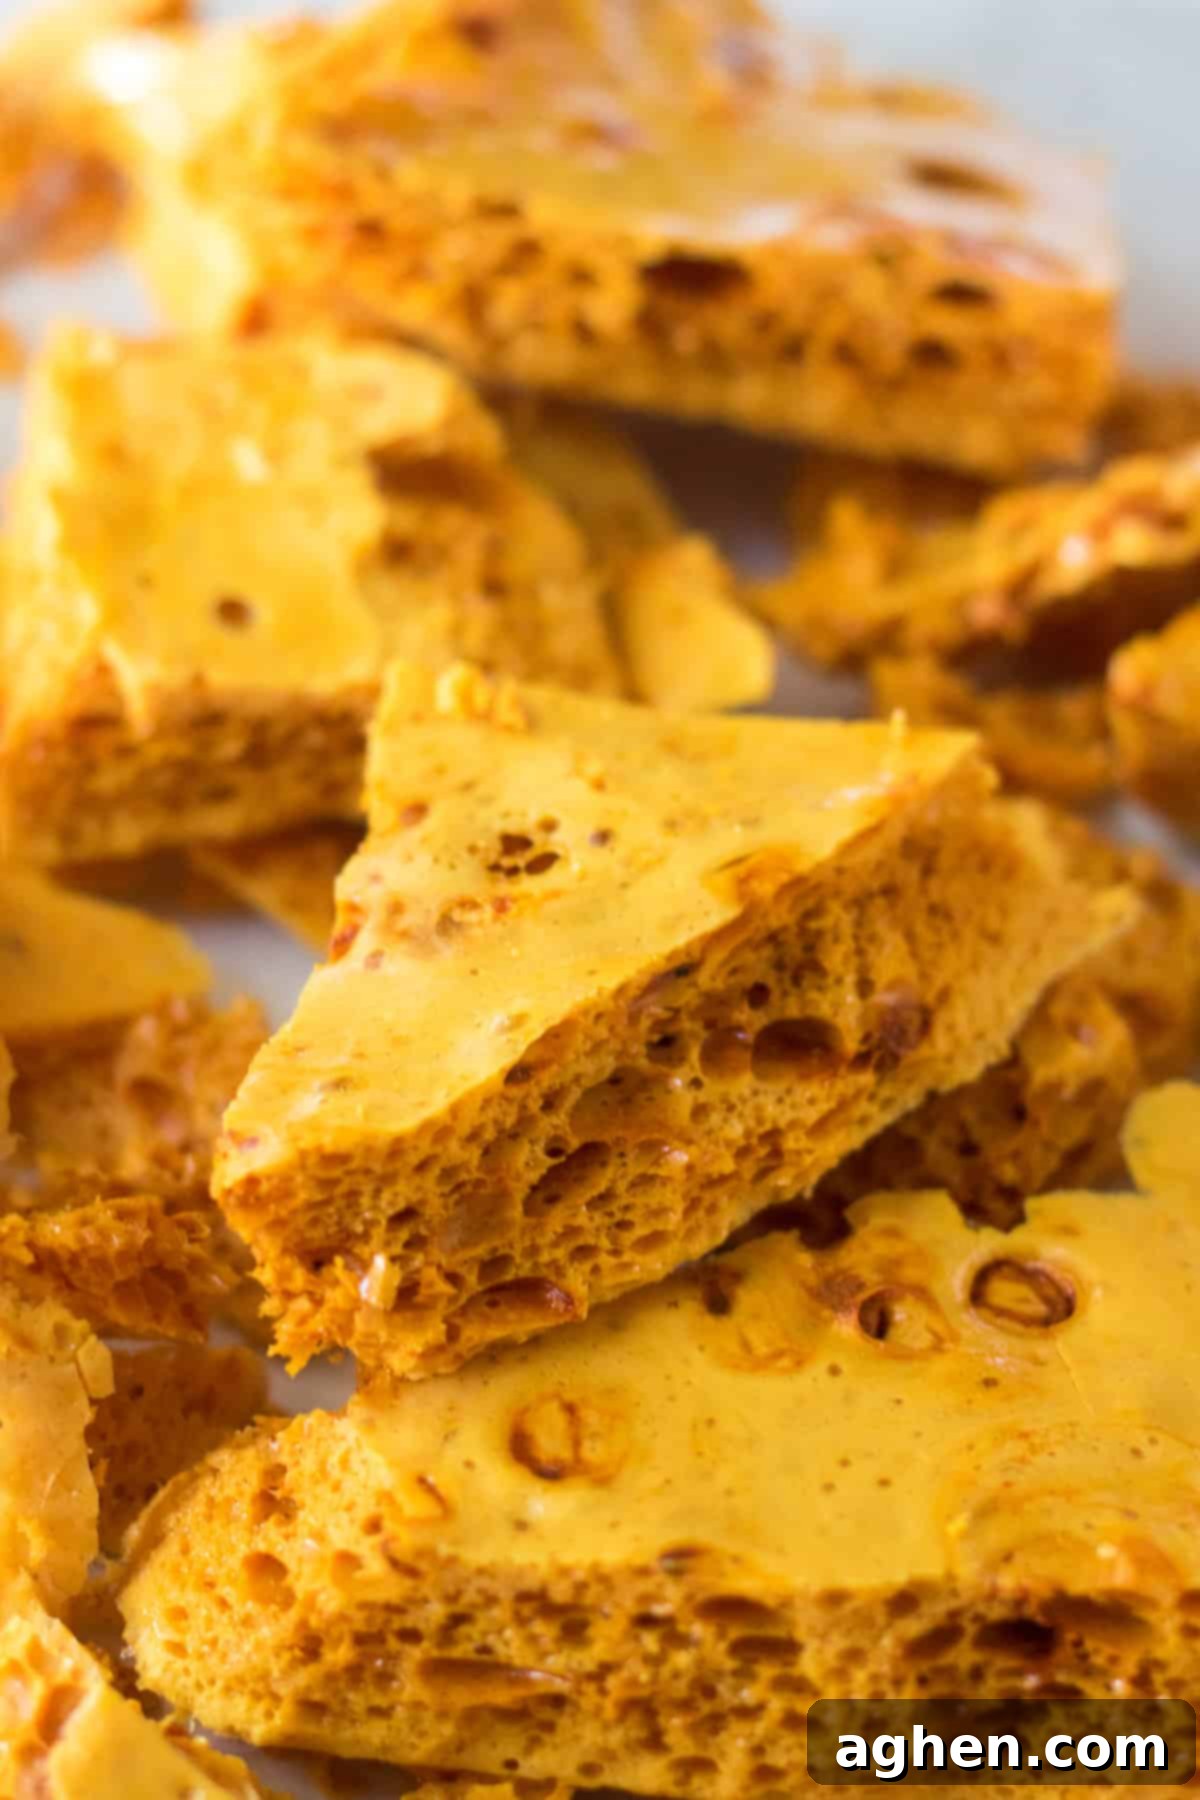
The interior of this candy is a marvel of confectionery science: wonderfully crispy and crunchy, yet never overly hard or difficult to bite. The secret lies in baking soda. When this simple ingredient is introduced to the hot sugar mixture, it undergoes a chemical reaction, releasing carbon dioxide gas. These gas bubbles become trapped within the setting candy, creating a distinctive, airy, and brittle toffee-like structure that gives honeycomb candy its signature appearance and satisfying crunch. Once cooled and hardened, these flaky, golden shards are ready for their decadent chocolate bath.
The Many Names of This Delightful Treat
This fantastic candy is known by a delightful array of names across the globe, each hinting at its unique texture and appeal. You might hear it called hokey pokey in New Zealand, cinder toffee in the UK, honeycomb toffee, angel food candy, sea foam candy, or sponge toffee. Regardless of its moniker, one thing remains constant: it’s a candy lover’s dream. Its light, airy structure and sweet, caramel notes make it an ideal sweet treat, especially perfect for holiday celebrations or as a thoughtful homemade gift.
If you enjoy creating easy homemade candies, you’ll also adore my Peanut and Almond Brittle, just like Grandma used to make! For more nostalgic, old-fashioned candies perfect for filling your holiday tins, consider my Homemade Peppermint Patties and delicious Chocolate Rum Balls. They pair wonderfully with this crispy cinder toffee, offering a delightful variety for any festive gathering.
Essential Ingredients for Your Homemade Honeycomb Candy
This section provides detailed ingredient notes, offering insights into their roles and potential substitution options. For precise measurements, a comprehensive list of ingredients, and step-by-step instructions, please refer to the printable recipe card located at the end of this post.
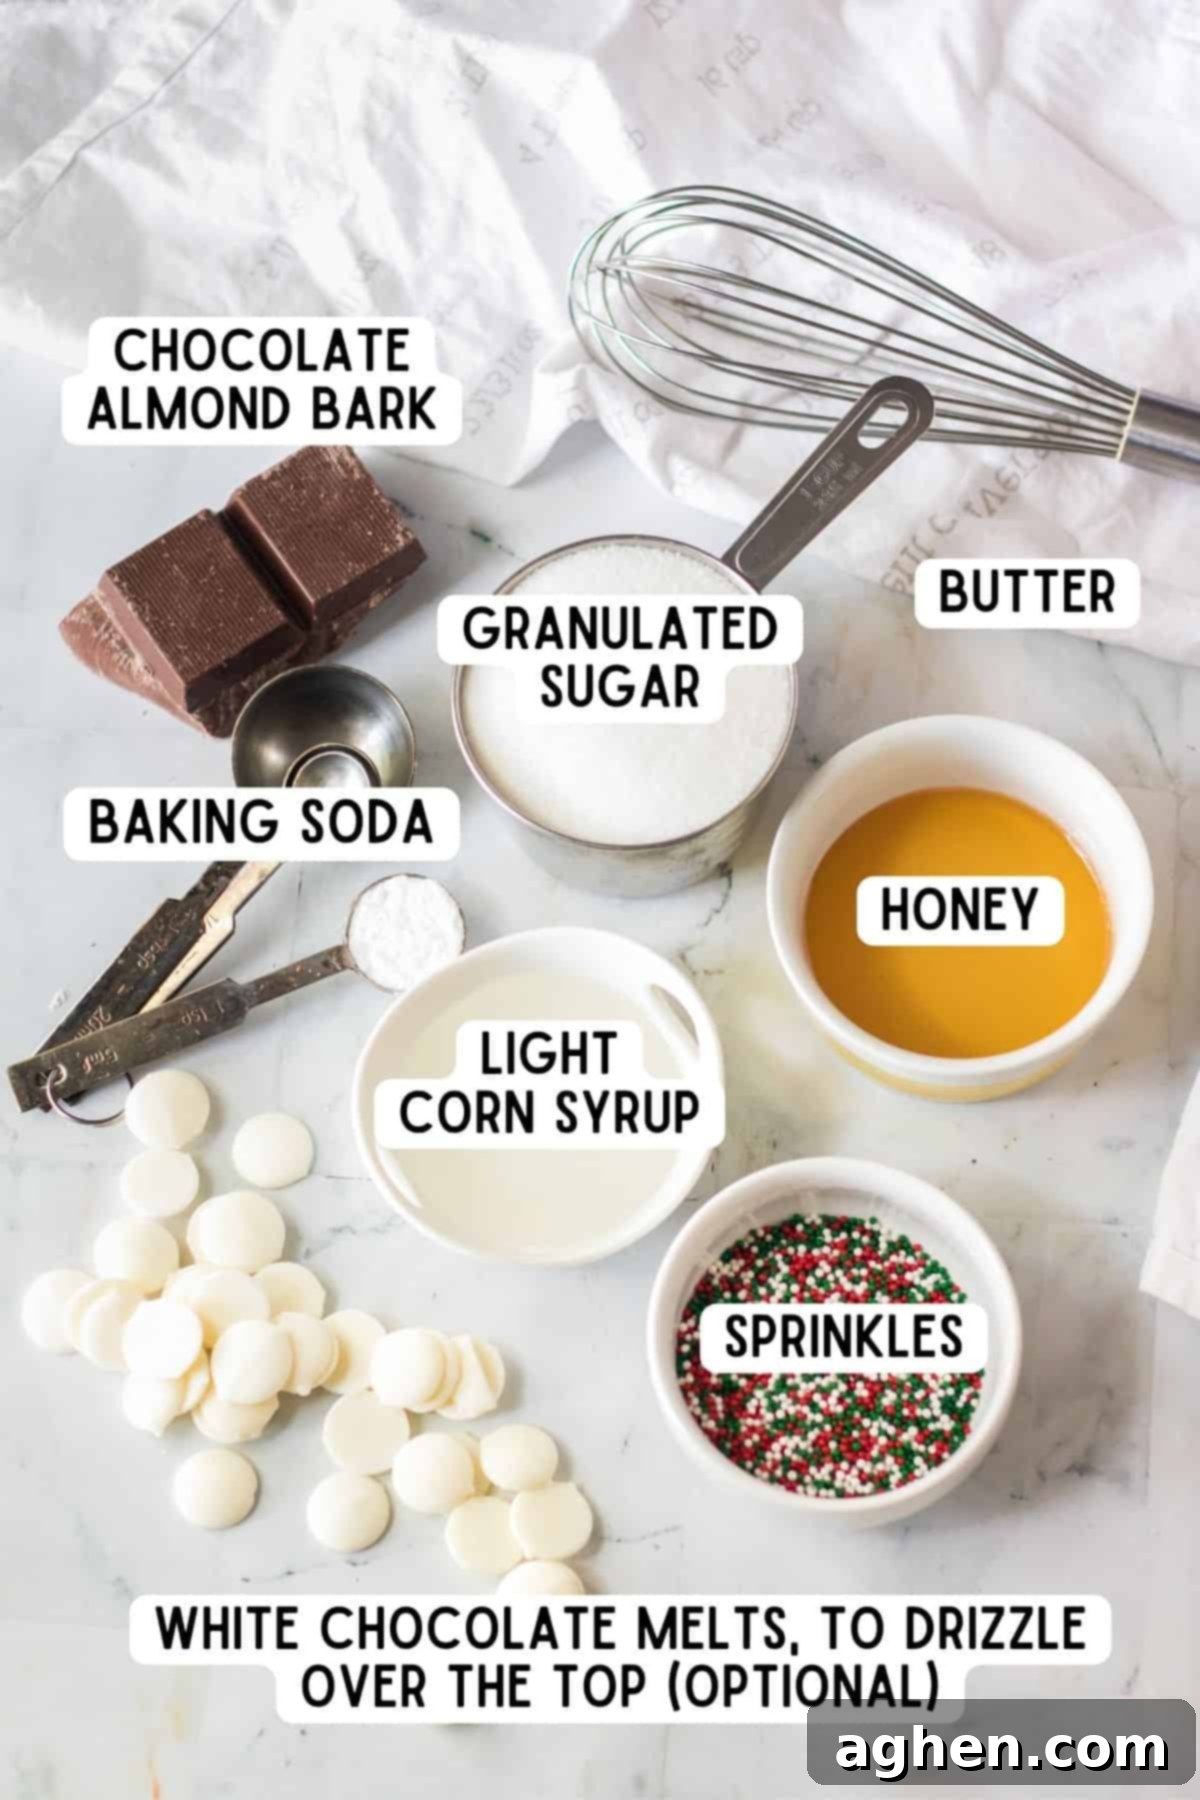
- Granulated Sugar — This is the foundation of our candy base, working in harmony with corn syrup, honey, and water to create a rich, caramel-like flavor and texture. Granulated sugar is preferred for its fine crystals and pure sweetness, which contributes to a clear, golden final product. While brown sugar might technically work, it hasn’t been tested in this specific recipe and could alter the color and possibly the setting consistency. Stick to granulated for guaranteed success.
- Water — Water plays a crucial role in dissolving the sugar and helping to create the initial syrup with corn syrup and honey. It acts as a solvent, ensuring the sugar melts evenly and preventing premature crystallization. As the candy cooks and reaches the correct temperature, the water will entirely evaporate, leaving behind a concentrated sugar mixture.
- Corn Syrup — Light corn syrup is generally recommended for its neutral flavor, which allows the honey’s natural sweetness to shine. However, if dark corn syrup is all you have on hand, it can be used, though it might impart a slightly deeper color and a subtle molasses flavor to the honeycomb. Corn syrup is vital for preventing the sugar from crystallizing, ensuring a smooth, glassy texture that breaks cleanly.
- Honey — The distinctive flavor of honeycomb candy often comes from, you guessed it, honey! Clover honey is a classic choice, offering a balanced sweetness that complements the other ingredients beautifully. However, don’t hesitate to experiment with different varietals; a robust wildflower honey or a delicate orange blossom honey could add intriguing nuances. If you prefer, or if honey is unavailable, you can substitute the entire amount with additional corn syrup, though the resulting candy will lack that authentic honey flavor profile.
- Baking Soda — This is truly where the magic happens and what gives honeycomb candy its unique, bubbly structure. When baking soda (sodium bicarbonate) is added to the hot sugar mixture, it quickly decomposes, releasing carbon dioxide gas. These gas bubbles get trapped within the rapidly cooling and solidifying sugar, creating the signature airy, porous texture. For the best results, ensure your baking soda is fresh and active – test a small amount with vinegar if you’re unsure of its potency.
- Chocolate Almond Bark or Chocolate Melts — For the luxurious coating, chocolate almond bark or high-quality chocolate melts are ideal. These products are specifically designed to melt smoothly and set up quickly without the need for tempering, making your dipping process much easier. You have a wide range of options here: classic milk chocolate, rich dark chocolate, semi-sweet, or even a vibrant white chocolate can be used to suit your taste and aesthetic preferences.
- Sprinkles and White Chocolate — These are entirely optional but highly encouraged, especially if you’re preparing this candy for a holiday party, a special occasion, or as a thoughtful gift. Sprinkles, whether festive holiday mixes or simple nonpareils, add a pop of color and a touch of whimsy. A drizzle of contrasting white chocolate can also create a beautiful visual effect and an extra layer of sweetness.
Essential Equipment You’ll Need for Perfect Honeycomb
To ensure a smooth and successful candy-making experience, gather your kitchen tools before you begin. Having everything ready will allow you to work quickly and efficiently, which is crucial for this recipe. You’ll need:
- 9×13 baking dish — This standard-sized baking dish provides the perfect surface area for your honeycomb to spread and cool to an ideal thickness.
- Parchment paper — Essential for easy release! Lining your baking dish with parchment paper prevents the sticky candy from adhering to the pan, allowing for effortless removal and cleanup.
- Heavy-bottomed pot — A heavy-bottomed pot is critical for even heat distribution, preventing the sugar mixture from scorching on the bottom while the rest cooks. This consistency is key for perfect caramelization.
- Wooden spoon — Ideal for initial stirring of the ingredients, a wooden spoon won’t scratch your pot and is sturdy enough for the thick syrup.
- Whisk — A whisk is indispensable for incorporating the baking soda quickly and evenly, ensuring the mixture foams up rapidly and uniformly to create that signature honeycomb texture.
- Candy thermometer — A reliable candy thermometer is your best friend in this recipe. It takes all the guesswork out of reaching the exact “hard crack” stage (300°F/149°C), which is crucial for crispy, rather than chewy, honeycomb.
- Airtight container for storage — Once your delicious candy is made, an airtight container is essential for preserving its crispiness and freshness, protecting it from moisture in the air.
How to Make Chocolate Covered Honeycomb: Step-by-Step Guide
This section provides a visual guide, demonstrating how to make this delightful recipe with step-by-step photos and detailed instructions. For the complete printable recipe with exact measurements, please refer to the recipe card found at the bottom of this post. These steps walk you through each critical phase of creating perfectly crispy honeycomb.
Step 1: Prepare Your Baking Dish. Line a 9×13 inch baking dish generously with parchment paper. Ensure that there’s enough paper hanging over the sides to create “handles” – these will be incredibly useful for lifting the hardened candy out of the pan later. If parchment paper isn’t available, tin foil sprayed thoroughly with a neutral cooking oil can work as an alternative, but parchment is highly recommended for its non-stick properties.
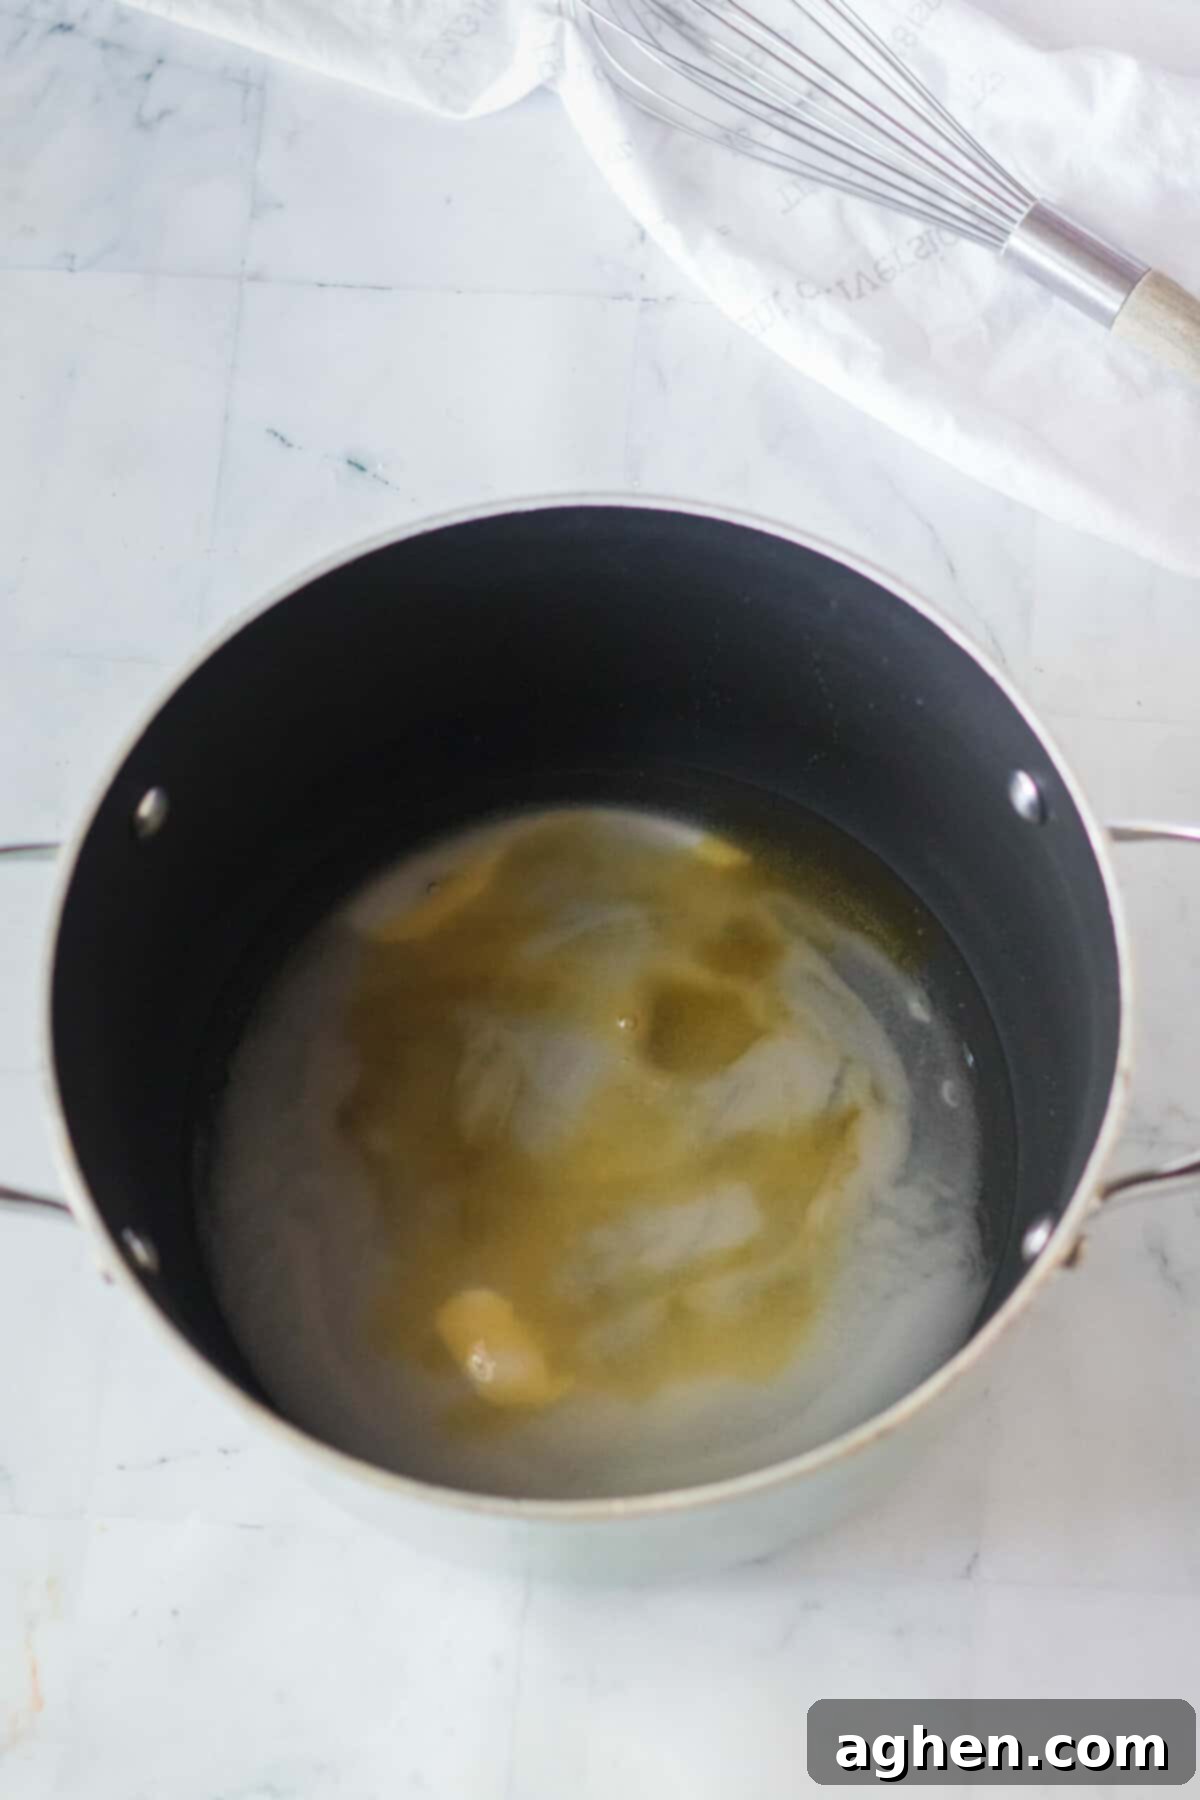
Step 2: Cook the Sugar Mixture to Perfection. In your chosen heavy-bottomed pot, combine the granulated sugar, water, corn syrup, and honey. Stir these ingredients gently just until they are combined. Place the pot over medium-high heat. Your goal is to cook this sugar mixture until it reaches precisely the “hard crack” stage, which is indicated by a candy thermometer reading 300°F (149°C). It is absolutely crucial not to stir the sugar mixture at all while it’s heating up and coming to temperature; stirring can cause sugar crystals to form, leading to a grainy candy. The mixture will transition to a beautiful light caramel color when it’s ready, signaling it’s time for the next step.
Step 3: Activate the Honeycomb Magic. As soon as your sugar mixture hits the 300°F mark and achieves that light caramel hue, immediately remove the pot from the heat source. This timing is critical. Now, quickly and vigorously stir in the baking soda. Continue stirring just until it’s fully combined and watch in amazement as the mixture rapidly doubles or even triples in volume, transforming into a light, foamy, aerated substance. Be careful not to over-stir at this stage, as too much agitation can cause the bubbles to collapse.
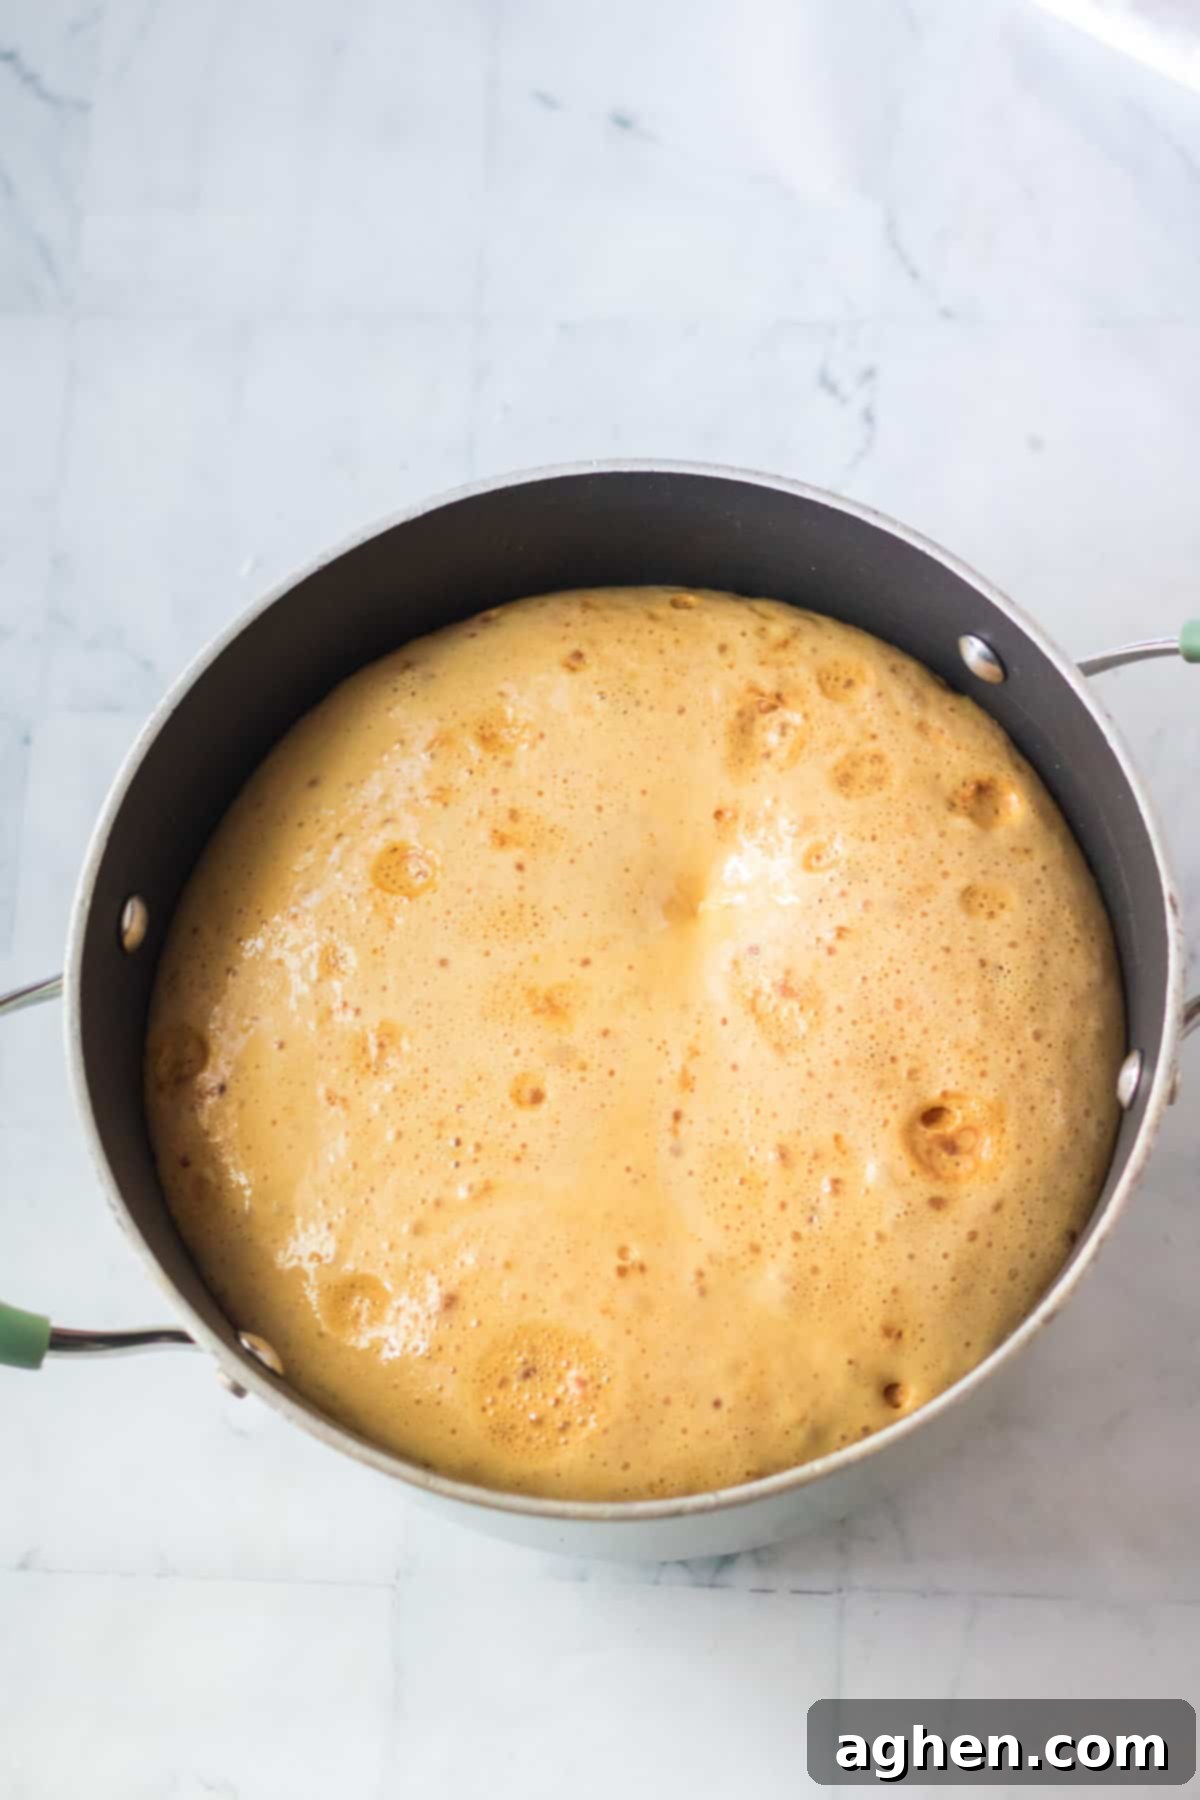
Step 4: Pour and Let It Set. Without delay, pour the incredibly foamy mixture into your prepared baking dish lined with parchment paper. Resist the urge to spread or manipulate the mixture. Simply pour it and leave it alone; the baking soda will continue its work, setting the bubbles in place as it cools. Disturbing it now can flatten the delicate structure you’ve just created.
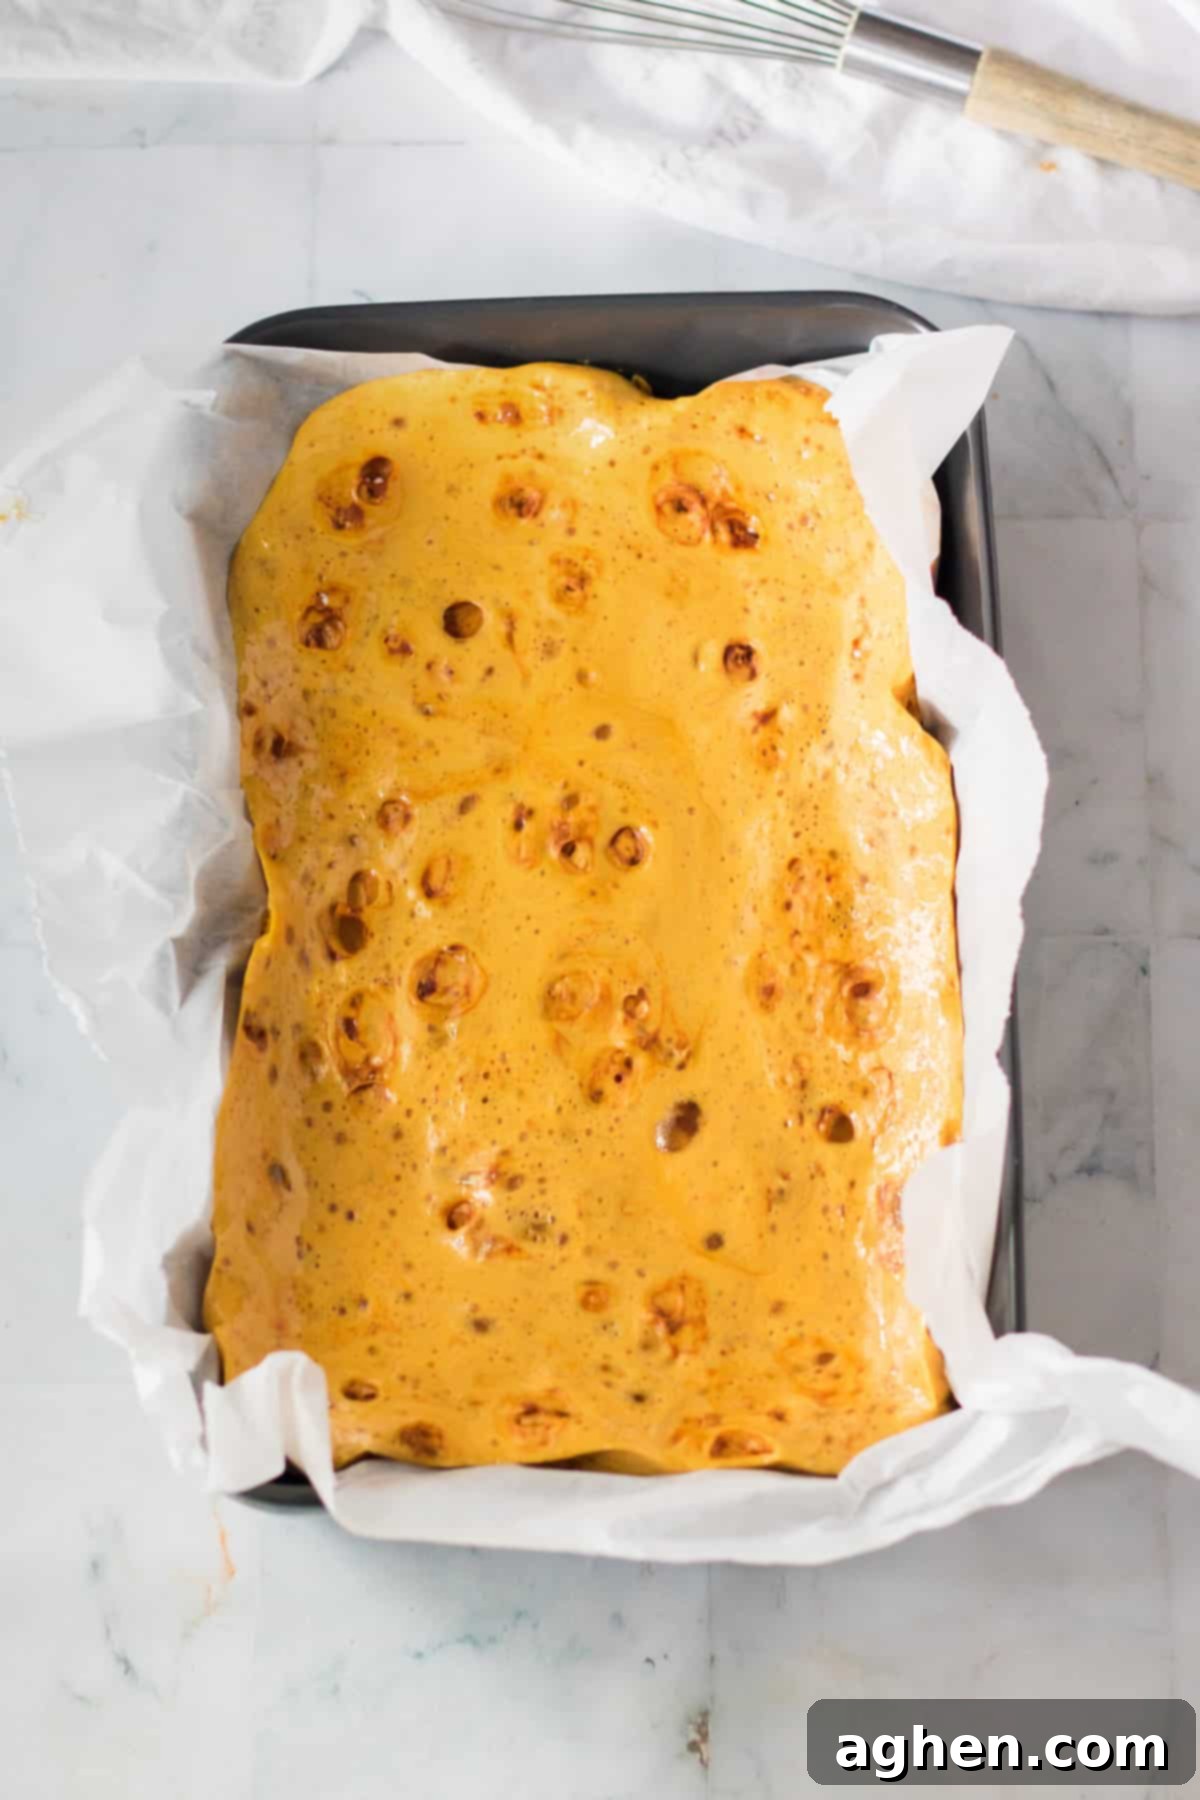
Step 5: Cool Completely. Allow the honeycomb candy to cool undisturbed at room temperature until it is completely firm and brittle. This process typically takes about an hour, but it may vary depending on your kitchen’s temperature and humidity. Do not try to rush this by refrigerating, as it can introduce moisture and lead to a chewy texture.
Step 6: Break into Pieces. Once thoroughly cooled, use the parchment paper handles to lift the entire slab of honeycomb out of the baking pan. You can then break it into irregular, bite-sized pieces using your hands, a sharp knife (be careful!), or by gently tapping it against a clean countertop. The natural brittle quality of the candy will make it easy to shatter into satisfying shards.
Step 7: Melt the Chocolate Coating. In a microwave-safe bowl, melt your chocolate almond bark or chosen chocolate melts. Heat in short bursts, typically 30-second intervals, stirring thoroughly after each interval. Continue this process until the chocolate is completely smooth, fluid, and free of any lumps. Be careful not to overheat, as this can cause the chocolate to seize.
Step 8: Dip the Honeycomb. Working quickly, use two forks to dip each individual piece of honeycomb candy into the melted chocolate. Allow any excess chocolate to drip off by gently tapping the fork against the side of the bowl. A thin, even coating is usually best for a perfect snap.
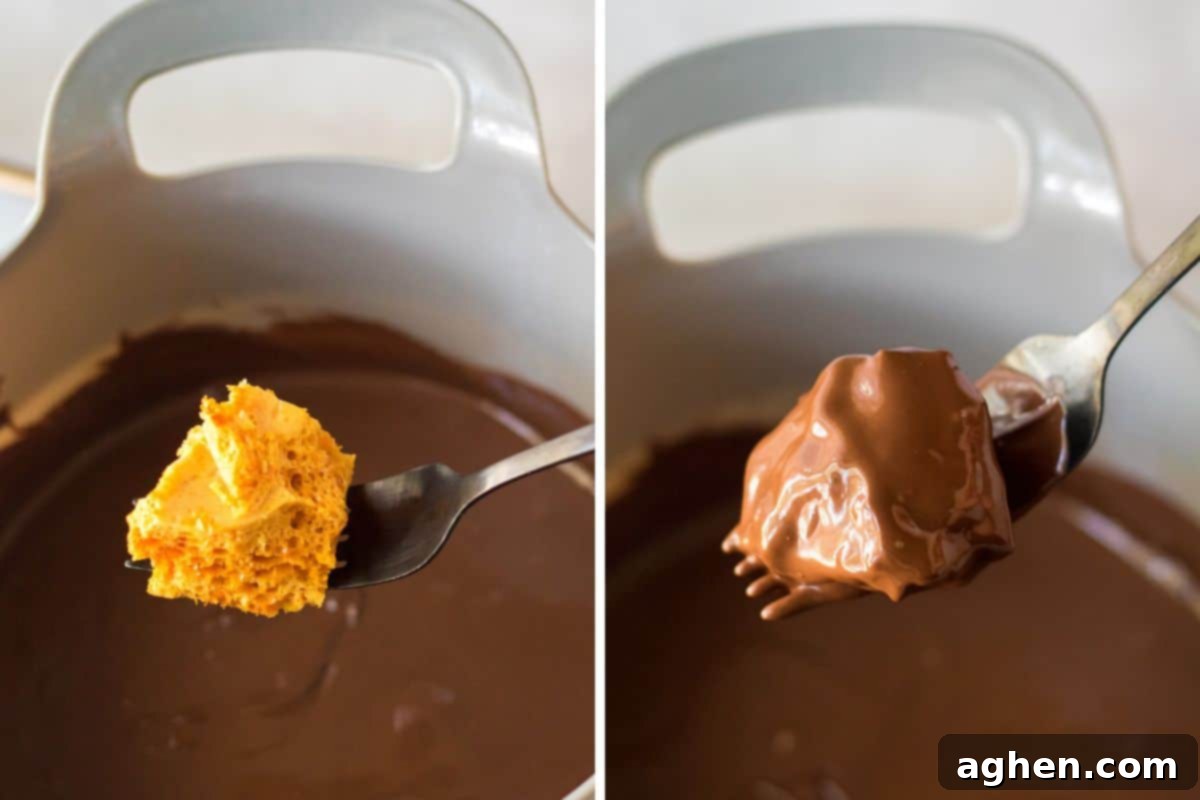
Step 9: Decorate and Set. Place the chocolate-dipped candy pieces back onto your parchment-lined baking dish. If you’re using sprinkles, apply them immediately while the chocolate is still wet, ensuring they adhere. Alternatively, if you prefer a white chocolate drizzle, allow the main chocolate coating to set slightly before adding your decorative drizzle for a beautiful contrasting effect.
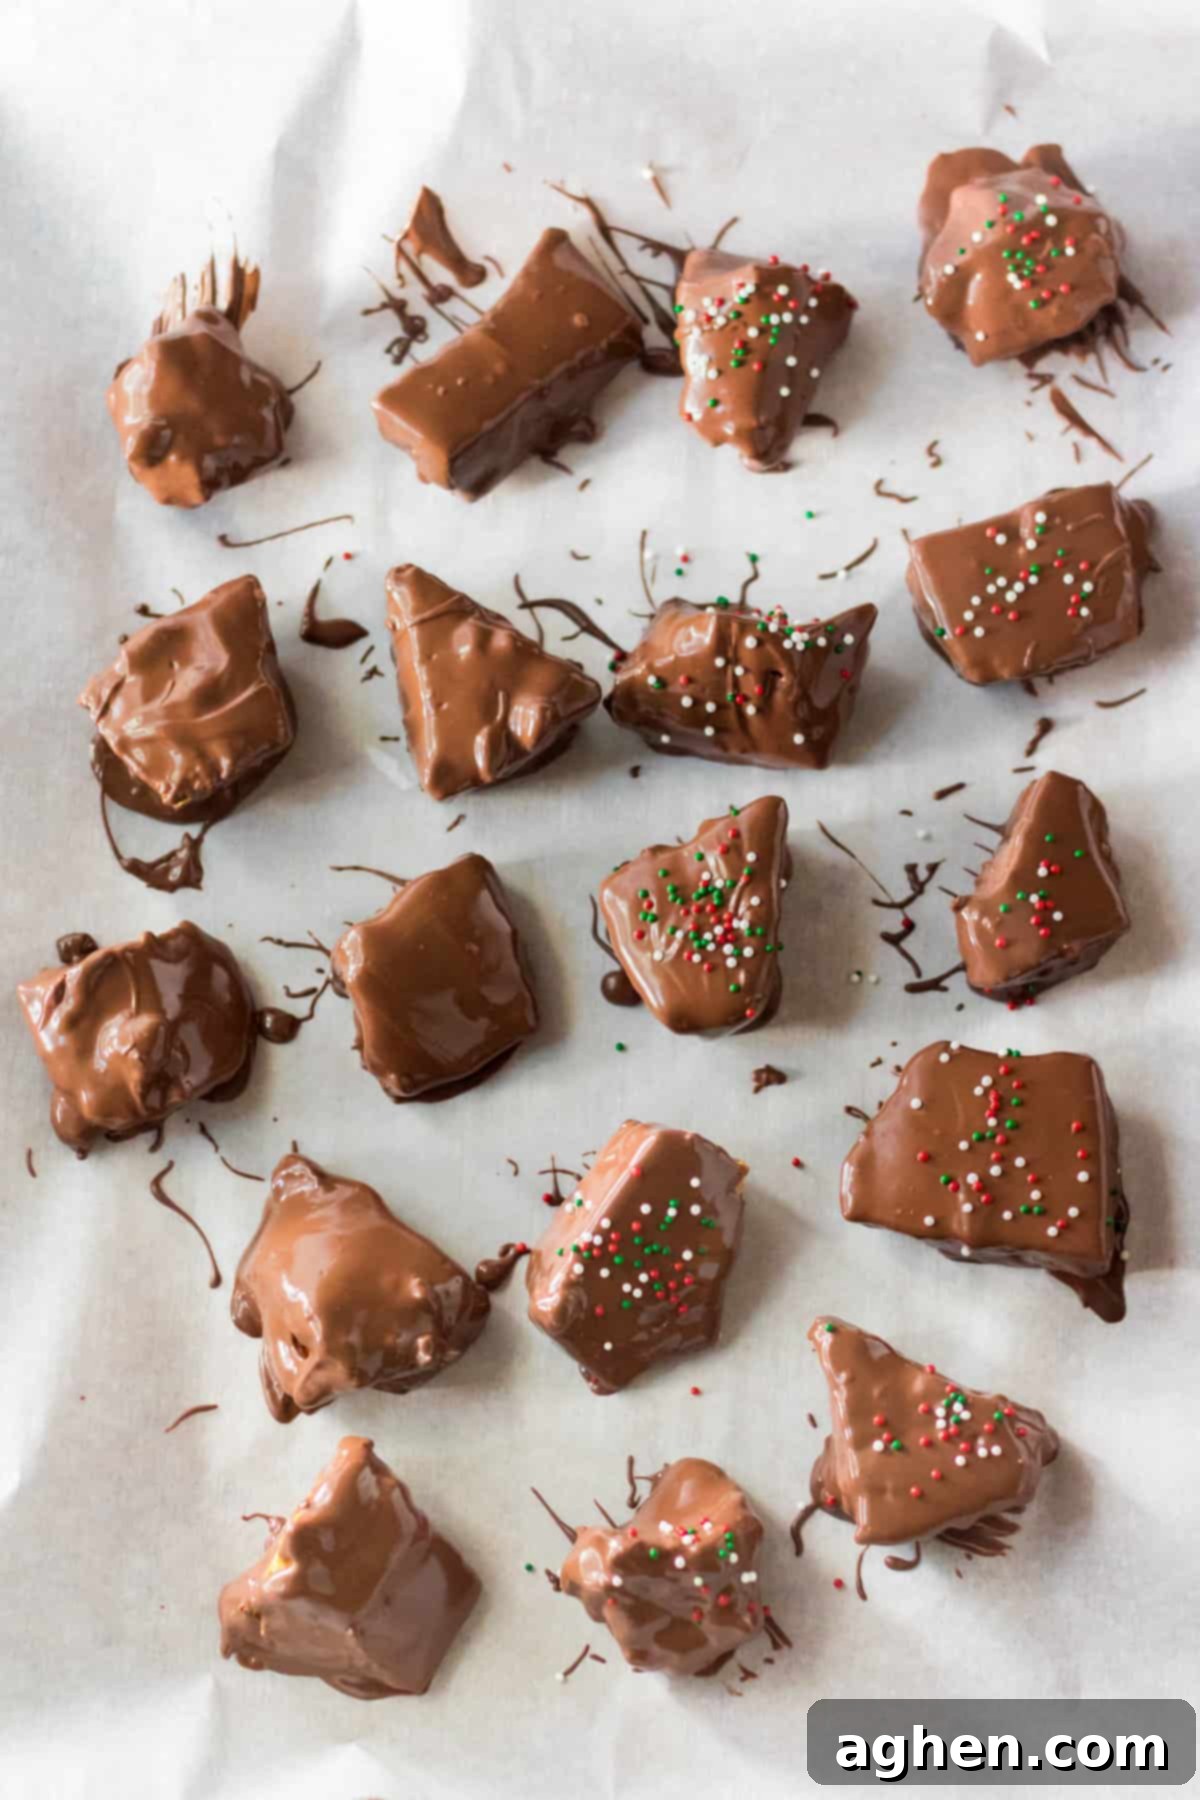
Step 10: Final Setting. Let the chocolate coating cool and set completely. This can be done at room temperature, which helps maintain the crisp texture of the honeycomb. Once fully hardened, your chocolate covered honeycomb candy is ready to be served or stored in an airtight container to preserve its delightful crunch.
Storage and Preserving Freshness
Proper storage is key to maintaining the delightful crispness of your homemade honeycomb candy. You can store this delicious treat in an airtight container at room temperature for up to 5 days. However, it’s important to note that honeycomb toffee is truly at its best when fresh. While it will last for several days, its optimal texture and flavor are most pronounced within the first 1-2 days after preparation.
The chocolate coating plays a vital role in preserving the candy’s quality. By encasing the honeycomb in chocolate, we create a barrier that helps it remain light and crispy for a longer duration. Without this protective layer, honeycomb is much more susceptible to absorbing moisture from the surrounding environment, which can quickly turn it chewy and sticky. Therefore, it’s paramount to keep moisture out. Never leave the candy exposed to the open air. Always store it in a plastic baggie with as much air squeezed out as possible, or in a tightly sealed airtight container. Ensuring a perfect seal will significantly extend its shelf life and keep it wonderfully crunchy.

Honeycomb Recipe Tips and Tricks for Success
Crafting perfect honeycomb candy requires a bit of precision and speed, but with these tips, you’ll achieve delicious results every time:
- Preparation is Key: Before you even turn on the stove, ensure all your ingredients are measured and your equipment is within easy reach (this is often called “mise en place”). This recipe moves quickly, especially after removing it from the heat, so you won’t have time to search for your whisk or measure baking soda during those crucial moments.
- Control the Heat: Resist the temptation to crank up the heat to speed up the cooking process. A steady medium-high heat is ideal. Cooking too fast increases the risk of scorching the sugar, leading to a bitter taste and an undesirable dark color. Patience here pays off in a beautifully golden and delicious candy.
- Whip it Good: When it’s time to add the baking soda, use a whisk. The whisk’s many tines help to quickly and evenly incorporate the baking soda throughout the hot sugar mixture, causing it to foam up rapidly and efficiently. This creates the maximum number of air bubbles for that iconic honeycomb structure.
- Batch Control: If you’re planning to make a large quantity of this candy, perhaps for holiday gift-giving, it’s highly recommended to prepare it in separate, smaller batches. The mixture expands significantly when the baking soda is added, making a double batch difficult to manage and potentially overflowing your pot or baking dish.
- Prevent Sticking: While parchment paper is generally non-stick, some batches of honeycomb or seafoam candy can occasionally cling stubbornly. To be absolutely certain of an easy release, you can lightly spray your parchment paper with a neutral cooking oil before pouring in the mixture.
- Customize Thickness: The thickness of your honeycomb is determined by the size of your baking pan. For a thicker, chunkier honeycomb with more substantial air pockets, simply use a slightly smaller pan, such as an 8×8 inch square dish, rather than a 9×13.
- Check Baking Soda Freshness: Old baking soda loses its potency, which means fewer bubbles and a denser honeycomb. To test, drop half a teaspoon into a small bowl of vinegar; it should bubble vigorously. If not, replace it.
- Avoid Humidity: Honeycomb candy is highly susceptible to moisture. Try to make it on a dry day, if possible, as high humidity can cause the candy to become sticky and soft, losing its crisp texture.
Additions and Variations to Customize Your Honeycomb Candy
While classic chocolate covered honeycomb is incredibly delicious, there are many ways to customize this recipe to suit your preferences or occasion:
- Go Au Naturel: Honeycomb is wonderfully flavorful on its own. If you prefer a simpler, less rich treat, feel free to skip the chocolate coating entirely. The pure honey-caramel flavor and crisp texture are perfectly delightful without any additions.
- Explore Chocolate Varieties: Don’t limit yourself to just one type of chocolate! Experiment with different cocoa percentages and flavor profiles. Milk chocolate offers a sweeter, creamier finish, semi-sweet provides a balanced sweetness, dark chocolate delivers a richer, more intense cocoa experience, and white chocolate can offer a sweet, milky contrast, especially when drizzled or used as a full coating.
- Embrace Sweet and Salty: For fans of the ever-popular salted caramel flavor profile, a sprinkle of coarse sea salt over the wet chocolate coating before it sets is a game-changer. The salt crystals provide a delightful counterpoint to the sweetness of the chocolate and honey, elevating the overall taste experience.
- Make it Vegan: Adapting this recipe for a vegan diet is straightforward. Simply replace the honey with an equal amount of golden syrup or dark corn syrup. Ensure that the chocolate you use for dipping is certified vegan, as many standard chocolate melts contain dairy. All other ingredients in the base candy are typically plant-based.
- Add Spices: For a warming twist, stir in a pinch of ground cinnamon or a tiny amount of cayenne pepper (for a subtle kick) into the sugar mixture just before removing it from the heat.
- Nutty Crunch: After dipping in chocolate, before it sets, sprinkle with finely chopped nuts like almonds, pecans, or pistachios for an added layer of flavor and crunch.
Chocolate Covered Honeycomb Candy Recipe FAQ
No, despite its name and appearance, this candy is not made with actual bee honeycomb. The term “honeycomb” refers to its striking resemblance to a real honeycomb structure, characterized by the numerous tiny holes created by the carbon dioxide gas released from the baking soda reacting with the hot sugar syrup. It’s an illusion created by clever chemistry!
This delicious homemade candy requires a surprisingly short list of very common ingredients. The core components include granulated sugar, water, corn syrup, and honey to form the base syrup, with baking soda as the crucial leavening agent. For the outer layer, you’ll need chocolate almond bark or your preferred chocolate melts. Sprinkles or white chocolate for drizzling are optional but add a festive touch.
While very similar and sometimes used interchangeably in family recipes, there are subtle distinctions. Honeycomb candy typically features larger, more defined holes and a crispier structure. It also traditionally includes honey as a key ingredient, imparting a distinct flavor. Sponge candy, on the other hand, is often made solely with corn syrup and may have a finer, more uniform aeration. Stefanelli’s Candies offers a more in-depth comparison of these two delicious treats.
The characteristic airy texture and bubbles in honeycomb candy are a result of a chemical reaction involving baking soda. When baking soda is added to the superheated sugar mixture, the heat causes it to rapidly decompose, releasing carbon dioxide gas. This gas gets trapped within the viscous sugar as it begins to set, creating numerous pockets and channels that give the candy its signature porous, honeycomb-like appearance.
The most common reason for chewy honeycomb is undercooking the sugar mixture. For a truly crisp, brittle texture, the syrup must reach the “hard crack” stage, which is precisely 300°F (149°C) on a reliable candy thermometer. Removing it from the heat too early means there’s still too much moisture in the syrup, preventing it from hardening properly. Investing in a good candy thermometer takes all the guesswork out of achieving the perfect consistency.
No, it’s generally best to avoid refrigerating honeycomb candy, both during its initial cooling phase and after dipping in chocolate. Rapid cooling in a fridge can introduce moisture, which is the enemy of crisp honeycomb, leading to a sticky or chewy texture. Simply allow it to cool completely at room temperature for about an hour before breaking it into pieces. After dipping in chocolate, room temperature setting also helps the chocolate maintain its shine and proper snap. Store the finished candy in an airtight container at room temperature.
While a candy thermometer is highly recommended for accuracy, you can still make honeycomb without one. The key is to watch the color of the syrup carefully. Cook the mixture over medium-high heat until it turns a light, golden caramel color, similar to a penny. Be sure to remove it from the heat immediately, as it can burn quickly. It’s a bit more challenging to get it perfect, but definitely achievable with a keen eye.
More Festive Christmas Candy Recipes
- Crockpot Peanut Clusters
- Peanut Butter Fritos Candy
- Reindeer Bark
- English Toffee Recipe
- Martha Washington Candy with Cherries
Still want more? Check out all 50+ of my homemade candy recipes!
Chocolate Covered Honeycomb Candy
Author: Jaclyn
Ingredients
- 1 1/2 cups granulated sugar
- 1/2 cup water
- 1/3 cup light corn syrup
- 3 Tablespoons honey
- 4 teaspoons baking soda
- 1 pound chocolate almond bark or chocolate melts
- white chocolate melts optional
- sprinkles optional
Instructions
-
Line a 9×13 baking dish with parchment paper. Leave some of the paper hanging over the sides of the pan to make it easier to remove. Set the pan aside.
-
Add the sugar, water, corn syrup, and honey to a pot with a heavy bottom. Stir the ingredients gently to combine. Cook over medium-high heat until a candy thermometer reads 300°F and the candy is light caramel in color. Do NOT stir while it is cooking.
-
Remove the pot from the heat and immediately stir in the baking soda. Stir quickly until just combined, but do NOT over-stir.
-
Immediately pour the candy mixture into the lined baking dish. Do not spread the mixture; just let the baking soda do its magic.
-
Let the candy cool completely — about 1 hour.
-
Once the candy is cool, lift it out of the pan using the overhanging parchment paper. Break it into small pieces using your hands, a sharp knife, or by tapping it on the countertop.
-
Melt the almond bark in the microwave in 30-second intervals. Stir after each interval until the chocolate is completely smooth and melted.
-
Work quickly to dip each piece of honeycomb candy into the chocolate. Tap off the excess.
-
Place the dipped candy back onto the lined baking dish and immediately top with sprinkles before the chocolate hardens. Or instead of sprinkles, top with a drizzle of white chocolate for contrast.
-
Let the coated candies set completely before serving or storing in an airtight container.
Notes
- Store honeycomb candy in an airtight container for up to 5 days.
- If you don’t have a candy thermometer, pull the sugar mixture off the heat when it’s a light caramel color. Don’t let it get dark in color.
Nutrition

Did You Make This Recipe?
Share it with me on Instagram @crayonsandcravings and follow on Pinterest @crayonsandcravings for even more!
Pin Recipe
Leave A Review
