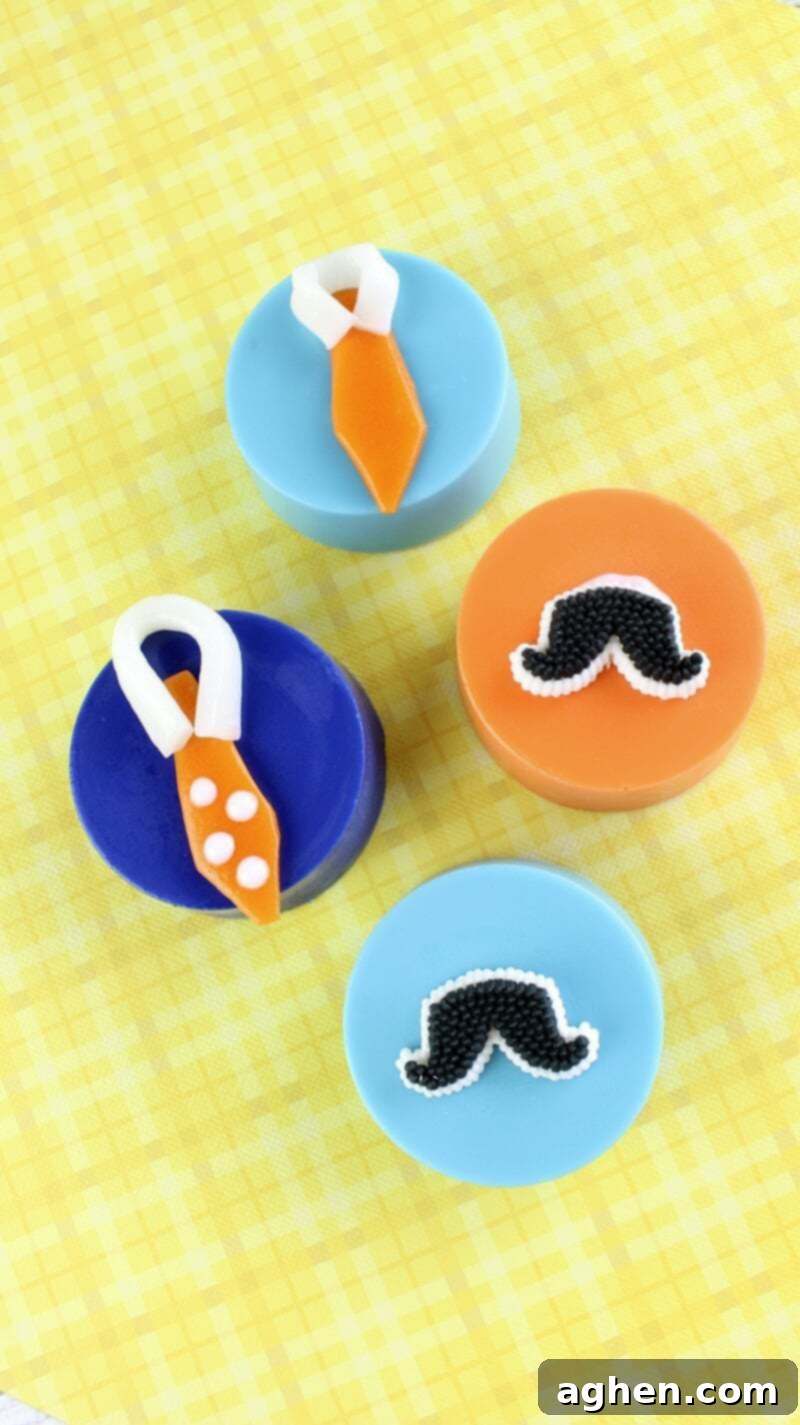
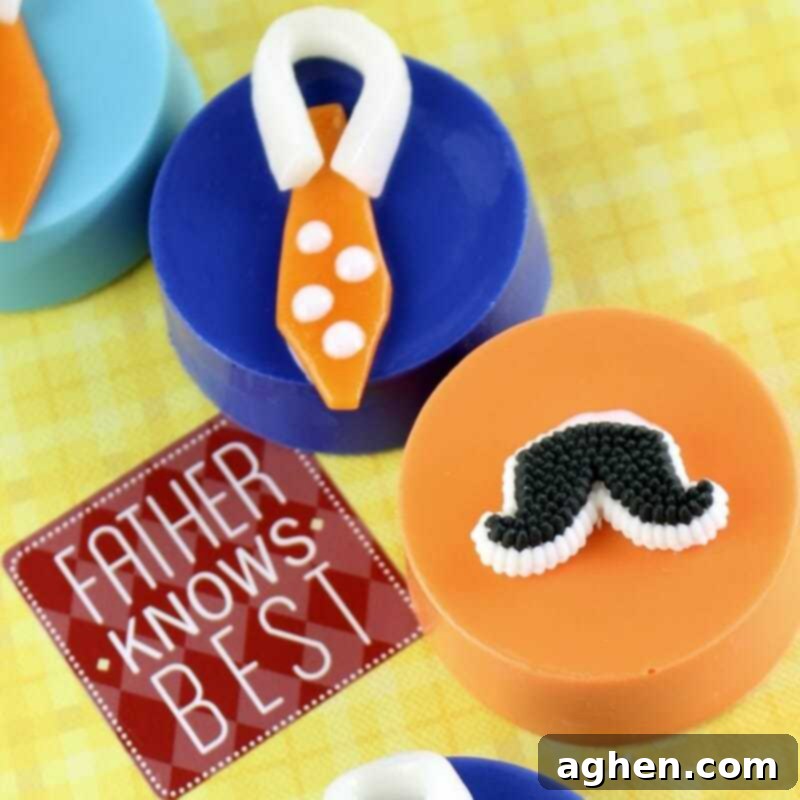
DIY Father’s Day Chocolate Covered Oreos: The Ultimate No-Bake Treat for Dad
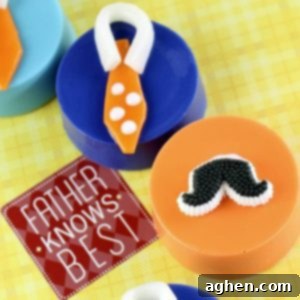
This Father’s Day, show Dad some extra love with a batch of homemade, delightful treats that are as fun to make as they are to eat! These Father’s Day Chocolate Covered Oreos, creatively decorated with playful mustaches and smart ties, are the perfect no-bake dessert. They offer a wonderfully easy way to involve the whole family in preparing a special, personalized gift that will surely bring a smile to his face.
There’s something undeniably charming about a homemade gift, especially when it’s a delicious, edible creation. And when that creation involves the beloved Oreo cookie, dipped in rich, vibrant chocolate, you know it’s going to be a hit. These chocolate-covered delights are not just incredibly tasty; they’re also incredibly simple to assemble, requiring no oven and minimal prep time. Get ready to create a memorable treat that celebrates the amazing dads in your life!
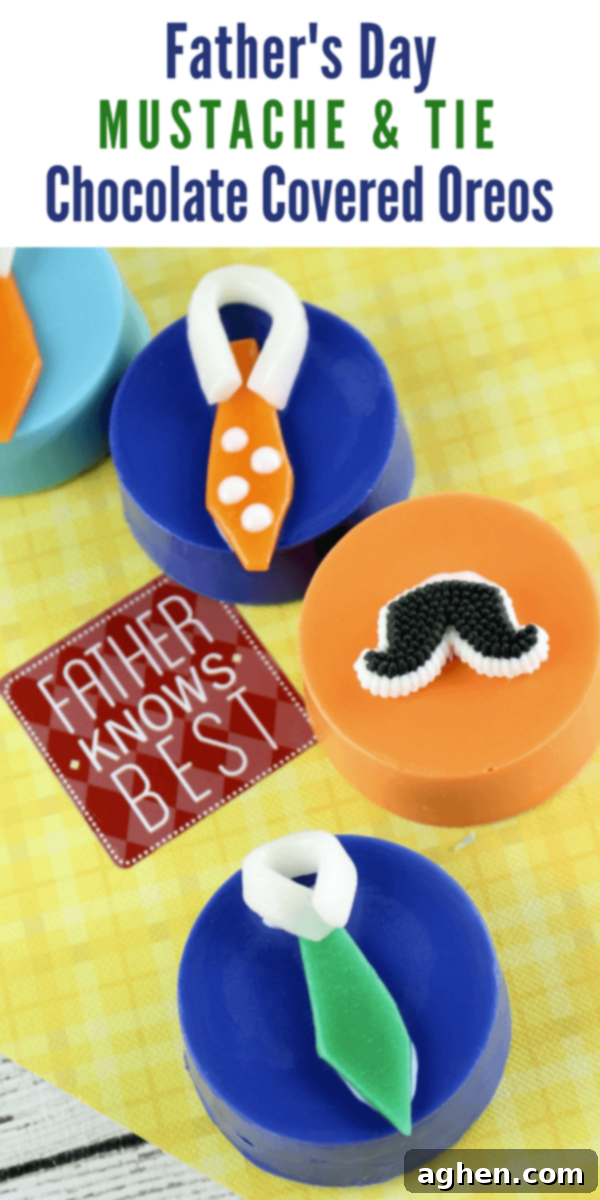
These charming Father’s Day Chocolate Covered Oreos are guaranteed to be a favorite not just for Dad, but for the entire family. Who can resist the satisfying crunch of an Oreo cookie enveloped in a smooth, sweet layer of chocolate? They are the quintessential indulgent treat, and the best part is their simplicity – absolutely no baking required!
If you’re a true OREO fan and looking for more delightful recipes, don’t miss our incredible OREO pudding poke cake for another show-stopping dessert idea!
Ingredients for Your Festive Father’s Day Oreos
This section provides detailed notes on each ingredient, including potential substitution options and helpful tips for sourcing the best components. For all precise measurements, a complete list of ingredients, and comprehensive instructions, please refer to the printable recipe card located at the very end of this post.
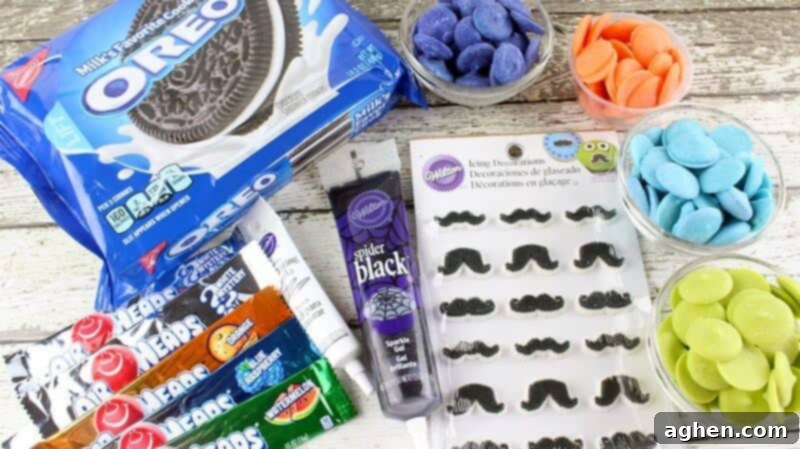
Below you’ll find a comprehensive list of all the essential ingredients and special supplies you’ll need to create these adorable and delicious Father’s Day Chocolate Covered Oreos. For your convenience and easy shopping, we’ve included direct links to purchase many of these ingredients on Amazon.
- Oreo cookies: You’ll need 12 of your favorite original Oreo cookies. These classic cookies provide the perfect chocolatey base for our festive treats. While double-stuffed Oreos can be used, regular ones fit better in standard molds.
- Chocolate Covered Oreo Molds: These specialized molds are crucial for creating perfectly shaped chocolate-covered Oreos. They ensure a smooth, professional finish. If you don’t have these, you can try dipping the Oreos by hand using a fork, but the molds make the process much easier and cleaner.
- Candy Mustaches: We utilized Wilton Mustache Icing Decorations, which are pre-made and super convenient for quick decorating. If these specific ones are hard to find, these Wilton candy mustaches would also work wonderfully, or you could even pipe small mustaches using black icing.
- Candy Melts: For vibrant colors and easy melting, we recommend using Wilton Candy Melts. We chose Royal Blue, Blue, Vibrant Green, and Orange to create a festive and masculine palette. Wilton Candy Melts are formulated to melt smoothly and set firmly, providing a beautiful coating. You’ll need about 1/2 cup of each color to make 3 cookies per color.
- White Decorating Icing: A tube of white icing with a fine tip is ideal for easy application when adhering decorations and adding fine details. This helps secure the mustaches and ties onto the chocolate-covered Oreos.
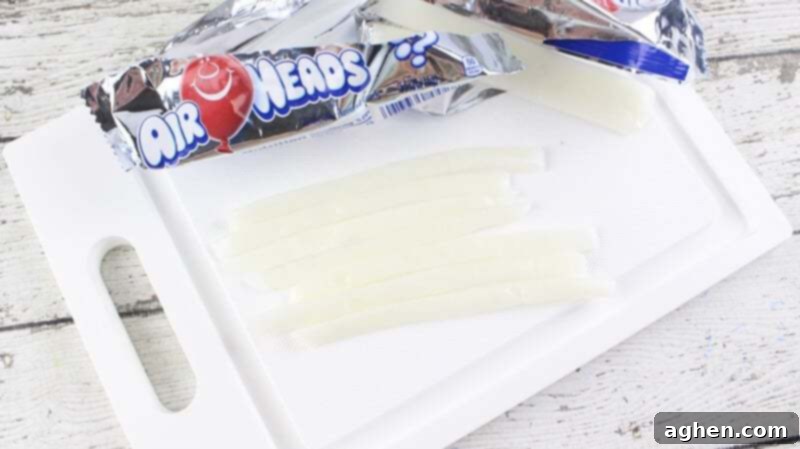
- Airheads: Make sure to pick up full-size Airheads, not the mini versions, as you’ll need enough surface area to cut out the tie shapes. We used one each of white, green, and orange Airheads for a fun variety of tie colors. These candies are pliable and easy to cut into desired shapes.
Step-by-Step: Crafting Your Father’s Day Chocolate-Covered Oreos
This section walks you through the entire process of making these delightful treats with clear, step-by-step photos and detailed instructions. For the complete printable recipe, including exact ingredient quantities and a quick overview, please refer to the recipe card found at the end of this post.
Preparing the Chocolate Layers
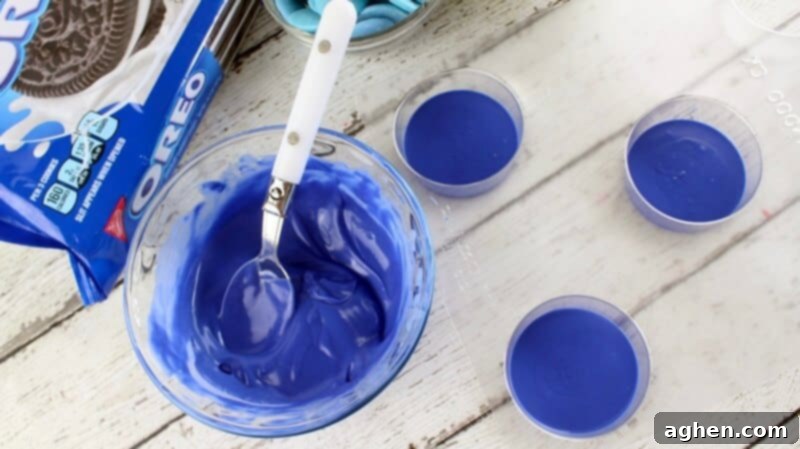
- Melt the Candy Melts: Begin by taking your royal blue candy melts. Place them in a microwave-safe bowl. Microwave on high for 45 seconds. After this initial heating, remove the bowl and stir the melts thoroughly until they are completely smooth and free of any lumps. If needed, microwave for additional 15-second intervals, stirring after each, until fully melted. Be careful not to overheat, as this can cause the chocolate to seize.
- Fill the Molds: Carefully pour about 2 tablespoons of the melted royal blue chocolate into three of your chocolate cookie molds. Ensure the bottom of each mold is evenly coated. Gently tap the mold on your countertop a few times to release any trapped air bubbles, which helps create a smooth surface.
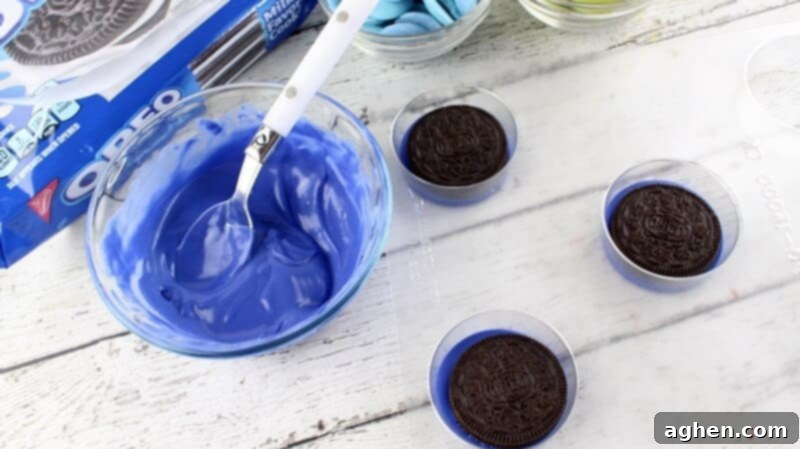
- Add the Oreos: Place one Oreo cookie on top of the melted chocolate in each of the three molds. Press down very gently to ensure the cookie is nestled into the chocolate, but do not submerge it completely.
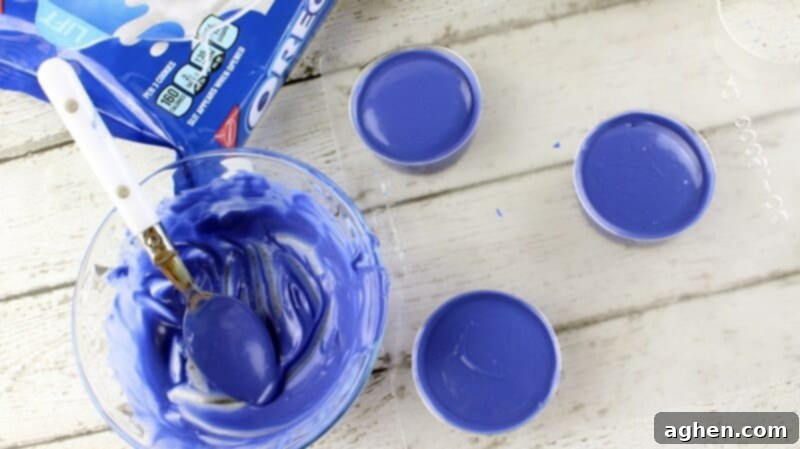
- Cover with Chocolate: Spoon additional melted royal blue chocolate on top of each cookie, filling the mold completely up to the top edge. Use a small spatula or the back of a spoon to spread the chocolate evenly, making sure the entire Oreo is covered. Tap the mold again to smooth the top surface and eliminate any remaining air bubbles.
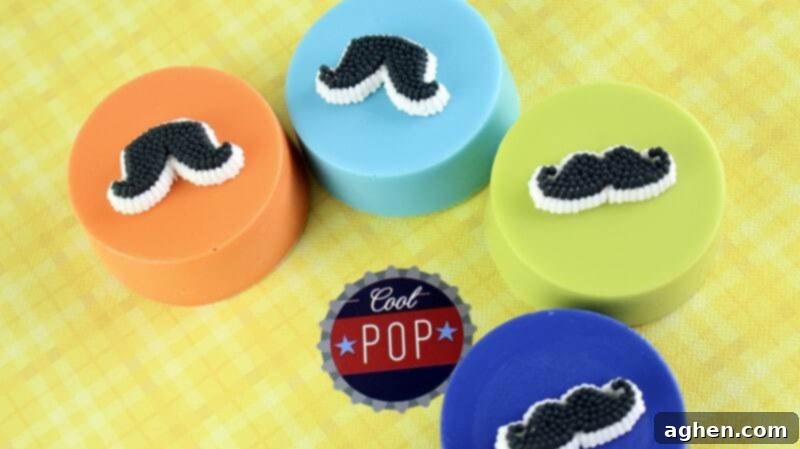
- Repeat for All Colors: Repeat the previous steps (melting, pouring, placing Oreos, covering) with the light blue, orange, and vibrant green candy melts, creating a colorful assortment of chocolate-covered Oreos.
- Chill to Set: Once all the molds are filled, carefully transfer them to the refrigerator. Chill for at least 30 minutes, or until the chocolate is completely set and firm to the touch. This chilling process is essential for easy demolding and prevents the chocolate from becoming sticky.
- Demold the Cookies: Line a cookie sheet with wax paper or parchment paper. Once the chocolate is fully set, gently pop each chilled cookie out of its mold. They should release easily if properly chilled. Place the demolded chocolate-covered Oreos onto the lined cookie sheet.
Decorating with Mustaches and Ties
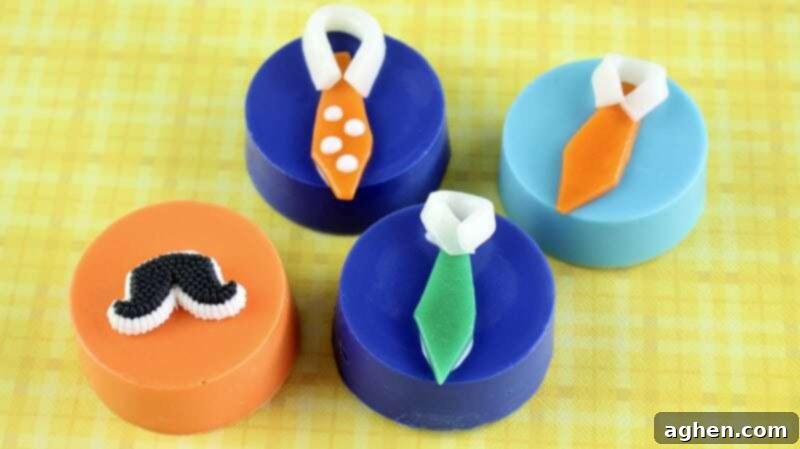
- Add the Mustaches: Take six of your freshly made chocolate-covered Oreos. Apply a small dab of white decorating icing gel to the back of six candy mustaches. Carefully place each mustache in the middle of these cookies, pressing gently to secure. These will form the “mustache” themed treats.
- Prepare the Airhead Ties: To create the adorable ties, unwrap your white Airheads candy. Using kitchen scissors or a sharp knife (with adult supervision if kids are helping), cut out six strips, each approximately 1 1/2 inches long and about 1/2 inch wide, from the white Airhead. These will serve as the shirt collars.
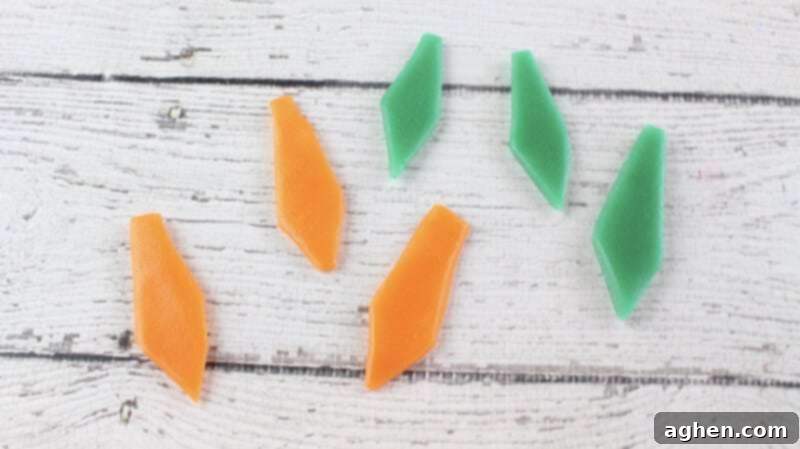
- Cut Tie Shapes: Now, unwrap your green and orange Airheads. Use scissors to cut out six small tie shapes from these colored Airheads. You can freehand these or use a small tie-shaped cookie cutter if you have one. Aim for varied colors to make the ties stand out.
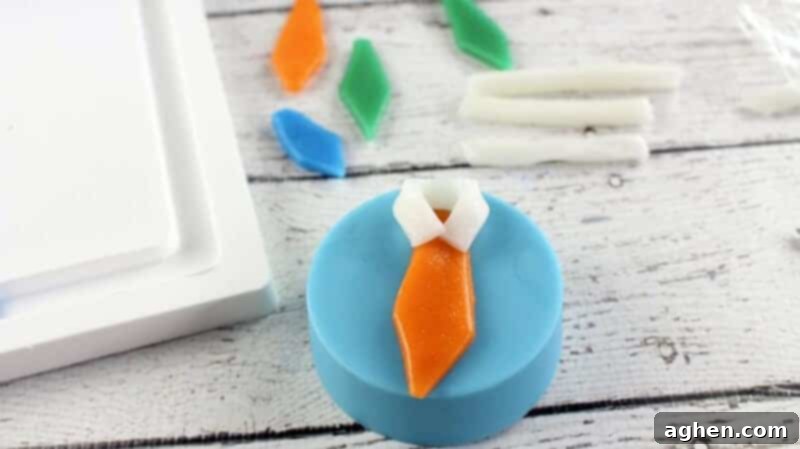
- Assemble Collars and Ties: Take the white Airhead strips you cut earlier. Fold the ends of each strip forward and slightly towards the center to mimic the look of a shirt collar. Apply a small amount of white icing to the top of the remaining six Oreos (those without mustaches). Gently press a folded white Airhead collar onto the icing.
- Attach Ties: Next, apply a thin line of icing down the middle of each Oreo, just below the “collar.” Carefully place one of your cut-out Airhead ties over this icing line, pressing down gently to secure it.
- Customize Your Ties: Don’t be afraid to get creative! You can further decorate the Airhead ties with extra icing to add patterns like polka dots, stripes, or even Dad’s initial. Alternatively, you can leave them solid in color for a classic look. The possibilities are endless for personalizing these charming treats!
Pro Tips for Perfect Chocolate Covered Oreos Every Time
Achieving perfectly smooth and beautifully decorated chocolate-covered Oreos is simple with a few expert tips:
- Don’t Overheat Candy Melts: Chocolate and candy melts can seize (become thick and clumpy) if overheated. Always microwave in short bursts (15-30 seconds) and stir thoroughly between each interval. The residual heat will continue to melt the remaining pieces.
- Tap Molds to Remove Air Bubbles: After pouring the first layer of chocolate and after covering the Oreo, gently tap the mold on your countertop. This helps release any trapped air bubbles, ensuring a smooth, even finish and preventing craters on your cookies.
- Ensure Molds are Clean and Dry: Any moisture in your molds can cause your chocolate to seize or create a dull finish. Always wash and thoroughly dry your molds before use.
- Chill Thoroughly: Patience is key! Ensure the chocolate-covered Oreos are fully chilled and hardened before attempting to remove them from the molds. This prevents breakage and ensures a clean release.
- Gentle Demolding: When removing the cookies from the molds, apply gentle pressure. Start by gently flexing the mold to loosen the edges, then push from the bottom. Avoid forcing them out.
- Use Good Quality Ingredients: While many brands of candy melts exist, Wilton or Ghirardelli offer reliable, smooth-melting options. Fresh Oreos also make a difference!
Storage and Gifting Ideas for Your Homemade Treats
Once your Father’s Day Chocolate Covered Oreos are complete, you’ll want to ensure they stay fresh and look their best, especially if you plan to give them as a gift.
- Storage: Store the finished chocolate-covered Oreos in an airtight container at room temperature for up to 1-2 weeks. If your home is particularly warm, you can store them in the refrigerator, but allow them to come to room temperature for about 15-20 minutes before serving for the best texture and flavor.
- Gifting: These personalized treats make excellent gifts! Arrange them in a decorative box lined with tissue paper, or place individual Oreos into small cellophane bags tied with a ribbon. You can mix and match the mustache and tie designs for a fun assortment. Add a handwritten card to make the gift even more special.
Variations and Creative Twists
While the mustache and tie theme is perfect for Father’s Day, don’t limit your creativity! Here are some ideas to customize your chocolate-covered Oreos for other occasions or simply to try something new:
- Different Candy Melt Colors: Choose Dad’s favorite colors, the colors of his favorite sports team, or seasonal colors for other holidays.
- Sprinkles and Edible Glitter: Before the chocolate fully sets, sprinkle on some festive sprinkles or a dusting of edible glitter for an extra sparkly touch.
- Other Candy Decorations: Instead of mustaches and ties, consider edible stars, hearts, or other small candy shapes for different themes.
- Drizzle Contrasting Chocolate: Once the main chocolate layer has set, melt a contrasting color of candy melt (e.g., white over blue) and drizzle it artfully over the top for an elegant finish.
- Flavor Extracts: Add a few drops of food-grade flavor extract (like peppermint, almond, or coffee) to your melted candy melts before dipping for an extra flavor dimension.
I sincerely hope that you and your family have a wonderful time making and enjoying this creative Father’s Day recipe. These homemade treats are a sweet way to show appreciation and celebrate the special dads in your life. Have a very Happy Father’s Day filled with joy, love, and delicious moments!
More Chocolate-Covered Oreo Recipes
- Heart Eyes Emoji Oreos
- Pot of Gold Oreos
- White Chocolate Valentine’s Day Oreos
- St. Patrick’s Day Oreos
More Father’s Day Recipe Ideas
- Crockpot Steak Bites
- Slow Cooker Mississippi Pork
- Brussels Sprouts with Bacon
- Air Fryer Hamburgers
Need even more fantastic Father’s Day recipe ideas? Be sure to check out our extensive collection of 30+ easy Father’s Day recipes for every taste and skill level!
Father’s Day Chocolate Covered Oreos
Author: Jaclyn
15 minutes
30 minutes
12
Saved!
Equipment
-
2 chocolate covered oreo molds
Ingredients
-
12
Oreo cookies -
6
candy mustaches -
1/2
cup
Royal Blue Candy Melts -
1/2
cup
Blue Candy Melts -
1/2
cup
Orange Candy Melts -
1/2
cup
Vibrant Green Candy Melts -
Wilton White Icing Tube -
3
Airheads Candy
we used white, green, and orange
Instructions
-
In a microwave safe bowl, microwave the royal blue candy melts for 45 seconds. Stir until completely melted and smooth.
-
Pour 2 tablespoons of the melted royal blue chocolate into 3 of the cookie molds. Place an Oreo on top of the melted chocolate. Spoon additional melted chocolate on top of each cookie, up to the top of the mold.
-
Repeat steps 1 & 2 with the light blue, orange, and green candy melts.
-
Place the cookie molds into the refrigerator and chill for 30 minutes to allow the chocolates to harden.
-
Line a cookie sheet with wax or parchment paper. Gently pop the chilled cookies out of their molds and place on the lined cookie sheet.
-
Apply icing gel to the back of 6 candy mustaches and place in the middle of 1/2 of the cookies.
-
To make the ties, cut out 6 (1 1/2 inch long ) strips from white Airheads. Use scissors to cut tie shapes from the green and orange Airheads.
-
Fold the ends of each white strip forward and to the center like a collar. Apply icing to the top of the remaining 6 Oreos and press the collar down on each one gently.
-
Apply icing down the middle of each Oreo and place a tie over the icing. Press down gently.
-
Feel free to decorate your ties with icing (think polka dots or stripes) or leave them solid in color.
Nutrition
Calories:
150
kcal
|
Carbohydrates:
21
g
|
Protein:
1
g
|
Fat:
7
g
|
Saturated Fat:
5
g
|
Polyunsaturated Fat:
0.4
g
|
Monounsaturated Fat:
1
g
|
Trans Fat:
0.01
g
|
Sodium:
64
mg
|
Potassium:
28
mg
|
Fiber:
0.3
g
|
Sugar:
17
g
|
Vitamin A:
0.2
IU
|
Calcium:
3
mg
|
Iron:
1
mg

Did You Make This Recipe?
Share it with me on Instagram @crayonsandcravings and follow on Pinterest @crayonsandcravings for even more!
Pin Recipe
Leave A Review
