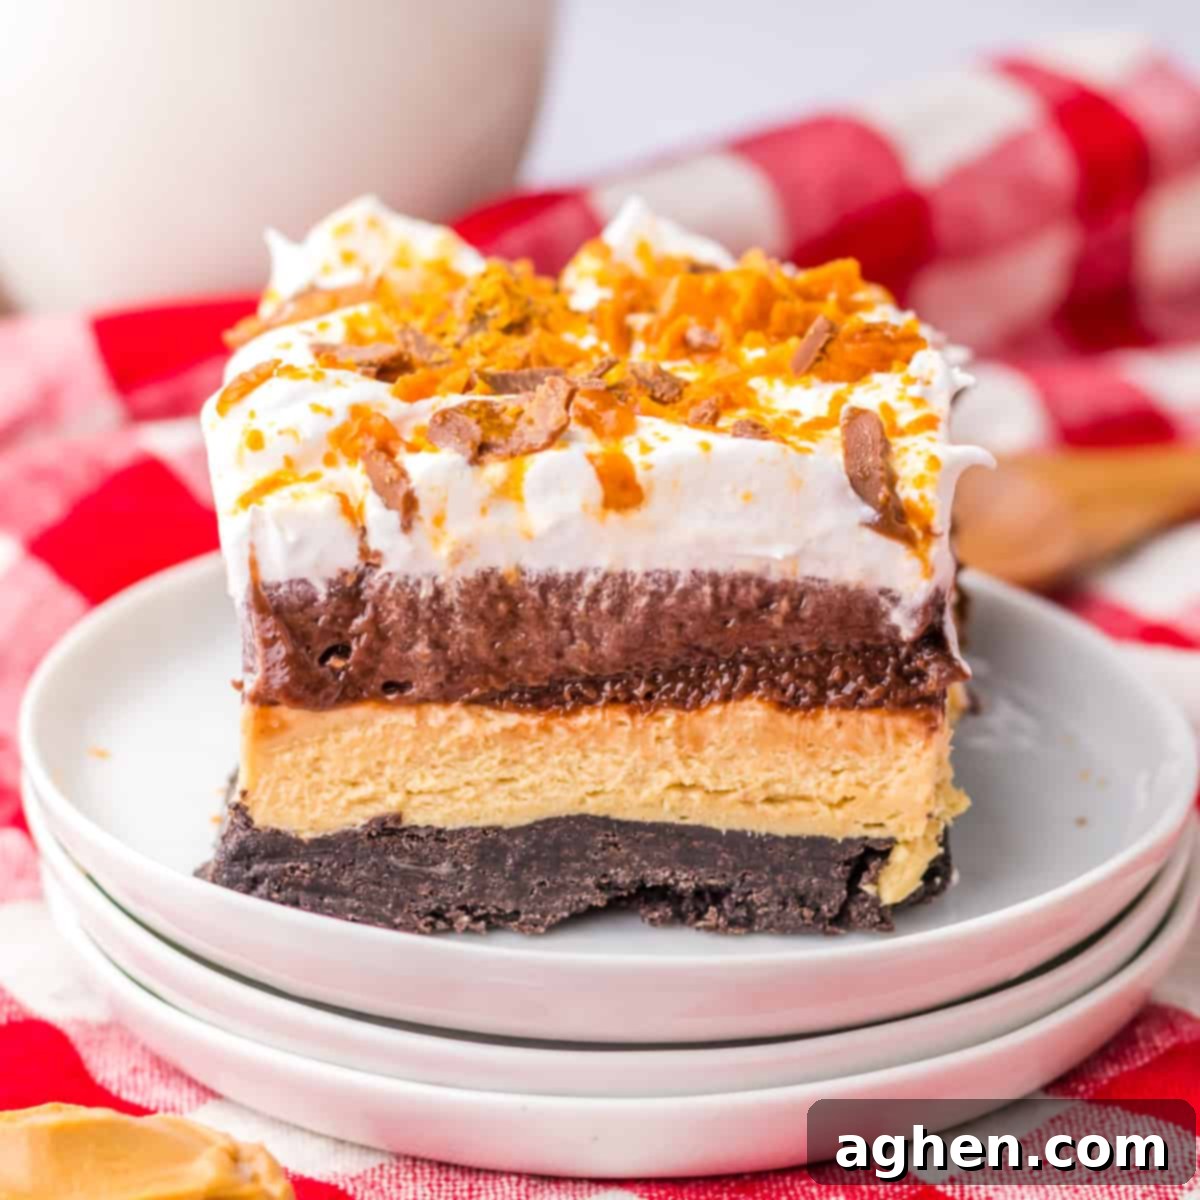
Irresistible No-Bake Butterfinger Lush: Your Ultimate Peanut Butter Chocolate Dessert
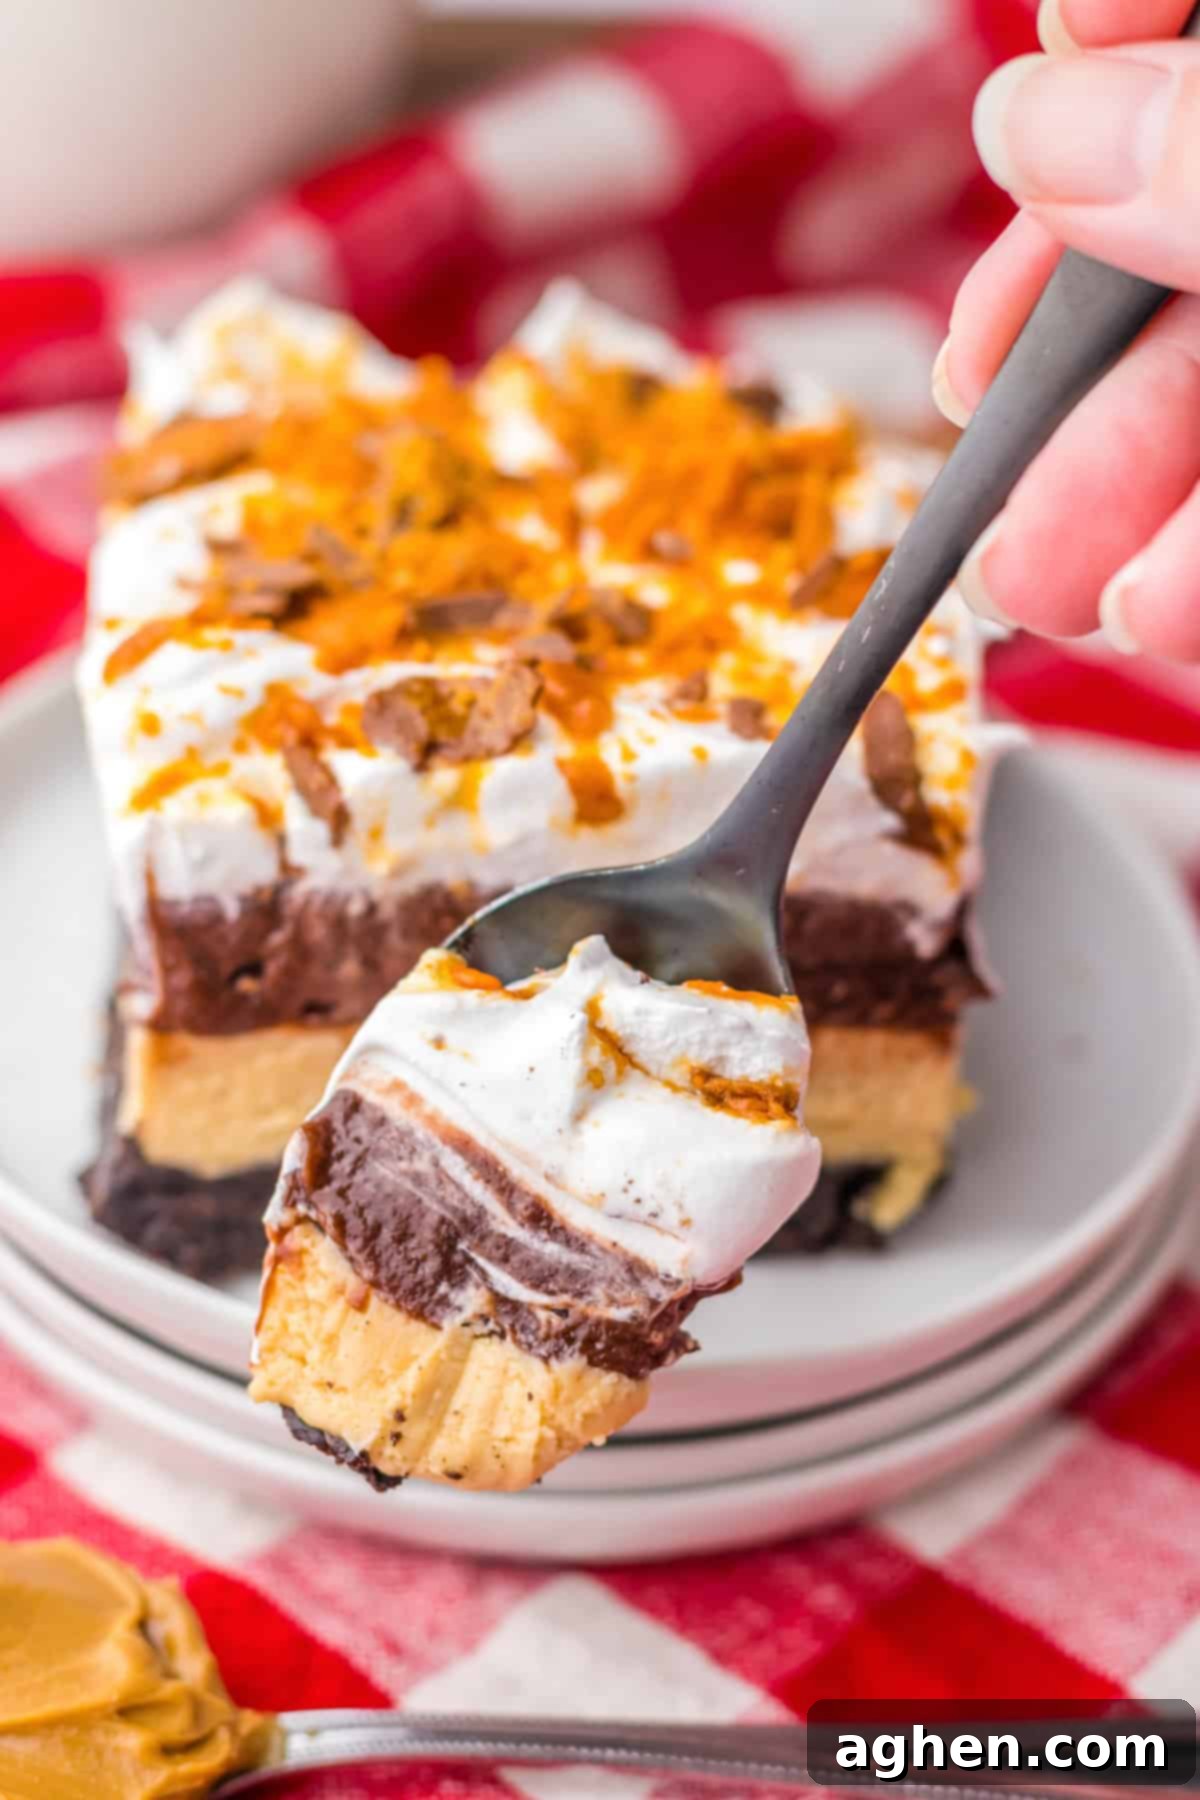
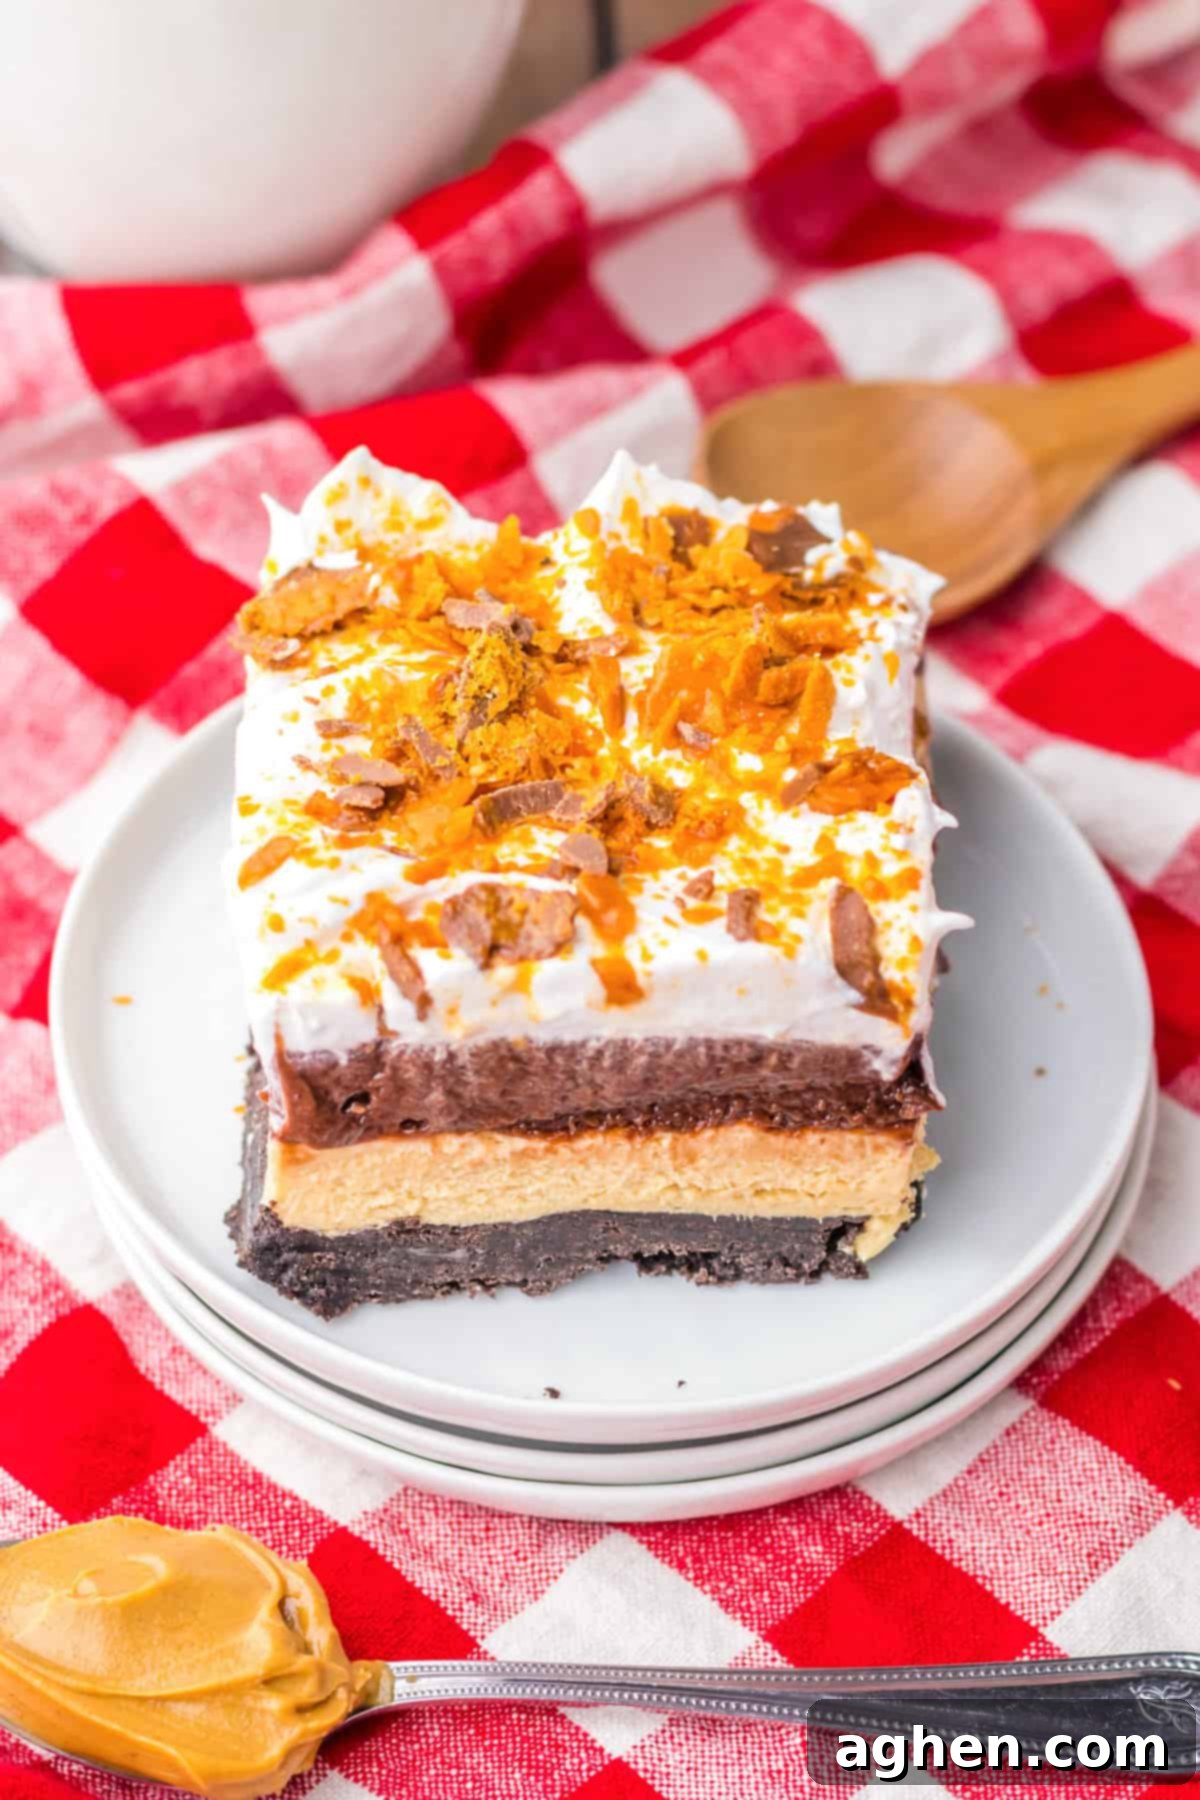
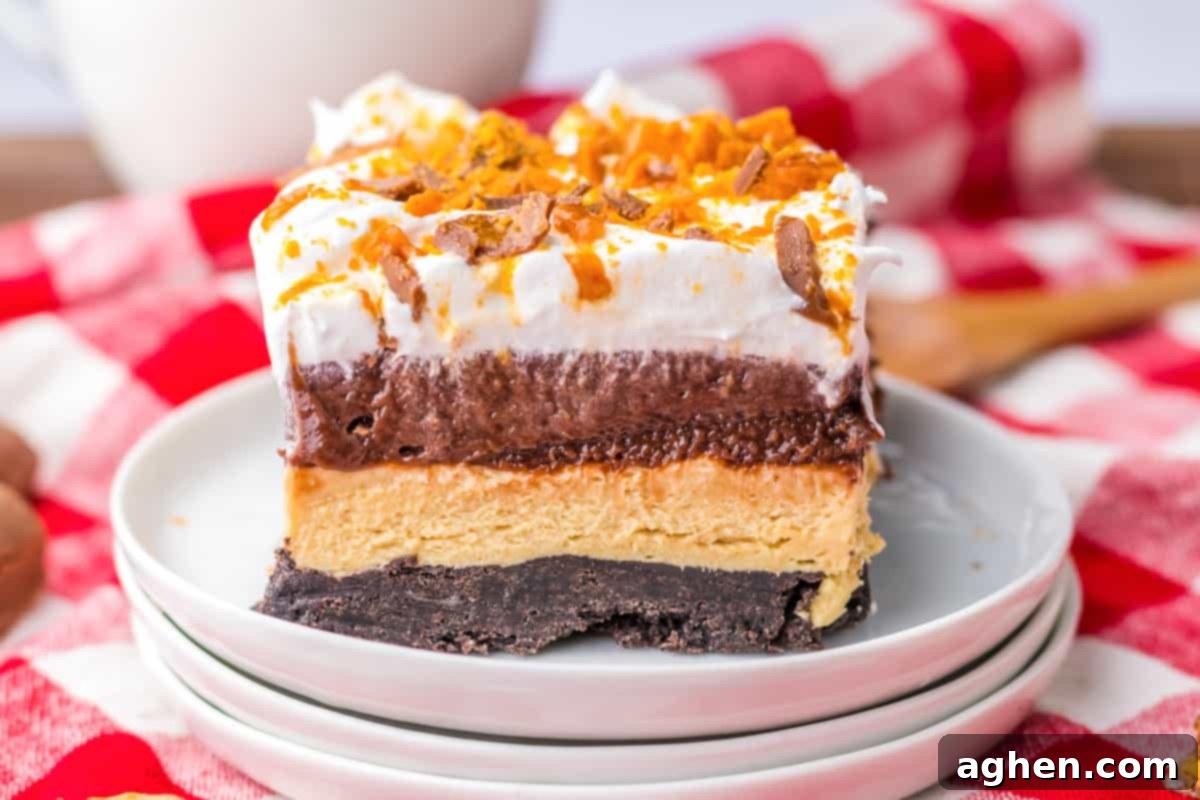
Indulge in the ultimate dessert experience with this incredible No-Bake Butterfinger Lush! It’s a rich, decadent, and utterly satisfying treat that combines creamy peanut butter, rich chocolate, and crunchy Butterfinger candy. Best of all, you can whip it up without ever turning on your oven, keeping your kitchen cool. Featuring layers of smooth peanut butter no-bake cheesecake, luscious chocolate pudding, and airy whipped topping, all resting on a crisp Oreo cookie crust, this dessert is guaranteed to be a crowd-pleaser. Crowned with plenty of chopped, peanut-buttery Butterfingers, it’s a true winner for any occasion!
If you’re a devoted Butterfinger fan, you’ll also adore my simple yet delicious recipe for Butterfinger Fluff. This easy dessert, made with just four ingredients, is perfect for dipping cookies or pretzels. And for a similar flavor profile that never fails to impress at potlucks, be sure to try this delightful No Bake Peanut Butter Pie!
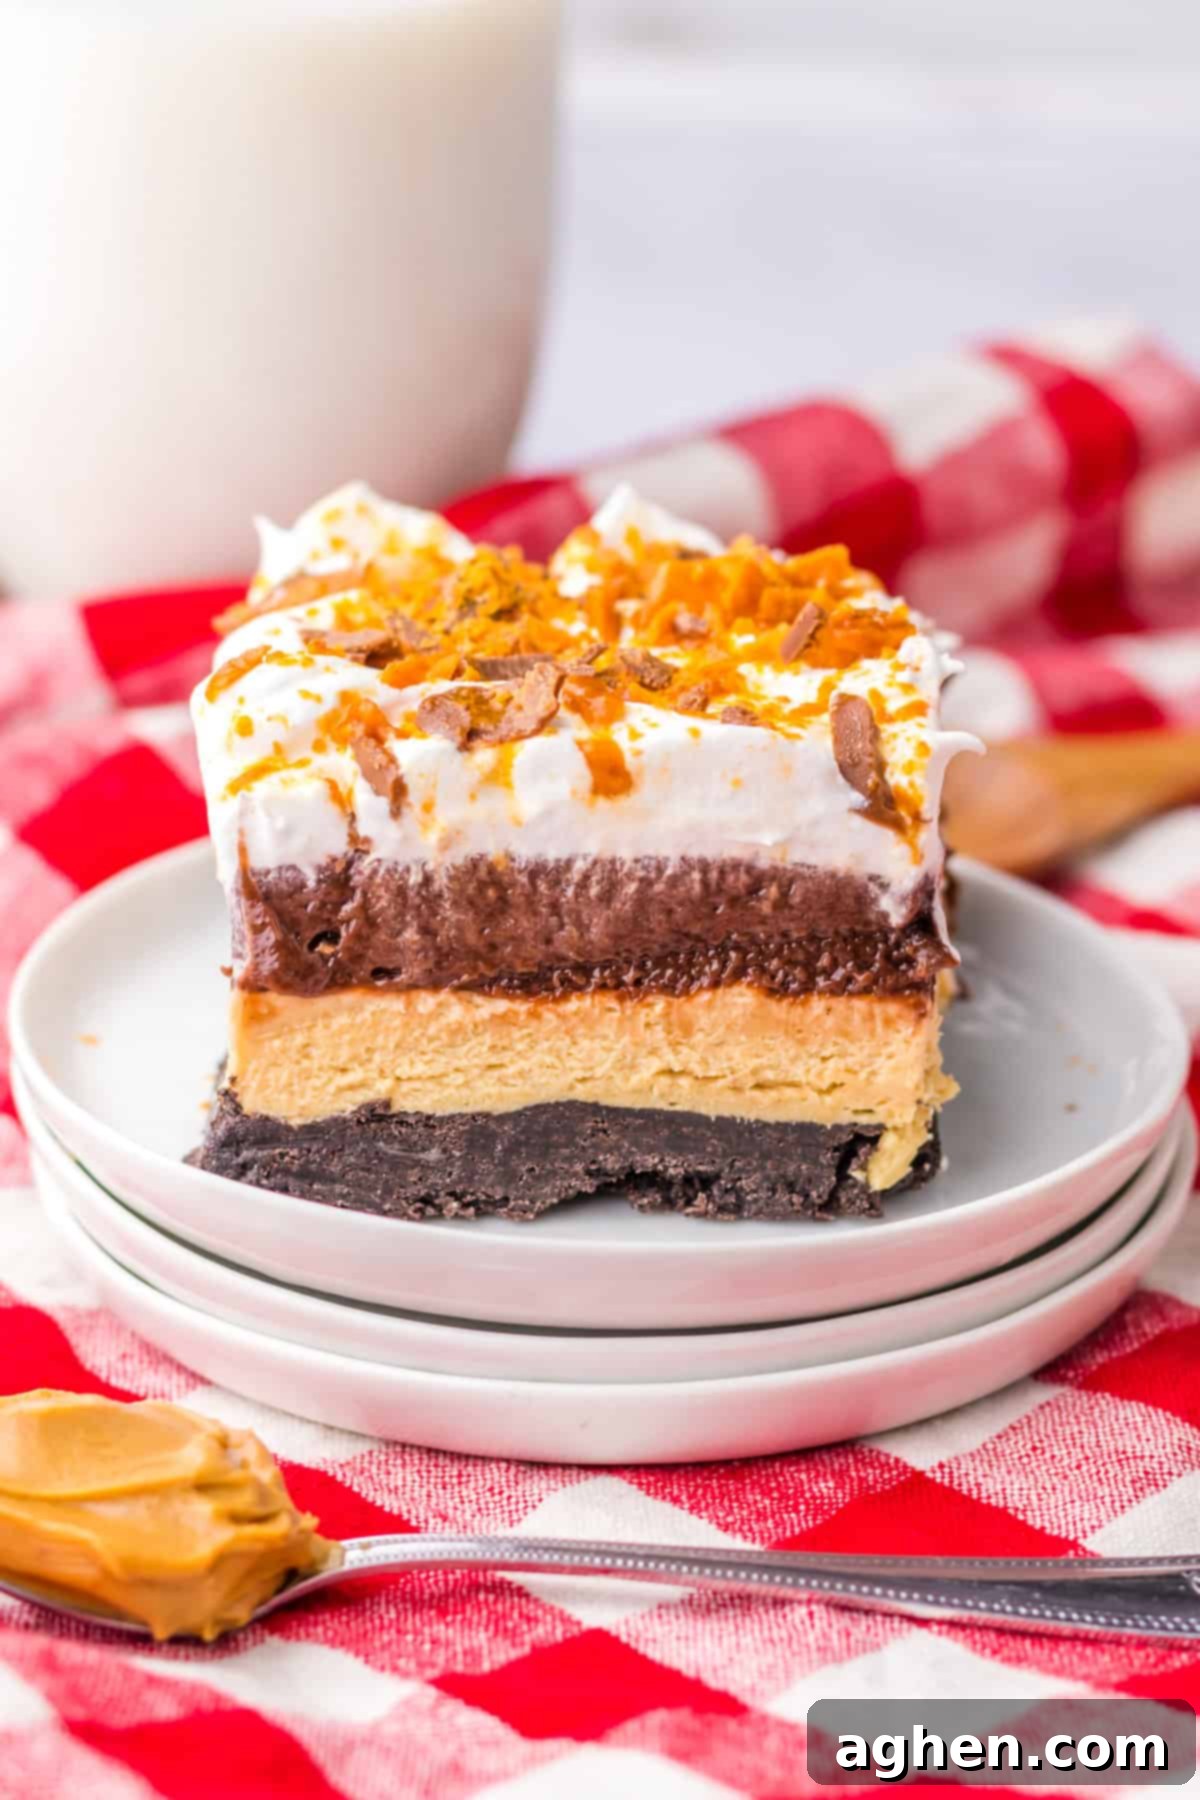
Whether you’re looking to beat the summer heat by avoiding the oven, or simply need a quick, easy, and undeniably delicious dessert to bring to a cookout, family gathering, or holiday celebration, this Butterfinger delight is absolutely perfect. Its effortless preparation means less time in the kitchen and more time enjoying special moments.
Every cool and creamy bite delivers that iconic, irresistible flavor combination of peanut butter and chocolate. Plus, it’s a fantastically fun and creative way to use up any leftover Butterfinger bars you might have stashed away after Halloween or other holidays! This recipe truly offers comfort and joy in every spoonful.
For more scrumptious lush recipes that are equally simple to make, don’t miss my refreshing Lemon Lush, the tropical Pina Colada Lush, and the festive Pumpkin Lush. Each one provides a unique flavor profile while maintaining the beloved layered, no-bake structure.
Key Ingredients for this Creamy Butterfinger Delight
This section provides detailed ingredient notes and offers helpful substitution options. You’ll find all precise measurements, a complete ingredient list, and step-by-step instructions in the printable recipe card located at the end of this post.
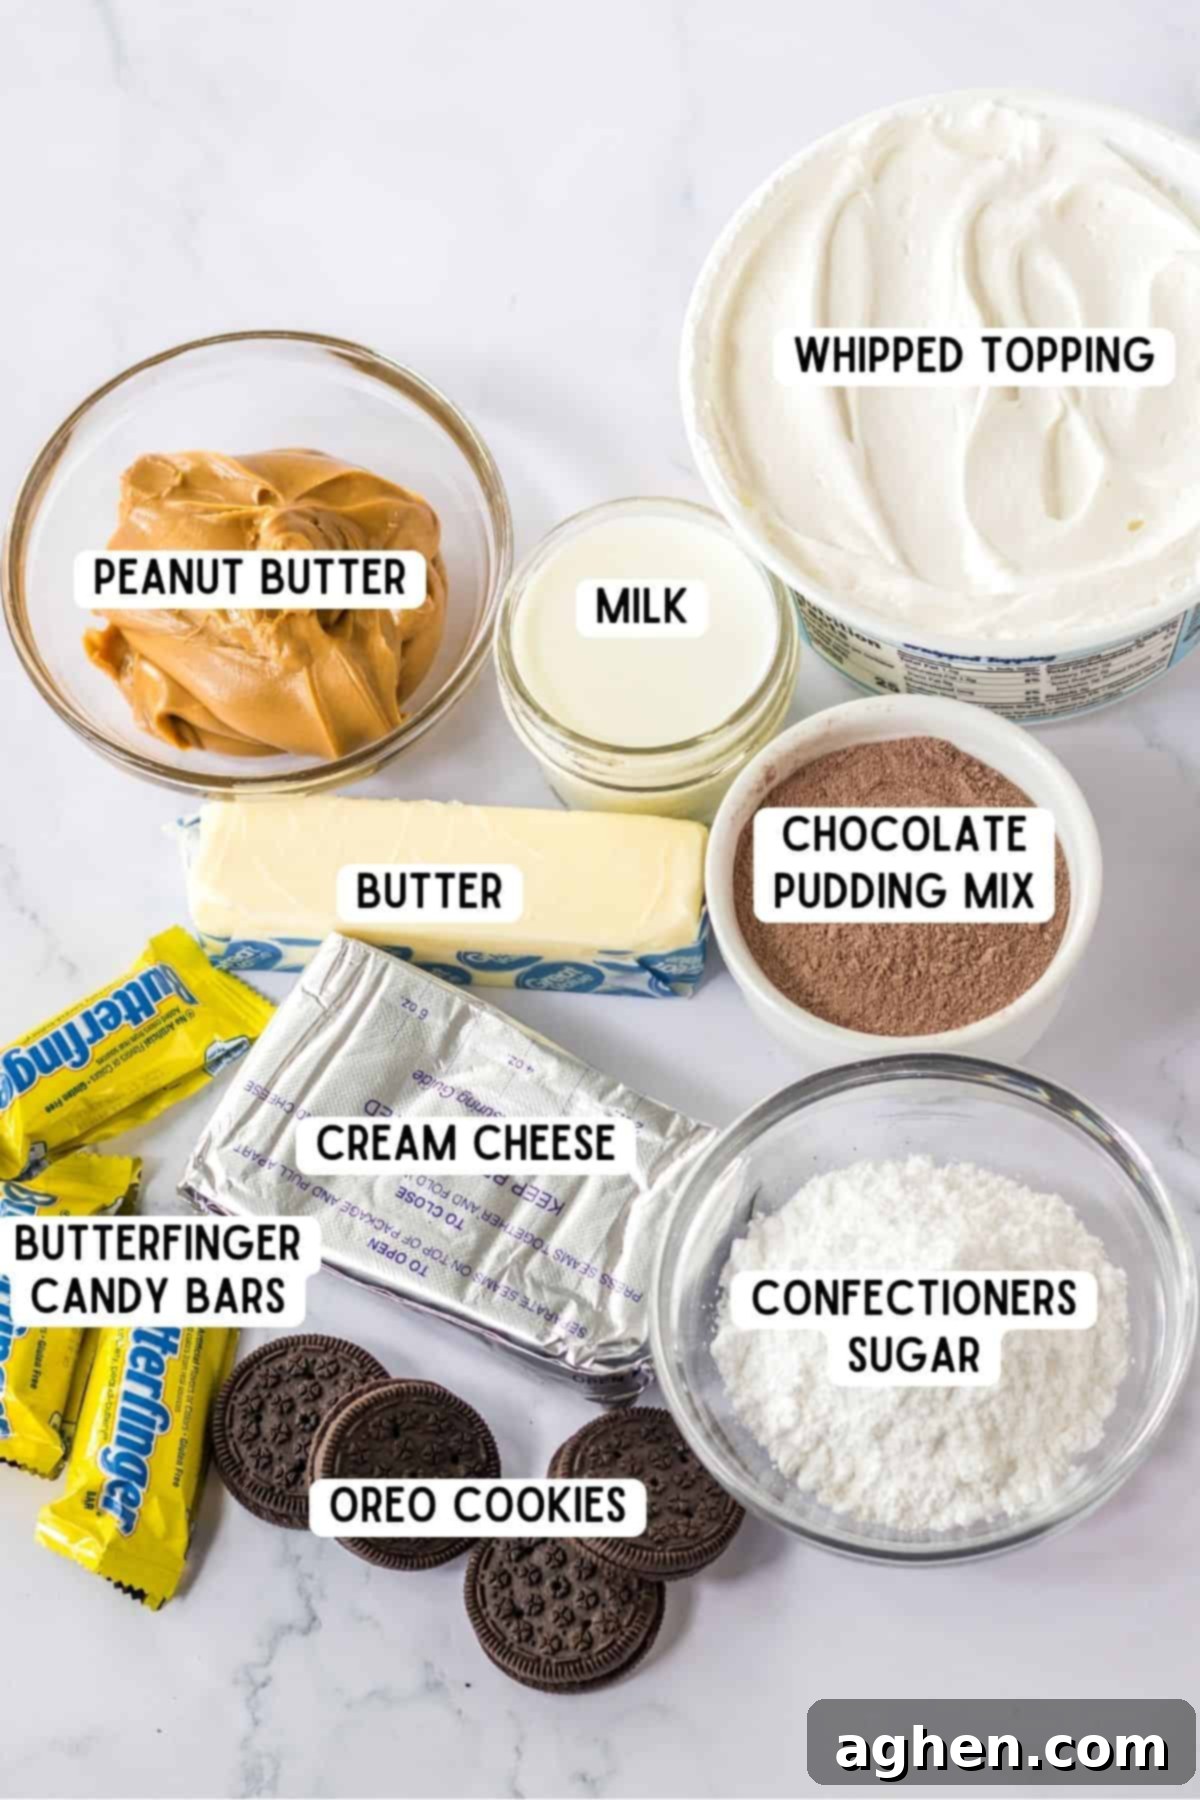
- Oreo Cookies — These classic chocolate sandwich cookies form the perfect, sturdy, and flavorful base for our easy no-bake dessert. Their rich chocolate flavor provides an ideal complement to the creamy peanut butter layer above.
- Butter — Melted butter is combined with the crushed Oreo cookies to create a cohesive and delicious crust. You can use either salted or unsalted butter; just be aware that salted butter will add a subtle savory note that many people enjoy.
- Cream Cheese — Essential for adding incredible creaminess and a delightful tangy richness to the peanut butter layer. For the smoothest possible mixture, remember to let your cream cheese come to room temperature before mixing. This prevents lumps and ensures a silky texture.
- Peanut Butter — Creamy peanut butter is highly recommended for this recipe, as its smooth consistency blends beautifully into the cheesecake layer. Avoid using natural peanut butter, as its tendency to separate and firmer texture can make it harder to stir and spread evenly.
- Confectioners’ Sugar — Also widely known as powdered sugar, this fine sugar is used to sweeten the peanut butter layer, giving it a melt-in-your-mouth texture without any grittiness.
- Whipped Topping — For convenience and stability, I typically use store-bought Cool Whip. However, any store-brand whipped topping or a homemade stabilized whipped cream (like my recipe for stabilized whipped cream) will work wonderfully. You’ll need 1 cup of whipped topping for the creamy peanut butter layer and an additional 2 cups to spread generously over the top of the dessert.
- Instant Chocolate Pudding Mix — This provides an extra boost of chocolate flavor and creates a smooth, firm layer. It is crucial to use instant pudding mix, not the type that requires cooking. Using cooked pudding will prevent your Butterfinger dessert from setting up correctly and result in a runny texture.
- Milk — Used to prepare the instant pudding, ensuring it thickens properly. Whole milk or 2% milk typically yields the best results, providing a rich and creamy texture to the pudding layer.
- Butterfingers — These iconic candy bars are chopped into bite-sized pieces and sprinkled generously over the top of the dessert. Their signature crunchy, peanut-buttery texture adds an essential element to the “lush” experience. You can use mini Butterfingers for convenience or full-size bars, chopping them yourself.
Essential Equipment for Crafting this No-Bake Delight
Ready to embark on making the perfect cool dessert, especially ideal for warmer weather or when you need something quick and impressive? Here are the simple tools you’ll need to create this amazing Butterfinger Lush:
- 9×9 square baking dish: This is the ideal size for achieving perfect layers and easy serving portions.
- Measuring cups: For accurate ingredient portions, which is key for the right consistency of each layer.
- Mixing bowls: You’ll need a few to prepare the crust, peanut butter layer, and pudding separately.
- Whisk: Perfect for quickly combining the instant pudding mix with milk until thickened.
- Electric mixer or stand mixer: Essential for beating the cream cheese, peanut butter, and confectioners’ sugar into a smooth and fluffy mixture.
- Food processor or blender: The quickest and most efficient way to turn your Oreo cookies into fine, uniform crumbs for the crust.
Step-by-Step Guide: How to Make Butterfinger Lush
This section walks you through the entire recipe process with clear, step-by-step photos and detailed instructions. For the complete printable recipe, including all measurements and ingredients, please refer to the recipe card located further down on this page. Get ready to create a masterpiece!
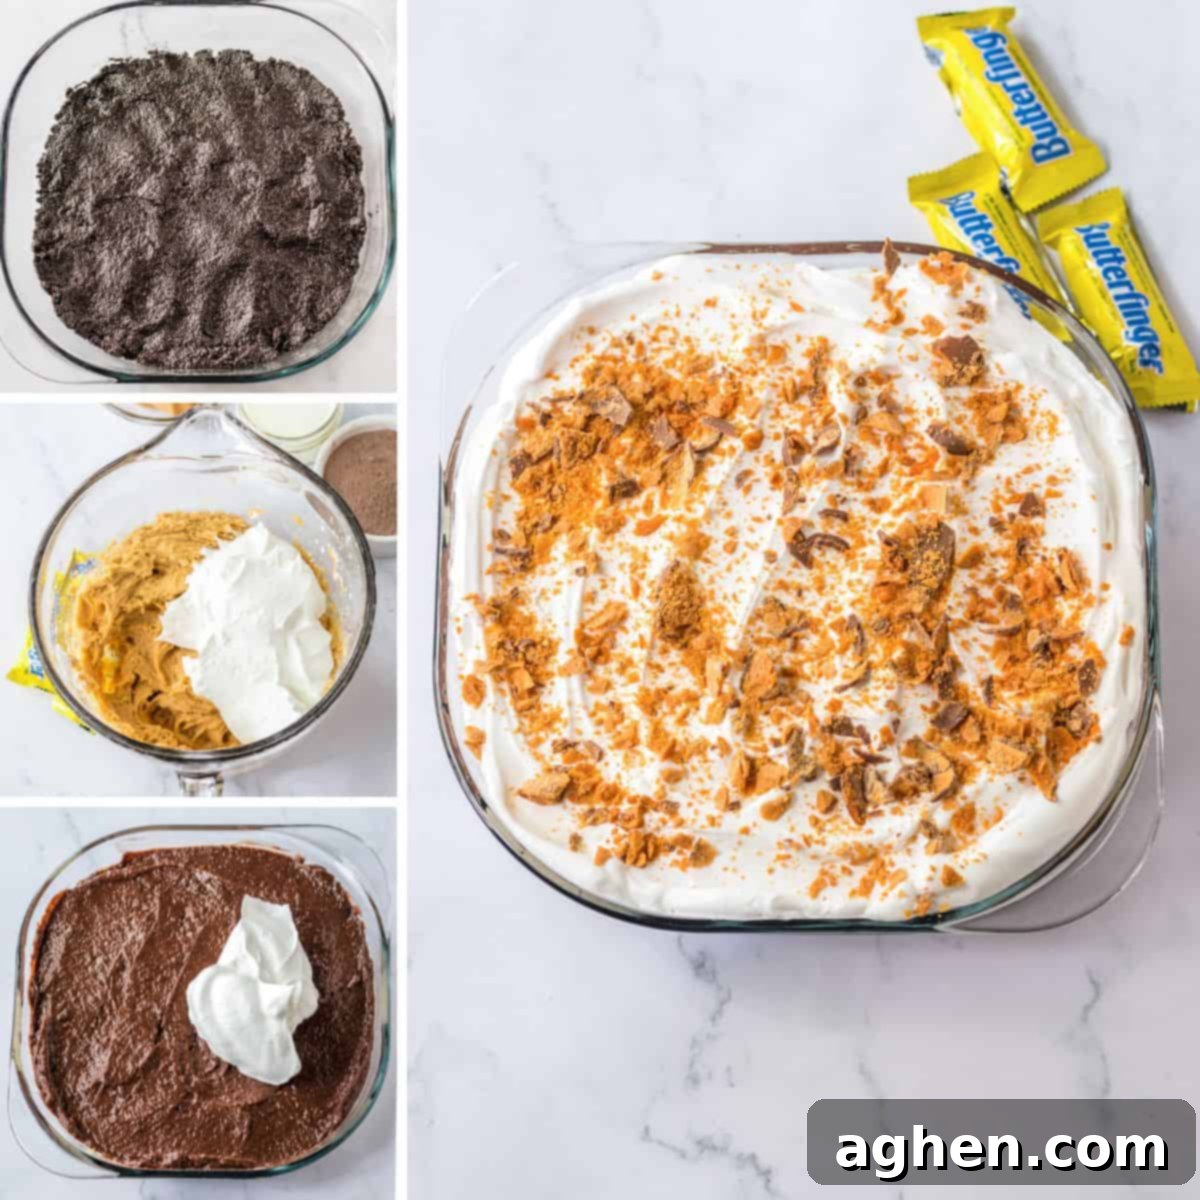
Step 1 — Prepare the Oreo Crust: Begin by adding your Oreo cookies (creams and all!) to a food processor or a high-powered blender. Pulse until they transform into fine, even crumbs. If your appliance is small, work in batches to ensure there are no large clumps remaining. This fine texture is key for a perfect crust.
Step 2 — Assemble the Cookie Crust: In a medium-sized mixing bowl, combine the finely crushed Oreo crumbs with the melted butter. Stir until the crumbs are thoroughly moistened and resemble wet sand. Transfer this mixture to the bottom of your 9×9 inch baking pan. Press the cookie crumb mixture down firmly and evenly using the back of a spoon or your clean hands to create a compact, stable crust.
Step 3 — Create the Peanut Butter Layer: In a large mixing bowl, using either a stand mixer fitted with a paddle attachment or a hand mixer, beat together the softened cream cheese, creamy peanut butter, and confectioners’ sugar. Mix until the mixture is completely smooth, light, and well-combined, with no lumps of cream cheese remaining. Gently fold in 1 cup of the whipped topping. This delicate step helps maintain the airy texture of the layer. Carefully spread this sweetened peanut butter mixture evenly over the chilled Oreo crust.
Step 4 — Prepare the Pudding Layer: In another medium bowl, whisk together the dry instant chocolate pudding mix with the cold milk. Whisk continuously for exactly 2 minutes until the mixture begins to thicken. It’s important to use instant pudding and whisk for the full time for proper setting. Once slightly thickened, carefully spread the pudding mixture evenly over the peanut butter layer. Allow it to sit for a few minutes to firm up slightly before moving to the next step, ensuring distinct layers.
Step 5 — Add the Finishing Touches: Gently spread the remaining 2 cups of whipped topping evenly over the chocolate pudding layer, creating a smooth and inviting white top. Finally, generously sprinkle the chopped Butterfinger candy bars over the entire surface of the dessert. This adds a beautiful visual appeal and that signature crunch.
Step 6 – Chill to Perfection: This chilling step is crucial! Place the assembled Butterfinger dessert in the refrigerator for a minimum of 2-4 hours to allow all the layers to set properly and meld their flavors. For the best results and easiest slicing, chilling it overnight is highly recommended. Once thoroughly chilled, cut into neat slices, serve, and savor this perfect cool dessert, especially refreshing on a warm day.
Serving Suggestions for Your Butterfinger Lush
This No-Bake Butterfinger Lush is best served impeccably chilled, straight from the refrigerator. For an extra touch of elegance and decadence, consider adding a luscious drizzle of chocolate syrup or warm caramel sauce over individual slices just before serving. You can also garnish with a few extra Butterfinger crumbles or even a fresh mint leaf for a pop of color. If you opt to freeze the dessert, remember to let it sit out on the counter for about 30 minutes before attempting to cut into slices; this allows it to soften slightly, making for easier and cleaner portions. It’s a delightful centerpiece for any gathering, from casual backyard barbecues to festive holiday meals.
Storage and Freezing Guidelines
To ensure your delicious Butterfinger Lush stays fresh and maintains its fantastic texture, proper storage is key:
Refrigerator: Any leftover Butterfinger Lush should be stored promptly in the refrigerator. Transfer it to an airtight container, or wrap the baking dish tightly with plastic wrap. When properly stored, this dessert will maintain its quality and deliciousness for up to 4 days, making it an excellent make-ahead option.
Freezer: This peanut butter dessert freezes exceptionally well! To freeze, place the lush in a freezer-safe container, or wrap it tightly first in plastic wrap and then in aluminum foil to prevent freezer burn. Alternatively, you can place the wrapped dish inside a large freezer bag. It can be stored in the freezer for up to 1 month. When you’re ready to enjoy it, thaw the dessert in the refrigerator overnight, or for a quicker option, let it sit on the countertop for 30-60 minutes to allow it to soften slightly before serving. The slight chill of a partially frozen slice is also a wonderful treat on a hot day!
Expert Tips and Tricks for Perfect Butterfinger Lush
- Fold Gently: When incorporating the whipped topping into the peanut butter cream cheese mixture, be sure to fold it in gently using a spatula. Avoid overmixing, as this can cause the whipped topping to “deflate,” leading to a denser layer. The air trapped in the whipped topping is crucial for a light and airy texture.
- Pudding Thickness: After whisking the instant chocolate pudding mix with milk, let the mixture sit undisturbed for a few minutes before spreading it over the peanut butter layer. This brief resting period allows the pudding to thicken further, which helps to create distinct, clean layers and prevents the chocolate and peanut butter from mixing too much.
- Slicing Frozen Dessert: If you decide to serve the dessert partially frozen for a firmer texture, a simple trick for clean slices is to run your knife under hot water for a few seconds, then wipe it dry, before each cut. This will help the knife glide smoothly through the layers.
- Convenient Crumbles: Did you know you can often find pre-crushed Butterfinger Bits in the baking aisle of most grocery stores? Using these saves you the step of crushing the candy bars yourself, making prep even faster and easier!
- Oreo Prep: There’s no need to remove the cream filling from the Oreo cookies. Simply add them whole to your food processor. The cream will blend seamlessly with the cookies and butter, contributing to a rich and flavorful crust after just a few pulses.
- Chill Time is Key: While 2-4 hours is the minimum, allowing the dessert to chill overnight in the refrigerator truly makes a difference. The flavors have more time to meld, and the layers become perfectly set, resulting in a cleaner slice and superior taste.
- Room Temperature Cream Cheese: Always ensure your cream cheese is at proper room temperature. This is vital for achieving a smooth, lump-free peanut butter layer. Cold cream cheese will be difficult to beat and can result in a grainy texture.
Exciting Additions and Delicious Variations
One of the best things about this No-Bake Butterfinger Lush is how easily it can be customized to suit your tastes! Here are some creative ideas to try:
- Experiment with Different Cookies for the Crust: While Oreos are classic, don’t limit yourself! Instead of Oreo cookies, you could try using peanut butter cookies (like Nutter Butters) for an intensified peanut butter flavor, or even a chocolate-peanut butter sandwich cookie for a twist. Graham cracker crumbs mixed with butter also make an excellent, traditional crust.
- Switch Up the Candy Bar Topping: Not a huge Butterfinger fan, or simply want to try something new? This recipe is incredibly versatile! Make it with your favorite chopped candy bar instead. Crushed Reese’s Peanut Butter Cups would amplify the peanut butter theme, Snickers would add a delightful caramel and nougat chew, or Kit Kats would provide a delicate wafer crunch.
- Alter the Pudding Flavor: The chocolate pudding layer is delicious, but changing it can completely transform the dessert. Vanilla instant pudding would offer a milder, sweeter backdrop, allowing the peanut butter to shine even more. Butterscotch pudding would introduce a rich, buttery, and slightly caramelized note that pairs wonderfully with peanut butter.
- Add an Extra Butterfinger Layer: For those who truly love the crunch and flavor of Butterfingers, why not double down? Add an additional thin layer of finely crushed candy bars between the peanut butter and pudding layers for an extra textural surprise in every bite.
- Make it Gluten-Free: It’s simple to adapt this recipe for those with gluten sensitivities. Just ensure you use gluten-free sandwich cookies for the crust and verify that your instant pudding mixes are certified gluten-free.
- Opt for a Lower Sugar Version: If you’re looking to reduce the sugar content, there are several substitutions you can make. Use Zero Sugar Cool Whip and sugar-free instant pudding mix. For the topping, sugar-free peanut butter cups can be chopped instead of regular Butterfingers. While the cookies and powdered sugar will still contribute sugar, these changes can significantly lower the overall amount.
Butterfinger Whipped Cream Dessert FAQ
Absolutely! This No-Bake Butterfinger Lush is an ideal make-ahead dessert. It requires a minimum chilling time of 2-4 hours for the layers to set and the flavors to meld, but chilling it overnight in the refrigerator yields the best results. This makes it perfect for planning ahead for parties, holidays, or any event.
The most common reason for a pudding layer not setting is using the wrong type of pudding mix. It is crucial to use instant pudding mix, not the type that needs to be cooked on the stovetop. Cooked pudding will not set properly in this no-bake application. Additionally, ensure you whisk the pudding mix and milk for the full recommended 2 minutes, and allow it to sit for a few extra minutes before spreading to ensure it thickens enough to form distinct layers.
Yes, you can certainly use homemade whipped cream for a fresher taste. However, be mindful that homemade whipped cream tends to be less stable and may not hold up as well over an extended period compared to store-bought whipped toppings (like Cool Whip), which often contain stabilizers. If using homemade, consider making a stabilized whipped cream for best results.
No food processor? No problem! You have a couple of easy alternatives. You can pulse the cookies a handful at a time in a sturdy blender until they turn into fine crumbs. Alternatively, place the Oreo cookies in a large zip-top bag, seal it, and crush them using a rolling pin, a meat mallet, or even the bottom of a heavy glass. Continue until you achieve a fine, crumbly texture similar to what a food processor would produce.
The term “Lush” in the context of desserts typically refers to a layered, no-bake dessert that features a crumbly crust, one or more creamy filling layers (often with cream cheese and pudding), and a whipped topping. These desserts are known for their rich, smooth, and indulgent texture, hence the name “Lush” which evokes a sense of luxuriousness and abundance.
More Delicious No-Bake Peanut Butter Recipes
For all you peanut butter enthusiasts out there, you absolutely must explore some of our other incredibly easy and delicious no-bake desserts. They are perfect for satisfying those cravings without any oven time!
- Peanut Butter Cup Dip — This creamy, sweet dip is a dream come true for peanut butter and chocolate lovers! Serve it with crunchy Nutter Butters for dipping, or lighten it up with crisp apple slices.
- Chocolate Peanut Butter No-Bake Cookies — A timeless classic that’s incredibly simple to make. These chewy, fudgy cookies are an absolute must-have for the holiday season or whenever you need a quick, satisfying treat.
- Peanut Butter Balls — Indulgent peanut butter flavored Rice Krispies molded into delightful balls and generously coated in a smooth, rich chocolate shell. They’re dangerously addictive!
- Cornflake Cookies — These cookies offer a fantastic balance of sweet and crunchy, with a delightful peanut butter and cornflake texture. They’re seriously addictive and a unique addition to any dessert spread.
No Bake Butterfinger Lush
Author: Jaclyn
Equipment
-
9 inch square baking dish
Ingredients
- 30 Oreo cookies
- ½ cup butter melted
- 8 ounces cream cheese softened
- ½ cup creamy peanut butter
- 1 cup confectioners sugar
- 8 ounces whipped topping divided
- 5.1 ounces instant chocolate pudding mix
- 2 cups milk
- Butterfinger bars chopped, for topping
Instructions
-
In a food processor, pulse the Oreo cookies until they are fine crumbs. You may need to do this in batches to ensure even crumbling.
-
In a medium bowl, mix the cookie crumbs with the melted butter until well combined. Press this mixture evenly into the bottom of a 9-inch square baking dish to form the crust.
-
In a large bowl, using a stand mixer or hand mixer, beat together the softened cream cheese, creamy peanut butter, and confectioners’ sugar until the mixture is smooth and well combined. Gently fold in 1 cup of the whipped topping. Spread this peanut butter mixture evenly over the cookie crust.
-
In a medium bowl, whisk together the dry instant chocolate pudding mix and cold milk for 2 minutes until it begins to thicken. Carefully spread this pudding mixture over the peanut butter layer.
-
Top the dessert with the remaining whipped topping, spreading it evenly, then sprinkle generously with the chopped Butterfinger pieces.
-
Refrigerate the Butterfinger Lush for 2-4 hours, or preferably overnight, before serving. Once chilled, slice and serve. Enjoy this delightful treat!
Notes
Nutrition

Did You Make This Recipe?
I would absolutely love to see your delicious creations! Share your beautiful Butterfinger Lush with me on Instagram @crayonsandcravings and make sure to follow me on Pinterest @crayonsandcravings for even more mouth-watering recipe ideas and inspiration!
Pin Recipe
Leave A Review
