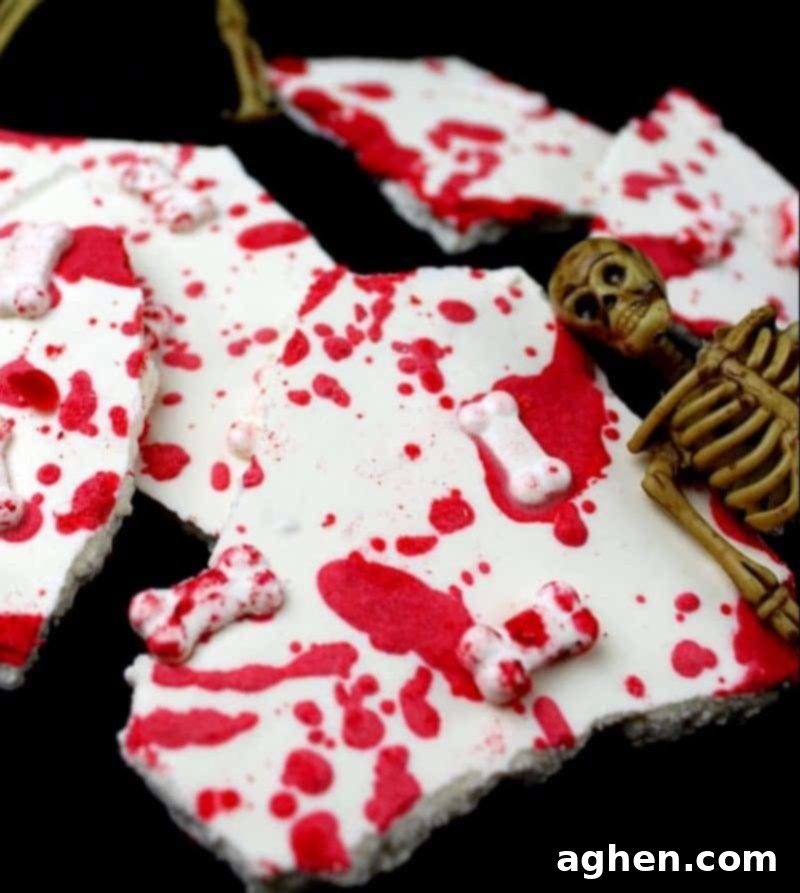
Easy & Spooktacular: Bloody Good Halloween Bones Bark Recipe for Your Party!
Get ready to add a touch of ghoulish delight to your Halloween celebrations with this incredibly simple and eerily captivating Bloody Good Halloween Bones Bark recipe. This isn’t just another Halloween treat; it’s a statement piece that’s guaranteed to be the star of your spooky spread, combining a smooth white chocolate base with chilling red splatters and playful bone sprinkles. Whether you’re hosting a haunted gathering or looking for the perfect candy to hand out to trick-or-treaters, this bark is as fun to make as it is to devour!
Looking for more festive Halloween bark inspiration? Don’t miss this equally delicious Salt and Sweet Halloween Bark recipe for another fantastic twist on this versatile candy.
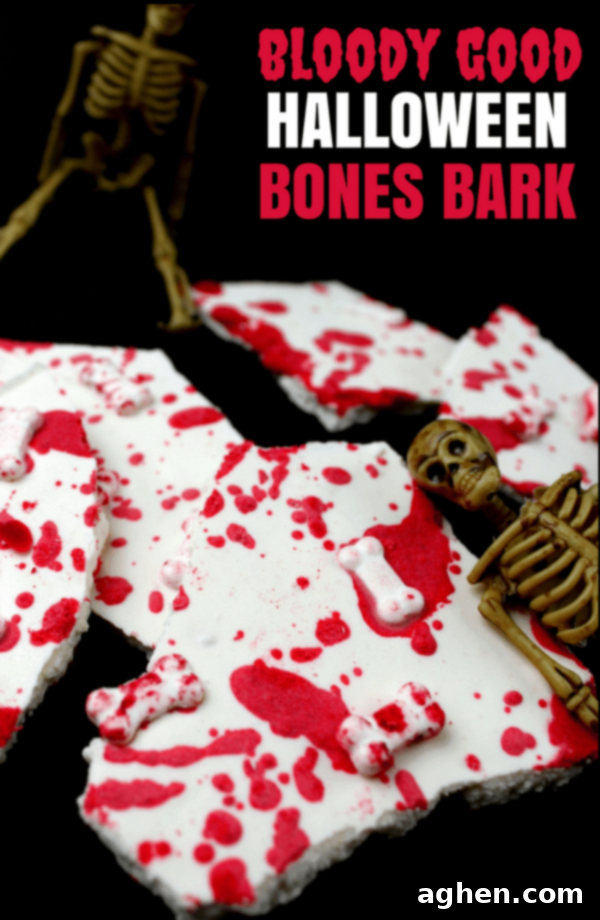
Have you ever noticed how bark candy often feels reserved exclusively for the festive cheer of Christmas? While we all adore classic peppermint bark for its minty freshness, it’s a shame to limit such an easy and adaptable treat to just one holiday! Why can’t we bring the joy and simplicity of candy bark to other special occasions like Valentine’s Day or, even better, the delightfully eerie holiday of Halloween? Well, the good news is, we absolutely can – and we have before with our delightful Valentine’s Day bark candy!
This year, unleash your inner ghoul and create something truly unforgettable with our Bloody Good Halloween Bones Bark. You’ll be astonished by how effortlessly this spooky candy comes together and the incredible impact it will have on your Halloween buffet. Imagine a platter of this eerie delight, or neatly packaged pieces tucked into treat bags for your Halloween party guests – it’s a fantastic way to add a homemade, personalized touch to your festivities!
Why This Bloody Good Halloween Bark is a Must-Make Treat
Halloween is all about fun, frights, and, of course, fantastic food! This Bloody Good Halloween Bones Bark perfectly encapsulates the spirit of the season. Here’s why it’s destined to become your go-to Halloween recipe:
- Incredibly Easy: You only need 5 simple ingredients to craft this delicious and visually stunning bark. Even beginner candy makers will find this recipe foolproof.
- Spooktacular Visual Appeal: The stark contrast of the vibrant red “blood” against the pristine white candy base, adorned with bone sprinkles, creates a truly creepy and captivating design. It’s guaranteed to catch every eye at your party!
- Versatile Serving Options: This candy isn’t just for a candy dish. Break it into smaller pieces to stick into cupcakes for an easy and creepy Halloween cupcake topper. It’s also perfect for October fundraisers, Halloween party favors, school events, or simply to bring a festive treat to the office.
- Quick to Prepare: If you’re short on time during the busy Halloween season, this is the perfect solution. It comes together quickly, leaving you more time to focus on costumes and decorations.
- Crowd-Pleaser: Much like popular Halloween Chex mix or adorable mummy rice krispie treats, this bark is simple, delicious, and sure to be a big hit with everyone who tries it, from kids to adults.
And for those wondering about substitutions, you can easily use shortening in place of lard if lard is hard to find in your local stores. While it won’t necessarily make the candy healthier, it ensures accessibility for everyone to enjoy this frightfully delicious treat.
Halloween Bones Bark Ingredients: Crafting Your Ghoulishly Good Candy
This section includes detailed ingredient notes and helpful substitution options to ensure your Halloween bark turns out perfectly. Find all precise measurements, ingredients, and step-by-step instructions in the printable recipe card located at the very end of this post.
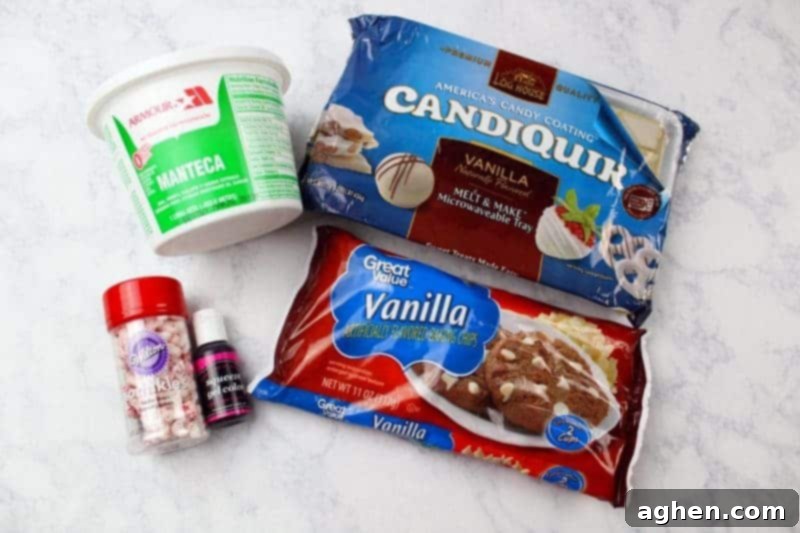
- Vanilla Candiquik or White Candy Melts: These form the creamy, pristine white base of your bark. Candiquik and candy melts are specifically designed for easy melting and setting, providing a smooth finish. You can also use vanilla almond bark as a viable alternative for the same great results.
- White Chocolate Chips: While the primary white base comes from Candiquik, these white chocolate chips will be dyed red to create the “blood” splatter. If you don’t have white chocolate chips, you can simply use extra Candiquik or white candy melts for this portion as well. The key is a meltable white base for the red color.
- Red Food Coloring: This is where the magic happens! For the most vibrant and realistic “blood” color, we highly recommend using a gel-based food coloring. Gel colors are more concentrated than liquid food dyes, meaning you’ll achieve a deep, rich red without significantly altering the consistency of your melted chocolate.
- Lard or Coconut Oil: These fats are crucial for thinning the melted candy, especially after adding the food coloring which can sometimes cause chocolate to seize (thicken and become lumpy). Lard provides a very smooth texture, but if you have trouble finding it, coconut oil is an excellent and widely available substitute that works just as effectively to achieve that perfect drippable consistency.
- Bone Sprinkles: These are the fun, optional yet highly recommended addition that truly brings the “bones” aspect to your bark. They add a delightful texture and an extra layer of creepy charm. You can often find these unique sprinkles in specialty baking stores or readily order them on Amazon. If bone sprinkles aren’t available, consider other Halloween-themed sprinkles like eyeballs, bats, or ghosts!
How to Make Blood-Splattered Bark: A Step-by-Step Guide
Follow these easy step-by-step photos and instructions to create your own spooky bark. For the complete printable recipe, including detailed measurements and a full recipe card, please scroll down to the end of this post.
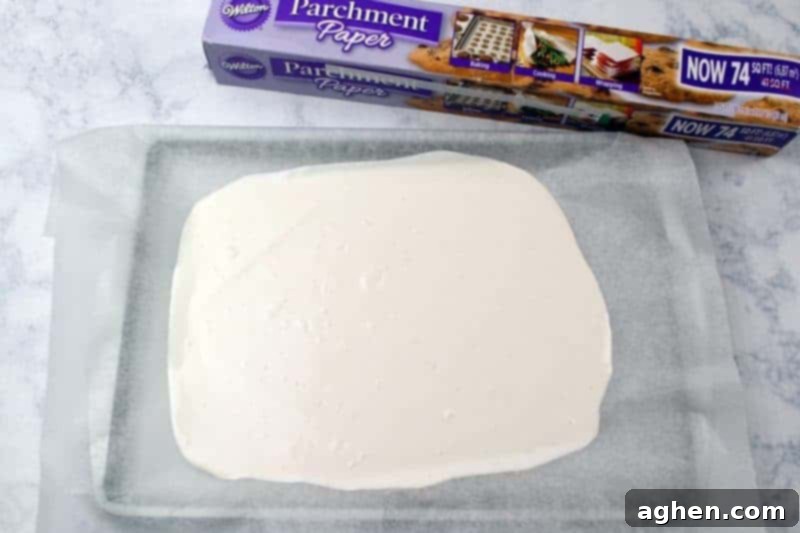
Step 1: Prepare the White Bark Base. Begin by melting your Candiquik or white candy melts. You can do this in the microwave by heating in 30-second intervals, stirring well after each, until the candy is completely smooth and free of any lumps. It’s crucial not to overheat the candy. Once melted, line a standard cookie sheet with parchment paper. This prevents sticking and makes for easy cleanup and removal. Pour the melted white candy onto the parchment paper and use a spoon or an offset spatula to spread it evenly into a thin layer. Allow this white base to dry and set completely. This might take 15-20 minutes at room temperature, or you can speed it up by placing it in the refrigerator for about 5-10 minutes.
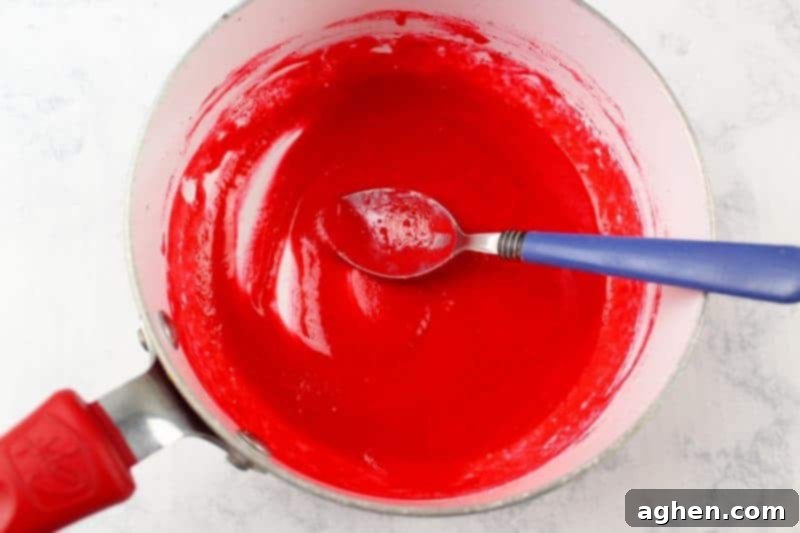
Step 2: Create the “Blood” Splatter. Now for the fun part! In a small saucepan, melt ½ cup of white vanilla chips (or extra Candiquik) on the stove over medium-low heat, stirring constantly to prevent scorching. Once melted and smooth, add your red food dye. Start with a few drops and gradually add more until you achieve a dark, rich red color that truly resembles blood. As you add the dye, the chocolate might start to seize and thicken. This is normal! Immediately add a small amount of coconut oil or lard (starting with ½ teaspoon and adding more if needed) to thin the melted candy back to a smooth, drippable consistency. Continue to stir thoroughly until your “blood” mixture is perfectly colored and has the desired thinness for splattering. Once you’re happy with the color and consistency, remove the pan from the stove.
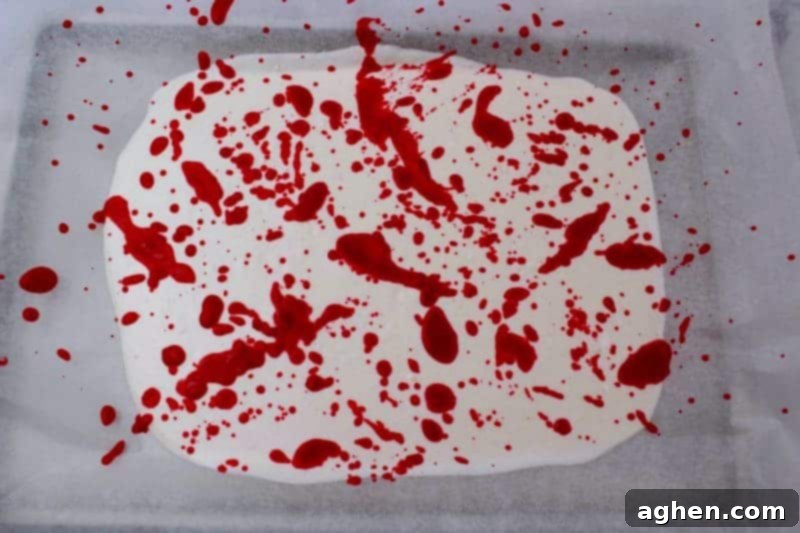
Step 3: Splatter the “Blood.” With your white bark base fully set, it’s time to get creative! Dip a clean spoon into your freshly prepared “blood” mixture. Hold the spoon over the white bark and, with a flick of your wrist, fling the red candy onto the white base. You can experiment with different amounts of candy on the spoon and varying flicking motions to create different splatter patterns – from fine mist-like drops to larger, more dramatic splashes. Continue this process until you’ve achieved your desired gruesome, yet artistic, look. Remember, no two pieces of bark will be exactly alike, adding to its homemade charm!
Step 4: Add the Bone Sprinkles. While the red melted candy is still wet and pliable, generously sprinkle your bloody bone sprinkles (or other spooky sprinkles) over the entire bark. Gently press the sprinkles down slightly with your fingertips to help them adhere securely to the candy. This ensures they don’t fall off once the bark has set. Allow the entire bark to set completely at room temperature or in the refrigerator for quicker results. Once fully hardened, break the bark into irregular pieces for that authentic, fractured bone look. Your Bloody Good Halloween Bones Bark is now ready to impress!
Tips for Perfect Halloween Bark Every Time:
- Melting Chocolate Mastery: When melting candy melts or chocolate, avoid any contact with water, as even a tiny drop can cause the chocolate to seize and become unusable. Use clean, dry utensils and bowls.
- Achieving Vibrant Color: Always use gel food coloring for chocolate. Liquid food coloring contains water, which can cause the chocolate to seize. Gel colors provide intense color with minimal product.
- Consistency is Key: If your red “blood” mixture seems too thick after adding dye, add lard or coconut oil in small increments (¼ teaspoon at a time) until you reach the desired thinness for easy splattering.
- Storage: Once completely set, store your Halloween bark in an airtight container at room temperature for up to two weeks, or in the refrigerator for an extended shelf life. Keep it away from direct sunlight or heat sources to prevent melting.
- Make Ahead: This bark is fantastic for making in advance! Prepare it a few days before your event and store it properly. It holds up beautifully.
More Bloody Good Recipes You Might Enjoy for Halloween:
If you’re loving the spooky vibe of this bark, you’ll definitely want to check out these other frightfully fun recipes to complete your Halloween feast!
- Bloody Cupcakes: These gruesome delights are perfect for a truly horrifying dessert table.
- Bloodshot Eyeball Doughnuts: Creep out your guests with these uncanny and delicious eyeball treats.
- Black Widow Venom Moonshine: For the adults, a potent and darkly mysterious beverage that’s sure to cast a spell.

Bloody Good Halloween Bones Bark
Author: Jaclyn
Saved!
Ingredients
- 16 oz white chocolate melting wafers or candiquik
- ½ cup white chocolate chips
- red food coloring
- 2 Tablespoons lard or coconut oil
- 1 Tablespoons bloody bone sprinkles
Instructions
-
Melt the chocolate wafers / candy melts in the microwave until smooth and free of lumps.
-
Cover a cookie sheet with parchment paper. Pour the melted chocolate onto the parchment paper and spread with a spoon. Allow to dry completely before moving on to the next step.
-
Melt ½ cup of white vanilla chips on the stove over medium heat. Stirring constantly.
-
Add red food dye and a small amount of lard to the white vanilla chips. Continue to stir. Keep adding red food dye until your chips reach a dark red color. Once you’ve reached the color of blood, remove the chips from the stove. Add more lard if needed to thin to desired consistency.
-
Dip a spoon into the melted chips and fling it onto the white bark. Keep doing this until you’ve reached your desired look.
-
While the candy is still wet, add some bone sprinkles. Press them down slightly to help them stick to the candy.
Nutrition

Did You Make This Recipe?
Share it with me on Instagram @crayonsandcravings and follow on Pinterest @crayonsandcravings for even more!
Pin Recipe
Leave A Review
We hope this detailed guide helps you create the most frightfully delicious and visually stunning Bloody Good Halloween Bones Bark for your upcoming festivities. It’s truly an easy Halloween candy that packs a punch of both flavor and spooky aesthetics. Happy Halloween and happy baking!
