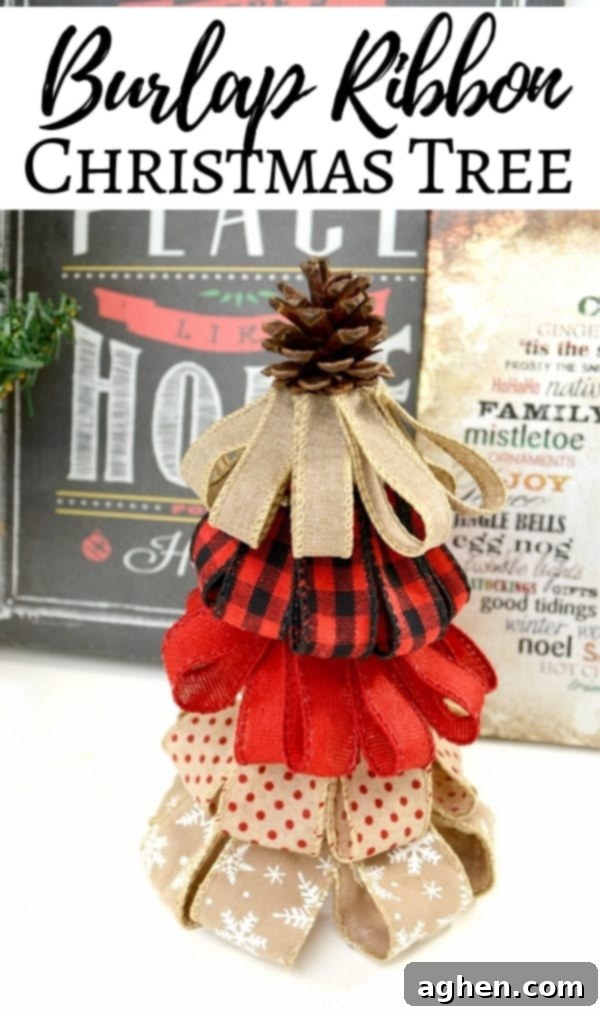
Create Charming Burlap Ribbon Christmas Trees: An Easy DIY Guide for Rustic Holiday Decor
Embrace the warm, inviting charm of rustic decor this holiday season with a craft that’s as delightful to make as it is to display: the Burlap Ribbon Christmas Tree. If you’re drawn to the cozy aesthetic of farmhouse-inspired decorations, these charming trees are an absolute must-have for your home. Perfect for adding a touch of homemade elegance to your holiday setup or for gifting to loved ones, this DIY project is simple, rewarding, and brimming with character.
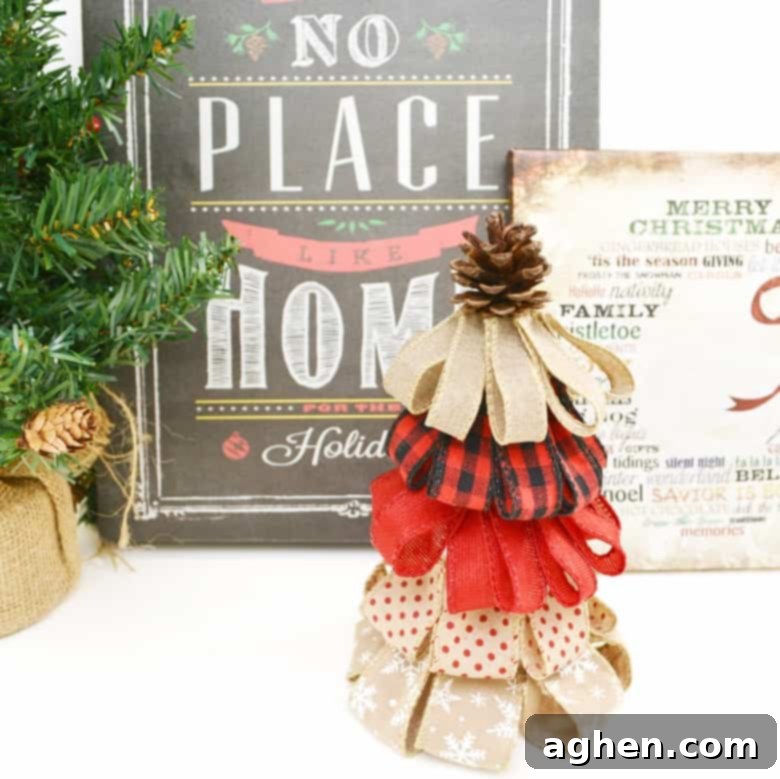
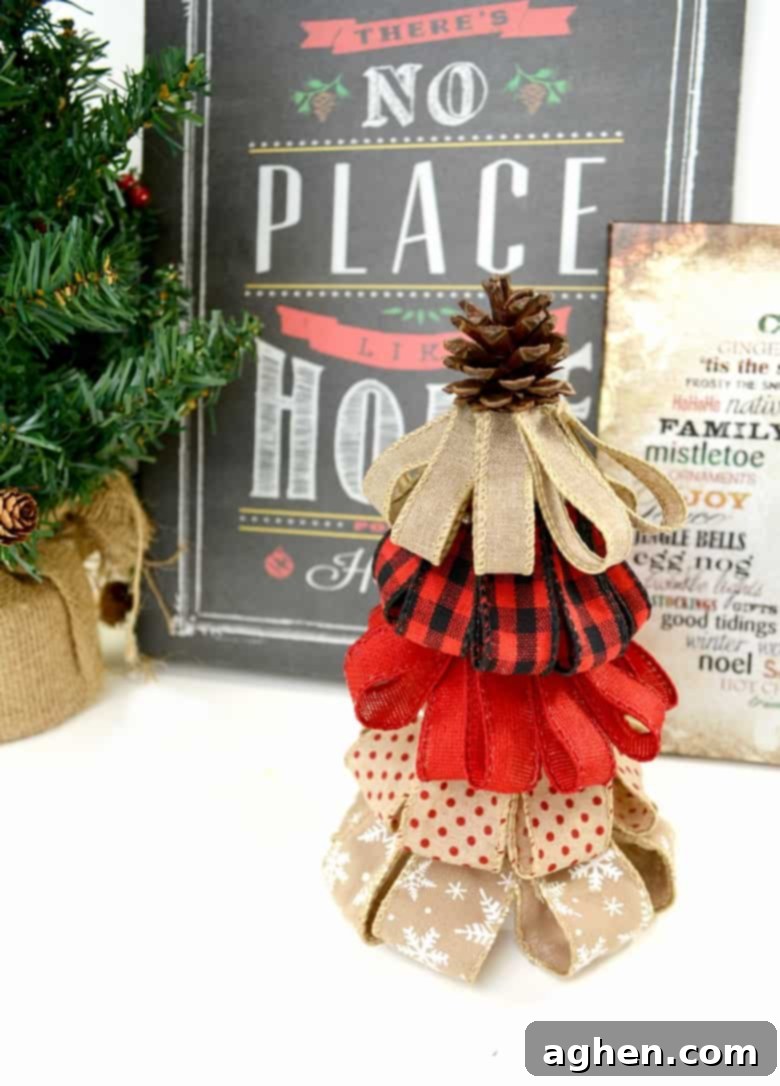
The Enduring Appeal of Rustic Christmas Decor
Rustic decor has captivated homeowners worldwide, bringing a sense of warmth, authenticity, and timeless appeal into modern spaces. There’s something undeniably comforting about pieces crafted from natural materials like galvanized metal, reclaimed wood, and, of course, burlap. This style evokes memories of simpler times, creating an atmosphere that feels both traditional and refreshingly unpretentious. For the Christmas season, rustic elements transform your home into a cozy, inviting haven, perfect for festive gatherings and quiet moments by the fire.
Burlap, in particular, stands out as a foundational material for rustic crafting. Its unique texture and earthy tones lend an organic, handcrafted feel to any project. It’s not just aesthetically pleasing; burlap is also incredibly durable and versatile, making it a dream to work with for a variety of DIY endeavors. From elegant table runners to charming wreaths, burlap effortlessly infuses a touch of natural beauty and understated sophistication into your holiday decorations.
Introducing Your Next Favorite Holiday Project: The Burlap Ribbon Christmas Tree
Speaking of charm, this DIY burlap ribbon Christmas tree is absolutely loaded with rustic appeal. Imagine a collection of these delightful trees adorning your mantelpiece, gracing your dining table, or adding a festive touch to your entryway. This project offers a wonderful escape from the hustle and bustle of holiday preparations, making it perfect for a leisurely afternoon craft session. Picture yourself on a chilly autumn or winter day, perhaps with a favorite Christmas movie playing in the background, as you transform simple materials into beautiful, unique decorations.
The beauty of these burlap ribbon trees lies in their simplicity and the creative freedom they offer. You can craft them in various sizes and styles to suit your personal taste and home decor. Make a set for yourself, create thoughtful gifts for friends and family, or host a crafting party to share the joy. Don’t be afraid to experiment with different burlap patterns and embellishments to make each tree truly unique. The possibilities are endless when you let your creativity guide you.
Versatile Decor for Every Space
These decorative burlap trees aren’t just limited to one display option; their versatility allows them to enhance almost any area of your home during the holidays. Here are a few ideas to inspire your decorating:
- Charming Centerpieces: Arrange a trio of varying-sized burlap trees in the center of your dining table, perhaps nestled within a homemade evergreen wreath, to create a stunning focal point.
- Mantelpiece Magic: Line your fireplace mantel with a row of these trees, interspersing them with fairy lights, small pinecones, or other natural elements for a cozy glow.
- Shelf & Bookcase Accents: Tuck smaller trees onto shelves or bookshelves to bring a festive touch to unexpected corners.
- Welcoming Entryways: Place a couple of larger trees on an entryway table or console, perhaps alongside a bowl of festive potpourri, to greet guests with holiday cheer.
- Thoughtful Gifts: Wrap a beautifully crafted burlap tree as a unique, handmade gift for teachers, neighbors, or hostesses. It’s a personal touch that shows you care.
- Kid’s Room Decor: These soft, pin-secured trees are safer than traditional glass ornaments, making them a charming addition to a child’s bedroom.
The natural texture of burlap pairs beautifully with other rustic elements like wood slices, twine, and subtle greenery, allowing these trees to seamlessly integrate into any farmhouse, country, or rustic-themed holiday decor.
Crafting Your Burlap Ribbon Christmas Tree: A Step-by-Step Guide
Ready to get started? This project is incredibly straightforward, even for beginner crafters. Gather your materials, clear a space, and let’s create some holiday magic!
Gathering Your Supplies
For this delightful DIY, you will need just a few essential items:
- Burlap Ribbon with Wire: Crucially, choose ribbons with a wired edge. This allows the loops to hold their shape beautifully and makes the crafting process much easier. Experiment with various prints, textures, and widths to add visual interest to your trees. A mix of wider ribbons for the base and narrower ones for the top creates a lovely graduated effect.
- Foam Tree Form: These cone-shaped Styrofoam forms are readily available at craft stores in a range of sizes. Pick a size that fits your desired tree height.
- Push Pins: You’ll need a good supply of these to secure your ribbon loops. Plan for at least 50 pins per medium-sized tree, as you’ll be adding many layers.
- Small Pine Cone or Star: For the perfect finishing touch, select a small natural pine cone, a rustic wooden star, or any other small embellishment you wish to use as your tree topper.
You will also need a sharp pair of scissors to cut your ribbon and a hot glue gun (with glue sticks) for the final top layer and attaching your embellishment. Always exercise caution when using a hot glue gun.
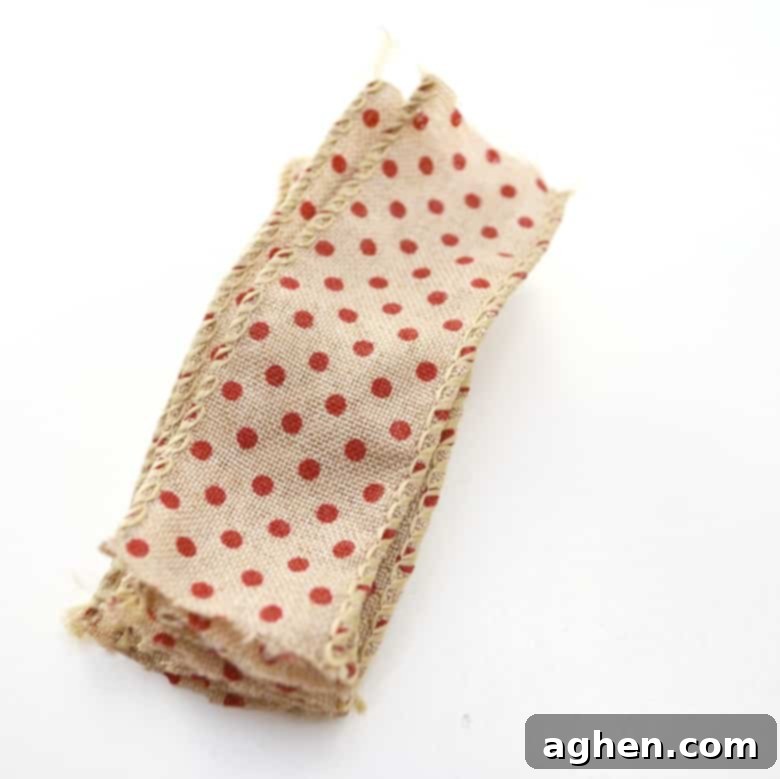
Step 1: Preparing Your Burlap Ribbon
Start by taking your widest burlap ribbon. Cut several short pieces, each only a few inches long (approximately 3-4 inches, depending on the desired loop size and ribbon width). The wired edges of the ribbon will be your best friend here, as they allow you to easily shape each piece into a neat loop. Form each cut piece into a loop, bringing the two raw ends together at the bottom. Secure these ends with a single push pin, pushing it through the overlapping fabric.
Step 2: Building the First Layer
Once you have a handful of pinned loops, begin attaching them to the foam tree form. Start at the very bottom of the tree, about an inch or two from the base. Pin the first loop firmly into the foam. Continue this process, placing loops side-by-side and overlapping slightly, working your way all around the circumference of the tree form. Aim for a consistent look in terms of loop size and spacing to ensure a uniform and full appearance for your tree’s base.
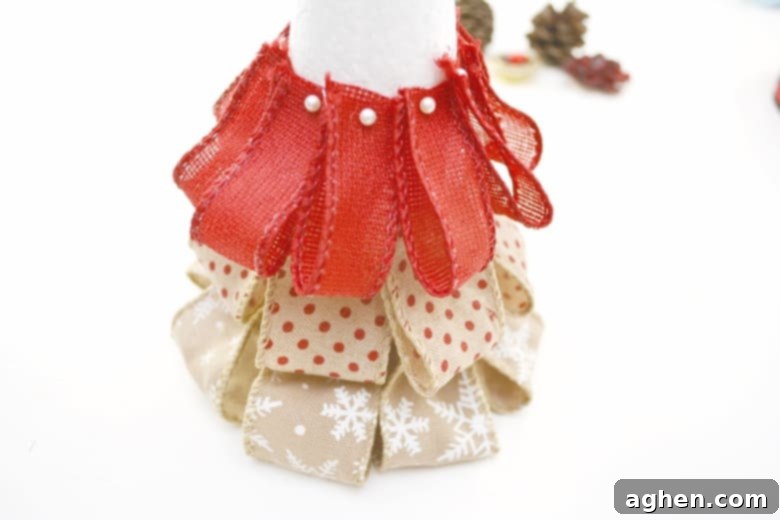
Step 3: Layering Up the Tree
After completing the bottom row, move upwards to the next layer. For this row, switch to your next widest ribbon if you’re using varied sizes. Repeat the process of cutting, looping, and pinning, ensuring that each new row slightly overlaps the row below it. This overlapping creates a fuller, more textured look, reminiscent of real Christmas tree branches. Continue covering the entire tree form with these beautiful layers of looped ribbon, gradually switching to narrower ribbons as you ascend towards the top, creating a natural tapering effect.
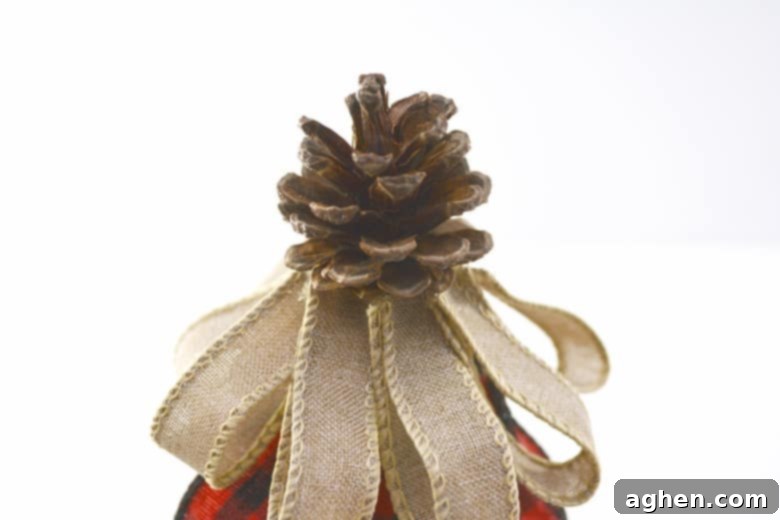
Step 4: The Finishing Touch (No Pins Allowed!)
As you approach the very top of the tree, for the final layer of ribbon loops, you’ll want to switch from push pins to a hot glue gun. The reason for this is purely aesthetic: using hot glue ensures that no pins are visible at the apex of your beautiful burlap tree, resulting in a cleaner, more professional finish. Carefully glue the final, smallest loops into place, concealing any exposed foam.
Step 5: Adding Your Tree Topper
Finally, it’s time to crown your creation! Take your chosen small pine cone, star, or other embellishment and securely attach it to the very tip of your burlap ribbon tree using hot glue. Hold it in place for a few moments until the glue sets. This final touch will complete your rustic masterpiece, giving it a polished and festive look.
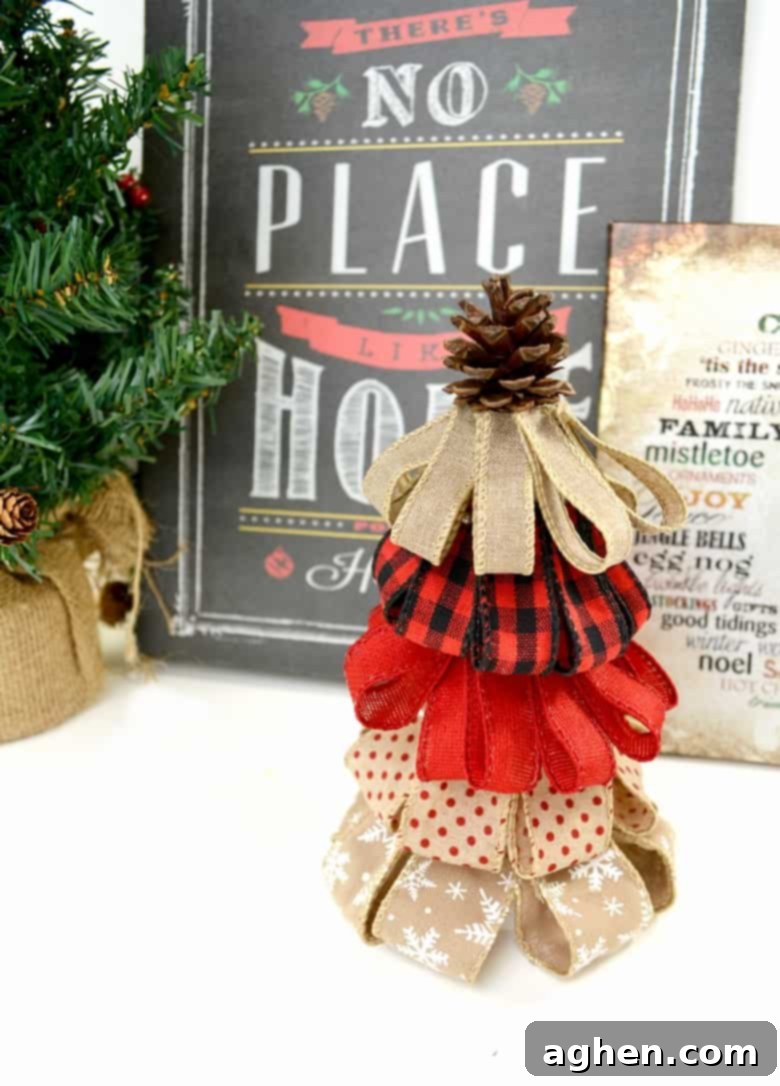
Tips for Achieving a Flawless Burlap Christmas Tree
- Ribbon Variety: Don’t be afraid to mix and match burlap ribbons with different patterns (e.g., solid, chevron, plaid) or even a touch of lace-edged ribbon for added texture. Natural tones like cream, beige, and light brown work wonderfully together.
- Foam Cone Size: Craft stores offer foam cones in various heights. Consider making a set of three trees in different sizes (small, medium, large) for a visually appealing display.
- Consistent Loops: Try to make your ribbon loops as uniform in size as possible for each layer. This creates a neat and professional appearance. Wired ribbon makes this much easier.
- Hot Glue Gun Safety: Always use caution when working with a hot glue gun. Ensure you have a protected surface and be mindful of your fingers.
- Add Embellishments: Beyond the topper, you can hot glue tiny faux berries, small rustic bells, or a sprinkle of glitter to the burlap loops for extra sparkle and festive cheer.
- Scented Options: For an extra sensory touch, add a few drops of essential oil (like cinnamon or pine) to the foam cone before adding the ribbon layers, or tuck in a few dried orange slices for a natural, festive aroma.
Personalize Your Rustic Masterpiece
While burlap provides a fantastic neutral base, there are countless ways to personalize your trees to match your home’s unique style. Consider adding:
- Color Accents: Integrate thin ribbons of red, green, or gold alongside your burlap for a pop of traditional Christmas color.
- Mini Ornaments: Tiny glass baubles, small rustic star ornaments, or even handmade clay charms can be carefully glued into the folds of the burlap.
- Natural Elements: Small sprigs of artificial pine, miniature holly leaves, or dried flowers can be tucked between the ribbon layers for an organic look.
- Sparkle and Shine: If you’re not fully committed to a purely rustic look, a light dusting of iridescent glitter spray can add a magical shimmer without detracting from the burlap’s charm.
These personal touches transform a simple craft into a cherished piece of holiday decor that reflects your individual taste and creativity.
DIY Holiday Gifting: A Heartfelt Touch
There’s nothing quite like a handmade gift to convey thoughtfulness and care, and these burlap ribbon Christmas trees are perfect for holiday gifting. Imagine presenting a beautifully wrapped, handcrafted tree to a friend, family member, or colleague. They make excellent hostess gifts, secret Santa surprises, or even small tokens of appreciation for teachers. Plus, crafting them yourself can be significantly more budget-friendly than purchasing store-bought decorations, allowing you to create multiple gifts without breaking the bank. Each tree will be a unique expression of your festive spirit, appreciated for its rustic charm and the effort you put into making it.
I hope that you enjoy this easy and charming Christmas decor DIY! It’s a project that promises not only beautiful results but also a wonderful opportunity to relax and immerse yourself in the creative spirit of the holiday season.
Did you know that you can now print out the material list & step-by-step instructions for Crayons & Cravings projects?! Just click on the big green print button below!
More Rustic Christmas Decor DIY & Crafts
If you’ve enjoyed making your burlap ribbon trees, you’ll love exploring other rustic and farmhouse-style Christmas crafts. Continue your creative journey and fill your home with handmade holiday cheer with these additional project ideas:
- Mason Jar Lid Christmas Wreath Ornament: Transform simple canning jar lids into adorable mini wreaths, perfect for tree ornaments or small gifts.
- Wood Slice Rudolph Ornament: Create charming Rudolph reindeer ornaments using natural wood slices – a delightful addition to any rustic Christmas tree.
- Rock Nativity Canvas Wall Art: Combine natural elements like painted rocks with a canvas for a unique and heartfelt nativity scene.
- Wooden Christmas Tree Decor: Explore other wooden craft ideas for more rustic tree decorations that complement your burlap creations.
- Rustic Farmhouse Christmas Floral Can Craft: Repurpose old cans into charming floral displays with a farmhouse twist, ideal for adding more greenery to your rustic theme.
Burlap Ribbon Christmas Tree
Author: Jaclyn
Equipment
-
hot glue gun
-
Scissors
Supplies
- burlap ribbon with wire various types and widths
- 1 foam cylinder tree form
- 50 push pins
- 1 small pine cone or other small decoration
Instructions
-
Begin by cutting short lengths of your widest ribbon. These should be only a couple of inches long. Form each piece of cut ribbon into a loop and put a pushpin through the top where the two loose ends meet.
-
Attach the pinned loop of ribbon to the bottom of your tree form just an inch or two from the bottom.
-
Continue to create a ring of looped ribbon all the way around the bottom.
-
Once you have finished one row, go to your next widest ribbon and continue the process to create another layer of pinned loops of ribbon just an inch or two above the last row.
-
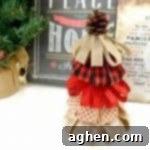
Keep making layers of looped ribbon all the way up the Styrofoam form. You can see the photo for reference as to what this should look like.
-
When you get to the final layer of looped ribbon, use hot glue to secure the loop closed and attach it to the Styrofoam form. You want to use hot glue and not pins on this layer so that no pins will be visible on your burlap ribbon tree.
-
Once finished with the layers, hot glue a small pine cone or other embellishment to the top of your burlap ribbon tree to complete the decor.
Did You Make This Craft?
Share it with me on Instagram @crayonsandcravings and follow on Pinterest @crayonsandcravings for even more!
Pin Craft
Leave A Review
Conclusion: Embrace the Handmade Holiday Spirit
Crafting these burlap ribbon Christmas trees is more than just a DIY project; it’s an invitation to slow down, get creative, and infuse your home with genuine holiday spirit. The simple beauty of burlap, combined with your personal touch, results in truly enchanting decorations that add rustic elegance to any festive setting. Whether you’re making them for your own home or as heartfelt gifts, these trees are a testament to the charm and warmth of handmade holiday decor. So, gather your supplies, put on some carols, and enjoy the process of creating something beautiful and unique this Christmas season!
Pin for Later:
