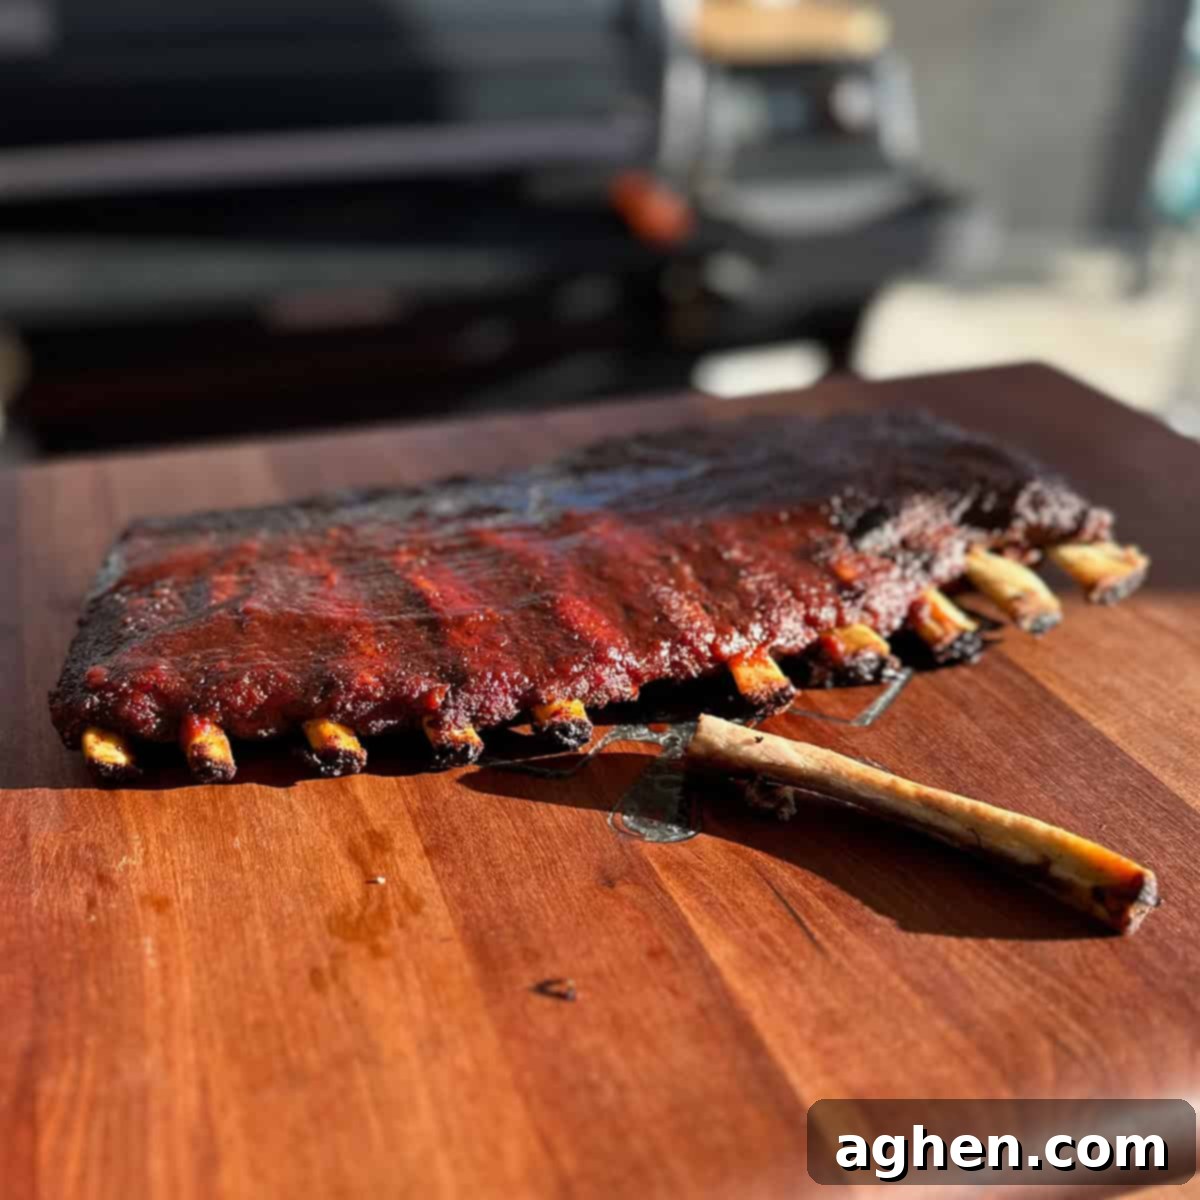
Mastering Fall-Off-The-Bone Ribs on Your Traeger: The Ultimate Recipe & Guide
There’s an ongoing debate in the world of barbecue: do you prefer ribs with a satisfying “tug” that firmly pulls off the bone, or do you crave that melt-in-your-mouth, fall-off-the-bone tenderness? Personally, I’m a fan of competition-style ribs that offer a bit of chew and structure. However, as a seasoned pitmaster, I understand that the true art lies in pleasing your audience. Many friends and family members yearn for that incredible fall-off-the-bone experience, and sometimes, you just have to give the people what they want!
This recipe is my definitive guide to achieving precisely that. I recently perfected these incredibly tender and flavorful ribs on my Traeger Ironwood 885. This state-of-the-art pellet grill, with its unparalleled ability to effortlessly control temperature and allow me to monitor my cook from anywhere using the intuitive Traeger App, truly made the result a masterpiece of tenderness and smoky flavor. Prepare to transform your backyard barbecue into a haven of culinary delight with ribs so tender, they practically surrender from the bone.
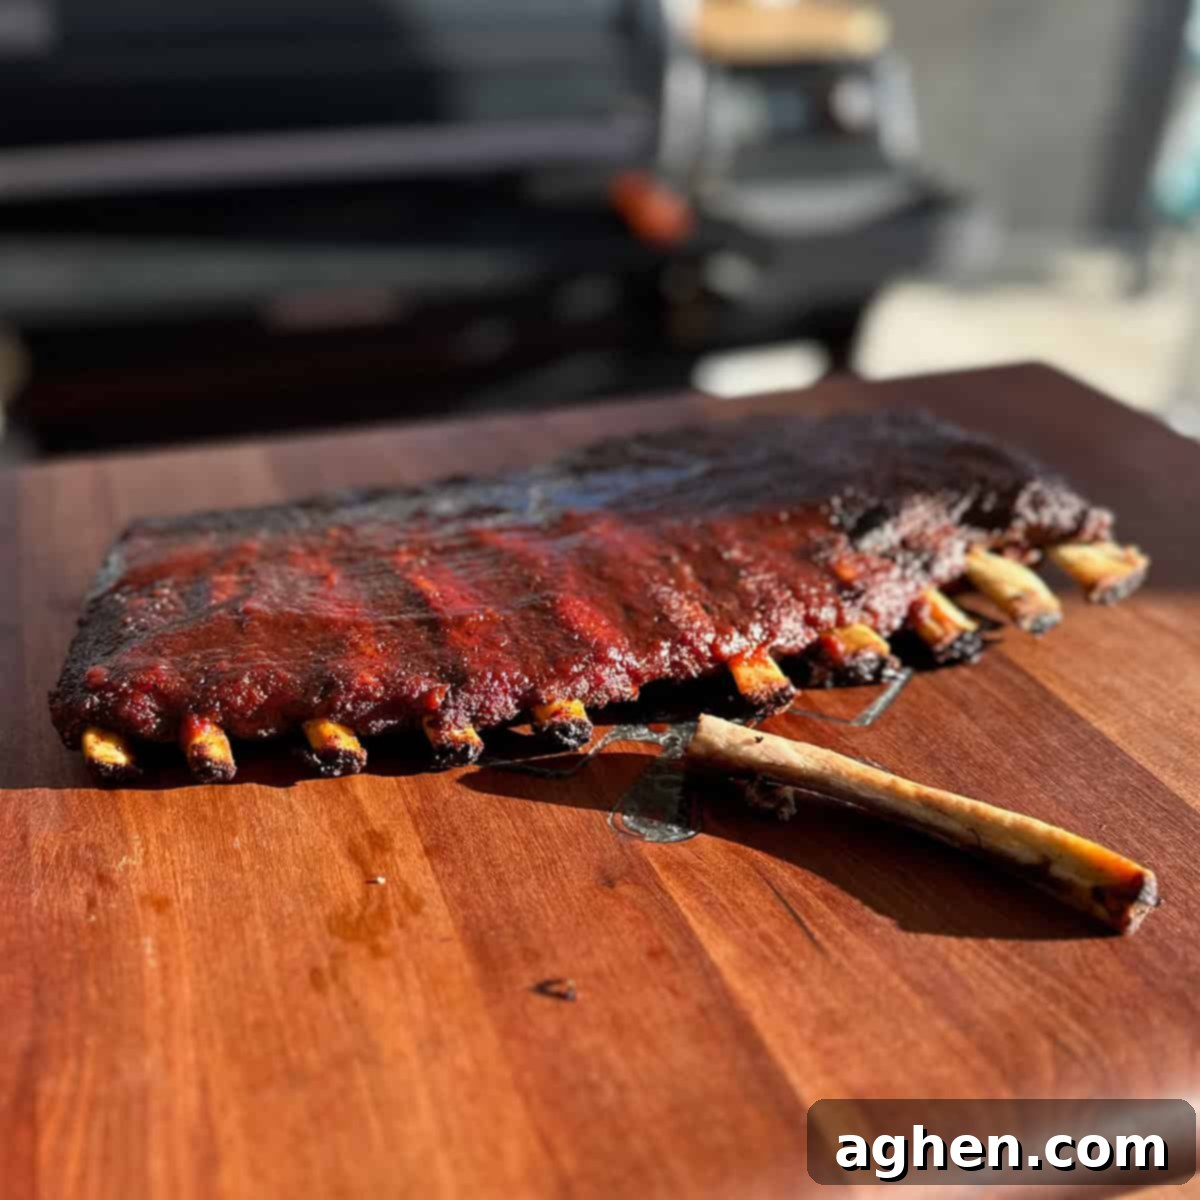
Why You Should Master This Fall-Off-The-Bone Rib Recipe
- Give the people what they want: As I mentioned, while my personal preference often leans towards a more structured, competition-style rib, a truly great pitmaster knows how to adapt and deliver on different preferences. This recipe is your secret weapon for those gatherings where guests are explicitly looking for ribs that require minimal effort to separate from the bone. The sheer joy and satisfaction on their faces when a bone slides clean out of the meat is incredibly rewarding, proving your versatility and skill in the art of barbecue. It’s about creating a memorable experience tailored to what your guests love most.
- Achieve a unique, desirable texture: Many people associate “fall-off-the-bone” with overcooked, mushy, or dry ribs. This recipe defies that stereotype. We’re aiming for extreme tenderness without sacrificing the integrity of the meat or its succulent juiciness. The method employed here ensures that while the ribs are incredibly tender, they retain a fantastic texture and a rich, smoky flavor, preventing them from becoming an indistinguishable pile of shredded pork. It’s a fine balance that this specific cooking process achieves beautifully, resulting in ribs that are both supremely tender and wonderfully moist.
- Expand your pitmaster repertoire (Options): For those who regularly fire up their Traeger grills, having a diverse range of recipes keeps the culinary journey exciting. If you’re short on time, my popular 275º method is a go-to for delicious ribs in a quicker timeframe. For a classic, perfectly balanced bite, my 2-2-1 recipe is a consistent winner. However, when time is a luxury and your goal is to slow-cook some truly exceptional ribs that reach peak tenderness and absorb maximum smoke flavor, this particular fall-off-the-bone recipe is absolutely perfect. It adds another impressive technique to your grilling arsenal, allowing you to cater to any craving or occasion.
Essential Ingredients for Unforgettable Fall-Off-The-Bone Ribs
- 1 slab pork spare ribs: For this particular recipe, I strongly recommend using spare ribs, or even St. Louis style ribs, over baby back ribs. Spare ribs typically have more fat marbling and a more uniform thickness, which is crucial for a longer cook and achieving that desired juicy, fall-off-the-bone texture without drying out. The fat renders down beautifully, adding incredible flavor and moisture throughout the extended smoking process.
- 1 tbsp yellow mustard: This might sound unconventional to some, but yellow mustard is my preferred binder. When applied thinly, it creates a slightly tacky surface that helps your dry rubs adhere uniformly to the meat. Crucially, the mustard flavor completely dissipates during the long cook, so it won’t alter the taste of your delicious ribs. Instead, it seems to positively impact the formation of a rich, mahogany bark and ensures your seasonings stick where they belong.
- 2 tbsp Smoked Q Rock’s Anytime Seasoning: This seasoning is your foundational layer, providing a classic Salt, Pepper, & Garlic (S.P.G.) flavor profile. It’s the base that all other flavors build upon, ensuring every bite is savory and well-seasoned from the inside out. This blend is robust enough to stand up to the smoke and the rich pork flavor.
- 2 tbsp Smoked Q Rock’s Summer BBQ Rub: Layering this on top of the Anytime seasoning is where the magic happens for that quintessential BBQ taste. My Summer BBQ rub imparts bold, sweet, and savory BBQ flavors, often with hints of brown sugar, paprika, and other warming spices. It’s also instrumental in developing that beautiful, deep red, almost mahogany-colored bark that is characteristic of perfectly smoked ribs.
- 1/4 cup Apple Cider Vinegar: Mixed with 1/4 cup water, this creates your essential spritzing liquid. It helps keep the surface of the ribs moist during the initial smoke, which in turn promotes better smoke absorption and bark development. The acidity also adds a subtle, tangy note that cuts through the richness of the pork and enhances the overall flavor profile.
- 2 tbsp Smoked Q Rock’s Irish Whiskey BBQ Sauce: No truly great rib experience is complete without the perfect finishing sauce. My Irish Whiskey BBQ sauce introduces a masterful blend of tangy, smoky, and slightly sweet heat, with a unique depth from the whiskey. Applied in the final stage, it caramelizes beautifully on the ribs, creating a sticky, glossy glaze that perfectly complements the tender meat and spicy rubs.
Step-by-Step Guide to Crafting Perfect Fall-Off-The-Bone Ribs
Smoking ribs to fall-off-the-bone perfection requires a keen eye and a patient hand. Follow these detailed steps to achieve truly unforgettable results:
1. Preheat Your Smoker to Perfection: The journey to exceptional ribs begins with precise temperature control. For this recipe, I set my trusty Traeger Ironwood 885 to 275ºF. This temperature is a sweet spot – it’s hot enough to cook the ribs efficiently, allowing the fat to render slowly, while still being low enough to ensure maximum smoke penetration for that rich, unmistakable smoky flavor. The Traeger’s consistent heat makes maintaining this temperature effortless, which is crucial for a tender outcome. Give it about 15-20 minutes to fully come to temperature before placing your ribs inside.
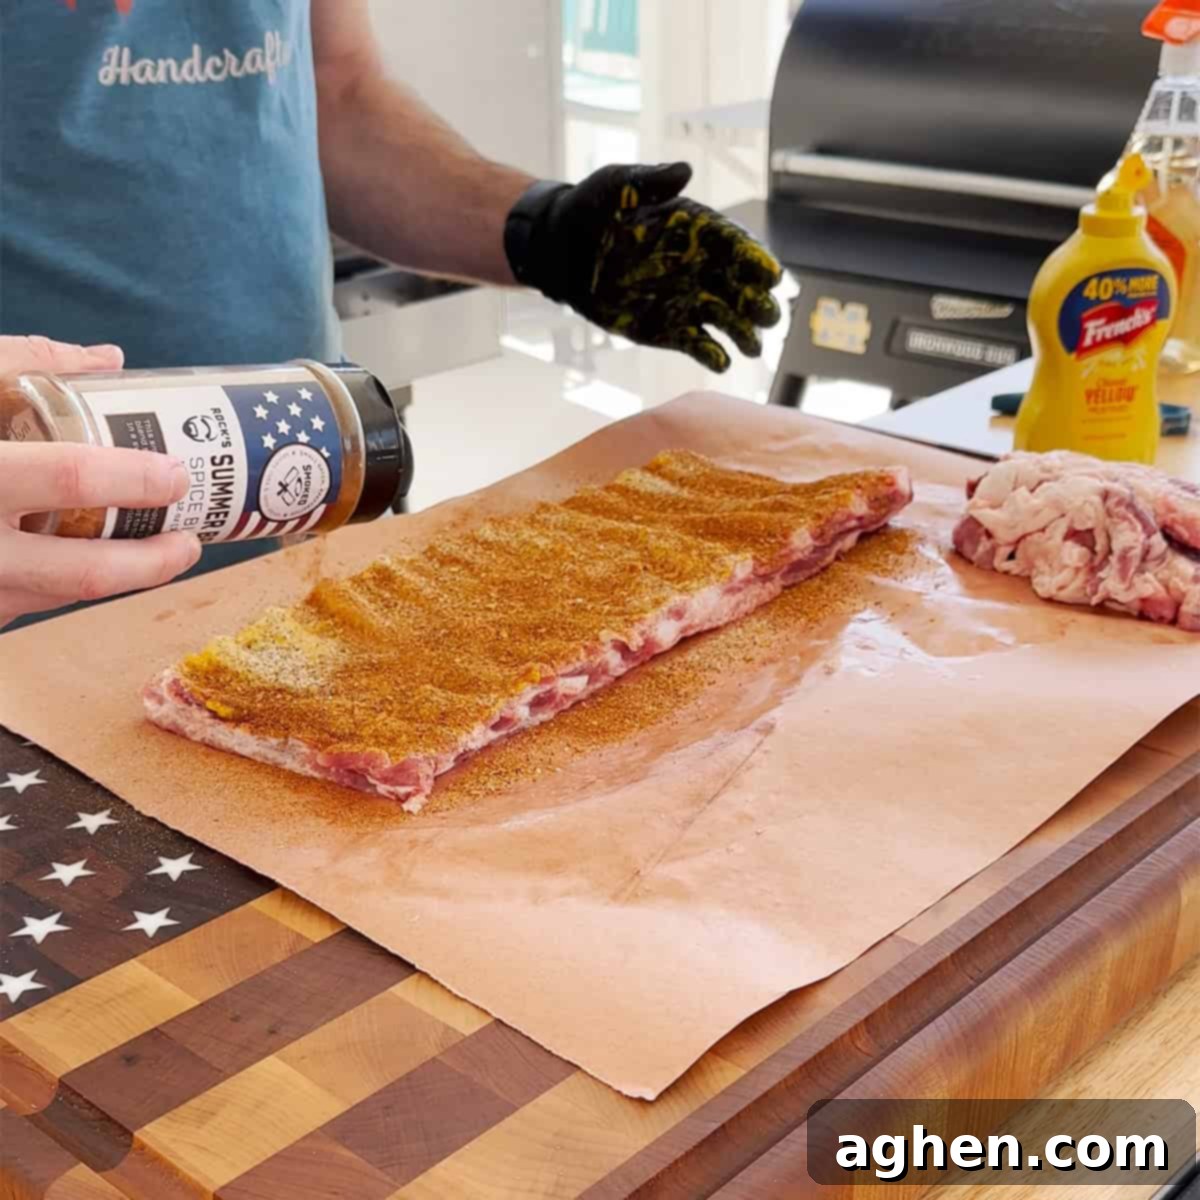
2. Prepare the Ribs for Maximum Flavor: Proper preparation is key to the best results. First, locate the thin membrane on the underside (bone side) of the ribs. Using a paper towel for a better grip, peel and remove this membrane entirely. This step is vital as the membrane can become tough and chewy when cooked, and its removal allows your rubs and smoke to fully penetrate the meat. Next, trim your slab of ribs into a neat, rectangular shape, removing any excessively fatty areas or thin bone ends that might burn or cook unevenly. This ensures a consistent cook and a beautiful presentation. Now, apply a thin, even layer of yellow mustard over all surfaces of the ribs – top, bottom, and sides – using it as a binder for your rubs. Don’t worry, the mustard flavor will cook off completely. Following this, generously apply a layer of Smoked Q Rock’s Anytime Seasoning, ensuring full coverage, then follow up with an equally generous layer of Smoked Q Rock’s Summer BBQ Rub. This layering technique builds complex flavors from the start. Once the bottom is seasoned, flip the ribs and repeat the binder and rub application on the top side. Let the seasoned ribs sit for 15-20 minutes at room temperature while your smoker comes up to heat, allowing the rubs to meld slightly with the meat.
3. The Initial Smoke & Spritz: Carefully place the prepped ribs directly onto the grates of your Traeger smoker, bone side down. For the first two hours of this cook, the ribs will remain unwrapped at 275ºF. This initial phase is crucial for developing a robust smoke ring and setting that delicious bark. To keep the surface moist and enhance smoke absorption, I highly recommend spritzing the ribs every hour. Prepare a mixture of equal parts apple cider vinegar and water in a spray bottle. Give the ribs a good, even misting each time. Continue smoking until the internal temperature of the thickest part of the meat reaches approximately 175ºF. This ensures good smoke flavor and begins the tenderizing process.
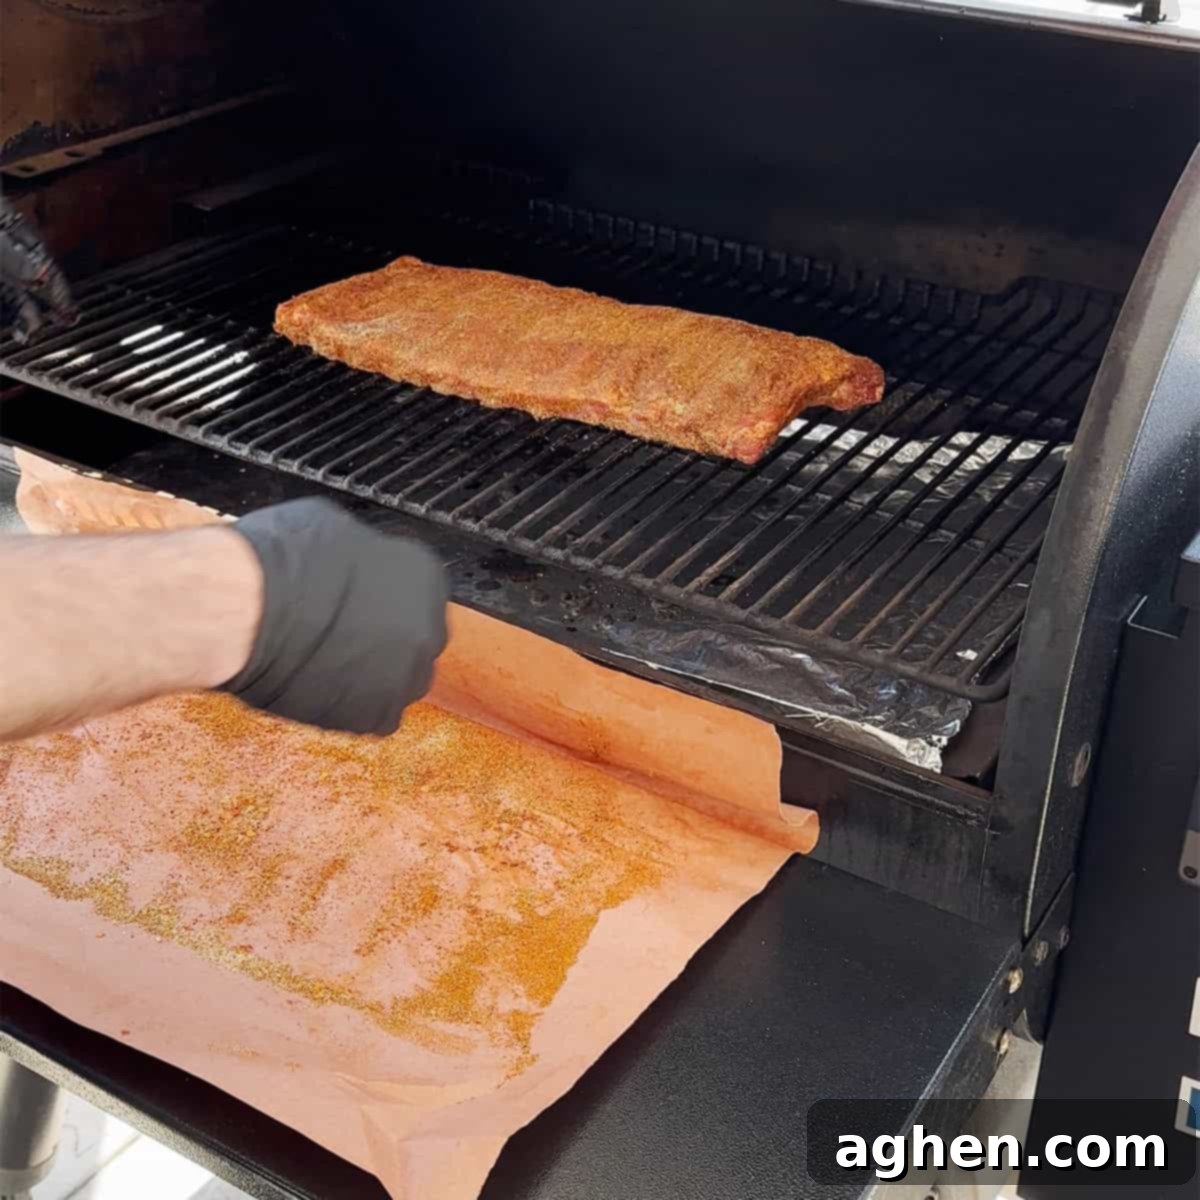
4. The Butcher Paper Wrap (The Texas Crutch): After the initial two hours and once the ribs have hit their target internal temperature, carefully remove them from the smoker. This is where we employ the “Texas Crutch” – a wrapping method designed to push through the stall, lock in moisture, and further tenderize the meat. Lay out a large sheet of butcher paper (large enough to fully enclose the ribs) and place the ribs onto it. Wrap them tightly, creating a sealed packet. Butcher paper is preferred over foil for this method as it allows some steam to escape, helping to preserve the bark, whereas foil can sometimes create too much steam, making the bark soft. Place the wrapped ribs back on the smoker for another 2.5 hours at the same 275ºF. This extended wrapped period will work wonders on their tenderness.
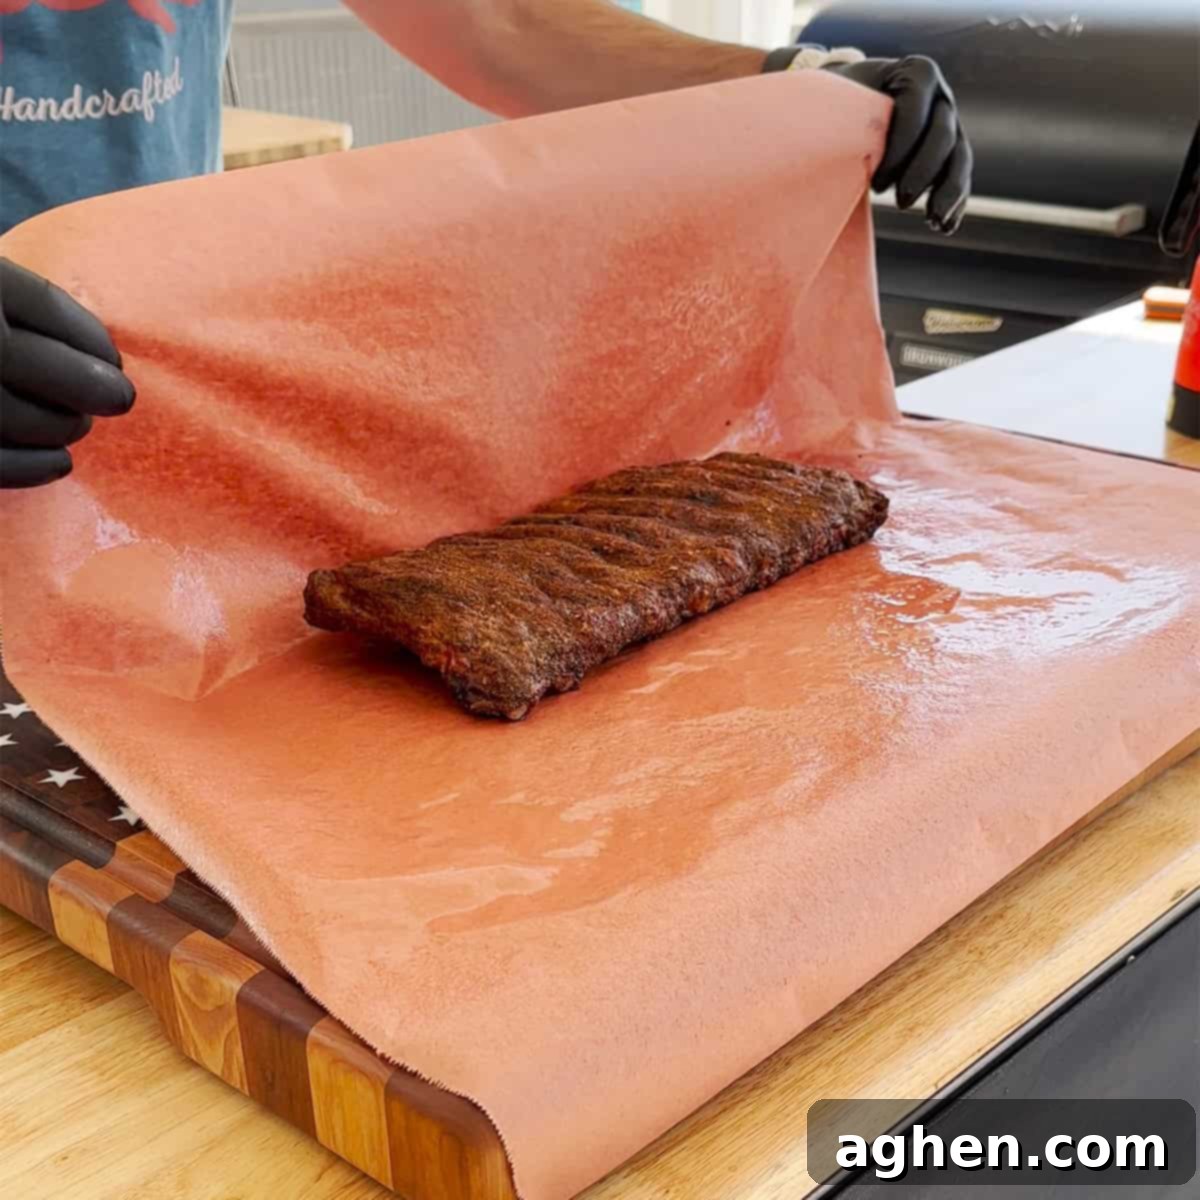
5. Glaze and Finish: After the 2.5 hours in butcher paper, it’s time to check for doneness and apply the finishing touches. Carefully unwrap the ribs. The meat should have pulled back from the ends of the bones, and a temperature probe should slide into the meat with minimal resistance, like butter. For fall-off-the-bone texture, we’re typically aiming for an internal temperature of around 205ºF. Once satisfied with the tenderness, remove the ribs from the smoker. At this point, generously brush a layer of Smoked Q Rock’s Irish Whiskey BBQ Sauce over the top surface of the ribs. Return the sauced ribs to the smoker, unwrapped, for an additional 15 minutes. This final short period allows the BBQ sauce to “set” or caramelize, creating a beautiful, sticky, and glossy glaze that locks in flavor and adds a fantastic finish. Keep a close eye on them to prevent the sauce from burning.
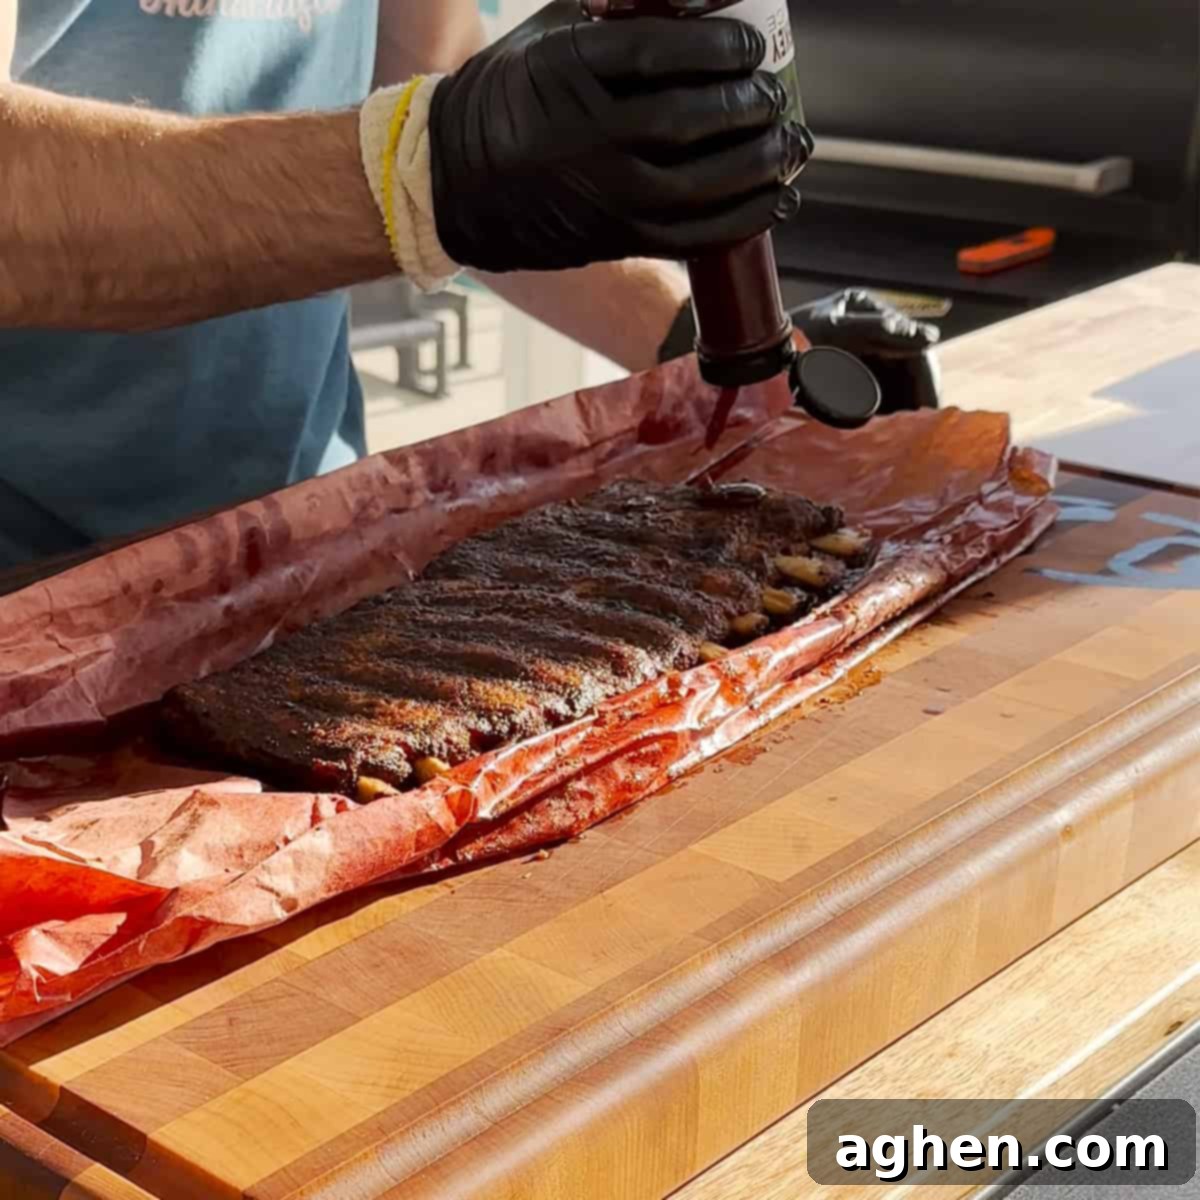
6. The Ultimate Test & Enjoyment: Once the sauce has set and the ribs look utterly irresistible, carefully remove them from the smoker. While it’s tempting to dive right in, allow the ribs to rest for about 10-15 minutes, lightly tented with foil. This resting period allows the juices to redistribute throughout the meat, ensuring every bite is as tender and succulent as possible. After resting, the ultimate test for fall-off-the-bone perfection is simple: gently grab hold of one of the bones. If it slides clean out with no resistance, you’ve nailed it! Slice and serve immediately, watching your guests marvel at your pitmaster prowess.
Delicious Variations and Flavor Substitutions
One of the joys of barbecue is the endless possibility for customization. While the Smoked Q rubs and sauce are exceptional, feel free to experiment to find your personal favorite combinations.
Alternate Rib Rubs: Ribs are a magnificent canvas for a wide array of seasoning combinations. If you’re looking to explore beyond the fantastic Smoked Q rubs, there are many other high-quality brands that deliver excellent results. Some of my personal favorites include Meat Church, known for their competition-grade blends; Whiskey Bent, offering a unique twist on traditional BBQ; Kendrick BBQ, for robust and savory profiles; JDQ, for innovative flavors; and Heath Riles, a consistent performer in the BBQ circuit. Each brand offers distinct flavor profiles, from sweet and smoky to spicy and savory, allowing you to tailor your ribs to your exact taste. But don’t be afraid to head to your pantry to make your own signature BBQ rub. A simple, yet incredibly effective, homemade blend can be created with common spices:
- 6 parts brown sugar (for sweetness and bark)
- 6 parts paprika (for color and mild flavor)
- 2 parts garlic powder (essential savory depth)
- 2 parts salt (flavor enhancer)
- 1 part black pepper (subtle heat and aroma)
- 1 part chili powder (for warmth and complexity)
Adjust these ratios to suit your preference for sweetness, spice, or savoriness. Feel free to add other elements like onion powder, cumin, or a pinch of cayenne for an extra kick.
Choosing Your Rib Cut (Substitution or Variation): As I emphasized earlier, this recipe is best served with pork spare ribs or St. Louis style ribs due to their ideal fat content and uniform shape, which promotes even cooking and incredible juiciness over a longer smoke. However, if baby back ribs are all you have on hand, don’t despair! You can absolutely use them with this method. Just be aware that baby back ribs are leaner and smaller, meaning they will cook faster. You’ll need to plan to run them for a slightly shorter duration and pay very close attention to their internal temperatures throughout the process to prevent them from drying out. Monitor them frequently with your thermometer and adjust your wrapping and saucing times accordingly, likely reducing each stage by 30-60 minutes depending on their size.
Pitmaster Tips & Tricks for Smoked Rib Perfection
Achieving truly great ribs, especially that coveted fall-off-the-bone texture, often comes down to a few key techniques and a mindset of patience.
Be patient: This is arguably the most crucial tip for any successful smoking endeavor. When smoking meat, it’s imperative to be patient and never rush the process. Barbecue operates on “meat time,” not clock time. Every cut of meat is unique, and various factors such as ambient weather conditions (humidity, temperature) and even altitude can significantly affect the cooking time of this recipe. To ensure the meat is cooked to absolute perfection, resist the urge to constantly open the smoker or increase the temperature. Instead, be patient, grab your favorite beverage, sit back, and truly enjoy the low-and-slow cooking process. Good things come to those who wait in barbecue!
Use a reliable thermometer: While experience allows pitmasters to rely on visual cues or the “bend test” for other rib recipes, achieving the precise fall-off-the-bone texture requires more exact measurements. Therefore, you absolutely must have a reliable instant-read thermometer. This will allow you to accurately track the internal temperature of the ribs, ensuring they reach the critical 205ºF needed for that perfect tenderness. Don’t guess; measure. A good thermometer is an invaluable tool in your BBQ toolkit.
Butcher paper vs. foil: The choice of wrapping material often sparks debate among BBQ enthusiasts, and each has its merits. For this recipe, I opted for butcher paper, primarily because it helps maintain a slightly firmer bark while still allowing the meat to tenderize effectively. Butcher paper breathes, allowing some steam to escape, which prevents the ribs from becoming too “steamy” or mushy. However, foil is also a fantastic choice, especially if you prioritize maximum tenderness and potentially want to speed up the cooking time slightly, as it creates a tighter seal that traps more moisture. So, when you try this recipe, don’t hesitate to use foil if that’s what you have handy or if you prefer an even more steamed, ultra-tender result. Experiment to discover your preference!
Choose your wood pellets wisely: The type of wood you use significantly impacts the final flavor profile of your smoked ribs. For pork, popular choices include hickory, apple, pecan, and cherry. Hickory offers a strong, classic smoky flavor. Apple and cherry provide a milder, fruitier smoke that pairs beautifully with pork and can enhance the color of the bark. Pecan offers a rich, nutty, and slightly sweet smoke. Experiment with different blends or single woods to find the smoke flavor that best complements your chosen rubs and sauce.
Don’t skip the rest period: Even for fall-off-the-bone ribs, allowing them to rest after coming off the smoker is crucial. A brief 10-15 minute rest, lightly tented with foil, allows the muscle fibers to relax and the internal juices to redistribute evenly throughout the meat. This simple step ensures your ribs remain as juicy and tender as possible when you finally slice into them, preventing them from drying out too quickly.
Fall Off The Bone Ribs
Equipment
-
1 Traeger Ironwood 885
-
1 Roll Butcher Paper
-
1 Spray Bottle
-
Instant-Read Thermometer
Ingredients
- 1 slab Pork Spare Ribs
- 1 tbsp Yellow Mustard
- 2 tbsp Smoked Q Rock’s Anytime Seasoning
- 2 tbsp Smoked Q Rock’s Summer BBQ Rub
- 1/4 cup Apple Cider Vinegar (for spritzing, mixed with 1/4 cup water)
- 2 tbsp Smoked Q Rock’s Irish Whiskey BBQ Sauce
Instructions
-
Preheat your Traeger Ironwood 885 to a consistent 275ºF. Allow it to fully come to temperature for about 15-20 minutes.
-
To prep the ribs, remove the membrane from the bone side using a paper towel. Trim the ribs into a neat rectangular shape, removing excess fat or thin ends. Apply a thin layer of yellow mustard as a binder, then generously coat all sides with Smoked Q Rock’s Anytime Seasoning, followed by Smoked Q Rock’s Summer BBQ Rub.
-
Place the seasoned ribs directly on the smoker grates. Smoke unwrapped for 2 hours at 275ºF. Every hour, spritz the ribs with a 1:1 mixture of apple cider vinegar and water to maintain moisture and promote smoke absorption. Continue until the internal temperature reaches about 175ºF.
-
After 2 hours, remove the ribs from the smoker. Tightly wrap them in butcher paper, creating a sealed packet. Place the wrapped ribs back on the smoker for another 2 and a half hours at 275ºF.
-
After the wrapped cook, unwrap the ribs. Check for tenderness – the bones should be pulling away, and a probe should slide in easily. The internal temperature should be around 205ºF. Remove from the smoker, apply a generous layer of Smoked Q Rock’s Irish Whiskey BBQ Sauce, and return to the smoker for a final 15 minutes to allow the sauce to set and caramelize.
-
Once the sauce is set, remove the ribs and let them rest for 10-15 minutes. The best test for perfection is to gently pull a bone – it should slide right out! Slice and enjoy your perfectly tender, fall-off-the-bone ribs.
Nutrition
Nutrition information is automatically calculated, so should only be used as an approximation.
