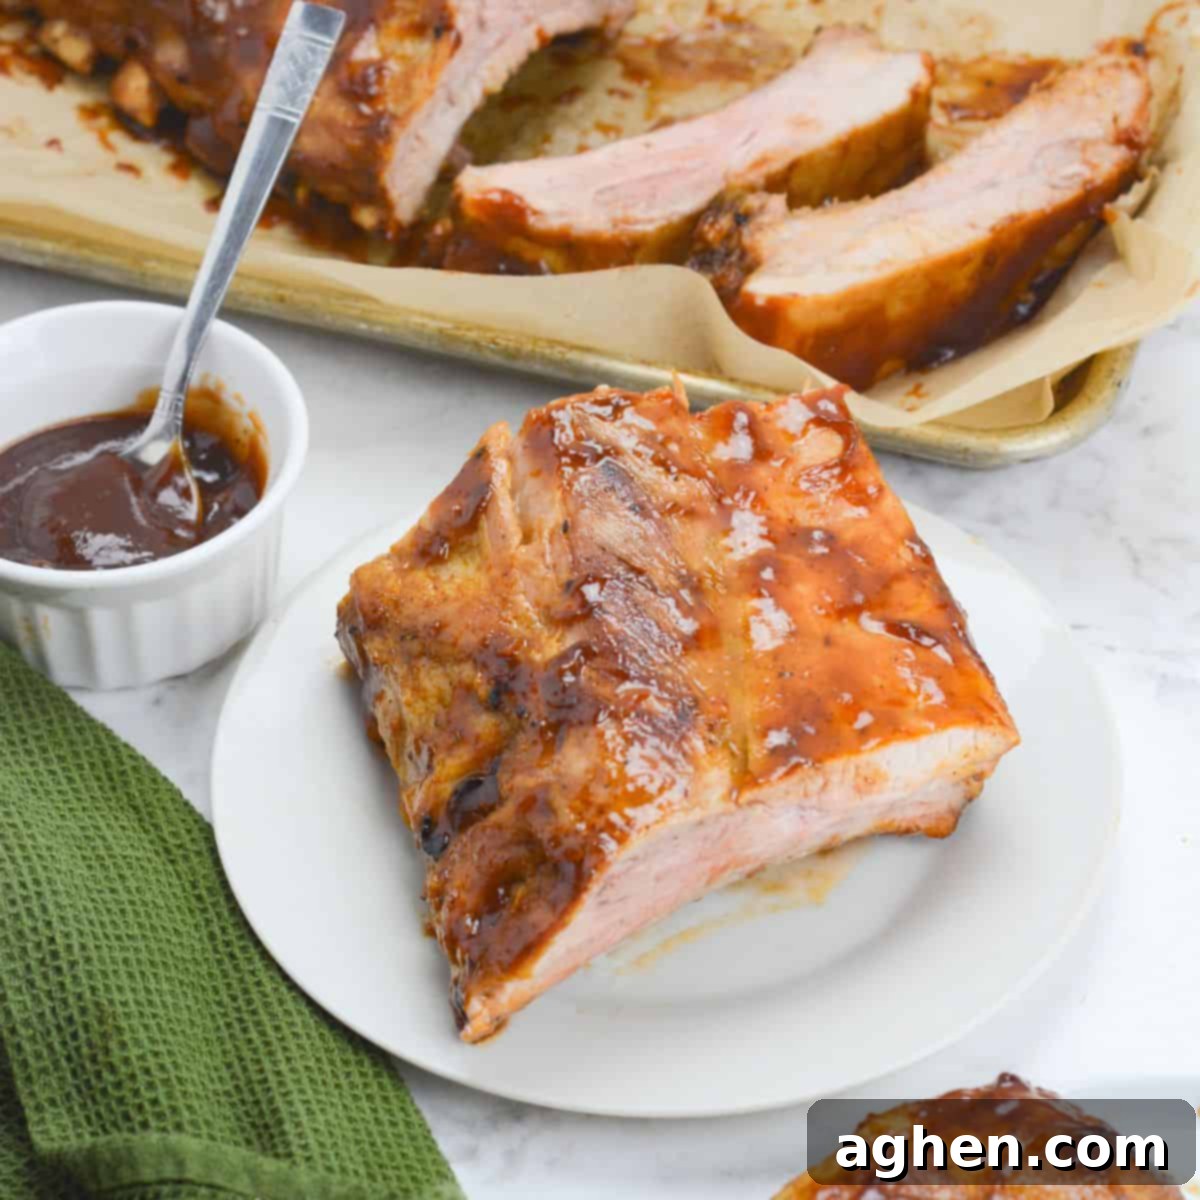
Mastering Blackstone Ribs: Achieve Tender, Flavorful Barbecue on Your Griddle
You might be surprised to learn that making exceptionally tender, flavorful barbecue ribs on your Blackstone griddle is not only easy but also incredibly efficient. While traditional methods like our Traeger 2-2-1 Ribs offer a classic smoky experience, cooking ribs on your Blackstone griddle presents a game-changing hack, especially when you’re looking for a delicious outcome in less time. This method delivers all the rich taste and satisfying texture of slow-cooked ribs, with the added benefit of a beautiful, caramelized crust that only a flat top can provide.
The prep work for Blackstone ribs largely mirrors what you’d do for any other method. You’ll season them to perfection with your preferred rub and then wrap them securely in aluminum foil. The pivotal difference when using the Blackstone comes partway through the cooking process. After an initial steaming period in foil, you’ll carefully unwrap the ribs, give them a spritz of apple cider vinegar, and then grill them directly on the griddle. This direct contact with the hot surface allows for an incredible sear and caramelization, building layers of flavor that are truly irresistible. The result is a rack of succulent, fall-off-the-bone ribs with a delightful bite and an unmatched exterior char. Dive into our tips and tricks below to elevate your Blackstone ribs experience to legendary status!
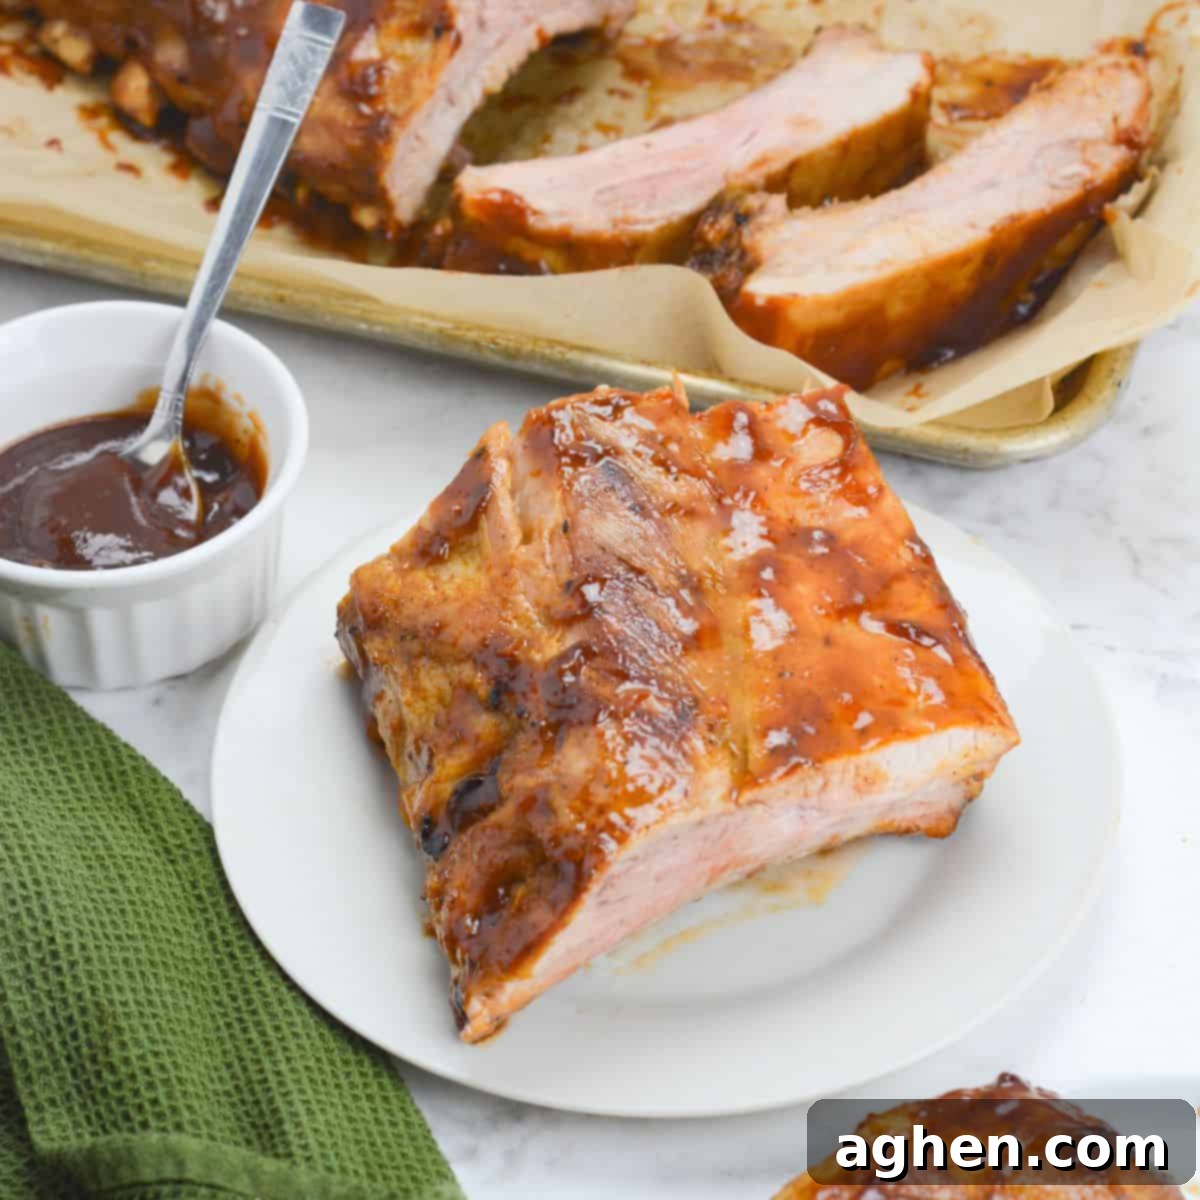
Why You Should Try This Blackstone Ribs Recipe
Discover the compelling reasons why cooking ribs on your Blackstone griddle will become your new favorite barbecue technique. This method offers distinct advantages that make it a standout choice for both seasoned grill masters and beginners alike.
- Unmatched Caramelization: The Blackstone griddle truly excels at caramelizing food, and ribs are no exception. This recipe leverages the griddle’s high, even heat to achieve beautiful caramelization in two distinct ways. First, the brown sugar in your dry rub melts and crisps against the hot surface, forming a mouthwatering, savory-sweet crust that locks in flavor and moisture. Then, once you introduce your favorite barbecue sauce, the griddle transforms it into a sticky, glossy, and deeply flavored glaze. This double dose of caramelization creates an irresistible depth of flavor and a textural contrast – tender meat beneath a slightly chewy, sweet, and savory exterior – that you simply won’t be able to get enough of. It’s a taste and texture sensation that sets Blackstone ribs apart.
- Superior Portability and Versatility: While a dedicated smoker undoubtedly produces delicious ribs, when it comes to portability and overall versatility for outdoor cooking, your Blackstone griddle is the undisputed champion. Imagine planning a camping trip or a tailgate party; if you can only bring one outdoor cooking appliance, a Blackstone griddle will allow you to cook an incredibly wide variety of meals, from breakfast pancakes and eggs to smash burgers, stir-fries, and, of course, these fantastic ribs. This expanded menu flexibility ensures a more enjoyable and varied culinary experience throughout your entire trip, making every meal an adventure. Its compact design and relatively quick heat-up time further enhance its appeal for on-the-go cooking, making it far more practical than lugging a large smoker.
- Effortless Clean-Up: You might assume that cooking something as saucy and fatty as ribs would lead to a monumental clean-up, but the clean-up after cooking ribs on the Blackstone is surprisingly easy. Provided your griddle is properly seasoned, you’re unlikely to experience excessive sticking. The non-stick surface, built up over time, means that cleaning up after ribs won’t be any more challenging than cleaning up after grilling chicken thighs or smash burgers. In many ways, the cleaning process is even simpler than a traditional grill because you don’t have to scrub both sides of grates or contend with messy charcoal ashes or pellet residue. A quick scrape, wipe, and a light re-oiling are usually all that’s needed to keep your Blackstone in pristine condition, ready for your next culinary creation.
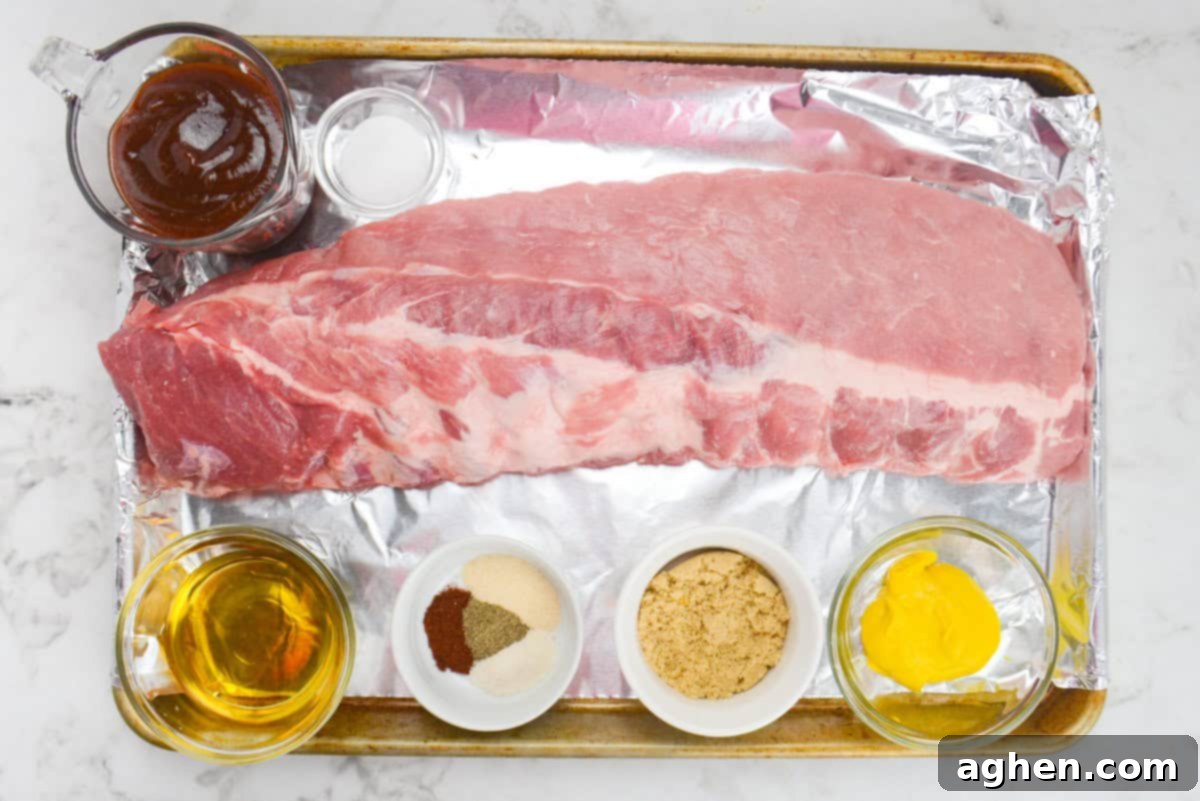
Key Ingredients for Perfectly Cooked Blackstone Ribs
Crafting the perfect rack of ribs starts with selecting high-quality ingredients and understanding how each component contributes to the overall flavor and texture. Here’s a detailed look at what you’ll need for these mouthwatering Blackstone ribs:
- 2 1/2 pounds Baby Back Ribs: For this specific recipe, we recommend Baby Back Ribs due to their tender meat and manageable size, which cooks efficiently on the griddle. However, don’t hesitate to experiment with other cuts like St. Louis Style or Country Style ribs. If you opt for a different style, be sure to adjust your cooking time accordingly based on their thickness and fat content. Always use an internal meat thermometer to frequently check their temperature, aiming for that perfect tender range. When selecting ribs, look for a good meat-to-bone ratio and even marbling.
- 2 tablespoons yellow mustard: Yellow mustard plays a crucial triple role in this recipe. First, it acts as an excellent binder, ensuring that the dry seasoning adheres evenly to the ribs. Second, it contributes a subtle tangy flavor that brightens the rich, smoky spices in your rub. Finally, and most importantly, it helps seal in moisture, preventing the thinner parts of the ribs from drying out while the thicker sections cook to their ideal temperature, resulting in a more uniformly tender rack. Rest assured, the ribs won’t taste overtly like mustard; its purpose is more functional than flavor-dominant.
- 2 tablespoons brown sugar: Brown sugar is a fundamental component of the dry rub, providing a delightful sweetness that perfectly complements the smoky and savory spices. Beyond flavor, it plays a vital role in caramelization, creating that desirable crispy, sugary crust on the griddle. This sweetness also helps to balance any heat from the paprika or other spices.
- 1 teaspoon Smoked paprika: Smoked paprika is a superstar ingredient, infusing the ribs with a wonderful smoky depth without requiring a smoker. It adds a gentle kick to the seasoning, enhancing the barbecue flavor without being overwhelmingly spicy. If you prefer a milder profile, feel free to swap it out for regular sweet paprika.
- 1 teaspoon Onion Powder: Using onion powder is an intelligent choice for griddle cooking. Diced fresh onions can easily burn and become bitter on a hot, flat top surface. Onion powder, on the other hand, allows you to impart the savory, aromatic essence of onion thoroughly and evenly throughout the rub, ensuring fantastic flavor without the risk of small, burned pieces compromising the texture or taste.
- 1 teaspoon Garlic salt: Garlic salt delivers a convenient combination of pungent garlic flavor and essential saltiness. It adds a touch of umami and depth that beautifully complements the other ingredients in the rub, enhancing the overall savory profile of the ribs.
- 2 teaspoons sea salt: Beyond the garlic salt, an additional two teaspoons of fine sea salt are essential. Salt is a fundamental flavor enhancer, drawing out the natural deliciousness of the pork. It also plays a critical role in balancing the sweet and spicy notes from the brown sugar and paprika, ensuring a well-rounded and complex flavor profile.
- 1/2 teaspoon ground black pepper: Freshly ground black pepper adds a foundational layer of warmth and a slightly spicy bite to the ribs. Its robust flavor deepens the overall seasoning, contributing to a more savory and aromatic final product.
- 1/4 cup apple cider vinegar: Apple cider vinegar is a secret weapon for tender ribs. Spritzing the ribs with this acidic liquid during cooking not only helps lock in moisture but also works as a tenderizer, breaking down tough muscle fibers and resulting in meat that is incredibly juicy and succulent. It also adds a subtle tang that brightens the rich flavors.
- 1/2 cup barbecue sauce: The final touch! Generously brushing the cooked ribs with your favorite barbecue sauce provides an explosion of flavor and allows for endless customization. Whether you prefer a sweet, tangy, smoky, or spicy sauce, this step is where you can truly make the recipe your own. The sauce caramelizes beautifully on the Blackstone, creating that perfect sticky, glossy exterior.
Detailed Instructions for Making Perfect Blackstone Ribs
Follow these steps closely to create tender, flavorful ribs with a fantastic griddle-seared finish:
1. Preheat the Blackstone and Prepare the Spice Rub: Begin by preheating your Blackstone griddle to a low setting. For the most even cooking, it’s a good practice to let your ribs sit on the counter for about 30 minutes before cooking to bring them closer to room temperature. While the griddle preheats and the ribs temper, prepare your flavor-packed spice rub. In a small bowl, thoroughly combine the brown sugar, smoked paprika, onion powder, garlic salt, sea salt, and ground black pepper. Mix well until all the ingredients are evenly distributed. Set this aromatic rub aside for the next step.
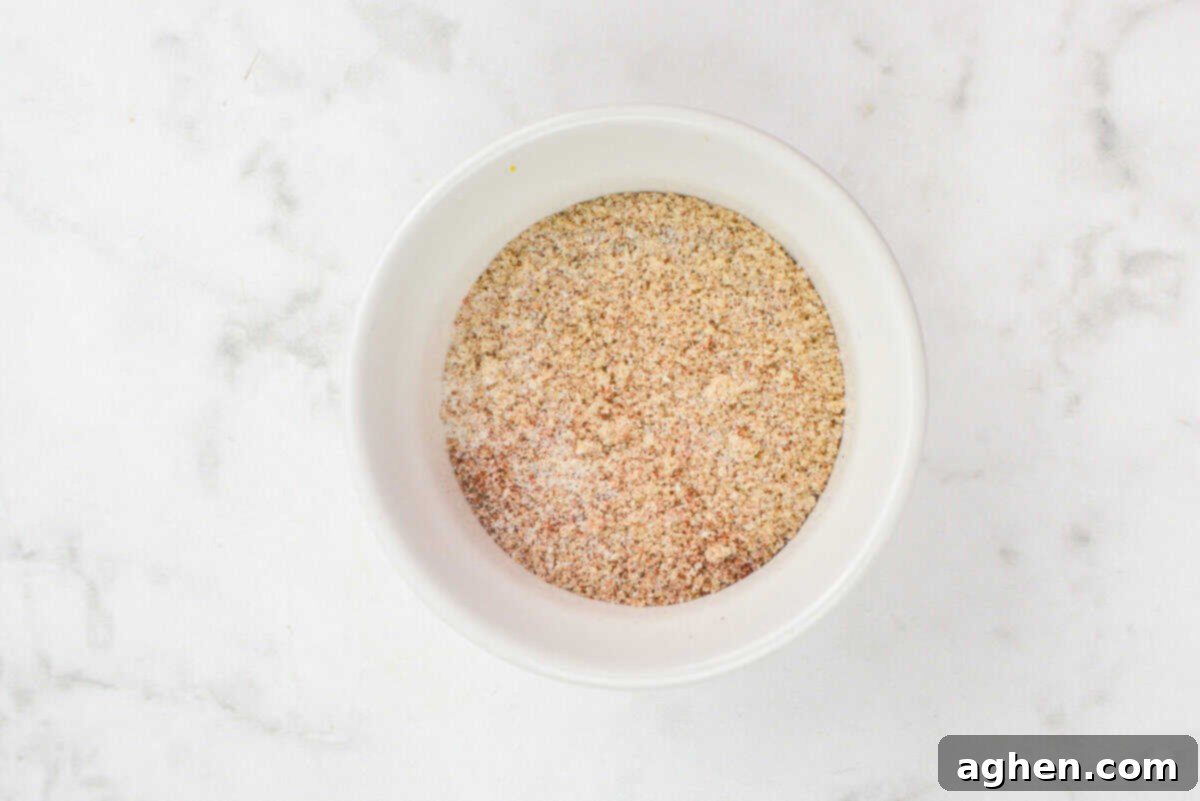
2. Remove the Membrane from the Ribs: This is a crucial step for achieving truly tender ribs. Locate the thick, silvery-white membrane on the underside (bone side) of the rib rack. To remove it, gently slide a small, thin knife (like a paring knife) under the membrane at one end of the rack, being careful not to cut into the meat. Once you have a small section loosened, grab it firmly with a paper towel (this provides a better grip) and slowly pull the membrane away from the rack. It might come off in one long strip; if it tears, simply repeat the process until it’s completely removed. Discard the membrane. Removing it prevents the ribs from becoming tough and ensures the rub and smoke flavors can penetrate the meat.
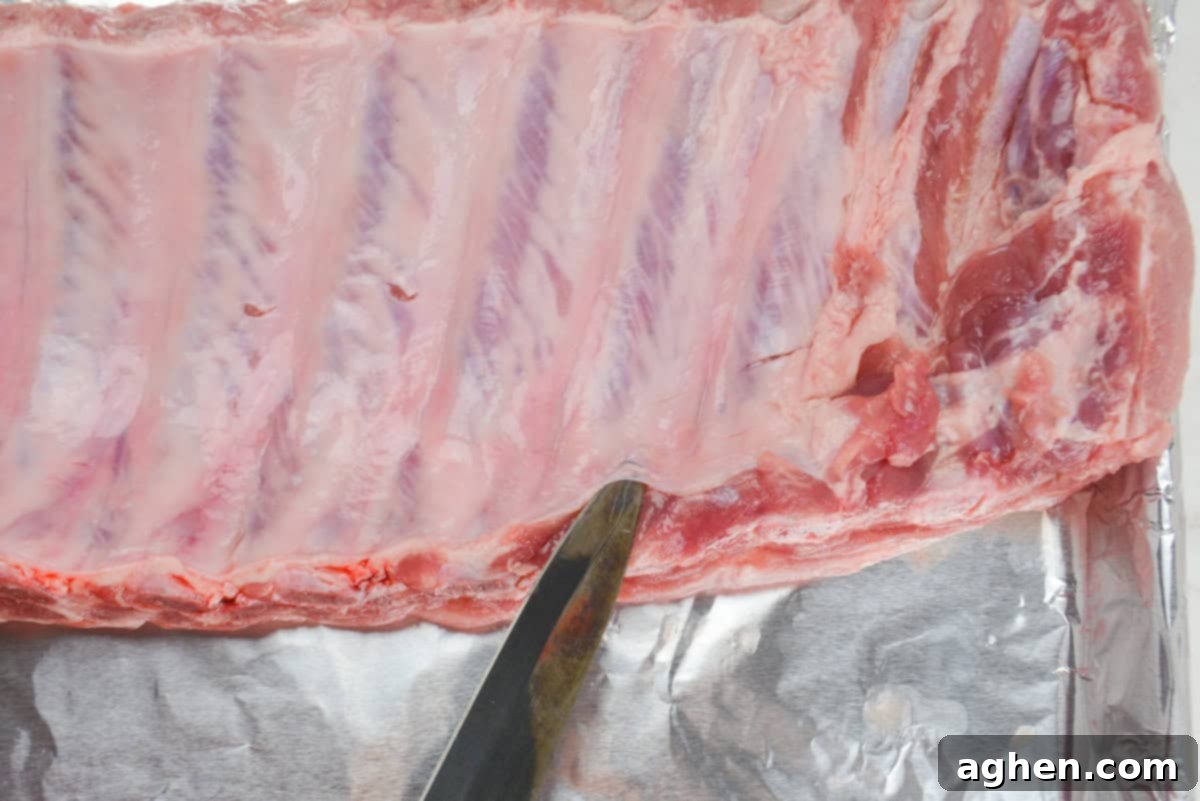
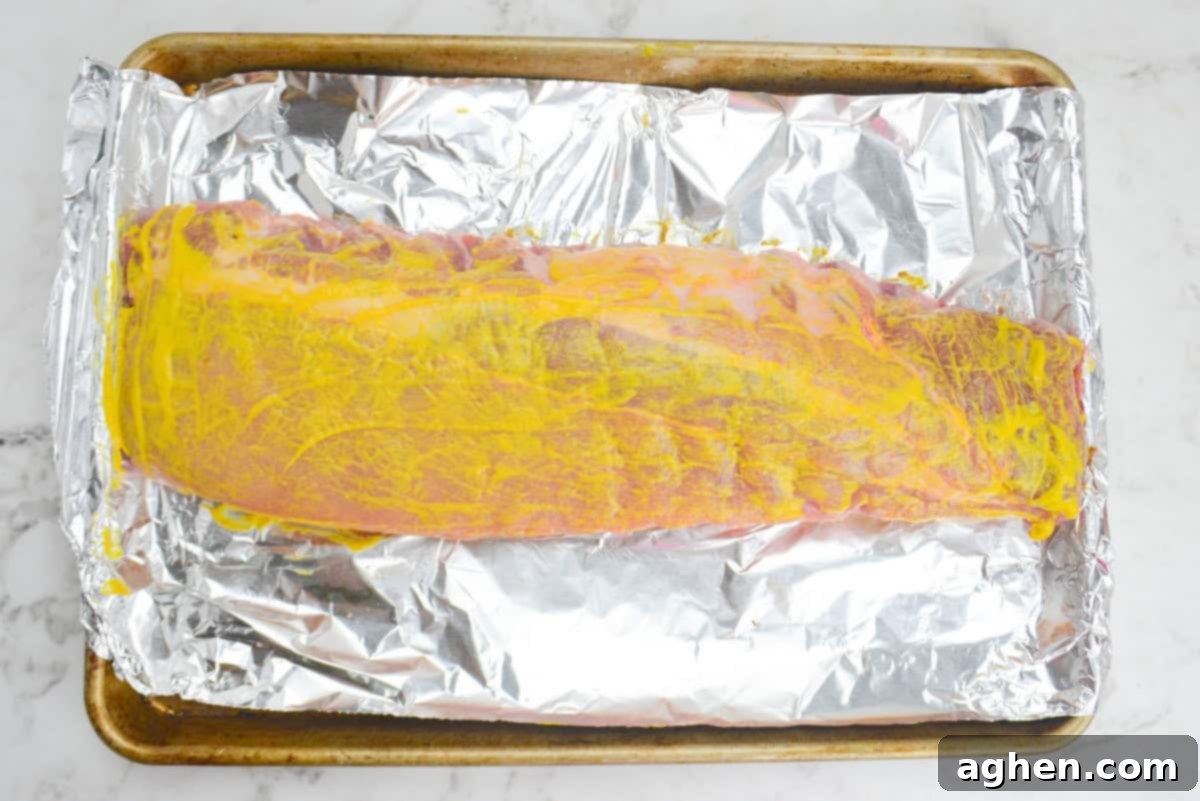
3. Coat the Ribs in Mustard: Place your membrane-free ribs on a sturdy baking sheet lined with aluminum foil. This makes for easier cleanup and helps contain any mess. Generously spread the yellow mustard evenly over all sides of the ribs – top, bottom, and edges. Don’t worry, the ribs won’t taste like mustard; it primarily acts as a binder for the dry rub and helps retain moisture.
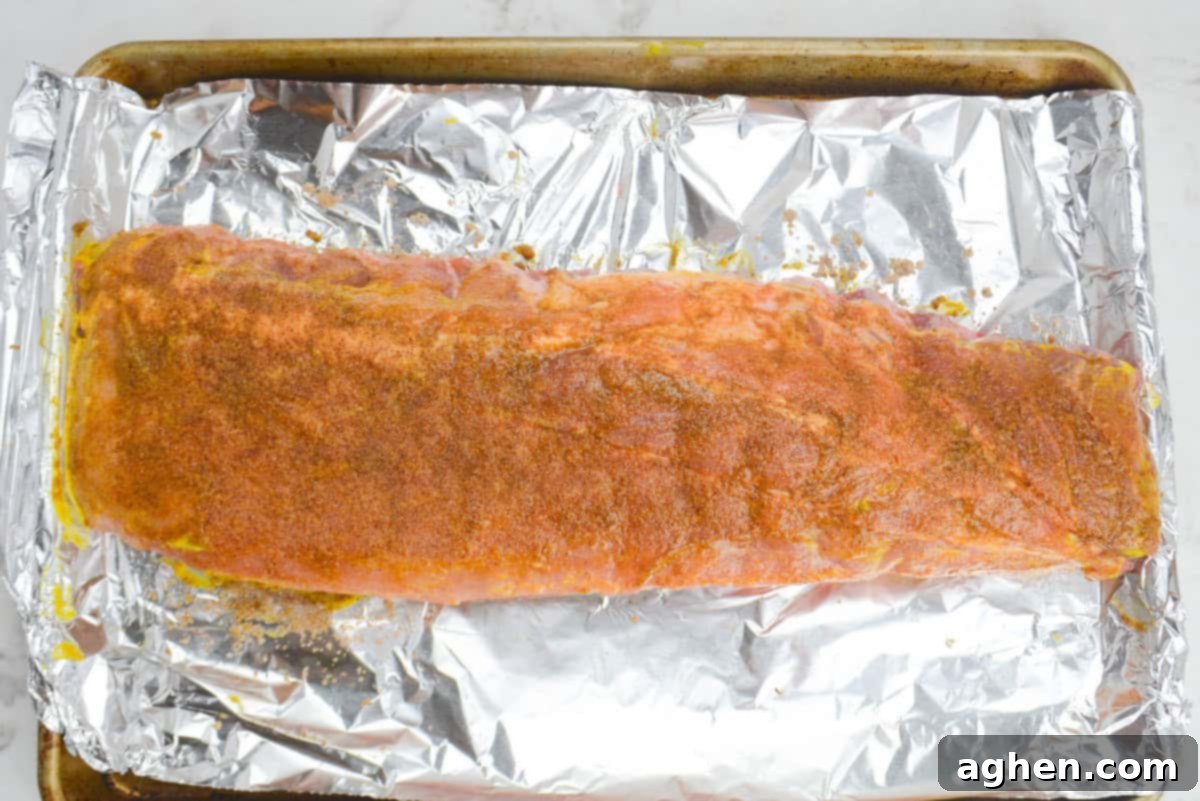
4. Apply the Dry Rub and Spritz: Now, generously sprinkle the prepared spice mixture onto all sides of the mustard-coated ribs. Don’t be shy; ensure every inch of the ribs, especially the edges, is thoroughly covered. Gently rub the spices into the meat, pressing them firmly to create a robust crust. Once the rub is applied, lightly spritz the entire rack with apple cider vinegar. This step not only tenderizes the meat but also helps the rub adhere even better and locks in essential moisture during cooking.
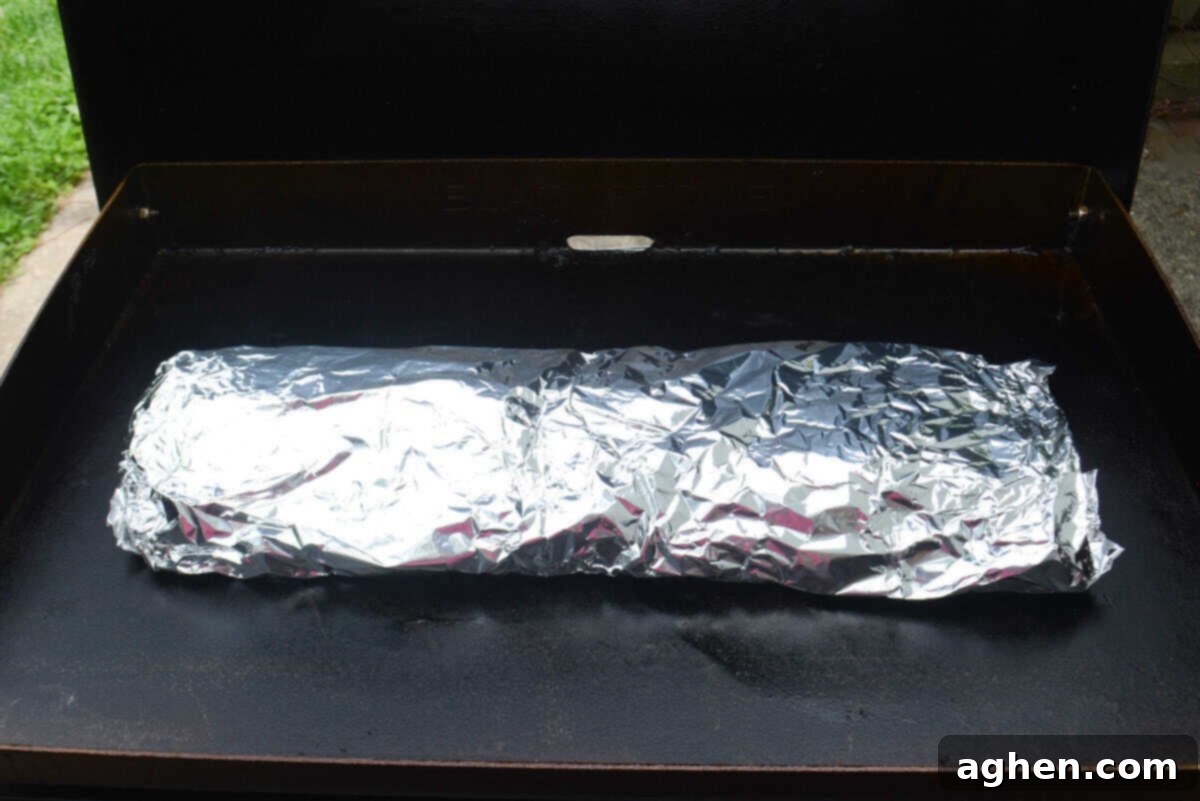
5. Wrap Tightly in Foil and Cook: Carefully wrap the seasoned ribs very tightly in the aluminum foil, creating a sealed packet. Ensure there are no gaps or tears in the foil, as this is crucial for steaming the ribs and making them tender. Place the foil-wrapped ribs onto the preheated Blackstone griddle with the bone-side down. Close the lid or cover the ribs with a metal dome (if your Blackstone doesn’t have a lid). Allow them to cook for 30-45 minutes on low heat. This initial steaming period is key to breaking down connective tissues and achieving that desired tenderness.
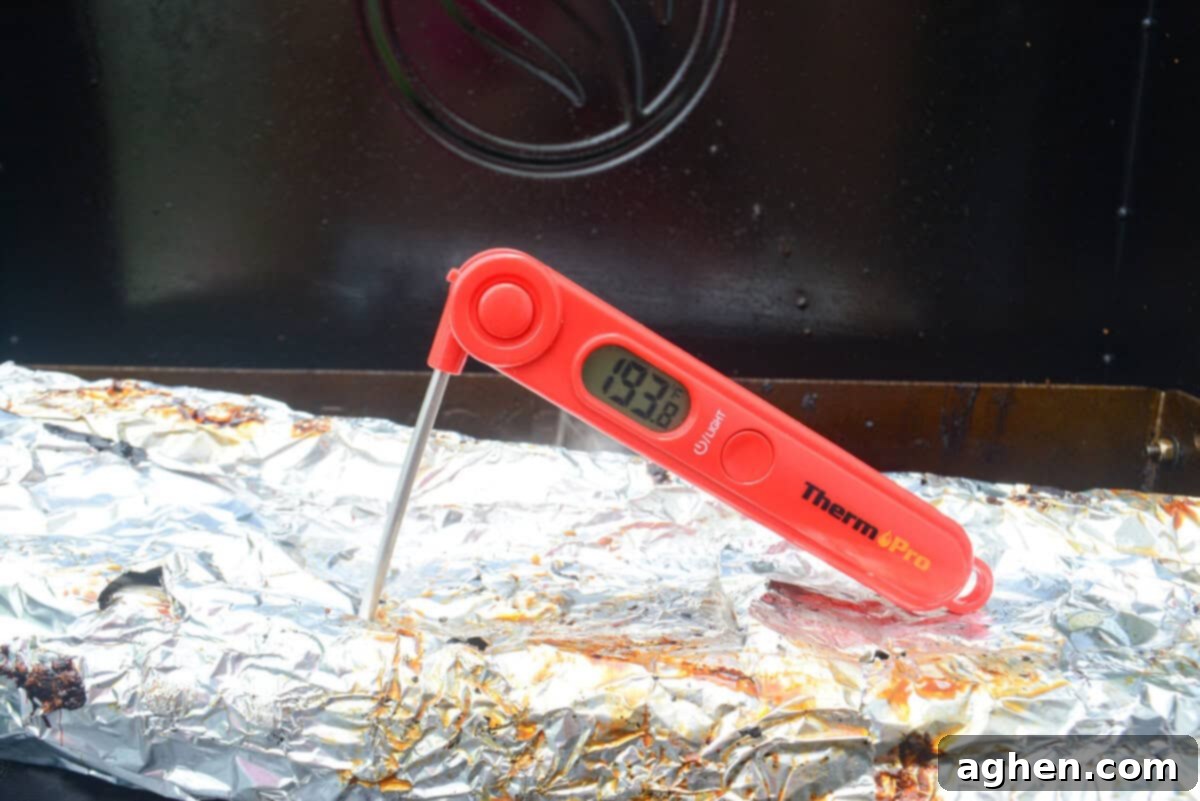
6. Continue Cooking to Internal Temperature: After the initial cooking time, carefully flip the foil package over on the griddle. Continue to cook for an additional 15-20 minutes, or until the internal temperature of the thickest part of the ribs reaches between 190°F-200°F. Use an accurate instant-read meat thermometer for this step, inserting it between the bones without touching them. This temperature range indicates that the collagen in the ribs has broken down, resulting in incredibly tender meat. If you prefer a firmer bite, you can aim for the lower end of the spectrum; for fall-off-the-bone, push closer to 200°F.
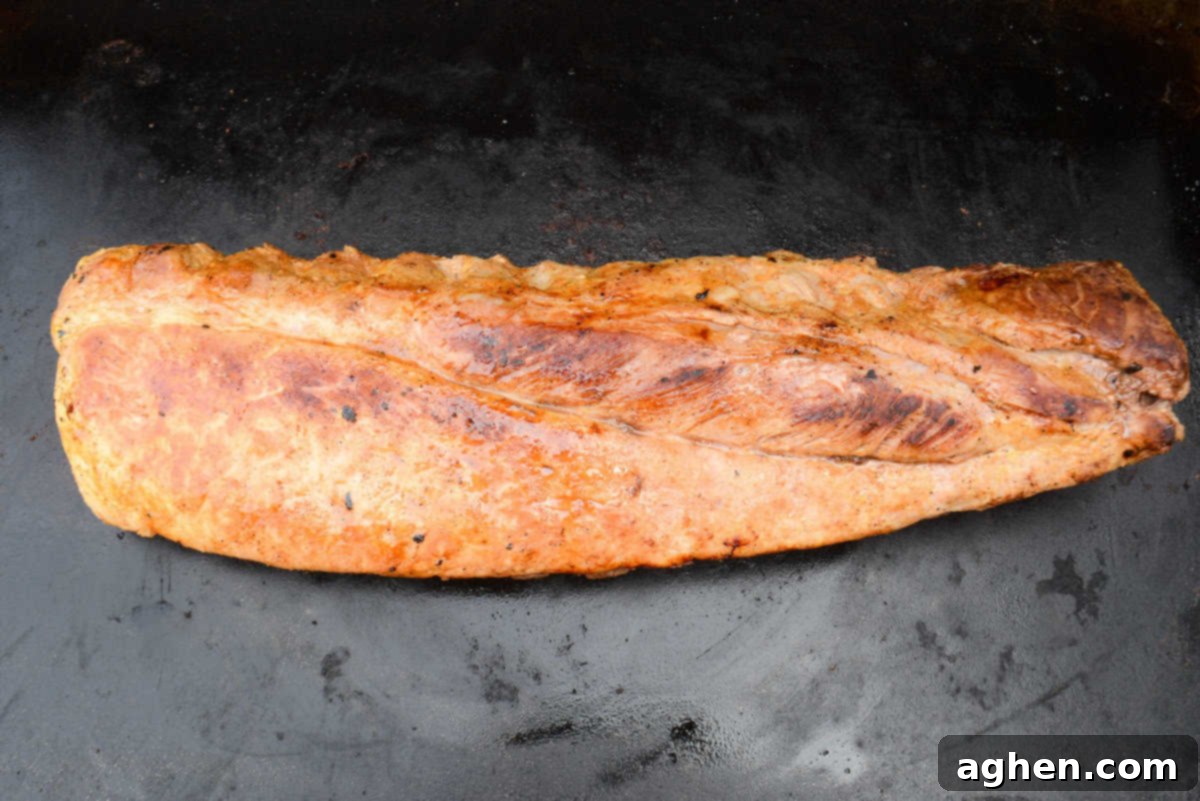
7. Sear the Ribs for a Perfect Crust: Once the ribs have reached their desired internal temperature, increase the heat on your Blackstone griddle to medium. Carefully remove the ribs from their foil wrapping. Place the unwrapped ribs directly onto the hot griddle surface. Sear each side for 5-10 minutes, or until a beautiful golden-brown crust forms. You might need to gently press down on the very edges of the ribs with a spatula or griddle press to ensure maximum contact with the flat top, guaranteeing an even sear across the entire surface. This step is where the griddle truly shines, creating that irresistible textural contrast.
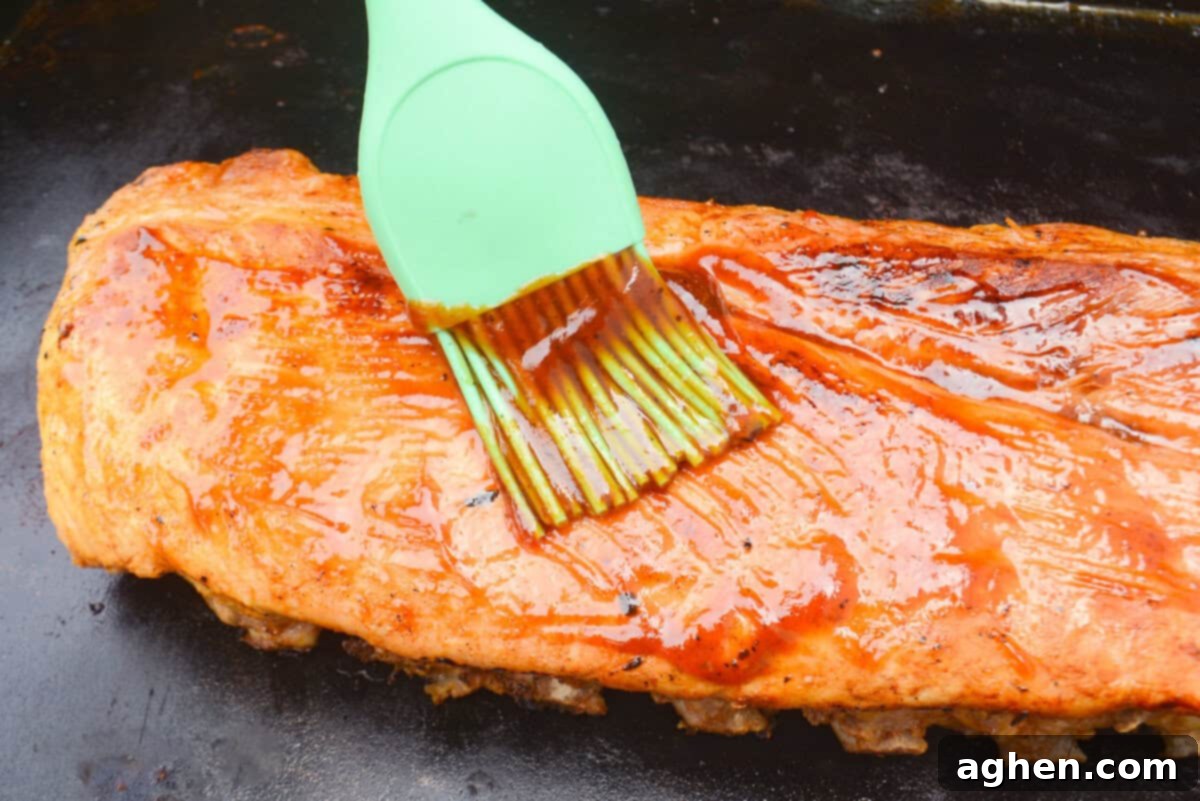
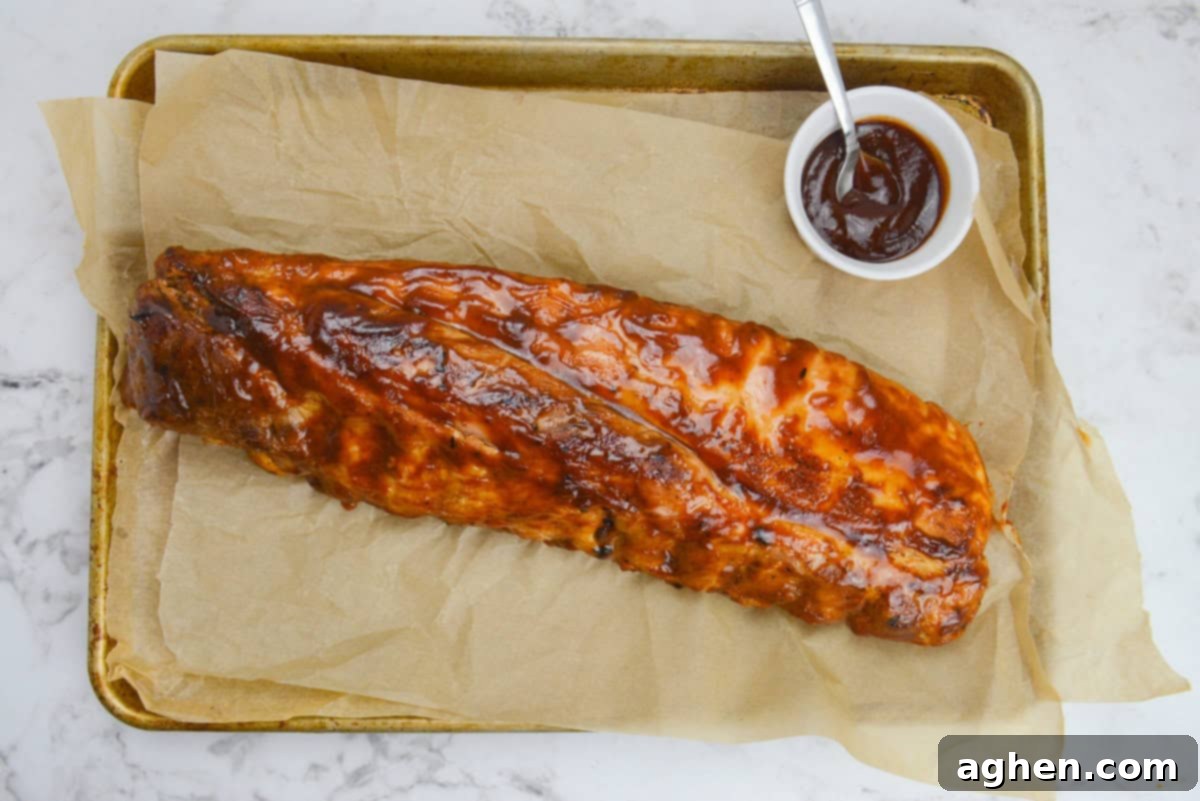
8. Caramelize with Barbecue Sauce: Now it’s time to add that glossy, flavorful finish. Generously brush each side of the seared ribs with your favorite barbecue sauce. Once sauced, flip the ribs and allow each side to sear directly on the griddle with the sauce for 2-3 minutes. Keep a close eye on them, as the sugars in the barbecue sauce will caramelize quickly, creating a sticky, slightly charred glaze. This step deepens the flavor and adds another layer of delicious texture to your ribs.
9. Add the Final Sauce Layer: For those who love extra saucy ribs, this is your moment! After the initial caramelization, brush more barbecue sauce over each side of the ribs as desired. You can warm this final layer of sauce slightly on the griddle if preferred, but it’s mostly for presentation and an added burst of flavor.
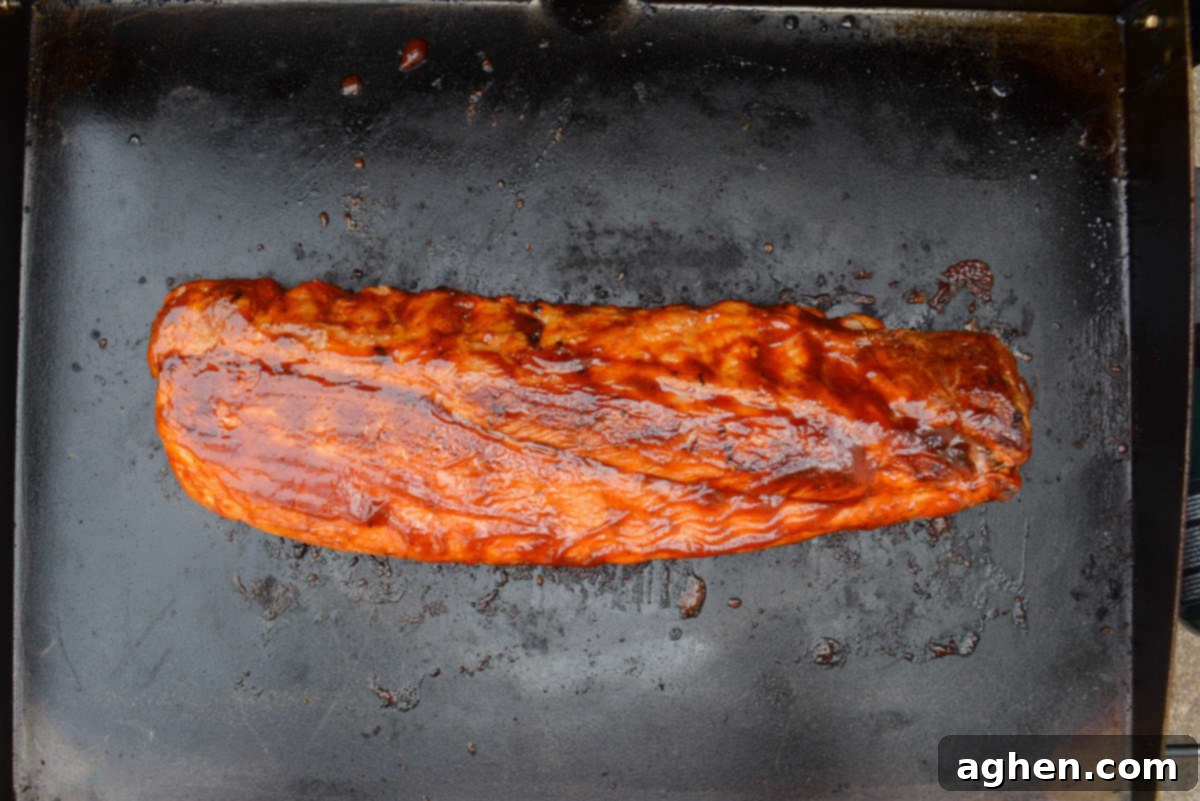
10. Rest and Serve: The final, essential step is to let your magnificent ribs rest. Transfer the ribs from the griddle to a cutting board and allow them to rest for 10 minutes. This resting period is critical; it allows the juices within the meat to redistribute, ensuring that every bite is as moist and flavorful as possible. After resting, slice the ribs between the bones and serve them warm to your eager diners. Enjoy your perfectly tender and caramelized Blackstone ribs!
Creative Variations and Smart Substitutions for Your Blackstone Ribs
This Blackstone ribs recipe provides a fantastic foundation, but don’t be afraid to get creative and tailor it to your personal taste preferences. Here are some exciting variations and practical substitutions:
- Amp Up the Spice: If you’re a heat enthusiast, there are many ways to elevate the spice level of your ribs. Try incorporating a pinch of cayenne pepper, a teaspoon of chili powder, or some crushed red pepper flakes into your dry rub. Start with a small amount and adjust to your liking, as these seasonings can quickly kick things up a notch. Another excellent way to layer on the heat is by using your favorite spicy barbecue sauce for the caramelization step. Consider adding a dash of hot sauce or even finely minced fresh jalapeños or serranos to the rub for an extra fresh, fiery kick.
- Explore Different BBQ Styles: Unlock a world of flavor by switching up your barbecue style. For an intriguing Asian-inspired flavor fusion, whisk together 1/4 cup of brown sugar with 1/4 cup of soy sauce to use as your glaze. Instead of a traditional barbecue rub, season the ribs with a blend of garlic powder, ground ginger, and a touch of five-spice powder. Once cooked, garnish these unique ribs with toasted sesame seeds and thinly sliced green onions for a visually appealing and delicious finish. You could also explore a Caribbean jerk style by using a jerk seasoning rub and glazing with a pineapple-based sauce, or a Mediterranean twist with oregano, thyme, lemon zest, and a light olive oil finish.
- Swap the Mustard Binder: While yellow mustard contributes acidity and acts as a superb binder without imparting a strong mustard flavor, you might want to try an alternative for a different flavor profile or if you simply prefer not to use it. Many options can serve a similar purpose:
- Honey: Adds sweetness and helps create a beautiful glaze, enhancing the caramelization.
- Butter or Olive Oil: Provides a rich base for the rub to stick to and contributes to browning.
- Extra Apple Cider Vinegar: If you want to lean into the tangy moisture, a heavier spritz can work as a binder.
- Dark-Colored Soda (e.g., Coke or Dr. Pepper): These sodas add a unique, subtle sweetness and tenderizing qualities. They can create a wonderfully dark and sticky crust.
- Hot Sauce: For a spicy twist, a thin layer of your favorite hot sauce can serve as a binder and infuse immediate heat.
Each of these options will give the ribs a unique flavor and texture profile while ensuring your spices adhere perfectly to the meat.
Expert Tips and Tricks for Perfecting Your Blackstone Ribs
Achieving consistently delicious ribs on your Blackstone griddle is easy with a few insider tips and tricks. These pointers will help ensure your ribs are tender, flavorful, and perfectly cooked every time.
- Master the Membrane Removal with a Paring Knife: The membrane on the underside of the ribs can vary in thickness and adhesion. While some racks allow for easy peeling, others require a bit more finesse. A small, thin paring knife is your best friend here. Carefully work the tip of the knife underneath the membrane, starting at one end of the rack. Once you’ve lifted a small edge, switch to using a paper towel to grip it firmly. This provides superior traction, allowing you to pull the membrane away cleanly and easily. Removing this membrane is vital for optimal tenderness and flavor penetration.
- Allow Ribs to Rest Before Cooking for Evenness: Don’t take your ribs straight from the fridge to the griddle. For more even cooking, place the seasoned ribs on the counter for no more than 30 minutes before placing them on the Blackstone. This brief rest allows the meat to come closer to room temperature, reducing the internal temperature shock and helping the ribs cook more uniformly from edge to center. This small step makes a significant difference in achieving consistent tenderness.
- Leverage a Premade Dry Rub: If you have a cherished BBQ dry rub from a local butcher or a commercial brand that you adore, absolutely feel free to use it for this recipe! Using a premade rub is a fantastic shortcut that doesn’t sacrifice flavor. However, be mindful of its salt content. Some commercial rubs are very high in sodium, so you might need to adjust the amount of added sea salt in our recipe to avoid over-salting. Always taste your rub if possible, or consult the ingredient list, to ensure a balanced flavor profile.
- Utilize Your Oven Broiler for an Extra Dark Glaze: For an exceptionally dark, intensely caramelized coating on your ribs, your oven broiler is an excellent tool. After the ribs have been fully cooked on the Blackstone and are glistening with their final layer of barbecue sauce, transfer them to a foil-lined baking sheet. You can cut them into individual portions or leave the rack whole. Place the baking sheet under a preheated broiler on high for 4-5 minutes. Watch them very closely, as sugars can burn quickly. The goal is to achieve a deep, rich brown color and a sticky, slightly charred texture on the edges, without burning. This method is particularly useful if you want to finish a large batch or prefer an even more aggressive glaze.
- Monitor Temperature Accurately: Investing in a good quality instant-read meat thermometer is crucial. While cooking times are provided, actual cooking can vary based on rib thickness and griddle temperature consistency. Always check the internal temperature by inserting the thermometer into the thickest part of the meat, avoiding the bone, to ensure they reach the target 190°F-200°F for perfect tenderness.
- Don’t Overcrowd the Griddle: Resist the urge to cram too many racks of ribs onto your Blackstone at once. Overcrowding can lower the griddle’s surface temperature, leading to uneven cooking and hindering proper searing and caramelization. Cook in batches if necessary, ensuring each rack has enough space for even heat distribution.
- Control Your Spritz: When spritzing with apple cider vinegar, use a fine mist spray bottle. This ensures even coverage without drenching the ribs, which could wash away your beautiful rub. A light, even mist is all you need to add moisture and tenderize the meat effectively.
Related Blackstone Griddle Recipes You’ll Love
- Blackstone BBQ Chicken Thighs
- Blackstone Pork Chops
- Perfect Blackstone Steak
Blackstone Ribs
Equipment
-
1 Blackstone Griddle with lid or metal cover
Ingredients
- 2 1/2 pounds Baby Back Ribs, membrane removed
- 2 tablespoons brown sugar
- 1 teaspoon smoked paprika
- 1 teaspoon onion powder
- 1 teaspoon garlic salt
- 2 teaspoons fine sea salt
- 1/2 teaspoon ground black pepper
- 2 tablespoons yellow mustard
- 2 tablespoons apple cider vinegar
- 1/2 cup barbecue sauce
Instructions
-
Preheat and make the spice rub: Preheat the Blackstone to low. If possible, allow the ribs to warm on the counter for 30 minutes for even heating. In a small bowl, mix together the brown sugar, paprika, onion powder, garlic salt, sea salt, and ground black pepper. Set aside.
-
Remove the membrane: Remove the thick white membrane from the underside of the ribs. Loosen it carefully with a knife as needed. Once loosened, pull it away from the rack and discard.
-
Coat in mustard: On a foil-lined baking sheet, spread the mustard evenly on all sides of the ribs.
-
Add the dry rub: Generously sprinkle the spice mixture onto each side of the ribs. Rub into the ribs, ensuring the edges are coated, then spritz with apple cider vinegar to tenderize the meat and help it retain moisture.
-
Wrap in foil: Wrap the ribs in the foil tightly and place them onto the Blackstone with the bone-side down. Close the lid and allow to cook for 30-45 minutes.
-
Cook to temperature: Carefully flip the foil package over and cook for an additional 15-20 minutes until the internal temperature is between 190°F-200°F.
-
Sear the ribs: Increase the heat to medium. Remove the foil from the ribs and sear on each side for 5-10 minutes until browned. You may need to press down on the very edges of the ribs to ensure they make contact with the flat top.
-
Caramelize: Brush each side generously with barbeque sauce. Then, turn and allow each side to be seared with the sauce for 2-3 minutes until it begins to caramelize.
-
Add the final sauce layer: Next, brush more sauce over each side of the ribs as desired.
-
Rest and serve: Allow the ribs to rest for 10 minutes. Then, slice and serve warm.
Nutrition
Nutrition information is automatically calculated, so should only be used as an approximation.
