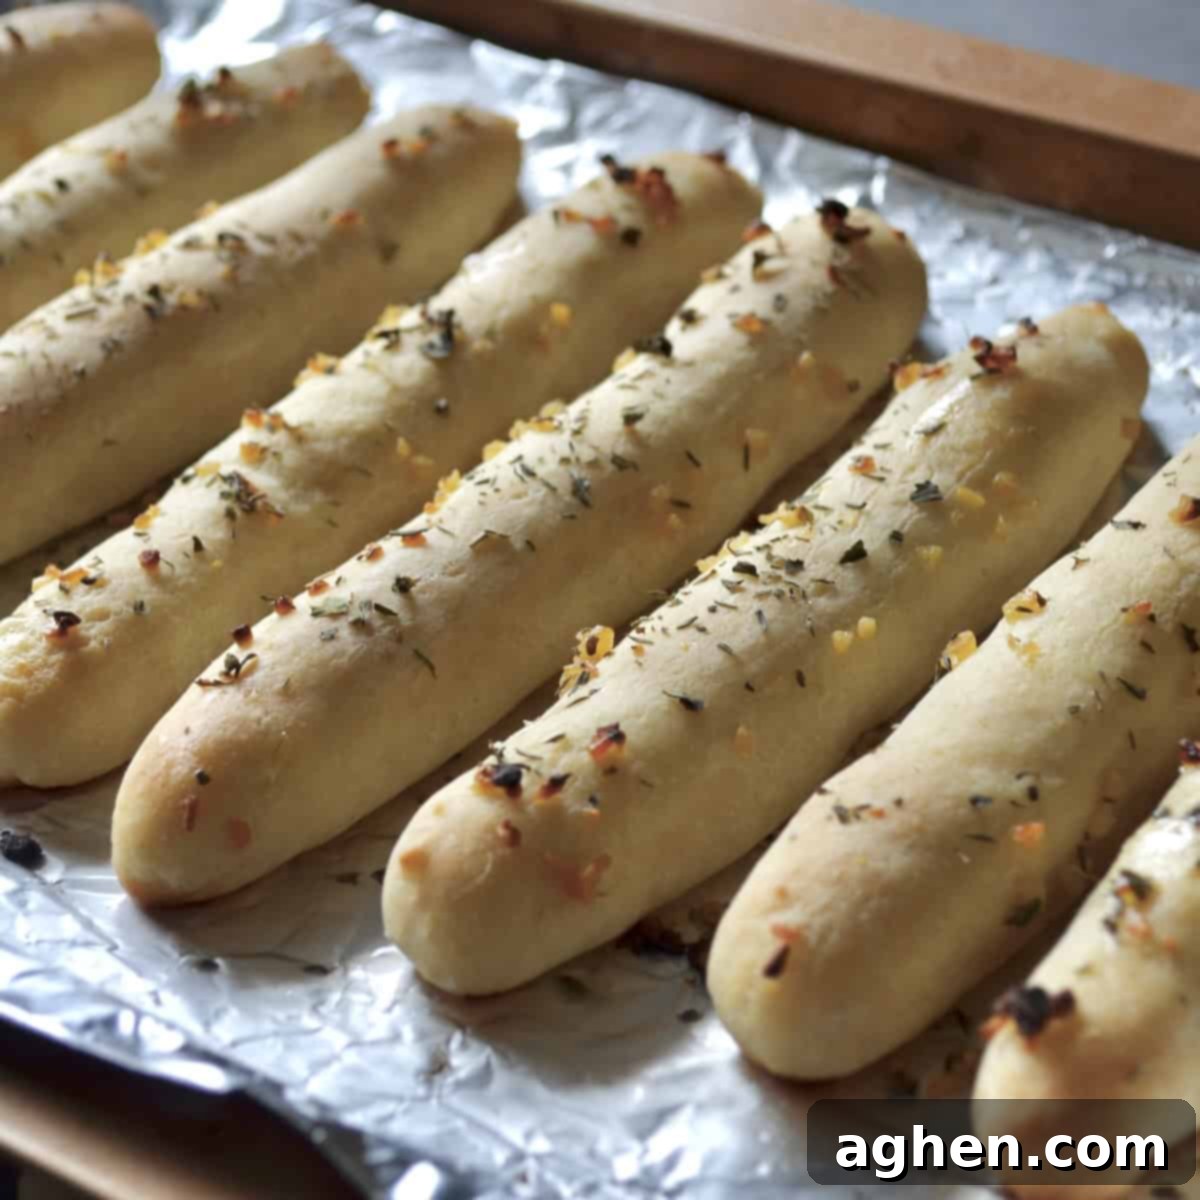
2-Point Weight Watchers Garlic Breadsticks: Easy, Healthy & Irresistibly Delicious
Discover the secret to making incredibly delicious, healthy, and easy 2-point Weight Watchers Garlic Breadsticks that will become a staple in your weeknight dinner rotation! These breadsticks are not only a fantastic, flavorful side dish but also a smart choice for anyone focusing on a balanced diet, as each breadstick clocks in at just two Weight Watchers points. The magic lies in their incredibly simple, yet effective, two-ingredient dough, made from self-rising flour and plain Greek yogurt. This innovative combination results in a dough that’s low in fat, high in protein, and boasts significantly fewer carbohydrates than traditional breadstick recipes.
You might be wondering how such minimal ingredients can create breadsticks that rival those made with yeast, oil, and a lengthy list of components. Prepare to be amazed! These homemade breadsticks deliver a satisfyingly golden-brown exterior and a light, fluffy, and delightfully chewy interior – exactly what you’d expect from your favorite restaurant-style breadsticks. They are a true testament to how simple ingredients can yield extraordinary flavor and texture, making them an absolute delight for your taste buds and a perfect complement to almost any meal.
What’s more, this recipe offers wonderful flexibility for personalization. You can craft a simple, flavorful garlic butter using a low-point butter substitute, then elevate the taste with your preferred fresh or dried herbs and spices. Imagine a sprinkle of fresh parsley, a hint of Italian seasoning, or a dash of red pepper flakes for an extra kick! With these healthy breadsticks ready in under an hour from start to finish, there’s truly no reason not to give this game-changing recipe a try. They’re quick, convenient, and incredibly satisfying, proving that healthy eating can also be incredibly delicious and accessible.
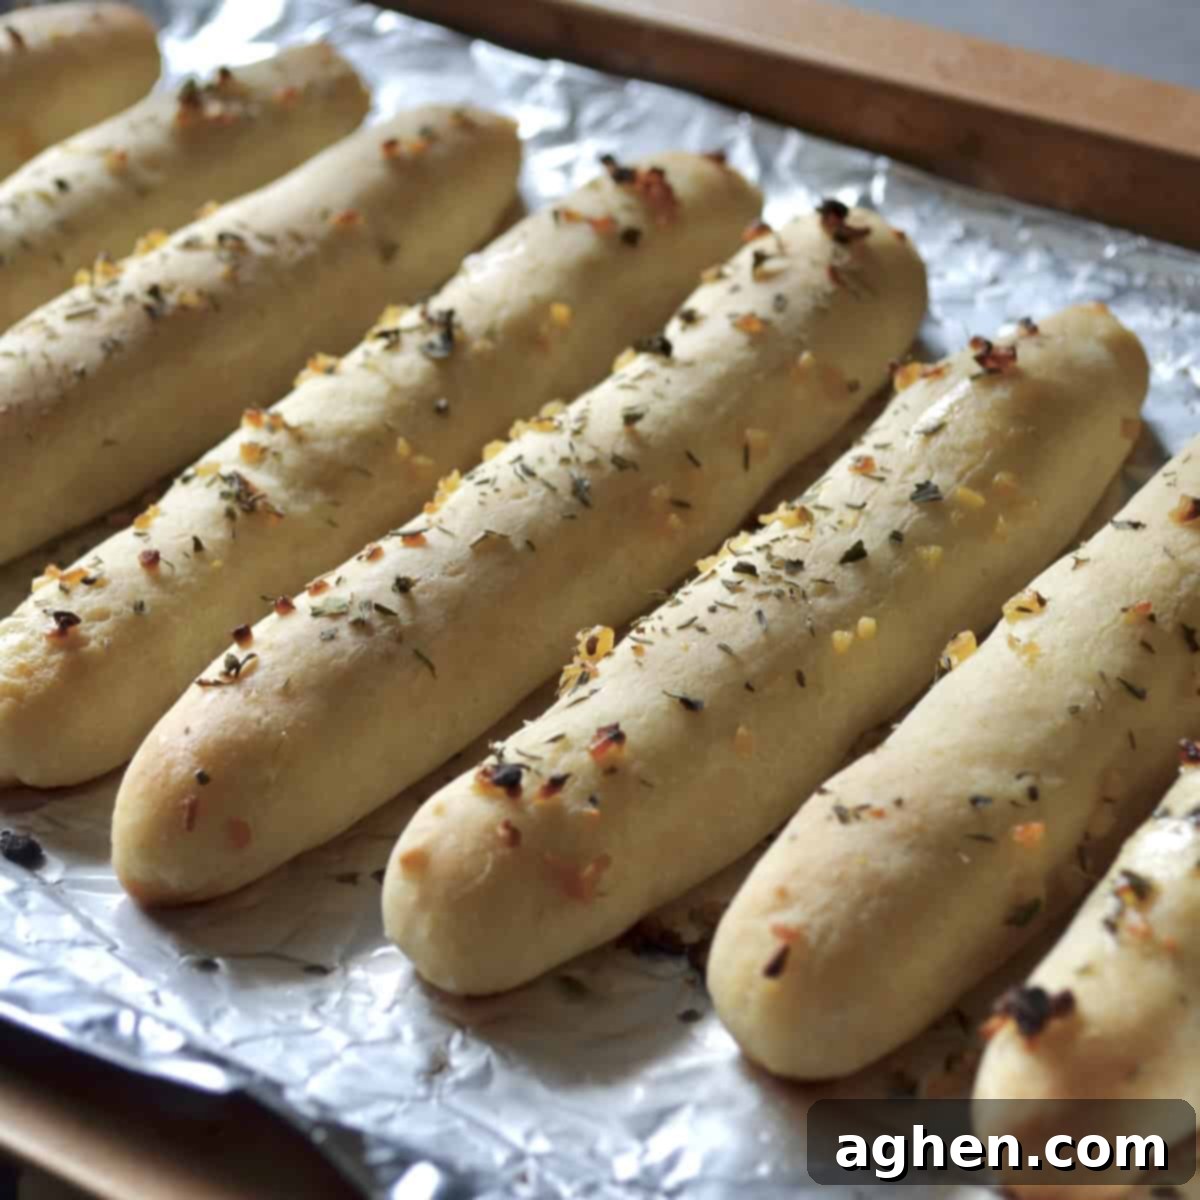
Why These Weight Watchers Garlic Breadsticks Are a Must-Try
These 2-point Weight Watchers Garlic Breadsticks aren’t just a recipe; they’re a revelation for healthy eating enthusiasts and busy home cooks alike. Here’s why they deserve a permanent spot in your culinary repertoire:
- They pair beautifully with countless entrees: The versatility of these fluffy, homemade breadsticks is truly unmatched. Imagine them alongside a hearty chicken dinner, soaking up the sauce from your favorite pasta dish, or as a comforting companion to warm soups and fresh salads. Their mild yet flavorful garlic profile makes them an ideal partner for a wide array of cuisines and meal types. The next time you’re searching for a quick, simple, and satisfying side dish, this recipe will undoubtedly come to your rescue, elevating even the simplest meal.
- The easiest dough you’ll ever make: This revolutionary two-ingredient dough is an absolute game-changer, especially for those new to baking or short on time. Forget the complexities of traditional yeast doughs that require precise measurements, proofing, and often, extensive kneading. With just self-rising flour and nonfat plain Greek yogurt, you can effortlessly transform these humble ingredients into a perfect, pliable bread dough in minutes. It’s so quick and straightforward that it feels almost like magic!
- No yeast or long proofing required: One of the most significant advantages of this recipe is the complete absence of yeast, which eliminates the need for any lengthy proofing times. Traditional breadsticks often demand hours of rising, which can be a deterrent for spontaneous baking. These breadsticks, however, only require a brief 10 to 15-minute rest while you prepare the aromatic garlic butter spread. This dramatically cuts down on preparation time, allowing you to enjoy fresh, warm breadsticks with minimal effort and planning.
Recipe Snapshot
Here’s a quick look at what you can expect from this incredible Weight Watchers Garlic Breadsticks recipe:
- Serving Size: 1 delicious breadstick (approximately 49g)
- Number of Servings: 8 perfectly portioned breadsticks
- Prep Time: Approximately 35 minutes (including a 10-15 minute rest for the dough)
- Cook Time: A quick 18 – 20 minutes
- Total Time: About 55 minutes from start to finish
- WW Points Per Recipe: A lean 2 points per breadstick, totaling 16 points for the entire batch.
Essential Ingredients for Your Homemade WW Garlic Breadsticks
The beauty of this recipe truly lies in its simplicity and reliance on just a few pantry staples. Each ingredient plays a crucial role in creating the desired texture and flavor, all while keeping the Weight Watchers points low. Here’s what you’ll need:
For the Revolutionary Two-Ingredient Breadstick Dough
This is where the magic happens! The combination of self-rising flour and Greek yogurt creates a dough that’s surprisingly similar to traditional yeast-leavened bread, but without all the fuss.
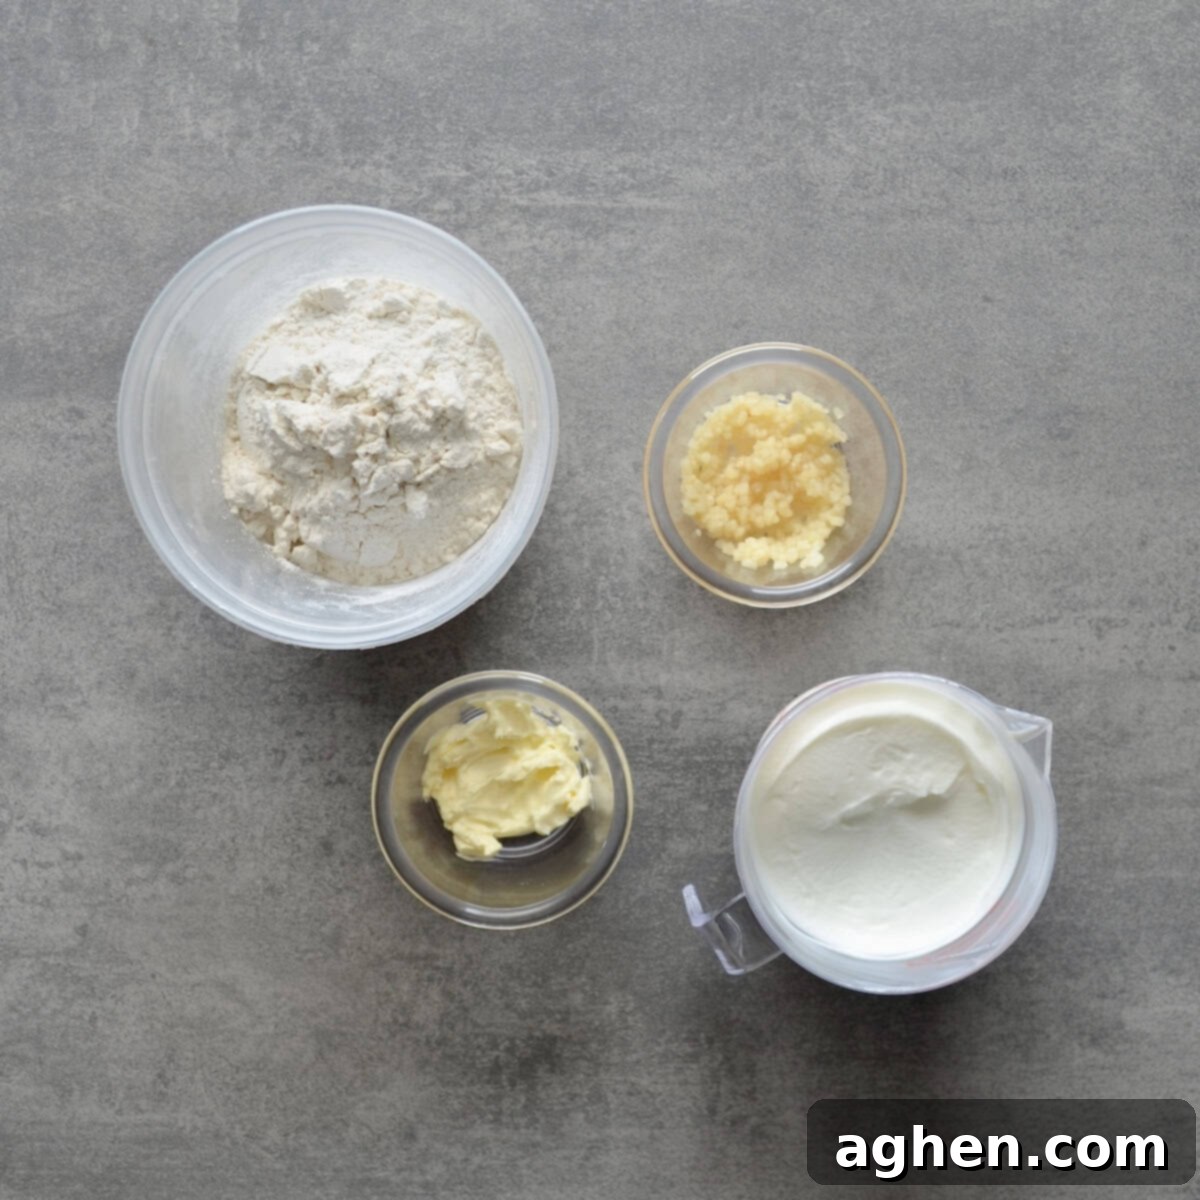
- 1 cup + 3 tbsp Self-rising flour: This flour already contains leavening agents and salt, simplifying the dough-making process. If you don’t have self-rising flour, don’t worry – you can easily make your own (see the “Variations and Substitutions” section below for details).
- 1 cup Nonfat plain Greek yogurt: The secret ingredient! Greek yogurt adds moisture, tang, and protein, and its acidity reacts with the leavening in the flour to create a light and airy texture without yeast. Ensure it’s plain and nonfat to keep the points low.
For the Aromatic Garlic Butter Spread
No garlic breadsticks are complete without a savory, fragrant garlic butter. We’re keeping it light and flavorful.
- 1 ½ tbsp minced garlic: Freshly minced garlic provides the most potent and delicious flavor, but pre-minced garlic from a jar works in a pinch.
- 1 ½ tbsp light vegetable oil spread (e.g., I Can’t Believe It’s Not Butter Light): Using a light vegetable oil spread instead of traditional butter helps significantly reduce the fat and calorie content, keeping your breadsticks Weight Watchers friendly.
- Optional: Your preferred herbs and spices (such as dried parsley, Italian seasoning, onion powder, or a sprinkle of garlic salt for extra punch).
Step-by-Step Guide: How to Make Weight Watchers Garlic Breadsticks
Creating these delicious 2-point garlic breadsticks is incredibly straightforward. Follow these simple steps, and you’ll have warm, fluffy breadsticks ready to enjoy in no time!
- **Prepare Your Baking Environment:** First, preheat your oven to 375°F (190°C). While the oven heats up, prepare a baking sheet by lining it with parchment paper or aluminum foil. This step is crucial for preventing sticking and ensuring easy cleanup.
- **Combine Dough Ingredients:** In a large mixing bowl, combine the self-rising flour and nonfat plain Greek yogurt. Begin mixing the ingredients together by hand. As they start to come together, use your hands to gently knead the mixture directly in the bowl. This initial kneading helps to incorporate the wet and dry ingredients thoroughly.
- **Form the Dough Ball:** Continue to knead in the bowl until a rough dough ball begins to form. You’ll likely notice some extra flour remaining at the bottom of the bowl. At this point, carefully transfer this remaining flour onto a clean, dry work surface. Then, move your partially formed dough ball onto this floured surface. The excess flour will act as a natural barrier, preventing the dough from sticking to your countertop as you continue kneading.
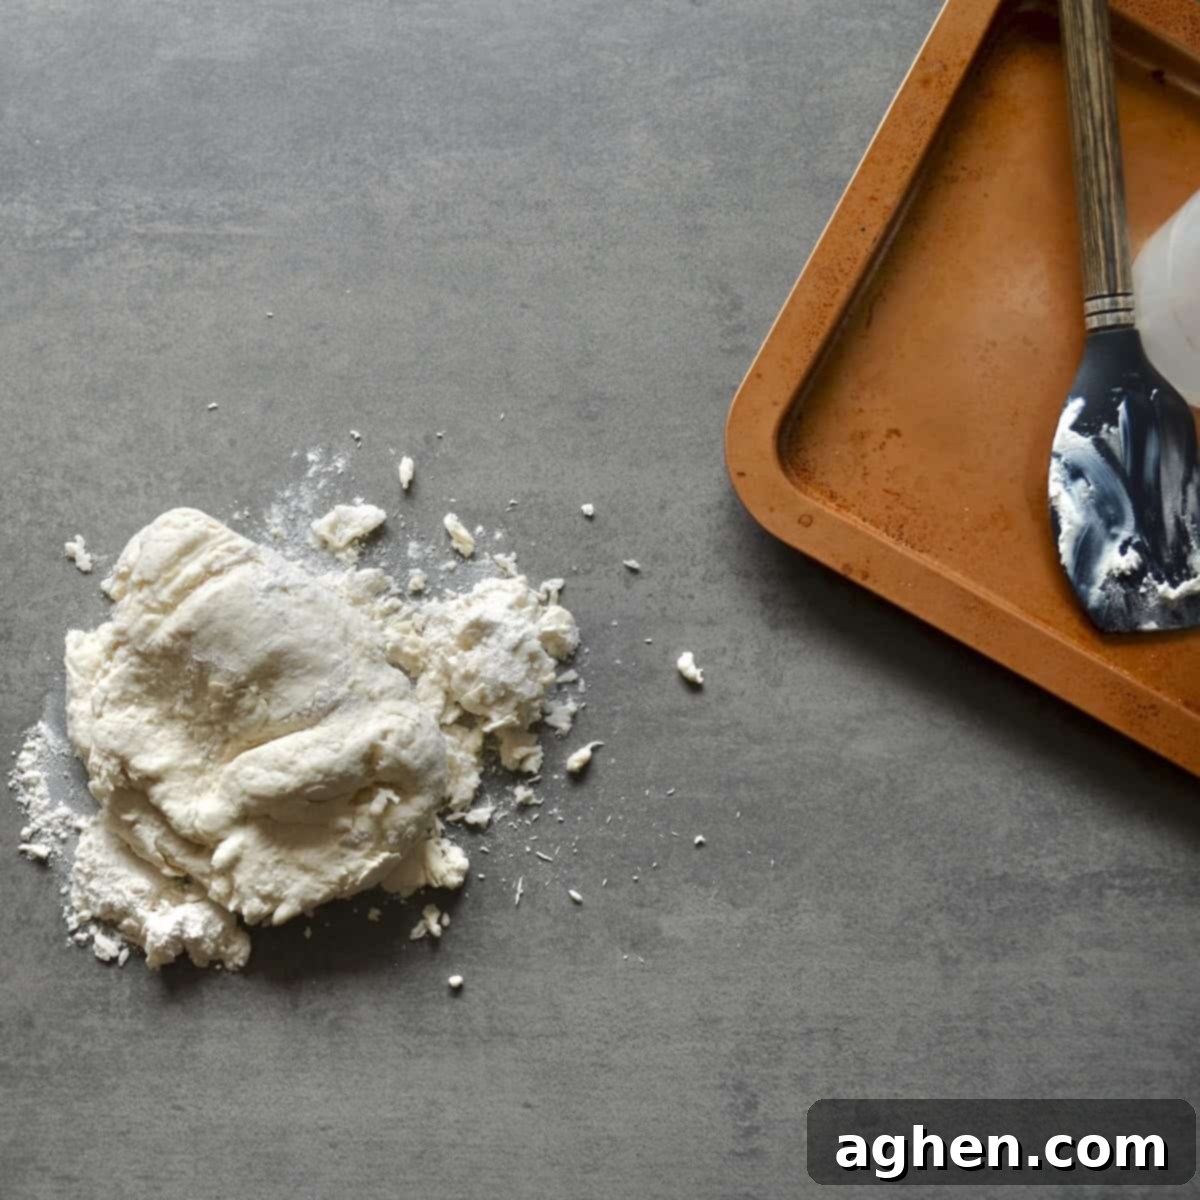
4. **Achieve Smooth Dough:** Continue kneading the dough on your floured surface for approximately 2 to 4 minutes. Your goal is to achieve a smooth, elastic dough where all the flour is fully incorporated and there are no dry, crumbly bits. Be careful not to over-knead, as this can make the breadsticks tough. The dough should feel soft and slightly springy.
5. **Shape the Breadsticks:** Once your dough is smooth, divide it into 8 equal portions. For consistent size and even baking, you can weigh them, but eyeballing them works just fine. Take each portion and roll it out into a long, thin strand, mimicking the classic breadstick shape. They might appear small and slender at this stage, but rest assured, they will puff up beautifully and expand in the oven, achieving that perfect, satisfying thickness.
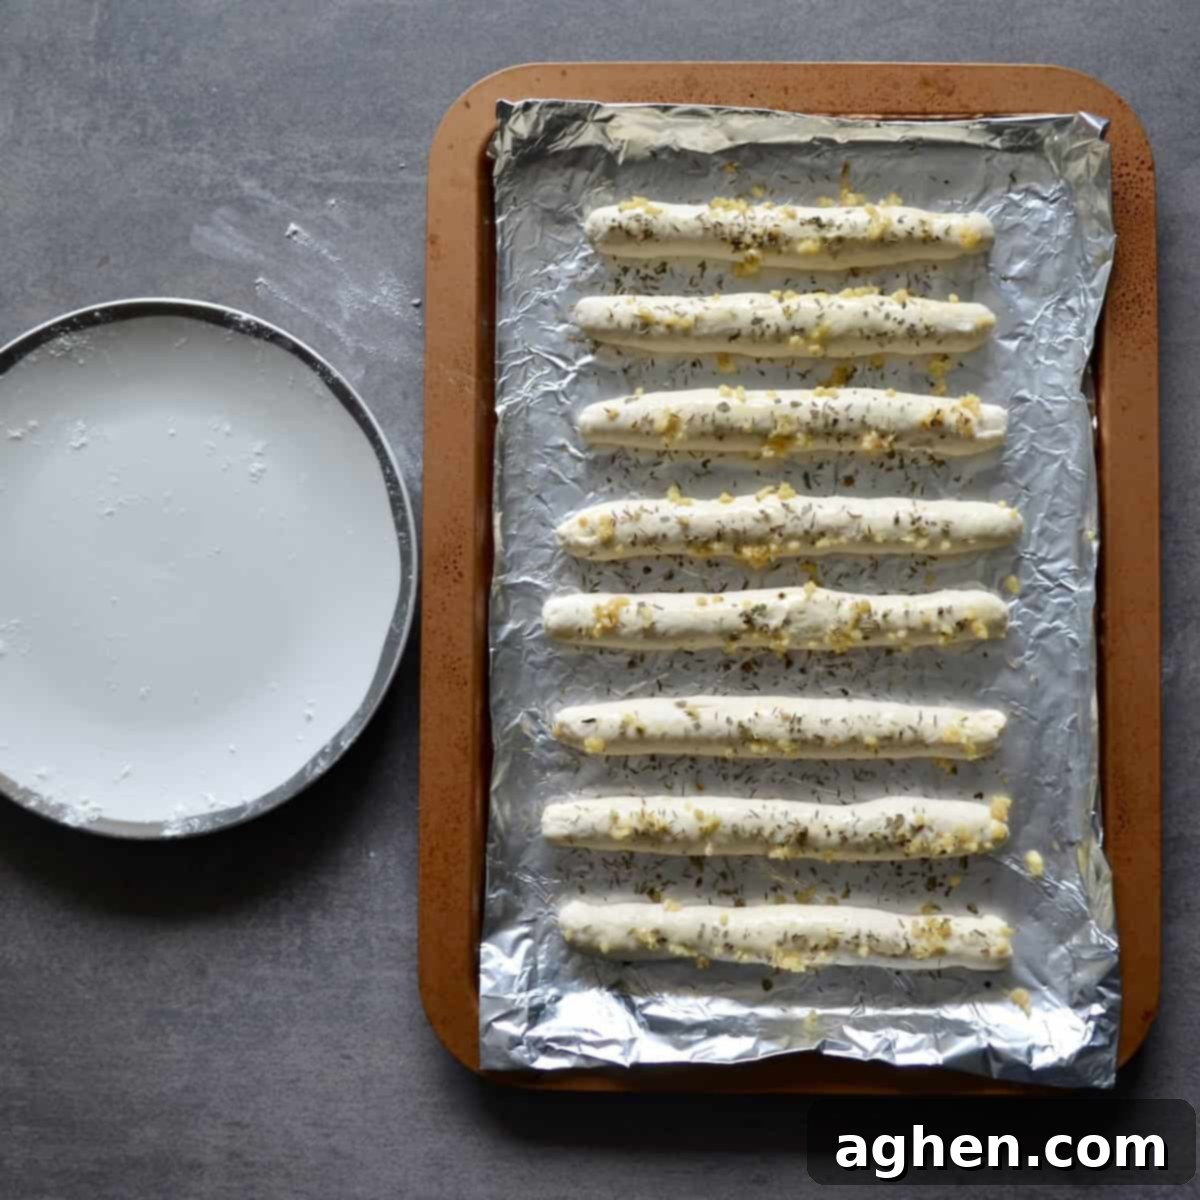
6. **Dough Rest & Garlic Butter Prep:** Arrange your uncooked breadsticks on the prepared baking sheet. Allow them to rest for 10 to 15 minutes. This brief resting period helps the dough relax, contributing to a tender interior. While they rest, it’s the perfect time to prepare your flavorful garlic butter.
7. **Craft the Garlic Butter:** You have two excellent options for making the garlic butter:
* **Stovetop Sauté Method:** In a small saucepan, melt the light vegetable oil spread over medium heat. Add the minced garlic and sauté gently for 1-2 minutes until it becomes fragrant and lightly golden, being careful not to burn it. This method mellows the garlic flavor and infuses the butter with its essence.
* **Food Processor Paste Method:** For a more pungent garlic kick and a quicker preparation, combine the minced garlic and light vegetable oil spread in a food processor. Process until a smooth, uniform paste is formed.
Once prepared, use a pastry brush to generously spread your chosen garlic butter mixture evenly over the tops of all the breadsticks.
8. **Season to Perfection:** This is your chance to customize! Sprinkle on your preferred seasonings. A dash of salt or garlic salt enhances the overall flavor. Consider adding dried herbs like parsley, oregano, or a blend of Italian seasoning for an authentic touch. Onion powder is another excellent addition for depth. Feel free to experiment with your favorites!
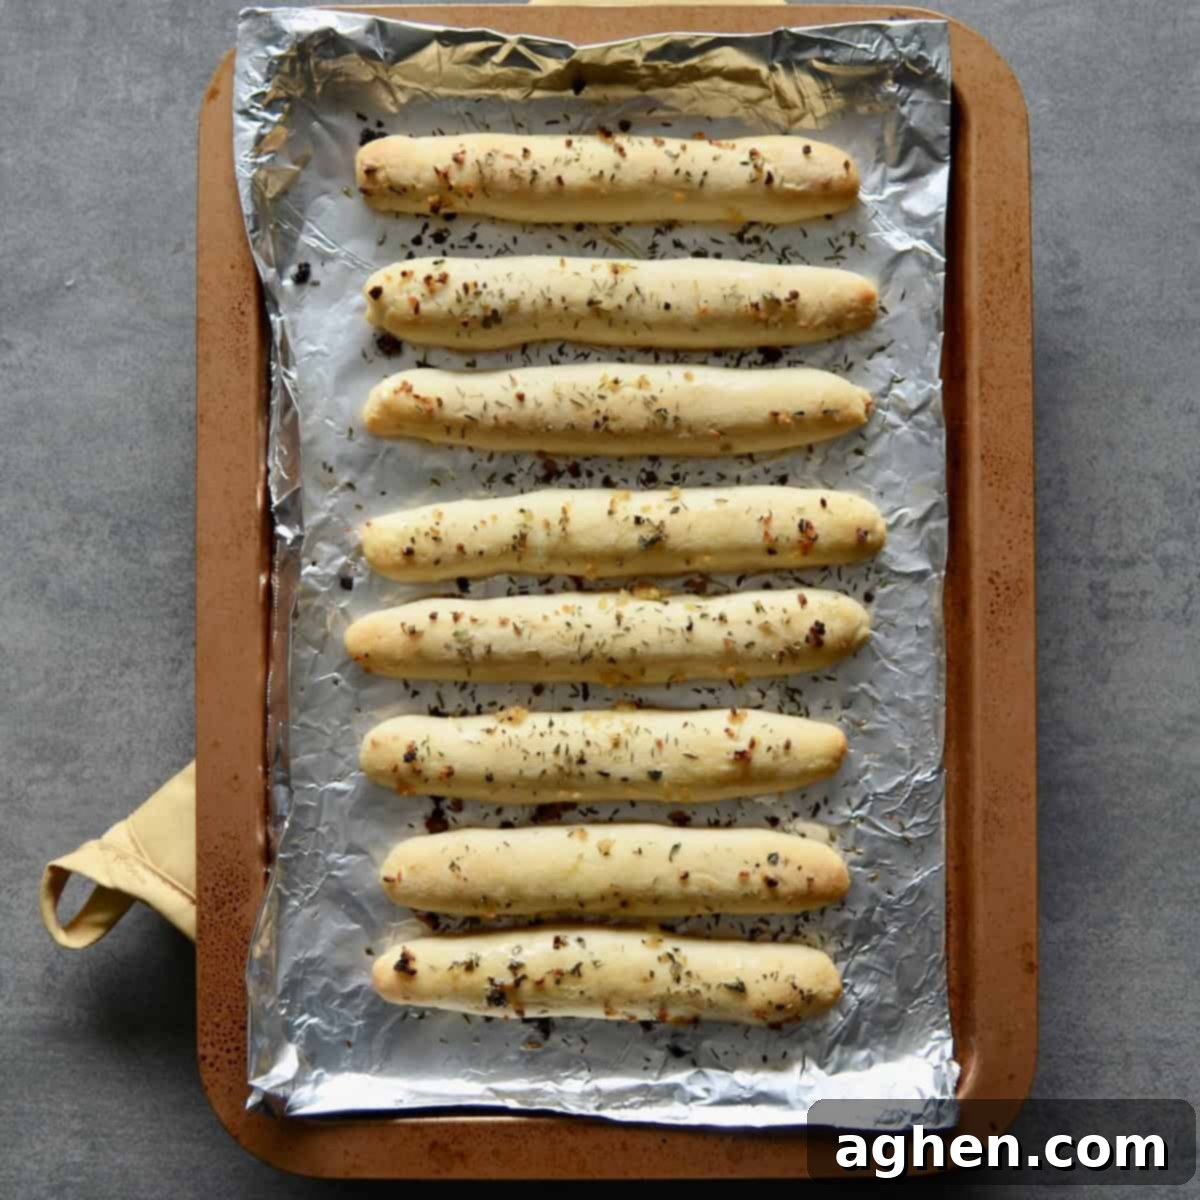
9. **Bake Until Golden:** Carefully place the baking sheet into your preheated oven. Bake for 18 to 20 minutes. Keep a close eye on them, as oven temperatures can vary. The breadsticks are perfectly done when their edges are beautifully golden brown and the tops have just started to darken slightly. Don’t forget to check the bottoms – they should also have a nice, appealing color. For the absolute best experience, serve and enjoy these warm, fresh from the oven!
Creative Variations & Smart Substitutions for Your Breadsticks
One of the joys of this two-ingredient dough recipe is its adaptability. Feel free to get creative and customize your breadsticks to suit your preferences or what you have on hand. Remember that some substitutions might slightly alter the Weight Watchers points.
- Flour Alternatives: If you don’t have self-rising flour in your pantry, you can easily create your own from all-purpose flour. Simply combine 1 ½ teaspoons of baking powder and ¼ teaspoon of salt for every cup of all-purpose flour. Whisk these ingredients together thoroughly to ensure even distribution before using it in the recipe.
- Yogurt Choices: While nonfat plain Greek yogurt is recommended for the lowest points, if full-fat Greek yogurt is all you have, it will certainly work. You might need to slightly adjust the amount of flour, potentially adding a tablespoon or two more, as full-fat yogurt tends to be thicker. Be aware that using full-fat yogurt will increase the Weight Watchers points per breadstick. The most crucial tip, regardless of fat content, is to always use plain, unflavored yogurt to avoid unwanted sweetness or artificial flavors.
- Stuffed Breadsticks (for extra points!): If you have a few extra Weight Watchers points to spare and want to elevate your breadsticks to a new level of deliciousness, consider stuffing them! When rolling out your dough portions, flatten them slightly, add a small amount of shredded mozzarella or grated Parmesan cheese, then carefully fold the dough over and seal it before rolling into the breadstick shape. You can also experiment with other fillings like thinly sliced olives, sun-dried tomatoes, or a small sprinkle of cooked, crumbled bacon for a savory surprise.
- Cheesy Topping: For a quick and delightful cheesy twist, simply sprinkle your favorite shredded cheese over the breadsticks just before baking. A small amount of fat-free mozzarella or a light dusting of Parmesan can add fantastic flavor without significantly impacting your Weight Watchers points. If using full-fat cheese, just be mindful of the portion size.
- Herbs and Seasonings Galore: This is your opportunity to truly kick up the flavor! Go beyond basic garlic and experiment with a variety of spices. Fresh or dried rosemary, thyme, oregano, or a robust Italian seasoning blend can add wonderful aromatic notes. For a spicy kick, add a pinch of red pepper flakes to your garlic butter or sprinkle them over the breadsticks before baking. Don’t be afraid to experiment with different flavor profiles to match your meal.
- One-Point Dinner Rolls: Looking for an even lower-point option or just prefer smaller portions? Instead of dividing the dough into 8 breadsticks, divide it into 16 smaller balls and shape them into miniature dinner rolls. Each tiny piece of bread will then be only one Weight Watchers point! Keep in mind that these smaller rolls will likely cook faster, so adjust baking time accordingly and watch them closely to prevent over-browning.
- Dipping Sauces: For those occasions when you have a few extra points to indulge, these breadsticks are fantastic with dipping sauces! Consider a low-fat cheese sauce, a light alfredo, or even a simple marinara.
Expert Tips & Tricks for Perfect Weight Watchers Garlic Breadsticks
Achieving perfectly fluffy and flavorful breadsticks is simple with a few key tips and tricks. Keep these in mind to ensure your 2-point Weight Watchers Garlic Breadsticks turn out amazing every time:
- **Avoid Over-Kneading:** The dough for these breadsticks is incredibly forgiving, but it’s important not to over-knead it. You only need to knead it for a few minutes, typically 2-4, until it feels smooth and cohesive. Over-mixing can over-develop the gluten, leading to tough, dense breadsticks that lack that desirable fluffy texture when you bite into them.
- **Knead by Hand for Best Results:** Following on the topic of over-kneading, I highly recommend mixing and kneading this dough by hand. This allows you to truly feel the dough’s elasticity and determine when it has reached the perfect smooth consistency. Using an electric mixer with a dough hook, while convenient for some doughs, can easily be overkill for this simple two-ingredient dough and may inadvertently tighten the gluten strands in the flour, resulting in a tougher breadstick.
- **Strategic Flour Usage:** When working with the dough, try to use only the measured amount of flour. Instead of instinctively adding more flour to your work surface if the dough feels slightly sticky, first ensure you’ve incorporated every bit of the flour you initially measured. Often, the ‘extra’ flour left in the bowl or on the table from combining the ingredients is exactly what you need to prevent sticking without adding additional flour. Adding too much extra flour can alter the dough’s hydration, potentially affecting the texture and, crucially, the Weight Watchers points. If it’s still slightly sticky after all measured flour is incorporated, a tiny pinch on your hands (not the surface) can help with rolling.
- **Enjoy Fresh and Warm:** These garlic breadsticks are unequivocally best enjoyed warm and fresh, straight from the oven on the same day they are made. The flavors are most vibrant, and the texture is at its peak. If you find that 8 breadsticks are too many for you or your family to consume in one sitting, remember that you can easily halve the recipe to make a smaller batch, ensuring you always have fresh, delicious breadsticks without waste.
- **Handling Slightly Sticky Dough:** It’s normal for the dough to be just slightly sticky when you’re rolling out the breadsticks. This stickiness contributes to the soft interior texture. If you’ve used up every ounce of flour from your mixing bowl and work surface, and the dough is still a bit too sticky to comfortably shape, resist the urge to add a large amount of extra flour. Instead, add just a tiny pinch of flour to your hands – not directly to the dough or the work surface – and it should provide enough of a barrier to help you roll and shape the breadsticks with ease.
- **Parchment Paper vs. Foil:** While both parchment paper and foil prevent sticking, parchment paper often yields a slightly crispier bottom crust for bread-like items, as it allows for better airflow. Foil works well but can sometimes trap a bit more moisture, leading to a slightly softer bottom.
Storing and Reheating Your Breadsticks
While these 2-point Weight Watchers Garlic Breadsticks are undeniably best enjoyed fresh, you can certainly store and reheat them to savor later. For optimal freshness, allow any leftover breadsticks to cool completely before storing. Place them in an airtight container or a resealable plastic bag at room temperature for up to 2-3 days. To reheat, a toaster oven or a conventional oven at 350°F (175°C) for 5-7 minutes will bring back their crisp exterior and warm, fluffy interior. Microwaving is an option for speed but may result in a softer texture.
Frequently Asked Questions (FAQs)
Here are some common questions about making these easy 2-point Weight Watchers Garlic Breadsticks:
- **Can I make the dough ahead of time?** Yes, you can prepare the dough a day in advance. Once mixed, wrap it tightly in plastic wrap and store it in the refrigerator. Let it come to room temperature for about 15-20 minutes before shaping and baking.
- **Can I freeze these breadsticks?** Yes, you can freeze both uncooked and baked breadsticks. For uncooked, shape them, then freeze on a parchment-lined tray until solid before transferring to a freezer bag. Bake from frozen, adding a few extra minutes to the cooking time. For baked, cool completely, then freeze in an airtight container. Reheat in the oven.
- **What if my dough is too sticky or too dry?** If the dough is too sticky, add a very small amount of self-rising flour (½-1 teaspoon at a time) and knead until it’s more manageable. If it’s too dry, add a tiny bit of Greek yogurt (½-1 teaspoon at a time) and knead until hydrated. Greek yogurt brands can vary in consistency, so slight adjustments may be needed.
- **Can I use flavored Greek yogurt?** No, it’s crucial to use plain, nonfat Greek yogurt for this recipe. Flavored yogurts contain sugars and artificial ingredients that will alter the taste profile and likely increase the Weight Watchers points.
- **Why are my breadsticks tough?** The most common reason for tough breadsticks is over-kneading the dough. Knead just enough until it’s smooth and combined, typically 2-4 minutes by hand. Over-developing the gluten will result in a chewy, tough texture.
More Delightful Bread Recipes to Explore
If you loved these easy and healthy garlic breadsticks, you might also enjoy these other fantastic bread recipes:
Garlic, Bacon, and Cheese Pull Apart Bread
Pull Apart Pizza Bread
Healthy Cornbread
Weight Watchers Garlic Breadsticks
Ingredients
Breadstick Dough
- 1 cup + 3 tbsp self rising flour, Refer to notes if you need to use AP
- 1 cup Nonfat plain greek yogurt
Garlic Butter
- 1 ½ tbsp minced garlic
- 1 ½ tbsp light vegetable oil spread, (I used I Can’t Believe It’s Not Butter Light)
Optional
- to taste salt, herbs, and other seasonings
Instructions
-
Preheat oven to 375°F (190°C). Line a baking sheet with parchment paper or foil.
-
Combine the self-rising flour and nonfat plain Greek yogurt in a large bowl. Mix it by hand, kneading it in the bowl to incorporate the ingredients until a rough dough ball forms.
-
Once a dough ball is mostly formed, move any extra flour from the bottom of the bowl to a clean work surface. Transfer the dough ball to this floured surface and continue kneading the dough to prevent it from sticking.
-
Knead the dough until it is smooth and all flour is completely mixed in, which should take about 2-4 minutes. Be careful not to over-knead.
-
Divide the dough into 8 equal portions. Roll each portion into a long, thin breadstick shape. Don’t worry if they seem small; they will puff up in the oven!
-
Allow the uncooked breadsticks to rest on the baking sheet for 10 to 15 minutes while you prepare the garlic butter.
-
**Make the garlic butter in one of two ways:** You can sauté the minced garlic and light vegetable oil spread over medium heat on the stovetop until the garlic is lightly browned and the spread is melted, then brush onto the breadsticks. Alternatively, combine the minced garlic and light spread in a food processor to create a smooth paste, then apply.
-
Generously sprinkle on your preferred seasonings, such as salt or garlic salt, and herbs like parsley, thyme, Italian seasoning, or onion powder.
-
Bake the breadsticks in the preheated oven for 18 to 20 minutes, or until the edges are golden brown and the tops begin to darken. The bottoms should also have a nice color. For best results, enjoy warm and fresh immediately after baking.
Notes
**To make self-rising flour yourself:** Mix 1 ½ teaspoons of baking powder and ¼ teaspoon of salt into every cup of all-purpose flour and ensure it is evenly distributed before using.
Nutrition
Nutrition information is automatically calculated, so should only be used as an approximation.
