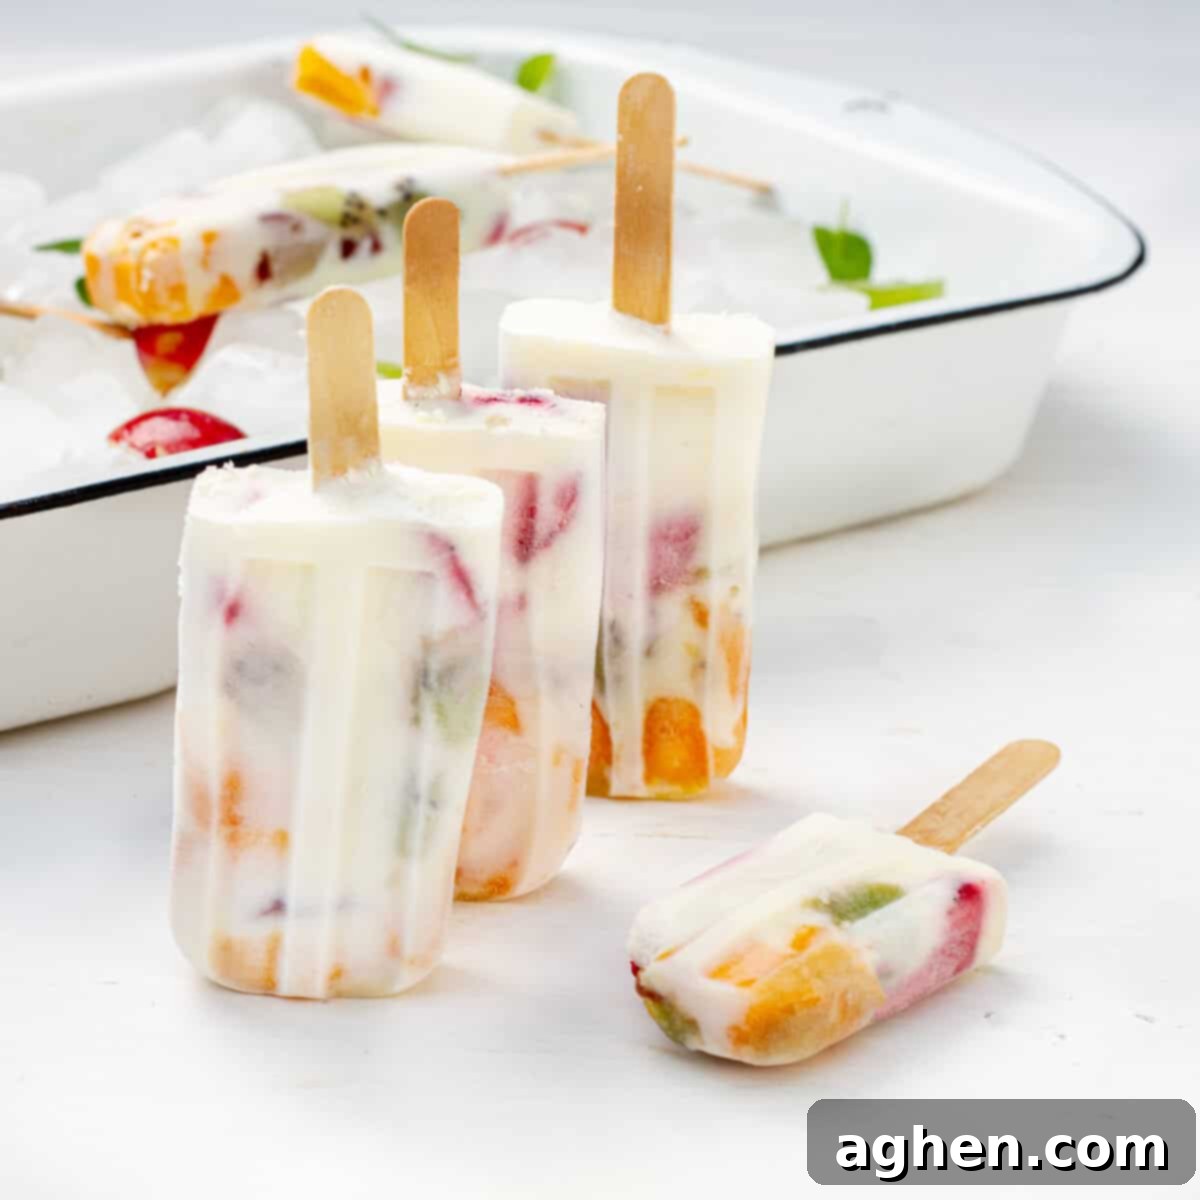
Refreshing 0-Point Yogurt and Fruit Ice Pops: Your Ultimate Healthy Summer Treat
Beat the heat and delight your taste buds with these incredible 0-Point Yogurt and Fruit Ice Pops! Perfect for a hot summer day, these naturally sweetened, homemade frozen treats are an absolute must-have. Crafted with just two main ingredients – your favorite vibrant fruits and creamy low-fat Greek yogurt – they offer a simple, refreshing, and guilt-free way to stay cool during the warmer months. Whether you’re following Weight Watchers or simply looking for a wholesome dessert, these healthy popsicles are a fantastic choice for the entire family.
This versatile 2-ingredient recipe serves as the perfect canvas for your culinary creativity. We’ve showcased a delightful combination of mango, kiwi, strawberries, and grapes, chosen for their appealing colors and complementary flavors. However, the beauty of this recipe lies in its adaptability; feel free to experiment with any fruits you love to create your unique frozen masterpieces. Each pop is a burst of natural sweetness and creamy texture, making it a satisfying snack or a light dessert without compromising on taste or your health goals. Get ready to enjoy a refreshing treat that truly pops!
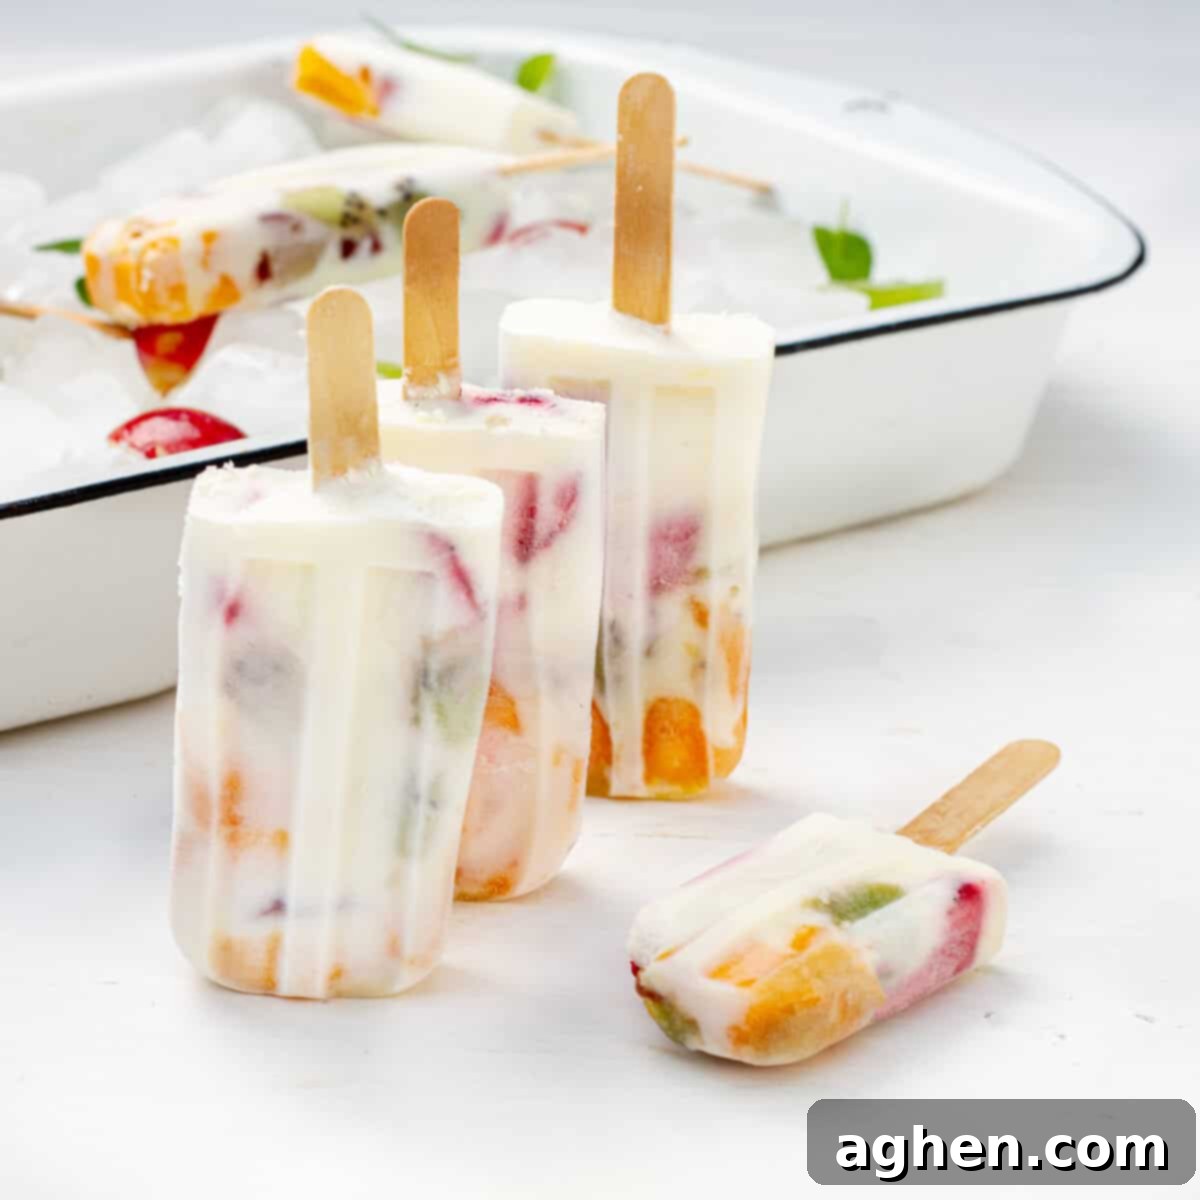
Why You’ll Love These Healthy Yogurt & Fruit Pops
There are countless reasons to make these delicious yogurt and fruit ice pops a staple in your summer repertoire. From their nutritional benefits to their sheer deliciousness, they tick all the boxes for a perfect seasonal treat that aligns with a healthy lifestyle.
- Visually Stunning & Kid-Friendly: The vibrant medley of colorful fruits against the creamy white yogurt creates an eye-catching treat that kids (and adults!) can’t resist. These homemade fruit pops are an ingenious way to incorporate more fruit and healthy dairy into your family’s diet, often without them even realizing how good it is for them! The appealing colors make healthy eating fun and exciting for even the pickiest eaters.
- A Nostalgic Journey: Take a trip down memory lane with every bite. These playful yogurt pops evoke the simple joy of childhood summers, reminiscent of chasing after the ice cream truck or enjoying a cool treat on a scorching afternoon. They offer a moment of pure, unadulterated pleasure that’s both refreshing and comforting, bringing back those happy, carefree summer vibes.
- Truly ZeroPoint on Weight Watchers: This is arguably one of the biggest draws! For those following the Weight Watchers (WW) program, finding genuinely satisfying 0-Point desserts can be a challenge. These ice pops are a game-changer, offering a light, healthy, and incredibly satisfying option that won’t cost you a single point. Made with wholesome low-fat Greek yogurt and fresh fruit, they align perfectly with a healthy eating plan, allowing you to indulge without guilt. It’s the ideal treat to support your wellness journey while curbing those sweet cravings.
- Naturally Sweetened & Wholesome: Unlike many store-bought popsicles packed with artificial flavors, high-fructose corn syrup, and refined sugars, these homemade treats rely on the natural sweetness of fresh fruit and a touch of Splenda (or your preferred sugar substitute) in the yogurt. This makes them a much healthier alternative, free from unnecessary additives and processed ingredients. You control exactly what goes into them, ensuring a clean and nutritious dessert.
- Effortlessly Simple & Quick Prep: With just a handful of staple ingredients and minimal prep time, these yogurt and fruit ice pops are incredibly easy to make. No complicated steps, no fancy equipment – just straightforward instructions that yield impressive results. They are perfect for busy individuals or families looking for quick, healthy snack solutions that require little effort but deliver big on flavor and satisfaction.
- Highly Customizable for Every Palate: As you’ll discover in the extensive variations section, this recipe is incredibly flexible. You can swap out fruits, experiment with different yogurt flavors, or add extra ingredients to suit your personal preferences or what’s in season. This ensures you can enjoy a fresh take on these healthy fruit pops every time you make them, keeping things exciting and tailored to your tastes.
Preparation Time: 15 minutes
Freezing Time: 8 hours (or overnight for best results)
Yields: 6 delightful ice pops
Serving Size: 1 ice pop
0 WW Points Per Serving. This makes them an exceptional choice for maintaining your Weight Watchers goals while still enjoying a delicious dessert. You can verify the recipe details on the WW Apphere. (WW login required.)
Essential Ingredients for Your Healthy Yogurt Fruit Pops
Creating these refreshing treats begins with selecting quality ingredients. The beauty of this recipe lies in its simplicity, requiring minimal items to achieve maximum flavor and health benefits. Always choose the freshest, ripest fruits for the best possible taste and natural sweetness. Here’s a detailed look at what you’ll need:
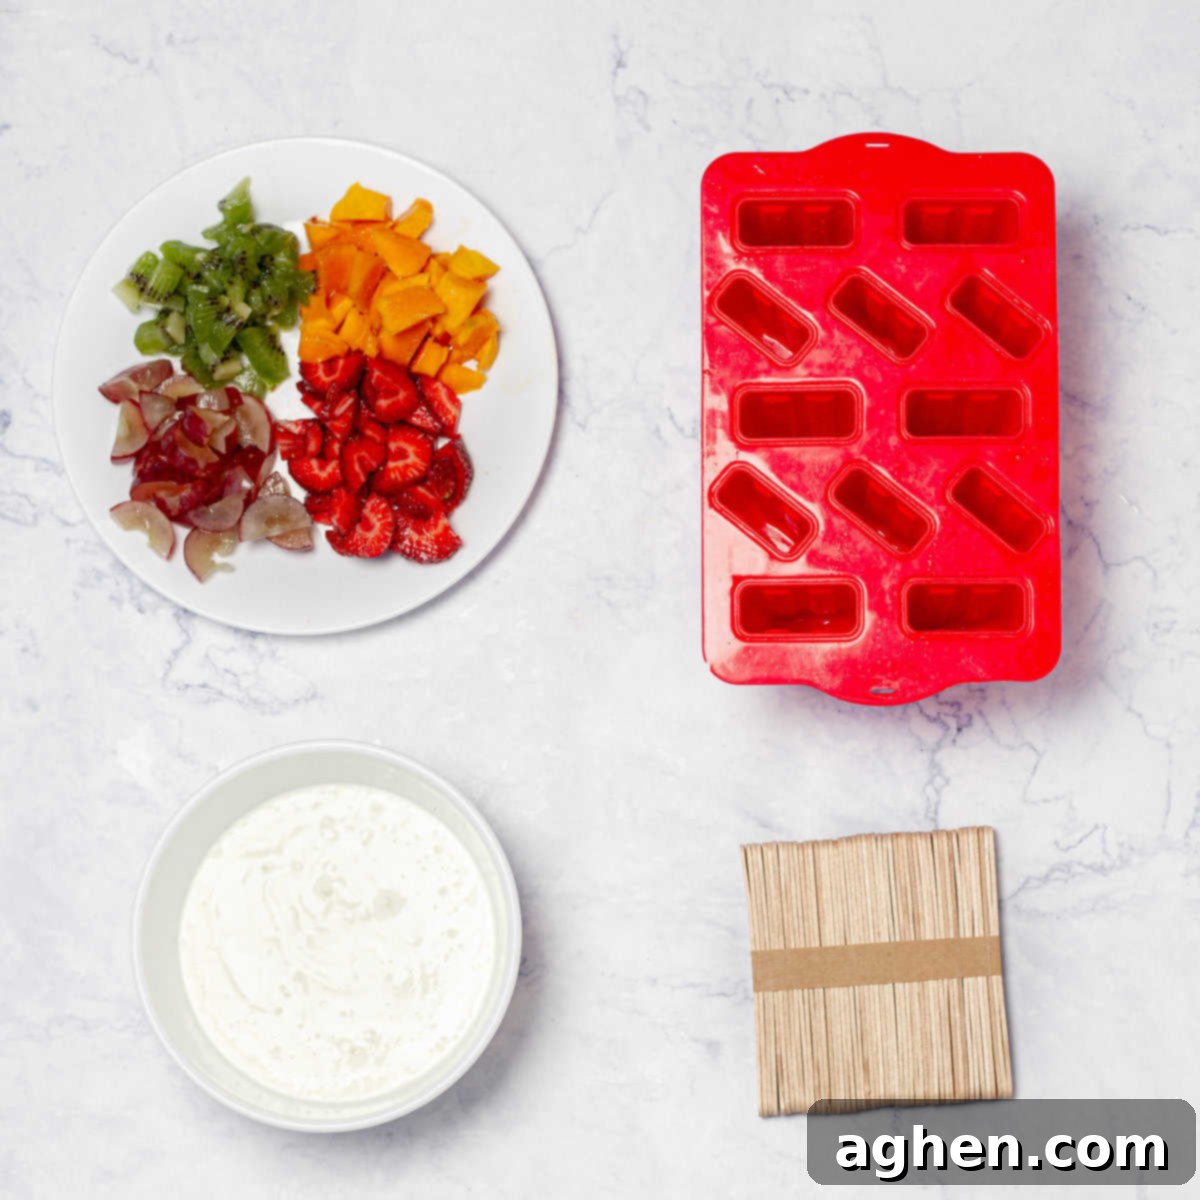
- 2 cups (480 ml) low-fat liquid Greek yogurt, sweetened with Splenda: Greek yogurt is the star here, providing a wonderfully thick, creamy texture and a significant protein boost, which helps with satiety. Opt for a low-fat variety to keep the Weight Watchers points at zero. Sweetening it with Splenda (or another preferred sugar substitute like Stevia, erythritol, or monk fruit sweetener) ensures a delicious taste without added sugar. If you can’t find “liquid” Greek yogurt, simply use regular plain low-fat Greek yogurt and whisk it vigorously or thin it slightly with a tablespoon or two of sugar-free milk or water to achieve a pourable consistency.
- 1 cup (165 g) mango, diced: Mango introduces a luscious tropical sweetness and a vibrant orange hue to your popsicles. When selecting a mango, look for one that is slightly soft to the touch and has a fragrant, fruity aroma near the stem. Dicing it into small, uniform pieces ensures even distribution and makes each bite enjoyable.
- ½ cup (90 g) kiwi, diced: Kiwi offers a delightful tart contrast to the sweeter fruits and adds a striking green color, enhancing the visual appeal of your frozen treats. Choose firm, unblemished kiwis. Peeling them carefully before dicing will ensure a smooth texture in your pops.
- 1 cup (150 g) strawberries, diced: Classic and universally loved, strawberries bring a familiar, juicy sweetness and a beautiful red color. Opt for bright red, firm berries that are free of mold or soft spots. Washing them thoroughly and removing the green tops before dicing is important for hygiene and taste.
- 1 cup (150 g) grapes, halved: Grapes add a burst of natural sweetness and a satisfyingly juicy crunch to the ice pops. Halving them makes them easier to eat within the frozen treat and helps distribute their flavor throughout the yogurt mixture. Any color of grape—red, green, or black—will work wonderfully, contributing to both taste and visual diversity.
Step-by-Step Instructions for Your Homemade Fruit Yogurt Pops
Creating these delightful yogurt and fruit ice pops is a breeze, even for novice cooks. Follow these simple, clear steps for perfectly set, delicious frozen treats every time. Remember, patience during the freezing process is paramount for the best results!
- Prepare the Ingredients Thoroughly: Begin your popsicle-making journey by washing all your selected fruits under cool running water. This removes any dirt or residues. Gently pat them dry with a clean cloth or paper towel. Precision in dicing is key for an even distribution and enjoyable texture in your popsicles. Carefully dice the mango, kiwi, and strawberries into small, uniform, bite-sized pieces (about ¼ to ½ inch cubes work well). For the grapes, simply halve them to ensure they are easy to eat when frozen and blend well with the yogurt. Once prepared, set each type of fruit aside in separate bowls for easy access and organization, especially if you plan to layer them.
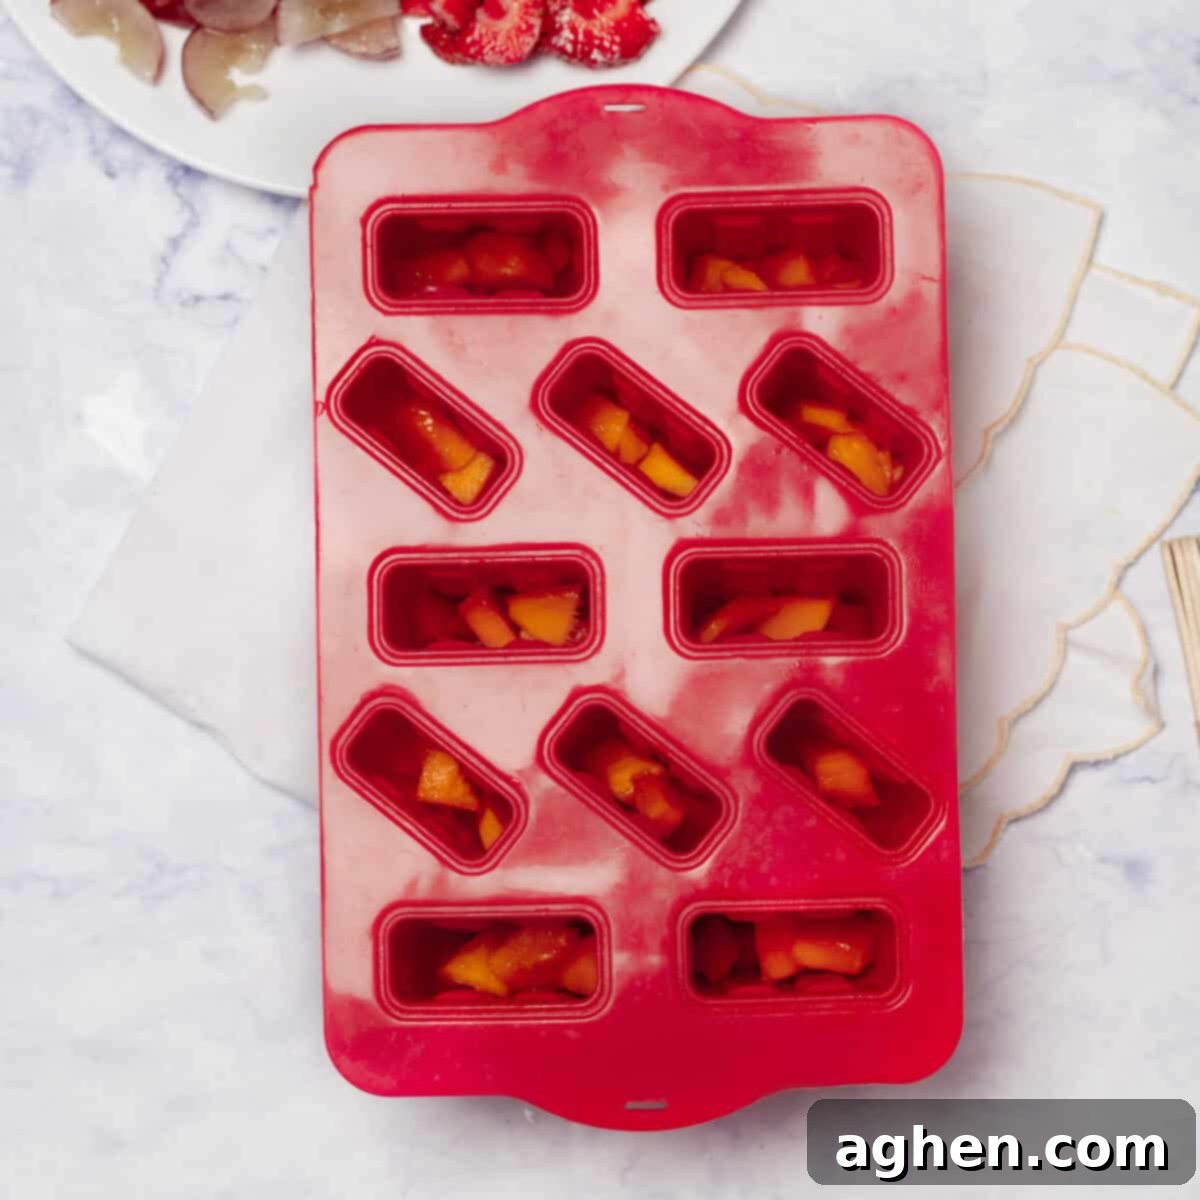
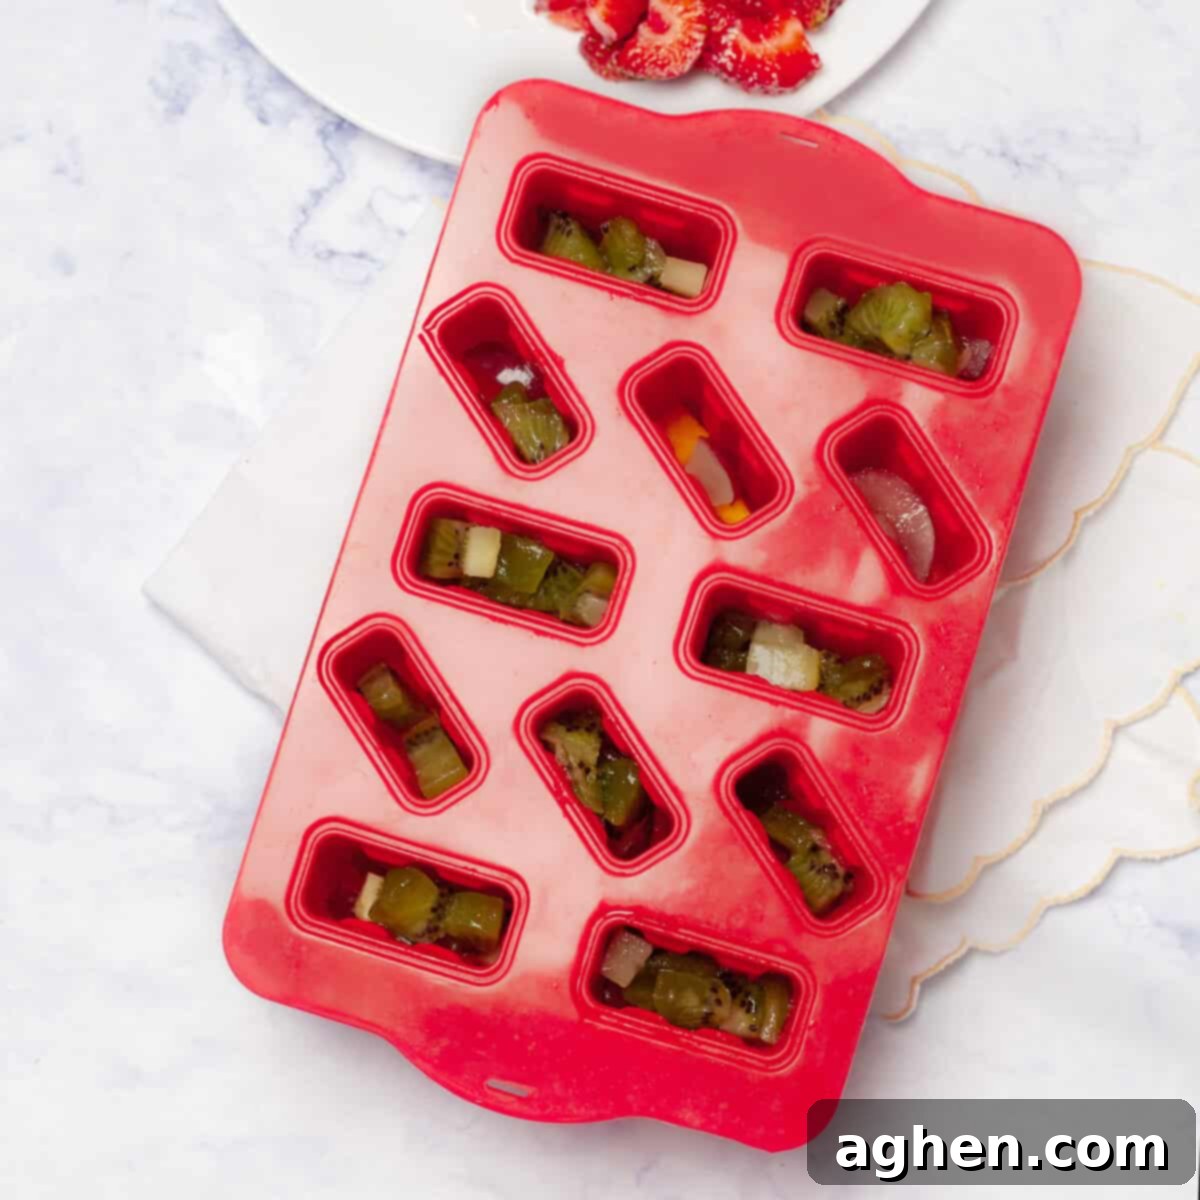
- Strategically Fill the Popsicle Molds: Take out your popsicle molds. Silicone molds are often recommended for their flexibility, making unmolding easier, but traditional plastic molds are also excellent. Now for the fun part: distributing the fruit! You have creative freedom here. You can either layer the diced mango, kiwi, strawberries, and halved grapes in distinct bands for a visually appealing, striped effect, or you can gently mix them within each mold for a more uniform fruit distribution. Aim for an even amount of fruit in each mold, filling them about one-third to half-full with your colorful fruit mixture. This ensures every bite has a good balance of fruit and creamy yogurt.
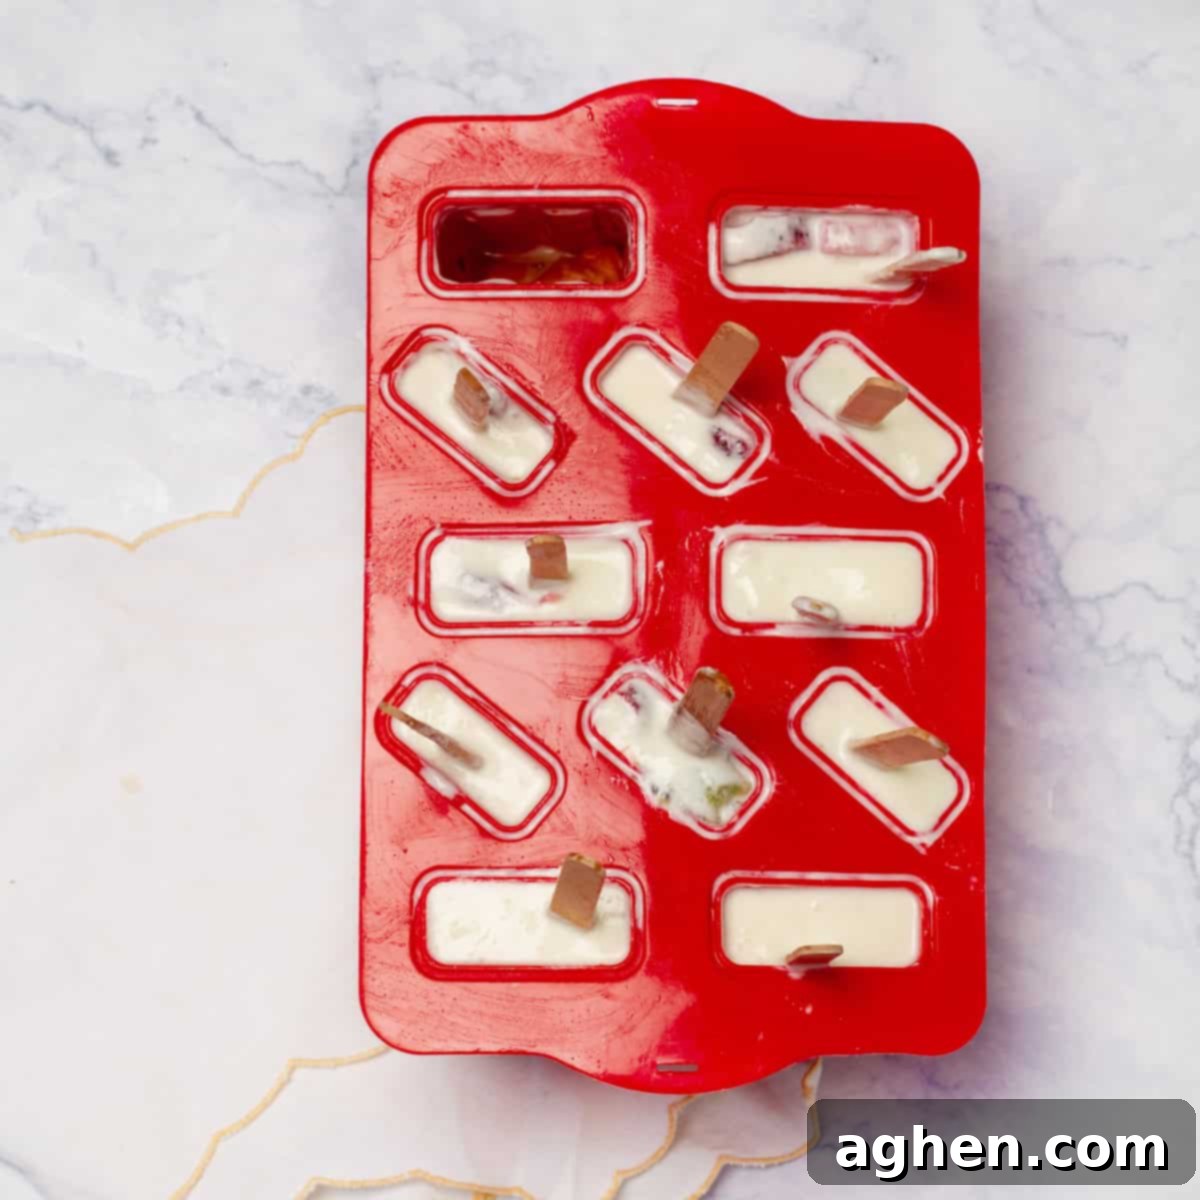
- Carefully Add the Yogurt Mixture: Once the vibrant fruit is in place, it’s time for the creamy element. Pour the low-fat liquid Greek yogurt, which you’ve already sweetened with Splenda, over the fruits in each mold. Fill the molds nearly to the top, but it’s crucial to leave a small gap (about a quarter-inch) at the very top. This small but important space allows for the natural expansion that occurs when liquids freeze, preventing your popsicles from overflowing and creating messy tops in your freezer.
- Securely Set the Popsicle Sticks: Now, gently insert the popsicle sticks into the center of each filled mold. If your popsicle molds are equipped with a cover that features slots designed to hold the sticks in place, definitely utilize it. This clever design ensures that the sticks remain upright and perfectly centered as the popsicles freeze, which makes them much easier and cleaner to hold and eat once they are set. If your molds don’t have a cover, you can carefully place them in the freezer and check after about an hour; once the yogurt is slightly firm, you can adjust any sticks that may have shifted.
- Settle the Mixture and Eliminate Air Bubbles: Greek yogurt’s wonderfully thick and creamy consistency, while great for flavor, means it can sometimes trap air bubbles or leave small gaps around the fruit pieces. To prevent this, gently but firmly tap the filled molds on your kitchen counter a few times. This action encourages the yogurt to settle thoroughly around the fruit, fills any potential air pockets, and ensures a solid, cohesive popsicle structure. This step is vital for preventing your ice pops from breaking apart when you try to unmold them.
- Allow for Adequate Freezing Time: Carefully place the filled molds into your freezer. It’s absolutely essential to let them freeze for a minimum of 8 hours. For best results, guaranteed solidity, and the perfect frozen texture, leaving them overnight (10-12 hours) is highly recommended. Rushing this step can result in soft, slushy, or crumbly popsicles that are difficult to unmold and enjoy. A fully frozen homemade popsicle is much more enjoyable and less messy!
- Effortlessly Unmold and Serve: When you’re ready to enjoy your homemade treats, carefully remove the molds from the freezer. To release the ice pops easily, there are a couple of effective tricks: you can run the outside of the molds under warm tap water for about 10-20 seconds. This slight warming helps to loosen the frozen pop from the mold. Alternatively, if your molds are made of flexible silicone, you can gently twist and push the bottom of the mold to release the popsicle without much effort. Once freed, serve immediately and savor the refreshing, healthy goodness of your homemade yogurt and fruit ice pops!
Endless Possibilities: Variations and Substitutions for Your Fruit Pops
One of the best aspects of these 0-Point yogurt and fruit ice pops is how easily they can be customized to suit your taste, dietary needs, or what seasonal ingredients you have on hand. Don’t be afraid to get creative and make them truly your own!
- Explore Your Yogurt Choices: While low-fat Greek yogurt is highly recommended for its zero-point status and wonderfully creamy texture, you have several options to experiment with depending on your preferences and dietary goals.
- Flavored Yogurt: If you prefer, opt for pre-flavored, sugar-free, and low-fat yogurts. Varieties like strawberry, peach, or pineapple flavored yogurts can add an exciting twist and might even negate the need for extra sweetener. Always double-check the nutrition label for sugar content and Weight Watchers points to ensure it fits your plan.
- Dairy-Free Alternatives: For those with dairy sensitivities, allergies, or who are following a vegan diet, unsweetened, low-fat coconut yogurt, almond yogurt, or soy yogurt can be excellent substitutes. Just ensure they are plain and then sweeten them to your liking with a sugar substitute for a delicious dairy-free version.
- Full-Fat Yogurt: If Weight Watchers points are not a primary concern for you, using full-fat Greek yogurt will yield an even richer, more indulgent, and creamier popsicle. However, be aware that this will increase the caloric and point value of your treats.
- Experiment with Diverse Fruit Options: Virtually any fresh, ripe fruit can be a star in these homemade pops! The key is to use fruit that is in season and at its peak for the best natural flavor and sweetness.
- Berries Galore: Beyond strawberries, consider raspberries, blueberries, blackberries, and pitted cherries. These small, juicy fruits are fantastic additions, offering bursts of tart and sweet flavors and powerful antioxidants.
- Tropical Paradise: Beyond mango, explore pineapple, papaya, or even a hint of passion fruit pulp for an exotic escape. Tropical fruits often pair wonderfully with the tang of Greek yogurt.
- Stone Fruits: When in season, fresh peaches, nectarines, and plums (peeled and diced) work beautifully. Their soft texture and natural sweetness are perfect for frozen treats.
- Melons: Diced watermelon or cantaloupe can add a refreshing, watery sweetness and a lovely texture, especially on very hot days.
- Citrus Zing: A tiny bit of lemon or lime zest mixed into the yogurt can brighten the overall flavors significantly, adding a lovely aromatic lift.
- Single Fruit Focus: Instead of a medley, try making single-fruit pops, such as pure strawberry-yogurt pops, mango-yogurt pops, or blueberry-yogurt pops for a focused flavor experience.
- Enhance with Additional Flavors and Textures: Elevate your popsicles with these simple additions to customize them even further:
- Vanilla Extract: A splash of pure vanilla extract (about ½ teaspoon per 2 cups of yogurt) can deepen the yogurt’s flavor and beautifully complement most fruits.
- Spices: A pinch of warm spices like cinnamon, nutmeg, or a tiny grating of fresh ginger can add complexity and warmth, particularly delicious with apple, pear, or peach-based popsicles.
- Healthy Add-ins for Texture: For a nutritional boost and interesting texture, stir in a teaspoon of chia seeds (they absorb moisture and create a pleasant gel-like texture), or a sprinkle of finely chopped nuts or granola (note: nuts and granola will add Weight Watchers points and calories).
- Herbs: For an adventurous palate, a few finely chopped fresh mint leaves or basil can add a sophisticated, refreshing twist, particularly with berry or melon flavors.
- Sweetener Adjustments: If you find your fruit isn’t quite sweet enough, or you simply prefer a sweeter popsicle, feel free to add a bit more Splenda or your preferred sugar substitute to the yogurt mixture before pouring it into the molds.
Expert Tips and Tricks for Perfect Homemade Popsicles
Achieving perfectly formed and irresistibly delicious homemade ice pops is easy with a few insider tips. These tricks will help you avoid common pitfalls and ensure your yogurt and fruit creations are a resounding success every time, delivering maximum enjoyment with minimal fuss.
- Preventing Oxidizing Fruits from Browning: Some fruits, such as bananas, pears, and apples, are highly susceptible to browning when exposed to air – a process known as oxidation. If you choose to incorporate these fruits into your popsicles, a simple yet effective trick is to drizzle them with a few drops of lemon or lime juice before adding them to the molds. The acidity of the citrus juice acts as a natural antioxidant, helping to prevent the enzymatic browning and keeping your popsicles looking fresh, vibrant, and appealing. Pineapple juice can also work well for this purpose.
- Creative Mold Alternatives: Don’t have dedicated popsicle molds? No problem at all! You can still enjoy homemade ice pops using items you likely already have in your kitchen, making this recipe even more accessible.
- Small Cups: Disposable paper or plastic cups (typically 3-5 oz size) work perfectly. Semi-conical shapes (like small paper cone cups) are particularly effective, as their tapered design makes unmolding much easier.
- Ice Cube Trays: For mini-pops or bite-sized frozen treats, an ice cube tray can be a fantastic option. Once the mixture has partially frozen (after about 30-60 minutes), you can insert toothpicks or small plastic spoons as handles.
- Silicone Molds: While not strictly an “alternative,” dedicated silicone molds are often the easiest to use due to their inherent flexibility. This allows for effortless release without the need for warm water, preserving the shape and integrity of your popsicles.
- Ensure Yogurt Settles Properly for a Smooth Finish: Greek yogurt’s inherent thickness, while wonderful for creating a creamy texture, can sometimes lead to trapped air pockets or small voids within your popsicles, especially around the fruit pieces. To prevent this, after you’ve poured the yogurt over the fruit in the molds, give the molds a gentle but firm tap on your kitchen counter several times. This action encourages the yogurt to settle thoroughly around the fruit, fills any potential air pockets, and releases trapped air bubbles. The result is a more uniform, solid, and aesthetically pleasing popsicle that is less likely to break apart when you try to unmold it.
- Achieving the Ideal Freezing Time: Patience is truly a virtue when making ice pops. While 8 hours is the minimum recommended freezing time for these yogurt and fruit ice pops, leaving them in the freezer overnight (10-12 hours) ensures they are rock-solid and perfectly set. If you attempt to unmold them too early, they may be slushy, still soft in the center, or break apart, leading to disappointment. A properly frozen pop will have a firm, consistent texture throughout, making for a much more enjoyable and less messy eating experience.
- Optimal Storage for Longevity: Once your popsicles are fully frozen and you’ve unmolded them, it’s crucial to store them properly to maintain their fresh taste and prevent freezer burn. Individually wrap each popsicle tightly in plastic wrap or parchment paper, then place them in an airtight freezer bag or container. Stored this way, they can retain their quality and delicious flavor for up to 2-3 weeks, allowing you to enjoy them over an extended period.
- Troubleshooting Ice Crystals: While Greek yogurt naturally lends itself to a creamy texture, sometimes ice crystals can form. To minimize this, ensure your yogurt is as thick as possible (less water content means fewer ice crystals). Also, try to avoid opening the freezer door frequently while they are setting, as temperature fluctuations can contribute to crystal formation. For an ultra-smooth texture, some people even add a tiny pinch of a natural stabilizer like guar gum or xanthan gum (start with ¼ teaspoon per 2 cups of yogurt) if they’re feeling adventurous, though it’s usually not necessary for these already creamy pops.
These 0-Point Yogurt and Fruit Ice Pops are more than just a dessert; they are a delightful, healthy, and endlessly customizable way to enjoy the summer season. Their vibrant colors and refreshing taste make them a hit with everyone, while their low-point value makes them a guilt-free pleasure for those mindful of their diet. Whip up a batch today and savor the sweet, cool goodness!
Yogurt and Fruit Ice Pops Recipe Card
Servings: 6 Ice Pops
Prep Time: 15 minutes
Freeze Time: 8 hours
Total Time: 8 hours 15 minutes
Share this recipe with your friends!
A simple, healthy, and delicious 0-Point summertime treat that the whole family will love!
Ingredients
- 2 cups (480 ml) low-fat liquid Greek yogurt, sweetened with Splenda
- 1 cup (165 g) mango, diced
- ½ cup (90 g) kiwi, diced
- 1 cup (150 g) strawberries, diced
- 1 cup (150 g) grapes, halved
Prevent your screen from going dark
Instructions
- Prepare the Ingredients: Wash and dry all fruits thoroughly. Dice mango, kiwi, and strawberries into small, uniform, bite-sized pieces. Halve the grapes. Set each prepared fruit aside in separate bowls.
- Fill the Popsicle Molds: Take your popsicle molds and evenly distribute the diced mango, kiwi, strawberries, and halved grapes among them. You can layer the fruits for visual appeal or mix them for a more uniform flavor distribution in each mold.
- Add the Yogurt: Pour the low-fat liquid Greek yogurt, sweetened with Splenda, over the fruits in each mold. Fill the molds nearly to the top, ensuring you leave a small gap (about ¼ inch) to allow for expansion during the freezing process.
- Set the Popsicle Sticks: Carefully insert the popsicle sticks into the center of each mold. If your molds come with a cover designed to hold the sticks in place, use it to ensure the sticks remain centered and upright as they freeze.
- Settle the Mixture: Gently tap the filled molds on your counter a few times. This crucial step helps the thick yogurt settle evenly around the fruit, eliminating any trapped air bubbles and ensuring the popsicles hold together well and have a smooth texture.
- Freeze: Place the molds carefully in the freezer. Allow them to freeze for a minimum of 8 hours, or preferably overnight, until they are completely solid and fully set. This ensures the best texture and prevents them from falling apart.
- Unmold and Serve: When ready to enjoy, remove the molds from the freezer. To easily release the ice pops, run the outside of the molds under warm tap water for about 10-20 seconds. If using flexible silicone molds, you can gently twist and push the bottom to release. Serve immediately and savor your refreshing, healthy homemade treat!
Notes
This recipe creates a truly ZeroPoint treat for Weight Watchers members, offering a healthy, low-calorie, and satisfying dessert option that perfectly fits your plan!
Nutrition (per 1 ice pop serving)
(Approximated values, calculated automatically based on ingredients provided)
- Serving Size: 133g
- Calories: 82 kcal
- Carbohydrates: 17 g
- Protein: 4 g
- Fat: 0.4 g
- Saturated Fat: 0.1 g
- Sodium: 14 mg
- Potassium: 229 mg
- Fiber: 2.6 g
- Sugar: 11 g
- Calcium: 57 mg
- Iron: 0.3 mg
Nutrition information is automatically calculated and should only be used as an approximation. Always consult official Weight Watchers resources for precise point values based on your specific ingredients and plan.
Additional Info
Course: Dessert
Cuisine: American
Tried this recipe? Mention @drizzlemeskinny or tag #drizzlemeskinny! We’d love to see your delicious creations!
