Guilt-Free Delight: Healthy Weight Watchers Apple Pie with Oat Flour Crust
There’s something inherently comforting and nostalgic about a classic apple pie. The warm, spiced apples, the flaky crust, the sweet aroma filling the kitchen – it’s a dessert that evokes cherished memories and celebrates the changing seasons, especially during holidays like Thanksgiving. However, for those mindful of their dietary intake, indulging in this beloved classic often comes with a side of guilt due to its high calorie and sugar content. But what if you could enjoy all the deliciousness of a homemade apple pie without derailing your health goals?
Enter our lightened-up, Weight Watchers-friendly apple pie recipe! We’ve meticulously crafted this version to retain all the quintessential flavors and textures of the traditional American dessert while making smart, health-conscious swaps. By incorporating nutrient-rich oat flour for a uniquely flavorful crust and strategically reducing butter and sugar with natural sweeteners, this recipe transforms a decadent treat into a wholesome delight. This pie isn’t just a healthier alternative; it’s a testament to how mindful cooking can bring joy back to your plate, allowing you to savor every bite without an ounce of regret. Get ready to embrace the warmth and comfort of a homemade apple pie, perfectly aligned with your wellness journey.

Why This Healthy Apple Pie Recipe Is a Must-Try
Our Weight Watchers apple pie isn’t just another dessert; it’s a smart culinary choice that offers numerous benefits beyond just satisfying your sweet tooth. Here’s why you should definitely add this recipe to your baking repertoire:
1. A Truly Healthier Option: Unlike many traditional recipes loaded with butter and refined sugars, our adapted apple pie prioritizes your well-being. By utilizing wholesome oat flour, significantly reduced butter, and a thoughtful balance of sugar and natural sweetener, we’ve created a fall favorite that perfectly aligns with a healthier lifestyle. It’s an ideal choice for anyone looking to enjoy a classic dessert without compromising their dietary goals or feeling bogged down by heavy ingredients.
2. Lower Calorie & Weight Watchers Friendly: If managing your calorie intake or tracking Weight Watchers points is a priority, this lighter apple pie is a game-changer. Each generous slice is meticulously designed to be lower in calories and boasts a mere 2 WW points, making it an incredibly indulgent yet guilt-free treat. Now you can enjoy a comforting dessert that fits seamlessly into your eating plan, allowing you to celebrate special occasions or simply enjoy a sweet moment without the worry of excess.
3. Nutritious Benefits from Oats: The inclusion of oat flour in our crust doesn’t just contribute to a unique, delightful texture; it also brings a host of nutritional benefits. Oats are renowned for being rich in dietary fiber, which plays a crucial role in digestive health and helps promote a feeling of fullness. This sustained energy release can help prevent sugar crashes, making this pie a more satisfying and wholesome dessert option compared to those made with refined flours.
4. Exceptional Flavor and Texture: Despite its lightened-up nature, this apple pie doesn’t skimp on flavor or texture. The oat flour crust offers a rustic, slightly nutty depth that beautifully complements the sweet-tart apple filling. The mindful use of spices like cinnamon enhances the natural sweetness of the apples, creating a harmonious blend that tastes every bit as comforting and delicious as its traditional counterpart. You truly won’t feel like you’re eating a “diet” pie.
5. Perfect for Any Occasion: Whether you’re hosting a holiday feast, bringing a dish to a potluck, or simply craving a homemade dessert on a cozy evening, this healthy apple pie is versatile enough for any event. Its crowd-pleasing appeal, combined with its healthier profile, makes it a thoughtful and welcome addition to any gathering, ensuring everyone can enjoy a slice of homemade goodness.
Recipe Snapshot:
- Yield: This recipe makes approximately 8 generous servings.
- Preparation Time: An efficient 15 minutes.
- Cooking Time: 45-50 minutes, resulting in a beautifully golden pie.
- Serving Size: Each slice represents about 1/8th of the pie.
- Weight Watchers Points: Only 2 WW points per serving, making it a truly guilt-free indulgence.
Key Ingredients for Your Healthy Apple Pie
Crafting a delicious and healthier apple pie begins with selecting the right ingredients. Our recipe uses common pantry staples alongside a few mindful substitutions to achieve that perfect balance of flavor, texture, and nutritional value. Here’s a closer look at what you’ll need and why these choices make a difference:
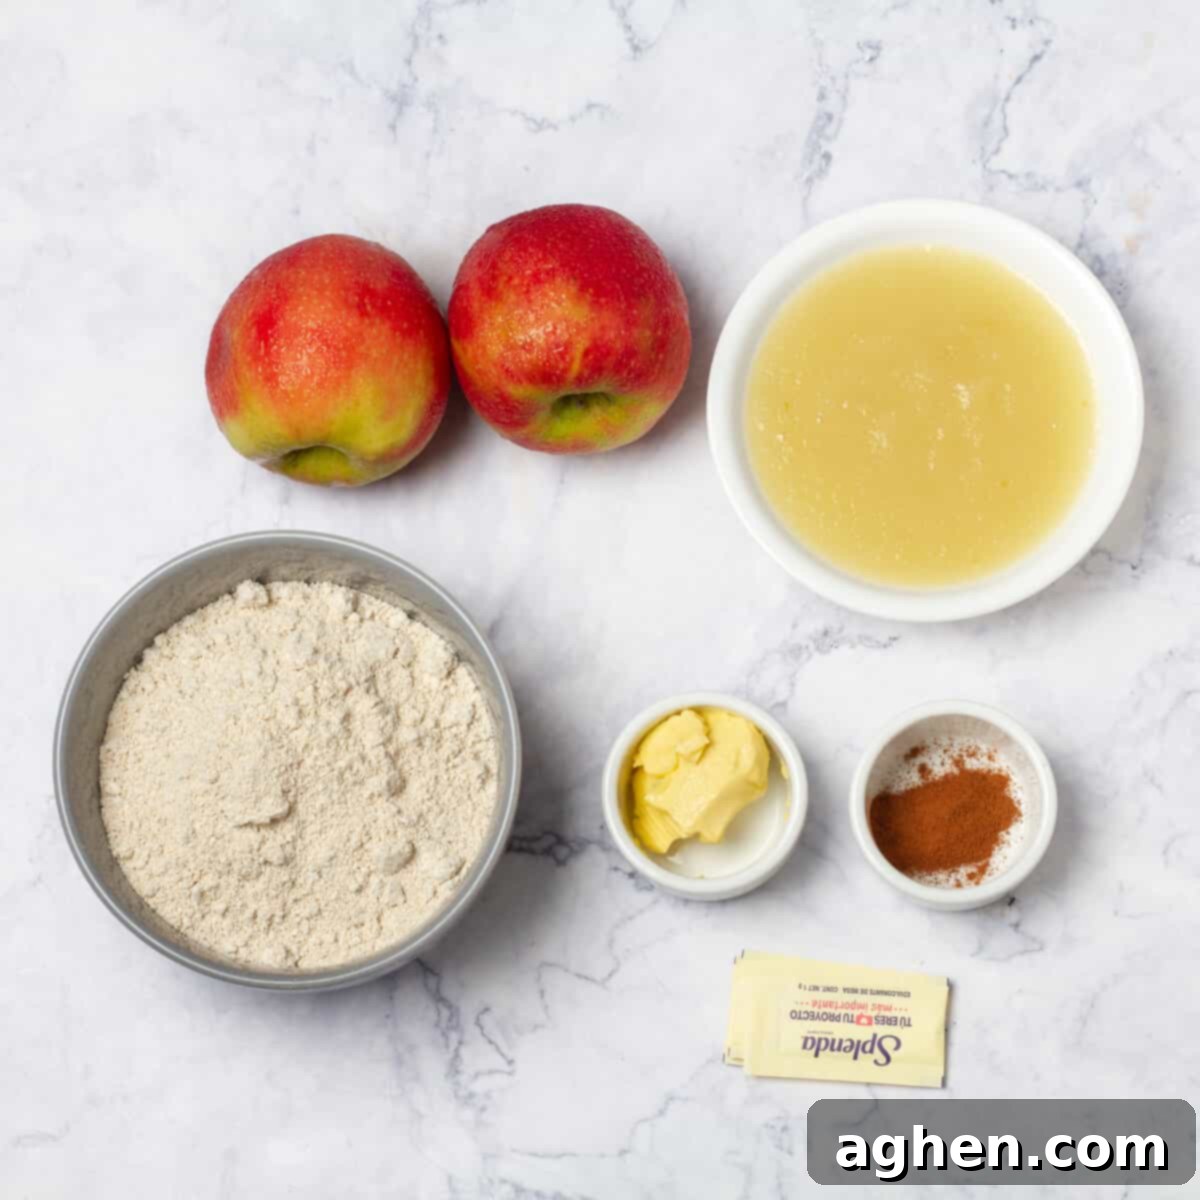
- 1 1/3 cups (150 g) Oat Flour: This is the star of our lightened-up crust. Oat flour provides a wonderful nutty flavor and a tender, slightly chewy texture that differs from traditional wheat flour but is equally delightful. It’s also gluten-free (if certified) and adds beneficial fiber.
- 3 large-sized Apples, peeled, cored, and sliced: The foundation of any great apple pie! For the best results, choose a blend of apples for a complex flavor profile. Varieties like Granny Smith (for tartness), Honeycrisp (for sweetness and crispness), or Fuji (for a balanced flavor) work exceptionally well. Ensure they are peeled, cored, and uniformly sliced for even cooking.
- 1/2 cup (125 g) Unsweetened Applesauce: This is a brilliant swap for some of the added sugar and butter often found in pie fillings. Unsweetened applesauce adds natural apple flavor, moisture, and sweetness without excessive calories, keeping the filling moist and tender.
- 8 packets of Granulated Stevia: Our chosen sweetener to significantly reduce added sugars. Stevia is a natural, calorie-free sweetener that provides ample sweetness. Adjust the amount to your personal preference, remembering that different stevia brands can vary in intensity.
- ¼ cup (60 ml) Water (for the crust): Essential for binding the oat flour and butter to form a cohesive, pliable dough. Add it gradually to ensure the perfect consistency.
- 1 tablespoon of Light Butter: We significantly cut down on butter, but a small amount is crucial for flavor and a hint of richness in both the crust and the filling. Light butter helps reduce saturated fat while still contributing to the overall taste and texture.
- 1 teaspoon Ground Cinnamon: The quintessential spice for apple pie! Cinnamon enhances the natural sweetness of apples and provides that warm, inviting aroma and flavor that is synonymous with this classic dessert. For an extra layer of complexity, you can also add a pinch of nutmeg or a dash of allspice.
Step-by-Step Instructions for Your Perfect Apple Pie
Making this healthy apple pie is a straightforward process, designed to be enjoyable for bakers of all skill levels. Follow these clear instructions to create a delicious and wholesome dessert that will impress everyone. Remember, preparation is key for a smooth baking experience!
For the crust:
- In a large mixing bowl, combine 1 1/3 cups (150 g) of oat flour with 2 teaspoons of stevia, ensuring they are well integrated.
- Melt 1 tablespoon of light butter in a microwave-safe bowl or small saucepan, then add it to the oat flour mixture.
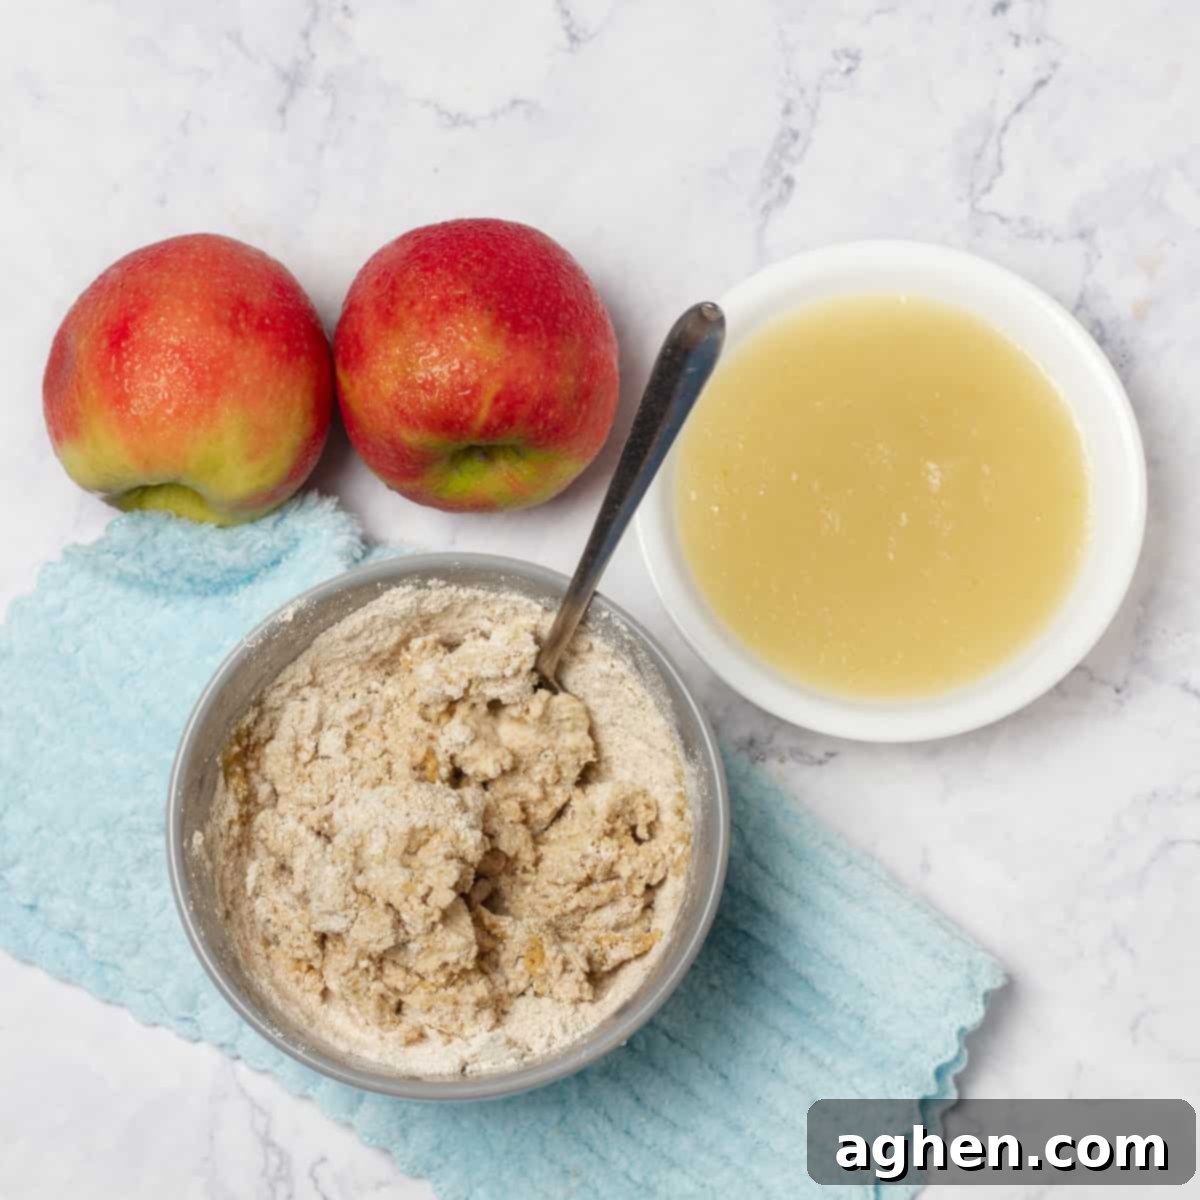
- Gradually mix in 1/4 cup (60 ml) of water. Begin to knead the mixture by hand or with a spatula until it comes together and forms a cohesive dough. If the dough feels too dry or crumbly, add more water one tablespoon at a time until it’s pliable.
- Form the dough into a flat disk, wrap it tightly in plastic wrap, and refrigerate it for at least 30 minutes. This chilling period is crucial as it helps the gluten relax and makes the dough much easier to roll out, contributing to a flakier crust.
For the filling:
- In a large saucepan, melt 1 tablespoon of light butter over medium heat.
- Add the remaining stevia and the sliced apples to the saucepan. Cook them gently for about 5 minutes, stirring occasionally, until the apple slices begin to soften slightly but still retain some firmness. This par-cooking step helps prevent a gap between the crust and the filling after baking.
- Stir in ½ cup (125 g) of unsweetened applesauce and 1 teaspoon of ground cinnamon. Mix all the ingredients thoroughly until the apples are evenly coated. Remove the saucepan from the heat and set the filling aside to cool slightly while you prepare the crust.
Putting it all together:
- Preheat your oven to 375°F (190°C). Prepare your pie dish by lightly greasing it if necessary, though most non-stick dishes won’t require it.
- On a lightly floured surface (you can use a little extra oat flour), roll out the chilled dough into a circle large enough to fit your 9-inch (23 cm) pie dish. Aim for an even thickness.
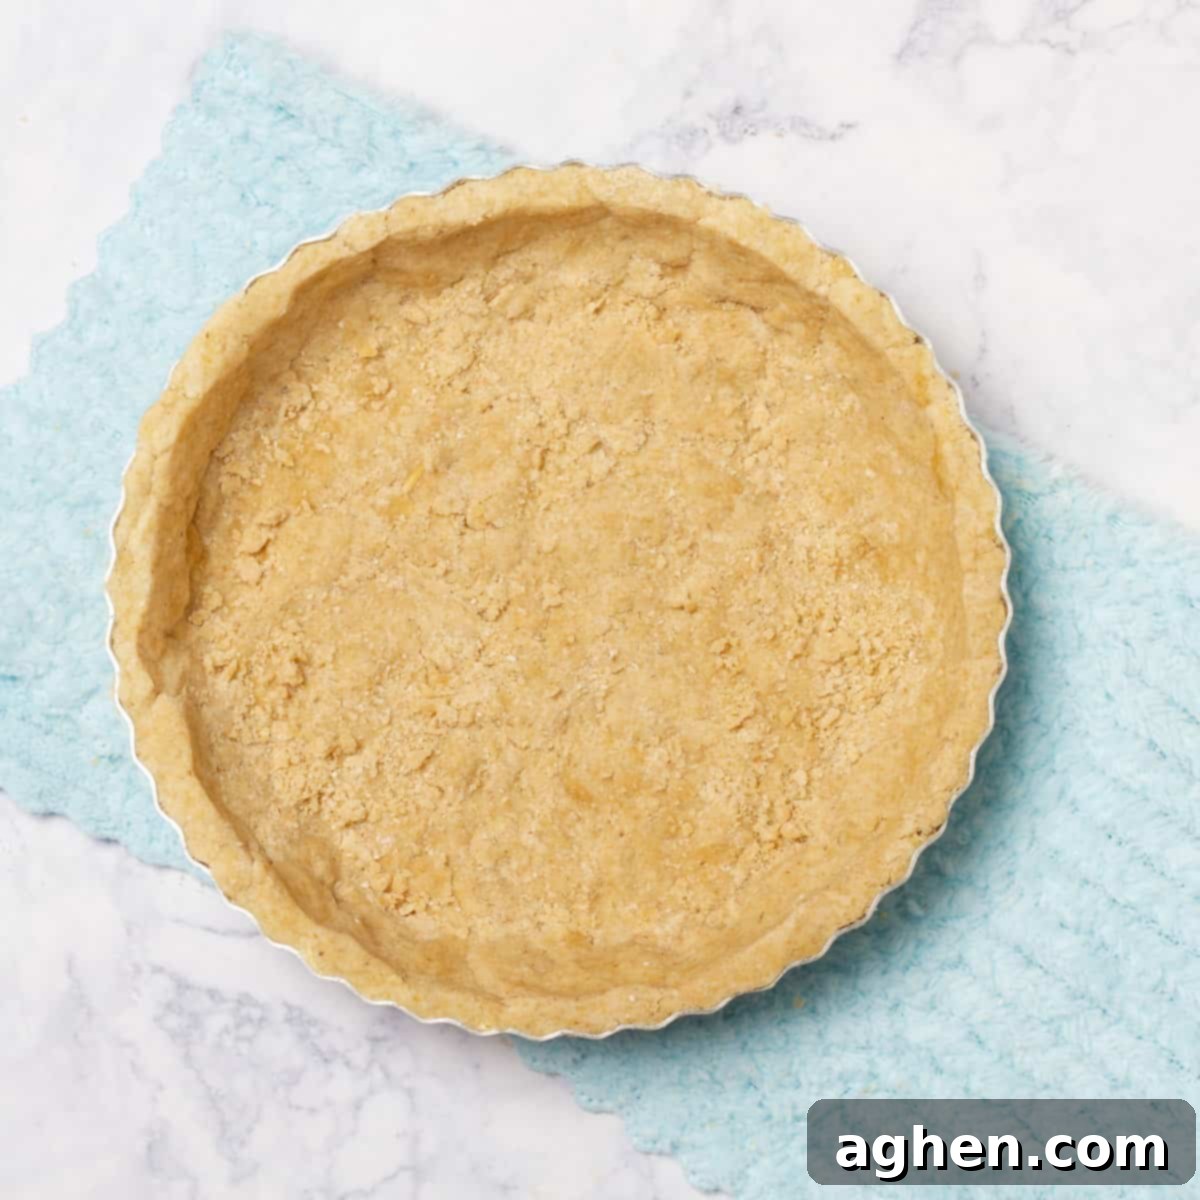
- Carefully transfer the rolled-out dough into the 9-inch (23 cm) pie dish, gently pressing it into the bottom and up the sides. Trim any excess dough from the edges, leaving a small overhang. You can crimp the edges decoratively if desired.
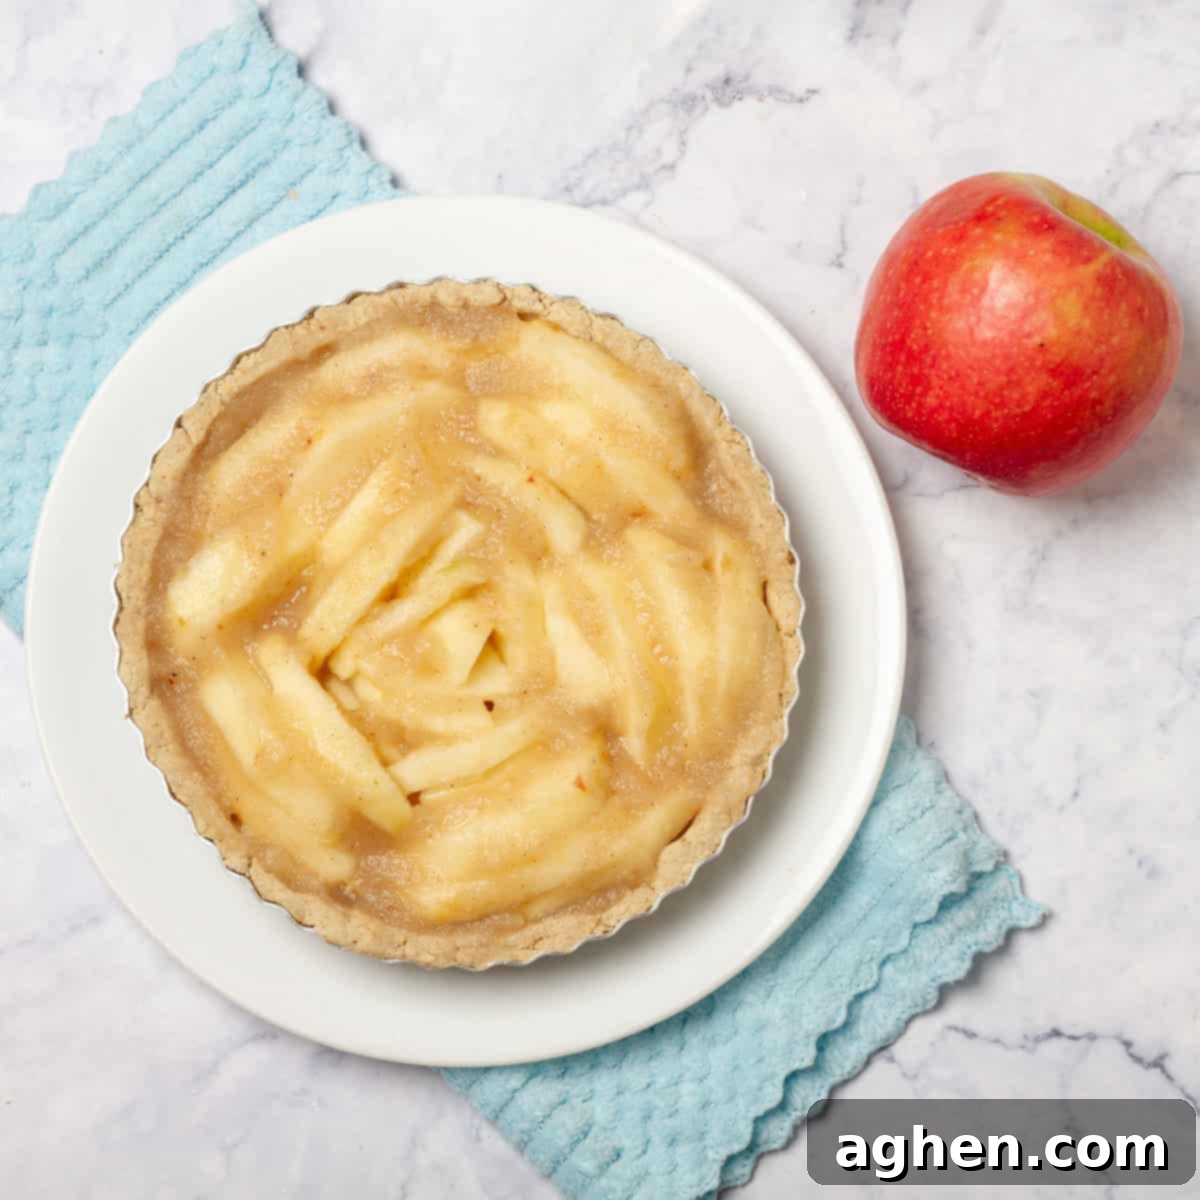
- Pour the cooled apple mixture into the pie crust, spreading it out evenly with a spoon or spatula to ensure consistent filling throughout.
- Bake in the preheated oven for 45-50 minutes, or until the pie crust is beautifully golden brown, and the apple filling is visibly bubbling, indicating it’s thoroughly cooked and caramelized.
- Once baked, remove the pie from the oven and let it cool completely on a wire rack before slicing. This cooling period is vital, as it allows the filling to set properly, preventing it from collapsing when cut. It’s absolutely delicious served warm with a scoop of light vanilla ice cream or a dollop of sugar-free whipped cream for an extra touch of indulgence.
Creative Variations and Smart Substitutions
One of the joys of baking is the freedom to customize and experiment. Our healthy apple pie recipe serves as a fantastic base, and with a few tweaks, you can adapt it to suit different tastes, dietary needs, or available ingredients. Here are some ideas to inspire your culinary creativity:
- Fruit Pies Beyond Apples: The beauty of this oat flour crust is its versatility. You can effortlessly use this exact same pie crust recipe to create delectable pies with other seasonal fruits. Imagine a tart cherry pie, a sweet peach pie in the summer, or a vibrant mixed berry pie. Just remember to substitute sugar-free sweeteners for any added sugar in your chosen fruit filling recipe to maintain the low-calorie and Weight Watchers-friendly profile. Ensure fruits are ripe for optimal flavor.
- Wholesome Crumbles: If you’re short on time or prefer a less structured dessert, transforming this into a crumble is a brilliant idea. Instead of a full top crust, simply prepare the apple filling as directed. For the topping, combine a mixture of oats, a touch of extra oat flour, finely chopped nuts (like walnuts or pecans), a bit more light butter, and warming spices like cinnamon and nutmeg. Sprinkle this mixture generously over the apple filling before baking. Crumbles are generally quicker to assemble and just as comforting and delicious.
- Elegant Tarts: Tarts offer a sophisticated twist on the classic pie, typically featuring an open face with the filling proudly displayed without a top crust. Using our oat flour crust recipe for tarts is a wonderful way to showcase the beautiful apple filling. You can bake it in a tart pan, par-baking the crust first to ensure crispness. While fruit fillings are popular, don’t shy away from savory options! Imagine a cheesy vegetable tart using this crust, proving its adaptability for both sweet and savory creations.
- Spice it Up: While cinnamon is classic, don’t hesitate to experiment with your spice blend. A pinch of nutmeg, ground ginger, allspice, or even a tiny hint of cardamom can add intriguing new dimensions to your apple filling. A dash of pure vanilla extract also elevates the flavor beautifully.
- Top with a Lattice: For an aesthetically pleasing finish, consider cutting your chilled crust dough into strips and creating a beautiful lattice top. This allows some of the apple filling to peek through and creates a professional-looking pie.
- Individual Mini Pies: For portion control or a charming presentation, divide the dough and filling into muffin tins or mini pie pans to create individual apple pies. Adjust baking time accordingly. These are perfect for parties or packed lunches.
Pro Tips and Tricks for a Perfect Healthy Apple Pie
While our apple pie recipe is designed to be simple and accessible, a few expert tips can elevate your baking experience and ensure a flawless result every time. Keep these suggestions in mind to achieve a pie that’s as delicious as it is beautiful.
1. Crucial Crust Chilling: After you’ve prepared the oat flour pie crust, it’s absolutely vital to chill it in the refrigerator for at least 30 minutes, or even longer. This step is a secret weapon for bakers! Chilling not only makes the dough firmer and much easier to handle and roll out without tearing but also helps the butter solidify, which creates pockets of steam during baking, leading to a wonderfully flakier and tender crust. Don’t skip this step for optimal results!
2. Ventilation for the Crust: Before you add your luscious apple filling, take a fork and gently prick the bottom and sides of your pie crust multiple times. These small holes act as steam vents. Without them, steam can build up underneath the crust during baking, causing it to puff up unevenly or even create large air bubbles that distort its shape. This simple trick ensures your crust remains flat, even, and attractive, providing a perfect base for your filling.
3. Pre-Bake for a Crispy Bottom: To combat the dreaded soggy bottom crust, especially with moist fruit fillings, consider par-baking or blind-baking your crust. Line the unbaked crust with parchment paper or aluminum foil, then fill it with pie weights, dried beans, or rice to prevent it from shrinking or puffing up. Bake in the preheated oven at 375°F (190°C) for about 10-15 minutes before adding the apple filling. This pre-baking step creates a crisp barrier and ensures the crust is fully cooked and golden, even under the moist filling.
4. Layer the Apples Thoughtfully: When it’s time to fill your pie, don’t just dump the apple mixture in. Instead, arrange the apple slices in even, slightly overlapping layers. This careful layering ensures consistent cooking throughout the pie, preventing the center from becoming mushy or undercooked while the outer layers are perfectly baked. It also helps create an even height and a beautiful dome for your pie.
5. The Aluminum Foil Shield: Pie crust edges are notorious for browning too quickly, sometimes even burning, before the rest of the pie is cooked. To prevent this, create an aluminum foil shield. Simply cut a large square of foil, fold it to create a ring, and gently place it over the edges of your pie crust before baking. Remove the foil during the last 15-20 minutes of baking to allow the edges to achieve a lovely golden hue. This small effort makes a big difference in the final appearance of your pie.
6. Patience with Cooling Time: We know it’s tempting to slice into a warm, fragrant pie straight out of the oven, but patience is a virtue here! Allow your apple pie to cool for at least a couple of hours on a wire rack. This critical resting period allows the filling to fully set and firm up. Attempting to slice a hot pie will likely result in a runny, messy filling and crumbling slices. A properly cooled pie will slice beautifully, holding its shape and showcasing its delicious layers.
7. Don’t Overwork the Dough: When mixing and kneading the crust dough, be gentle and avoid overworking it. Overworking can develop too much gluten in the oat flour (even though it’s less than wheat flour), leading to a tough, less tender crust. Mix just enough until the ingredients come together.
8. Storage and Reheating: Leftover apple pie can be stored at room temperature for up to 2 days, or refrigerated for up to 4 days. To reheat, gently warm slices in the microwave or oven until heated through, restoring some of that fresh-baked warmth.
Explore More Healthy & Delicious Desserts
If you loved this lightened-up apple pie, you’re in for a treat! We have a collection of other Weight Watchers-friendly desserts that are equally delightful and designed to keep your health goals on track without sacrificing flavor. Explore these recipes for more guilt-free indulgence:
Weight Watchers Pumpkin Pie Squares
Key Lime Cheesecake
Weight Watchers Key Lime Pie
Frequently Asked Questions About Healthy Apple Pie
Here are answers to some common questions you might have about making and enjoying your healthy apple pie:
Q: Can I use different types of flour for the crust?
A: While oat flour gives this recipe its unique healthy profile and texture, you can experiment with other flours. However, note that gluten-free flour blends or whole wheat pastry flour might require slight adjustments to the water content and could alter the texture of the crust. For Weight Watchers friendly results, sticking to oat flour as recommended is best.
Q: What if I don’t have stevia? Can I use another sweetener?
A: Yes, you can substitute stevia with other calorie-free granular sweeteners like erythritol or a monk fruit blend. Be sure to check the conversion ratios as sweetness levels can vary significantly between brands and types of sweeteners. Always taste the filling mixture (before adding to pie) and adjust to your preferred sweetness.
Q: How do I prevent the crust from getting soggy?
A: The key steps to prevent a soggy crust are par-baking the crust (as detailed in tip #3), ensuring your apple filling isn’t overly watery, and allowing the pie to cool completely before slicing. Properly cooling the pie allows the liquids in the filling to absorb and set, which helps maintain the crust’s integrity.
Q: Can I make this pie ahead of time?
A: Absolutely! This apple pie can be baked a day in advance and stored at room temperature, covered, or refrigerated for up to 3-4 days. For best results, allow it to come to room temperature or gently rewarm slices before serving. The flavors often deepen overnight, making it even more delicious.
Q: Are there any topping suggestions that are also Weight Watchers friendly?
A: For a truly guilt-free treat, serve your pie with a dollop of sugar-free whipped cream, a spoonful of fat-free Greek yogurt sweetened with a touch of stevia and vanilla, or even a very small scoop of light vanilla ice cream. These options complement the pie beautifully without adding excessive points or calories.
Weight Watchers Friendly Apple Pie

Ingredients
- 1 1/3 cups oat flour (150 g)
- 3 large-sized apples, peeled, cored, and sliced
- 1/2 cup unsweetened applesauce (125 g)
- 8 packets granulated stevia
- ¼ cup water (60 ml, for the crust)
- 1 tablespoon light butter
- 1 teaspoon ground cinnamon
Instructions
For the crust
-
In a large mixing bowl, combine 1 1/3 cups (150 g) of oat flour with 2 teaspoons of stevia.
-
Melt 1 tablespoon of butter and add it to the oats.
-
Mix in 1/4 cup (60 ml) of water and knead until the mixture holds together. If necessary, add more water, one tablespoon at a time.
-
Form the dough into a disk, wrap it in plastic wrap, and refrigerate it for at least 30 minutes.
For the filling
-
In a large saucepan, melt 1 tablespoon of butter over medium heat.
-
Add the stevia, sliced apples and cook for about 5 minutes until they start to soften.
-
Stir in ½ cup (125 g) of unsweetened applesauce and 1 teaspoon of ground cinnamon. Mix well and remove from heat.
Assemble and bake
-
Preheat your oven to 375°F (190°C).
-
Roll out the chilled dough on a floured surface to fit your pie dish.
-
Place the rolled-out dough into a 9-inch (23 cm) pie dish.
-
Pour the apple mixture into the crust, spreading it out evenly.
-
Bake in the preheated oven for 45-50 minutes, or until the crust is golden brown, and the filling is bubbling.
-
Let the pie cool before slicing. It’s delicious served warm with a scoop of vanilla ice cream or a dollop of whipped cream.
Notes
Nutrition
Nutrition information is automatically calculated, so should only be used as an approximation.
Additional Info
We hope you enjoy this healthy, guilt-free version of a classic apple pie! It’s proof that you don’t have to sacrifice flavor for health. Happy baking!
