Mastering the Art of Smoking on Your Weber Grill: A Comprehensive Guide for Irresistible Flavors
Whether you’re a seasoned pitmaster or just embarking on your culinary journey, mastering the art of smoking can unlock a world of incredible flavors and unparalleled tenderness for your meats. The low and slow cooking method transforms ordinary cuts into extraordinary dishes, infusing them with a rich, smoky aroma that’s simply irresistible. This comprehensive guide will walk you through everything you need to know about smoking on your beloved Weber grill, from selecting the perfect wood chips and expertly preparing your grill to achieving precise temperature control and knowing when your masterpiece is ready. Get ready to elevate your grilling game and delight your taste buds with succulent, smoky perfection. Let’s ignite those coals and get smokin’!

1. Choosing the Right Wood Chips for Optimal Flavor
The type of wood chips you select is arguably one of the most critical decisions when smoking meats, as it profoundly influences the final flavor profile. Different woods impart distinct characteristics, ranging from mild and subtly sweet to bold and robustly smoky. Understanding these nuances allows you to tailor the flavor to your specific dish and personal preference, transforming a simple piece of meat into a culinary experience.
For delicate meats such as poultry, fish, and even lighter cuts of pork, fruit woods like apple or cherry are excellent choices. Apple wood offers a mild, sweet, and fruity smoke that complements chicken, turkey, and fish beautifully without overpowering their natural flavors. Cherry wood provides a similar mild sweetness with a slightly deeper, more complex fruity note, often imparting a beautiful reddish hue to the meat’s exterior, especially on pork ribs or chicken. Peach wood is another fantastic option in this category, offering a light, sweet, and fragrant smoke.
When it comes to heartier meats like beef briskets, pork shoulders, and thick steaks, you’ll want to reach for bolder, more robust woods. Hickory is a classic choice, delivering a strong, bacon-like, and savory smoke that is quintessentially American barbecue. It pairs exceptionally well with pork butt, ribs, and beef brisket, providing that deep, traditional smoky flavor many crave. Mesquite, known for its intense, earthy, and sometimes slightly bitter smoke, is another powerful option, particularly popular in Southwestern barbecue. Use mesquite sparingly, as its potent flavor can quickly dominate; it’s best suited for short cooks or mixed with milder woods.
Oak is a versatile hardwood that offers a medium-strength smoke, less intense than hickory but stronger than fruit woods. It provides a classic smoky flavor that works well with almost any meat, making it a great all-around choice for beginners. Maple offers a milder, sweeter smoke than oak, often used for poultry, pork, and even vegetables. Experimenting with various wood chip types, and even blending them, is key to discovering your favorite flavor combinations and perfecting your signature smoked dishes.
Consider whether to soak your wood chips. While many traditionalists advocate soaking wood chips in water for 30 minutes to an hour to produce more smoke and prevent them from burning too quickly, some experts argue that soaked chips produce steam rather than true smoke, which can wash away flavor. Unsoaked chips tend to ignite faster and produce a cleaner, more intense smoke. A good compromise is using wood chunks (larger pieces of wood) that burn slower and produce consistent smoke without needing to be soaked, or placing dry chips in a smoker box on a gas grill.

2. Preparing Your Weber Grill for Low and Slow Smoking
Properly preparing your Weber grill is paramount to achieving successful and delicious smoked meats. The goal is to create a consistent, indirect heat environment that allows your meat to cook slowly while absorbing that beautiful smoky flavor. The setup varies slightly depending on whether you’re using a charcoal or gas grill.
Setting Up a Charcoal Weber Grill for Smoking:
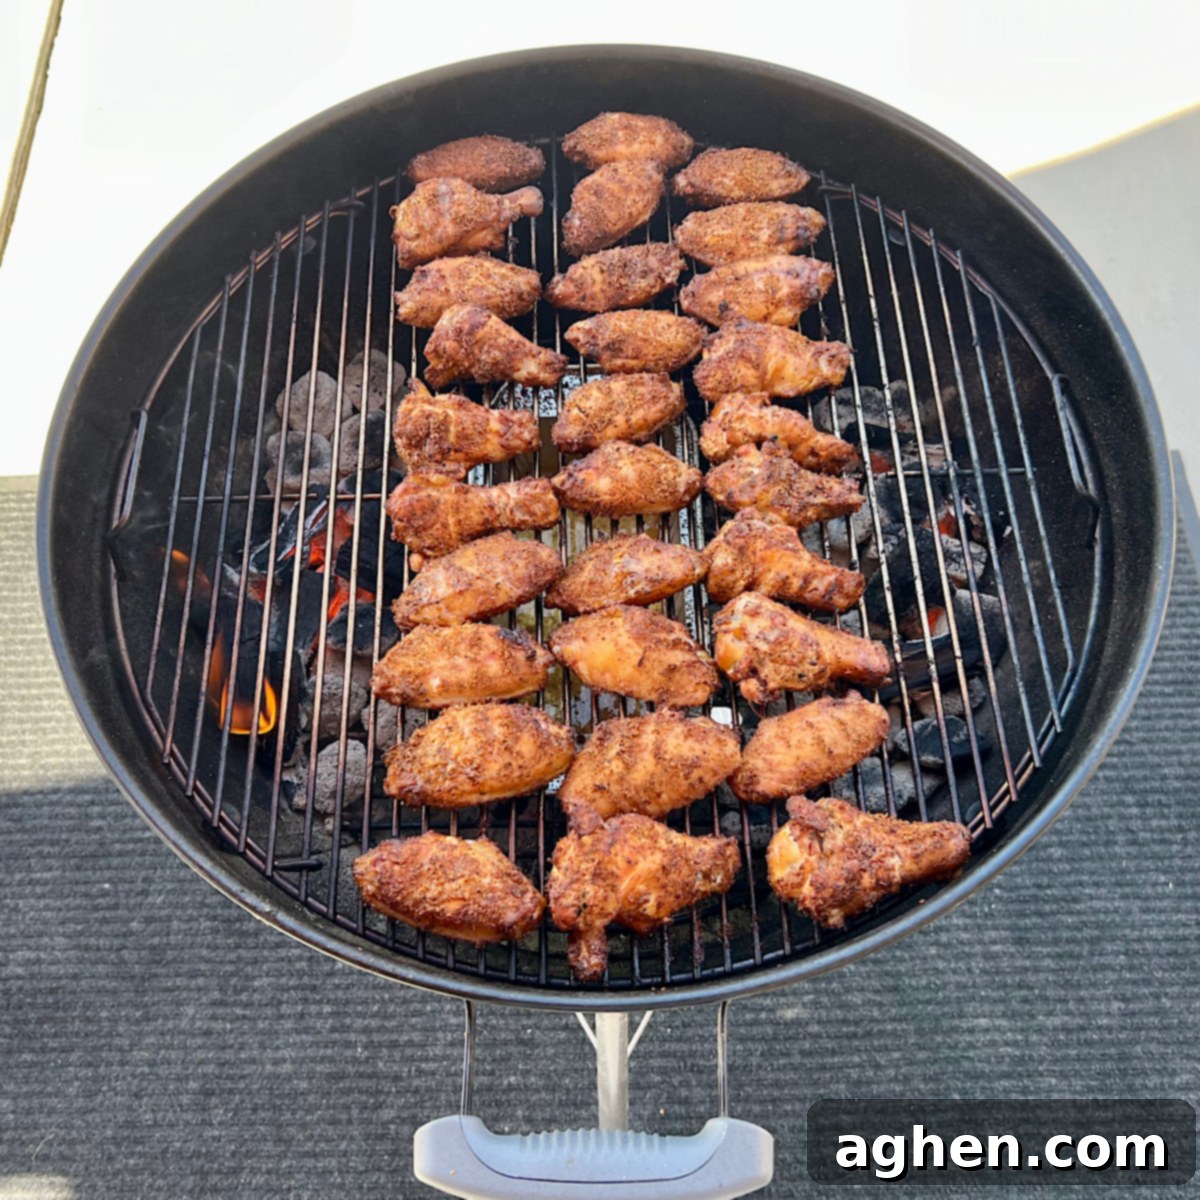
For charcoal grills, the most effective method is to create a two-zone cooking setup. This means arranging your hot charcoal on one side of the grill and leaving the other side empty for your meat to cook indirectly. Start by piling about 50-60 charcoal briquettes in a charcoal chimney starter and lighting them. Once they are fully lit and covered in white ash, carefully spread them to one side of the charcoal grate. To maintain a consistent low temperature, you might consider using a “snake method” or “minion method” where unlit briquettes are surrounded by lit ones, burning slowly over time.
Place a drip pan filled with water directly under the grate on the empty side. This serves multiple purposes: it catches meat drippings, making cleanup easier; it adds moisture to the cooking environment, which helps keep the meat moist; and it helps stabilize the grill’s temperature. Place your chosen wood chunks or chips (either dry or soaked, depending on your preference) directly on top of the lit coals. Ensure the grill grates are clean before placing them back on the grill.
Setting Up a Gas Weber Grill for Smoking:
Gas grills can also produce fantastic smoked meats with a bit of setup. The key is to generate smoke and indirect heat. Begin by filling a smoker box or creating an aluminum foil pouch with wood chips. If using a foil pouch, poke a few holes in it to allow the smoke to escape. Place the smoker box or pouch directly over one of the lit burners on the grill. Turn this burner to medium-high heat to get the wood chips smoking.
Once you see smoke, reduce the heat on that burner to low, or turn it off entirely if your grill design allows for very low temperatures from other burners. The goal is to maintain the smoke without letting the wood chips ignite into flames. Turn on one or two other burners on the opposite side of the grill to low heat, creating your indirect cooking zone. Ensure the burners directly underneath where the meat will sit are turned off. This configuration allows you to infuse your meats with delightful smoky flavors while preventing them from burning.
Regardless of your grill type, always ensure your grill is clean before starting. Residue from previous cooks can impart off-flavors to your smoked meats. After setup, close the lid and allow the grill to preheat and stabilize at your target smoking temperature before introducing the meat. This crucial step ensures a consistent cooking environment from the moment your meat hits the grates.

3. Mastering Temperature Control for Tender, Flavorful Meats
Maintaining the ideal smoking temperature is the cornerstone of achieving perfectly smoked meats that are both tender and bursting with flavor. The golden rule for most smoking applications is “low and slow,” meaning you’ll aim for a consistent temperature range of 225°F to 250°F (107°C to 121°C). This gentle heat breaks down tough connective tissues in the meat over several hours, resulting in that melt-in-your-mouth tenderness we all crave, while allowing ample time for the smoke to penetrate and infuse its complex flavors.
To accurately monitor and maintain these precise temperatures, investing in reliable thermometers is absolutely necessary. You’ll need two main types: an ambient grill thermometer to track the temperature inside the grill chamber, and a quality meat thermometer with a probe to monitor the internal temperature of your meats. While many Weber grills come with a lid thermometer, it often only gives an approximate reading of the temperature near the top vent, which can be significantly different from the temperature at grate level where your meat is cooking. An external, clip-on grate thermometer provides a much more accurate reading of the cooking environment.
Once your grill is set up and preheating, watch your thermometers closely. If the temperature is too low on a charcoal grill, you might need to open the bottom vents slightly to increase airflow to the coals, or add a few more lit briquettes if using a minion method. If the temperature is too high, partially closing the bottom vents will restrict oxygen flow, cooling the coals down. For gas grills, simply adjust the burner knobs up or down to regulate the heat. Remember, small adjustments are key; dramatic changes can cause wide temperature swings that are difficult to correct.
The “low and slow” approach is crucial because it gives collagen and fat within the meat time to render and break down into gelatin, resulting in succulence. Rushing the process with high heat will dry out the meat and make it tough. By diligently monitoring your temperatures and making careful adjustments to your grill’s vents or burner settings, you’ll be able to regulate the airflow and keep the temperature consistent throughout the entire smoking process. This patience and precision will be amply rewarded with delicious, tender, and incredibly flavorful smoked meats that will impress even the most discerning palates.
4. Prepping Your Meats for Smoking Perfection
Before your meats even touch the grill, proper preparation is essential to ensure they absorb maximum flavor and achieve that perfect texture. This stage lays the groundwork for a truly outstanding smoked dish.
The first step for many cuts, especially larger ones like briskets, pork butts, and ribs, is trimming excess fat. While a layer of fat (often called the “fat cap”) can help keep meat moist during a long smoke, too much can prevent smoke penetration and can render down into an unappealing texture. Trim hard, thick pieces of fat, leaving about a quarter-inch layer on top. This protective layer will slowly render and baste the meat. Removing excess fat also prevents flare-ups, which can impart bitter, burnt flavors to your meat.
To infuse your meats with deep, complex flavors, consider applying a dry rub or a marinade. A dry rub typically consists of a blend of salt, pepper, sugar, and various spices (paprika, garlic powder, onion powder, cayenne, etc.). Apply the rub generously to all surfaces of the meat, massaging it in gently. For best results, apply the rub several hours or even overnight before smoking, allowing the salt to penetrate and tenderize the meat. For poultry and some pork cuts, a wet brine (submerging the meat in a saltwater solution, often with sugar and spices) can significantly improve moisture retention and seasoning throughout the meat.
If you prefer a marinade, choose one that complements your wood choice. Marinades, usually containing an acidic component like vinegar or citrus juice, oil, and seasonings, can tenderize and flavor the meat. Allow the meat to marinate for at least a few hours, or overnight, in the refrigerator.
Before placing the meat on the grill, allow it to sit at room temperature for about 30 minutes to an hour. This step, often overlooked, helps the meat cook more evenly. Putting cold meat directly onto a hot grill can cause the outer layers to cook much faster than the interior, leading to uneven doneness and a tougher texture. This equilibration allows the heat to penetrate more uniformly.
Additionally, for some cuts, especially those with smooth surfaces, a binding agent like a thin layer of mustard (yellow or Dijon) or olive oil can help the dry rub adhere better to the meat, ensuring an even coating and creating a desirable bark during the smoking process. By following these meticulous preparation tips, you can significantly elevate the flavor and texture of your smoked meats, setting the stage for a truly delicious culinary experience.

5. The Smoking Process: Monitoring, Adjusting, and Patience
Once your Weber grill is stabilized at the target temperature and your meats are prepped, it’s time to begin the smoking process. This is where patience truly becomes a virtue, as constant monitoring and minimal intervention are key to success.
Carefully place your meat on the indirect cooking zone of your grill. For charcoal grills, this means placing it over the drip pan, away from the direct coals. For gas grills, position it over the unlit burners. Insert the probe of your reliable meat thermometer into the thickest part of the meat, ensuring it doesn’t touch any bone, which can give an inaccurate reading. Close the lid and resist the urge to peek frequently. “If you’re looking, you’re not cooking” is a common adage in the smoking community, and for good reason—every time you lift the lid, heat escapes, and your cooking time is extended, impacting temperature stability and smoke retention.
Throughout the smoking process, continuously monitor both the ambient grill temperature and the internal temperature of your meats. Aim to keep your grill within the 225°F to 250°F range. If the grill temperature fluctuates, make small, calculated adjustments. For charcoal, manipulate the top and bottom vents to control airflow. For gas, adjust the low-heat burners. These minor tweaks are essential to maintain consistent smoking conditions.
Different meats have different target internal temperatures for doneness. For instance, pork butt for pulled pork typically reaches 200-205°F (93-96°C) for maximum tenderness. Brisket usually aims for a similar range, though texture is also critical. Chicken should reach 165°F (74°C) for safety, and ribs are often judged by tenderness (the “bend test”) rather than a strict temperature.
You might encounter a phenomenon known as “the stall” when smoking large cuts like brisket or pork shoulder. This is when the internal temperature of the meat plateaus, sometimes for hours, typically between 150-170°F (65-77°C). This occurs due to evaporative cooling as moisture from the meat evaporates from the surface. Don’t panic! This is normal. You can power through it, or if you’re short on time, employ the “Texas crutch,” which involves wrapping the meat tightly in butcher paper or aluminum foil once it hits the stall. This traps moisture and heat, helping the temperature rise faster, though some argue it can soften the bark.
During a long smoke, you may need to replenish your wood chips or chunks to maintain a consistent smoke flavor. Add fresh wood as needed, being mindful not to add too much at once, which can create a bitter, acrid smoke. Some pitmasters also like to periodically spritz their meat with apple cider vinegar, apple juice, or water, especially during the latter stages of the cook, to keep the surface moist and promote a beautiful bark.
Patience truly is paramount when smoking on a Weber grill. Resist the urge to rush the process. Trust your thermometers and the “low and slow” method. The time and effort invested in monitoring and adjusting will be undeniably worth it when you cut into perfectly tender, flavorful smoked meats.
6. The Art of Resting and Serving Your Smoked Masterpiece
You’ve invested hours tending to your Weber grill, meticulously maintaining temperatures, and patiently waiting for your meat to reach its peak. The journey isn’t quite over yet; the final, crucial step is allowing your smoked masterpiece to rest before serving. This simple act is often overlooked but profoundly impacts the juiciness and overall enjoyment of your dish.
Once your meats have reached their desired internal doneness and tenderness, carefully remove them from the grill. Do not cut into them immediately. Instead, transfer the meat to a cutting board, a clean pan, or a cooler (for larger cuts like brisket or pork butt). Loosely tent it with aluminum foil – don’t wrap it tightly, as this will continue to cook the meat and soften the bark you worked so hard to achieve.
The resting period serves several vital functions. Firstly, it allows the muscle fibers, which have tightened during cooking, to relax. As they relax, the juices that have migrated to the center of the meat during cooking can redistribute evenly throughout the entire cut. If you slice into the meat too soon, those precious juices will simply run out onto your cutting board, leaving you with a drier, less flavorful piece of meat. Secondly, resting allows for “carry-over cooking,” where the internal temperature of the meat can continue to rise by a few degrees even after it’s removed from the heat. This is important to account for when judging final doneness.
The duration of the rest depends on the size of the meat. Smaller cuts like chicken breasts or steaks might only need 10-15 minutes. Larger cuts like briskets, pork shoulders, or whole turkeys can benefit from resting for 30 minutes to up to an hour, or even longer when held in a cooler. For long rests, wrapping the meat tightly in foil and then in a towel, and placing it in an insulated cooler, can keep it warm for several hours without overcooking.
After resting, it’s time to carve and serve your perfectly smoked creation. Carve against the grain for maximum tenderness, especially for cuts like brisket. Whether you’re presenting succulent smoked brisket, fall-off-the-bone ribs, juicy smoked chicken, or delicate smoked fish, the reward of perfectly smoked meats, enhanced by a proper rest, is truly well worth the time and effort. This simple yet crucial step can leave a lasting impression on your dinner guests, cementing your reputation as a master of the grill.
With the comprehensive knowledge of selecting the proper wood chips, preparing your Weber grill for optimal indirect heat, mastering consistent temperature control, meticulously prepping your meats, monitoring the smoking process with patience, and finally allowing your creations to rest, you are now equipped to add meat smoking as a celebrated skill in your grilling repertoire. Embrace the journey of culinary discovery that smoking offers. With practice, attention to detail, and a spirit of adventure, you can truly master the art of smoking on your Weber grill, delighting your taste buds and those of your loved ones with a wide array of delicious, smoky dishes that are a testament to your newfound expertise.
