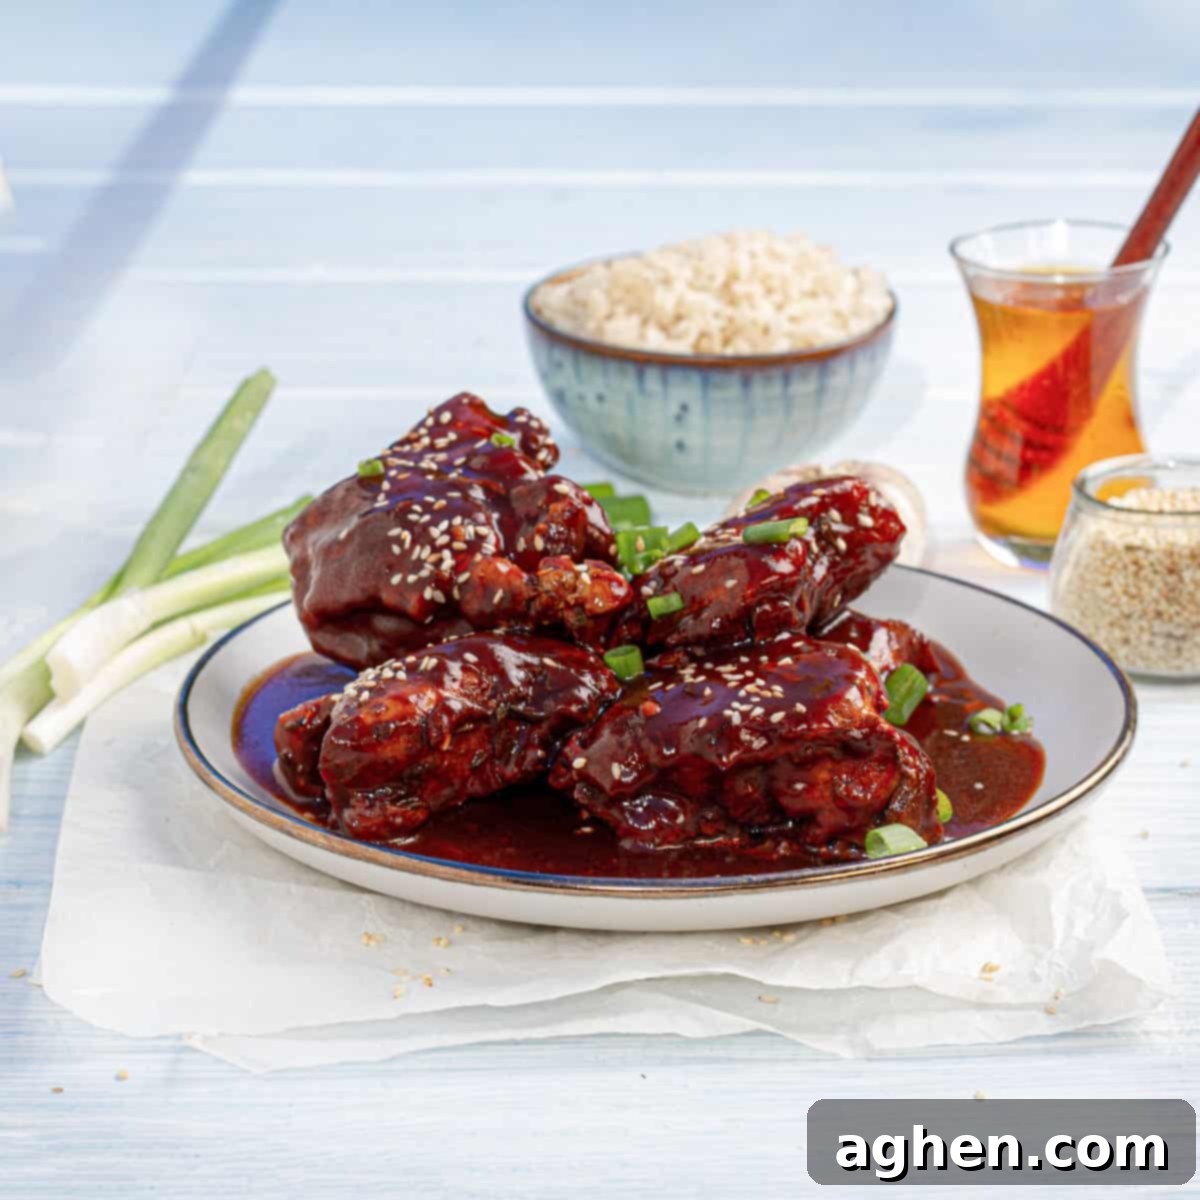
Delicious & Easy Instant Pot Honey Garlic Chicken: Your New Go-To Dinner
The first time I experienced the incredible taste of Honey Garlic Chicken was at a beloved Chinese restaurant. The perfect balance of sweet and savory, with that irresistible sticky glaze, left such a lasting impression that I became determined to recreate that magic in my own kitchen. After some experimentation, I discovered that the Instant Pot is the ideal tool for achieving this classic flavor profile with remarkable ease and speed, making it perfect for busy weeknights.
This Instant Pot Honey Garlic Chicken recipe is not only incredibly simple to prepare, but it’s also a fantastic option for a quick, healthy, and satisfying family dinner. The process is straightforward: you’ll start by seasoning tender chicken breasts, then sear them to golden perfection right in your Instant Pot. The chicken is then enveloped in a luscious, homemade sauce crafted from honey, pungent garlic, tangy light ketchup, savory light soy sauce, and a hint of dried oregano. With minimal effort, you’ll have a flavorful, wholesome meal ready to impress.
For those mindful of their dietary intake, particularly Weight Watchers participants, this recipe can be easily adapted. By opting for sugar-free ketchup, a minimal amount of honey, and skinless chicken breasts, you can significantly reduce the calorie and point count without sacrificing the vibrant flavors that make this dish so appealing. It’s a testament to how effortlessly healthy eating can be both convenient and incredibly delicious.
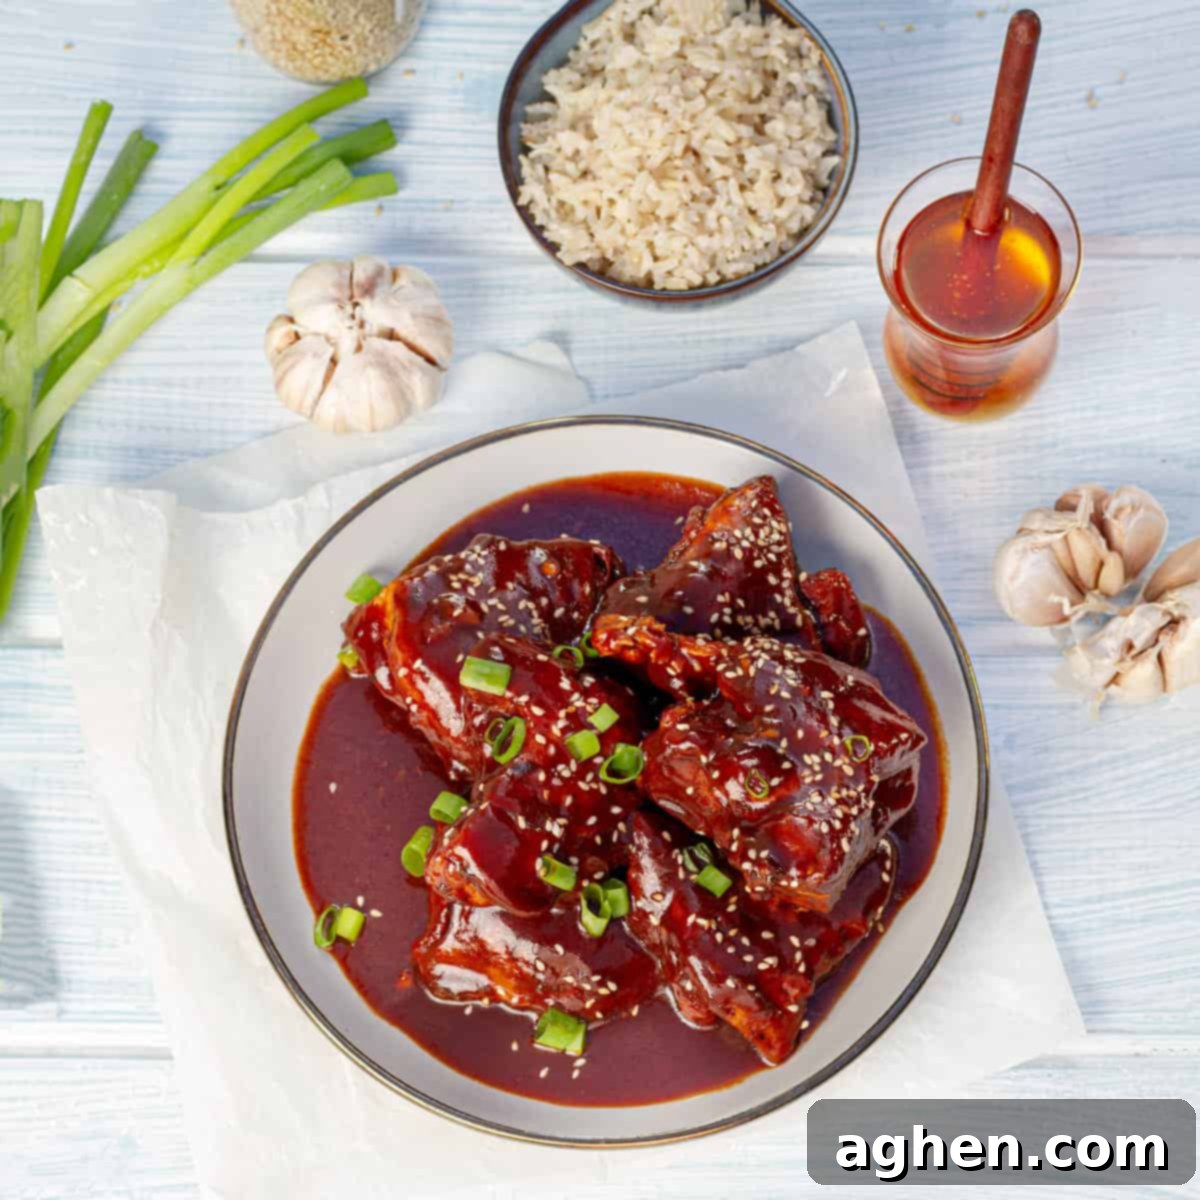
Why You’ll Love This Instant Pot Honey Garlic Chicken Recipe
If you’re looking for a new staple to add to your weeknight rotation, this Instant Pot Honey Garlic Chicken is an absolute must-try. Here’s why it will quickly become a family favorite:
- Incredibly Quick & Easy: From start to finish, this recipe requires only about 30 minutes of active cooking time, making it perfect for those hectic evenings when you need a delicious meal on the table fast. The Instant Pot handles the pressure cooking, leaving you more time to relax.
- Nutrient-Packed: Featuring lean protein from boneless, skinless chicken breasts and a wholesome sauce, this dish is a great way to enjoy a satisfying meal that aligns with a balanced diet. It’s naturally low in fat and can be paired with a variety of vegetables or grains.
- Remarkably Versatile: This honey garlic chicken is a culinary chameleon! It pairs beautifully with classic steamed white or brown rice, but also shines when served with lighter options like cauliflower rice or zucchini noodles. Don’t hesitate to incorporate your favorite steamed or roasted vegetables for an even more complete meal.
- Crowd-Pleaser: The sweet and savory honey garlic flavor is universally loved by both adults and children, making it an excellent choice for family dinners or entertaining guests. It’s a dish that guarantees clean plates every time.
- Minimal Cleanup: One of the greatest advantages of cooking with an Instant Pot is the minimal cleanup. Everything cooks in a single pot, reducing the pile of dirty dishes and making post-dinner tidying a breeze.
- Weight Watchers Friendly: As mentioned, with simple adjustments like using sugar-free ketchup and stevia, this recipe fits perfectly into a Weight Watchers plan, proving that healthy eating doesn’t mean compromising on taste.
What is an Instant Pot and Why Use It?
The Instant Pot is a multi-functional, programmable electric pressure cooker that has revolutionized home cooking for millions. It combines several kitchen appliances into one, typically functioning as a pressure cooker, slow cooker, rice cooker, steamer, sauté pan, yogurt maker, and food warmer. Its primary benefit is its ability to cook food significantly faster than traditional methods, thanks to the power of pressure cooking.
When cooking with an Instant Pot, food is cooked under high pressure, which raises the boiling point of water and traps steam, allowing ingredients to cook more quickly and efficiently. This not only saves time but also often results in more tender and flavorful dishes, as moisture and nutrients are sealed within the pot. For recipes like Honey Garlic Chicken, it means the chicken becomes incredibly tender and absorbs the rich flavors of the sauce in a fraction of the time it would take on a stovetop or in an oven, all while using a single pot for sautéing and cooking.
Ingredients You’ll Need
Gathering your ingredients is the first step to creating this delectable Instant Pot Honey Garlic Chicken. Each component plays a crucial role in building the dish’s signature sweet and savory profile.
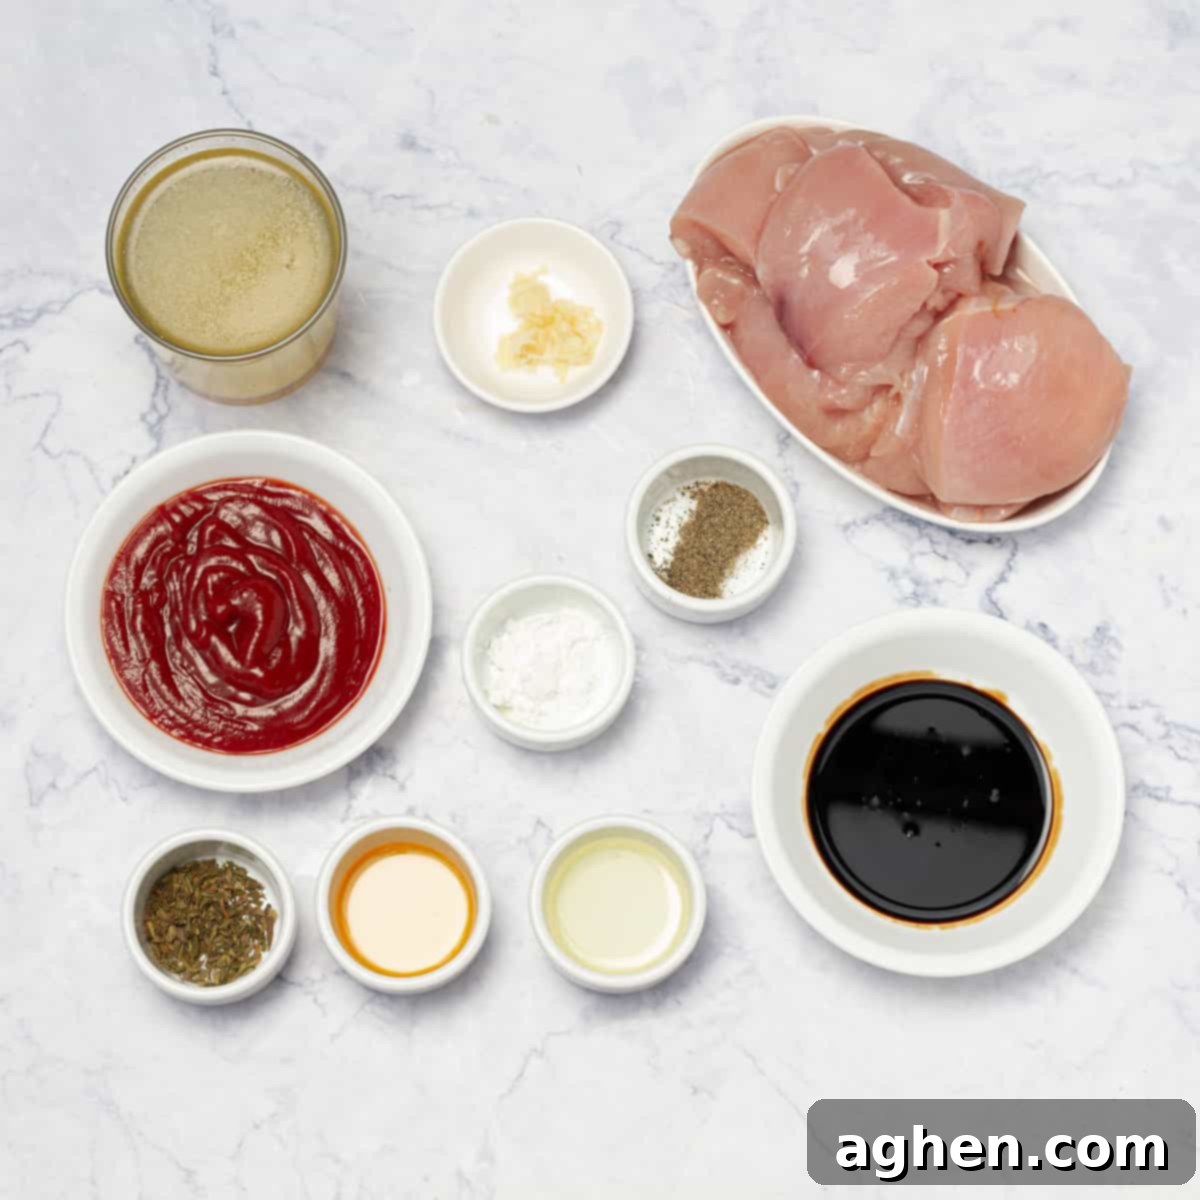
- 2 lbs (900g) boneless, skinless chicken breasts: The star of our dish. Using boneless, skinless breasts keeps the meal lean and ensures even cooking. You can cut them into larger chunks or keep them whole depending on your preference.
- 1 teaspoon dried oregano: This herb adds an earthy, slightly peppery note that complements the garlic and honey beautifully, providing an aromatic depth to the chicken.
- 1 teaspoon oil: Any neutral cooking oil like olive oil, avocado oil, or vegetable oil works well for searing the chicken and sautéing the garlic, helping to develop rich flavors.
- 4 cloves garlic, minced: Garlic is essential for this recipe, providing a pungent, aromatic base that infuses the entire dish with its distinct flavor. Freshly minced garlic yields the best results.
- ½ cup (120ml) sugar-free ketchup: A fantastic base for the sauce, offering sweetness and a touch of tang. Using a sugar-free variety helps keep the overall sugar content low and is ideal for Weight Watchers.
- ¼ cup (60ml) light soy sauce: Provides the essential umami and savory depth to the sauce. Opt for light (low sodium) soy sauce to manage sodium intake. For a gluten-free option, tamari is an excellent substitute.
- 1 tablespoon honey: The namesake ingredient that brings natural sweetness and a beautiful glaze to the chicken. Even a small amount provides a significant flavor boost.
- 2 teaspoons Stevia (optional, for added sweetness): If you prefer a sweeter sauce or are strictly monitoring sugar, Stevia can be used to boost the sweetness without extra calories. Adjust to your taste.
- ½ teaspoon black pepper: A pantry staple that adds a subtle warmth and complements the other seasonings. Freshly ground pepper is always recommended for superior flavor.
- 1 cup (240ml) chicken broth: Forms the liquid base for the pressure cooking and helps create a flavorful sauce. Use low-sodium chicken broth for better control over the saltiness.
- 1 tablespoon cornstarch: Used to create a slurry that thickens the sauce at the end, giving it that desirable restaurant-quality consistency.
For Serving:
- Chopped chives
- Toasted sesame seeds
Prep Time: 10 minutes
Cook Time: 15 minutes (plus additional time for Instant Pot to pressurize and release steam)
Servings: 4
Serving size: 400 g.
Step-by-Step Instructions
Follow these detailed steps to create a mouthwatering Instant Pot Honey Garlic Chicken that’s packed with flavor and incredibly tender.
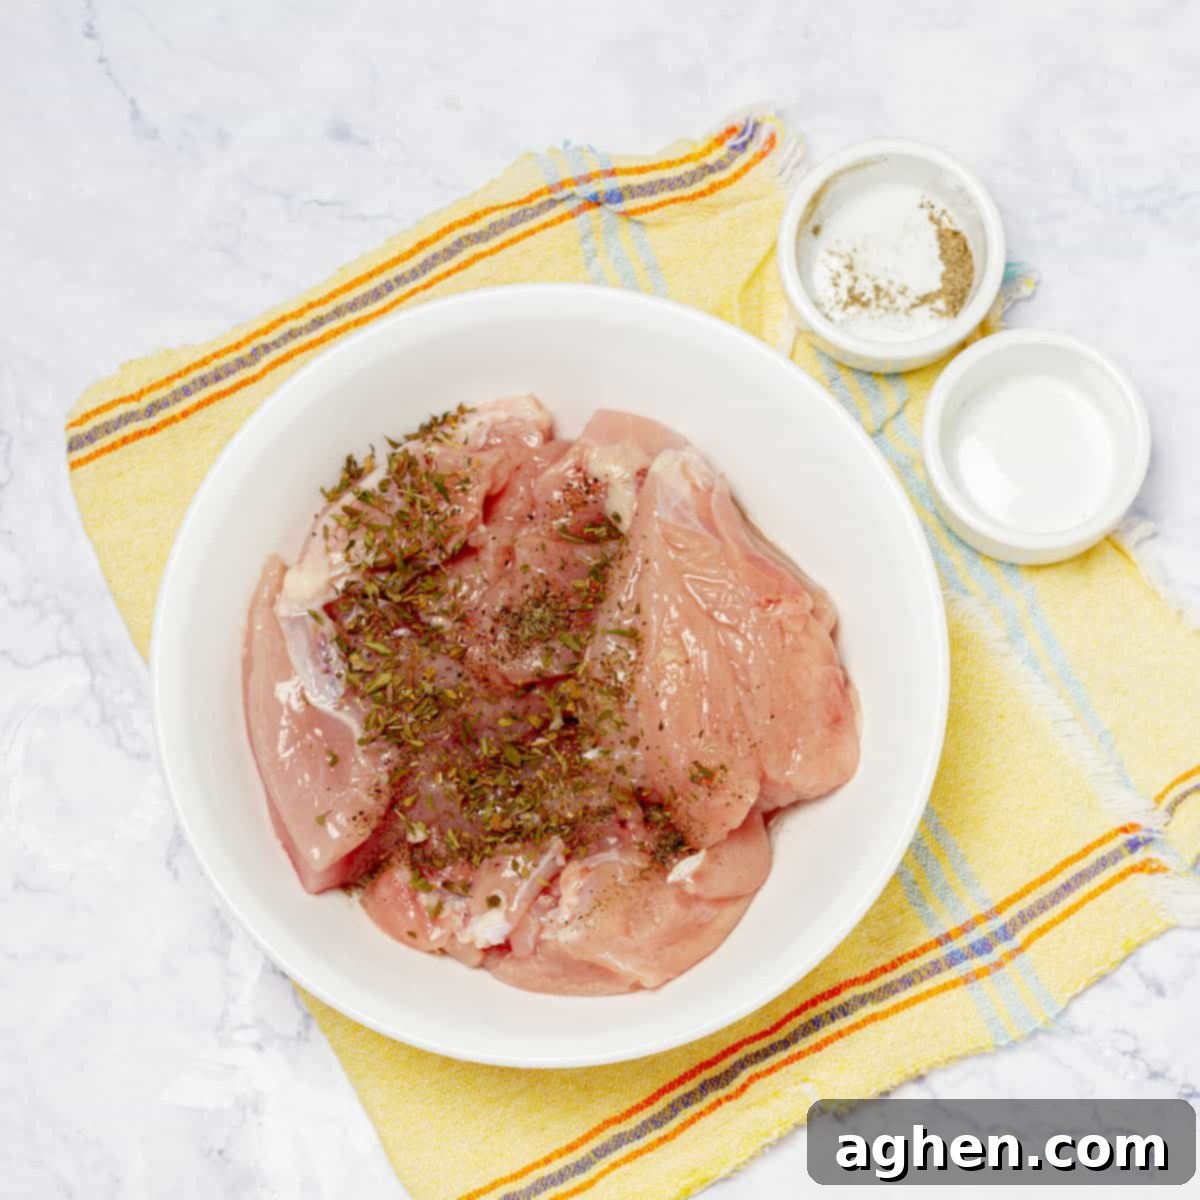
1. Prepare the Chicken: Begin by patting your boneless, skinless chicken breasts dry with paper towels. This helps ensure a good sear. Then, generously season both sides of the chicken breasts with dried oregano and black pepper. You can cut the chicken into 1-inch pieces or keep the breasts whole; adjust pressure cooking time accordingly if cutting into smaller pieces (e.g., 6-7 minutes for smaller pieces).
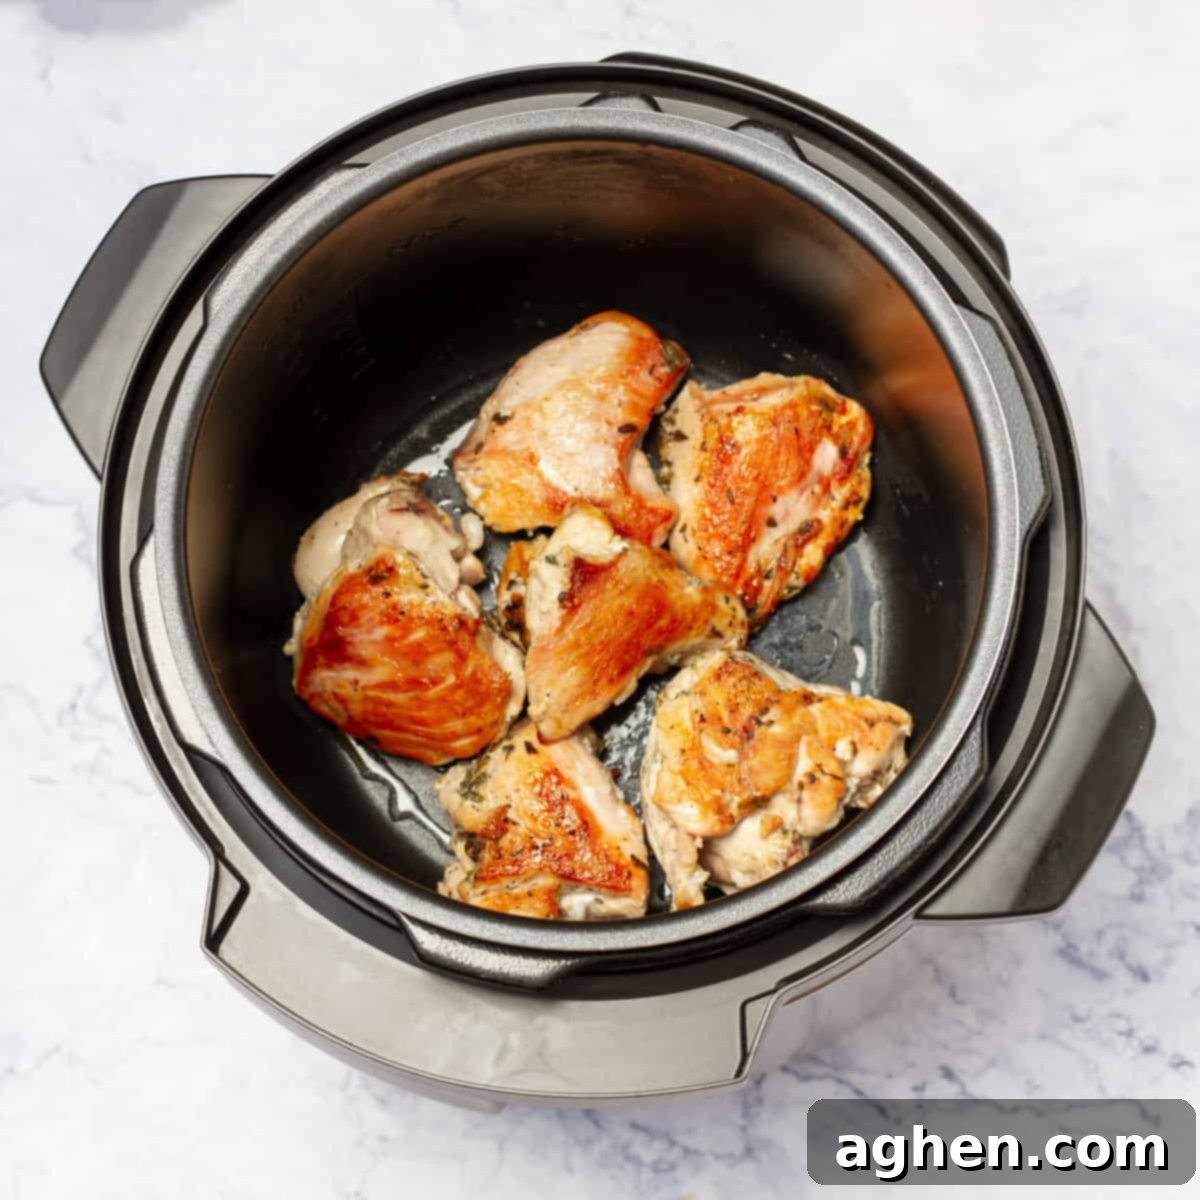
2. Sear the Chicken: Place your Instant Pot on “Sauté” mode and add the oil. Once hot, carefully add the seasoned chicken breasts to the pot in a single layer, ensuring not to overcrowd. Sear for 2-3 minutes per side until beautifully browned. This step is crucial for adding depth of flavor and locking in moisture. You might need to do this in batches. Once seared, remove the chicken from the Instant Pot and set it aside on a plate.
3. Sauté Aromatics and Deglaze: In the same pot, with any leftover chicken bits and oil, add the minced garlic. Sauté for about 30-60 seconds until it becomes wonderfully fragrant, being careful not to burn it. Then, pour in the chicken broth and use a wooden spoon to scrape up any browned bits from the bottom of the pot. This crucial step, known as deglazing, prevents a “Burn” notice and adds even more flavor to your sauce.
4. Build the Sauce and Combine: Now, add the light ketchup, light soy sauce, honey, and optional Stevia to the Instant Pot. Stir all these ingredients together until well combined, creating the base for your rich honey garlic sauce. The sauce will look thin at this stage, but don’t worry, it will thicken later.
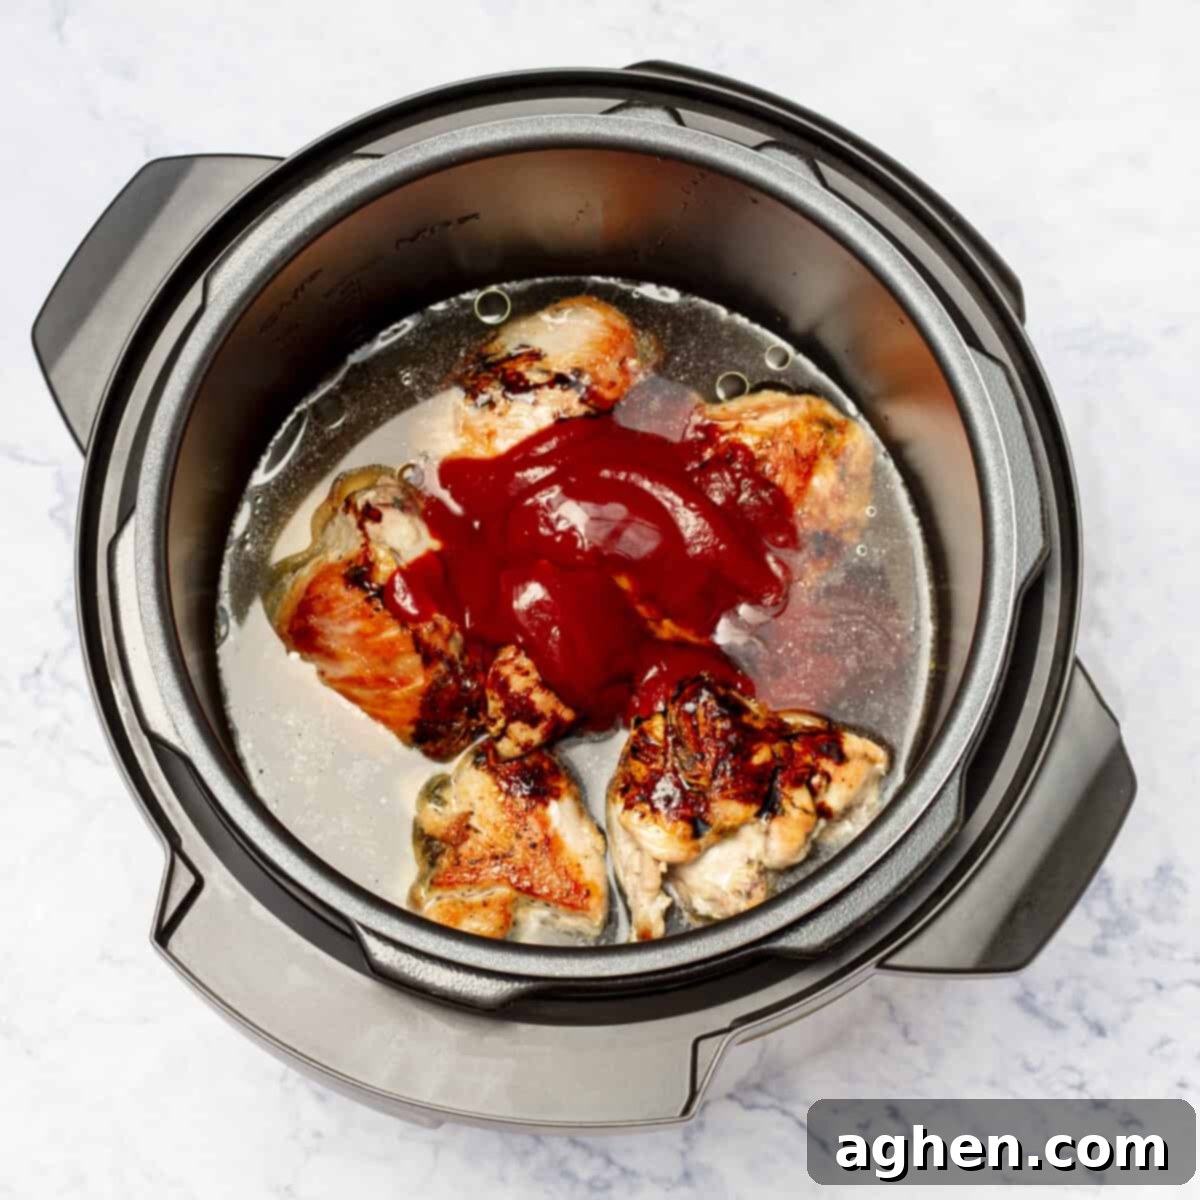
5. Pressure Cook: Return the seared chicken to the Instant Pot, nesting each piece carefully into the sauce. Ensure the chicken is submerged as much as possible for even cooking. Secure the Instant Pot lid, making sure the sealing valve is set to the “Sealing” position. Select “Pressure Cook” (or “Manual”) mode and set the timer for 8 minutes on high pressure. For slightly thicker breasts, you might increase to 9-10 minutes. Once cooking is complete, allow for a natural pressure release for about 5 minutes. This helps the chicken stay moist. After 5 minutes, carefully perform a quick release by turning the sealing valve to “Venting” to release any remaining pressure.
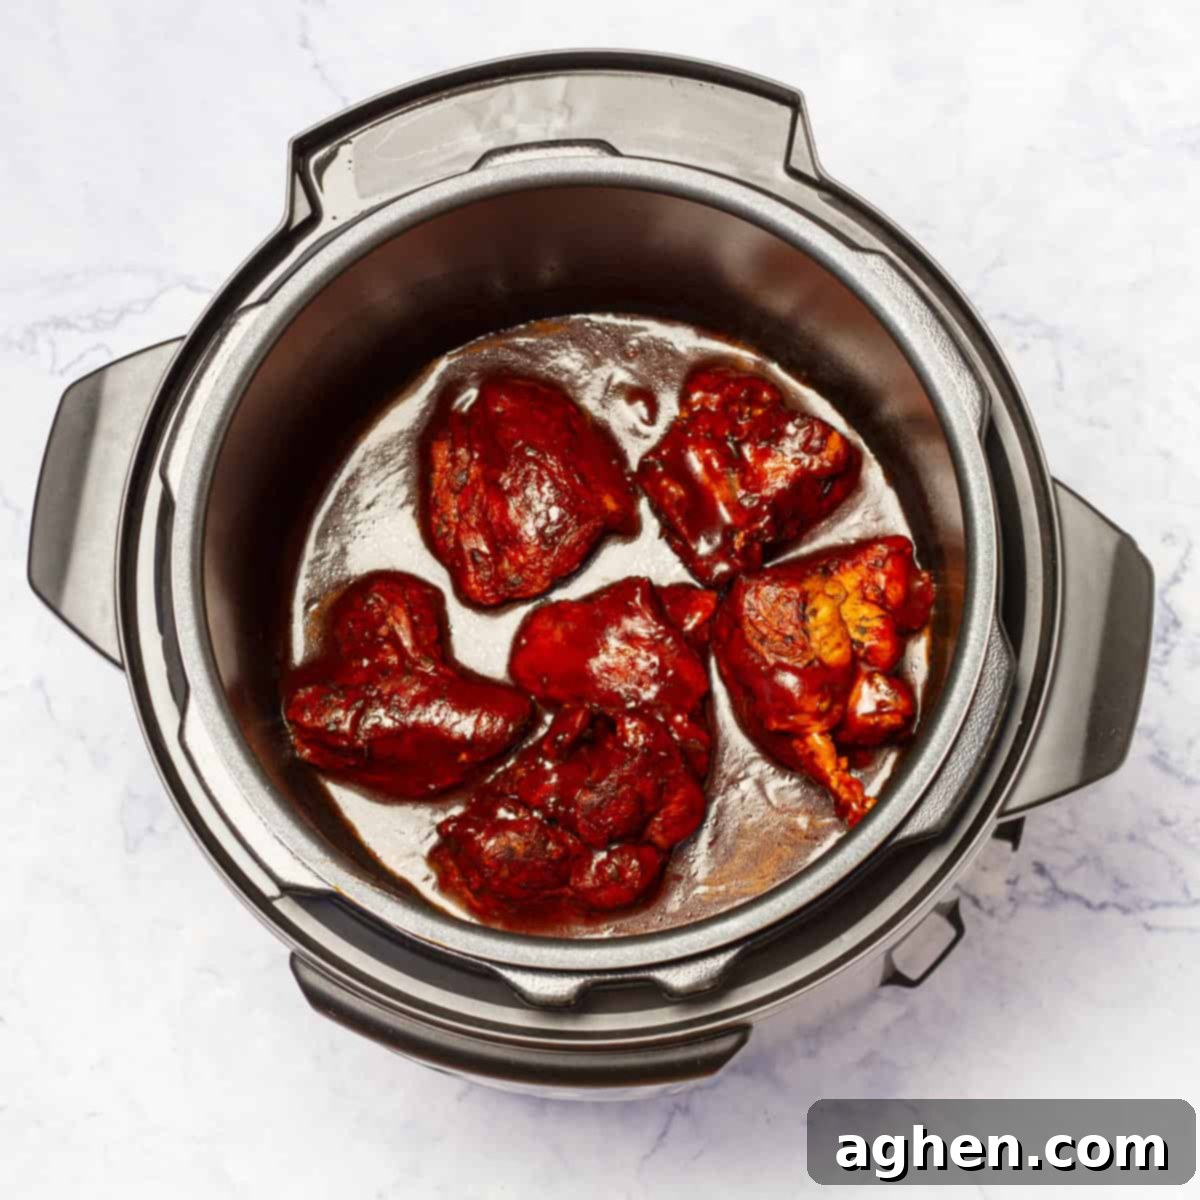
6. Thicken the Sauce: Carefully remove the lid. In a small bowl, whisk together the cornstarch with 2 tablespoons of cold water to create a smooth slurry. Set the Instant Pot back to “Sauté” mode (if it hasn’t automatically turned off). Slowly pour the cornstarch slurry into the simmering sauce, stirring continuously. Continue to cook, stirring occasionally, until the sauce visibly thickens to your desired consistency. This usually takes 2-4 minutes. If the sauce becomes too thick, you can add a tablespoon or two of extra broth or water to thin it out.
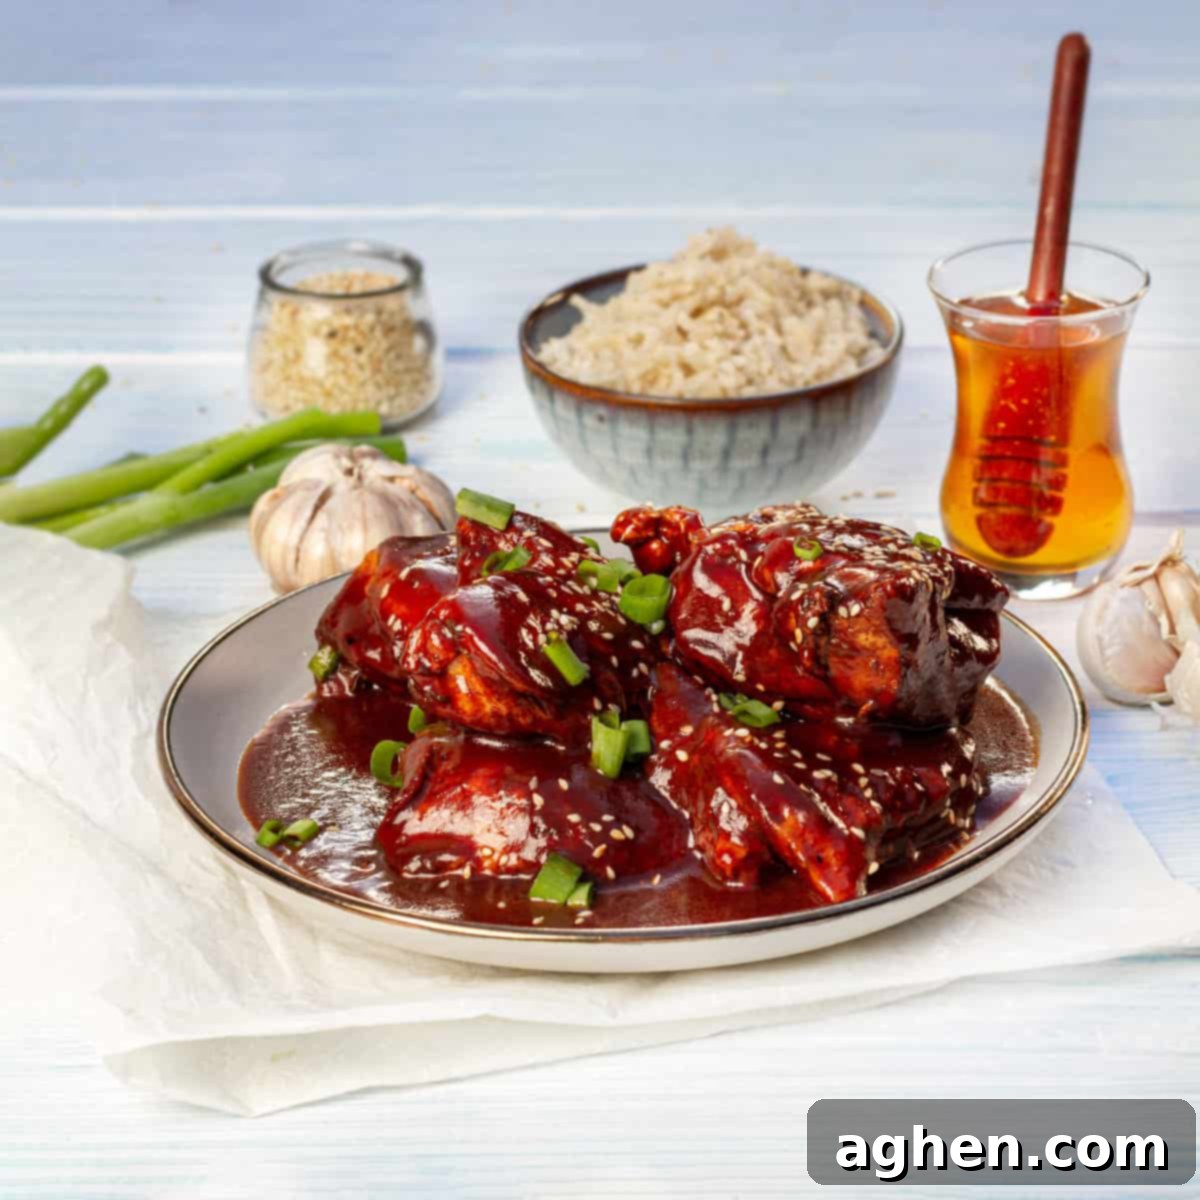
7. Serve and Garnish: Taste the honey garlic chicken and its sauce, adjusting any seasonings if necessary (you might want a pinch more salt, pepper, or a touch more honey for sweetness). Serve the tender chicken and its luscious sauce over a bed of fluffy steamed rice, healthy cauliflower rice, or your favorite veggie noodles. For an authentic and visually appealing finish, garnish generously with fresh chopped chives and a sprinkle of toasted sesame seeds. Enjoy your perfectly cooked, flavorful Instant Pot Honey Garlic Chicken!
Flavorful Variations and Smart Substitutions
One of the best things about this Instant Pot Honey Garlic Chicken recipe is how easily it can be customized to suit your taste preferences or what you have on hand. Don’t be afraid to get creative!
- For a More Citrusy or Tangy Flavor: If you enjoy a brighter, more zesty profile, consider substituting part of the light ketchup with fresh mandarin juice or concentrated orange juice. A squeeze of lime or lemon juice at the end can also lift the flavors. For an even more Asian-inspired twist, a teaspoon of rice vinegar can be added to the sauce.
- Adding More Vegetables: This dish is a perfect canvas for incorporating extra veggies. You can easily add quick-cooking vegetables like broccoli florets, sliced carrots, snap peas, bell peppers, or asparagus. For firmer vegetables like carrots, add them along with the chicken. For softer vegetables like broccoli or snap peas, stir them in after the pressure cooking cycle is complete, letting them steam in the hot sauce for a few minutes before thickening.
- Different Proteins: While chicken breasts are specified, boneless, skinless chicken thighs can be used for an even more succulent result. The cooking time would remain similar. You could also experiment with pork loin or even firm tofu chunks, adjusting cooking times as needed.
- Spice it Up: If you crave a kick, add a pinch of red chili flakes, a dash of Sriracha, or a little cayenne pepper to the sauce along with the other liquid ingredients. Start small and add more to taste.
- Sweetness Adjustment: The amount of honey and optional Stevia can be tailored. If you prefer a less sweet sauce, reduce the honey and omit the Stevia. For a sweeter glaze, add a touch more honey or Stevia until it reaches your desired level. Maple syrup or brown sugar can also be used as a honey substitute.
- Gluten-Free Option: To make this recipe completely gluten-free, ensure you use tamari instead of regular soy sauce, and double-check that your chicken broth and ketchup are certified gluten-free.
- Garnish Galore: Beyond chives and sesame seeds, consider adding a sprinkle of fresh cilantro, a drizzle of chili oil, or a few chopped peanuts for extra crunch and flavor.
Expert Tips & Tricks for Perfect Honey Garlic Chicken
Achieving restaurant-quality Instant Pot Honey Garlic Chicken is easy with a few insider tips and tricks:
- Marinating for Maximum Flavor: While this recipe is quick, if you have extra time, marinating the chicken for a few hours or even overnight in a portion of the sauce ingredients (like soy sauce, minced garlic, and a touch of honey) can significantly intensify the flavors, making each bite even more delicious.
- Searing is Key for Texture and Flavor: Don’t skip the searing step! Browning the chicken on all sides before pressure cooking not only locks in juices but also creates a richer, more complex flavor profile thanks to the Maillard reaction. This also prevents the chicken from becoming rubbery or bland.
- Preventing the “Burn” Notice: After searing and sautéing, always deglaze the pot by adding the broth and scraping the bottom with a wooden spoon to remove any stuck-on food bits. This is crucial for preventing the dreaded Instant Pot “Burn” error and ensures smooth pressure buildup.
- Serving Suggestions Beyond Rice: While steamed rice is a classic companion, consider other options:
- Low-Carb Alternative: Serve over cauliflower rice, zucchini noodles, or steamed green beans for a lighter, carb-conscious meal.
- Noodle Bowls: Toss the chicken and sauce with cooked egg noodles or ramen for a hearty noodle bowl.
- Wraps: Shred the chicken and use it as a filling for lettuce wraps or soft tortillas.
- Adjusting Sauce Thickness: If your sauce isn’t as thick as you’d like after adding the cornstarch slurry, you can always make a bit more slurry (1 tsp cornstarch + 1 tbsp cold water) and stir it in on Sauté mode until it reaches your preferred consistency. If it becomes too thick, a splash of hot water or broth will thin it out.
- No Instant Pot? No Problem! You can still enjoy this delicious honey garlic chicken.
- Stovetop Method: Sear chicken in a large skillet. Remove. Sauté garlic, then add sauce ingredients. Return chicken, bring to a simmer, cover, and cook for 15-20 minutes until chicken is cooked through. Thicken with cornstarch slurry.
- Oven Method: Sear chicken in an oven-safe pot. Remove. Sauté garlic, add sauce ingredients. Return chicken, cover, and bake at 375°F (190°C) for 20-25 minutes, or until cooked through. Thicken sauce on the stovetop if desired.
- Proper Storage and Reheating: Store any leftover Instant Pot Honey Garlic Chicken in an airtight container in the refrigerator for up to 3-4 days. To reheat, gently warm on the stovetop over medium-low heat or in the microwave until heated through. Add a splash of water or broth if the sauce has thickened too much during storage.
Troubleshooting Common Instant Pot Issues
Even seasoned Instant Pot users can encounter minor hiccups. Here’s how to address some common issues:
- “Burn” Notice: If your Instant Pot displays a “Burn” message, it usually means there’s food stuck to the bottom of the inner pot. The most common culprit is not fully deglazing after sautéing. Immediately press “Cancel,” remove the pot from the base, and let it cool slightly. Transfer the chicken and sauce to another bowl, inspect the bottom, and carefully scrape off any burned bits. Add a splash more liquid, then return the contents and restart.
- Chicken Not Tender Enough: If your chicken isn’t as tender as you’d like, it might need a minute or two more of pressure cooking. Ensure your chicken pieces are of a consistent size for even cooking. Also, remember that a natural release for at least 5 minutes helps the chicken remain juicy and continue to cook gently.
- Sauce Too Thin: After pressure cooking, if your sauce hasn’t reached the desired thickness, simply return the Instant Pot to “Sauté” mode and add a cornstarch slurry. For every 1 tablespoon of cornstarch, mix with 1 tablespoon of cold water until smooth, then whisk into the simmering sauce. Let it cook for a few minutes until it thickens.
Frequently Asked Questions (FAQ)
Here are some common questions about making Instant Pot Honey Garlic Chicken:
- Can I use frozen chicken breasts?
- Yes, you can! If using frozen chicken breasts, you’ll need to adjust the pressure cooking time. For whole frozen breasts, increase the pressure cook time to 12-15 minutes, followed by a natural release. No need to thaw beforehand, but they won’t sear as well.
- How long does this dish last in the refrigerator?
- When stored in an airtight container, Instant Pot Honey Garlic Chicken will stay fresh in the refrigerator for 3-4 days, making it an excellent meal prep option.
- Can I make this dairy-free or gluten-free?
- Absolutely! This recipe is naturally dairy-free. To make it gluten-free, simply substitute regular soy sauce with tamari (which is gluten-free) and ensure your chicken broth and ketchup are certified gluten-free. It’s a simple swap that keeps all the flavor!
- Can I use chicken thighs instead of breasts?
- Yes, boneless, skinless chicken thighs work wonderfully in this recipe and often result in even juicier chicken. The pressure cooking time will remain very similar, around 8-9 minutes.
- What if I don’t have Stevia?
- Stevia is optional for added sweetness. If you don’t have it, you can simply omit it or add a tiny bit more honey or a pinch of brown sugar to taste, if you don’t mind the extra sugar.
Related Recipes
If you loved this Instant Pot Honey Garlic Chicken, you might also enjoy these other flavorful and healthy chicken dishes:
Huli Huli Chicken: A Healthy Hawaiian Classic
<2>
Instant Pot Apple Balsamic Chicken
<2>
Weight Watchers Points Breakdown
For those tracking their intake, here’s a detailed breakdown of the Weight Watchers points for each ingredient in this delicious Instant Pot Honey Garlic Chicken recipe:
Uncooked boneless skin-less chicken breast 0 points
Dried oregano 0 points
Honey 5 points
Stevia leaf herbal extract 0 points
Black pepper 0 points
Olive oil 1 point
Chicken broth 0 points
Garlic 0 points
Cornstarch 1 point
Unsweetened ketchup 2 points
Soy sauce 1 point
Instant Pot Honey Garlic Chicken

Ingredients
- 2 lbs (900g) boneless, skinless chicken breasts
- 1 teaspoon dried oregano
- 1 teaspoons oil
- 4 cloves garlic, minced
- ½ cup (120ml) light ketchup
- ¼ cup (60ml) light soy sauce
- 1 tablespoon honey
- 2 teaspoons Stevia (optional, for added sweetness)
- ½ teaspoon black pepper
- 1 cup (240ml) chicken broth
- 1 tablespoon cornstarch
- For Serving:
- Chopped chives
- Toasted sesame seeds
Instructions
-
Season the chicken breasts with oregano and black pepper on both sides.
-
Set the Instant Pot to “Sauté” mode. Add oil and sear the chicken until browned on both sides. Remove chicken and set aside.
-
In the same pot, add minced garlic and sauté until fragrant. Add light tomato sauce, light soy sauce, honey, Stevia and chicken broth. Mix well.
-
Return the seared chicken to the Instant Pot, ensuring each piece is coated in the sauce.
-
Secure the Instant Pot lid, set to “Pressure Cook” mode, and cook for 8 minutes. Allow for a natural release for about 5 minutes, then carefully perform a quick release to release any remaining pressure.
-
In a small bowl, mix cornstarch with a bit of water to create a slurry. Stir the slurry into the sauce, then set the Instant Pot back to “Sauté” mode. Cook until the sauce thickens.
-
Taste and adjust seasoning if necessary. Serve the Instant Pot Honey Garlic Chicken over steamed rice or cauliflower rice. Garnish with chopped chives and toasted sesame seeds.
Notes
Nutrition
Nutrition information is automatically calculated, so should only be used as an approximation.
