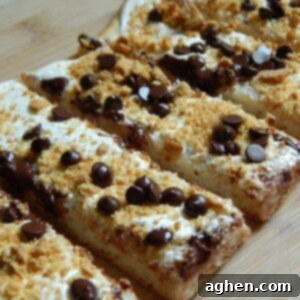
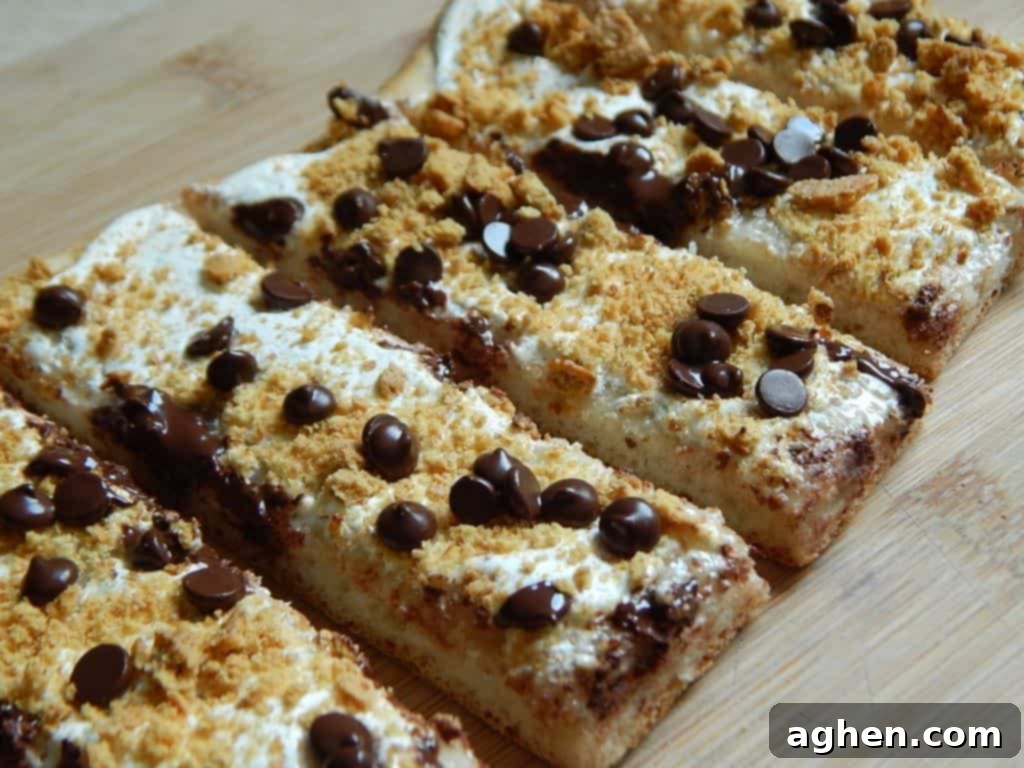
Decadent S’mores Pizza Fingers: The Ultimate Easy Dessert for Any Occasion
Prepare to delight your taste buds with an irresistible twist on a classic campfire treat: S’mores Pizza Fingers! Imagine the warm, gooey embrace of toasted marshmallow, the rich melt of chocolate, and the satisfying crunch of graham crackers, all served up on a tender pizza crust. This dessert isn’t just a treat; it’s an experience, bringing the joy of s’mores right to your kitchen table without the need for a campfire. Perfect for family gatherings, kids’ parties, or simply satisfying that sweet craving, these pizza fingers are incredibly easy to make, requiring just a handful of simple ingredients and minimal prep time. You’ll be amazed at how quickly these crowd-pleasers come together, and everyone who tries them will be asking for the recipe!
One of the most appealing aspects of these S’mores Pizza Fingers is their surprisingly manageable nutritional profile, especially for those mindful of their diet. Clocking in at just 3 SmartPoints per serving on many popular weight management programs, they offer a guilt-free indulgence that doesn’t compromise on flavor or satisfaction. This recipe proves that you don’t have to sacrifice deliciousness for smart eating. With only four core ingredients, you can whip up a batch of these heavenly bites in a flash, making them an ideal last-minute dessert or a fun baking project with the kids.
Dive into the world of effortless dessert creation. Our S’mores Pizza Fingers recipe is designed for ease, ensuring that even novice bakers can achieve spectacular results. The combination of pre-made pizza dough, creamy marshmallow fluff, crunchy graham crackers, and sweet mini chocolate chips creates a symphony of textures and flavors that is truly unforgettable. Get ready to become everyone’s favorite baker once you introduce them to this delightful and unbelievably simple dessert!
Why S’mores Pizza Fingers Are Your Next Go-To Dessert
There’s something inherently comforting and nostalgic about s’mores. That classic trio of toasted marshmallow, melted chocolate, and crisp graham cracker evokes memories of summer nights, campfires, and shared laughter. But what if you could capture that magic and bring it indoors, transforming it into an even more convenient and shareable form? That’s precisely what S’mores Pizza Fingers accomplish. They take the beloved flavor profile of s’mores and meld it with the fun, bite-sized appeal of pizza fingers, making them incredibly versatile for various occasions.
- **Effortless Preparation:** Forget complicated steps or extensive ingredient lists. This recipe shines in its simplicity, making it accessible for home cooks of all skill levels.
- **Quick Turnaround:** From start to finish, you’re looking at under 20 minutes. This is the perfect solution for sudden dessert cravings or unexpected guests.
- **Crowd-Pleasing Flavors:** Who doesn’t love s’mores? The familiar and universally adored combination of sweet marshmallow, rich chocolate, and crispy graham cracker ensures these fingers will disappear fast.
- **Diet-Friendly Option:** With their smart point value, these pizza fingers offer a delicious way to enjoy a sweet treat without derailing your health goals.
- **Versatile Serving:** Perfect as a dessert, a snack, or even a fun breakfast treat (we won’t tell!), these fingers are great for parties, movie nights, or a quiet evening at home.
This dessert also offers a fantastic opportunity to get creative in the kitchen. While the basic recipe is stellar on its own, it also provides a blank canvas for experimentation with different types of chocolate, added toppings, or even a sprinkle of sea salt to balance the sweetness. The beauty of S’mores Pizza Fingers lies not only in their delicious taste but also in their adaptability and the sheer joy they bring to those who make and eat them.
S’mores Pizza Fingers

Ingredients
- 1 package Pillsbury pizza dough
- 1/2 cup marshmallow fluff
- 3 graham crackers
- 1/4 cup mini chocolate chips
Prevent your screen from going dark
Instructions
-
Preheat your oven to 400°F (200°C). This ensures your pizza dough bakes evenly and achieves that perfect golden crust.
-
Carefully unroll the Pillsbury pizza dough onto a baking sheet, following the specific directions on its packaging. Pre-bake the dough for 8 minutes to give it a head start and prevent it from becoming soggy. Remove it from the oven once the pre-bake time is complete.
-
For easier spreading, microwave your marshmallow fluff for approximately 30 seconds. This will make it soft and pliable. Evenly spread the warmed fluff over the pre-baked pizza dough, ensuring good coverage. Next, crush the graham crackers into small pieces – a small zip-lock bag and a rolling pin work perfectly for this – and sprinkle them generously over the marshmallow fluff. Finish by sprinkling the mini chocolate chips on top.
-
Return the dough with its toppings to the preheated oven. Bake for an additional 6-10 minutes, or as directed by your pizza dough package, until the marshmallow fluff is lightly golden and bubbly, and the chocolate chips are melted and glossy.
-
Allow the S’mores Pizza to cool for about 5 minutes on the baking sheet. This brief cooling period helps the toppings set slightly and makes cutting easier. Using a pizza cutter, make one long cut across the middle of the pizza, then cut 9 strips down perpendicular to the first cut. This will yield 18 perfectly sized S’mores Pizza Fingers. Each finger accounts for 3 personal points, 3 SmartPoints (SP), or 2 points plus (depending on the specific Weight Watchers program you’re following). Store any leftovers in an airtight container at room temperature.
-
Nutritional Information per finger (approximate): Calories – 84; Fat – 1.7g; Saturated Fat – 0.6g; Carbohydrates – 15.8g; Fiber – 0.4g; Sugars – 5.1g; Protein – 1.8g.
Additional Info
Tips for Perfect S’mores Pizza Fingers Every Time
While this recipe is incredibly simple, a few tips can elevate your S’mores Pizza Fingers from good to absolutely glorious. Pay attention to these details for a truly unforgettable dessert:
- **Pre-Baking is Key:** Don’t skip the initial 8-minute pre-bake of the pizza dough. This step is crucial for achieving a firm base that can hold the rich toppings without becoming gummy or undercooked. It also helps create a slightly crispy edge, enhancing the overall texture.
- **Warm the Fluff:** Microwaving the marshmallow fluff for 30 seconds makes it much easier to spread evenly across the dough. Cold, thick fluff can tear the pre-baked crust, so ensure it’s smooth and workable before spreading.
- **Crush Your Graham Crackers Well:** For the best texture, aim for a mix of fine crumbs and small pea-sized pieces of graham cracker. This provides both a cohesive base for the chocolate and delightful crunchy bits in every bite. A Ziploc bag and a rolling pin are your best friends here.
- **Don’t Overbake:** Keep a close eye on your S’mores Pizza during the final bake. The goal is golden, bubbly marshmallow and melted chocolate, not burnt toppings. Ovens vary, so the 6-10 minute window is a guideline – pull it out when it looks perfectly toasted.
- **Allow to Cool Slightly:** Giving the pizza 5 minutes to cool before cutting is essential. This allows the hot marshmallow and chocolate to set just enough, preventing a gooey mess and making it easier to cut clean, individual fingers.
- **Even Cutting:** For uniform “fingers” that are easy to pick up, make sure your initial cut down the middle is straight, and then aim for roughly even strips across. This also helps with consistent portion control if you’re tracking points.
Creative Variations to Explore
Once you’ve mastered the classic S’mores Pizza Fingers, feel free to unleash your creativity! This recipe is highly adaptable, allowing for delightful variations:
- **Chocolate Choices:** Instead of just mini chocolate chips, try a mix of milk chocolate, dark chocolate, or even white chocolate chips. Chopped chocolate bars (like Hershey’s for an authentic s’mores feel) also work wonderfully.
- **Nutty Additions:** Sprinkle a handful of chopped pecans, walnuts, or almonds over the chocolate chips for added crunch and flavor.
- **Caramel Drizzle:** After baking, a light drizzle of caramel sauce can add an extra layer of decadence.
- **Sweet & Salty:** A pinch of sea salt sprinkled over the melted chocolate can enhance the sweetness and provide a sophisticated counterpoint.
- **Fruity Twist:** For a brighter flavor, consider adding finely diced strawberries or raspberries *after* baking, or a very thin layer of fruit preserves before the marshmallow fluff.
- **Spiced S’mores:** A tiny dash of cinnamon or pumpkin spice mixed with the graham cracker crumbs can add a warm, inviting aroma and taste.
Storing and Reheating Your S’mores Treats
While these S’mores Pizza Fingers are best enjoyed fresh and warm from the oven, you can absolutely save any leftovers for later. Proper storage ensures they retain their delightful texture and flavor:
- **Cool Completely:** Before storing, make sure the pizza fingers have cooled entirely to room temperature. Storing them while warm will create condensation, making them soggy.
- **Airtight Container:** Place the cooled S’mores Pizza Fingers in an airtight container. This will protect them from drying out and absorbing other odors from your fridge or pantry.
- **Storage Location:** For optimal taste and texture, store them at room temperature for up to 2 days. If you need to keep them longer, they can be stored in the refrigerator for up to 4-5 days.
- **Reheating:** To enjoy them warm again, you have a few options:
- **Oven/Toaster Oven:** This is the best method for reviving crispness. Place the fingers on a baking sheet and heat at 300°F (150°C) for 5-10 minutes, or until the marshmallow is soft and gooey again.
- **Microwave:** For a quick reheat, microwave individual fingers for 10-20 seconds. Be careful not to overheat, as the marshmallow can become tough. The crust might not be as crispy as when reheated in an oven, but it will still be warm and delicious.
Conclusion: A Simple Path to S’mores Bliss
These S’mores Pizza Fingers truly are a game-changer for anyone looking for an easy, delicious, and fun dessert. They encapsulate the magic of the classic campfire treat in a convenient, shareable format that’s perfect for any occasion. Whether you’re a seasoned baker or just starting, this recipe’s simplicity and quick preparation time make it an absolute winner. The balance of gooey marshmallow, rich chocolate, and crispy graham cracker on a tender pizza crust is a symphony of flavors and textures that will leave everyone craving more.
So go ahead, gather your ingredients, preheat your oven, and get ready to create some sweet memories. Don’t forget to share your creations! If you tried this recipe and loved it, we’d be thrilled to see your culinary masterpieces. Mention @drizzlemeskinny or tag #drizzlemeskinny on social media. Your glowing reviews and delicious photos inspire us to keep sharing more amazing recipes!
