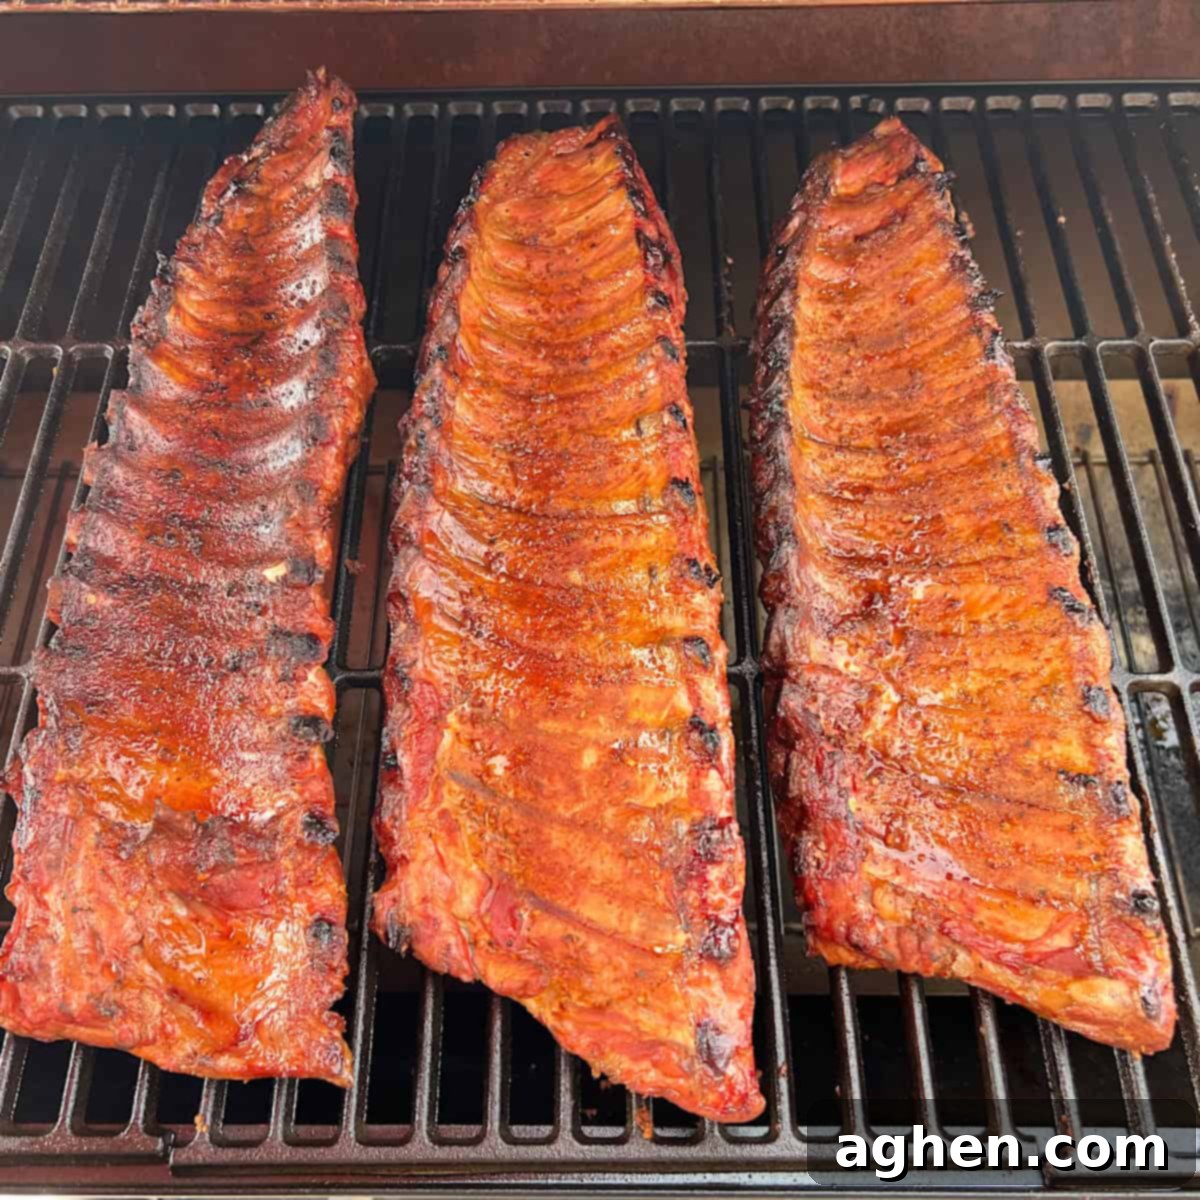
The Ultimate Guide to Perfectly Smoked Baby Back Ribs on an Offset Smoker
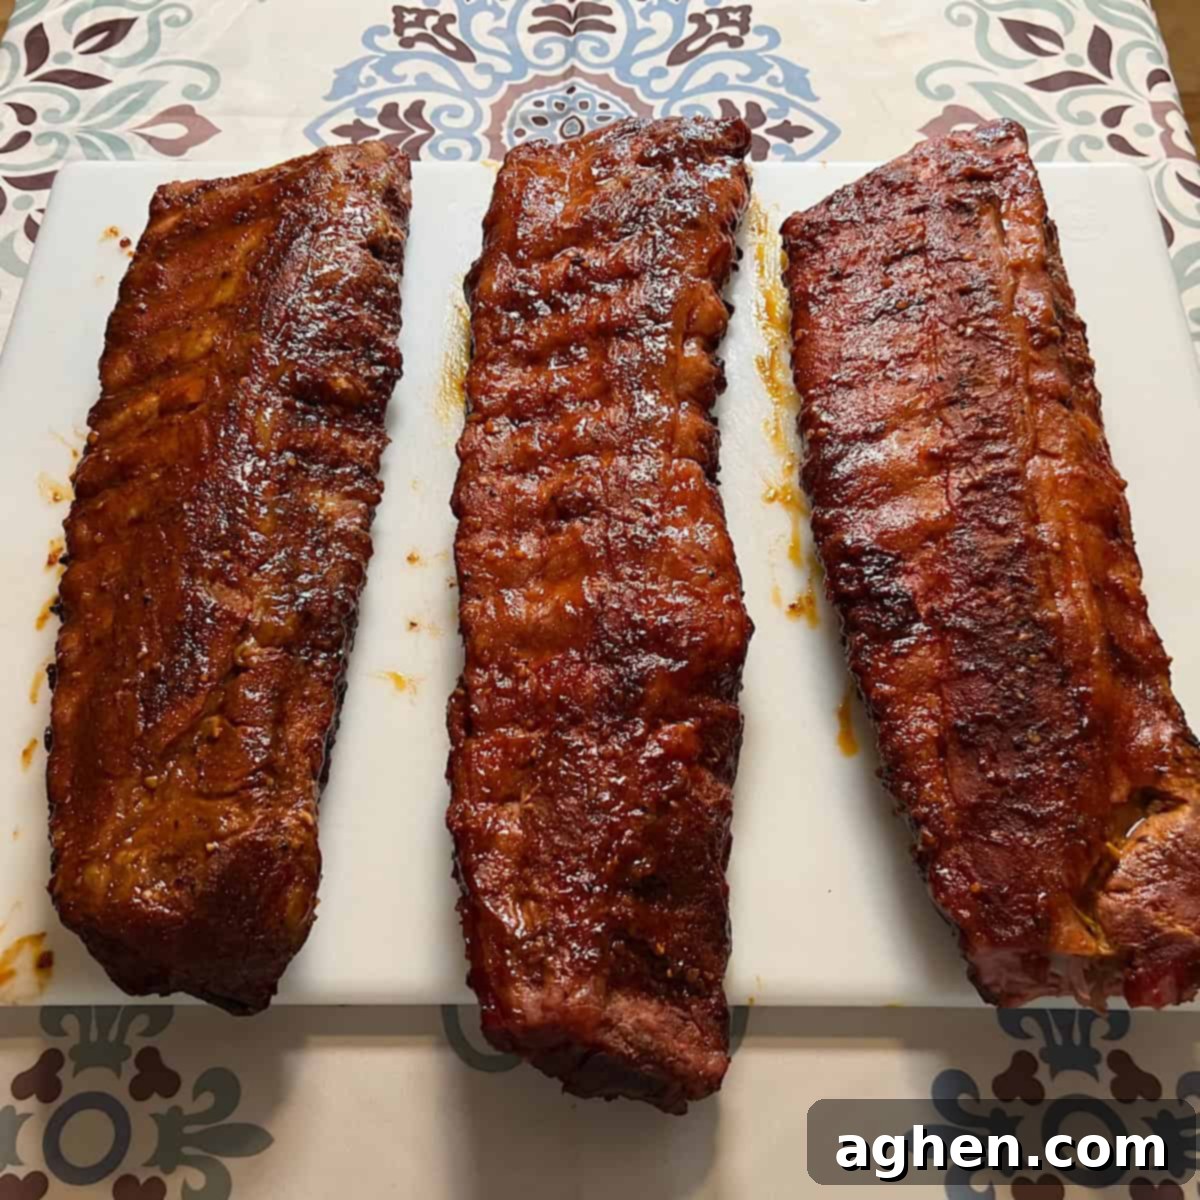
There’s an undeniable magic to perfectly smoked baby back ribs – a culinary masterpiece that transforms simple pork into an unforgettable feast. The rich aroma filling the air, the tender meat falling off the bone, and the complex flavors that develop over hours of slow smoking are truly unparalleled.
This comprehensive guide will walk you through creating exceptional baby back ribs on an offset smoker, just as the BBQ gods intended. While pellet grills offer a different approach (and for those, you can explore our Traeger 2-2-1 ribs recipe here), there’s something uniquely authentic about an offset smoker that infuses a deep, smoky flavor that’s hard to beat.
Imagine being able to enjoy restaurant-quality pork ribs anytime you desire, without the hefty price tag or the drive to your favorite BBQ joint. With this method, you can smoke multiple racks of these succulent pork ribs and indulge until your heart’s content! Read on, fellow smoked pork rib enthusiasts, and discover just how simple and rewarding it is to smoke your own incredible ribs.
Why This Smoked Pork Ribs Recipe Stands Out
- Only Five Simple Ingredients – Forget complex shopping lists. This recipe focuses on five straightforward, easy-to-find ingredients that work in harmony to produce extraordinary flavor. Using fewer, high-quality ingredients allows the natural taste of the pork and the smoky essence to truly shine, without unnecessary clutter.
- Uncomplicated Preparation – Even if you’re new to smoking, you’ll find the preparation for these ribs incredibly easy. With minimal steps, your pork ribs will be prepped and ready for the smoker in no time. This simplicity means less stress in the kitchen and more time enjoying the smoking process.
- Relatively Short Smoking Time – Compared to other large cuts of smoked meat like brisket or pulled pork, baby back ribs offer a quicker path to BBQ nirvana. With just 15 minutes of prep, 2 hours directly exposed to smoke, 2 hours wrapped in foil for tenderization, and a final 15-minute rest, you’re looking at a total cooking time of approximately 4 1/2 hours. This makes them a fantastic option for a weekend cookout without requiring an all-day commitment.
- Feeds a Crowd (or a Family!) – Typically, one rack of baby back ribs comfortably serves two people. This makes scaling the recipe incredibly easy. Double or triple the quantities, and you can effortlessly feed a whole family or a hungry gathering of friends. Smoking multiple racks at once also maximizes the efficiency of your offset smoker.
Essential Ingredients for Irresistible Smoked Pork Ribs
- 1 Rack Baby Back Pork Ribs – The foundation of our recipe! There are three primary types of pork ribs: spare ribs, St. Louis ribs, and baby back ribs. Baby back ribs are cut from the loin area, near the spine. They are generally leaner, meatier, and more tender than other cuts, and their smaller size means they cook faster. When selecting a rack, look for even meat distribution and avoid racks with excessive fat pockets, although some marbling is desirable for flavor.
- ½ Cup Yellow Mustard – Yes, plain old yellow mustard is your secret weapon! Liberally brushing the mustard over the ribs serves several crucial purposes. Firstly, it acts as a fantastic binder, ensuring your dry rub adheres perfectly to the meat. Secondly, it helps keep the ribs moist during the initial smoking phase, contributing to a better bark (the flavorful crust). Don’t worry, the mustard flavor won’t dominate; it simply provides a subtle tang that complements the pork and smoke.
- 1 Cup Rib Rub – A great rub is key to developing that signature BBQ flavor. You can opt for your favorite store-bought pork rib rub – many excellent brands are available. For instance, I’m partial to Famous Dave’s Rib Rub for its balanced flavor profile. Alternatively, unleash your inner pitmaster and create your own ‘secret ingredient’ pork rib rub. For inspiration and expert techniques, I highly recommend checking out Paul Kirk’s Championship Barbecue Sauces, Rubs, and More for detailed instructions. (Disclaimer: We have no association with Paul Kirk and receive no commission from book sales; we simply appreciate the quality of his work.)
- 1 Cup BBQ Sauce – The finishing touch that ties all the flavors together! Just like with the rub, feel free to use your favorite store-bought BBQ sauce. A classic choice like Sweet Baby Ray’s Hickory & Brown Sugar Barbecue Sauce offers a sweet and smoky profile that’s incredibly popular. For those seeking to customize their experience, Paul Kirk’s book also provides fantastic recipes for crafting your own soon-to-be-famous BBQ sauces from scratch.
- 1 Cup Apple Juice – This simple ingredient plays a vital role in the final stage of the smoking process. Spraying apple juice on your pork ribs helps to keep them wonderfully moist, adds a subtle fruity sweetness, and contributes to the development of a beautiful, glazed bark. It’s a light touch that makes a big difference in the finished product.
Step-By-Step Directions for Smoking Perfect Pork Ribs
Achieving perfectly smoked ribs is a process that requires patience and attention to detail. Follow these steps for tender, juicy, and flavorful results every time.
1. Preheat Your Smoker to Temperature – The first critical step is to bring your offset smoker to a consistent temperature of approximately 250 degrees Fahrenheit (121°C). Maintaining this temperature throughout the entire smoking process is key to slow cooking the ribs to perfection, allowing the smoke to penetrate the meat without drying it out.
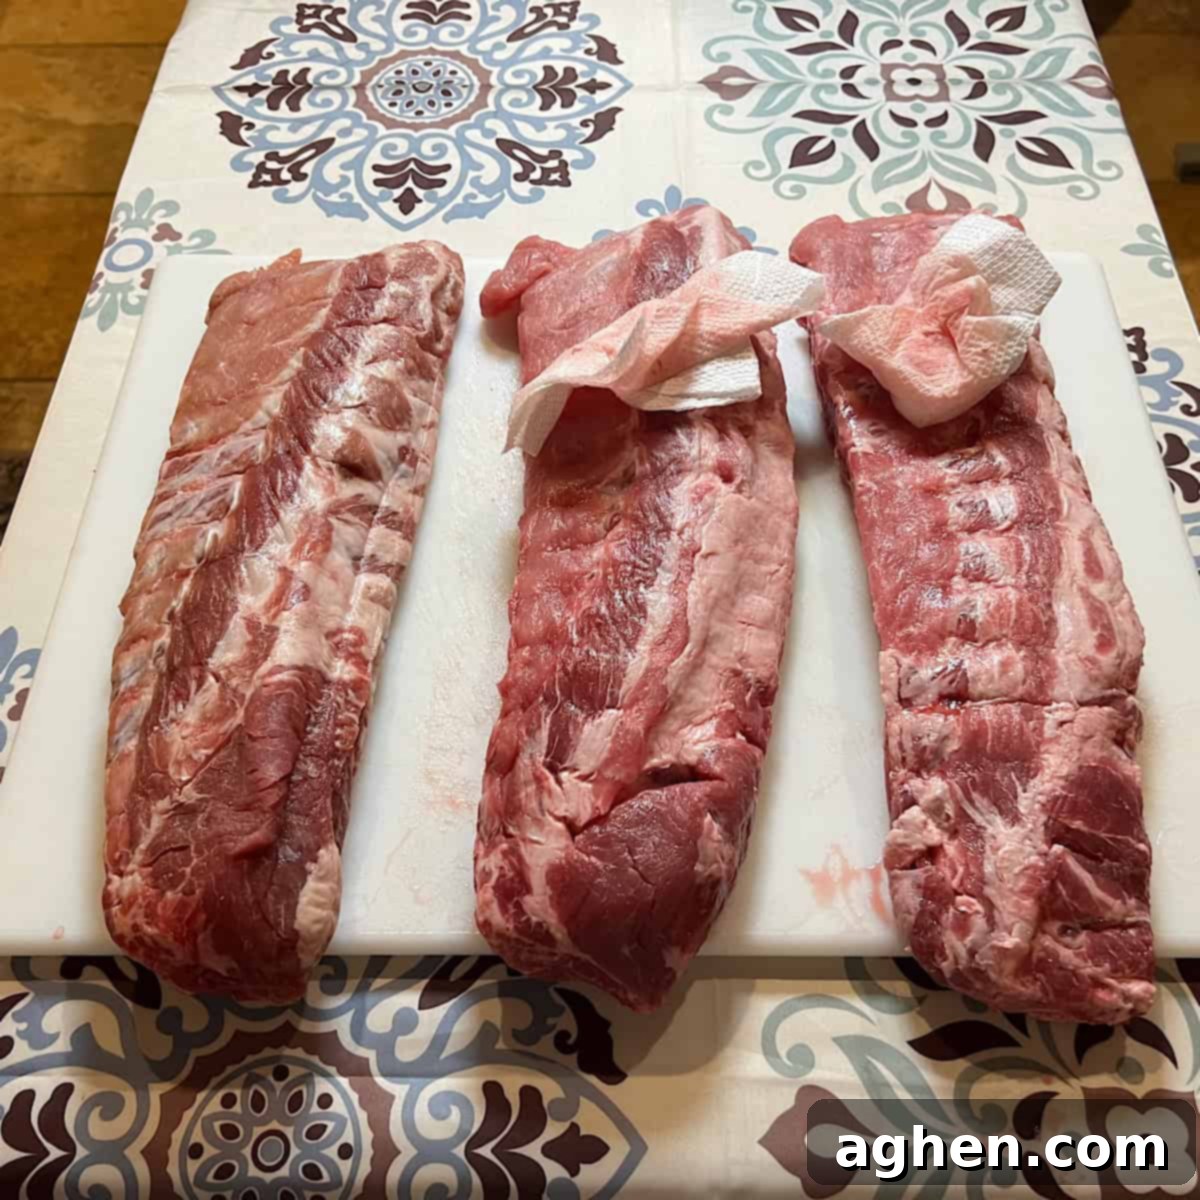
2. Prepare the Ribs: Wipe Away Moisture – Before applying any seasonings, take a clean paper towel and thoroughly pat down the rib rack to remove any excess surface moisture. This step is crucial as it helps the rub adhere better to the meat and promotes the formation of a desirable, crispy bark during smoking.
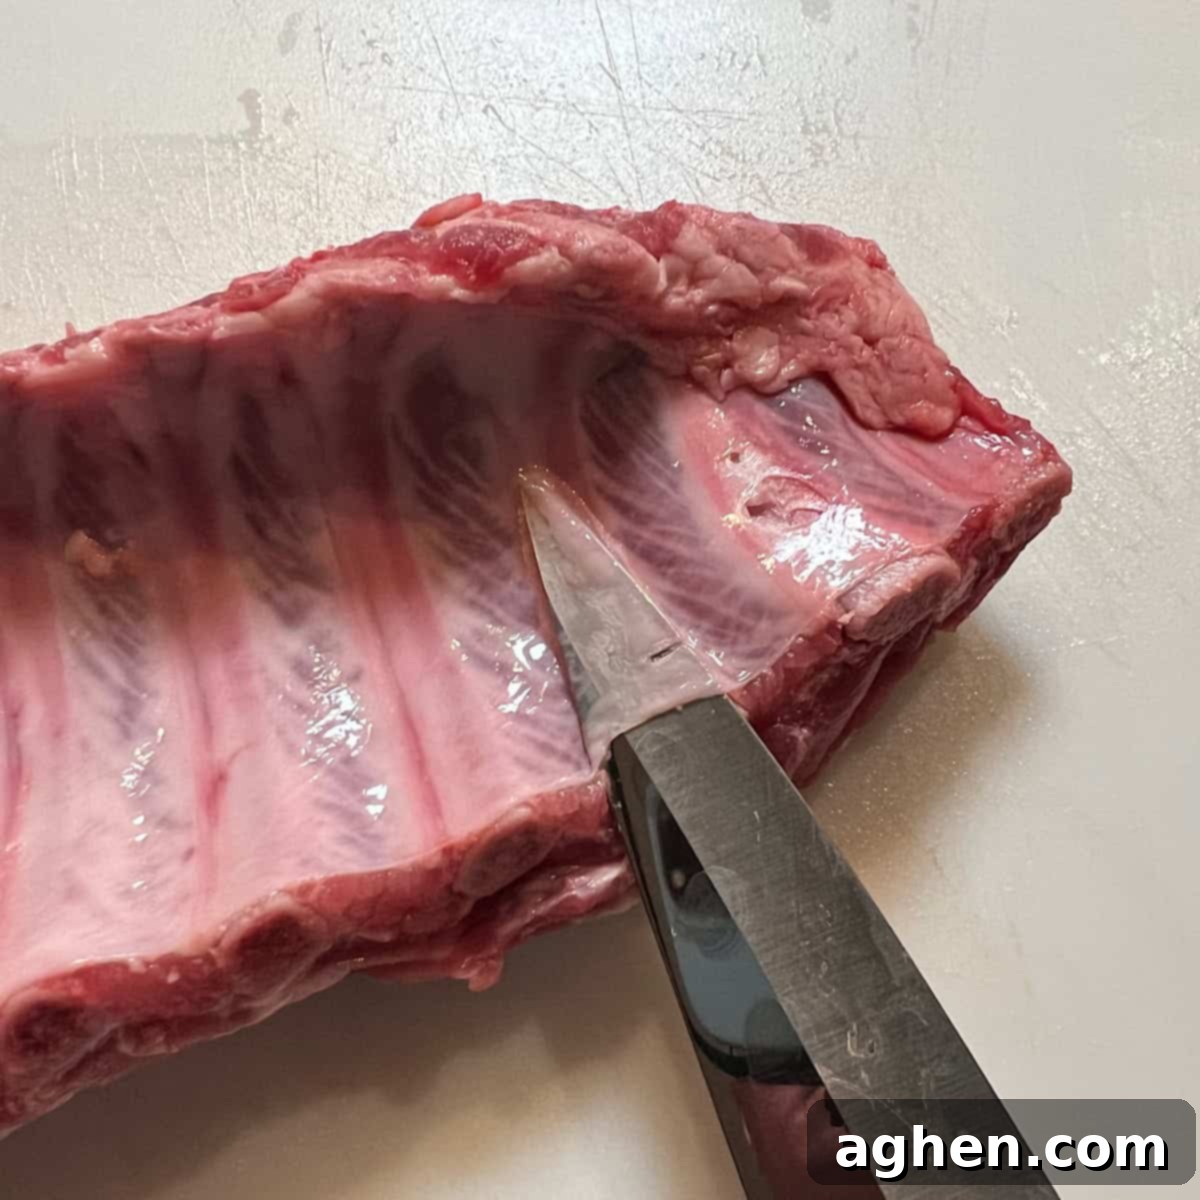
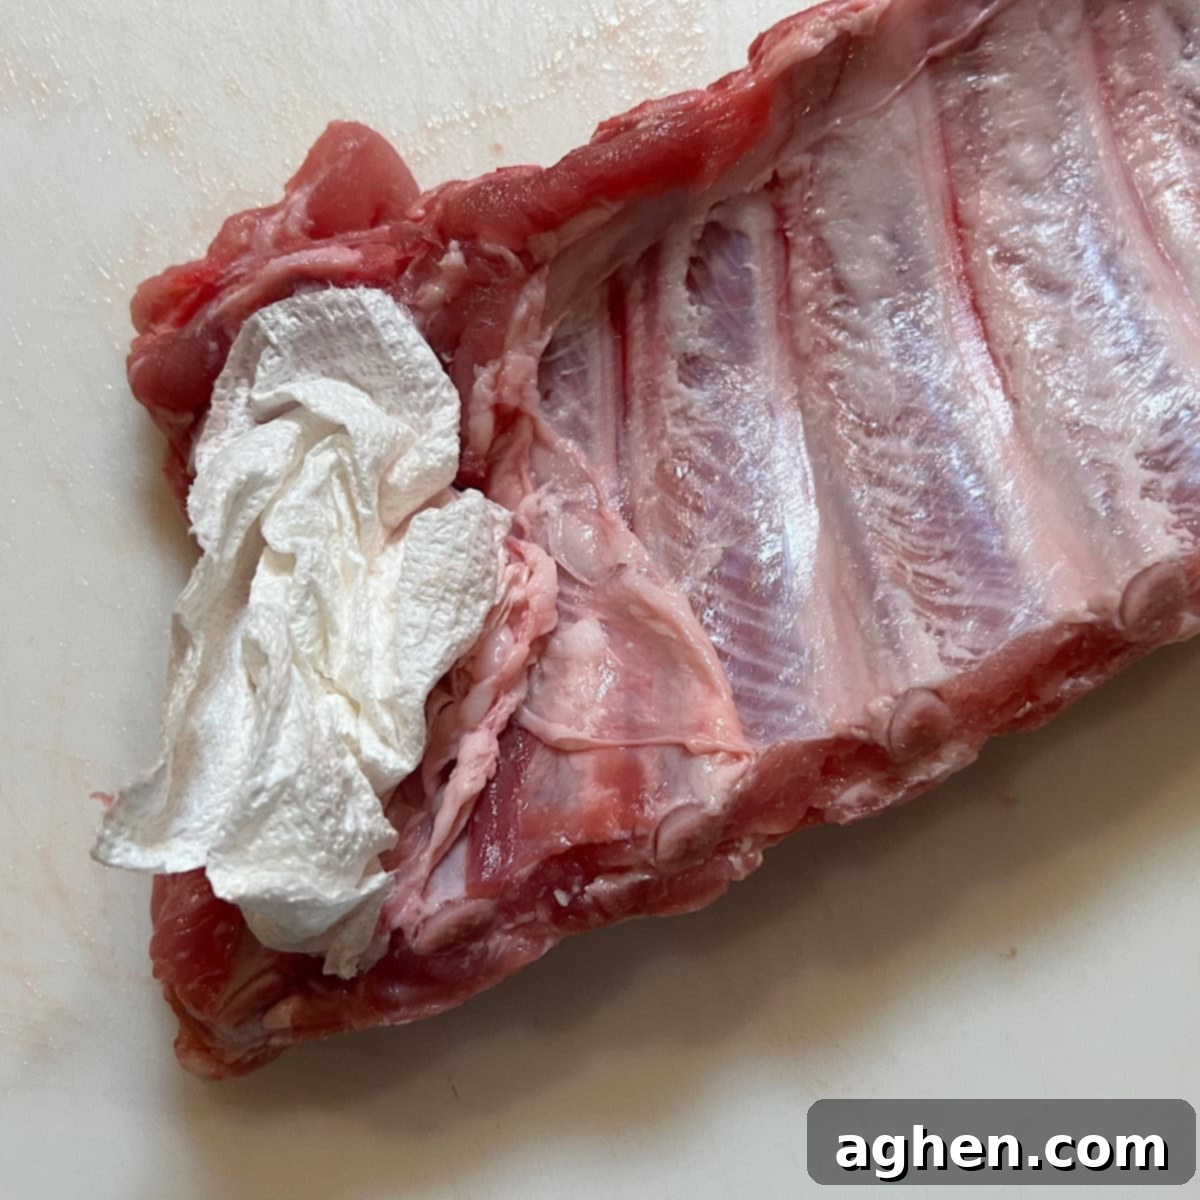
3. Remove the Membrane and Trim Any Excess – Flip the rib rack over to the bone side. Using a sharp knife or the tip of a spoon, carefully separate the thin, clear membrane from one end of the ribs. Once you have a small section lifted, grip the membrane firmly with a paper towel (this provides a better grip) and slowly pull it off the entire rack. This membrane, if left on, can become tough and rubbery when cooked, hindering both the texture and the penetration of smoke and rub. Additionally, trim any large, loose flaps of meat or excess fat for a more uniform cook.
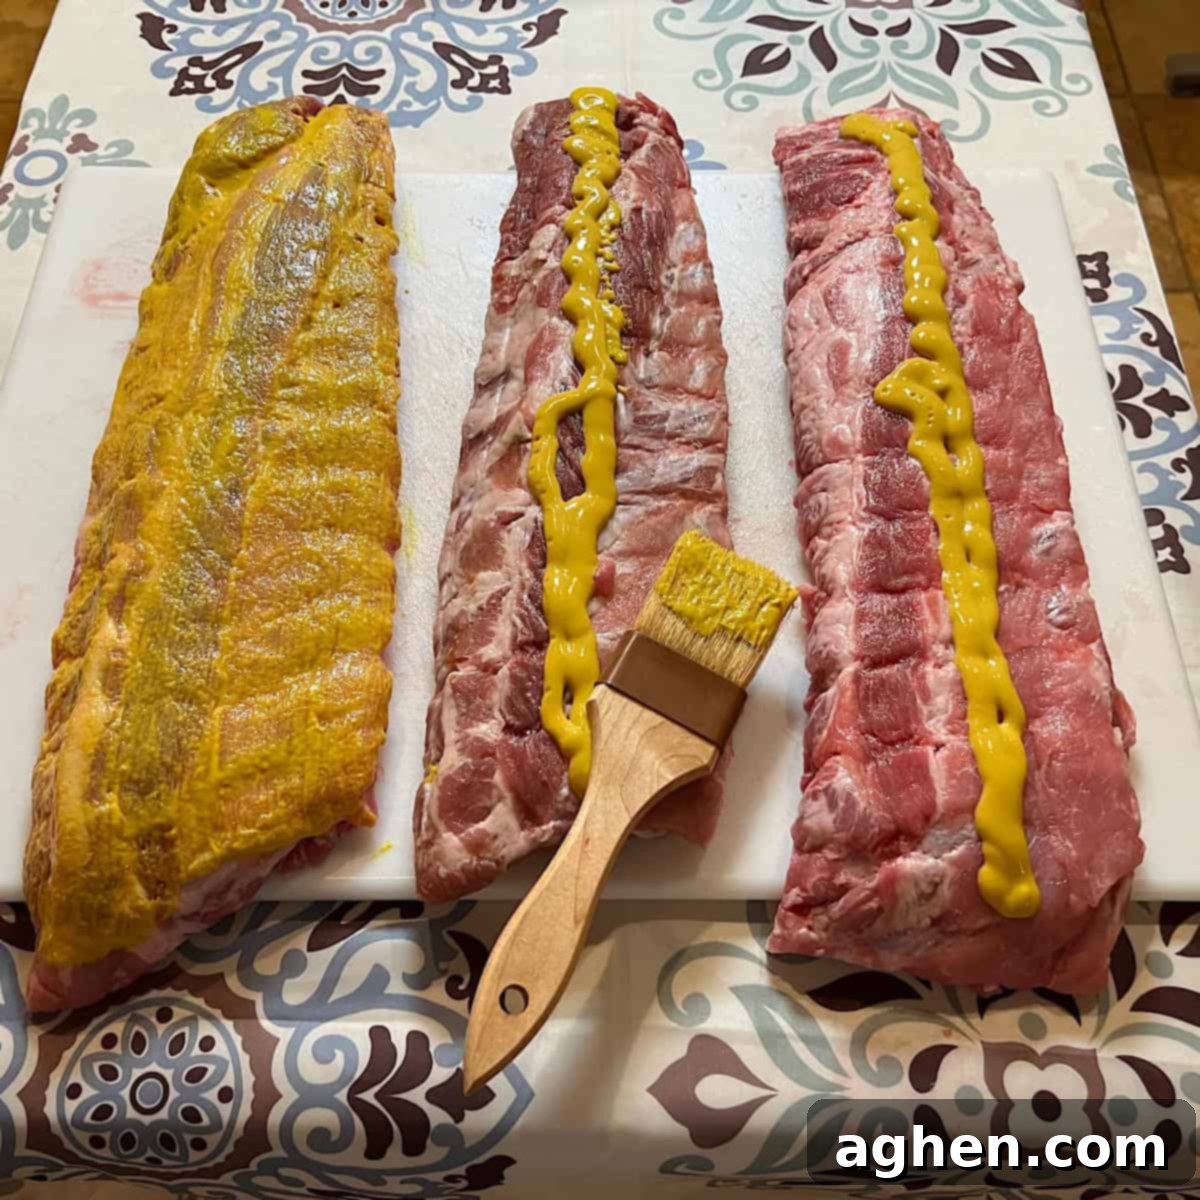
4. Apply the Yellow Mustard – With the membrane removed, liberally brush a thin, even layer of yellow mustard over the entire surface of the ribs, covering both the front and back. Ensure complete coverage, as this mustard layer is crucial for binding the rub and retaining moisture.
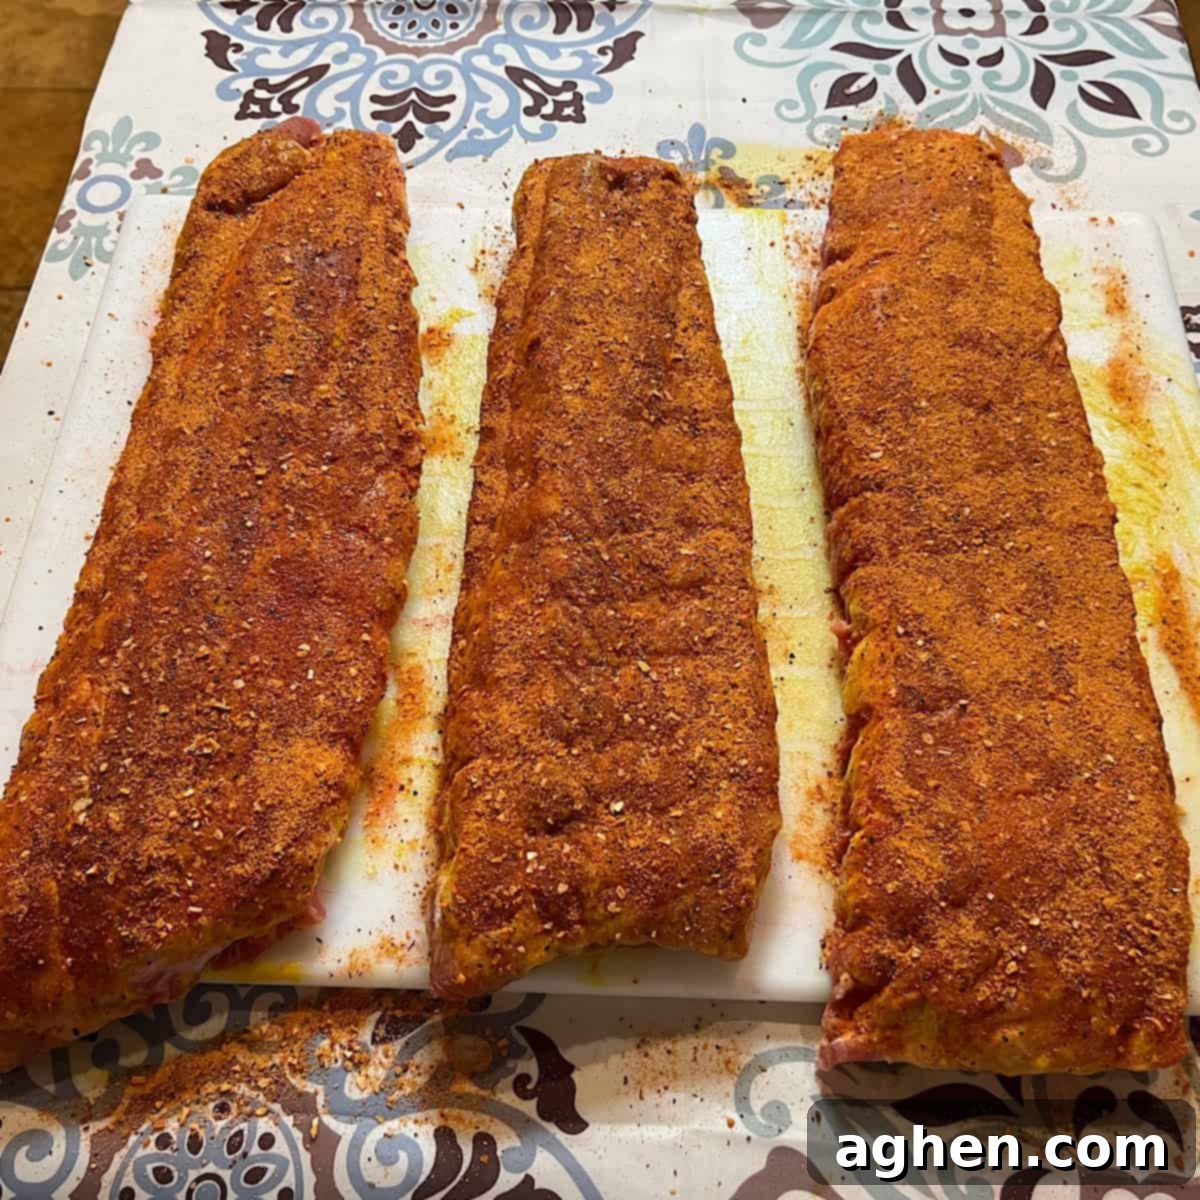
5. Generously Apply the Rib Rub – Now it’s time for flavor! Liberally sprinkle your chosen rib rub over all surfaces of the rack. Don’t be shy; a good layer of rub is essential. Once applied, gently pat the rub into the mustard layer to ensure it adheres well. This creates a flavorful crust that will transform into a delicious bark during smoking.
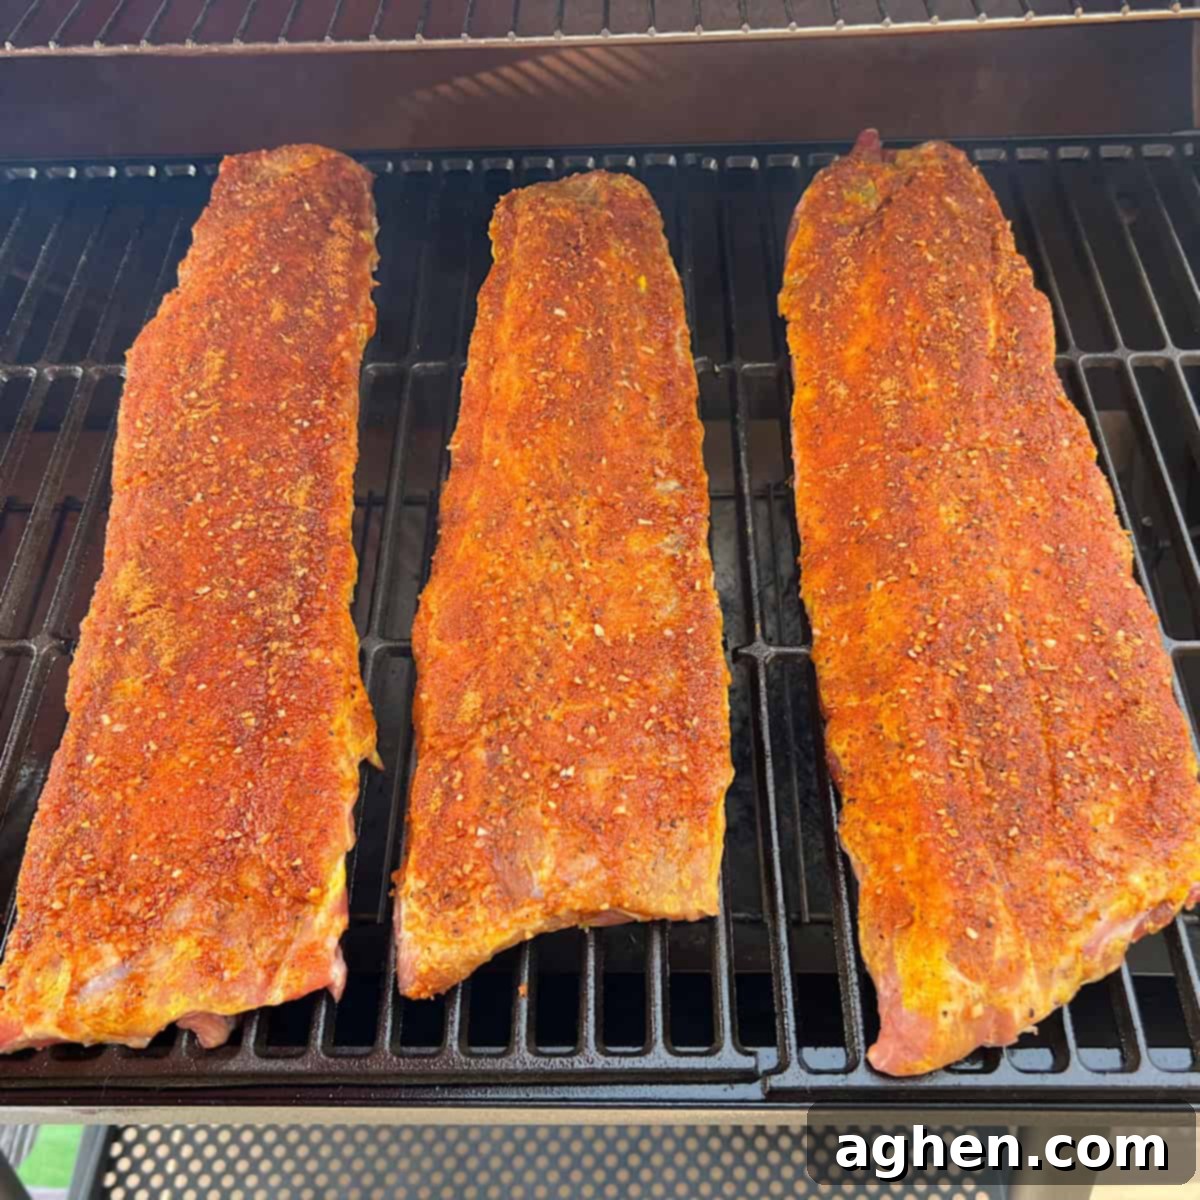
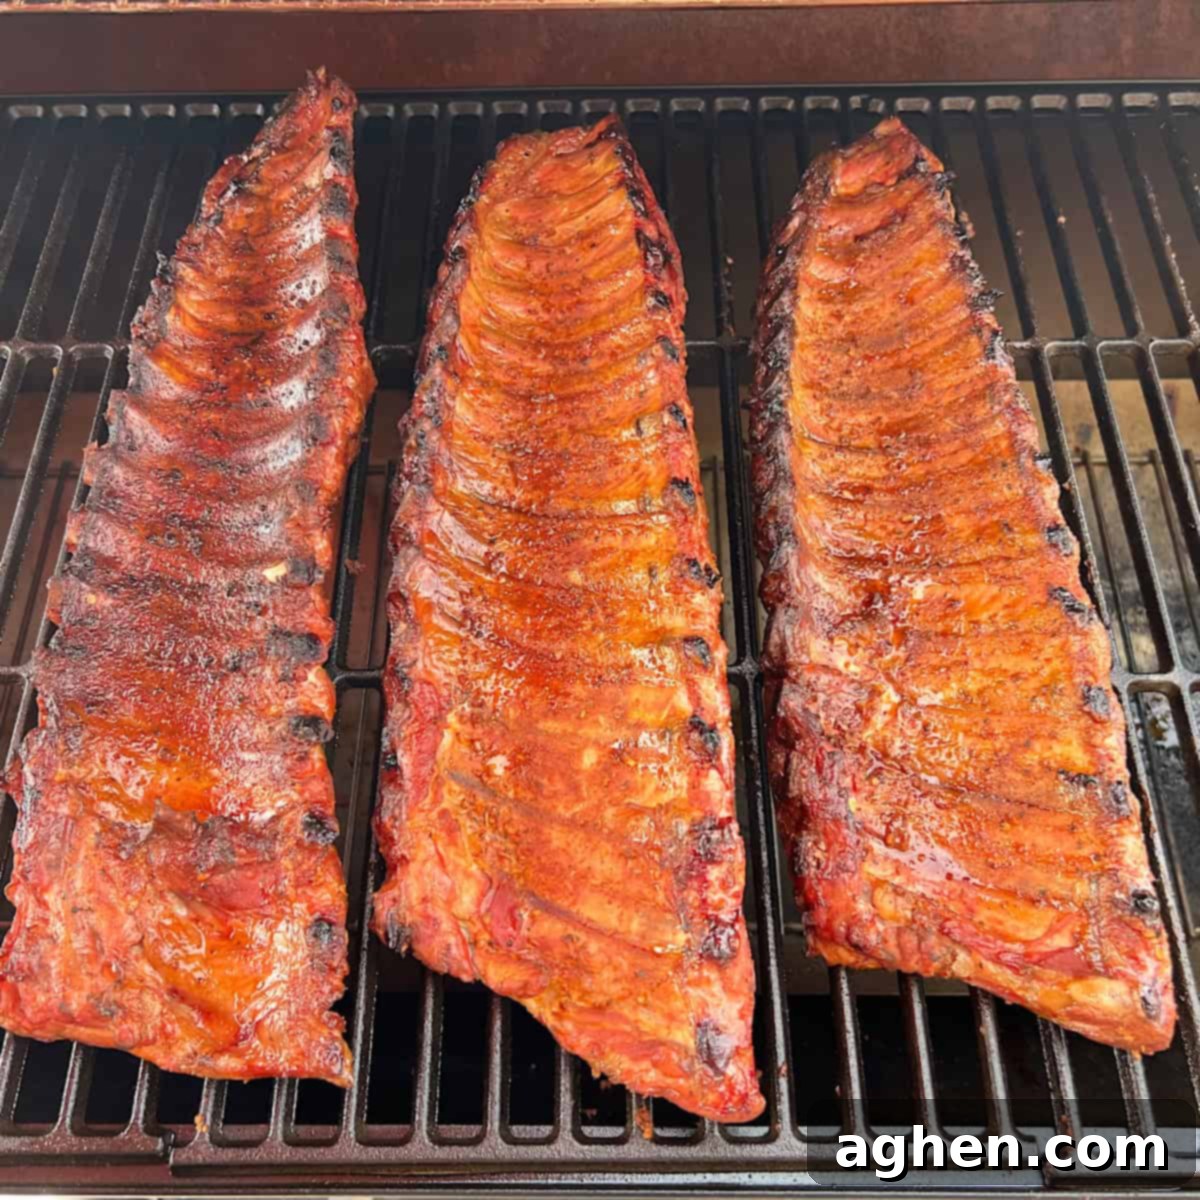
6. Place Your Rib Rack on the Grill Grate – Carefully place your seasoned ribs midway on the grill grate of your preheated offset smoker. Position them so they are not directly over the firebox (the primary heat source), allowing for indirect cooking. The goal is to smoke the ribs slowly, not to grill or char them, so maintaining distance from direct heat is vital.
7. Rotate and Flip for Even Smoking (First 2 Hours) – This initial smoking phase lasts for two hours. During this time, it’s crucial to rotate and flip your rib racks every half hour. Offset smokers often have hotter and cooler zones, especially closer to the firebox. Regular rotation ensures that all surfaces of the ribs are exposed evenly to the smoke and heat, resulting in a consistent smoke ring and bark formation. You will perform this rotation and flipping three times during this 2-hour period.
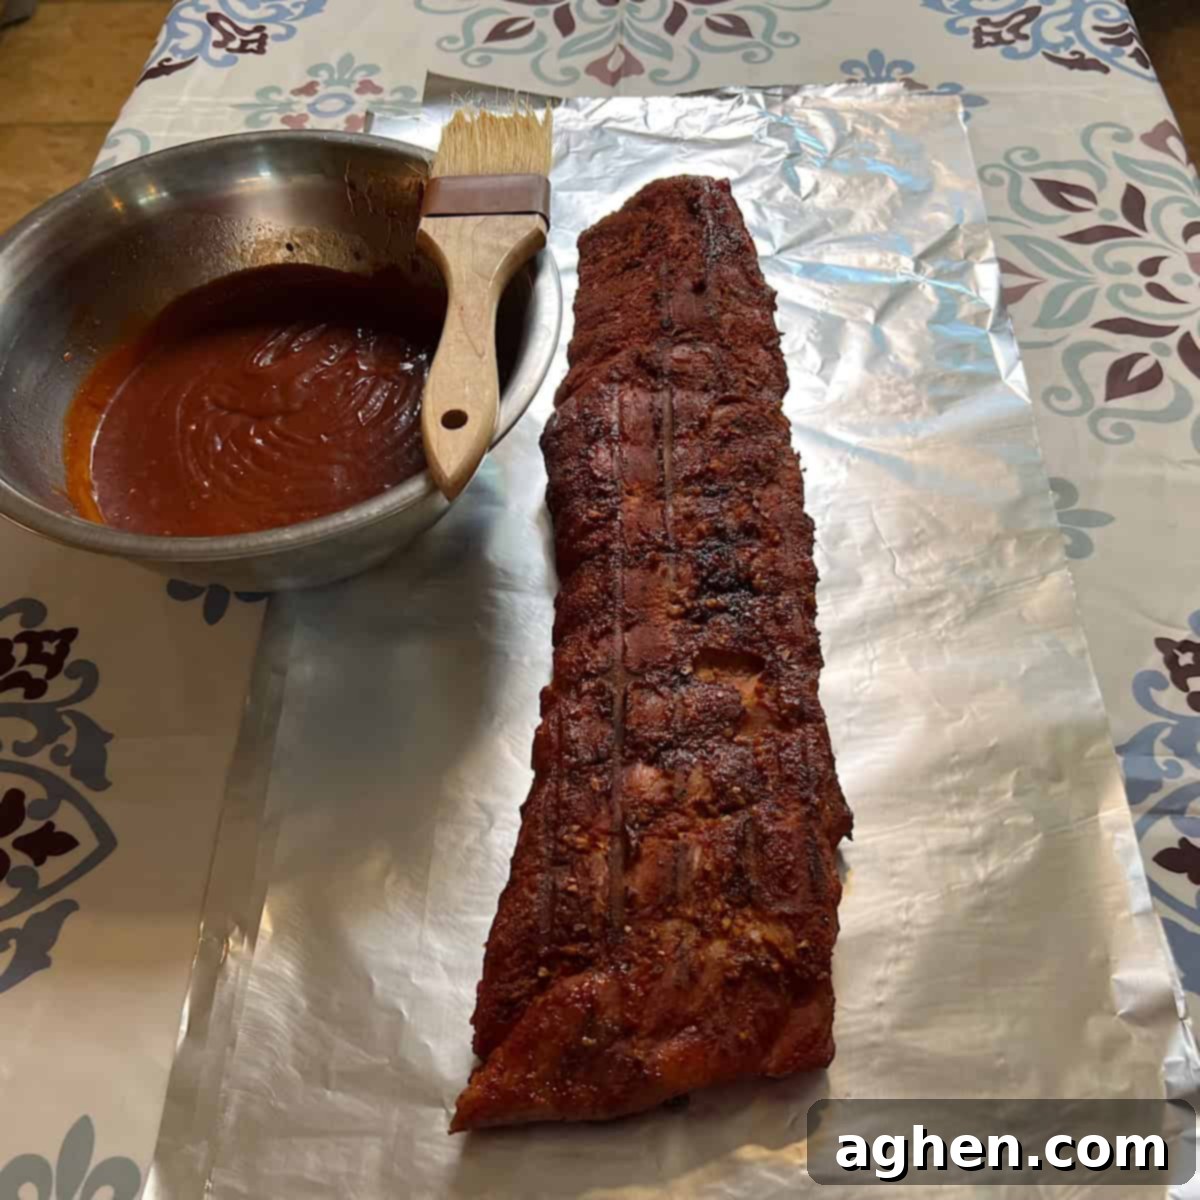
8. Wrap in Foil with BBQ Sauce (The “Crutch”) – After the initial two hours of smoking, gently remove the rib rack from the grill grate and place it onto a large, sturdy sheet of aluminum foil. Liberally brush the ribs with your chosen BBQ sauce, ensuring a generous coating. Then, tightly fold the aluminum foil around the rib rack, creating a completely sealed package. This “crutch” step is designed to tenderize the ribs by braising them in their own juices and the added BBQ sauce, making them incredibly moist and juicy. It also helps push them through the “stall” where meat temperature plateaus.
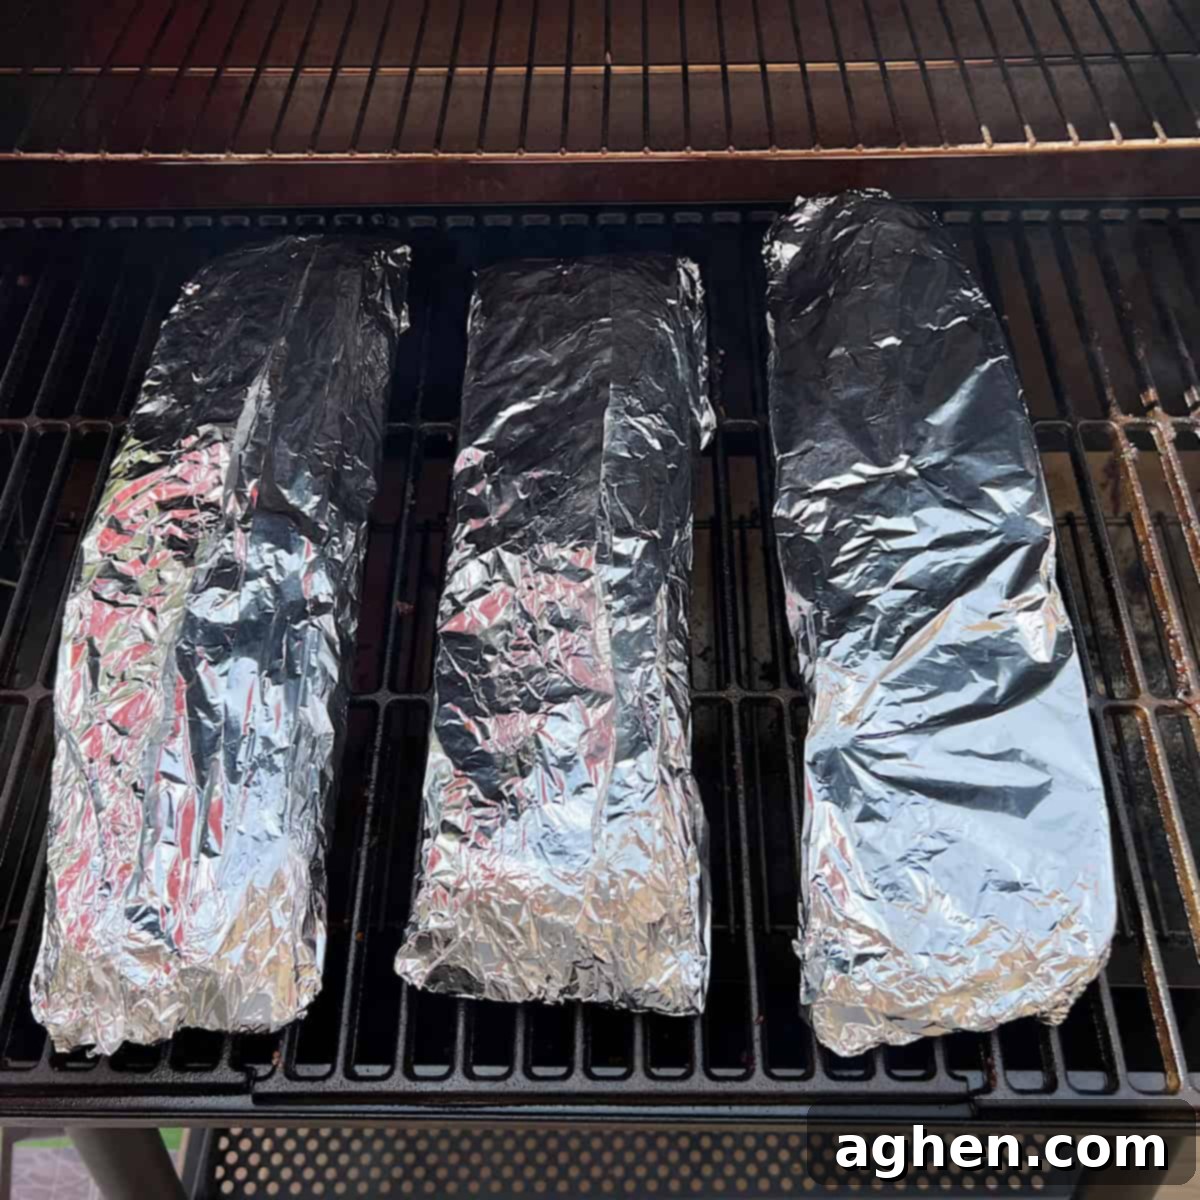
9. Return Wrapped Ribs to the Grill (Next 2 Hours) – Place the foil-wrapped rib rack back onto the grill grate, again midway to avoid direct heat. Similar to the first phase, continue to rotate and flip the wrapped ribs every half hour to ensure even cooking and tenderization. This second phase of smoking, while wrapped, also lasts for two hours, meaning you will rotate and flip the ribs three more times. This step is critical for achieving that melt-in-your-mouth texture.
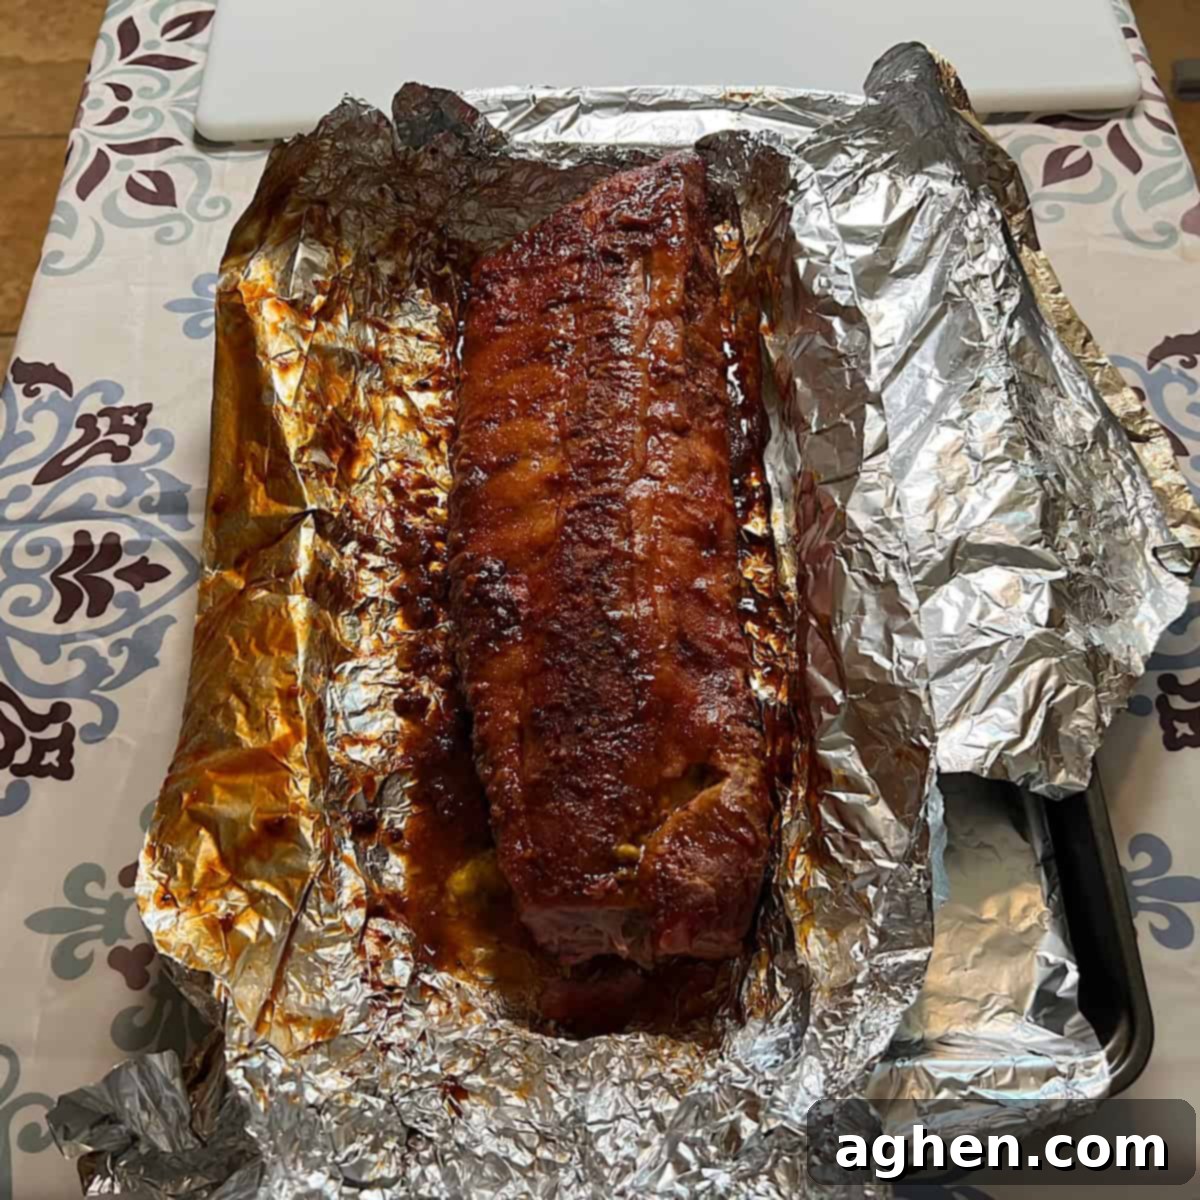
10. Remove Foil, Spray with Apple Juice, and Rest (Final 15 Minutes) – After the second two-hour phase, carefully remove the rib rack from the smoker and unwrap it from the aluminum foil. Place the unwrapped ribs back on the grill grate. At this point, generously spray the surface of the ribs with apple juice. Close the smoker lid and allow the ribs to rest on the grill for a final 15 minutes. This last step helps to set the bark, allows any excess moisture to evaporate, and provides a beautiful, slightly sweet glaze from the apple juice.
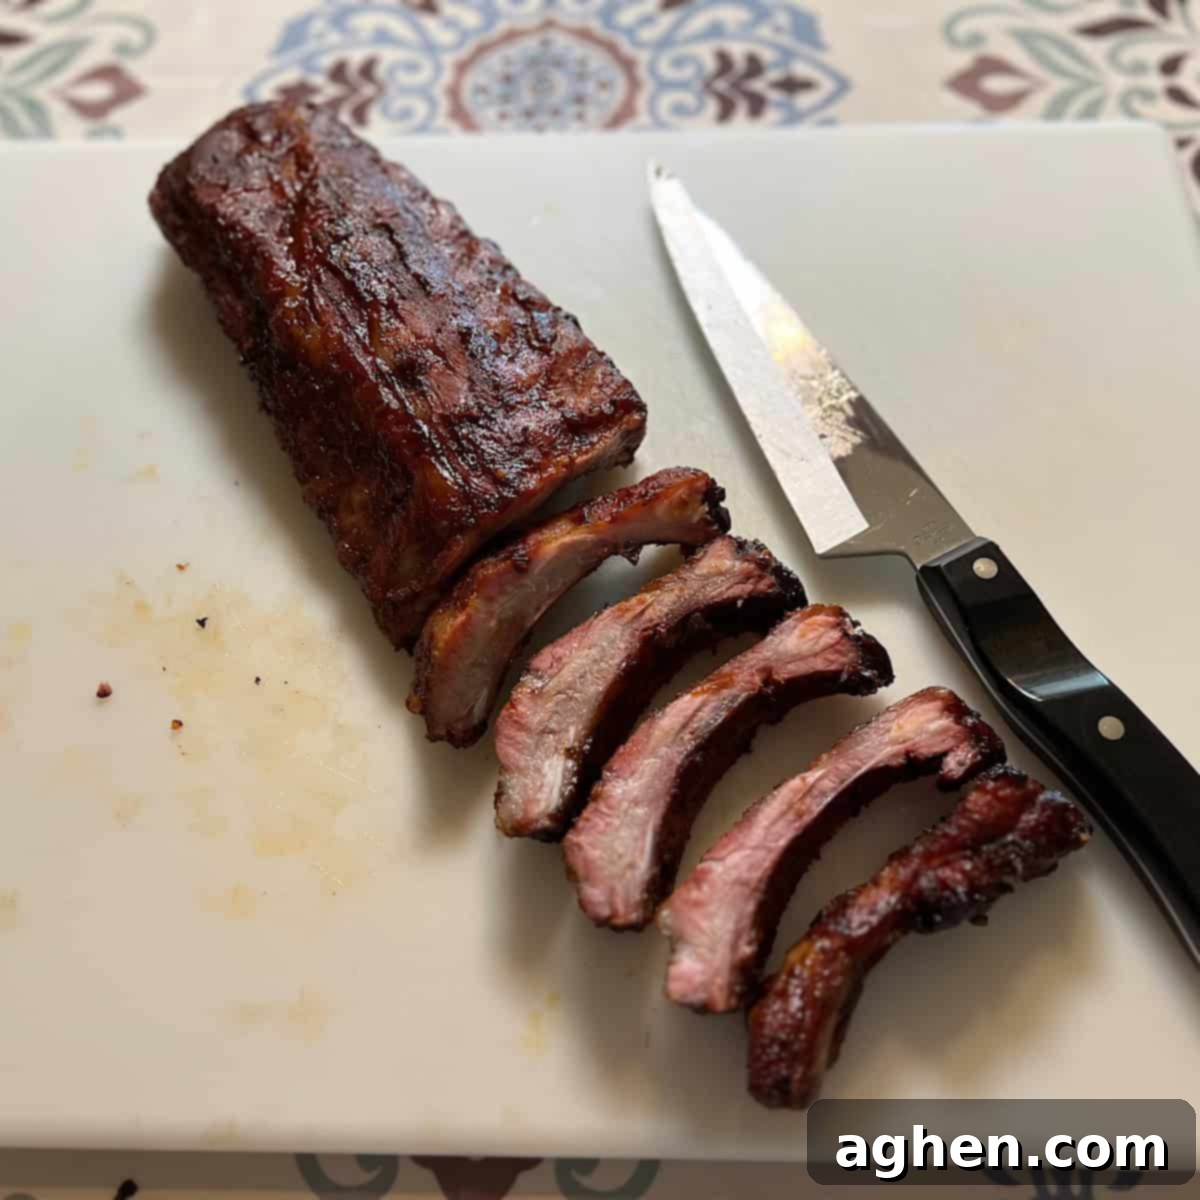
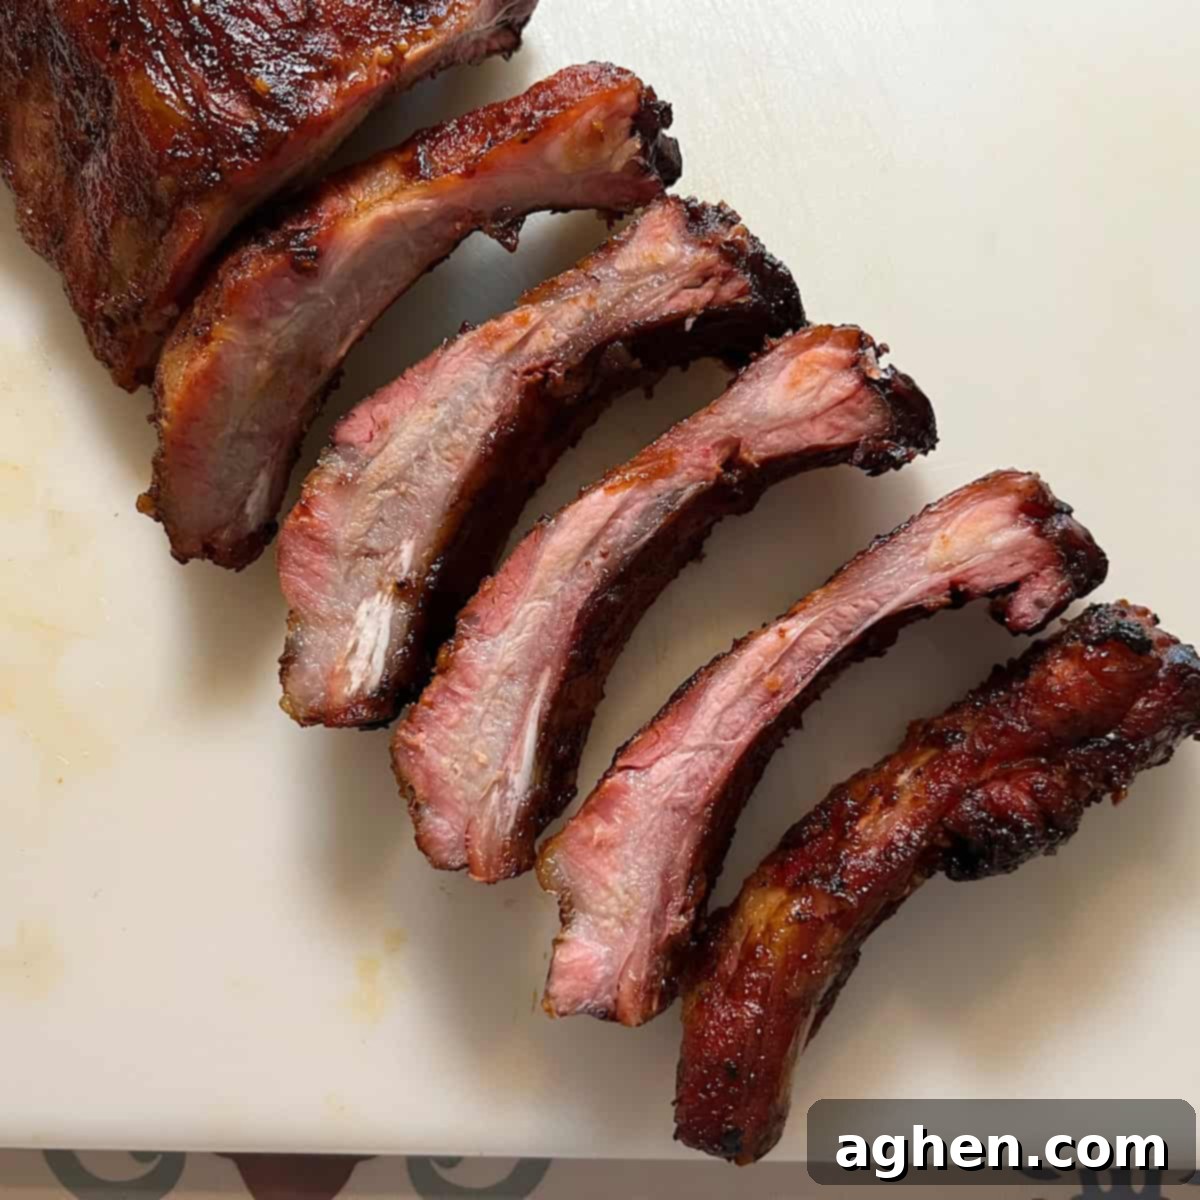
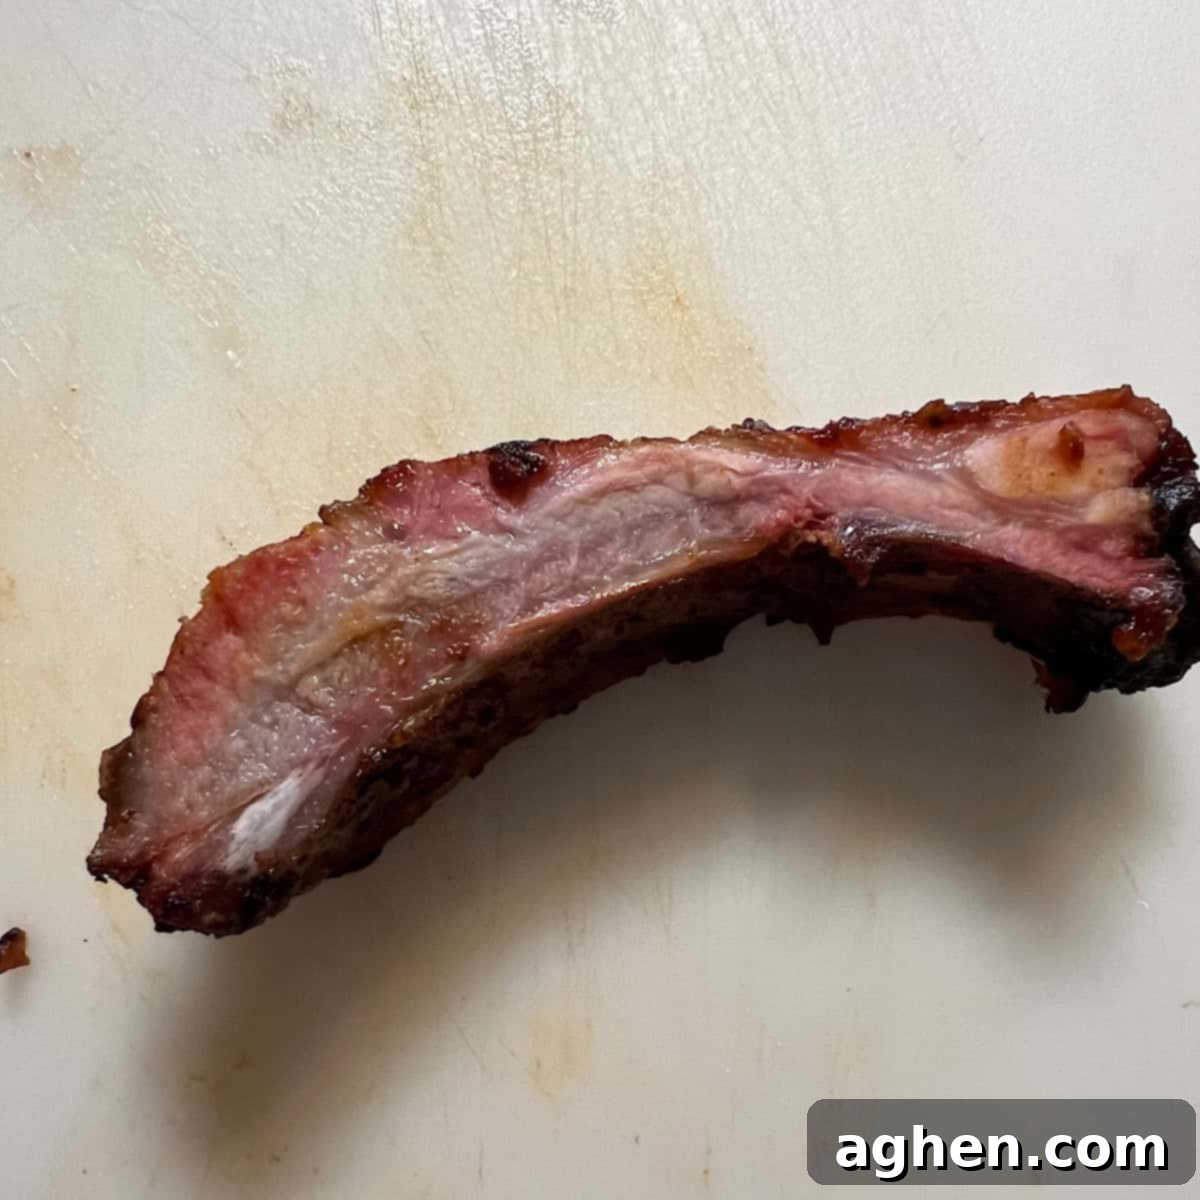
11. Slice and Serve with Your Favorite Sauce – Once the 15-minute rest period is complete, remove the ribs from the smoker. Place them on a cutting board and slice between the bones to create individual, perfectly smoked pieces. Serve these delectable ribs immediately, perhaps with extra BBQ sauce on the side for dipping, or your favorite accompanying dipping sauce. Enjoy the fruits of your labor!
Exciting Variations and Smart Substitutions for Your Smoked Pork Ribs
Smoking ribs is an art form, and there’s plenty of room for creative experimentation. Don’t be afraid to customize your approach to find your perfect flavor profile.
Explore Diverse BBQ Sauce Styles – The United States boasts a rich tapestry of regional BBQ styles, each with its own distinctive sauce. Trying different sauces can dramatically alter the flavor of your smoked pork ribs.
- Kansas City Style: Known for being thick, sweet, and tangy, often tomato-based with molasses and brown sugar.
- Carolina Style: Ranges from vinegar-and-pepper based (Eastern North Carolina) to mustard-based (South Carolina), offering a sharp, tangy contrast to rich pork.
- Memphis Style: Often focuses heavily on dry rub, but wet ribs feature a thinner, sweeter, and sometimes spicier tomato-based sauce.
- Texas Style: While beef is king, Texas BBQ sauces tend to be savory, less sweet, and often thin, with a focus on smoky depth.
Each time you smoke pork ribs, consider trying a different regional style. You’ll be amazed by the delicious differences and might just discover a new favorite!
Craft Your Own Pork Rib Rubs – While the market offers a multitude of excellent pork rib rubs, making your own allows for complete customization and a truly unique flavor. Here’s a simple, yet incredibly tasty, rub recipe you can easily make at home:
Chef Keith’s All-Purpose Pork Rib Rub
- ½ cup salt
- 1 tablespoon Cajun Seasoning
- 1 tablespoon sugar
- 1 tablespoon brown sugar
- 1 tablespoon paprika
- 1 tablespoon smoked paprika (adds an extra layer of smoky flavor)
- 1 tablespoon cumin
- 1 tablespoon black pepper
- 1 teaspoon cayenne pepper (adjust to your spice preference)
- 1 teaspoon garlic powder
- 1 teaspoon onion powder
Simply mix all the ingredients thoroughly in a bowl. Store your homemade rub in an airtight spice jar in a cool, dark place, and it will be ready for your next smoking adventure.
Experiment with Other Pork Rib Varieties – Beyond baby back ribs, the world of pork ribs offers two other fantastic choices: spare ribs and St. Louis style ribs. Both are incredibly delicious and widely available, though they come with slightly different characteristics and cooking considerations.
- Spare Ribs: These come from the belly of the hog, just below the loin. They are larger, meatier, and have more fat and cartilage than baby backs, which contributes to a rich, deep flavor. Due to their size and fat content, spare ribs will generally require a longer cooking time (often 5-6 hours or more).
- St. Louis Style Ribs: These are essentially spare ribs that have been trimmed of the sternum bone and cartilage, resulting in a more uniform, rectangular rack. This trimming makes them easier to handle and cut, and they cook more evenly than full spare ribs. They retain the robust flavor of spare ribs but with a slightly reduced cooking time compared to untrimmed spares.
When substituting, remember that their larger size and higher fat content mean these variations will need a longer smoking duration to achieve optimal tenderness.
Expert Tips and Tricks for Flawless Smoked Pork Ribs
Even seasoned pitmasters rely on a few clever tricks to make the smoking process smoother and more enjoyable. These tips will help you achieve outstanding results and keep your smoking area clean.
- Effortless Clean-Up Strategy: Smoking can be a messy business, with drippings and spills being almost inevitable. To save yourself a major cleaning headache, lay a large piece of cardboard or a tarp directly under your smoker before you even fire it up. This simple barrier will catch all the grease and debris, making disposal a breeze. Trust me, learning this the hard way is not fun!
- Mess-Free Rib Package Opening – Opening the vacuum-sealed packaging of ribs can often result in juices spilling everywhere. Here’s a super-clean method: take the entire rib package to your kitchen sink. Using a pair of sharp scissors, cut open the plastic bag at the largest end of the rib rack. Reach in, pull the whole rack of ribs out, then turn the empty package over and allow any residual blood or juices to drain neatly into the sink. This technique ensures a tidy start to your rib preparation with no fuss.
- Always Have Two Spray Bottles Handy – Beyond the apple juice for moistening your ribs, a second spray bottle filled with plain water is an absolute must. Flare-ups in your firebox are a common occurrence, especially with fatty meats. A quick spritz of water can safely and effectively dampen these flare-ups, preventing your ribs from charring and helping to maintain a consistent smoking temperature. Always be prepared!
- Minimize Opening the Smoker Lid – This is a golden rule in low-and-slow smoking: “If you’re looking, you ain’t cooking!” Besides the scheduled times for rotating and flipping your rib racks, resist the urge to peek. Every time the smoker lid is opened, the internal temperature plummets, and it takes valuable time for your smoker to recover and return to the optimal 250-degree Fahrenheit cooking temperature. Trust the process; your ribs are developing a beautiful smoke ring and becoming perfectly tender inside. Patience is a virtue in BBQ!
Smoked Pork Ribs
Equipment
-
1 Offset Smoker
Ingredients
- 1 rack baby back pork ribs
- 1/2 cup yellow mustard
- 1 cup rib rub, use your favorite store-bought or refer to the “Variations” section above to make your own at home
- 1 cup BBQ sauce, use your favorite store-bought brand
- 1 cup apple juice
Instructions
-
1. Preheat Your Smoker: Bring your offset smoker to a consistent temperature of approximately 250 degrees Fahrenheit (121°C) and maintain it throughout the entire process.
-
2. Prepare Ribs: Use a paper towel to remove any excess moisture from the rib rack surface.
-
3. Remove Membrane & Trim: Using a sharp knife or spoon, separate the clear membrane from the underside of the rib rack. Grab the membrane with a paper towel and firmly pull it off. Trim any loose meat or excess fat.
-
4. Apply Mustard: Liberally brush yellow mustard over the entire rib rack, front and back, ensuring even coverage.
-
5. Apply Rib Rub: Generously shake on your chosen rib rub over the entire rack (front and back), then gently pat it to ensure good adhesion to the mustard layer.
-
6. Smoke Unwrapped (Phase 1 – 2 Hours): Place the seasoned ribs midway on the smoker grate, ensuring they are not too close to the firebox. Close the lid.
-
7. Rotate & Flip (Phase 1): During this first 2-hour smoking phase, rotate and flip the rib racks every half hour to ensure even exposure to heat and smoke. You will do this three times.
-
8. Wrap in Foil with BBQ Sauce (Phase 2 – 2 Hours): Carefully remove the ribs from the smoker. Place each rack on a large sheet of aluminum foil. Liberally brush with BBQ sauce, then tightly fold the foil around the rack to form a seal.
-
9. Return Wrapped Ribs to Smoker (Phase 2): Place the foil-wrapped ribs back on the grill grate, midway from the heat source. Continue to rotate and flip the wrapped ribs every half hour for the duration of this 2-hour phase (three times).
-
10. Unwrap & Finish (Final 15 Minutes): Remove the ribs from the smoker and carefully unwrap them from the aluminum foil. Place the unwrapped ribs back on the grill grate. Liberally spray the surface with apple juice. Close the lid and let them rest on the grill for 15 minutes.
-
11. Slice and Serve: Remove the ribs from the smoker, slice between the bones to create individual pieces, and serve immediately with extra BBQ sauce or your favorite dipping sauce.
