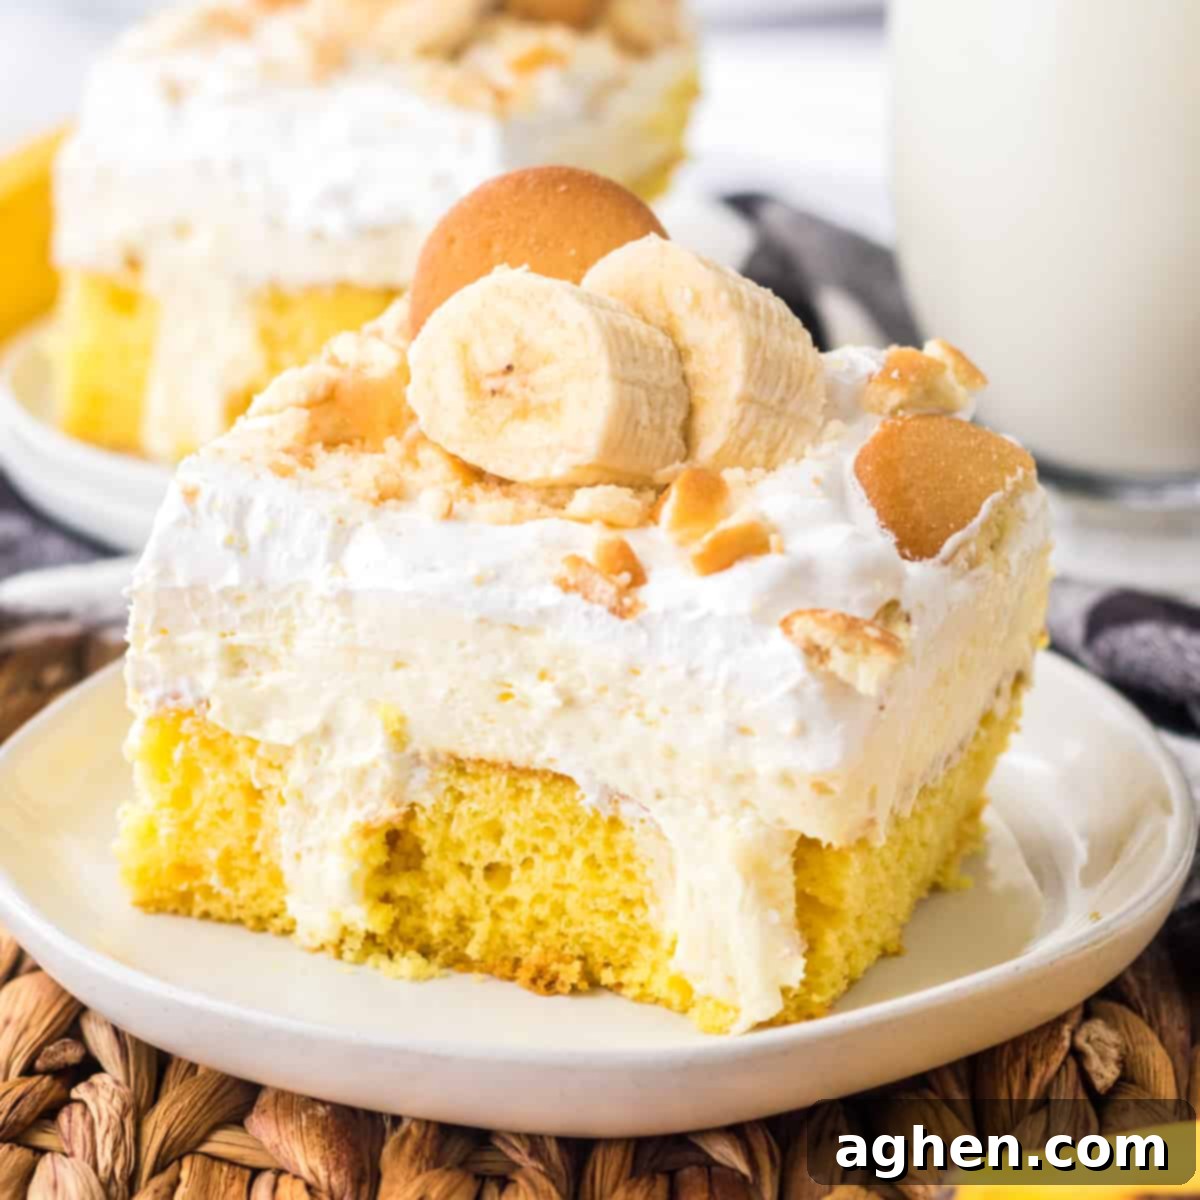
Ultimate Banana Pudding Poke Cake: An Easy, Creamy, and Crowd-Pleasing Dessert
Prepare to delight your taste buds with the **Ultimate Banana Pudding Poke Cake**, a heavenly combination of two beloved desserts! This recipe takes the classic comfort of banana pudding and ingeniously folds it into a moist, tender yellow cake. Starting with a simple box mix, the cake is generously poked with holes, then filled with a rich, creamy concoction of banana pudding, smooth cream cheese, and luscious sweetened condensed milk. Topped with a fluffy layer of Cool Whip and crunchy ‘Nilla wafers, this dessert is an absolute showstopper. It’s not only incredibly delicious but also surprisingly easy to make, making it the perfect choice for family gatherings, potlucks, holidays, or simply a sweet weeknight treat.
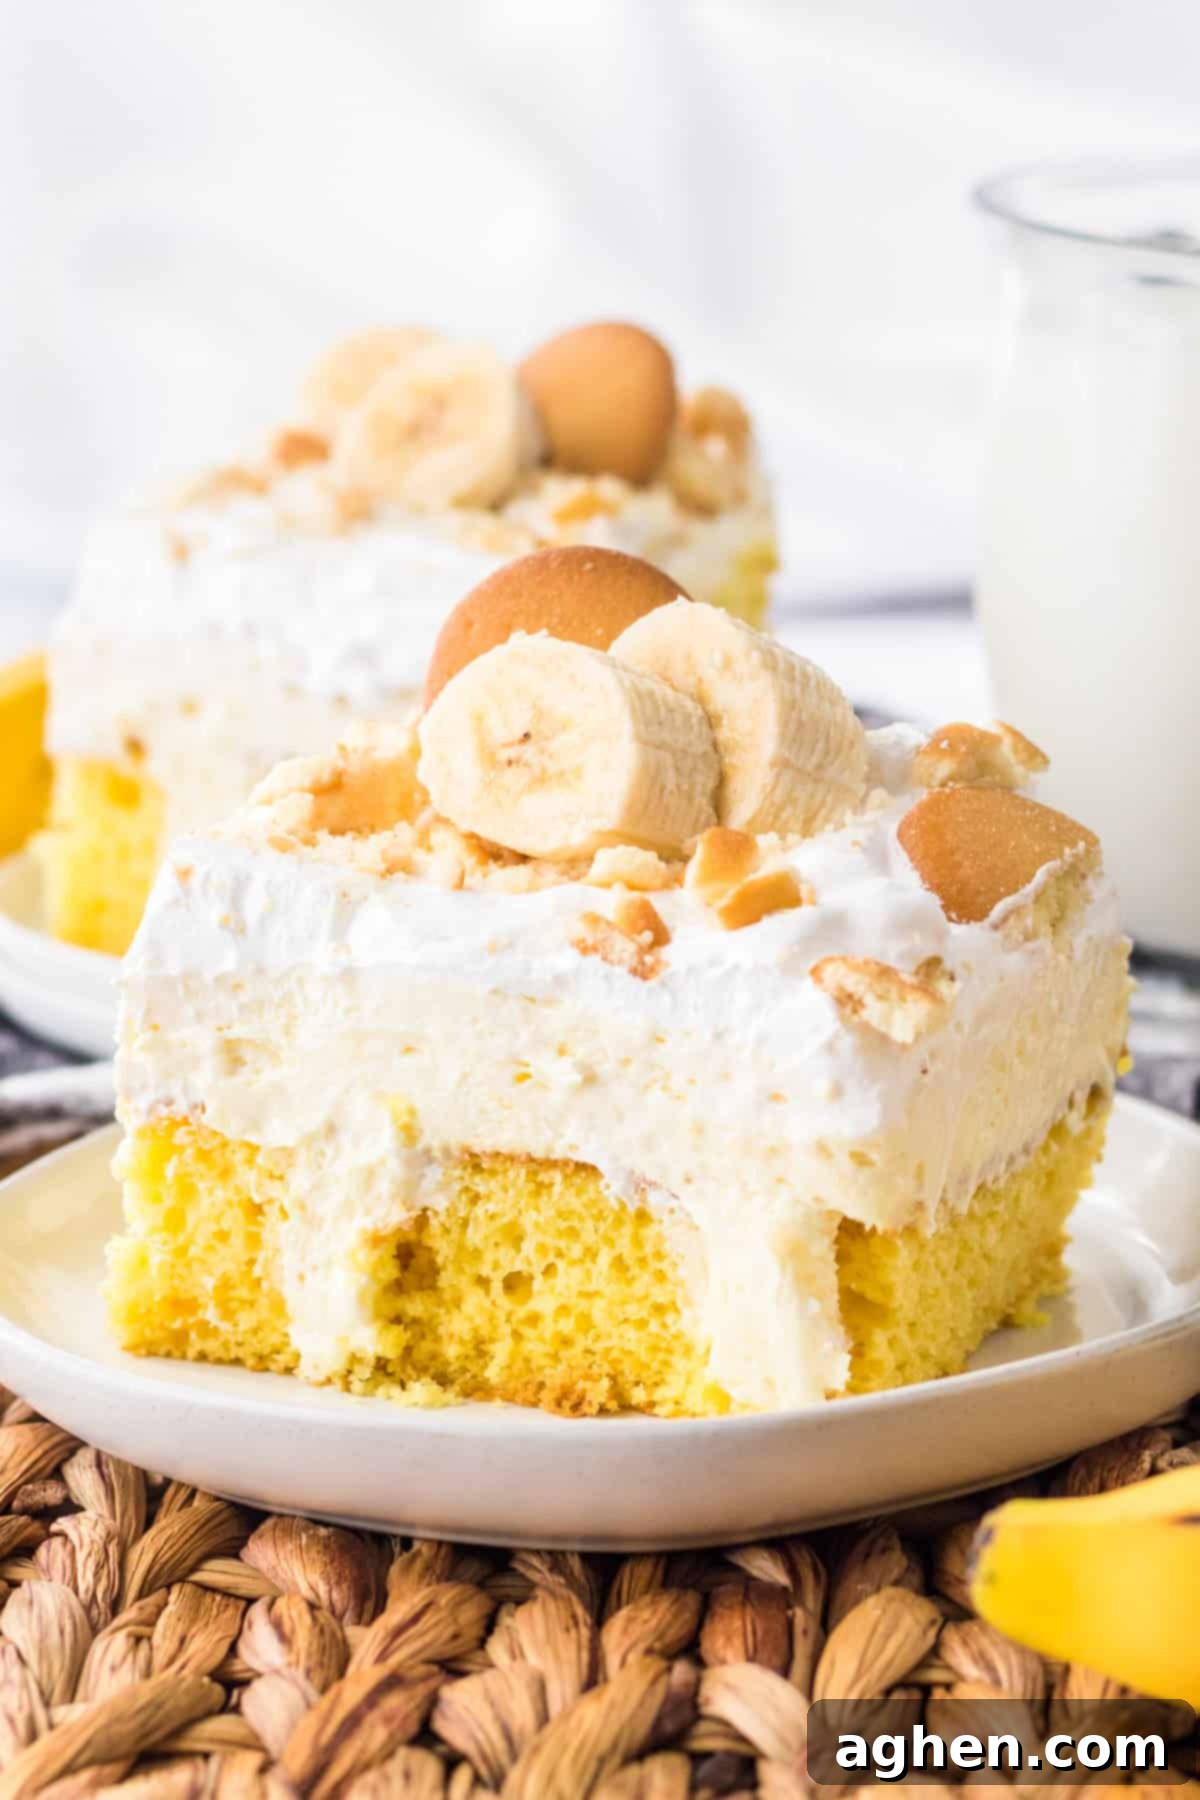
This delightful **banana pudding poke cake** marries the nostalgic charm of a classic banana pudding with the fun, surprising element of a filled cake. What makes it truly special is how the creamy filling seeps into every crevice of the cake, infusing it with incredible flavor and moisture. Beyond its irresistible taste, this is a fantastic make-ahead dessert. The flavors deepen and the texture improves significantly when you prepare it the day before and allow it to chill thoroughly overnight. This means less stress on event day and more time to enjoy with your loved ones!
If you’re searching for a surefire hit dessert to bring to a party or potluck, look no further. Seriously, slices of this banana poke cake vanish almost instantly! Its universal appeal and comforting flavors make it a favorite among all ages, guaranteeing rave reviews and empty plates every single time.
The best part about this incredible dessert is its simplicity. You start with a convenient boxed cake mix, bake it to golden perfection, then create small channels throughout its surface. These holes are then filled with a luxurious, creamy blend of instant banana pudding, velvety cream cheese, a touch of sweetened condensed milk, and light whipped topping. This unique filling technique ensures every bite is bursting with rich banana flavor and a wonderfully moist texture. Your friends and family will undoubtedly be clamoring for the recipe, astonished by how easy such an impressive dessert can be!
If **poke cakes** are your ultimate weakness, you’re in for a treat! Don’t miss out on my other fantastic recipes that offer a variety of flavors and textures. For bright, fruity delights perfect for warmer months, try my Lemon Jello Poke Cake, the tropical Coconut Cream Poke Cake, or the ever-popular Strawberry Jello Poke Cake. If you crave something deeply decadent with rich chocolate and caramel notes, my Snickers Poke Cake is a must-try. And for those who appreciate a creamy, chocolatey indulgence with a hint of something extra, my Baileys Poke Cake is simply divine. But for now, let’s dive into creating this truly irresistible banana poke cake with pudding, a dessert that promises to be a new family favorite!
Essential Ingredients for Your Banana Pudding Poke Cake
This section provides detailed ingredient notes and clever substitution options to help you perfect your banana pudding poke cake. For precise measurements, a complete list of ingredients, and step-by-step instructions, please refer to the printable recipe card located at the very end of this post.
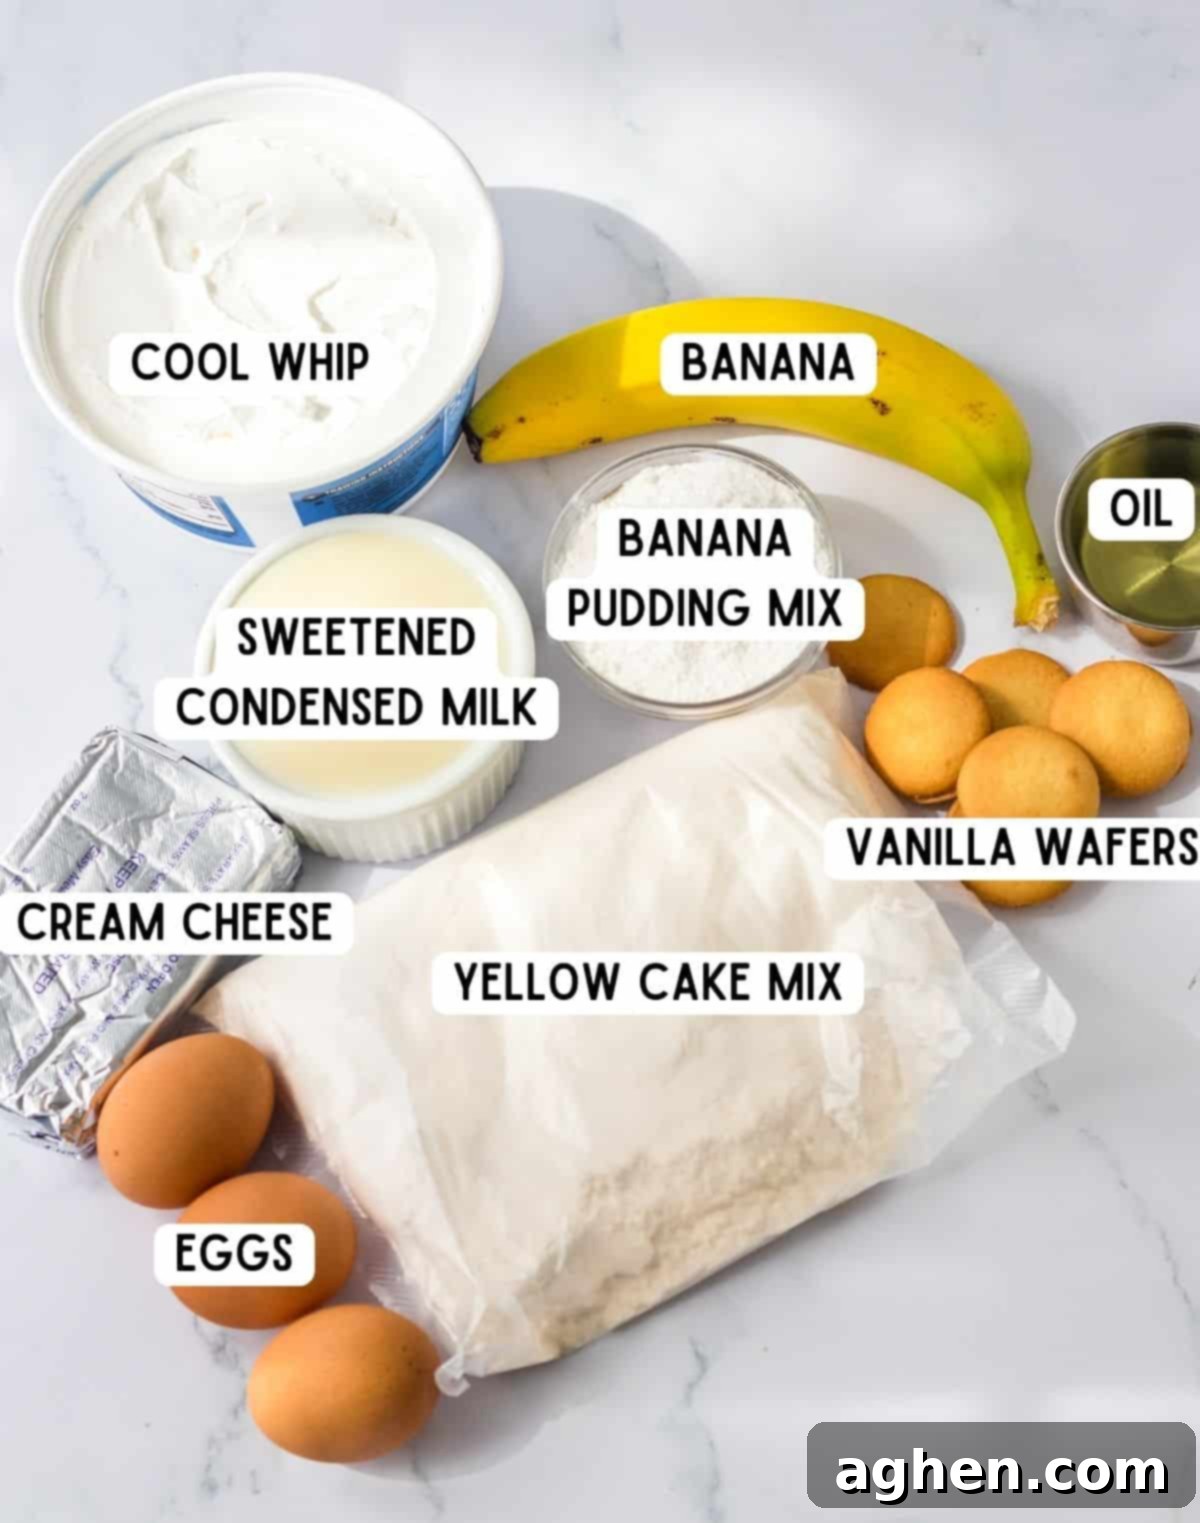
- Yellow Cake Mix — The foundation of our delicious poke cake! Any brand of yellow cake mix will work beautifully. Be sure to check the specific instructions on the back of your chosen box mix for the exact quantities of eggs, oil, and water required to prepare the cake batter perfectly. This ensures a moist and flavorful cake base.
- Cream Cheese — It’s crucial to allow your cream cheese to soften completely to room temperature before mixing. This ensures a smooth, lump-free filling that combines effortlessly with other ingredients. The cream cheese adds a delightful, subtle tanginess to the sweet pudding mixture, balancing the flavors and preventing the dessert from being overly sweet.
- Sweetened Condensed Milk — This magical ingredient is key to the filling’s luscious texture and rich sweetness. It contributes to the creamy consistency and provides an unparalleled depth of flavor, making the pudding mixture incredibly decadent and smooth.
- Whipped Topping — A thawed tub of frozen whipped topping, such as Cool Whip, makes the filling incredibly light, airy, and fluffy. It also forms a gorgeous, cloud-like top layer for the cake. Any brand of frozen whipped topping you prefer will work, but remember to let it thaw fully in the refrigerator before you begin.
- Instant Banana Pudding Mix — This is where the star flavor comes from! Opt for the large 5.1-ounce box to ensure ample banana goodness. Crucially, make sure you pick up *instant pudding mix*, not the “cook and serve” variety, as it will not set correctly for this recipe.
- Milk — Whole milk is recommended for combining with the instant pudding mix. Its richness helps create a perfectly pourable, creamy, and velvety smooth pudding that will soak beautifully into the cake holes.
- Vanilla Wafers — You simply cannot have an authentic banana pudding-themed dessert without these iconic, crunchy cookies! They provide a delightful textural contrast and a classic flavor that complements the banana pudding perfectly. Use them whole or crushed for topping.
- Fresh Bananas — While optional, topping your cake with freshly sliced bananas just before serving elevates the authentic banana pudding experience. The vibrant color and natural sweetness of fresh bananas add an extra layer of deliciousness and aesthetic appeal. Be sure to add them right before serving to prevent browning.
Essential Equipment for Crafting This Delicious Poke Cake
To effortlessly prepare this easy banana pudding poke cake, you’ll need a few common kitchen tools:
- Measuring cups (for both wet and dry ingredients)
- Large mixing bowls (at least two for separate mixtures)
- Wooden spoon (essential for poking holes!)
- Hand mixer (for creaming cheese)
- Whisk (for pudding mix)
- Rubber spatula (for spreading and combining)
- 9×13 inch baking dish (for the cake)
How to Make the Ultimate Banana Pudding Poke Cake: Step-by-Step Guide
This section provides a visual, step-by-step guide with photos and clear instructions to help you create this amazing dessert. For the complete, printable recipe card with exact measurements and detailed notes, please scroll down to the end of this post.
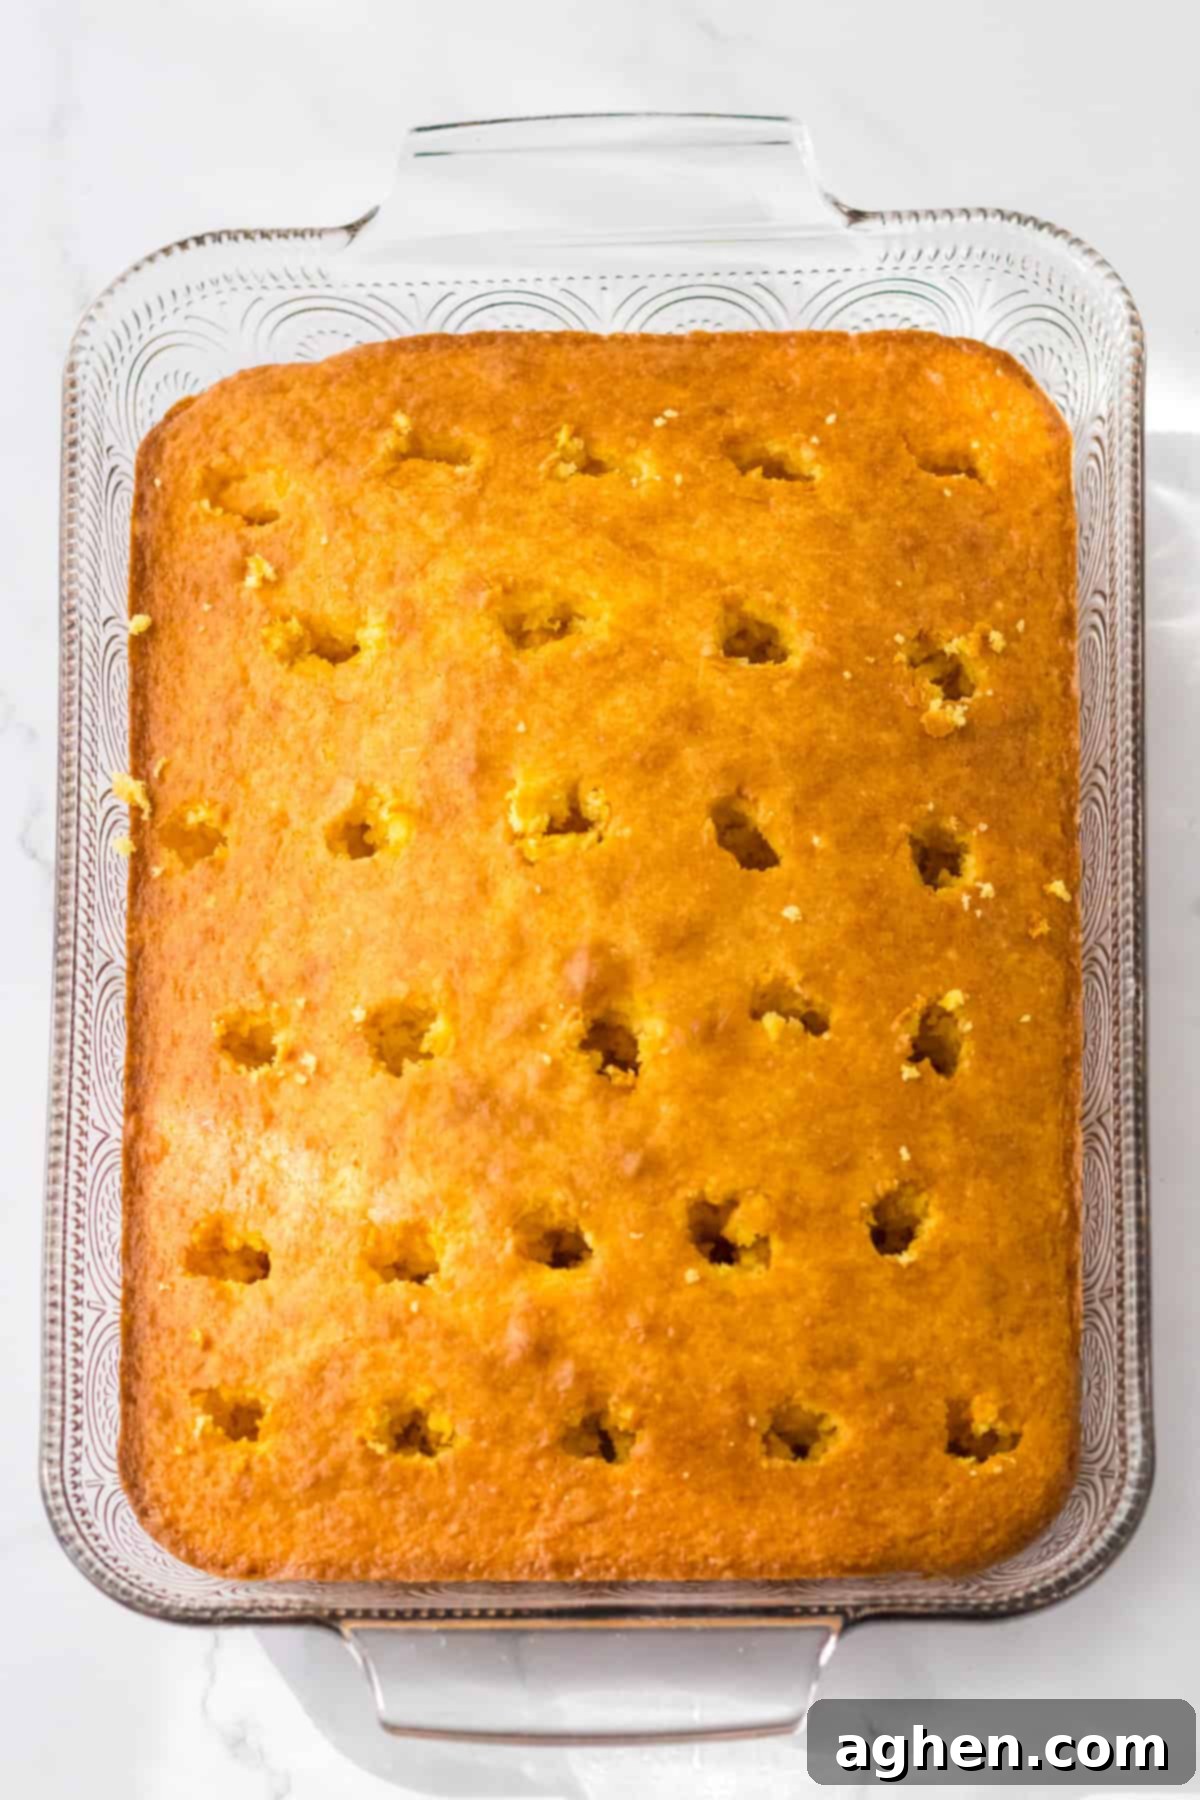
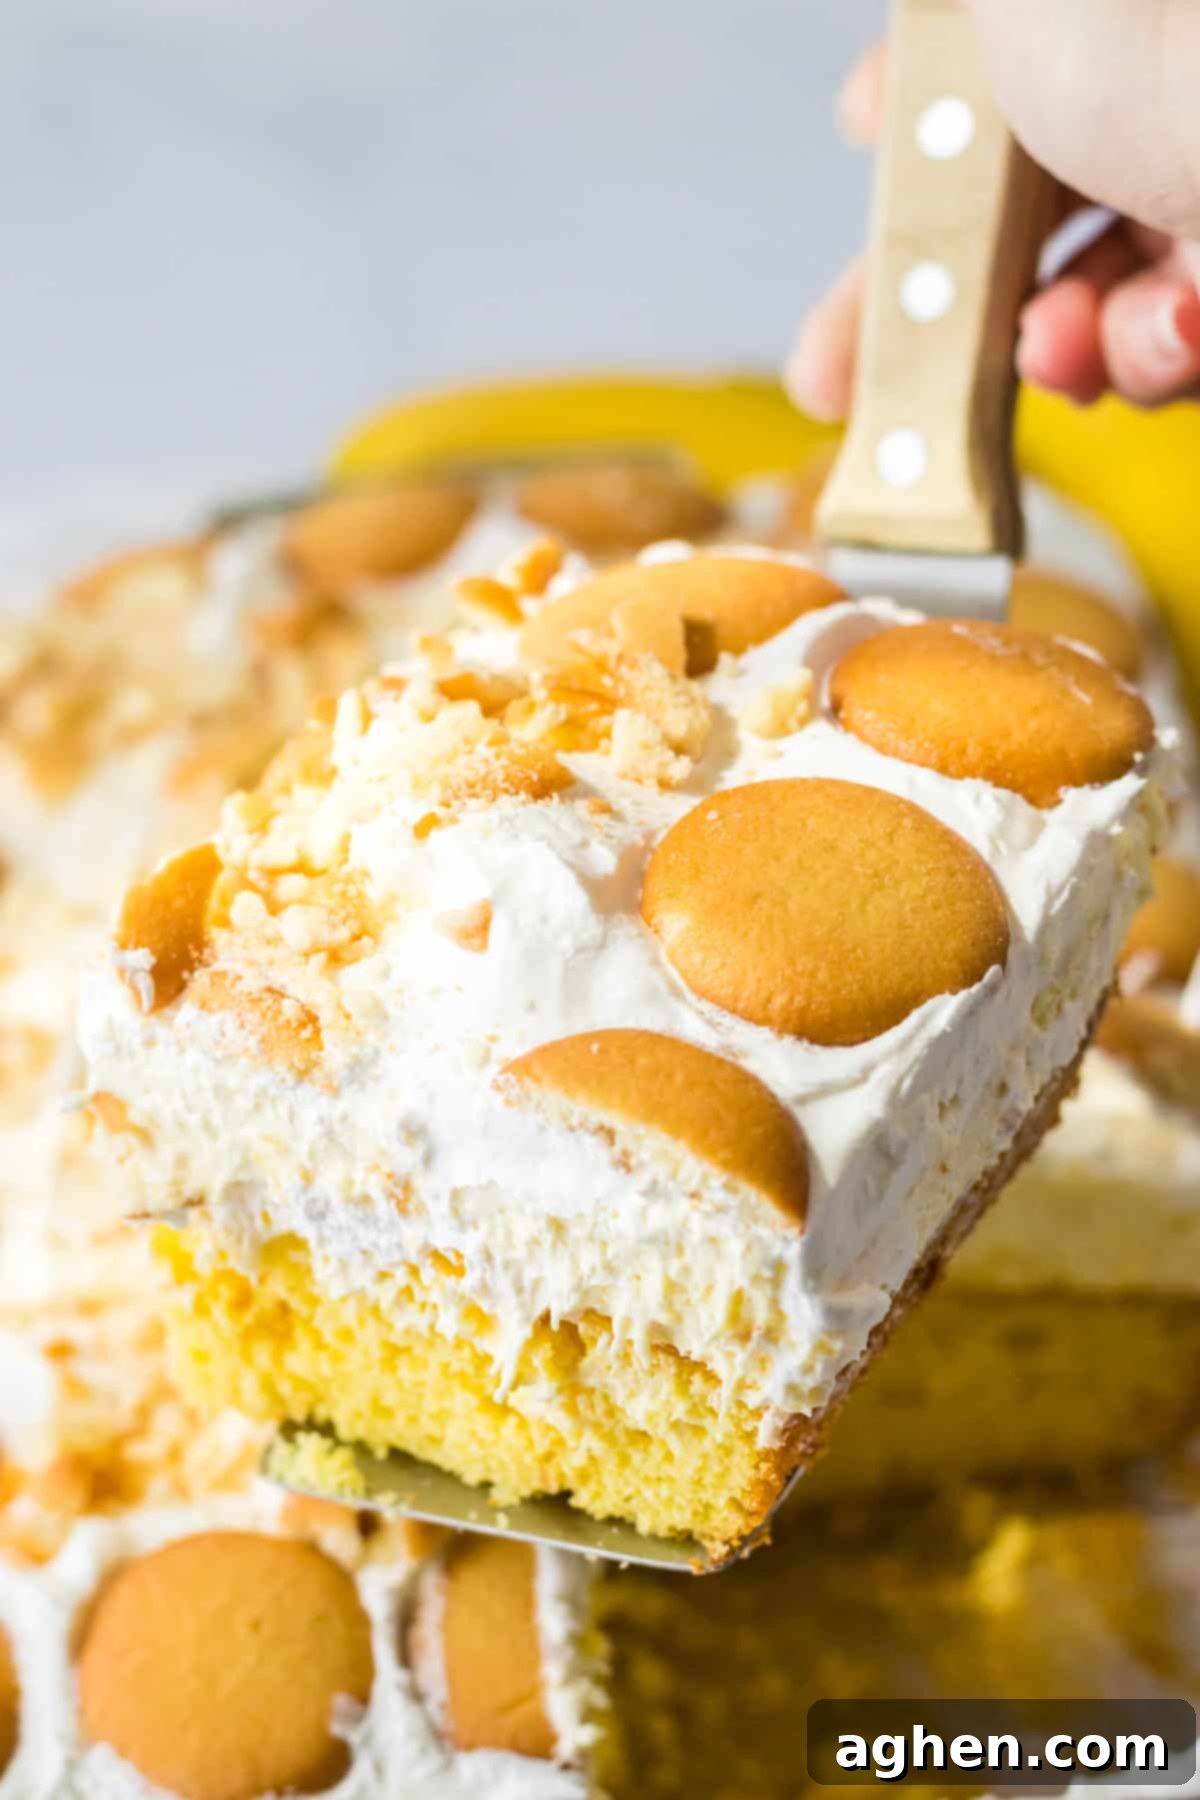
Step 1: Bake Your Yellow Cake Foundation. In a large mixing bowl, prepare your favorite yellow boxed cake mix according to the package directions. Pour the batter into a greased 9×13-inch baking dish and bake as instructed. Once the cake is baked to a golden finish, remove it from the oven and allow it to cool on a wire rack for approximately 15 minutes. This brief cooling period is crucial before poking the holes, as it helps the cake maintain its structure.
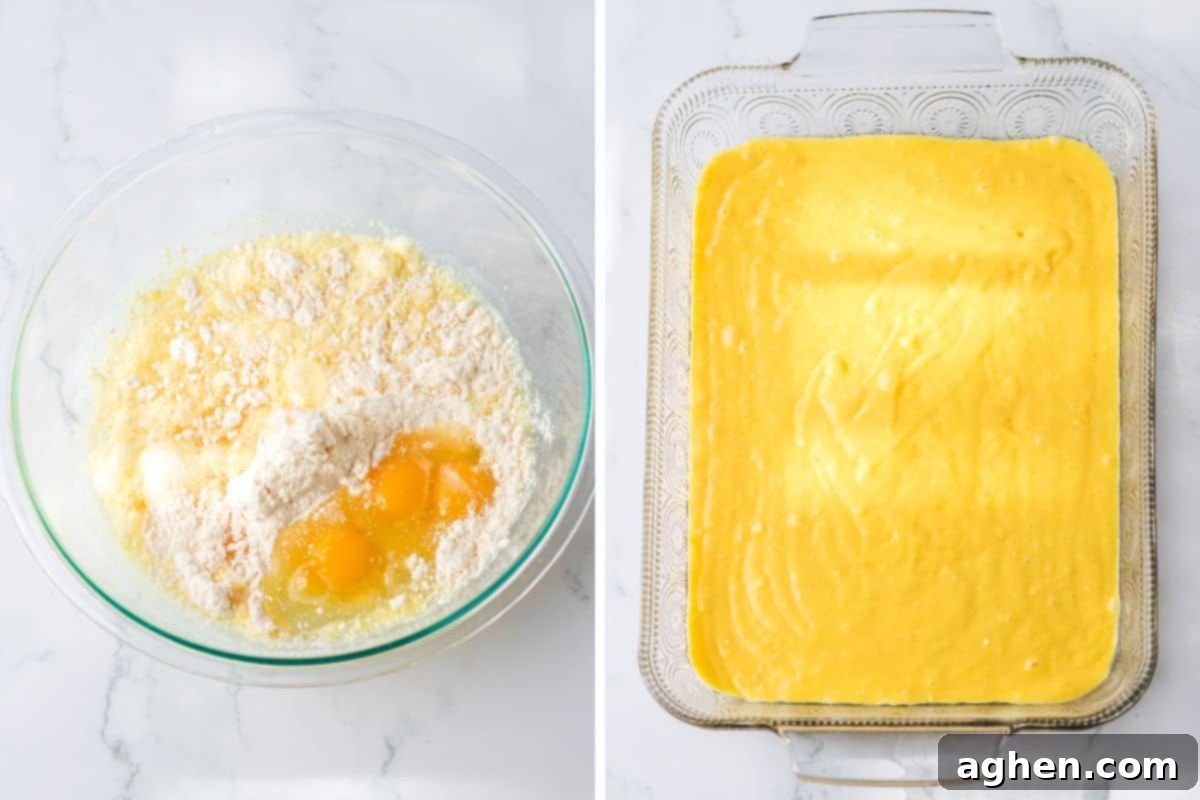
Step 2: Create the “Poke” Effect. Grab a wooden spoon, preferably one with a rounded handle. Use the handle to generously poke large, evenly spaced holes all over the warm cake’s surface. Don’t be shy – give the spoon a gentle wiggle in each hole to ensure they are wide enough to accommodate the creamy filling. These holes are essential for allowing the delicious pudding mixture to seep deep into the cake, creating its signature moist and flavorful texture.
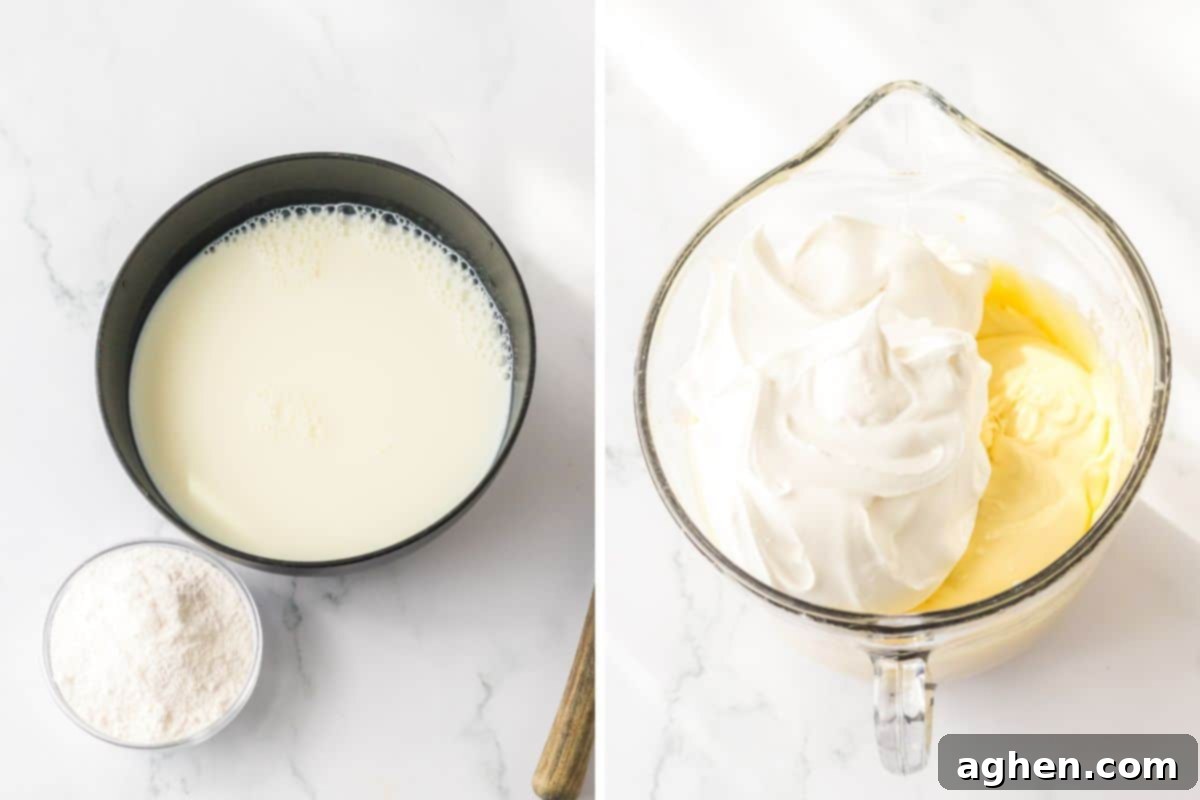
Step 3: Prepare the Banana Pudding Base. In a separate large bowl, combine the instant banana pudding mix with the specified amount of cold milk. Whisk these ingredients together thoroughly until the pudding begins to thicken, becoming smooth and creamy. Once thickened, gently fold in about one-third of your thawed whipped topping. This step makes the pudding lighter and fluffier, preparing it for its role in the ultimate filling. Set this bowl aside for a moment.
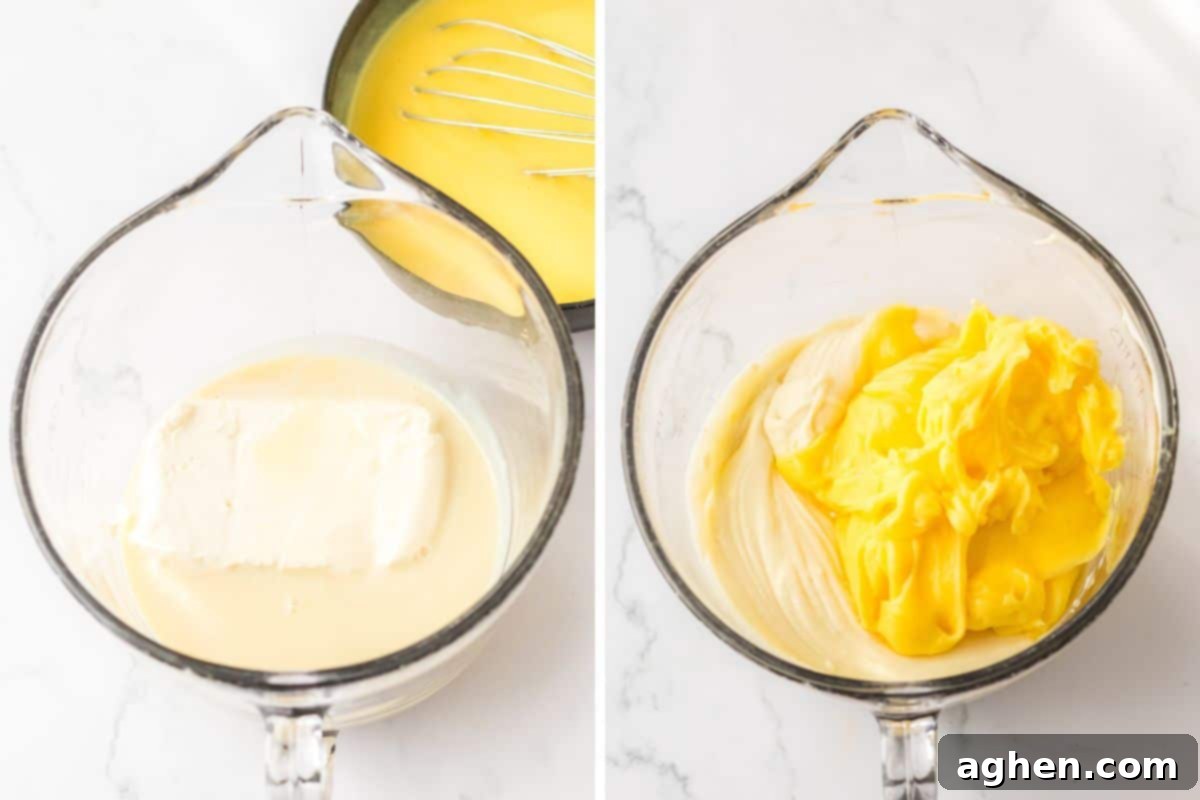
Step 4: Create the Cream Cheese Infusion. In yet another clean bowl, combine the softened cream cheese and the sweetened condensed milk. Using a hand mixer or a stand mixer, beat these two ingredients together on medium speed until the mixture is completely smooth, creamy, and well combined, with no lumps of cream cheese remaining. This step is vital for a velvety filling. Next, gently fold the prepared banana pudding mixture (from Step 3) into the cream cheese mixture until everything is thoroughly incorporated. This creates the rich, irresistible filling that will permeate your cake.
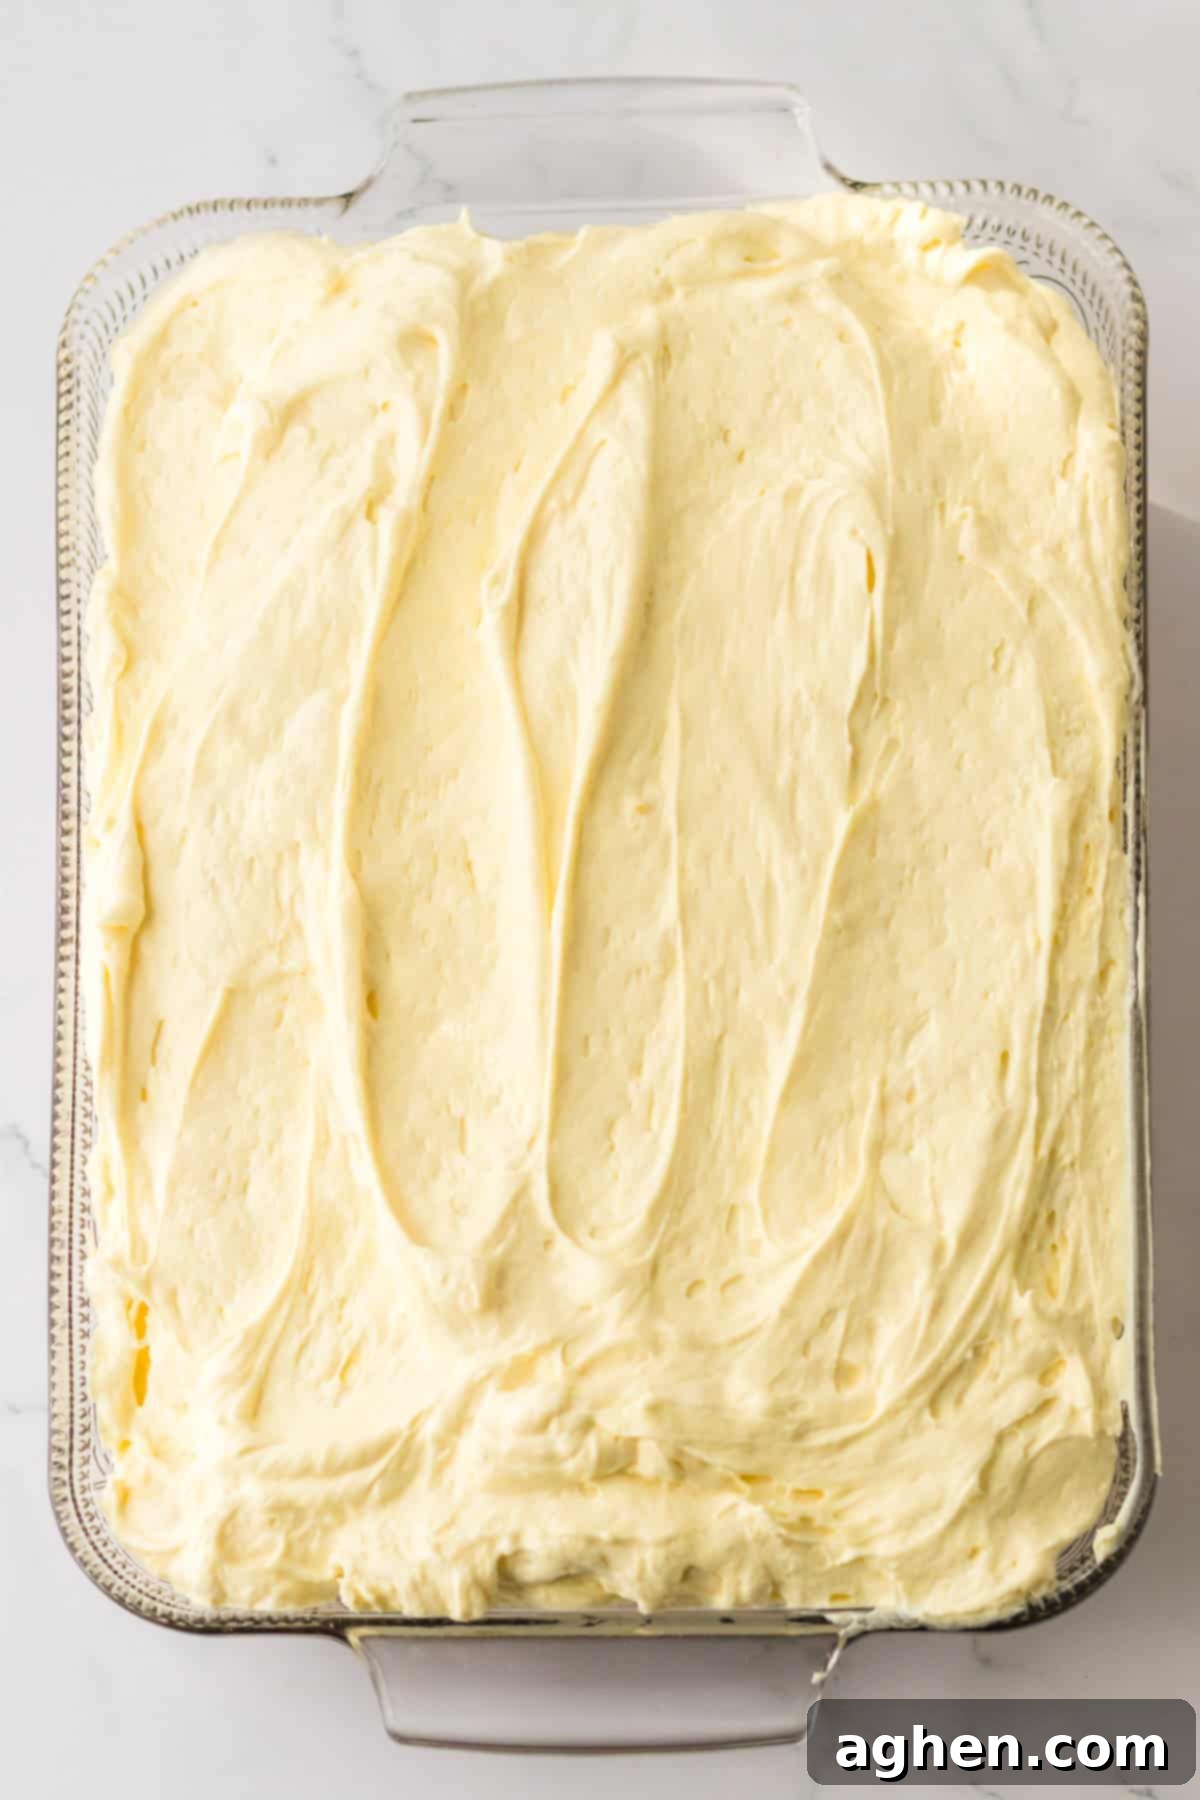
Step 5: Fill the Cake with Creamy Goodness. Carefully pour the combined pudding and cream cheese mixture evenly over the poked cake. Use a rubber spatula to gently encourage the filling into all the holes, ensuring every part of the cake is infused with flavor. Spread the remaining filling across the top of the cake to create an even, smooth layer that will be the base for our final topping.
Step 6: Add the Final Whipped Topping and Wafers. Take the remainder of your thawed whipped topping and dollop it generously over the filled cake. Gently spread the whipped topping across the entire surface to form a smooth, luscious white layer. For that signature banana pudding finish, top your cake with whole vanilla wafers arranged decoratively, or sprinkle a generous amount of crushed vanilla wafers for an extra satisfying crunch and classic aesthetic.
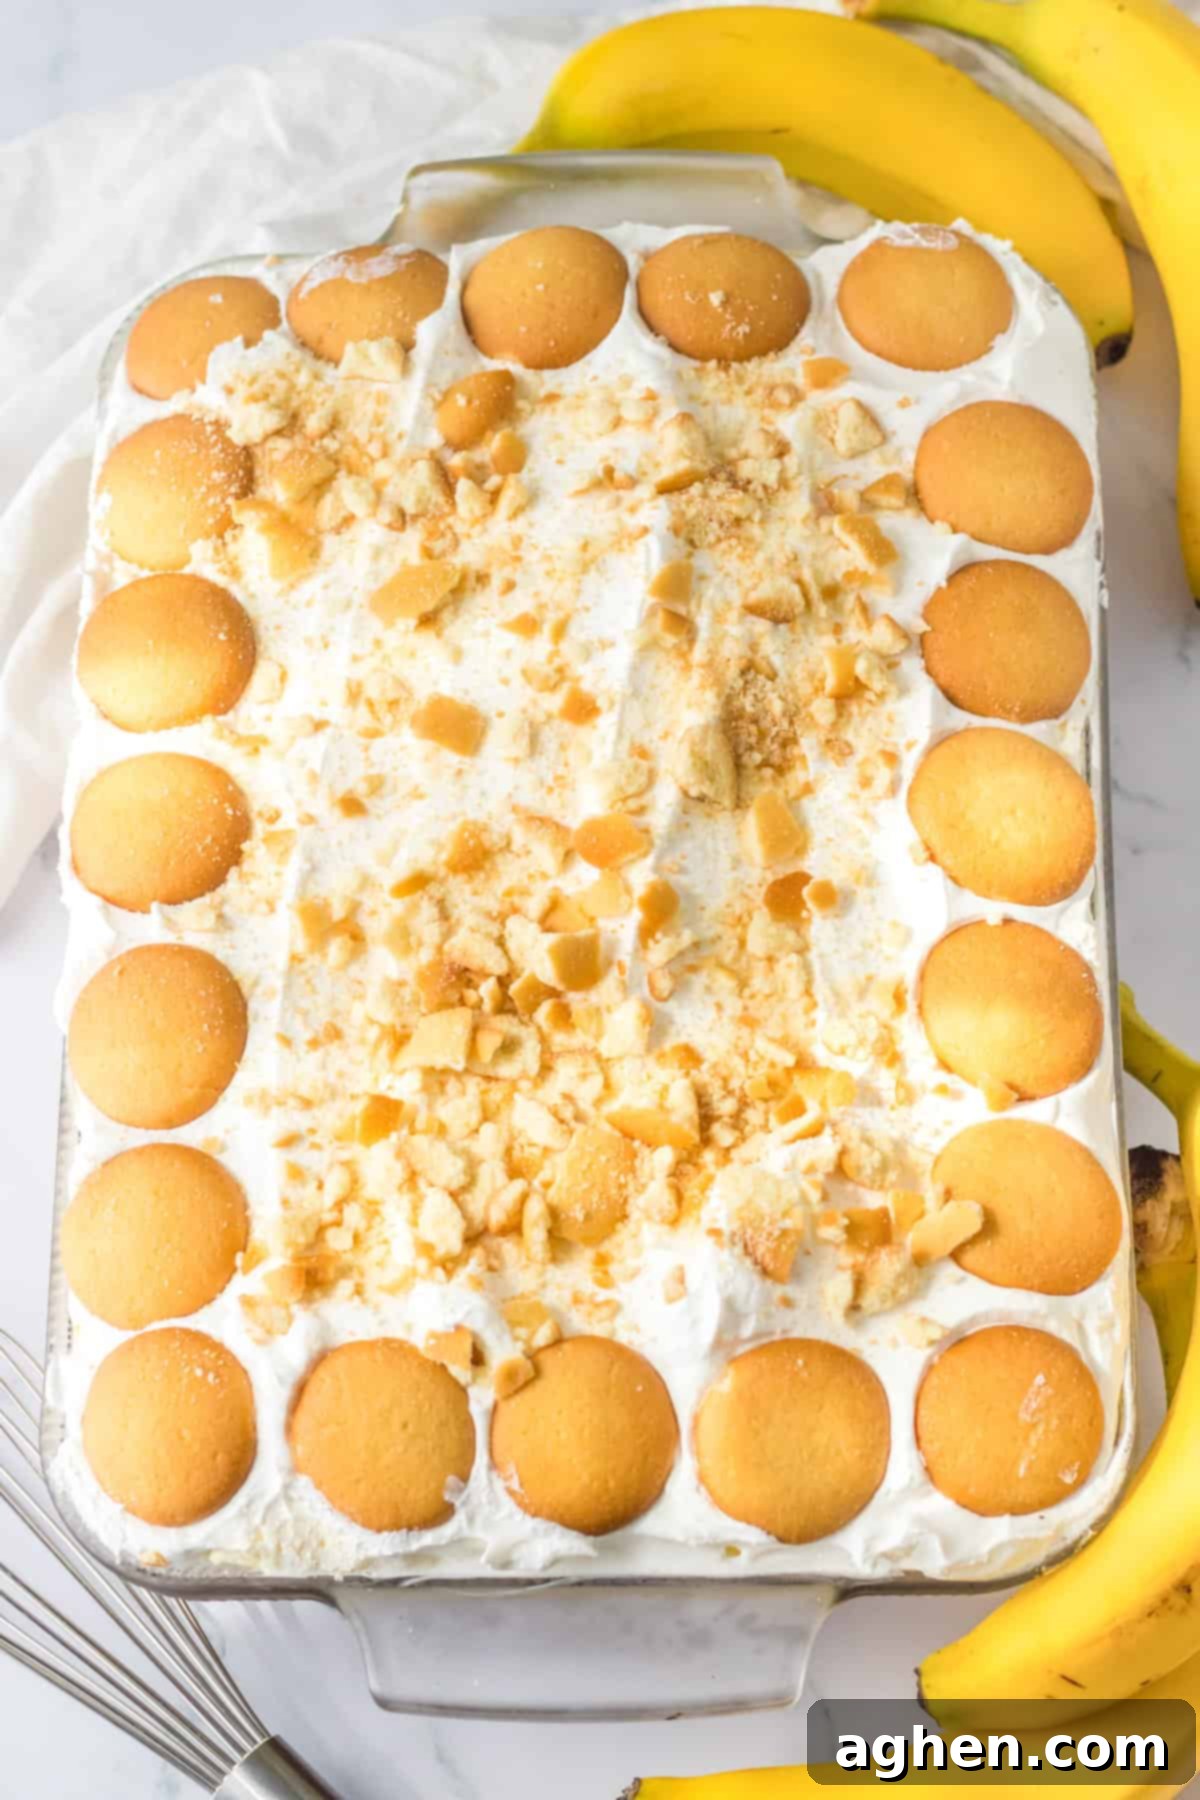
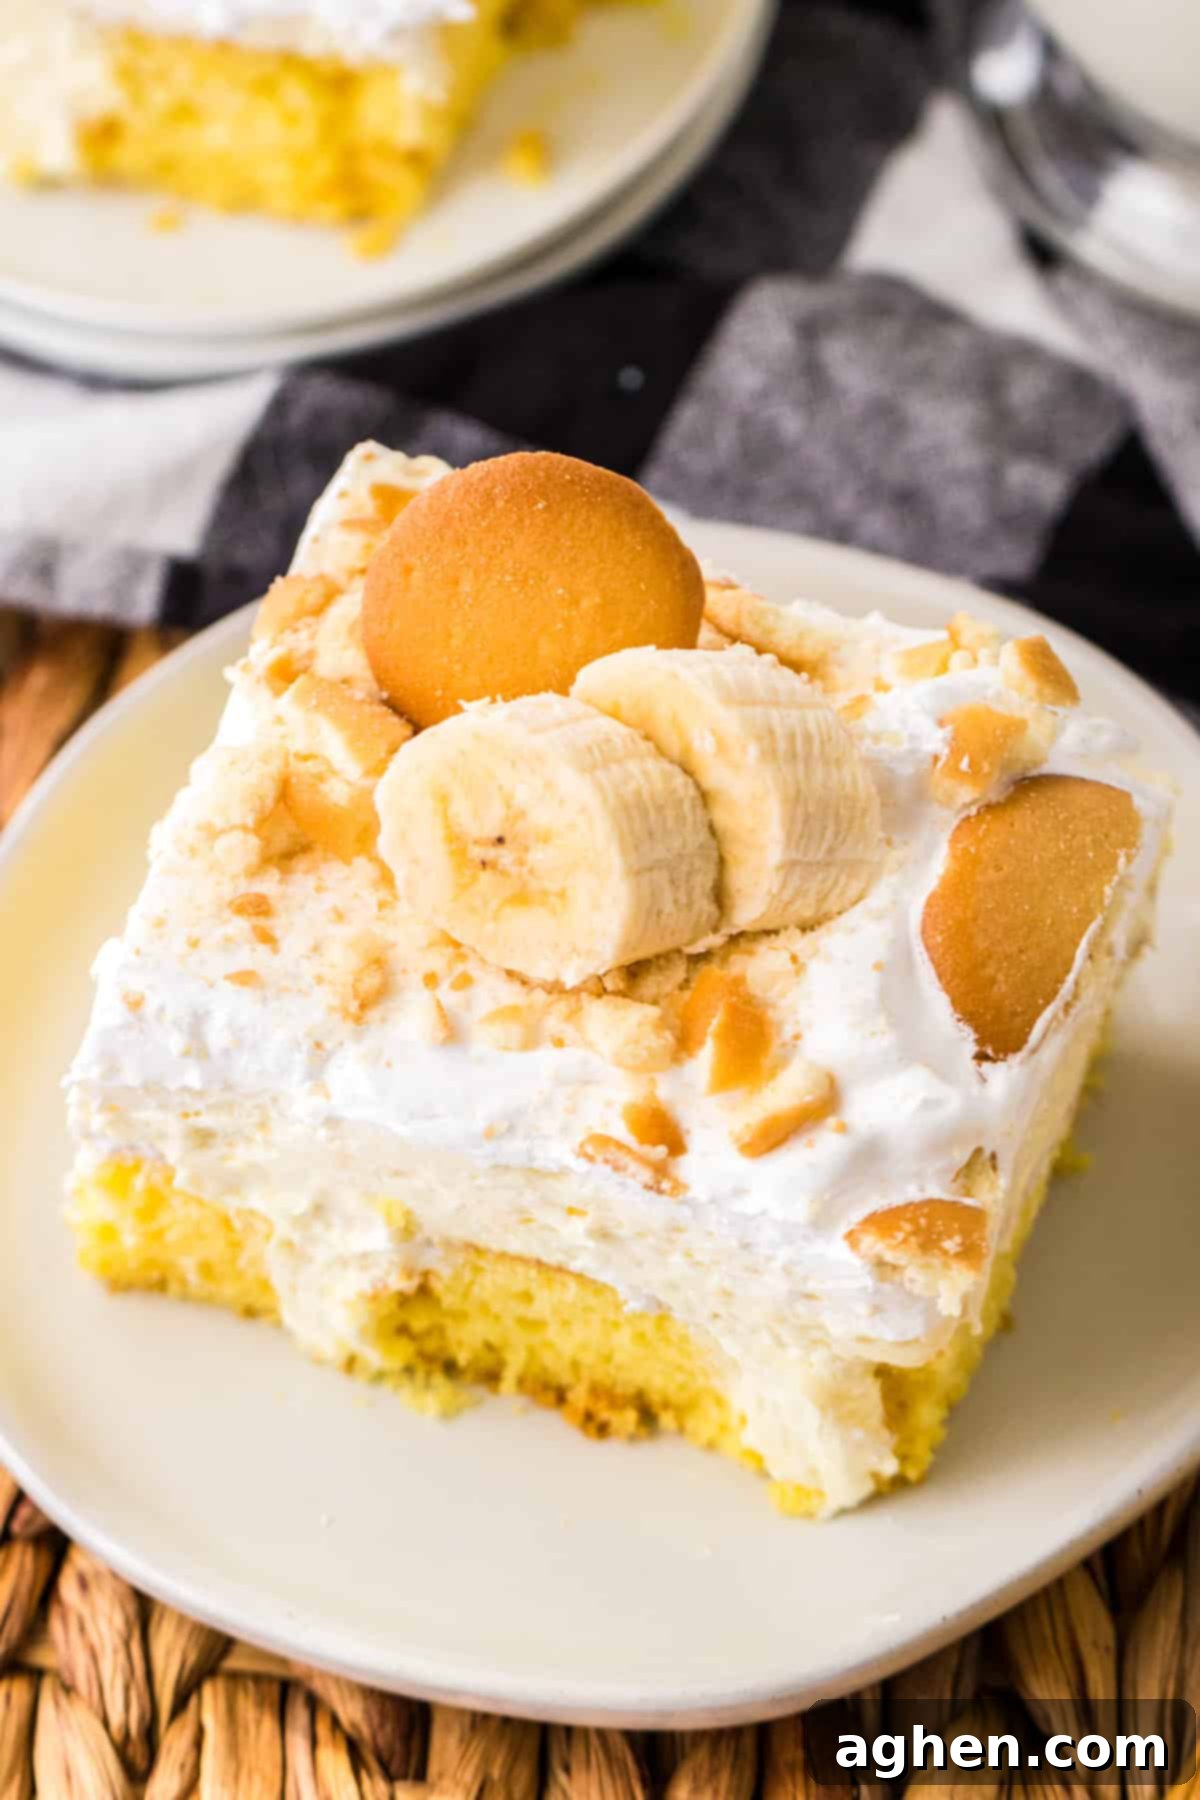
Step 7: Chill, Garnish, and Serve! Place the assembled cake into the refrigerator to chill for at least two hours. For the absolute best flavor and texture, chilling it overnight is highly recommended, as it allows the filling to fully set and the flavors to meld beautifully. Just before you’re ready to serve this delightful dessert, add slices of fresh banana on top, if desired. This adds a burst of fresh flavor and vibrant color. Then, slice and enjoy your incredible banana pudding poke cake!
Storing and Freezing Your Delicious Banana Pudding Cake
Proper storage is key to enjoying your banana pudding poke cake for as long as possible. Here’s how to keep it fresh and delicious:
Refrigerator: To maintain its freshness and prevent it from drying out, any leftover banana pudding poke cake should be stored tightly covered in the refrigerator. Use plastic wrap or an airtight container to seal it well. It will remain wonderfully fresh and moist for up to 3 days. Remember, the fresh banana slices should only be added just before serving, as they tend to brown quickly when exposed to air.
Freezing instructions: If you plan on freezing your banana pudding poke cake, it’s important to make a slight adjustment. Do not add the whipped topping layer or the vanilla wafers to the top of the cake before freezing. These elements do not freeze and thaw well – whipped topping can become watery, and wafers will lose their crunch. Instead, prepare the cake up to the point of adding the pudding mixture and allowing it to set. Refrigerate the cake for a couple of hours until the pudding layer is firm. Then, tightly wrap the cake in several layers of plastic wrap, followed by a layer of aluminum foil to prevent freezer burn. This cake can be frozen for up to 3 months.
If you prefer to freeze individual slices of cake for easy portioning, first cut the cake into your desired serving sizes. Then, flash freeze the slices for about 2 hours on a baking sheet until firm. Once frozen, wrap each individual slice in plastic wrap, then place them in a freezer-safe container or freezer bag, or wrap them again in aluminum foil. This method ensures they don’t stick together and allows you to thaw just one slice at a time. Thaw frozen cake slices in the refrigerator overnight before serving, adding fresh whipped topping and wafers if desired.
Tips and Tricks for the Ultimate Banana Cream Poke Cake Perfection
- Even Hole Distribution: When poking holes in the cake, aim for even distribution. This isn’t just for aesthetics; it ensures the creamy filling reaches every single part of the cake, guaranteeing a consistent, moist texture and rich flavor in every bite.
- Room Temperature Cream Cheese: For a flawlessly smooth filling, always use softened cream cheese. Take it out of the refrigerator at least 30 minutes, or even an hour, before you plan to start the recipe. Cold cream cheese will result in lumps, making your filling less appealing.
- Garnish Just Before Serving: To prevent unsightly browning, always add fresh banana slices as a garnish right before you serve the cake. You can also toss them lightly in a little lemon juice or pineapple juice if you need to prepare them slightly in advance, though fresh is always best.
- Double the Whipped Topping: If you’re a true fan of whipped topping, feel free to double up! Use one entire container for incorporating into the creamy filling, and another fresh container to create a lavish, fluffy topping layer for your cake. More is more when it comes to Cool Whip!
- Pudding Mix Size Adjustment: Can’t find the large 6-serving size (5.1 oz) box of instant banana pudding mix? No problem! Simply use two smaller 3.4-ounce boxes instead. When doing so, remember to increase the amount of milk to a total of 3 cups to achieve the correct, pourable consistency for the pudding.
- Crushing Vanilla Wafers: There are several easy ways to crush vanilla wafers. For a rustic crumb, place them in a zip-top baggie and roll a rolling pin over them. For finer crumbs, you can use a rubber mallet or even a food processor for quick and consistent results.
- Amp Up the Banana Flavor: For an even more intense banana flavor experience, consider swapping out the yellow cake mix for a banana cake mix. This subtle change will deepen the overall banana essence of your poke cake, making it truly irresistible for banana lovers.
- Don’t Overbake the Cake: A perfectly moist poke cake starts with a perfectly baked cake. Avoid overbaking, as this can lead to a dry base that won’t absorb the pudding filling as well. Bake until a toothpick inserted into the center comes out clean or with moist crumbs attached.
Exciting Additions and Delicious Variations for Your Poke Cake
While this banana pudding poke cake is magnificent on its own, it’s also wonderfully adaptable! Here are some creative ways to customize your cake and add your personal touch:
- Make it with chocolate cake. For a truly classic and beloved flavor combination, simply swap out the yellow cake mix for your favorite chocolate cake mix. The rich chocolate pairs beautifully with the creamy banana pudding filling.
- Add nuts. Introduce an extra layer of crunch and nutty flavor by topping your cake with finely chopped walnuts or pecans. Toasting the nuts lightly before sprinkling them on can enhance their flavor even further.
- Sprinkle with chocolate chips. For an even sweeter, more indulgent treat, generously sprinkle mini chocolate chips over the Cool Whip layer. Dark, milk, or even white chocolate chips would be delicious.
- Drizzle with caramel. Bananas and caramel are a match made in heaven! Add a luxurious touch by drizzling a generous amount of warm homemade caramel sauce or a good quality store-bought caramel topping over your finished cake before serving.
- Add some spice. For a comforting, warm twist reminiscent of banana bread, incorporate a little ground cinnamon, nutmeg, or even a touch of allspice into your cake batter. These spices enhance the natural sweetness of the bananas beautifully.
- Coconut flakes. For a tropical twist, sprinkle toasted coconut flakes on top of the whipped cream layer. The subtle chewiness and distinct flavor of coconut complement the banana pudding wonderfully.
- Dipped Wafers: For an extra special touch, consider dipping half of your vanilla wafers in melted chocolate and letting them set before arranging them on top of the cake. This adds visual appeal and another layer of flavor.
Banana Pudding Poke Cake Recipe FAQ
The name “poke cake” is quite literal! It comes from the distinctive process of poking numerous holes into a freshly baked cake. These holes are then filled with a liquid or creamy glaze, pudding, or sauce, which then seeps down into the cake. This technique not only creates an incredibly moist, tender texture but also infuses every bite with the chosen flavor, making the cake uniquely delicious and often visually appealing with its striped or spotted appearance when sliced.
A soggy poke cake can occur for a few reasons. The most common cause is using a filling with too much liquid or pouring an excessive amount of filling over the cake. It’s crucial to follow the recipe’s specified amounts for both the filling ingredients and the overall volume of filling. Additionally, ensure you are using a liquid measuring cup for liquids to guarantee accuracy. Another factor can be not allowing the cake to cool sufficiently before adding the filling; a very hot cake might break down and absorb liquid differently. Lastly, sometimes the type of cake mix or pudding can affect absorption, so stick to instant pudding mixes for poke cakes.
There isn’t a hard and fast rule for the exact number of holes to poke in a poke cake, as it can vary based on the size of your cake and the thickness of your filling. However, the general guideline is to make the holes evenly spaced, typically about 1 inch apart across the entire surface of the cake. This uniform spacing ensures that the delicious filling gets distributed consistently throughout the cake, so every slice offers that wonderful moist, flavorful experience. For thicker fillings like pudding, larger holes (like those made with a wooden spoon handle) work best.
Absolutely, making this banana pudding poke cake recipe a day in advance is highly recommended! In fact, preparing it ahead of time allows the filling ample time to properly set and firm up, while also giving the delightful flavors a chance to fully meld and deepen throughout the cake. This results in an even more delicious and cohesive dessert. Just be sure to store the cake in the refrigerator, tightly covered, until you are ready to serve it. For the freshest appearance, wait until the very last minute to add any fresh banana slices to the top.
For a poke cake with a thicker, creamy filling like this banana pudding recipe, I find that using the handle of a wooden spoon works exceptionally well. The rounded end creates holes that are perfectly sized and deep enough to allow a generous amount of pudding to seep in. If you’re working with a thinner glaze or a lighter liquid filling, a wooden skewer, the tines of a fork, or even a chopstick can be more appropriate for creating smaller, more delicate holes.
Yes, you can certainly use homemade whipped cream as a substitute for Cool Whip in this recipe. However, it’s important to be aware that homemade whipped cream tends to be less stable and doesn’t hold its light and fluffy texture for as long as stabilized frozen whipped topping like Cool Whip. If you opt for homemade whipped cream, I strongly recommend either stabilizing it (by adding a bit of gelatin or cornstarch) or planning to prepare and serve the cake on the same day to ensure the best texture and appearance.
To ensure your cake comes out of the baking dish cleanly, always grease and flour your pan thoroughly before pouring in the batter. You can also line the bottom of the pan with parchment paper, leaving an overhang on the sides to create “handles” for easy lifting once the cake is cooled. A non-stick baking spray with flour is also a great option for a seamless release every time.
More Irresistible Banana Pudding Desserts
Can’t get enough of that classic banana pudding flavor? You’re not alone! Here are even more sweet treats that will satisfy your banana pudding cravings in exciting new ways:
- Banana Pudding Popsicles: A refreshing, cool twist on the classic.
- Banana Icebox Cake: Layers of creamy goodness and wafers, no baking required!
- No-Bake Banana Pudding Pie: All the flavor of the classic in an easy pie form.
- Banana Pudding Cookies: Chewy, delightful cookies infused with banana pudding flavor.
Banana Poke Cake
Author: Jaclyn
15 minutes
30 minutes
2 hours
2 hours 45 minutes
12
Saved!
Ingredients
- 15.25 ounce yellow cake mix
- 3 large eggs or as called for on the box
- 1 cup water or as called for on the box
- ½ vegetable oil or as called for on the box
- 5.1 ounce instant banana pudding mix
- 2 ¼ cups milk
- 8 ounce frozen whipped topping thawed and divided (we used Cool Whip for its stability)
- 8 ounce cream cheese softened to room temperature for smooth mixing
- 14 ounce sweetened condensed milk
- vanilla wafers as desired, for crunchy topping or decoration
- bananas freshly sliced, optional garnish for serving
Instructions
-
Prepare and bake your chosen yellow cake mix in a 9×13-inch baking dish exactly as directed on the cake mix box. Once baked, allow the warm cake to cool for about 15 minutes before proceeding.
-
Using the rounded end of a wooden spoon, carefully poke numerous holes throughout the entire top surface of the cake. Gently wiggle the spoon after each poke to ensure the holes are generously sized, allowing the rich filling to deeply penetrate the cake.
-
In a large bowl, whisk together the instant banana pudding mix and cold milk until the mixture begins to thicken and becomes smooth. Gently fold in about one-third of your thawed whipped topping into the pudding to lighten it. Set this fluffy pudding mixture aside.
-
In a separate mixing bowl, use a hand mixer or stand mixer to beat the softened cream cheese and sweetened condensed milk together until the mixture is perfectly smooth, creamy, and completely combined, ensuring there are no lumps.
-
Gently combine the cream cheese mixture with the prepared banana pudding mixture, stirring until they are thoroughly blended and form a cohesive, smooth filling.
-
Pour the luscious pudding and cream cheese mixture evenly over the poked cake. Use a rubber spatula to gently press the filling down into all the holes, then spread any remaining filling into a smooth, even layer across the entire top surface of the cake.
-
Generously spoon dollops of the remaining thawed whipped topping over the top of the cake. Carefully and gently spread these dollops out to create a beautiful, smooth, and fluffy layer covering the entire surface of the cake.
-
For the classic finish, top your cake with whole vanilla wafers arranged decoratively, or sprinkle a generous amount of crushed vanilla wafers for added texture and flavor.
-
Place the cake in the refrigerator to chill for a minimum of two hours. For the absolute best results, allowing it to chill overnight will let the filling set perfectly and the flavors to fully meld.
-
Just before you are ready to serve this delightful dessert, garnish with fresh banana slices, if desired. Enjoy every creamy, banana-filled bite!
Notes
- Always wait until just before serving to add the fresh banana slices. This prevents them from browning and keeps your cake looking its best.
- Ensure any leftovers are covered tightly with plastic wrap or placed in an airtight container and kept in the fridge. It will stay fresh for up to 3 days.
- If you absolutely adore Cool Whip, feel free to use a double amount! Incorporate one container into the creamy filling and use a second fresh container to create a lavish, fluffy topping for your cake.
- For those who prefer a less sweet dessert, you can adjust the sweetness by using only half a can of sweetened condensed milk in the filling. Taste and adjust to your preference.
- If you can’t find a large 6-serving size (5.1-ounce) box of instant banana pudding mix, simply use two of the smaller 3.4-ounce sized boxes. Remember to increase the total amount of milk to 3 cups to maintain the correct consistency for the pudding mixture.
Nutrition

Did You Make This Recipe?
We’d love to see your creations! Share it with me on Instagram @crayonsandcravings and make sure to follow us on Pinterest @crayonsandcravings for even more delicious recipe inspiration!
Pin Recipe
Leave A Review
