Easy No-Bake Bunny Oreo Balls: Your Adorable Easter Dessert Guide!
Hop into the most delightful Easter celebration with these utterly adorable Bunny Oreo Balls! These irresistible treats feature a rich, creamy Oreo cookie base, generously dipped in smooth white chocolate, and then charmingly decorated with cute bunny tails and tiny pink feet. They’re guaranteed to bring smiles and a touch of whimsy to your holiday table!
If you’re on the hunt for more fun Easter bunny-themed recipes and spring delights, be sure to check out my bunny butt pancakes, imaginative Peeps Twinkie cars, and our popular bunny bait mix!

Whimsical Easter Oreo Truffles: Bunny Butt Delights
Searching for a truly unique and memorable Easter dessert that’s both simple to make and incredibly charming? Look no further than these delightful Bunny Butt Truffles! These little bites are a playful and whimsical twist on traditional Oreo cookie truffles, designed to add an extra layer of charm and cheer to your festive Easter spread. What makes them even better? They are a no-bake wonder, meaning less time in the kitchen and more time enjoying the holiday.
Our recipe specifically calls for zesty lemon Oreos, which infuse these truffles with a wonderfully bright and tangy flavor that perfectly complements the creamy texture. This refreshing citrus kick is often a delightful surprise, making them a hit with both kids and adults. However, if lemon isn’t your preference, or if you’re aiming for a more classic flavor profile, you can easily substitute with regular Golden Oreos for a rich vanilla taste, or even classic chocolate Oreos for a truly indulgent experience. The versatility of this recipe ensures everyone can enjoy these adorable treats!
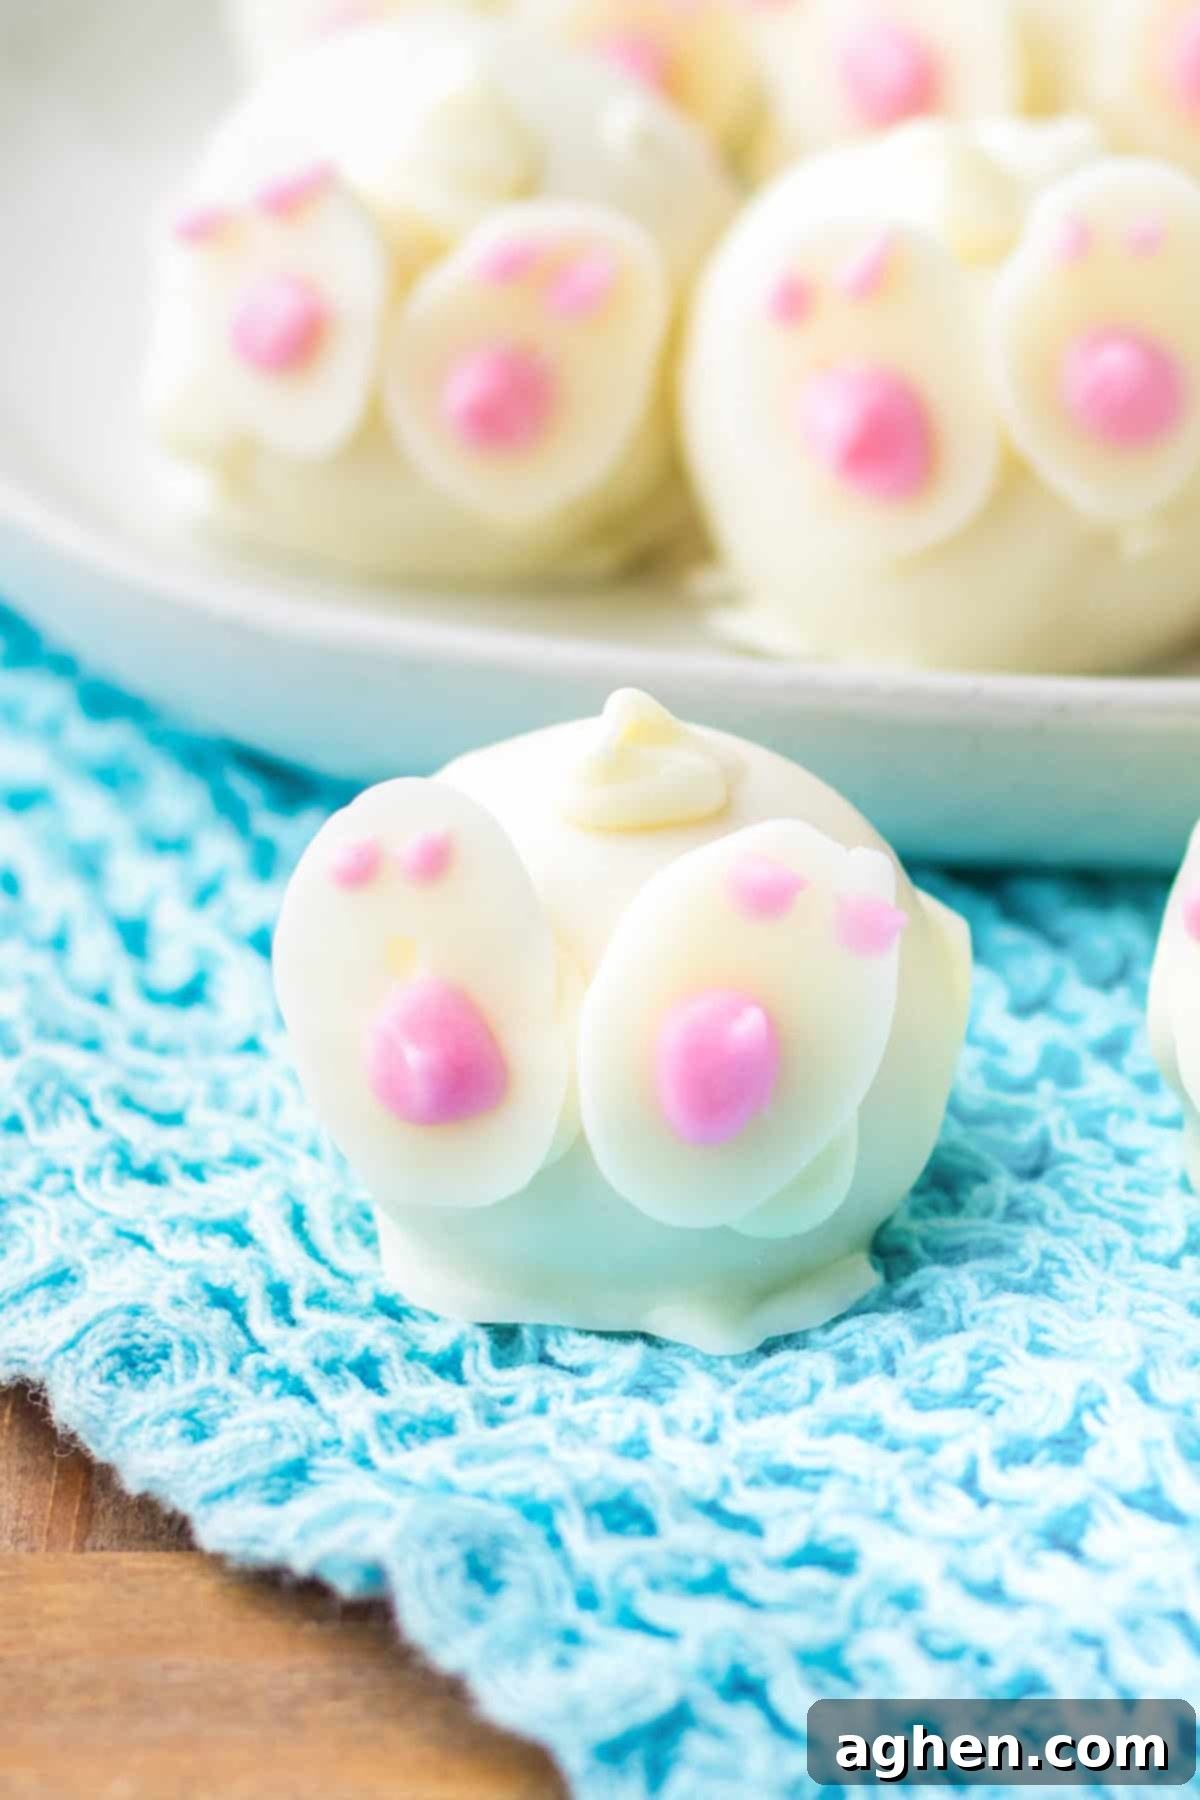
Crafted with just a few simple ingredients – including cream cheese, your choice of Oreo cookies, and smooth white melting chocolate – these endearing Easter Oreo truffles are surprisingly easy to create. Their irresistible cuteness and delicious flavor are sure to bring smiles to everyone’s faces. Seriously, who can resist a dessert that looks like tiny bunnies hopping across your platter? They are almost too cute to eat (but you’ll definitely want to!).
Essential Ingredients for Bunny Oreo Truffles
This section provides detailed ingredient notes and helpful substitution options. For precise measurements, a complete list of ingredients, and step-by-step instructions, please refer to the printable recipe card conveniently located at the end of this post.
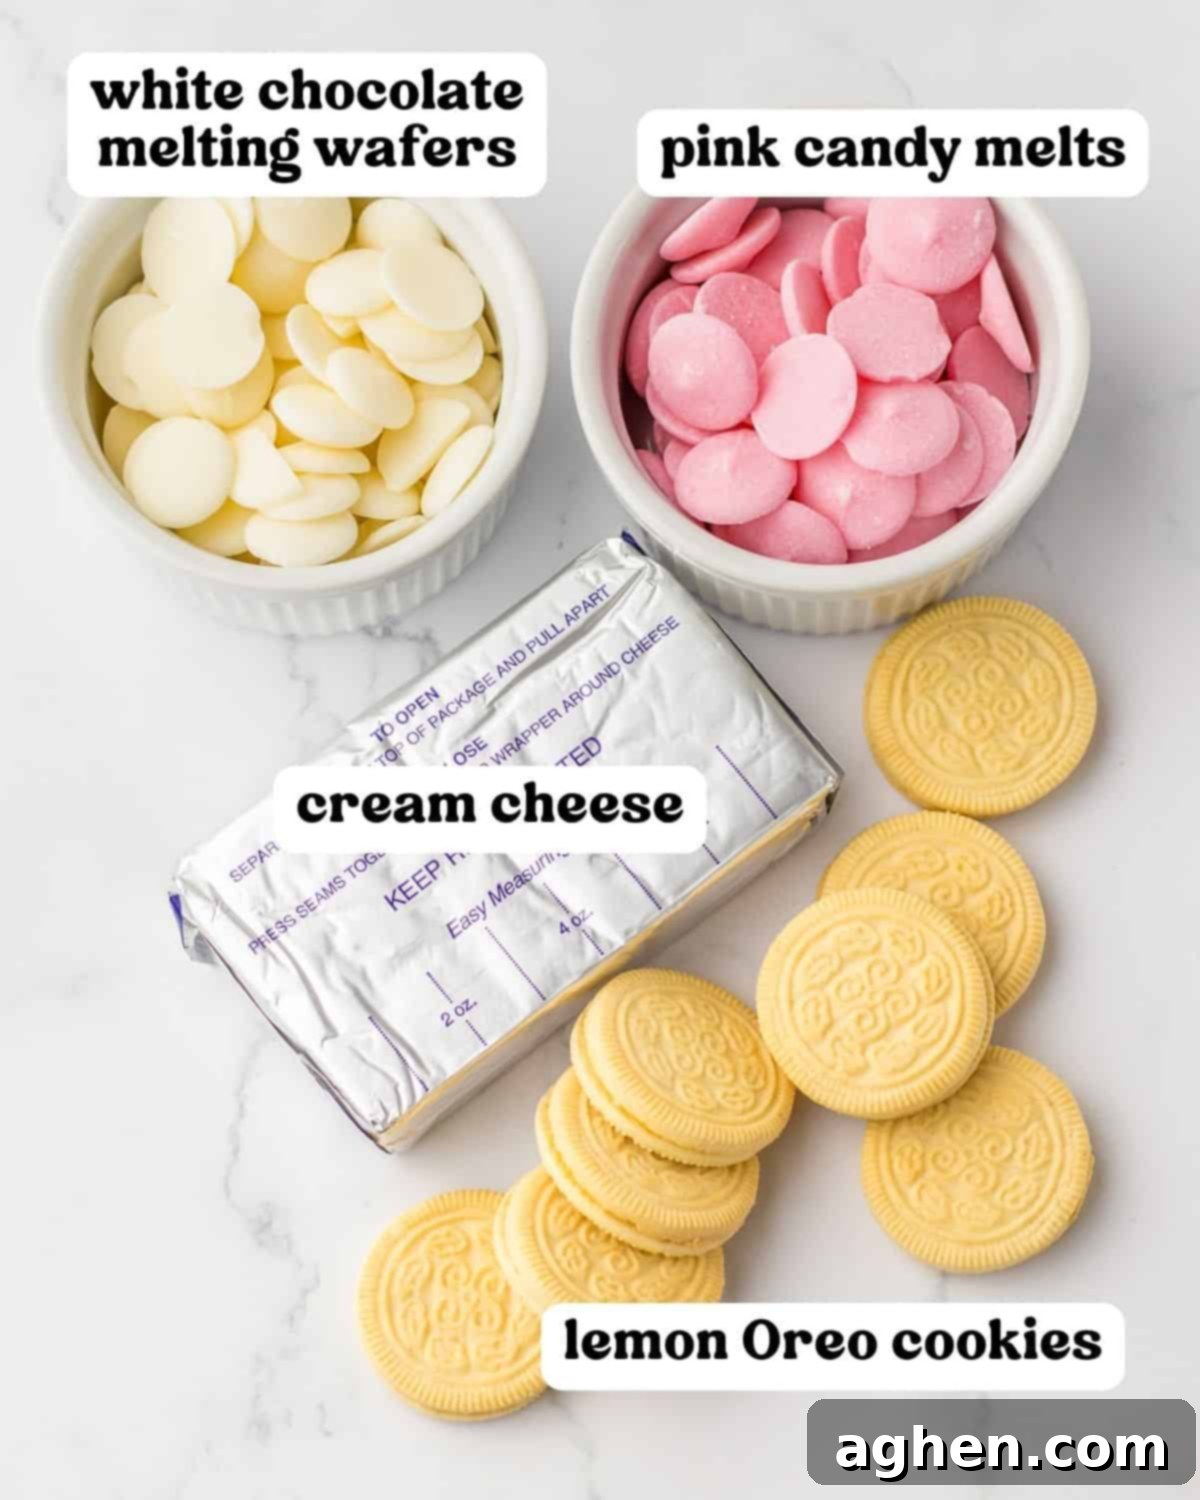
- Cream Cheese: It’s crucial to use softened cream cheese for this recipe. If it’s too cold, it won’t combine smoothly with the cookie crumbs, resulting in a lumpy mixture. Bring it to room temperature for at least 30 minutes before mixing for the best, most uniform truffle dough. Full-fat cream cheese also yields the creamiest texture.
- Lemon Oreos: We absolutely adore the bright, zesty kick that Lemon Oreos bring to these truffles, making them wonderfully refreshing. However, these truffles are incredibly versatile! You can easily substitute with classic Original Oreos for a traditional chocolate and cream flavor, or opt for Golden Oreo cookies if you prefer a rich, vanilla-based treat. Feel free to experiment with other seasonal Oreo flavors too!
- White Melting Chocolate: For a smooth, even coating that sets beautifully, I highly recommend using Vanilla candy wafers or almond bark. These products are specifically designed for melting and dipping, providing a superior finish and being much easier to work with than regular white chocolate chips, which can seize or become clumpy if not melted perfectly.
- Pink Candy Melts: These are primarily used for adding those undeniably cute bunny details like paw pads and toes. They melt smoothly and offer a vibrant pink color. As an alternative, you can also use a small amount of white melting chocolate (or even some of your main batch) and dye it with a gel food coloring. Gel colors provide intense color without altering the chocolate’s consistency as much as liquid food coloring.
Required Equipment for Easy Preparation
To make these delightful Bunny Oreo Balls, you’ll need a few common kitchen tools. Here’s what you’ll need to gather:
- Food Processor: Essential for transforming Oreos into fine crumbs quickly and efficiently.
- Mixing Bowl: A large bowl for combining your cream cheese and cookie crumbs.
- Electric Mixer: Makes blending the truffle mixture smooth and effortless.
- Parchment or Wax Paper: Crucial for lining your baking sheets to prevent sticking.
- Baking Sheets: You’ll need at least two, one for chilling the balls and one for decorating the feet.
- Fork or Candy Dipping Tool: For evenly coating your Oreo balls in melted white chocolate.
How to Make Adorable Bunny Butt Oreo Balls Step-by-Step
This comprehensive section provides detailed, step-by-step photos and clear instructions to guide you through the recipe. For the complete printable recipe, including ingredient quantities and full instructions, please see the recipe card at the bottom of this post.
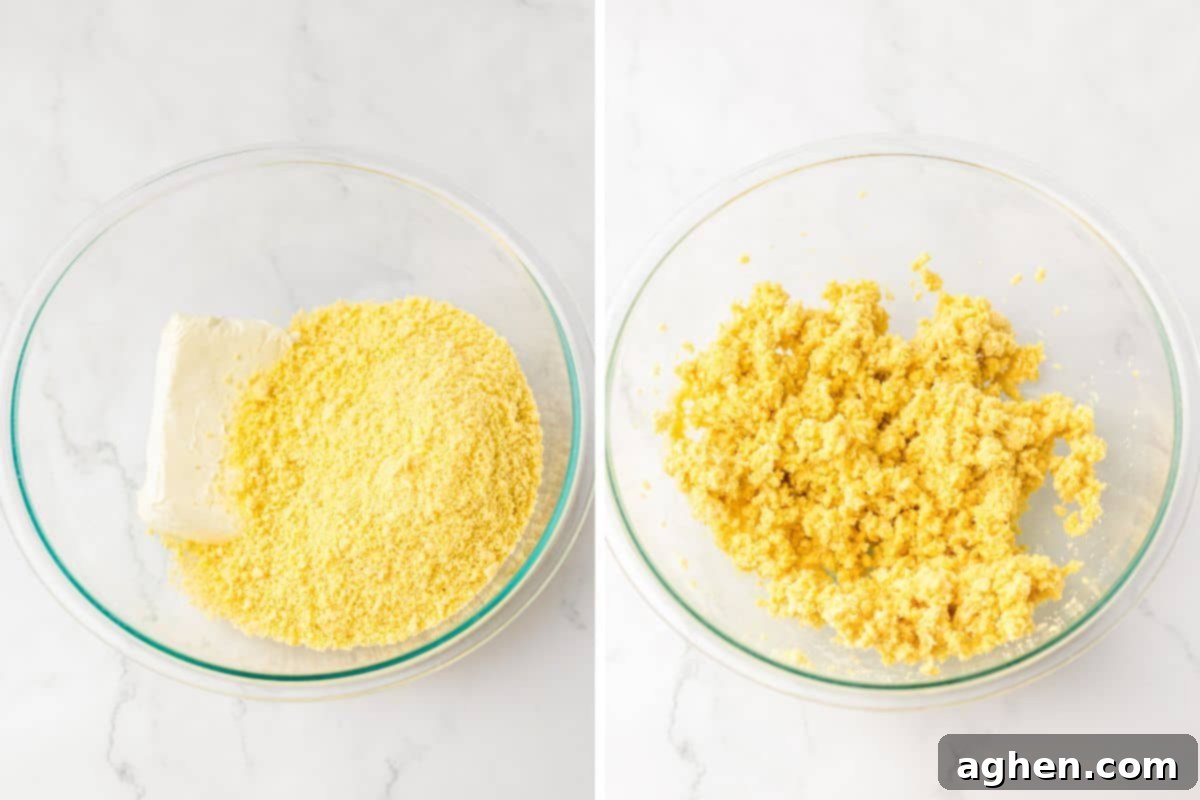
Step 1: Prepare Your Cookies. Begin by lining two standard baking sheets with parchment paper or wax paper. This will prevent your truffle balls and decorations from sticking. Set these aside. Next, take your chosen Oreo cookies (lemon, golden, or classic) and crush them into very fine crumbs using a food processor. Depending on the size of your food processor, you will likely need to do this in two batches to ensure all cookies are uniformly pulverized. Fine crumbs are key for a smooth truffle texture.
Step 2: Combine and Mix. In a large mixing bowl, combine your softened cream cheese with the finely crushed Oreo cookie crumbs. Use an electric mixer to blend these two ingredients together thoroughly. Mix until the mixture is well combined, forming a thick, uniform “dough” that pulls away from the sides of the bowl. Ensure there are no large lumps of cream cheese or uncrushed cookie pieces.
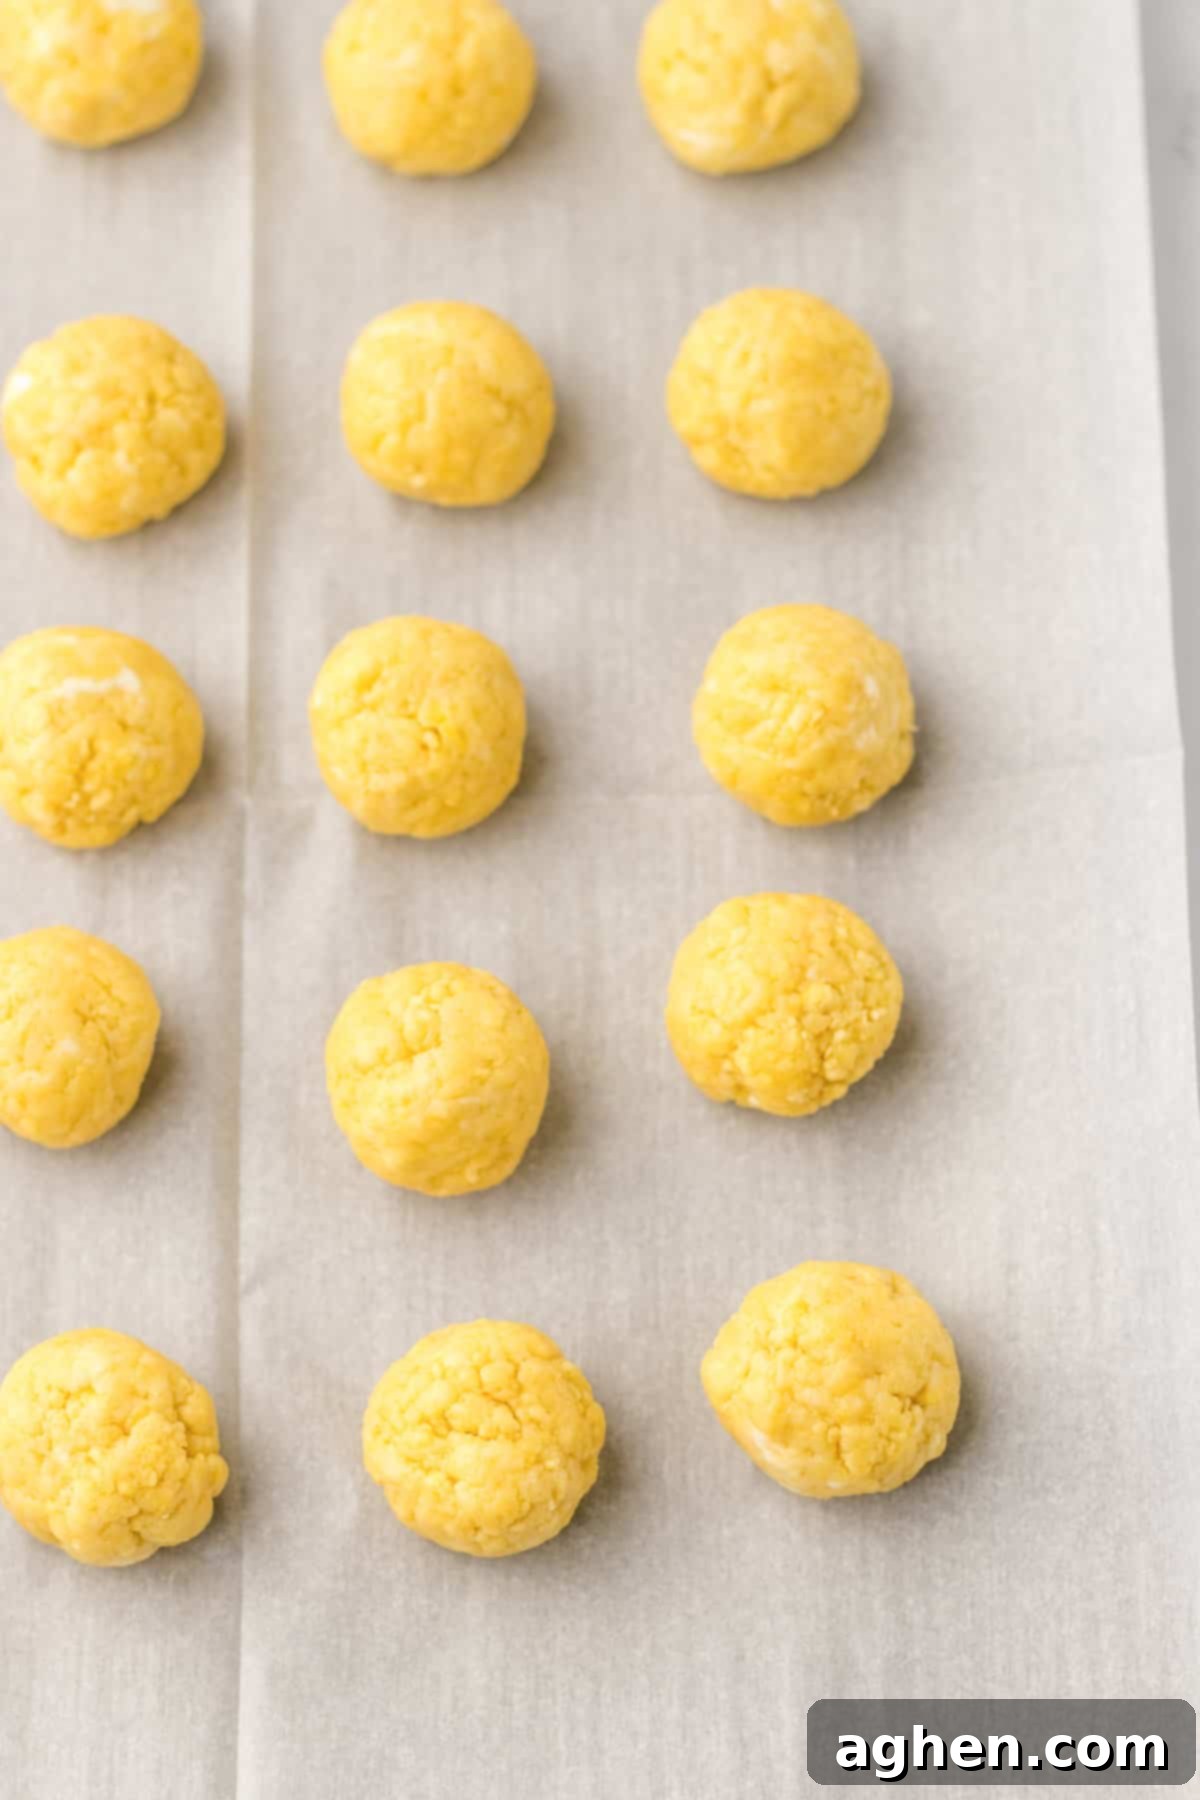
Step 3: Roll and Chill the Truffle Balls. Scoop out portions of the Oreo mixture and roll them into uniform 1-inch balls. For consistent sizing and quicker rolling, a small cookie scoop (about 1 tablespoon in size) can be incredibly helpful. Place these neatly rolled balls onto one of your prepared parchment-lined baking sheets. Once all balls are formed, cover the sheet with plastic wrap and chill them in the refrigerator for a minimum of 2 hours, or ideally, overnight. Proper chilling is essential for the balls to firm up, making them much easier to dip in chocolate without falling apart.
Step 4: Dip in White Chocolate. Once your truffle balls are thoroughly chilled, it’s time to coat them. Melt your white melting chocolate (wafers or almond bark) in the microwave. Do this in 30-second intervals, stirring thoroughly after each interval, until the chocolate is completely smooth and melted. Be careful not to overheat it. Using a candy dipping tool or a regular fork, carefully dip each chilled Oreo ball into the melted white chocolate, ensuring it’s fully coated. Gently tap the tool or fork against the side of the bowl to allow any excess chocolate to drip off, then return the dipped ball to the clean parchment paper on your second prepared baking sheet to set. Continue until all truffles are dipped.
Pro Tip for Perfect Truffles
If you find that your Oreo mixture becomes sticky and challenging to roll or handle during any stage, simply pop it back into the refrigerator for 15-30 minutes. This quick chill will help the mixture firm up again, making it much easier to work with and ensuring smooth, perfectly shaped truffle balls.

Step 5: Create Bunny Tails and Feet. Once all your truffles are dipped, take the remaining melted white chocolate and transfer it into a freezer baggie or a piping bag. Snip off a very tiny corner of the bag to create a small opening. On each dipped truffle, pipe a small, swirling dollop of white chocolate to resemble a fluffy bunny tail. Next, on your second parchment-lined pan, pipe approximately 48 small, oval-shaped blobs of white chocolate. These will form the base of your bunny feet (two per truffle). Place both pans – the truffles with tails and the piped feet – back into the refrigerator to chill for at least 30 minutes, allowing the chocolate to fully set.
Step 6: Detail the Bunny Feet. While the white chocolate is chilling, melt your pink candy melts in the microwave, following the same 30-second interval method until smooth. Transfer the melted pink chocolate into a clean freezer baggie and snip a tiny corner. Remove the pan with the white chocolate bunny feet from the refrigerator. Carefully flip each foot over. Using the pink chocolate, pipe two small ‘toes’ and a larger ‘foot pad’ onto each white chocolate oval, bringing them to life as realistic bunny feet. Return the pan of detailed bunny feet to the fridge for another 10 minutes, or until the pink chocolate is fully set.
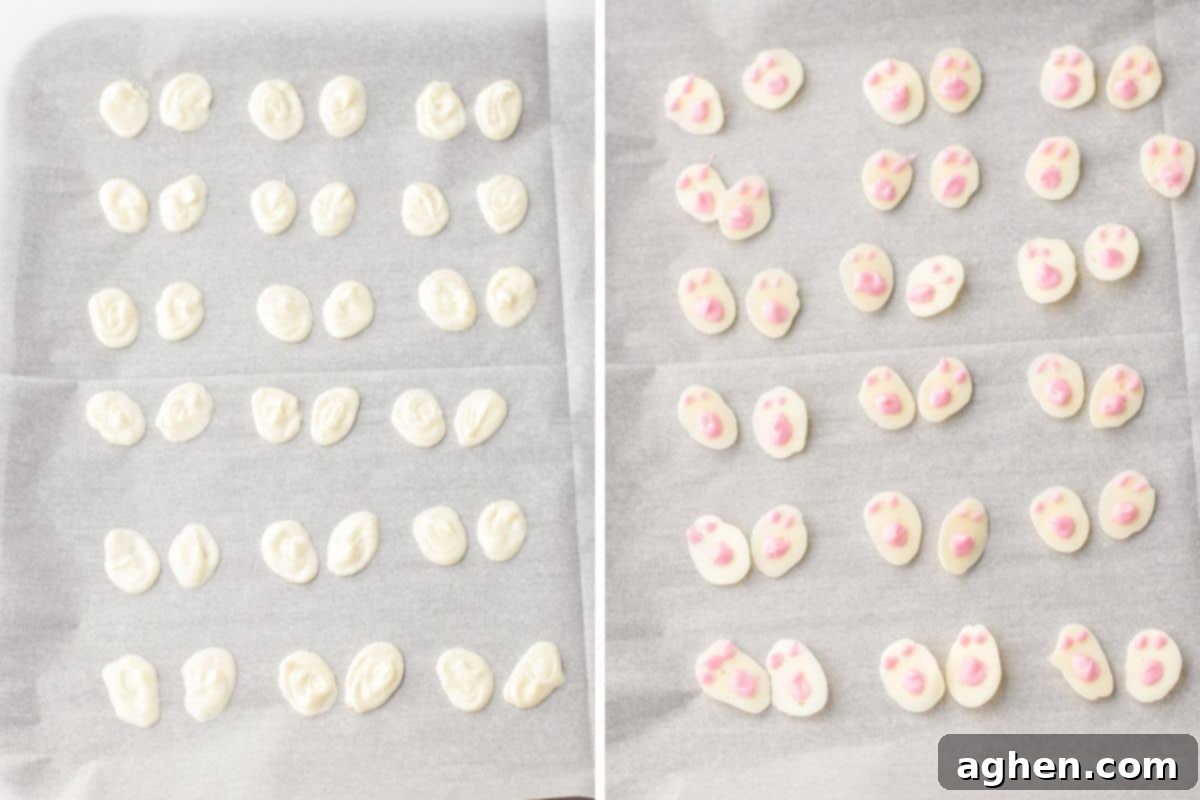
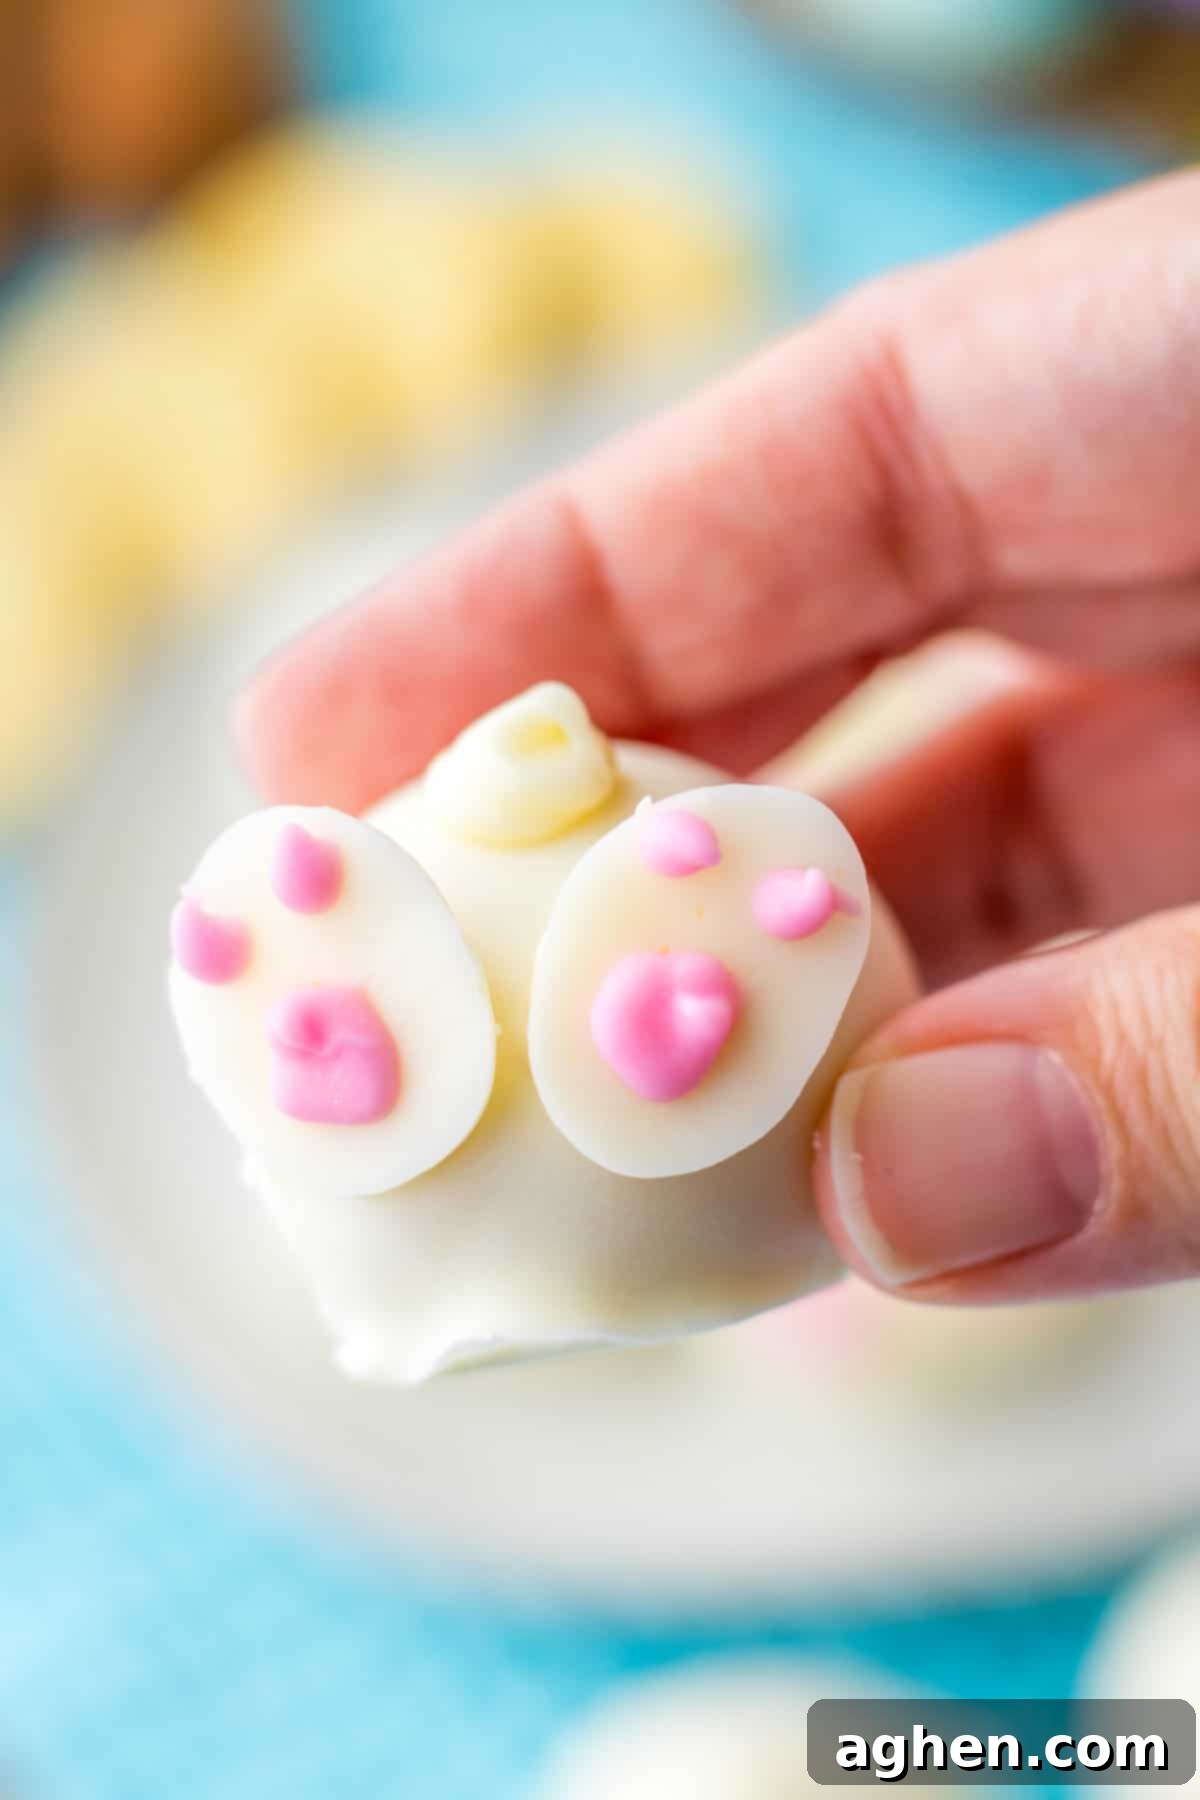
Step 7: Assemble Your Bunny Oreo Balls. Once all components are chilled and set, it’s time for the final assembly. Take a tiny bit of melted white chocolate (you can re-melt any leftover white chocolate or melt a few more wafers) and use it as “glue.” Pipe a small dot onto the back of each finished bunny foot and carefully attach a pair of feet to the bottom of each Oreo ball, positioning them to look like a bunny’s hind legs peeking out. Allow the truffles to set fully in the refrigerator for a final chill before serving or storing. And there you have it – your adorable Bunny Butt Oreo Balls are complete and ready to delight!

Storage Tips for Freshness
Ensuring your Bunny Oreo Balls stay fresh and delicious is simple with these storage guidelines:
Refrigerator: To maintain their optimal taste and texture, store your finished Bunny Oreo Balls in an airtight container in the refrigerator. They will remain fresh and delightful for up to 5 days. If stacking layers, place a sheet of wax paper between them to prevent sticking and preserve their delicate decorations.
Freezer: For longer storage, you can freeze the undipped Oreo cookie balls. Simply place the un-dipped balls on a parchment-lined baking sheet and freeze until solid. Then, transfer them to a freezer-safe airtight container or bag. They can be stored in the freezer for up to 3 months. When you’re ready to enjoy them, thaw the frozen balls in the refrigerator overnight before proceeding with dipping and decorating steps as usual.

Creative Additions and Delicious Variations
These Bunny Oreo Balls are wonderfully customizable! Here are some fun ideas to personalize your batch:
- Mini Marshmallow Tails: For an extra fluffy and adorable bunny tail, before chilling the rolled truffle balls, gently press a mini marshmallow into the center of each one. Once dipped in white chocolate, it will create a perfectly plump and soft tail.
- Sparkling Pink Sanding Sugar: After you’ve piped the pink chocolate details onto the bunny feet, immediately sprinkle a touch of pink sanding sugar over the melted chocolate. This adds a beautiful sparkle and a delightful textural element to your bunny paws.
- Extra Lemony Boost: If you’re a true lemon lover and want to intensify the citrus flavor, add 1 tablespoon of finely grated lemon zest (from about one lemon) to the Oreo and cream cheese mixture. This will provide an extra burst of fresh lemon in every bite.
- Easter Egg Oreo Balls: Instead of rolling the Oreo truffle mixture into round balls, shape them into small egg forms. Once chilled and dipped in white chocolate, you can get creative and decorate them with various colored candy melts, sprinkles, or edible glitter to create a vibrant assortment of Easter egg truffles.
- Coconut Flakes for Texture: After dipping the truffle balls in white chocolate, roll them lightly in finely shredded coconut flakes before the chocolate sets. This creates a wonderfully textured “fur” for the bunny tails and adds a tropical hint.
Expert Tips for the Best Oreo Cookie Balls
Achieving perfectly smooth and delicious Oreo cookie balls is easier than you think with these expert tips:
- Thorough Chilling is Key: This cannot be stressed enough! Ensure your truffle balls are thoroughly chilled in the refrigerator for at least 2 hours (or even longer, overnight is best) before you begin the dipping process. Well-chilled balls maintain their shape better and prevent the chocolate coating from cracking or sliding off.
- Uniformity with a Scoop: For quickly shaping uniform-sized small balls, a small cookie scoop (typically 1-tablespoon capacity) is your best friend. This ensures all your truffles are roughly the same size, leading to even dipping and a professional-looking finished product.
- Need to Speed Things Up? If you’re pressed for time and can’t wait for a long chill, you can place the rolled Oreo balls in the freezer for about 1 hour instead of chilling them in the fridge. They will firm up quickly, allowing you to proceed with dipping sooner.
- Proper Chocolate Melting: When melting your white chocolate, use a double boiler method or microwave in very short intervals (15-30 seconds), stirring thoroughly after each interval. Overheated chocolate can seize or burn, becoming unusable. Smooth, fluid chocolate is essential for a beautiful, even coating.
- Shake Off Excess: After dipping each truffle, gently tap the fork or dipping tool against the side of your bowl. This allows excess chocolate to drip off, preventing puddles at the base of your truffles and ensuring a cleaner, more appealing finish.
Easter Oreo Balls FAQ
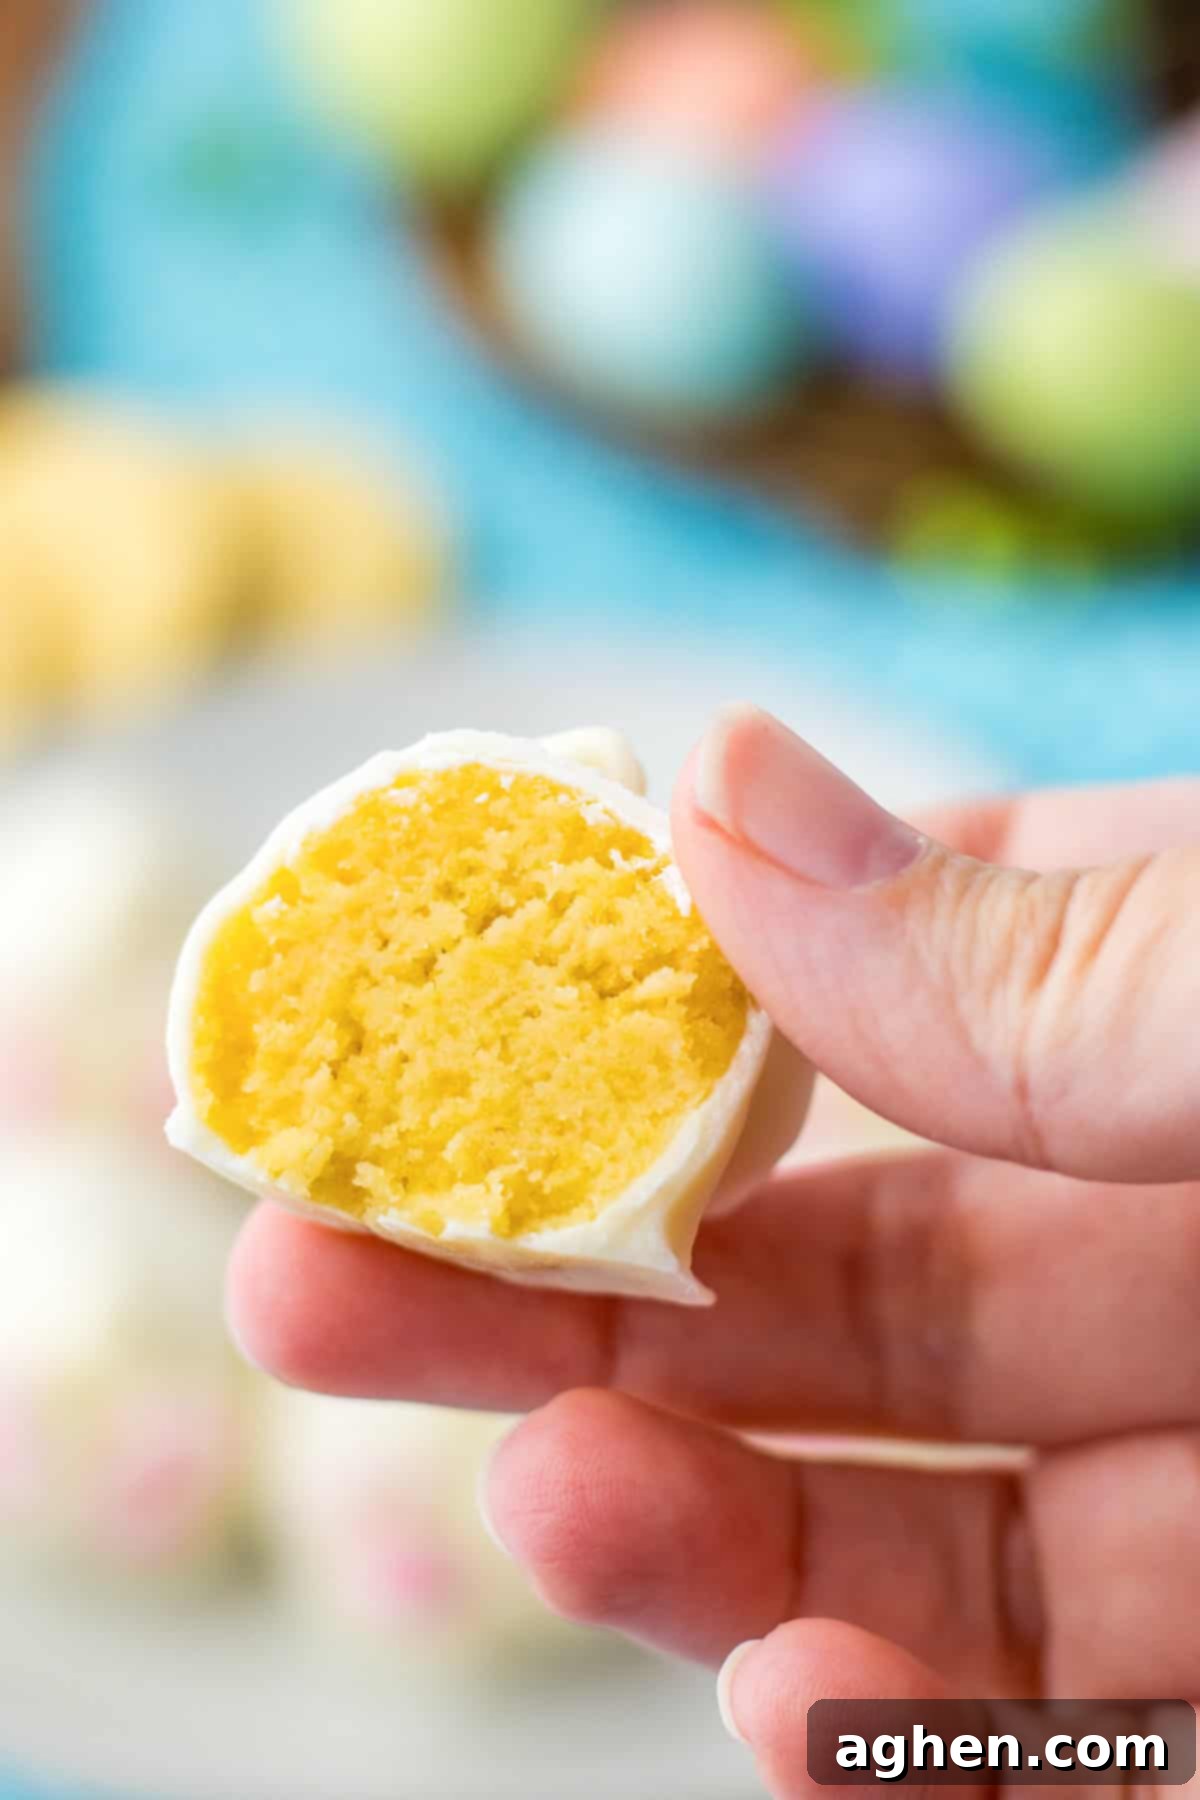
Absolutely! While lemon Oreos add a wonderful zest, regular Original Oreos or even Golden Oreos will work perfectly for this recipe. Feel free to experiment with different flavor varieties to create your own unique twist. The fundamental texture and structure of the truffle will remain the same, regardless of the Oreo flavor you choose.
No worries at all! A simple kitchen fork works incredibly well for dipping the truffles in chocolate. Just place an Oreo ball on the tines of the fork, submerge it in the melted chocolate, and then gently tap the fork on the side of the bowl. This helps to shake off any excess chocolate, ensuring a smooth and even coating before you place them on parchment paper to set.
If you’re short on time or simply prefer to buy them pre-made, edible bunny feet and tail candy decorations are often available during the Easter season. You can typically find them in the baking aisle of larger grocery stores, specialty craft stores (like Michael’s or Hobby Lobby), or through online retailers such as Amazon. Keep an eye out as Easter approaches! So far this year, I’ve primarily seen adorable edible bunny ears, but I’m optimistic that the feet and tails will become more widely available soon.
More Fun Easter Recipes to Try
Looking for more festive treats to celebrate Easter? Here are some other delightful recipes you’re sure to love:
- Bunny Pancakes: Start your Easter morning with a smile!
- Easter Punch: A refreshing and colorful drink for your holiday gathering.
- Bunny Bait: A sweet and salty snack mix that’s addictively good.
- Easter Cake Roll: An elegant and delicious dessert centerpiece.
- M&M Flower Pretzels: Simple, cute, and perfect for little helpers.
- Easter Bark: A quick and customizable candy bark with spring colors.


Bunny Butt Oreo Balls (No-Bake Easter Truffles)
Author: Jaclyn
Ingredients
- 8 ounce cream cheese softened
- 36 lemon oreos 14.3 ounce package (or golden/classic Oreos)
- 24 ounces white chocolate melting wafers or almond bark
- 8 ounces pink candy melts (or white chocolate dyed pink)
Instructions
-
Line 2 sheet pans with parchment paper or wax paper. Set aside.
-
Crush cookies in a food processor until fine crumbs (you may need to do this in batches for best results).
-
In a large bowl, use an electric mixer to combine the softened cream cheese and cookie crumbs until well blended.
-
Scoop and roll the dough into 1-inch balls. Place them on one of the lined sheets, cover, and chill in the refrigerator for at least 2 hours (or overnight) to firm up.
-
Melt white chocolate in the microwave in 30-second intervals, stirring after each, until smooth and fully melted (follow package directions).
-
One at a time, dip each chilled truffle ball into the melted white chocolate using a fork or dipping tool. Allow excess chocolate to drip off, then place on the second lined pan.
-
Transfer remaining melted white chocolate to a freezer baggie (snip a tiny corner). Pipe bunny tails onto the dipped truffles. On the second parchment-lined pan, pipe 48 small oval shapes for bunny feet. Chill both pans for 30 minutes.
-
Melt pink candy melts until smooth. Transfer to a clean baggie (snip corner). Remove bunny feet from fridge, flip them, and pipe 2 toes and a foot pad onto each with pink chocolate. Chill for 10 minutes, or until set.
-
Use a tiny dot of melted white chocolate as “glue” to attach a pair of bunny feet to the bottom of each truffle. Chill until fully set before serving or storing.
Notes
If you don’t own a food processor, you can use a high-speed blender for crushing cookies. Alternatively, place the cookies into a sturdy freezer baggie, seal it, and crush them finely with a rolling pin or the smooth side of a meat tenderizer. The goal is to achieve crumbs that are as fine as possible for a smooth truffle consistency.
If the Oreo ball mixture becomes too sticky or soft to handle during the rolling or dipping process, simply pop it back into the fridge or freezer for 15-30 minutes. This will help it firm up again, making it much easier to work with.
Nutrition

Did You Make This Recipe?
Share your delightful creations with me on Instagram @crayonsandcravings! Don’t forget to follow on Pinterest @crayonsandcravings for even more inspiring recipes and fun ideas!
Pin Recipe
Leave A Review
