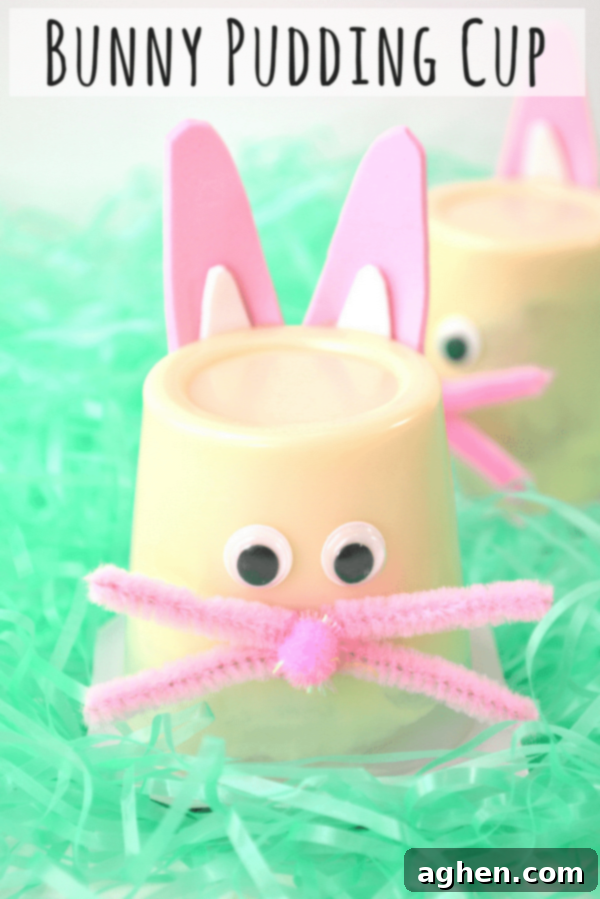
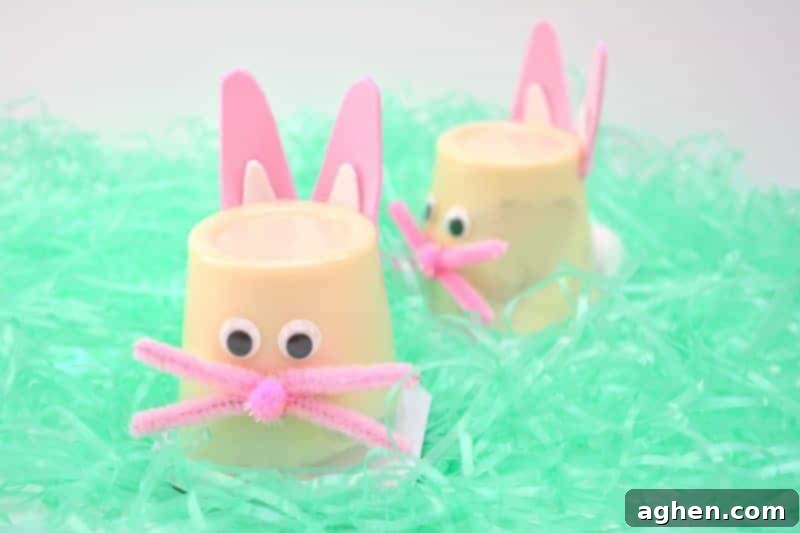
Hop into Spring with Easy Easter Bunny Pudding Cups: The Ultimate Kid-Friendly Craft & Treat!
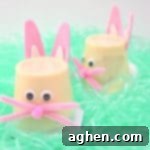
Are you searching for an Easter activity that combines creativity, simplicity, and a delicious treat? Look no further! These charming **Easter Bunny Pudding Cups** are a delightful solution that will bring smiles to every face. Imagine transforming an ordinary pudding cup into an adorable bunny, complete with googly eyes, a fluffy tail, and perky ears – it’s an incredibly fun and easy craft perfect for celebrating the arrival of spring and the joy of Easter.
This craft isn’t just about making something cute; it’s about creating lasting memories with your little ones. Whether you’re a parent looking for a weekend project, a teacher planning a classroom activity, or simply someone who loves festive DIYs, these bunny pudding cups offer a fantastic blend of fun and functionality. Plus, they double as a wonderful, edible treat, making snack time extra special and much anticipated.
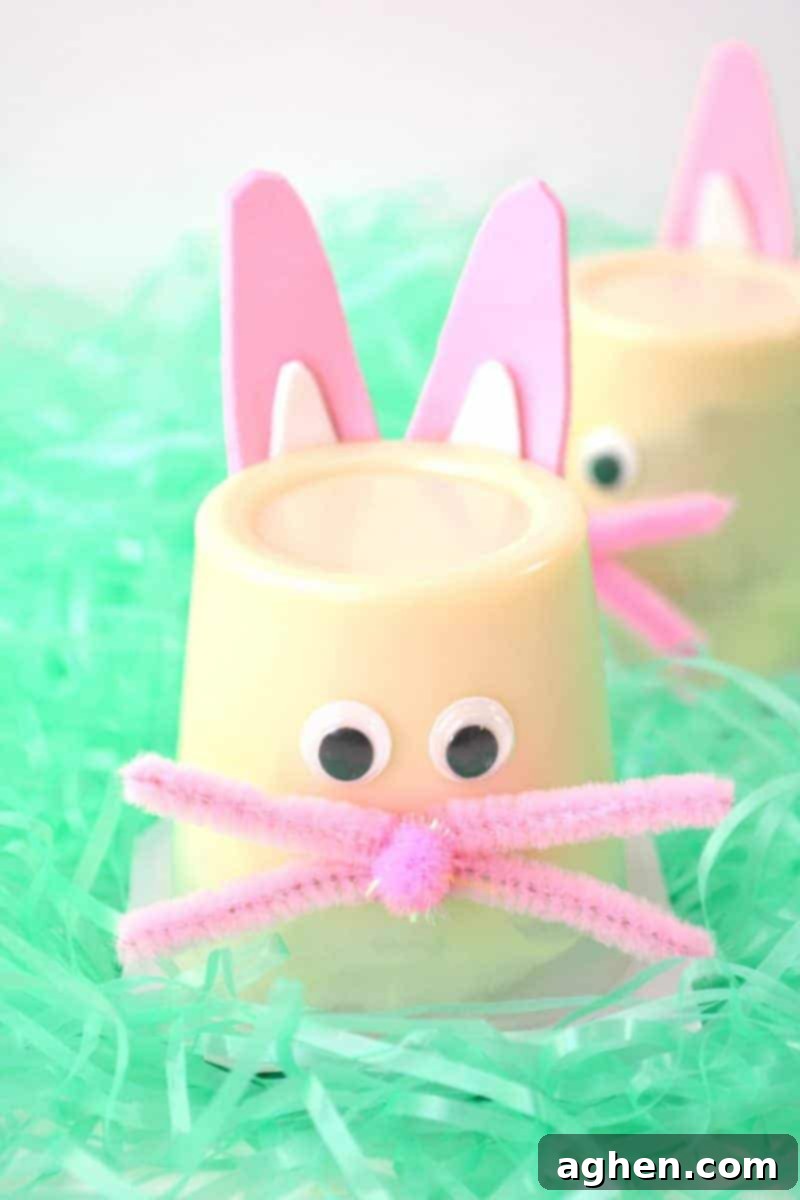
Who knew that humble pudding cups possessed such an amazing ability to be transformed into cute little Easter bunnies? This project truly showcases how a few simple craft supplies can ignite imagination and create something truly special. Get ready to gather your materials and embark on an exciting crafting adventure that culminates in a snack everyone will love!
Why These Bunny Pudding Cups Are a Must-Try Easter Craft for Kids
These **Easter bunny pudding cups** are more than just a craft; they’re an experience designed for pure joy and ease. Here’s why they’ve become a favorite for families and educators alike during the Easter season:
- **Effortless & Quick to Assemble:** You’ll be pleasantly surprised at how quickly these charming bunnies come together. With minimal steps and simple materials, you can create a whole “hutch” of bunnies in no time, making them ideal for busy schedules or short attention spans. This swift crafting means more time for play and less for setup!
- **Budget-Friendly Fun:** Planning an Easter celebration or a fun activity shouldn’t break the bank. Most of the supplies required for this project can easily be found at your local dollar store or craft supply retailer, allowing you to craft a multitude of adorable bunnies without spending a fortune. It’s perfect for large groups, classroom settings, or even just stocking up for future craft sessions.
- **Utterly Adorable Results:** The finished product is undeniably cute! These little bunny faces are sure to charm anyone who sees them, making them fantastic centerpieces for an Easter brunch, delightful party favors that guests can take home, or a special, personalized treat in lunchboxes. The cuteness factor alone makes them a hit!
- **Kid-Approved Edible Craft:** The absolute best part? They’re deliciously edible! Kids absolutely adore eating their pudding right from their custom-made bunny cup once snack time rolls around. This adds an extra layer of enjoyment and a tangible sense of accomplishment, turning snack time into a reward for their creativity.
- **A Wonderful Non-Candy Alternative:** In an age where many parents and teachers are looking for non-candy options for holiday treats, these pudding cups hit the mark perfectly. They offer a sweet indulgence combined with a creative, hands-on activity, providing a balanced and exciting alternative to traditional Easter candy.
- **Versatile for Any Occasion:** While undeniably perfect for Easter celebrations, these bunny cups can also be a charming addition to spring-themed parties, baby showers, or any event where a touch of adorable cuteness is desired. Their appeal extends far beyond just one holiday.
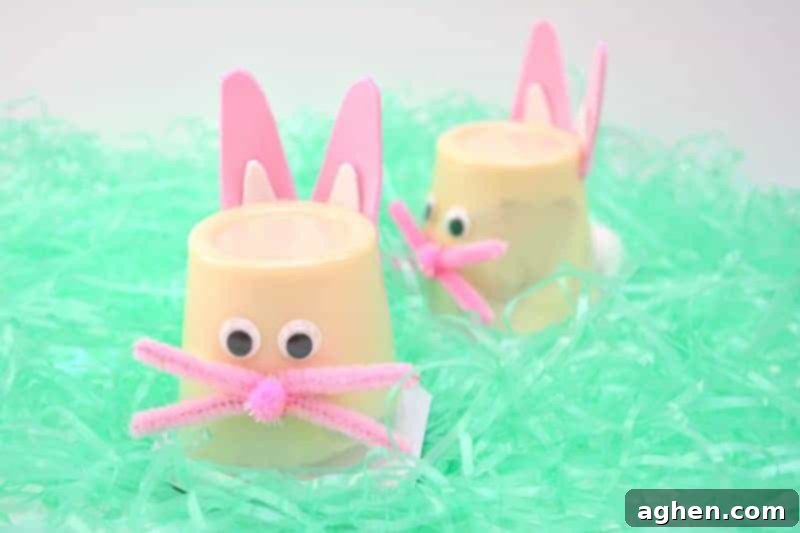
Whether you’re a teacher looking for a delightful, non-candy Easter treat to hand out to your students, or a parent wanting a fun craft-and-snack combo for your children, these **bunny pudding cups** are an excellent choice. They encourage creativity, fine motor skills, and provide a rewarding edible outcome, truly a win-win for everyone involved.
For a complete bunny-themed breakfast experience, don’t miss these adorable bunny pancakes! They’re another fantastic way to add a touch of Easter magic to your family’s morning routine, complementing your pudding cup craft perfectly.
Gather Your Supplies: What You’ll Need for This Easy Easter Craft
One of the best aspects of this **easy Easter craft** is that it requires only a handful of common and affordable materials. You might even have many of these items already stashed in your craft drawer, making this a spontaneous activity whenever the mood strikes!
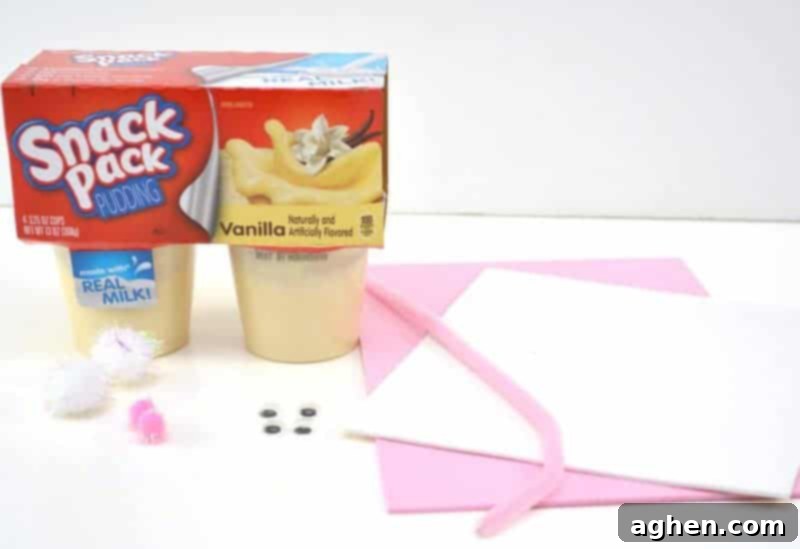
- **Vanilla Pudding Snack Cups:** These serve as the sturdy foundation of your adorable bunnies! While vanilla is suggested, feel free to use chocolate, butterscotch, or any other pudding flavor your child prefers. Ensure they are the individual-serving size cups.
- **Pink Craft Foam:** This flexible and easy-to-cut material will form the larger, outer part of the bunny’s ears, giving them that classic soft pink interior. It adds a lovely pop of color.
- **White Craft Foam:** Used for the smaller, inner ear details, providing a lovely contrast and defining the ear shape. This helps to create dimension and make the ears look more realistic.
- **Googly Eyes:** Essential for bringing your bunny’s face to life with a playful, animated look. They instantly add character and charm to each creation.
- **Small Pink Pom Pom:** This fluffy little sphere creates the perfect cute and soft bunny nose, a central feature of your bunny’s face.
- **Medium White Pom Pom:** The ideal size and fluffiness for your adorable creation’s tail, giving it that iconic bunny backside.
- **Pink Pipe Cleaner:** Used for crafting those iconic, whimsical bunny whiskers. You might want to choose a color that stands out against the pudding cup for better visibility.
- **Pencil:** An everyday item needed for drawing the ear shapes onto the craft foam before cutting.
- **Scissors:** For carefully cutting the foam shapes. (Adult supervision is highly recommended for younger children when using scissors).
- **Craft Glue or Hot Glue Gun:** Craft glue is generally safer for younger children and provides a strong bond, though it requires more drying time. A low-temperature hot glue gun (always with adult supervision) offers quicker drying and stronger adhesion, making the process faster.
Shop Your Bunny Pudding Cup Supplies with Ease
To make gathering your materials even easier, we’ve put together a list of suggested supplies you can find online. Click through to stock up on everything you need to create your own adorable **pudding cup bunnies** without a hassle!
Step-by-Step Guide: Crafting Your Adorable Bunny Pudding Cups
Follow these simple, easy-to-understand instructions to transform plain pudding cups into festive Easter bunnies. This is a fantastic activity for all ages, with younger children benefiting from a little adult assistance, especially with cutting and the application of glue.
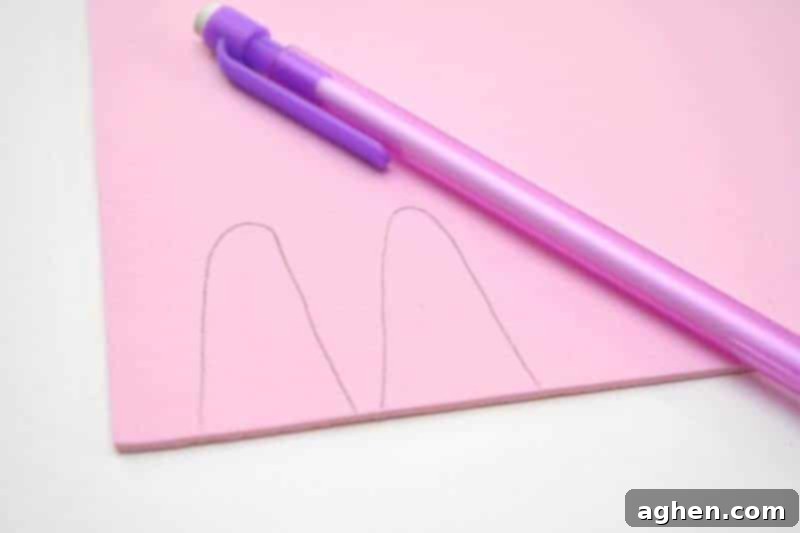
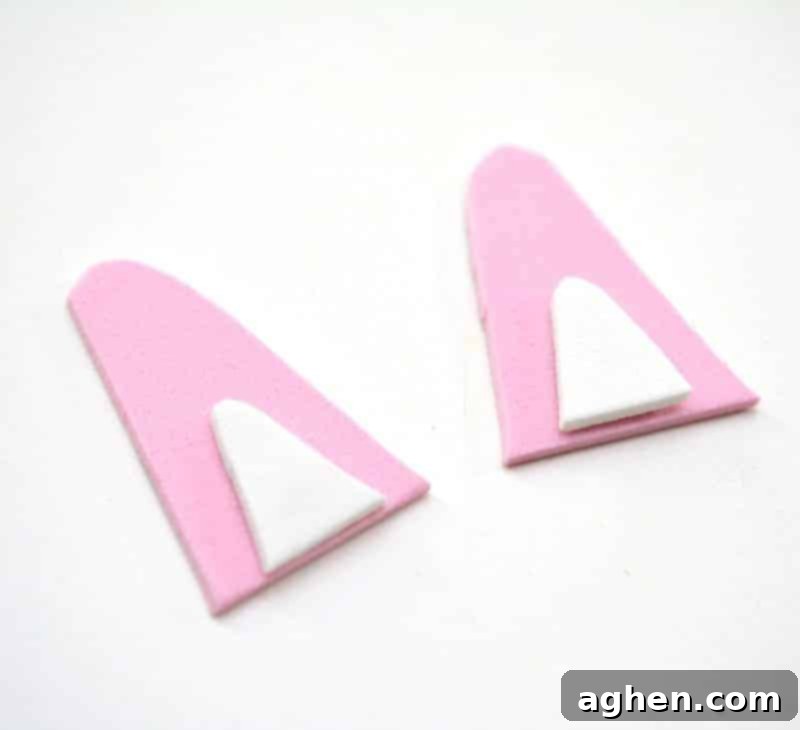
- **Outline the Outer Ears:** Begin by taking your pink craft foam and a pencil. Draw the shape of two bunny ears. A good reference for size is the pudding snack cup itself – aim for tall, rounded hill-like shapes that will sit nicely on top of the cup. Make sure they are proportionate to the cup size.
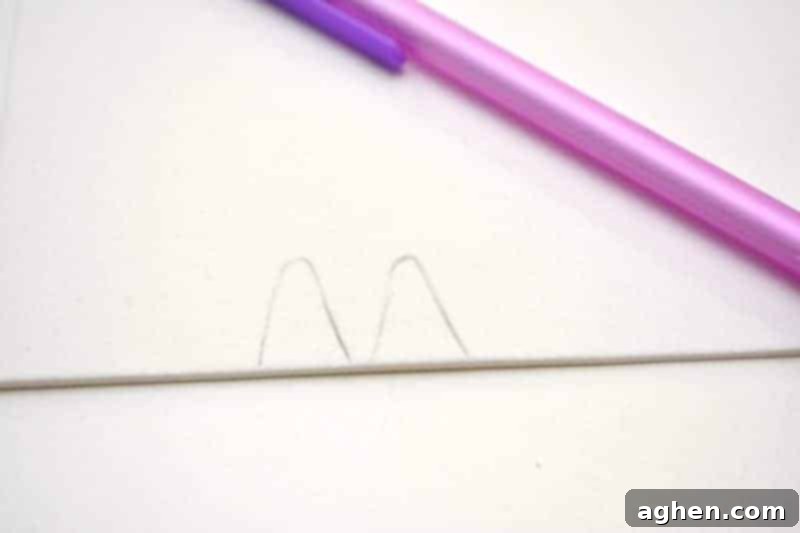
- **Create the Inner Ears:** Next, on a piece of white craft foam, draw the exact same ear shape, but on a slightly smaller scale. These will become the adorable inner part of your bunny’s ears, so make sure they are small enough to fit neatly within the pink foam shapes you just drew, leaving a border of pink around them.
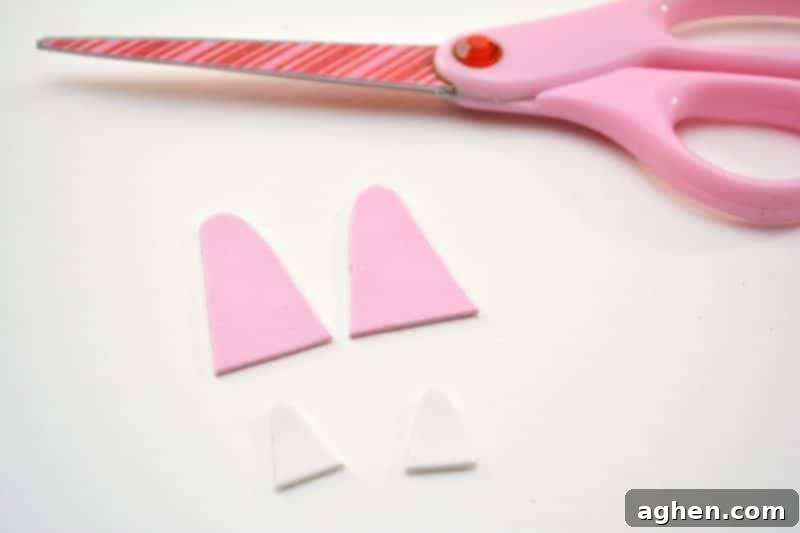
- **Cut Out the Shapes:** Carefully cut out all four craft foam shapes – both the larger pink outer ears and the smaller white inner ears. Precision helps to create a neat look, but remember that a charming handmade quality is part of the fun!
- **Assemble the Ears:** Using your chosen craft glue or a low-temp hot glue gun (always with adult supervision for the latter), attach the white craft foam shapes onto the bottom center of the pink craft foam shapes. This creates the classic two-toned bunny ear effect that is instantly recognizable.
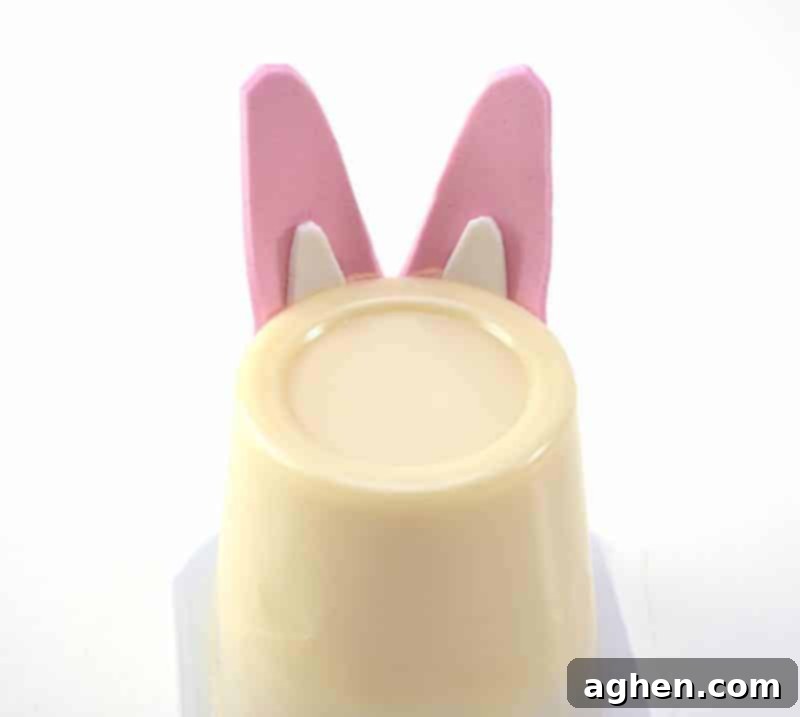
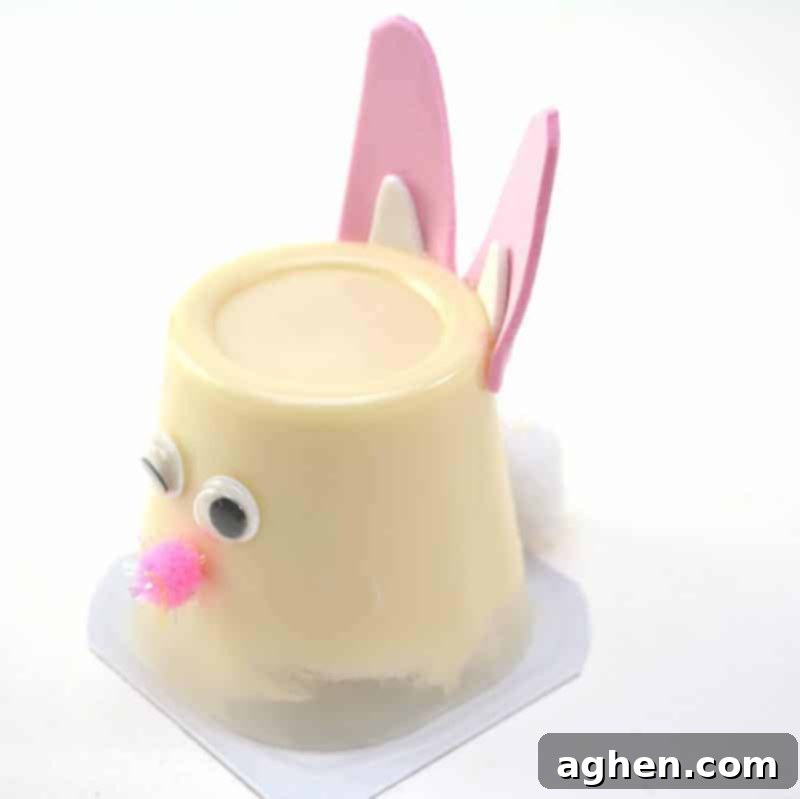
- **Attach the Ears to the Pudding Cup:** Take a vanilla pudding snack cup and turn it upside down. Using glue, attach the completed bunny ear shapes to the top of the back of the cup. Hold them firmly in place for a moment to ensure they adhere well and stand upright.
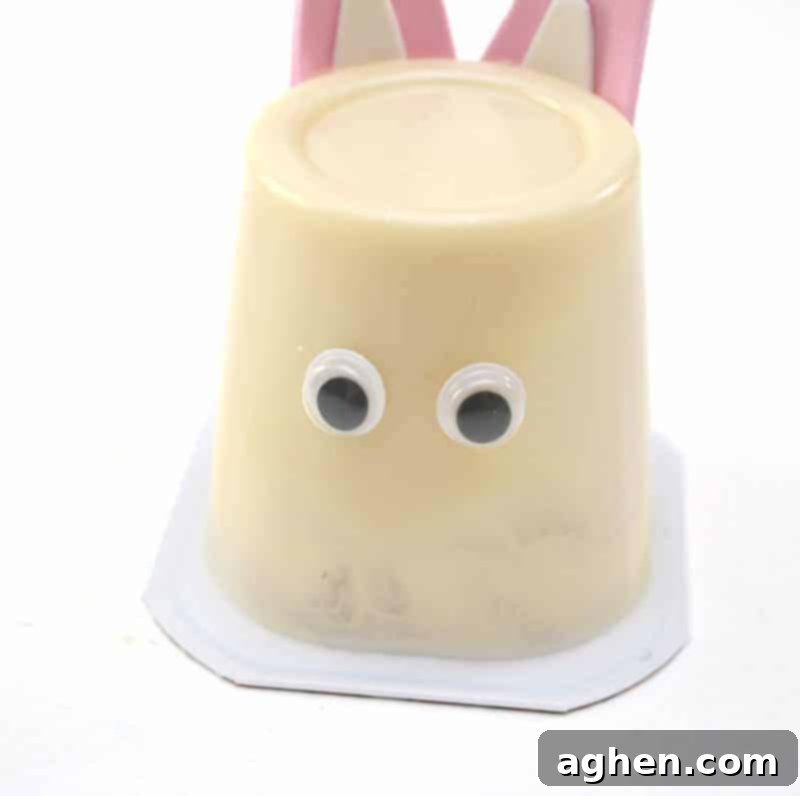
- **Add Googly Eyes:** Now for the fun part that truly brings your bunny to life! Glue a pair of googly eyes to the front of your upside-down pudding cup, positioning them where a bunny’s eyes would naturally be. This step adds so much personality!
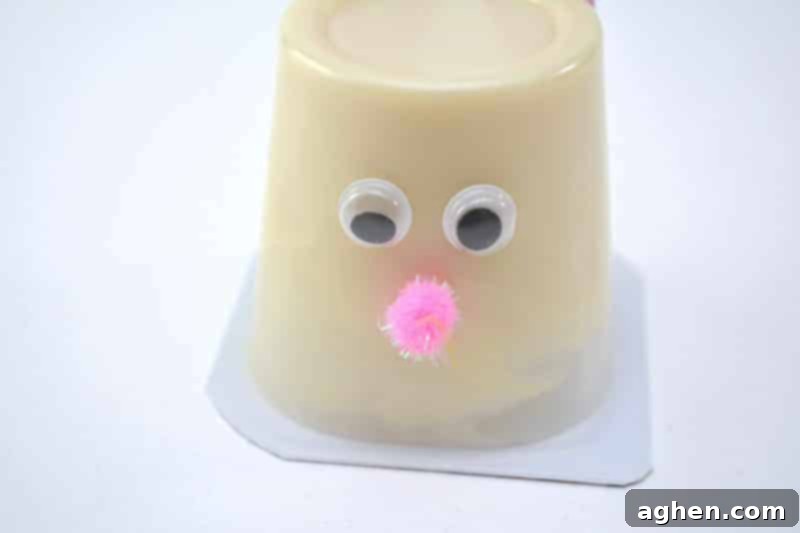
- **Place the Bunny Nose:** Attach a small pink craft pom pom to the front of the upside-down pudding cup, directly below the googly eyes. This instantly becomes your bunny’s adorable little nose, completing the facial features.
- **Add a Fluffy Tail:** Glue a medium white pom pom to the bottom of the back of your upside-down pudding cup, just below where you attached the ears. This fluffy addition completes your bunny’s charming silhouette from behind.
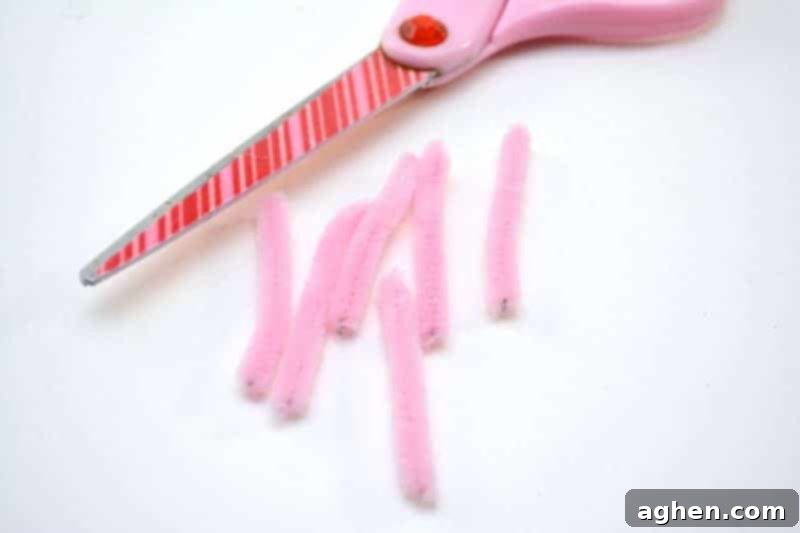
- **Prepare the Whiskers:** Take your pink pipe cleaner and cut it into several small, equal pieces, each about an inch long. You’ll typically need two pieces for each side of the nose to create realistic whiskers.
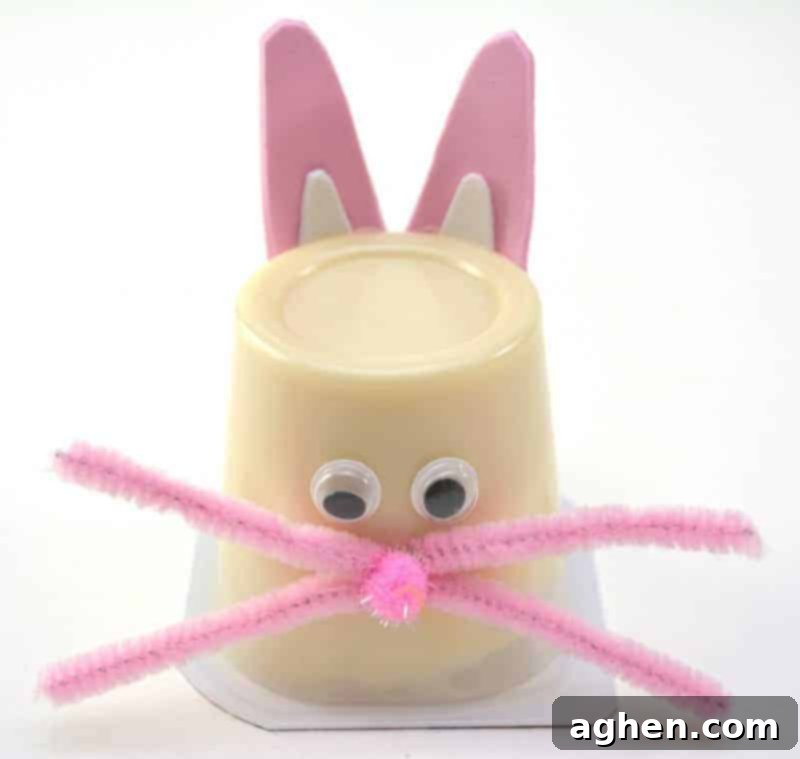
- **Attach the Whiskers:** Finally, use glue to attach two pipe cleaner pieces to either side of the craft pom pom nose on the front of the upside-down pudding cup. Fan them out slightly to create those characteristic bunny whiskers, giving your bunny its final charming detail. And there you have it – your adorable **Easter Bunny Pudding Cup** is complete and ready to be admired and enjoyed!
Tips for Success and Creative Variations for Your Pudding Cup Bunnies
Making these **Easter bunny pudding cups** is inherently simple and rewarding, but a few extra tips can enhance your crafting experience and open up possibilities for even more personalization and fun:
- **Pudding Flavor Fun:** Don’t limit your imagination to just vanilla! Chocolate, butterscotch, or even a mix of pudding flavors can add a delightful surprise for those enjoying the treat. For a truly colorful twist, consider adding a few drops of food coloring to vanilla pudding before decorating to create pastel shades that match your Easter theme.
- **Experiment with Ear Color Combos:** While pink and white are traditional and lovely, feel free to experiment with other craft foam colors for the inner and outer ears. Light blue, lavender, bright yellow, or even patterned foam could create unique and vibrant bunnies that reflect individual personalities.
- **Create Expressive Faces:** Googly eyes come in various sizes and styles – from tiny to large, and even colored ones! Mix and match them for different bunny personalities and expressions. For an even more detailed face, you can use a fine-tip permanent marker to draw a small, cheerful mouth under the nose.
- **Add Extra Embellishments:** To give your bunnies a touch of sparkle or flair, add a sprinkle of glitter to the ears while the glue is wet, or glue on tiny adhesive rhinestones. Small satin bows or miniature craft flowers near the base of the ears can also make your bunnies look extra fancy and festive.
- **Simplify for Group Crafting:** If you’re making these with multiple children, especially a large group like in a classroom or at a party, consider pre-cutting some of the foam shapes. This will significantly speed up the process and allow kids to focus on the exciting assembly and creative placement, making it more manageable for younger participants.
- **Hot Glue Safety First:** If you choose to use a hot glue gun for faster drying and stronger bonds, always ensure strict adult supervision. For younger children, it’s best to have adults handle all hot glue steps to prevent any burns. Craft glue is a perfectly safe and effective alternative, though it will require a bit more drying time.
- **Optimal Storage & Presentation:** These delightful treats are best enjoyed fresh to ensure the pudding is at its prime. If you need to prepare them slightly in advance, keep them refrigerated. For serving, arrange your completed **pudding cup bunnies** on a platter with some festive Easter grass, colorful shredded paper, or scattered mini chocolate eggs for a truly engaging and celebratory display.
Educational & Developmental Benefits of This Kids Easter Activity
Beyond the sheer fun and undeniable cuteness, engaging in the craft of making **bunny pudding cups** offers several wonderful developmental benefits for children, making it a valuable learning experience disguised as play:
- **Enhances Fine Motor Skills:** The intricate actions involved in this craft, such as carefully cutting foam shapes, picking up small pom poms, and precisely placing googly eyes, all contribute significantly to the development and refinement of fine motor skills and hand-eye coordination.
- **Promotes Following Instructions:** The step-by-step nature of this craft encourages children to listen attentively, understand, and then execute a sequence of instructions. This is a crucial skill for academic learning and everyday tasks.
- **Sparks Creativity & Imagination:** While there’s a basic template to follow, children can still express their unique creativity through choosing different color combinations for the ears, varying ear shapes slightly, or adding their own unique embellishments. It sparks imagination and allows for wonderful personal expression.
- **Fosters Problem-Solving Skills:** If a piece doesn’t stick perfectly the first time, or an eye goes a little askew, children learn to identify the problem and figure out how to adjust or fix it. This fosters resilience, adaptability, and basic problem-solving abilities.
- **Encourages Sensory Exploration:** The different textures encountered – the smooth feel of craft foam, the soft fluffiness of pom poms, and the slightly bumpy pipe cleaners – provide a gentle and engaging sensory experience for children.
- **Develops Patience & Focus:** Completing a craft project from start to finish requires a certain level of patience and the ability to focus on the task at hand. This activity helps children to develop and strengthen these important attributes.
Perfect for Easter Classroom Treats & Parties
For educators and party planners alike, these **bunny pudding cups** present a fantastic, interactive, and memorable way to celebrate Easter without relying solely on sugary candy. Here’s why they are an ideal choice for a school environment or a lively Easter party:
- **Engaging Group Activity:** This craft can easily be adapted into a station-based activity, where children move from one step to the next (e.g., cutting station, gluing station, decorating station), making it a dynamic and interactive session that keeps everyone involved.
- **Delicious Non-Candy Treat Option:** As a delicious, satisfying, and visually appealing alternative to traditional Easter candy, these cups are always a hit. They can be served as part of a balanced classroom snack, a special party dessert, or a delightful take-home treat.
- **Relatively Minimal Mess:** Compared to more elaborate craft projects involving paints or extensive baking, this craft is relatively low-mess. This is a huge bonus for teachers and parents who are often responsible for cleanup!
- **Personalized Take-Home Keepsake:** Each child gets to create and take home their own personalized bunny, providing a tangible memory of the fun activity. It’s a craft they can proudly display before enjoying.
- **Adaptable for Allergy Considerations:** While standard pudding cups contain dairy, this craft can be adapted for other dietary needs by using readily available dairy-free pudding alternatives, making it a more inclusive option for all children to enjoy.
Frequently Asked Questions About Making Bunny Pudding Cups
- Q: Can I use construction paper instead of craft foam for the ears?
- A: Yes, you certainly can! Craft foam generally holds its shape a bit better and adds a nice, slightly thicker texture, but construction paper or even felt would also work wonderfully. Just be aware that paper might be more prone to bending or tearing if not handled carefully.
- Q: How far in advance can I prepare these bunny pudding cups?
- A: It’s best to assemble and serve these delightful treats relatively close to when you plan to enjoy them, ideally within a day. While the craft elements themselves will hold up, the pudding inside is always best when fresh. Remember to keep them refrigerated until serving to maintain their quality and freshness.
- Q: What if I don’t have googly eyes on hand?
- A: No problem at all! Get creative! You can easily draw eyes onto small circles of white paper and glue those on, or simply use a permanent marker to draw expressive eyes directly onto the pudding cup. Even small buttons or beads could work if carefully glued.
- Q: Can younger toddlers participate in this craft?
- A: Absolutely! Toddlers can certainly participate and will love helping with tasks like sticking on the googly eyes, pom poms, and pre-cut ears. Adult supervision and assistance, especially with cutting and any gluing (particularly hot glue), will be necessary to ensure their safety and the success of the craft.
- Q: Are there any other creative ways to make the whiskers?
- A: If you don’t have pipe cleaners, there are several alternatives! Thin strips of black or colored construction paper, strands of black thread, or even thin natural twigs (cleaned) can be carefully glued on as whiskers. The goal is to add that final, charming touch of bunny detail!
I hope that you and your loved ones have an absolutely wonderful time creating and indulging in these delightful **Easter bunny pudding cups**. This easy, engaging, and utterly adorable project is sure to become a cherished part of your family’s Easter traditions, bringing joy and a touch of handmade magic to your holiday celebration. Don’t miss our other fantastic Easter ideas for kids below!
More Fun Easter Ideas for Kids:
- 30+ Easter Desserts for Kids
- Easter Chicks Wine Cork Painting
- Easter Bunny Bark
- Bunny Bait
- Easter Punch
- Puffy Peeps Paint
Bunny Pudding Cups
Author: Jaclyn
Equipment
-
pencil
-
Scissors
-
craft glue or low temperature hot glue gun
Supplies
- 1 vanilla pudding cup
- 1 sheet pink craft foam
- 1 sheet white craft foam
- 2 googly eyes
- 1 small pink pom pom
- 1 medium white pom pom
- 1 pink pipe cleaner
Instructions
-
Using a pencil, outline the shape of two bunny ears on a piece of pink craft foam. Use the size of the pudding snack cup for reference.
-
Draw the same shape, but on a smaller scale, onto white craft foam. This will be the inside of your bunny’s ears, so make sure that these shapes are small enough to fit inside the ones that you drew on the pink craft foam.
-
Cut out both the pink and the white craft foam shapes.
-
Glue the white craft foam shapes onto the bottom center of the pink craft foam shapes.
-
Using glue, attach the bunny ears to the top of the back of your upside-down pudding cup.
-
Glue a pair of googly eyes to the front of the pudding cup.
-
Attach a pink pom pom to the front of the pudding cup, just below the googly eyes. This will be the bunny’s nose.
-
Glue a white pom pom to the bottom of the backside of the pudding cup to act as the bunny’s tail.
-
Cut a pipe cleaner into 4 equal-size pieces.
-
Use glue to attach 2 pipe cleaners to either side of the bunny’s pom pom nose. These will be your bunny’s whiskers.
Did You Make This Craft?
Share it with me on Instagram @crayonsandcravings and follow on Pinterest @crayonsandcravings for even more!
Pin Craft
Leave A Review
Pin for Later:
