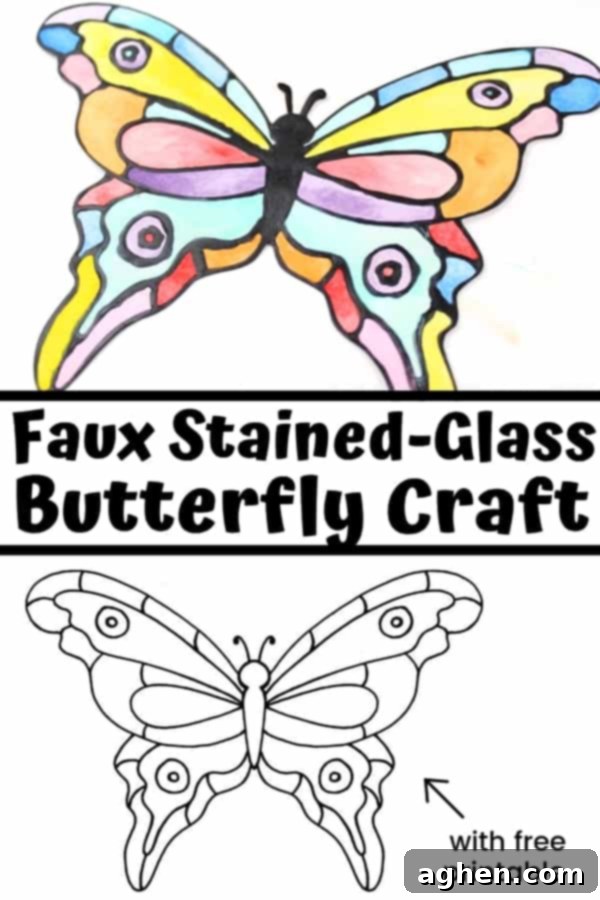
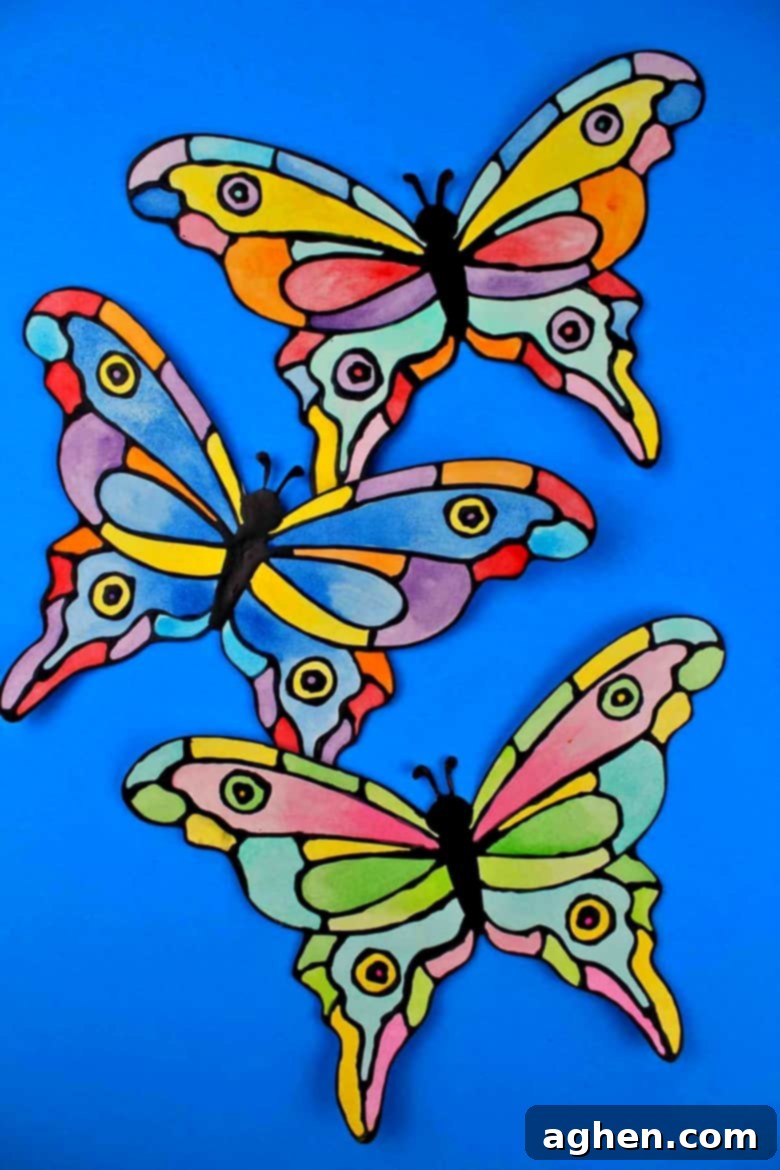
DIY Faux Stained Glass Butterfly Craft: A Vibrant Activity for All Ages
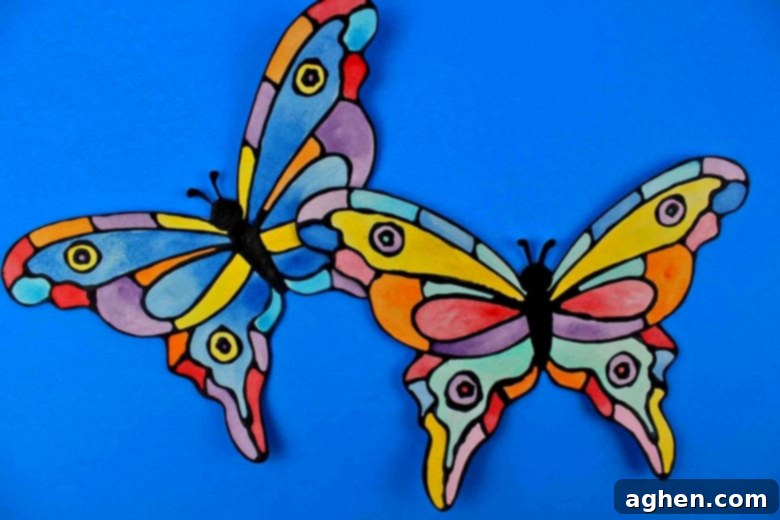
Unleash your creativity and brighten up any space with this enchanting DIY Faux Stained Glass Butterfly Craft! Perfect for spring, summer, or any day you need a splash of color, this project transforms simple materials like cardstock, glue, and watercolors into a stunning piece of art. Imagine delicate butterflies, their wings shimmering with vibrant hues, catching the light just like real stained glass – but without the intricate cutting or expensive supplies. This engaging craft is a fantastic way to spend an afternoon, whether you’re seeking a relaxing solo project or a fun activity to share with family and friends.
In this comprehensive guide, we’ll walk you through every step of creating these beautiful faux stained-glass butterflies. From preparing your unique “black glue” to coloring your designs with bright watercolors, you’ll discover how easy it is to achieve a captivating stained-glass effect. We’ve even included a free printable butterfly template to get you started immediately. Get ready to add a touch of handmade magic to your home or classroom with these delightful winged wonders!
Embrace the Beauty of Spring with Vibrant Butterfly Crafts
As the days grow longer and nature awakens, the arrival of spring brings a renewed sense of energy and a desire for vibrant colors. What better way to celebrate this season of rebirth than by creating these exquisite faux stained glass butterflies? Their delicate beauty and radiant colors make them an ideal project for welcoming warmer weather, decorating your home, or gifting to loved ones. These aren’t just any butterfly crafts; they’re designed to mimic the intricate beauty of traditional stained glass, offering a sophisticated yet accessible artistic experience.
This butterfly craft is wonderfully versatile, appealing to a wide range of ages and skill levels. While older children and adults will thoroughly enjoy the entire process – from carefully tracing lines with glue to blending watercolors – younger children can also participate with a little assistance. For your little ones, we suggest having an adult or older sibling handle the glue application steps. Once the glue has dried, the butterflies become a delightful canvas, ready for small hands to paint with an array of dazzling watercolors. This allows everyone to contribute and feel proud of their personalized artwork.
Whether you’re planning a fun family craft day, looking for an engaging classroom activity, or simply want to unwind with a creative endeavor, these faux stained-glass butterflies offer a rewarding experience. The process encourages patience, precision, and artistic expression, culminating in a beautiful decorative piece that reflects your unique style.
The Joy and Benefits of Crafting Butterflies
Engaging in crafts like this faux stained glass butterfly project offers more than just a beautiful end product; it provides numerous developmental and psychological benefits. For children, it’s a fantastic way to enhance their **fine motor skills** as they learn to control the flow of glue and carefully maneuver a paintbrush. Following instructions also boosts their **problem-solving abilities** and **patience** – especially during the drying stages!
Moreover, crafting fosters **creativity and self-expression**. Choosing colors, deciding on patterns, and seeing their vision come to life empowers children and builds their confidence. It’s also an excellent opportunity for **color recognition and artistic exploration**, allowing them to experiment with how different watercolors blend and create new shades.
For adults, crafting can be a wonderfully **stress-relieving and meditative activity**. The focused attention required for tracing and painting can help clear the mind, reduce anxiety, and promote a sense of calm. It offers a tangible break from screens and daily routines, allowing you to tap into your inner artist and enjoy the satisfaction of creating something beautiful with your own hands. Plus, sharing these moments with children creates lasting memories and strengthens bonds.
Gather Your Supplies: What You’ll Need
Before you embark on this creative journey, let’s ensure you have all the necessary tools and materials at hand. The beauty of this craft lies in its simplicity and the accessibility of its components. You likely have many of these items around your home already!
For this captivating butterfly craft, you will need:
- **Cardstock:** Opt for a bright white, heavy-duty cardstock. Its sturdy nature will prevent the paper from buckling when wet with glue and watercolors, ensuring your butterflies hold their shape beautifully.
- **Black Paint:** Acrylic craft paint works perfectly. This will be mixed with glue to create our “faux leading” effect.
- **White Glue:** Standard school glue (like Elmer’s Glue-All) is ideal. Its consistency is perfect for mixing with paint and tracing lines.
- **Watercolor Paint Set:** A basic set of vibrant watercolors will bring your butterflies to life. The translucent quality of watercolors is key to achieving the stained-glass look.
- **Paintbrushes:** A selection of small to medium-sized brushes will allow for detailed painting within the glue outlines.
- **Scissors:** Sharp scissors are essential for carefully cutting out your butterfly shapes.
- **Printable Butterfly Template:** Don’t forget to download our free template – it’s the foundation for your beautiful designs!
Having everything organized before you begin will make the crafting process much smoother and more enjoyable. Lay out your workspace with a protective covering, as paints and glues can be a bit messy, especially with enthusiastic young crafters!
How to Create Your Faux Stained-Glass Butterfly: Step-by-Step Guide
Follow these simple instructions to craft your very own stunning faux stained-glass butterflies. The process is straightforward, but a little patience, especially during drying times, will yield the best results!
-
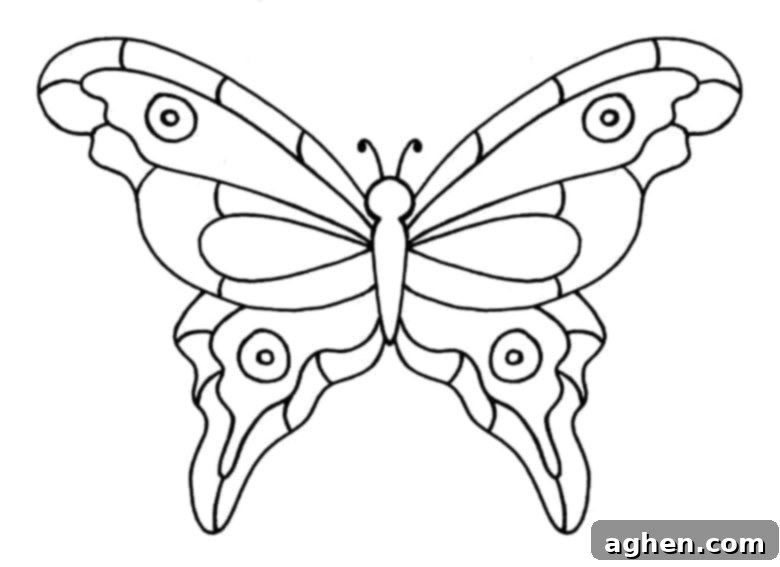
Step 1: Download and Print Your Butterfly Template
First things first, you’ll need our special butterfly design. Download the printable butterfly template here. Print it out directly onto your chosen cardstock. Using cardstock is crucial here, as it’s thick enough to prevent warping from the wet glue and paints, ensuring your butterflies hold their shape beautifully. Print as many butterflies as you wish to create – the more, the merrier!
-
Step 2: Prepare Your “Black Glue”
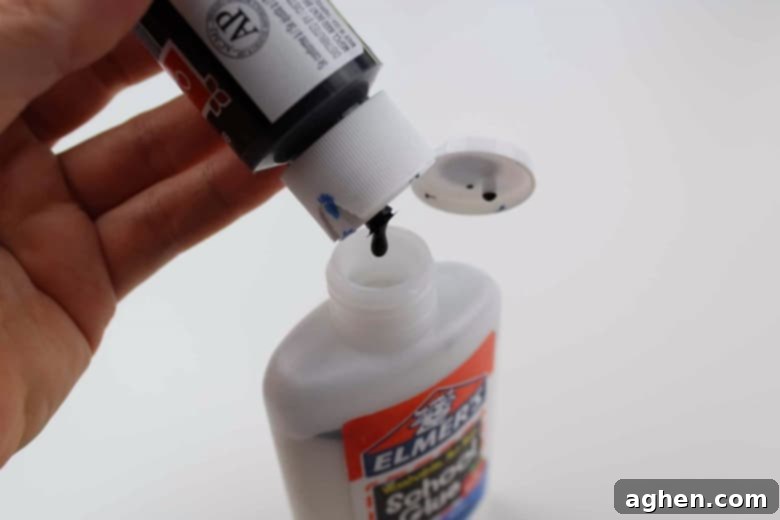
This is where the magic begins! Take your bottle of white glue and carefully open the top. You might need to pour out a small amount of glue (into a separate container for another craft, perhaps!) to make room for the black paint. Then, add approximately a tablespoon of black acrylic paint directly into the glue bottle. Secure the lid tightly and shake the bottle vigorously for a minute or two. The goal is to achieve a consistent dark grey or black color. Check the color; if it’s not dark enough, add a bit more black paint and shake again. If the paint and glue are stubborn and not mixing well with shaking alone, a wooden dowel or a chopstick can be inserted into the bottle to help stir and combine the mixture thoroughly.
-
Step 3: Trace with Black Glue
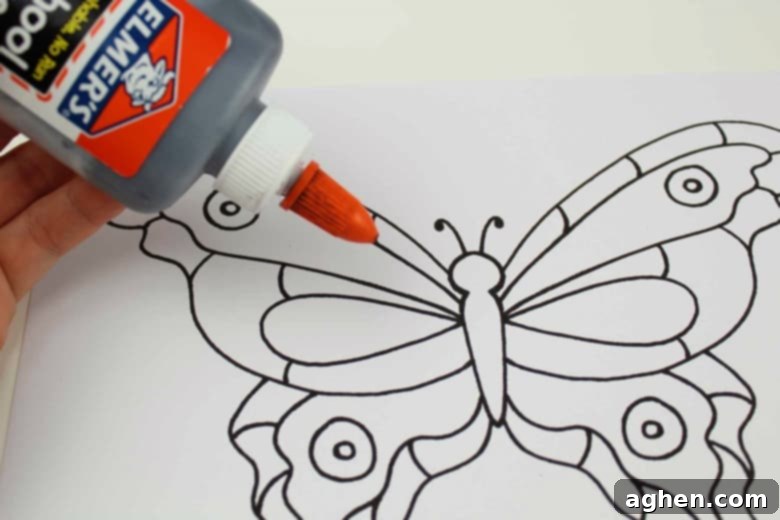
Now for the intricate part! Using your newly created black glue, carefully trace over every line of the butterfly template. The raised lines of black glue will act as the “leading” in your stained-glass design, separating the colors and giving it that authentic look. Take your time with this step to ensure smooth, continuous lines. The precision here will significantly impact the final appearance of your butterflies. Encourage older children to practice on scrap paper first if they’re nervous about direct application.
-
Step 4: Allow the Black Glue to Dry Completely
Patience is a virtue, especially in crafting! Once you’ve traced all the lines, it’s absolutely crucial to let the black glue dry thoroughly. We highly recommend letting your creations dry overnight, or for at least 8-12 hours. This extended drying time ensures the glue hardens properly, preventing any smudging or mixing with the watercolors in the next step. A completely dry glue outline will create clear, crisp boundaries for your paint.
-
Step 5: Cut Out Your Butterflies
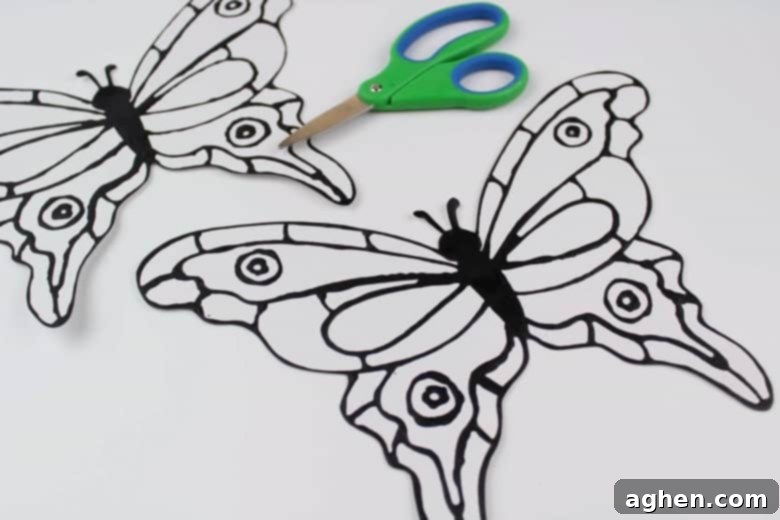
Once the black glue is completely dry and firm to the touch, carefully cut out each butterfly. Follow the outer edges of the template. This step requires steady hands, so adults might assist younger children to ensure clean cuts and preserve the delicate wing shapes.
-
Step 6: Paint with Watercolors
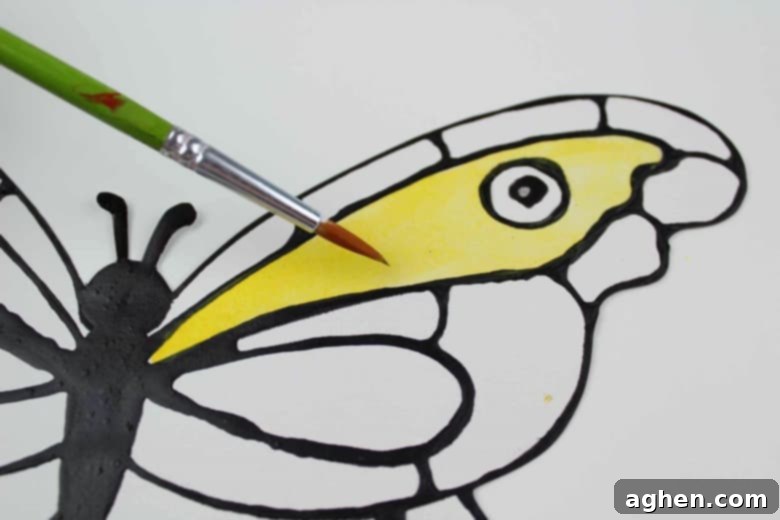
Now for the most vibrant and exciting part! Use your watercolor paints to fill in the sections of your butterflies. The raised black glue lines will act as natural barriers, effectively keeping each color from bleeding into adjacent areas, much like the leading in actual stained glass. Experiment with different shades, blend colors, or create gradient effects within each segment of the wings. The beauty of watercolors is their translucent quality, which will allow light to pass through your finished craft, enhancing the stained-glass illusion. Don’t be afraid to be bold with your color choices!
-
Step 7: Final Drying and Display
After painting, allow your watercolor butterflies to dry completely. This usually takes much less time than the glue, but ensure they are fully dry to prevent smudging or stickiness. Once dry, your beautiful faux stained-glass butterflies are ready to be displayed and admired!
Tips for a Perfect Faux Stained Glass Butterfly
- **Practice Makes Perfect:** If you’re new to tracing with glue, try a few lines on a scrap piece of paper first to get a feel for the flow and pressure.
- **Don’t Over-Saturate:** When painting with watercolors, use enough water to get vibrant color, but avoid drenching the paper, as this can still cause slight buckling or affect the glue.
- **Experiment with Color:** Try blending two watercolor shades within one section for a gradient effect, or use metallic watercolors for extra sparkle.
- **Custom Templates:** Once you’ve mastered the basic butterfly, try drawing your own designs or finding other intricate templates (like flowers or other insects) to expand your faux stained-glass collection.
- **Clean Glue Nozzle:** If your black glue starts to clog, gently clear the nozzle with a toothpick.
Creative Ways to Display Your Faux Stained-Glass Butterflies
Your beautifully crafted faux stained-glass butterflies deserve to be shown off! Here are a few creative ideas to display your vibrant creations:
- **Window Decorations:** Their translucent nature makes them ideal for hanging in windows, where sunlight can truly illuminate their colors and mimic real stained glass. Use a small piece of clear tape or fishing line.
- **Classroom Decor:** A fun way to display these in a classroom is to make two butterflies and glue them back-to-back. Then, hang them from the ceiling using fishing line or clear thread. This creates a wonderful mobile effect, giving the illusion that they are gracefully flying in the air.
- **Greeting Cards:** Glue a smaller butterfly onto a folded piece of cardstock to create a unique, handmade greeting card for birthdays, Mother’s Day, or just to say hello.
- **Mobile or Garland:** String several butterflies together with beads or small pearls to create an eye-catching mobile for a child’s room or a festive garland for a party.
- **Wall Art:** Arrange a cluster of butterflies on a wall, perhaps in varying sizes, to create a stunning 3D art installation.
- **Gift Tags:** Use smaller versions of the template to create charming and personalized gift tags.
Shop Supplies
Bright White CardstockApple Barrel Multi-Surface Black PaintElmer’s Glue-All Multi-Purpose GlueWatercolor Paint and Brush Set
Faux Stained-Glass Butterfly Craft
Author: Jaclyn
Equipment
-
Scissors
-
paint brush
Supplies
- cardstock
- glue
- black acrylic paint
- watercolor paints
Instructions
-
Download and print out the butterfly template.
-
Open the top of a bottle of glue. Pour a small bit out, if necessary, so that there is room to add black paint. Add about a tablespoon of black paint, place the lid back on and shake well. Check the color to see if a dark grey / black color has been achieved. If not, add a bit more black paint and shake again. If the paint and glue are not mixing well by shaking, you can place a wooden dowel or chopstick into the bottle to help stir.
-
Trace each line in the butterfly template with black glue.
-
Allow the glue to dry completely — I recommend letting it dry overnight.
-
Cut butterflies out.
-
Use watercolors to paint the butterflies. The black glue will help keep each color from bleeding into other areas.
-
Allow the paint to dry completely before displaying.

Did You Make This Craft?
Share it with me on Instagram @crayonsandcravings and follow on Pinterest @crayonsandcravings for even more!
Pin Craft
Leave A Review
Pin for Later:
