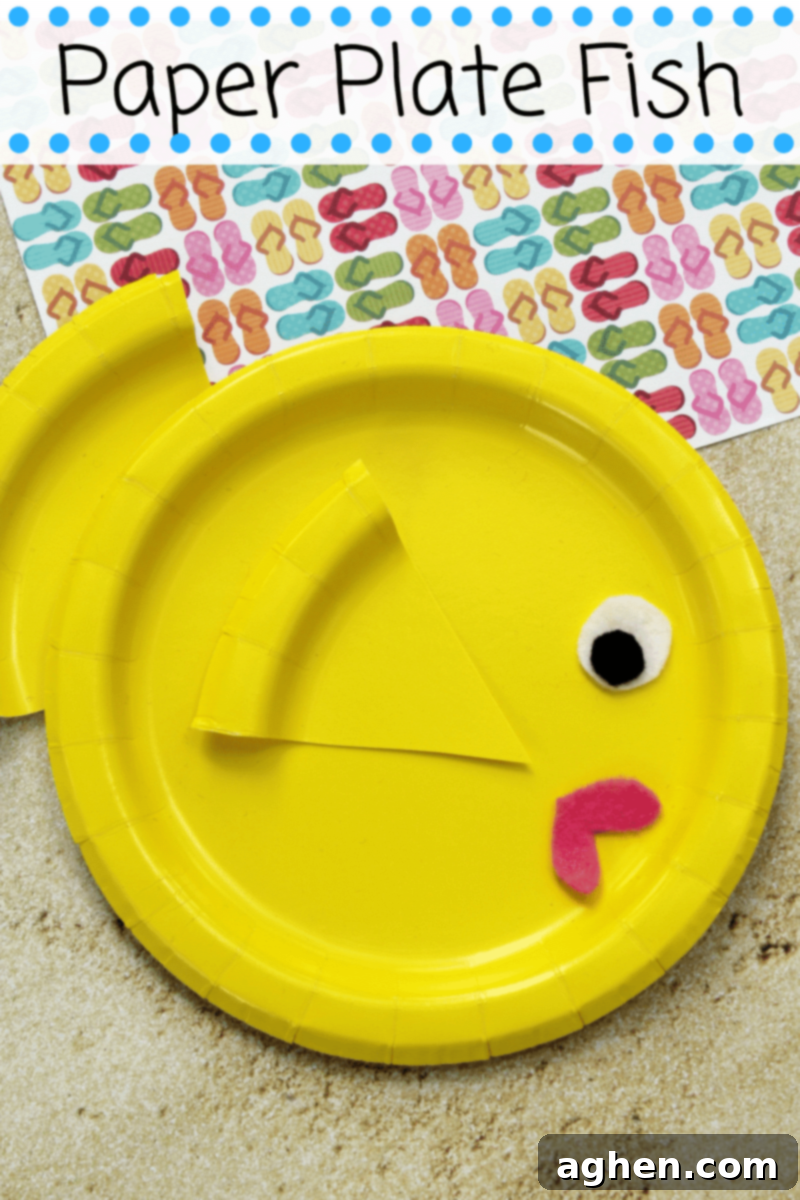
Fin-tastic Underwater Fun: Easy Paper Plate Fish Craft for Kids & Preschoolers
Dive into a world of creativity with this vibrant and incredibly easy paper plate fish craft! Perfect for warm summer days, rainy afternoons, or any time your little ones need a fun, engaging activity, this project transforms simple supplies into a delightful aquatic friend. Whether you’re a parent looking for a quick craft at home or a preschool teacher planning a group activity, this paper plate fish is a fantastic way to spark imagination and develop essential skills.
Made primarily from a paper plate, a few pieces of craft felt or construction paper, and some glue, this craft is not only budget-friendly but also wonderfully adaptable. Kids will love bringing their fish to life, choosing colors, and arranging the features to create their own unique underwater creature. It’s an activity that promises smiles, creativity, and a sense of accomplishment for every young artist.
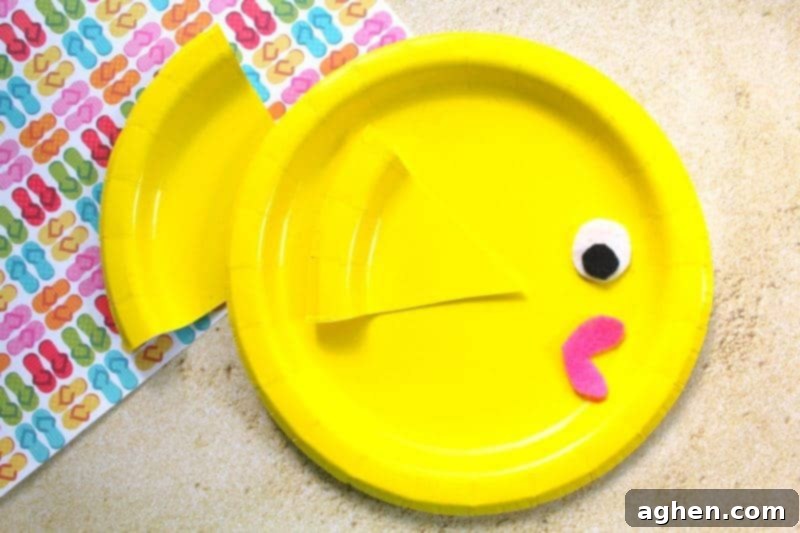
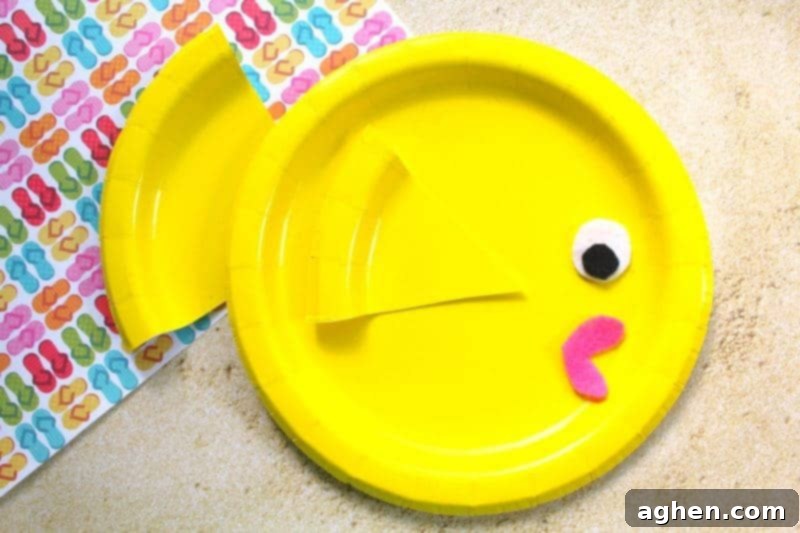
Are you searching for the perfect summer craft idea that’s both simple and utterly charming? Look no further! This adorable paper plate fish is designed to be super simple, making it ideal for preschoolers and toddlers (with a little adult assistance) to create at home or in a classroom setting. It’s a wonderful way to celebrate the sunny season or explore an ocean theme.
You might recall the delightful paper plate pineapples we crafted previously. If you happen to have some colored paper plates left over, like our yellow ones, this fish craft is an excellent way to use them up! However, don’t worry if you only have plain white paper plates; these can be colored, painted, or decorated by the children first, adding another layer of personalization and fun to the project. Both approaches yield fantastic results.
For the fish’s facial features – the mouth and eye pieces – we opted for colorful felt pieces. Felt adds a wonderful texture and dimension to the craft. But don’t feel limited! Craft foam or even construction paper work just as beautifully. The key is to use whatever materials you have readily available, making this a truly flexible and accessible craft for everyone.
To ensure a smooth and enjoyable experience for little hands, we recommend that an adult takes charge of steps 1 and 2, which involve cutting. Having all the necessary pieces – the fins, lips, and eye elements – pre-cut and presented to the children allows them to focus solely on the exciting part: assembling and gluing their fish together. This minimizes frustration and maximizes fun, though a little assistance with glue application or piece placement might still be needed for the youngest crafters.
Why Crafting a Paper Plate Fish is More Than Just Fun
Beyond the sheer enjoyment, engaging in simple crafts like this paper plate fish offers a wealth of developmental benefits for young children:
- Fine Motor Skill Development: Holding scissors (for older kids), picking up small felt pieces, and carefully applying glue helps strengthen the small muscles in their hands and fingers, crucial for writing and other daily tasks.
- Hand-Eye Coordination: Aligning the eye, mouth, and fins on the paper plate requires precision and improves coordination.
- Creativity and Imagination: Children get to make choices about their fish’s colors, expressions, and decorations, fostering imaginative play and artistic expression. They can even invent stories about their fish.
- Following Instructions: Listening to and following multi-step directions helps build cognitive skills and a sense of order.
- Shape and Color Recognition: Identifying circles, wedges, and various colors while crafting reinforces early learning concepts.
- Problem-Solving: Sometimes a piece might not stick perfectly, or a child might want to try a different arrangement. These small challenges encourage basic problem-solving skills.
- Patience and Focus: Completing a craft from start to finish teaches children to focus on a task and experience the reward of patience.
- Sense of Accomplishment: Holding up their finished, self-made fish fills children with pride and boosts their self-esteem.
- Bonding Opportunity: Crafting together provides a wonderful opportunity for parents, guardians, or teachers to connect with children in a relaxed and creative environment.
Paper Plate Fish Craft Supplies
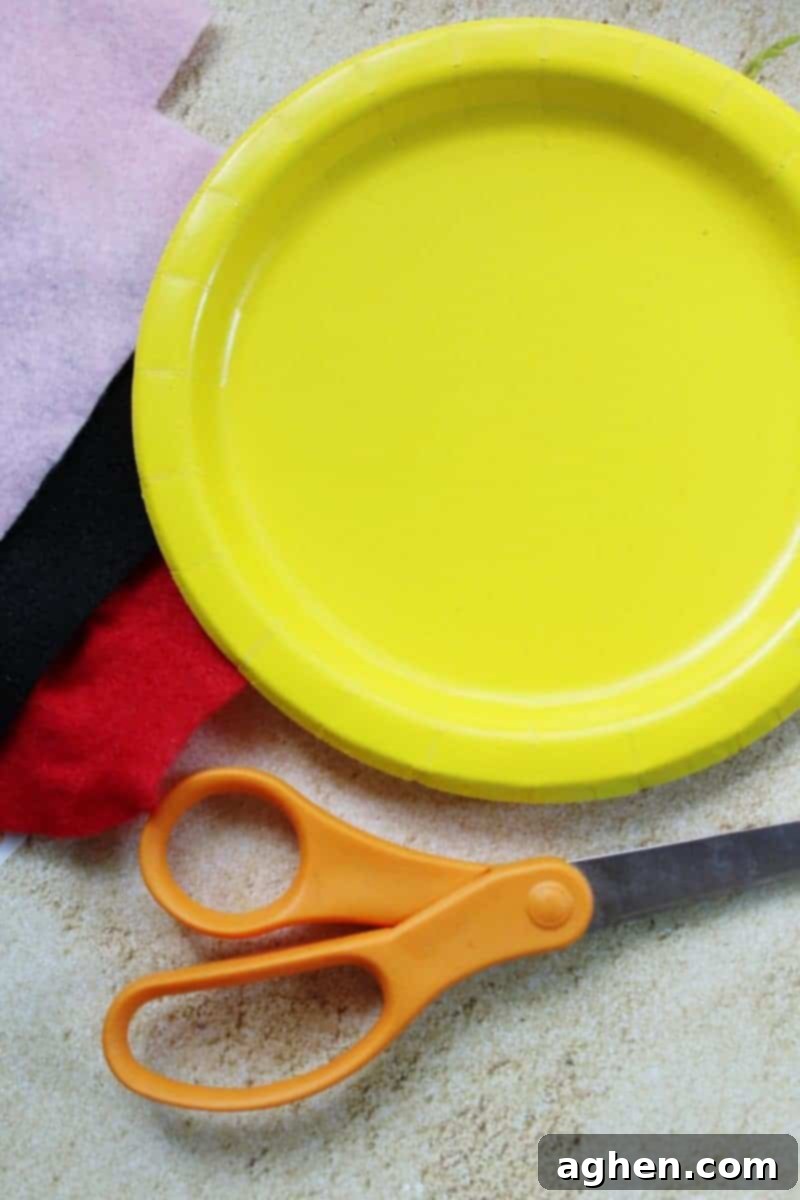
Gathering your materials is the first step to a successful craft project. The beauty of this paper plate fish is how few and common the supplies are. Most items you might already have around the house or can easily pick up at any craft store or even a dollar store.
- 2 Paper Plates: You can choose pre-colored plates for a vibrant start, or opt for plain white ones and let the kids unleash their inner artists by painting or coloring them before assembly. Using two plates ensures you have enough material for both the body and the fins/tail.
- Scissors: Child-safe scissors are recommended for older kids who will be doing their own cutting. For preschoolers, adults should handle all cutting tasks.
- White, Black, and Pink Felt: These colors are perfect for creating the classic fish eye and lips. Felt offers a lovely soft texture. However, don’t hesitate to substitute with craft foam sheets for a sturdier feel or even construction paper for a simpler approach. You can also get creative with other colors!
- Craft Glue: A good quality craft glue that dries clear is essential. White school glue works perfectly and is non-toxic, making it safe for children’s projects.
How to Make a Paper Plate Fish: Step-by-Step Guide
Follow these simple steps to create your cheerful paper plate fish. Remember, adult assistance is encouraged, especially for younger children, to ensure a safe and enjoyable crafting experience.
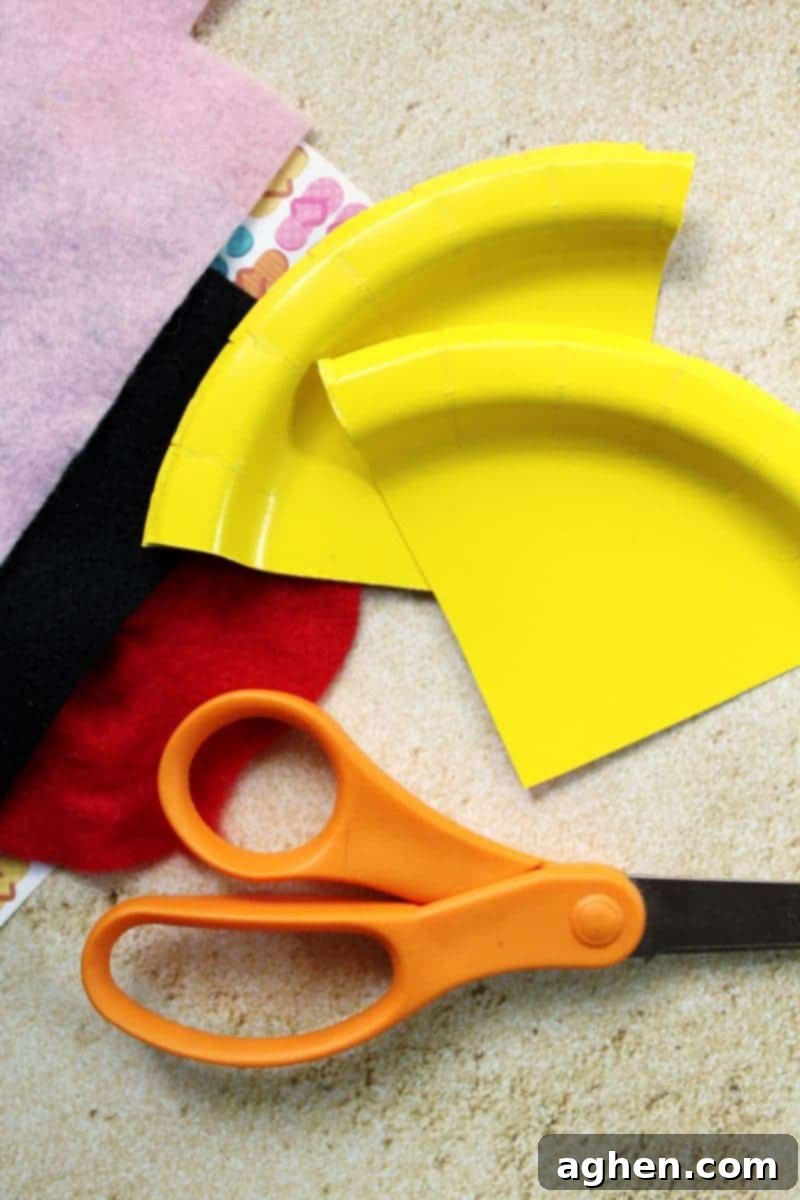
1. Prepare the Fins and Tail:
Begin by taking one of your paper plates. This plate will be transformed into the fins and tail of your fish. Using scissors, cut the plate into several wedge-shaped pieces. You can make these wedges as wide or as narrow as you wish, allowing for customization of your fish’s fins. For a classic look, aim for about 3-4 wedges. These cut pieces will give your fish its distinctive shape and help it “swim” in your child’s imagination! Always have an adult handle the cutting for safety, especially with sharp scissors.
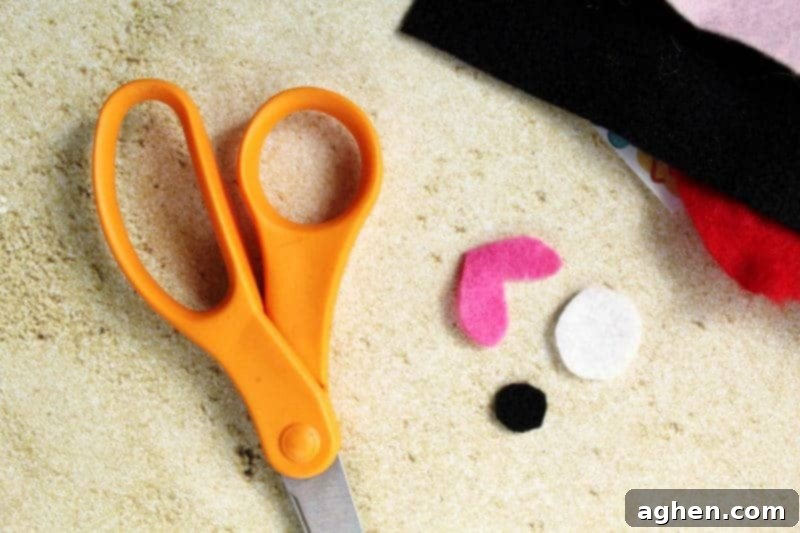
2. Cut Out Facial Features:
Next, it’s time to bring your fish’s personality to life by cutting out its facial features. From your felt, craft foam, or paper, cut a small pink crescent shape for the fish’s lips. Then, create a white circle for the main part of the eye, and a smaller black circle to serve as the pupil. These simple shapes will give your fish a friendly and expressive face. For a different look, you can also use googly eyes for an extra touch of character. Again, adult supervision or assistance is recommended for precise cutting.
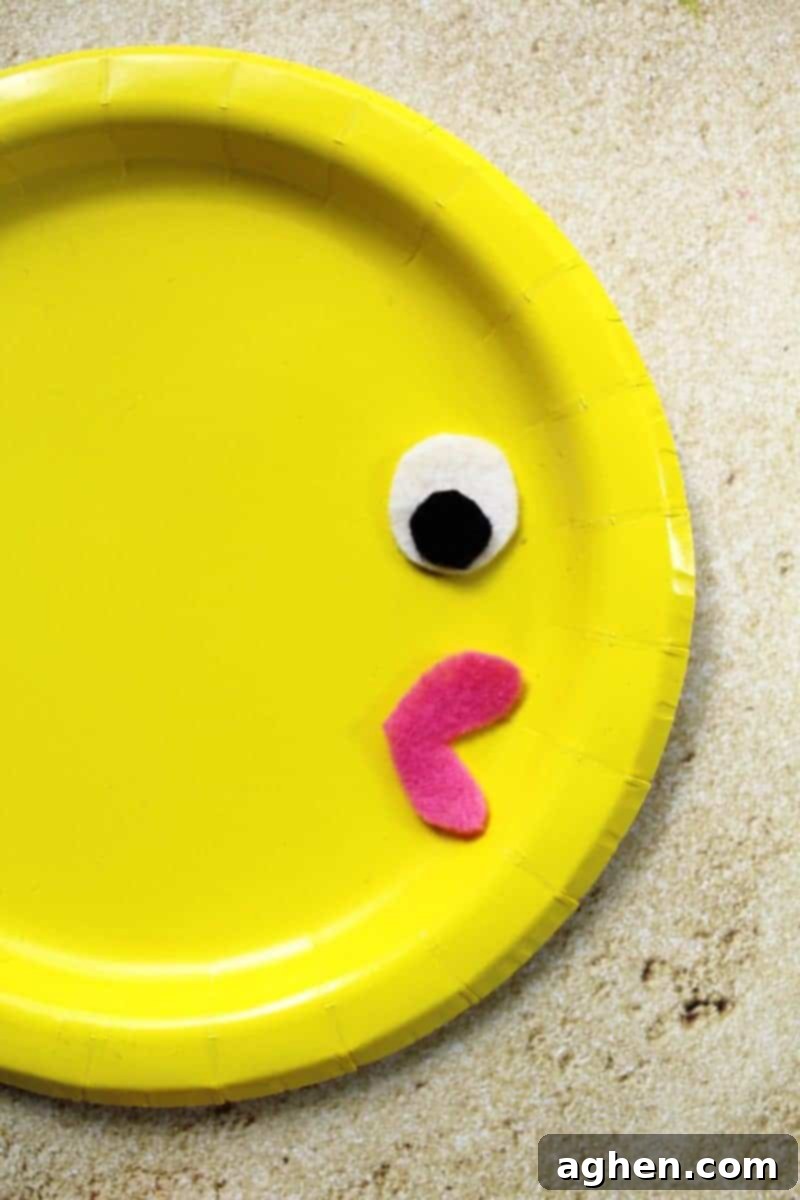
3. Assemble the Fish’s Face:
Now comes the fun part for the kids! Take the main paper plate (which will be your fish’s body) and carefully add a dab of craft glue to the back of each facial feature. Position the pink lips towards the bottom front of the plate, and the white eye circle with the black pupil inside slightly above and to the side. Press each piece firmly into place and hold for a few seconds to ensure it adheres securely. Encourage children to experiment with the placement to create different expressions for their fish – happy, surprised, or silly!
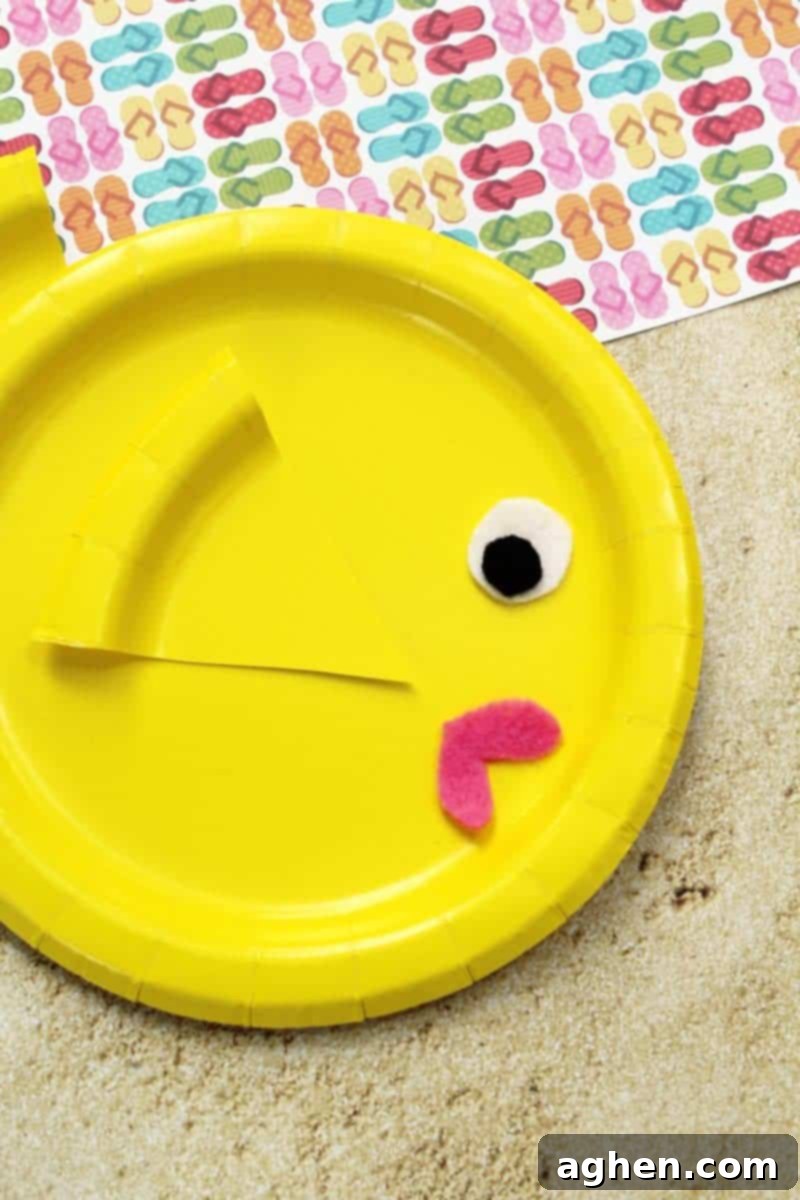
4. Attach the Fins and Tail:
Finally, it’s time to give your fish its swimming power! Take the wedge pieces you cut in step 1. Apply a line of glue along one straight edge of each wedge. Attach two wedges to the sides of the paper plate (body) to act as the side fins. Then, attach one or two more wedges to the back of the plate to form the tail. You can overlap them slightly or spread them out for a more dynamic look. Press firmly and hold each fin in place until the glue begins to set. This step completes the basic structure of your charming paper plate fish.
Once all the pieces are securely glued, simply allow the craft to dry completely. Drying time will vary depending on the type of glue used and the thickness of the materials. Once dry, your bright and colorful paper plate fish is ready to be displayed and admired!
Tips for a Super Swimmy Fish & Creative Variations
To make your paper plate fish craft even more special and to encourage maximum creativity, consider these additional tips and variations:
- Decorate the Body First: If using white paper plates, let kids color, paint, or draw patterns on them before adding the features. They can use crayons, markers, watercolor paints, or even finger paints for a sensory experience.
- Add Scales: For extra texture and detail, cut small circles or semi-circles from different colored paper or felt and glue them onto the fish’s body to create “scales.” You could even use sequins or glitter for a shimmery effect.
- Googly Eyes: Instead of cutting out felt eyes, use self-adhesive googly eyes for an instant adorable and wiggly gaze.
- Shine and Sparkle: A touch of glitter glue along the fins or body can make your fish truly stand out. Just be prepared for a little mess!
- Different Fish Species: Encourage children to imagine different types of fish. They could make a rainbow fish with multicolored scales, a clownfish with orange and white stripes, or a deep-sea anglerfish with a glow-in-the-dark lure (using glow-in-the-dark paint or paper).
- Make it a Mobile: Punch a small hole at the top of the fish and string some yarn or fishing line through it. Hang several fish at different lengths from a hanger or a stick to create an “underwater” mobile.
- Create an Ocean Scene: Once the fish are dry, create a larger ocean scene on a blue poster board with construction paper seaweed, bubbles, and other sea creatures. Your paper plate fish can be the star of the show!
- Story Time: Encourage children to name their fish and tell a story about where it lives, what it eats, and what adventures it has. This boosts language skills and imagination.
- Vary the Plate Size: Use different sized paper plates to create a family of fish – a big mama fish, a medium papa fish, and little baby fish!
Safety Tips for Crafting with Little Hands
While this craft is generally safe, always prioritize safety when crafting with children:
- Adult Supervision: Always supervise young children, especially when using scissors or glue.
- Child-Safe Scissors: For children old enough to use scissors, ensure they are blunt-tipped and designed for kids.
- Non-Toxic Materials: Confirm that all paints, glues, and markers are non-toxic and child-friendly.
- Small Parts: Be mindful of small pieces (like felt eyes) which could be choking hazards for very young children (under 3). If toddlers are participating, pre-cut all pieces and supervise closely.
- Clean Workspace: Protect your work surface with newspaper or a plastic tablecloth, and clean up spills promptly. Wash hands thoroughly after crafting.
Shop Paper Plate Fish Craft Supplies
Craft Foam AssortmentYellow Paper PlatesElmer’s Glue
We truly hope that your kiddos enjoy crafting these adorable and easy paper plate fish! It’s a wonderful project that encourages creativity, fine motor skills, and imaginative play, making it a perfect addition to any day.
More Under-the-Sea Adventures for Kids
If your children loved this fish craft and are eager for more ocean-themed activities, be sure to check out these other exciting ideas:
- Under the Sea Ocean Slime – A tactile and mesmerizing activity that brings the ocean’s depths to your fingertips.
- Under the Sea Banana Treats – A fun and healthy snack idea perfect for any ocean-themed party or playdate.
Pin for Later!
Don’t forget to save this fantastic paper plate fish craft idea for future reference! Pin it to your favorite craft or kids’ activities board on Pinterest so you can easily find it whenever inspiration strikes for a fun and engaging project.
