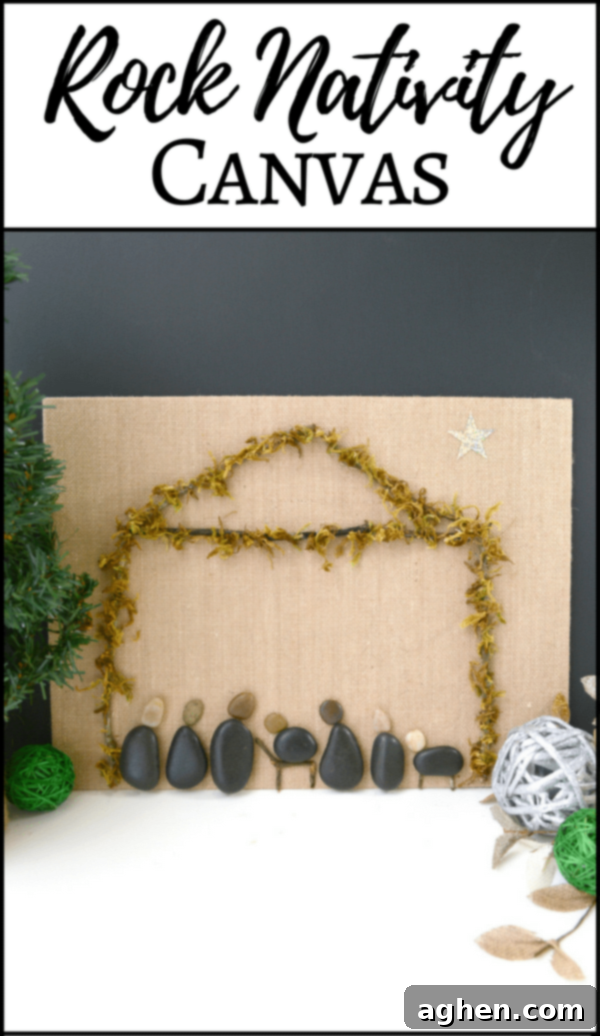
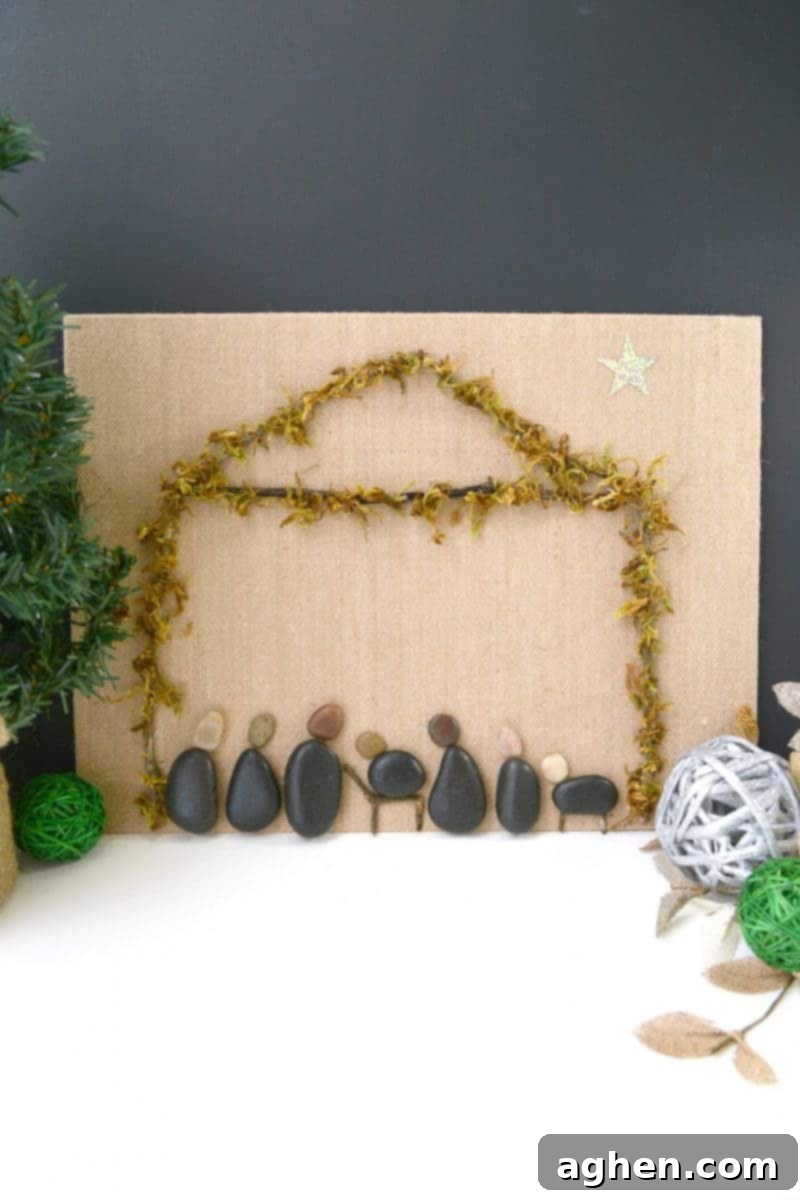
DIY Rock Nativity Canvas: A Cherished Christmas Craft for the Whole Family
The holiday season is a wonderful time for family togetherness, festive decorations, and heartwarming traditions. While many Christmas activities bring joy, focusing on the spiritual core of the celebration can deepen its meaning. This unique DIY rock nativity canvas offers a beautiful and hands-on way to connect with the true essence of Christmas: the birth of Jesus Christ. More than just a craft, this project becomes a cherished piece of handmade Christmas decor that you can display year after year, serving as a gentle reminder of the season’s profound significance.
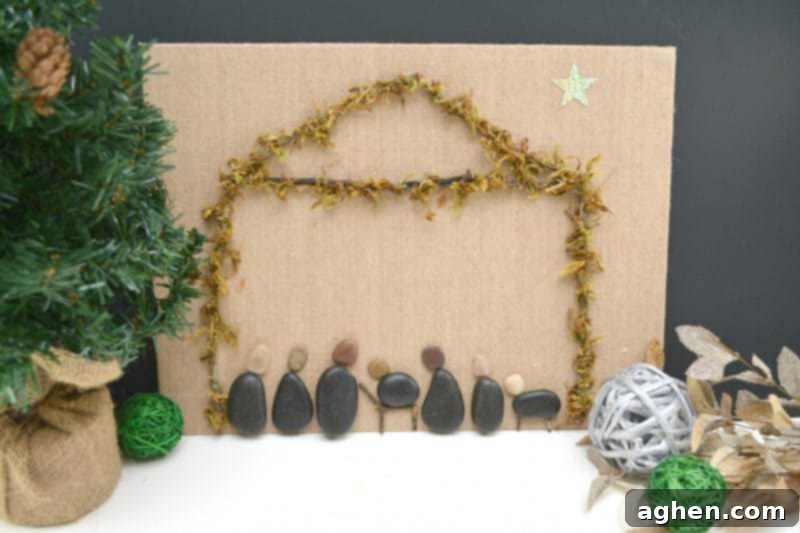
Reclaiming the True Meaning of Christmas Through Craft
Christmas often becomes a whirlwind of gift-giving, elaborate decorations, and endless to-do lists. While these elements are part of the festive cheer, it’s easy for the foundational story—the birth of Jesus—to get overshadowed. For Christian families, imparting this story to children in an engaging and memorable way is paramount. This rock nativity canvas project provides an exceptional opportunity to do just that. As you gather materials and assemble your scene, you can share the narrative of Mary, Joseph, baby Jesus, the shepherds, and the wise men, making the story tangible and personal for young minds.
Unlike many fleeting Christmas craft projects, this nativity scene is designed to be a lasting symbol. It’s an ideal activity for parents and children to collaborate on, fostering not only creativity but also spiritual connection. Imagine bringing out this handmade treasure each December, recalling the precious moments spent creating it and the sacred story it represents. It’s a simple, yet powerful, way to build meaningful Christmas traditions and reinforce faith within your home.
Why Choose a DIY Rock Nativity Canvas?
This particular DIY Christmas craft stands out for several compelling reasons, making it a perfect addition to your holiday preparations.
A Meaningful Family Activity
Engaging in crafts together is a fantastic way to bond as a family. This project, in particular, offers more than just fun; it provides a shared experience centered around faith. As you search for the perfect rocks and twigs outdoors, or meticulously arrange the elements on the canvas, you’re creating memories and conversations that revolve around the narrative of Christ’s birth. It’s a hands-on learning experience that encourages questions, imagination, and a deeper understanding of the biblical story, making it an excellent family Christmas activity.
Simple, Fun, and Educational for All Ages
One of the greatest appeals of this simple nativity craft is its accessibility. You don’t need to be an expert crafter, nor do you require complex tools or expensive supplies. Even toddlers can participate in finding rocks and pebbles or helping with the gluing (under close adult supervision, of course). The beauty lies in its simplicity. While children are having fun, they are also developing fine motor skills, learning about shapes and sizes, and most importantly, internalizing the core story of Christmas in an interactive way. It transforms abstract religious concepts into a concrete, touchable scene.
A Cherished Keepsake for Years to Come
Unlike store-bought decorations that might change with trends, a handmade piece like this rock nativity wall art carries immense sentimental value. Each imperfection, each unique rock, tells a part of your family’s story. It becomes a personal heirloom, something you’ll look forward to displaying every holiday season. As your children grow, they’ll look back on this piece and remember the joy of creating it with you, making it a truly invaluable and cherished keepsake that transcends fleeting holiday fads.
Gathering Your Materials: Natural Elements & Craft Essentials
The beauty of this natural materials craft lies in its blend of easily accessible items. Many of the key components for your DIY rock nativity canvas can be found right in your backyard, making it an eco-friendly and budget-conscious project. Get your children involved in a nature scavenger hunt to find the perfect stones and twigs – it adds another layer of fun to the activity! For the remaining craft essentials, your local dollar store or online retailers like Amazon are excellent resources.
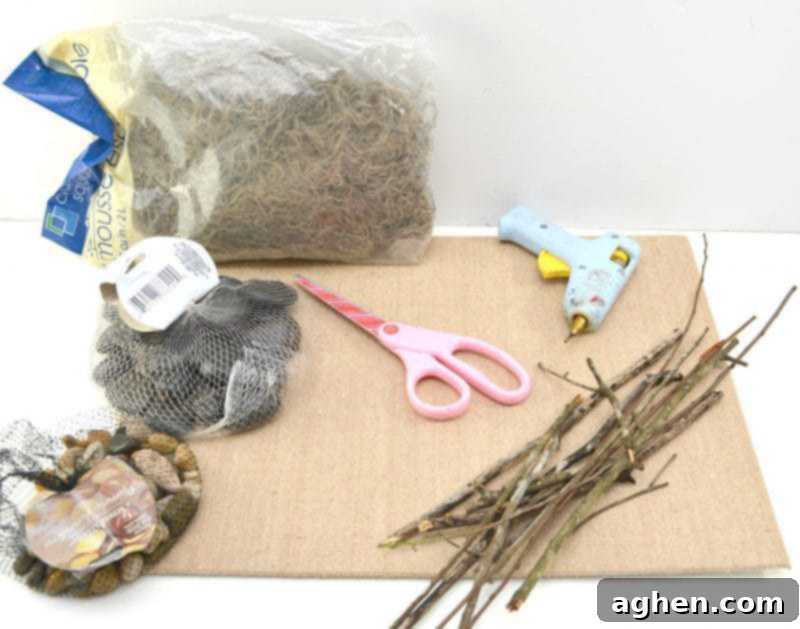
- Large flat rocks: These will form the bodies of your main nativity figures (Mary, Joseph, etc.). Look for smooth, somewhat flat stones that are stable when placed upright.
- Small pebbles: Perfect for heads of your figures, or even small animals like sheep. Varying sizes will add character.
- Twigs of different lengths: Seek out twigs that are relatively straight and snap easily. These will be used to construct the stable and the manger.
- Hot glue gun and glue sticks: An essential tool for securely attaching all the elements to your canvas. Always supervise children when using a hot glue gun.
- Burlap covered canvas: The rustic texture of burlap provides an authentic and beautiful backdrop for your natural nativity scene. Choose a size that allows enough space for your figures and stable.
- Floral moss: A lovely touch for adding texture and a natural, earthy feel, mimicking hay or ground cover within the stable.
- Star shaped confetti or metallic paper: For the iconic Star of Bethlehem. If using metallic paper, you’ll need scissors to cut out a star shape.
Step-by-Step Guide: Crafting Your Rock Nativity Scene
Creating your beautiful rock nativity canvas wall art is a straightforward process that’s enjoyable for all skill levels. Here’s how you can bring the sacred scene to life on your burlap canvas, perfect for your holiday home decor.
Step 1: Designing the Stable Structure
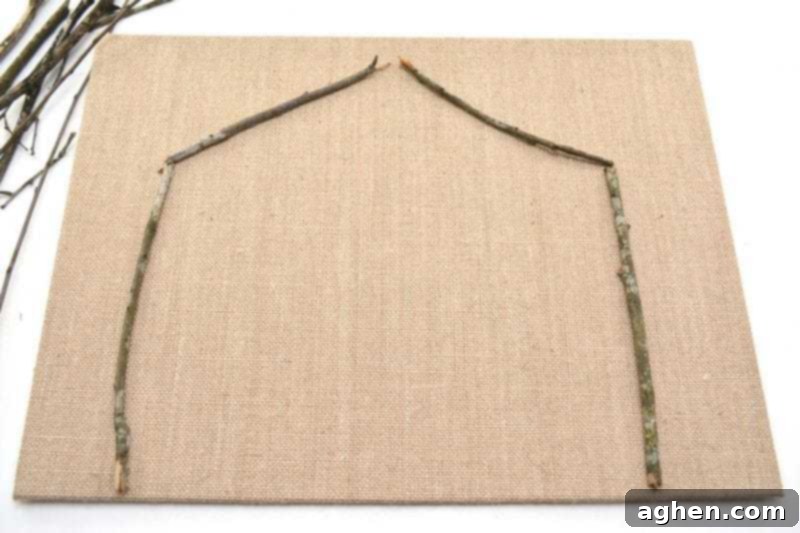
Begin by laying out your chosen twigs on the burlap canvas to form the shape of a stable. This is a creative step where you can experiment with different twig arrangements. Aim to create an open structure that is large enough to comfortably accommodate all the nativity characters you plan to include. You might need a few longer pieces for the upright supports and shorter ones for the roof. Refer to the provided image for a general idea of the basic stable outline. Once satisfied with the arrangement, carefully apply hot glue along the contact points of the twigs and press them firmly onto the canvas. Hold each piece in place for a few seconds until the glue sets, ensuring a sturdy foundation for your nativity scene.
Step 2: Securing the Stable and Adding Greenery
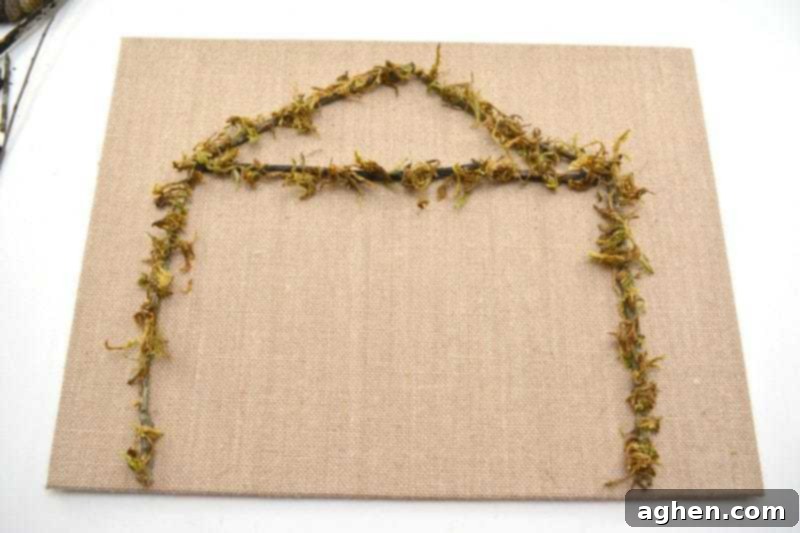
With the stable framework securely glued, you can now add a touch of natural softness. Apply a thin line of hot glue along the base of the stable structure, or wherever you’d like some ground cover. Gently press small tufts of floral moss onto the wet glue. This step helps to create a more organic feel, mimicking the straw or natural elements found in a traditional stable. Lightly tap off any excess moss that doesn’t adhere. Allow the glue to dry completely before moving on, ensuring all elements are firmly attached to your burlap canvas project.
Step 3: Crafting Baby Jesus and His Manger
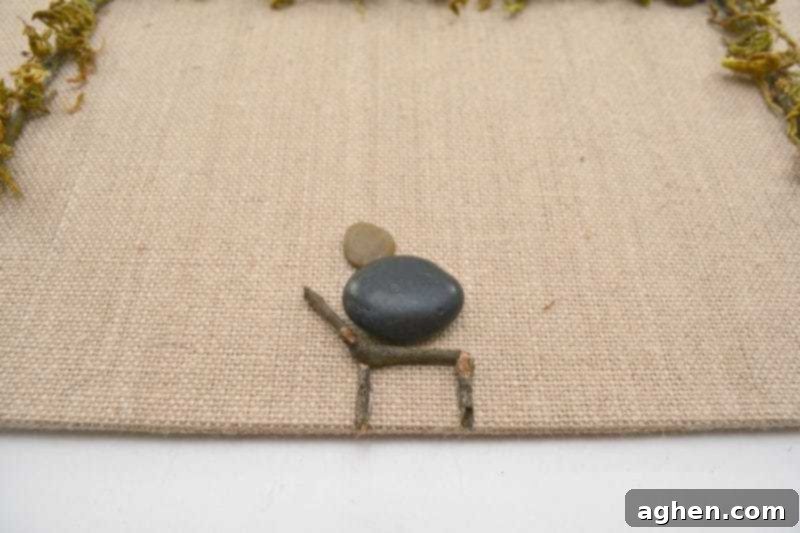
The heart of your rock nativity scene is Baby Jesus. Select a medium-sized, relatively flat and round stone for his body, and a smaller pebble for his head. Gently hot glue the smaller pebble onto the larger stone to form a simple figure. Position Baby Jesus in the center of your stable and glue him into place. Remember to leave a small space beneath him where you can create a manger. Next, use a few very small twigs to fashion a rustic manger. Arrange them to form a tiny bed, glue them together, and then secure the completed manger beneath your Baby Jesus figure on the canvas.
Step 4: Populating Your Nativity Scene
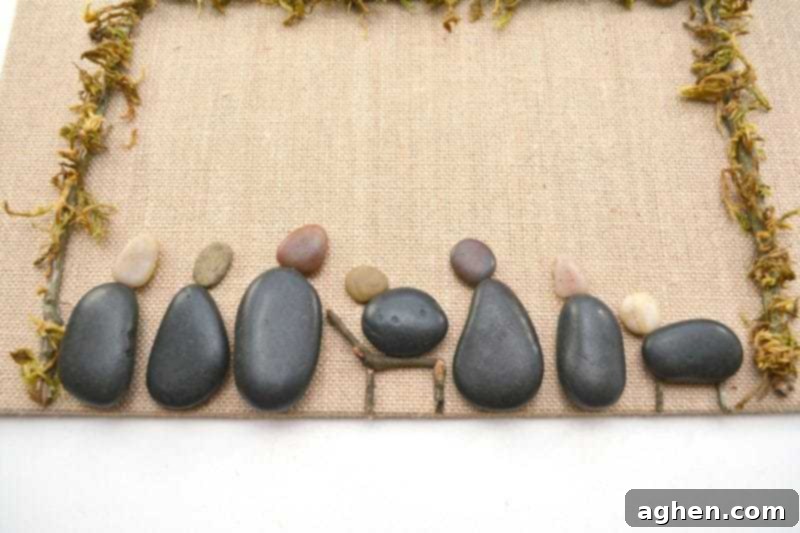
Now it’s time to bring the rest of the Christmas story to life! Choose larger flat stones for Mary and Joseph, and perhaps other wise men or shepherds. Use small pebbles for their heads, just as you did for Baby Jesus. For animals like sheep, you can find smaller, more rounded stones or even use tiny pieces of cotton or wool if you desire more texture. Arrange these rock characters thoughtfully within the stable, placing Mary and Joseph close to Baby Jesus. Once you’re happy with their positions, carefully hot glue each rock figure into place on the burlap canvas. This step allows for a lot of creativity and personalization in your DIY Christmas wall art.
Step 5: The Guiding Star
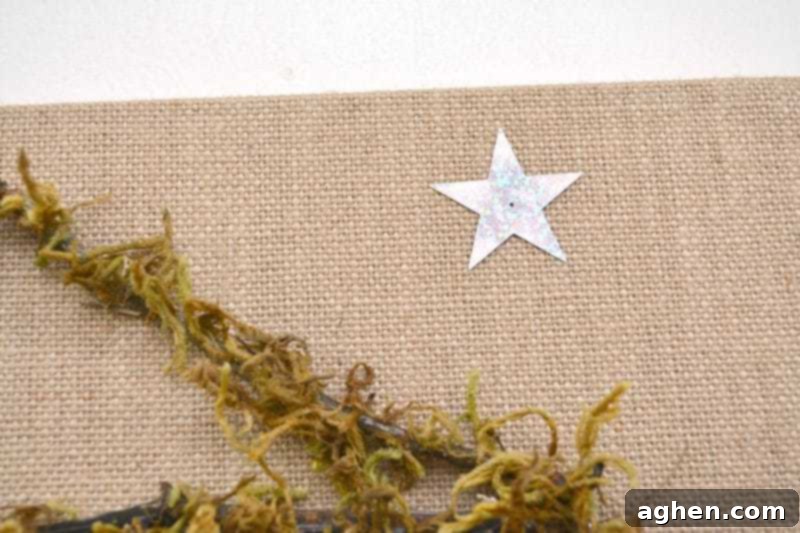
No nativity scene is complete without the guiding Star of Bethlehem! Select a prominent spot at the top of your canvas, directly above the stable. If you have star-shaped confetti, simply glue a large one into place. Alternatively, if you’re using metallic paper, carefully cut out a star shape of your desired size and then hot glue it onto the canvas. The star serves as the crowning touch, symbolizing the miraculous event and completing your beautiful handmade nativity scene.
Personalizing Your Nativity Canvas
While the basic instructions create a charming rock nativity canvas, don’t hesitate to add your personal touch! This project is wonderfully adaptable. Consider painting a simple backdrop on the canvas *before* adding the twigs and rocks. A deep blue for a night sky, a faint yellow for the stable’s interior, or even a starry night effect can greatly enhance the scene. You could also add small glitter accents to the star, or tiny fabric scraps to represent blankets for Baby Jesus. Use different shaped rocks to represent various animals or even an angel. These personalizations make your DIY Christmas decor truly unique and reflective of your family’s creativity.
Displaying and Cherishing Your Handmade Nativity
Once your rock nativity canvas is complete and the glue has fully dried, it’s ready to take its place in your home. This beautiful piece of holiday wall art is perfect for displaying on a mantelpiece, a shelf, or even as a centerpiece on your dining table. Its rustic charm complements a wide range of decor styles, from farmhouse to traditional. Make it a tradition to unveil your handmade nativity at the start of Advent each year. It serves as a visual reminder and a wonderful conversation starter about the reason for the season, fostering a sense of reverence and wonder throughout Christmas.
The Lasting Message: Teaching the Christmas Story
This DIY rock nativity canvas project is more than just a craft; it’s a tool for spiritual education and family connection. Sharing the story of the birth of Jesus is a fundamental part of the Christian faith, and engaging children in a hands-on activity like this brings the narrative to life in a memorable way. Regardless of their age, children benefit immensely from understanding the story behind why we celebrate Christmas. This craft provides a tangible link to that sacred event, fostering a deeper appreciation for the love, hope, and joy that the birth of Jesus brought to the world. It’s a powerful way to ensure that the true meaning of Christmas resonates deeply within your family for many years to come.
