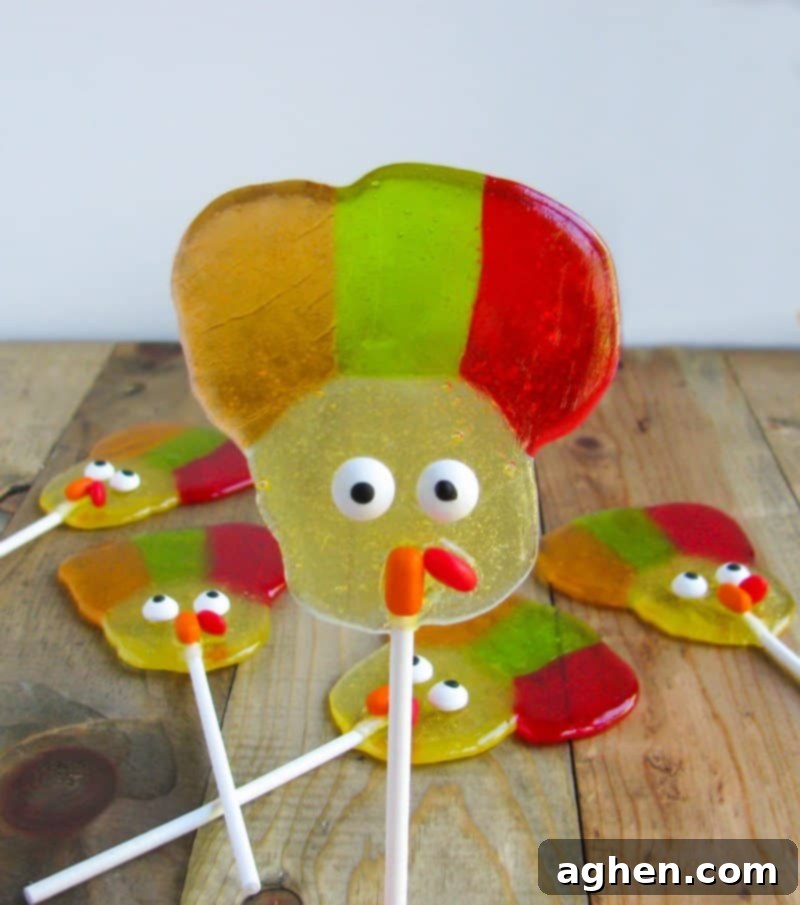
Easy & Adorable Jolly Rancher Turkey Lollipops: The Perfect Kid-Friendly Thanksgiving Treat
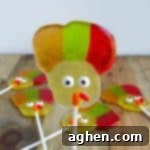
As the leaves turn golden and the aroma of pumpkin spice fills the air, our thoughts drift to Thanksgiving – a time for gratitude, family, and, of course, delicious food! While traditional pies and elaborate main courses often steal the spotlight, there’s always room for a simple, fun, and irresistibly cute treat that will capture the hearts of both young and old. Enter our Turkey-shaped Lollipops, a delightful and incredibly easy Thanksgiving candy that is guaranteed to be gobbled up in no time.
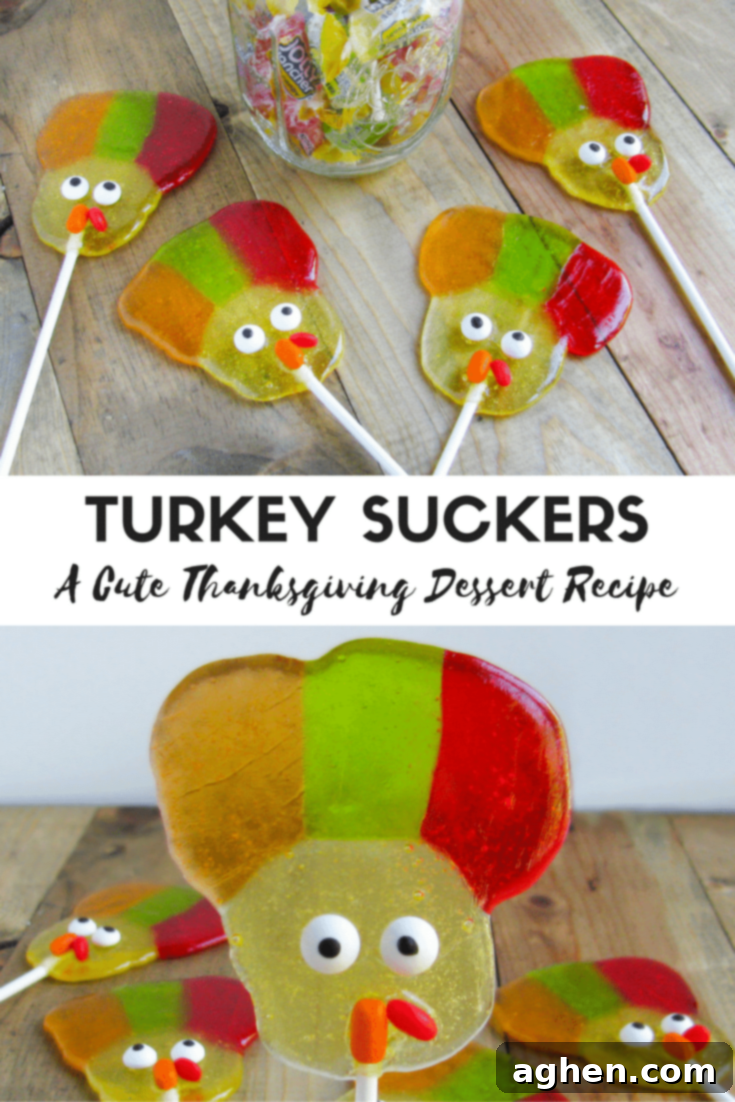
Following the tremendous success and joy our Halloween Frankenstein Suckers brought, we’re thrilled to share another super easy lollipop recipe with you. These adorable Turkey Lollipops are equally charming and even simpler to make, making them the perfect addition to your holiday dessert spread or as a fun activity to do with the kids. Imagine the smiles on their faces as they help create these festive candies!
Why These Turkey Lollipops Are a Must-Have Thanksgiving Treat
Thanksgiving is a feast for the senses, and these turkey-shaped lollipops add a playful touch to your dessert table. They are not just visually appealing; they offer a sweet, fruity burst that complements the rich flavors of a Thanksgiving meal. Here’s why they’re perfect for your celebration:
- Effortlessly Adorable: Despite their intricate appearance, these lollipops are surprisingly simple to assemble, requiring minimal artistic skill.
- Kid-Friendly Fun: This recipe is a fantastic way to get children involved in holiday preparations. They can help unwrap candies, arrange the “feathers,” and add the final facial details.
- Quick & Easy: With just a few ingredients and a short time in the oven, you can whip up a batch of these charming treats in under 20 minutes.
- Perfect Party Favors: Individually wrapped, these lollipops make wonderful take-home gifts for your Thanksgiving guests or classroom treats.
- Customizable: While we stick to classic turkey colors, you can easily experiment with different Jolly Rancher flavors and colors to create a unique flock!
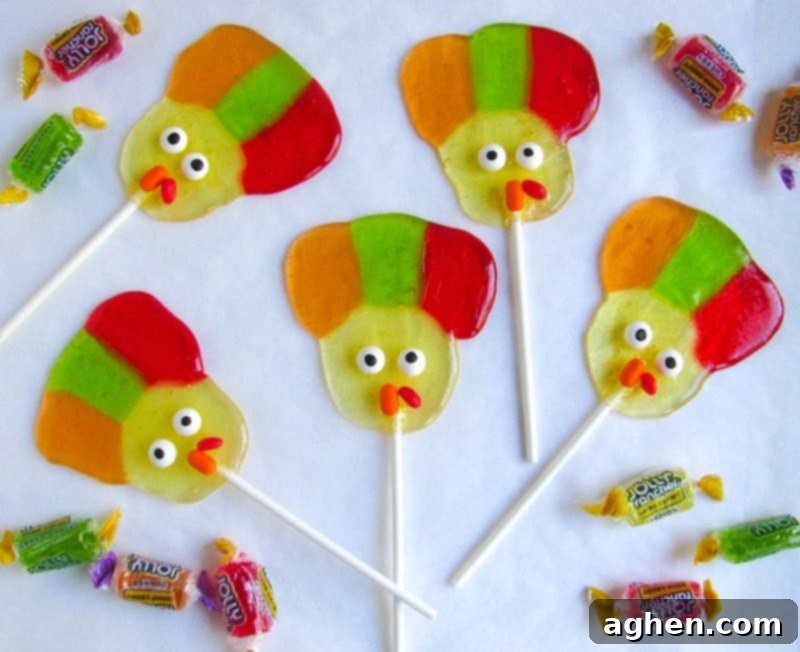
You might look at these delightful little turkeys and think they’re a challenging confection, but we promise, putting them together is incredibly straightforward. With our step-by-step instructions, you’ll be creating a flock of candy turkeys in no time!
Gather Your Ingredients: What You’ll Need
This section includes detailed ingredient notes and substitution options to help you customize your turkey lollipops. You’ll find all exact measurements and instructions in the printable recipe card at the end of this post.
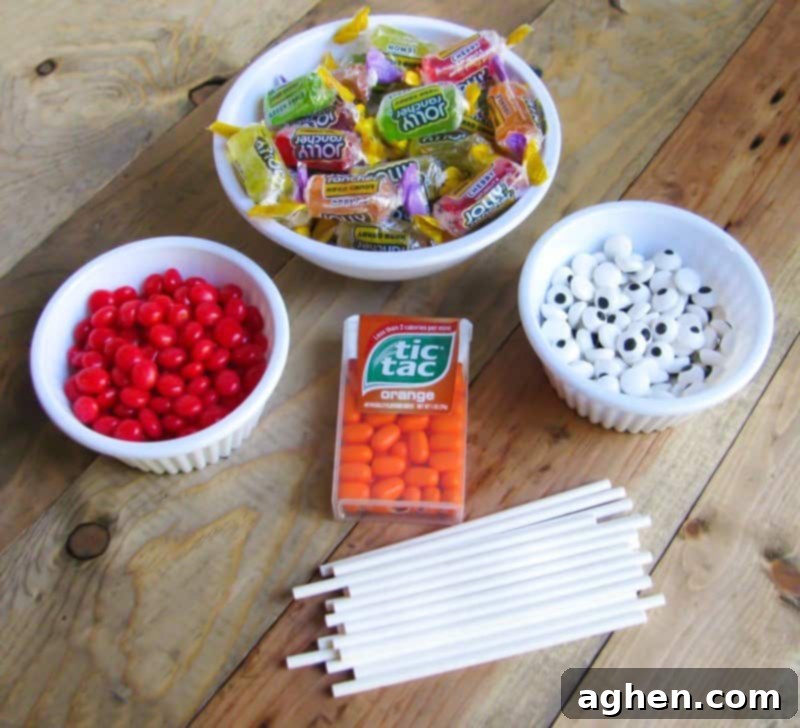
To craft these adorable little turkey lollipops, you will need a few key candies and supplies:
- Jolly Ranchers: These hard candies are the star of our show, providing the vibrant colors and sturdy structure for our turkeys. We recommend a mix of yellow for the body (about 2 per turkey) and red, orange, and green for the tail feathers (1 of each color per turkey). Their flat shape and melty consistency are perfect for this project. Shop Jolly Ranchers here.
- Substitution Tip: While Jolly Ranchers work best due to their flat shape and even melting, other hard candies like Werther’s Originals (for a more caramel-colored turkey body) or even crushed hard candies in different colors could be experimented with, though results may vary.
- Orange Tic-Tacs: These tiny, oblong mints are ideal for creating the turkey’s beak, adding a pop of orange color and a subtle minty freshness. Find orange Tic-Tacs here.
- Substitution Tip: Small orange candies or even tiny pieces of dried apricot could work as an alternative if Tic-Tacs aren’t available.
- Candy Eyeballs: These instantly bring your turkeys to life! You can find them in various sizes; opt for smaller ones for a cuter, more proportional look. Get your candy eyeballs.
- Substitution Tip: If you can’t find candy eyeballs, tiny dots of melted chocolate or black icing could be piped on for eyes, though they won’t have the same dimensional effect.
- Red Hot Candies: These classic cinnamon candies are perfect for forming the wattle (the fleshy growth under a turkey’s beak), adding a touch of festive red and a hint of spice. Purchase Red Hot candies.
- Substitution Tip: A small red sprinkle or a tiny piece of red fruit leather could serve as a wattle alternative.
- Lollipop Sticks: Essential for turning your candy turkeys into actual lollipops! Make sure they are sturdy enough to hold the melted candy. Buy lollipop sticks.
- Substitution Tip: Craft sticks or even sturdy paper straws cut to size could work in a pinch, but traditional lollipop sticks are recommended.
Essential Equipment for Making Turkey Lollipops
Beyond your ingredients, you’ll need a couple of basic kitchen tools to make this recipe a breeze:
- Baking Sheet: A standard baking sheet will be perfect for arranging your candies.
- Parchment Paper: Crucial for preventing the melted Jolly Ranchers from sticking to your baking sheet. Do not use wax paper, as it will melt and stick to the candy.
- Lighter (optional but helpful): For reheating small areas of candy if they harden too quickly during decoration. Handle with extreme caution if using.
How to Make Turkey Lollipops: A Simple Step-by-Step Guide
This section walks you through the entire process of making these festive turkey lollipops with helpful step-by-step photos and detailed instructions. For the full printable recipe card with exact measurements, please scroll to the end of this post.
Putting together these delightful turkey suckers is truly a simple and enjoyable process. Let’s get started!
Step 1: Prepare Your Workspace
Before you begin, preheat your oven to 275°F (135°C). Line a standard baking sheet with parchment paper. This is a critical step, as the melted Jolly Ranchers will stick to an unlined pan. Ensure the parchment paper lies flat. Unwrap all your Jolly Ranchers and separate them by color for easy access.
Step 2: Assemble the Turkey Bodies and Feathers
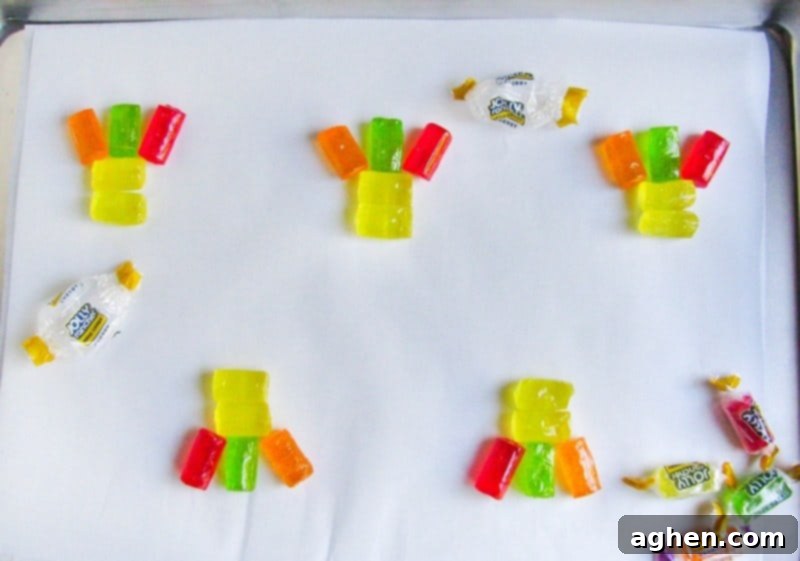
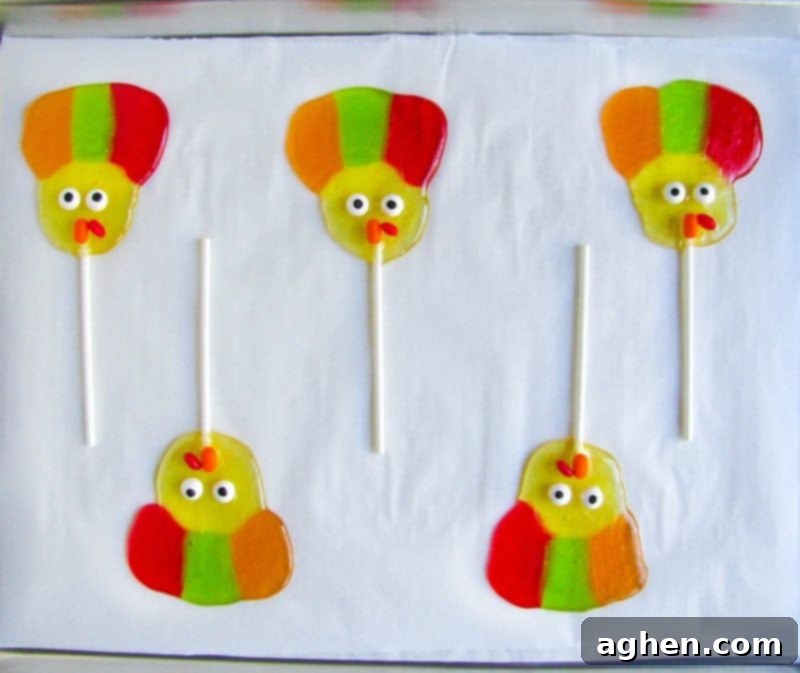
On the prepared parchment-lined baking sheet, start by sticking together two yellow Jolly Ranchers vertically. These will form the main body of your turkey. Make sure they are touching securely along their long edges. Next, take your red, orange, and green Jolly Ranchers. Arrange them in a fan motion directly above the yellow body, creating the vibrant tail feathers. Position them so that the bottom edges of the ‘feathers’ touch the top edge of the yellow ‘body’. It’s important to leave a small gap at the very bottom of the yellow Jolly Ranchers where you’ll insert the lollipop stick later. This ensures your stick has enough melted candy to adhere to.
Step 3: Melt the Candies
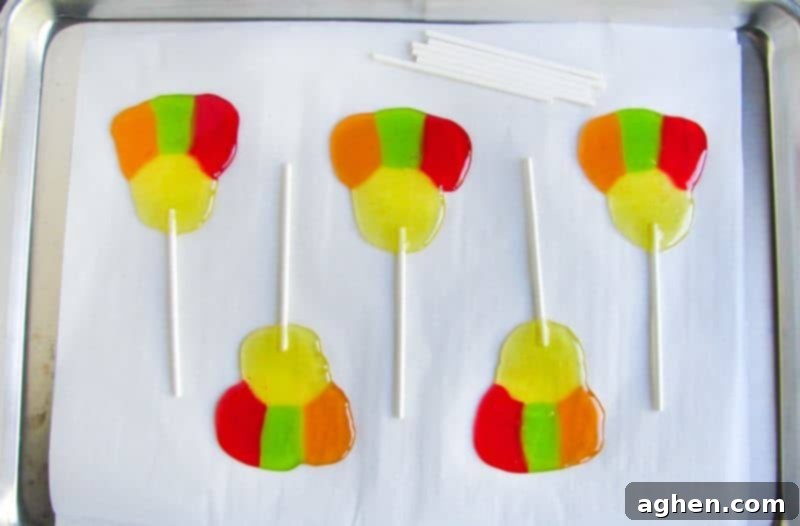
Once you have all your Jolly Ranchers carefully arranged on the baking sheet, carefully place the sheet into your preheated oven. Let them melt together for approximately 5-6 minutes. Keep a close eye on them! The goal is for the candies to soften and just merge into a single, cohesive shape, but not to spread too much or bubble excessively. They should look slightly glossy and fluid, maintaining their turkey form.
Step 4: Insert Lollipop Sticks
As soon as you remove the baking sheet from the oven, immediately take your lollipop sticks. Roll the end of a lollipop stick into the bottom center of each melted turkey shape. Work quickly but gently, ensuring the stick is firmly embedded into the warm, pliable candy. The candy will begin to harden quickly, so speed is key here.
Step 5: Decorate Your Turkeys
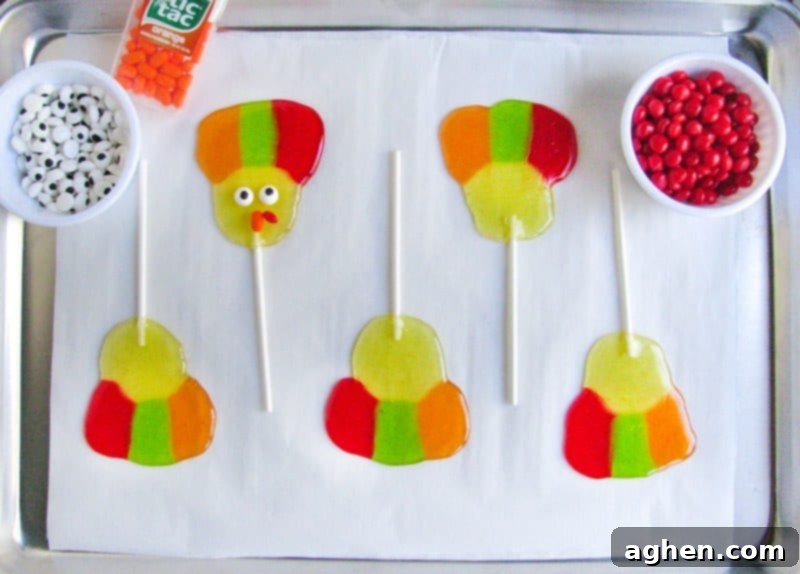
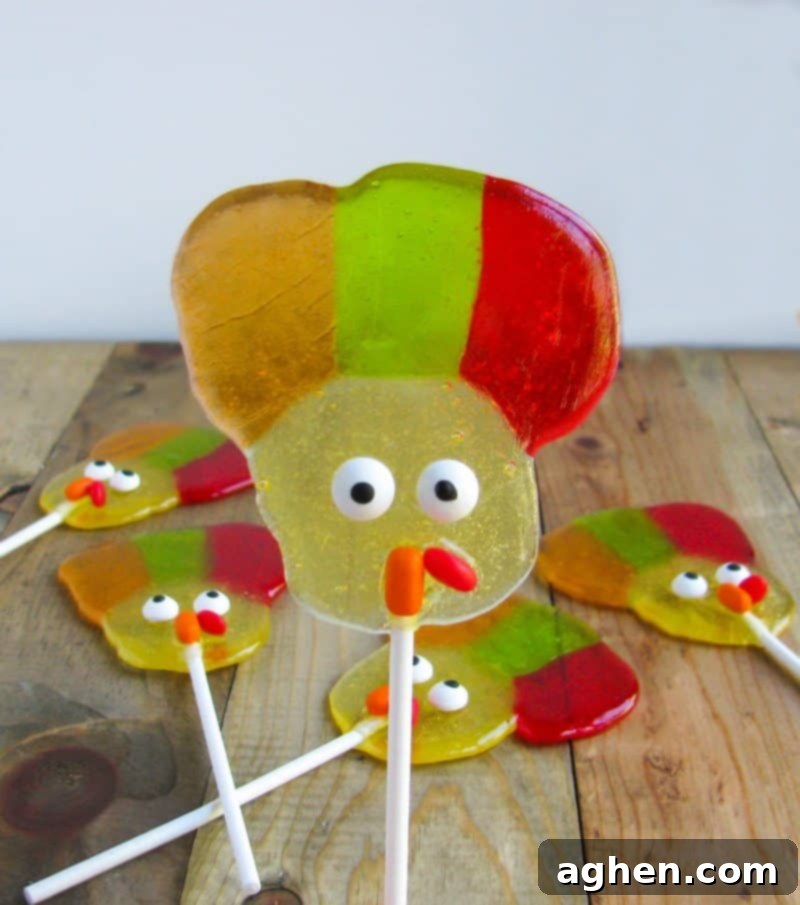
Now for the fun part – bringing your turkeys to life! While the candy is still warm and soft, quickly add the candy eyes, an orange Tic-Tac for the beak, and a Red Hot candy for the wattle. Place the eyes above the stick, the Tic-Tac below the eyes for the beak, and the Red Hot just below or to the side of the Tic-Tac. Work swiftly, as the candy base will continue to harden.
Step 6: The Lighter Trick (if needed)
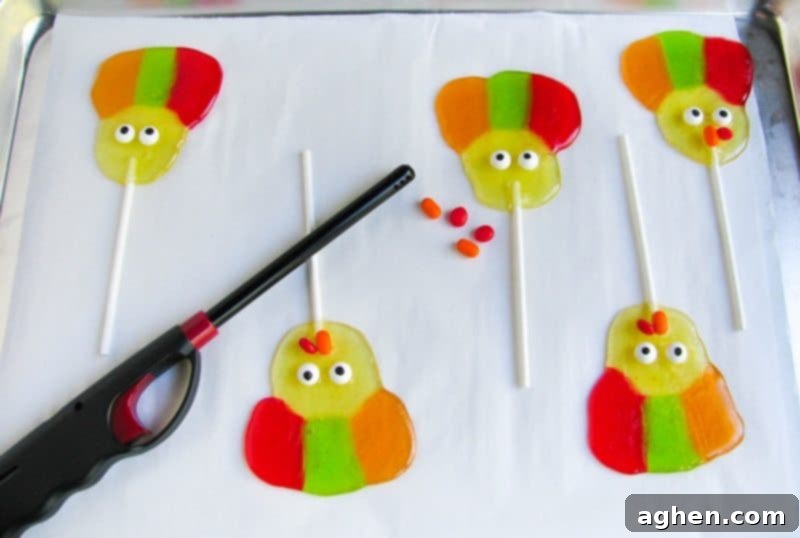
If some of your suckers start to harden before you’ve finished decorating, don’t worry! Grab a handheld lighter (use with extreme caution and adult supervision). Carefully hold the flame for just a few seconds on the specific spot where you want to attach a candy. The flame will momentarily melt the surface of the lollipop just enough to make it sticky, allowing you to press your candy eyes, Tic-Tacs, or Red Hots securely into place. This quick trick is a lifesaver for perfect decorations!
Step 7: Allow to Set
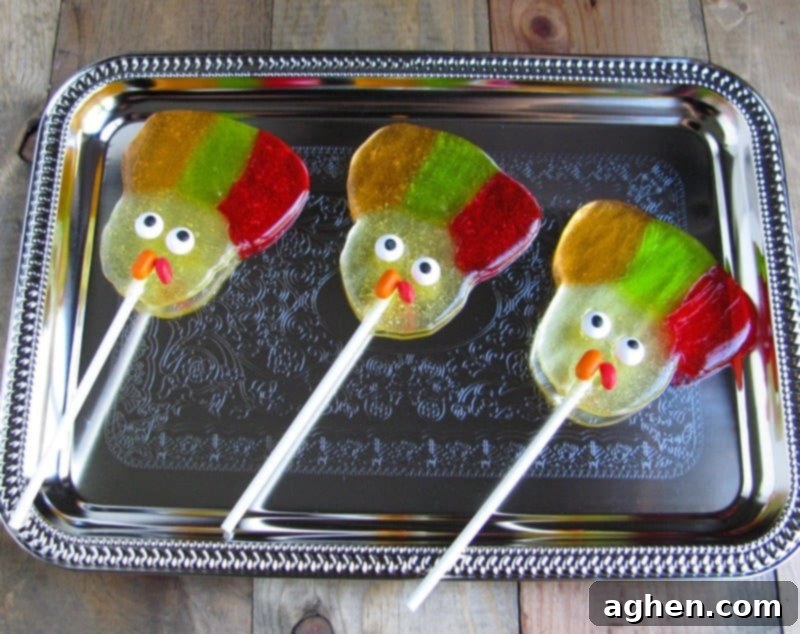
Once decorated, let your turkey lollipops set at room temperature. This usually takes about 10 minutes, during which the candy will fully harden and secure all the decorative elements. Once completely firm, they are ready to be served and enjoyed!
Tips for Turkey Lollipop Perfection
- Work Fast: The key to success is working quickly once the Jolly Ranchers come out of the oven. Have all your decorative candies unwrapped and ready.
- Parchment Paper is Essential: Do not skip lining your baking sheet with parchment paper. Wax paper is not a suitable substitute as it will melt and stick.
- Don’t Overbake: Keep a close eye on the candies in the oven. They should just melt and merge, not bubble or brown. Overbaking can make them brittle.
- Even Thickness: Try to arrange your Jolly Ranchers to have a relatively even thickness when melted. This ensures they harden uniformly.
- Practice Patience: If making a large batch, consider doing them in smaller batches to ensure you have enough time to decorate before they harden.
Creative Variations & Customization
While the classic turkey design is undeniably charming, feel free to get creative and personalize your lollipops:
- Feather Colors: Use different combinations of Jolly Rancher colors for the feathers. Think vibrant purples, blues, or even a mix of all colors!
- Sparkling Turkeys: Lightly sprinkle edible glitter or fine sugar crystals on the melted candies immediately after removing from the oven for a shimmering effect.
- Flavor Fun: Experiment with different Jolly Rancher flavors. Just ensure you have enough yellow ones for the body.
- Different Eyes/Beaks: Instead of Tic-Tacs, you could use a small piece of orange candy corn for the beak, or even mini chocolate chips for eyes.
Storage & Make-Ahead Tips
These turkey lollipops are fantastic for making ahead of time, which is a huge plus during the busy holiday season!
- Airtight Container: Once completely hardened, store the lollipops in an airtight container at room temperature. Layer them with parchment paper between each layer to prevent sticking.
- Shelf Life: Stored properly, these candy lollipops can last for up to 1-2 weeks, making them a perfect treat to prepare days before your Thanksgiving gathering.
- Avoid Refrigeration: Do not refrigerate these lollipops, as moisture can make them sticky.
- Individual Wrapping: For party favors or to prevent sticking, you can wrap each lollipop in small cellophane bags tied with a festive ribbon.
Frequently Asked Questions (FAQs)
- Can I use other brands of hard candy?
- While Jolly Ranchers are recommended due to their specific melting properties and flat shape, you can experiment with other hard candies. Just be aware that melting times and spread might vary. Test a small batch first!
- My candies are sticking to the parchment paper after melting. What went wrong?
- This is highly unusual if you’re using true parchment paper. Ensure you are not using wax paper, which will definitely stick. Also, make sure the candies are fully hardened before attempting to peel them off the paper.
- How do I prevent the lollipop stick from coming out?
- The key is to embed the stick immediately after removing the candies from the oven when they are still very warm and pliable. Roll the stick firmly into the melted candy to ensure good adhesion. If it’s loose, you can gently reheat the base with a lighter as described in Step 6.
- Are these suitable for very young children?
- Like all lollipops and hard candies, they pose a choking hazard for very young children. Always supervise kids while they enjoy these treats.
We hope you enjoyed this incredibly easy-to-make and super cute Thanksgiving dessert recipe. These Jolly Rancher Turkey Lollipops are sure to bring joy and a touch of festive whimsy to your holiday celebration. They’re not just a treat; they’re an experience!
Have a fantastic Thanksgiving filled with laughter, love, and plenty of delicious food! Gobble Gobble!
Looking for more easy Thanksgiving ideas and recipes to make your holiday extra special?
Be sure to check out these cute Turkey Cupcakes for another adorable treat!
Turkey Lollipops
Author: Jaclyn
15
5
20
These easy-to-make turkey-shaped lollipops are sure to get gobbled up in no time, making them a festive and fun Thanksgiving treat.
5
Share on Facebook
Equipment
-
5 lollipop sticks
Ingredients
- 25 Jolly Ranchers (10 yellow for bodies, 5 green, 5 red, 5 orange for feathers)
- 10 candy eyeballs
- 5 orange Tic-Tacs (for beaks)
- 5 Red Hot candies (for wattles)
Instructions
-
Preheat the oven to 275°F (135°C) and line a cookie sheet with parchment paper. Set aside. Have all your Jolly Ranchers unwrapped.
-
On the prepared baking sheet, stick two yellow Jolly Ranchers together vertically for the turkey’s body. Then, arrange one red, one orange, and one green Jolly Rancher above the yellow ones in a fan shape to form the tail feathers. Ensure they are touching. Leave a small space at the bottom of the yellow candies for the lollipop stick.
-
Carefully place the baking sheet in the preheated oven for about 5-6 minutes. Watch closely and remove when the Jolly Ranchers have melted together into the desired turkey shape, but before they spread too much.
-
Immediately after removing from the oven, roll the end of a lollipop stick into the bottom of each melted candy turkey.
-
Quickly add the candy eyes, an orange Tic-Tac for the beak, and a Red Hot candy for the wattle onto each warm, soft turkey.
-
If any suckers start to harden before you finish decorating, carefully use a lighter to gently melt a small spot where you wish to place the candy. Press the candy into the softened area. (Exercise extreme caution if using a lighter).
-
Let the turkey lollipops set at room temperature until they are completely hard, which typically takes about 10 minutes. Once firm, they are ready to enjoy!
Nutrition
Calories: 123kcal
|
Carbohydrates: 30g
|
Sugar: 20g
Did You Make This Recipe?
Share your delightful creations with me on Instagram @crayonsandcravings and be sure to follow us on Pinterest @crayonsandcravings for even more creative recipes and holiday inspiration!
Pin Recipe
Leave A Review
