Delicious 4-Ingredient Candy Corn Fudge: The Ultimate Easy Halloween Treat
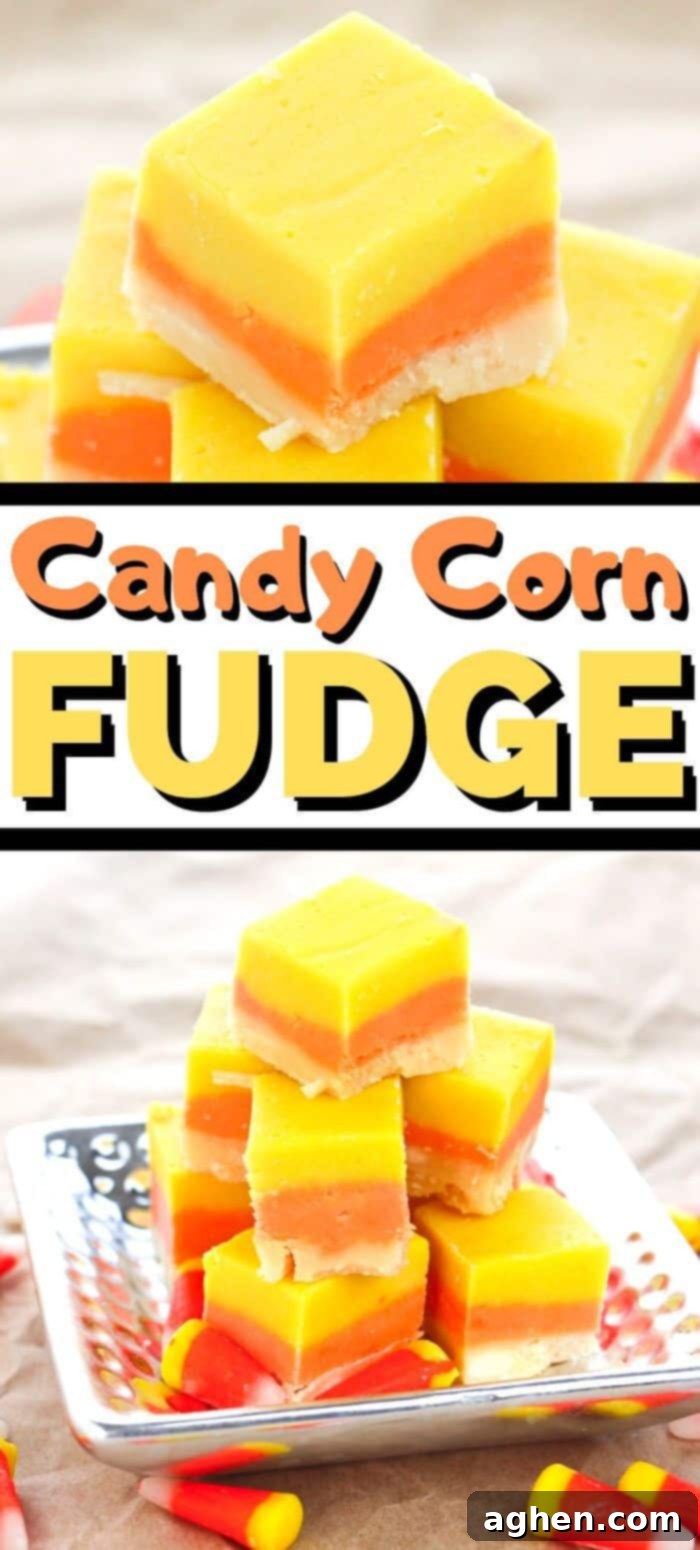
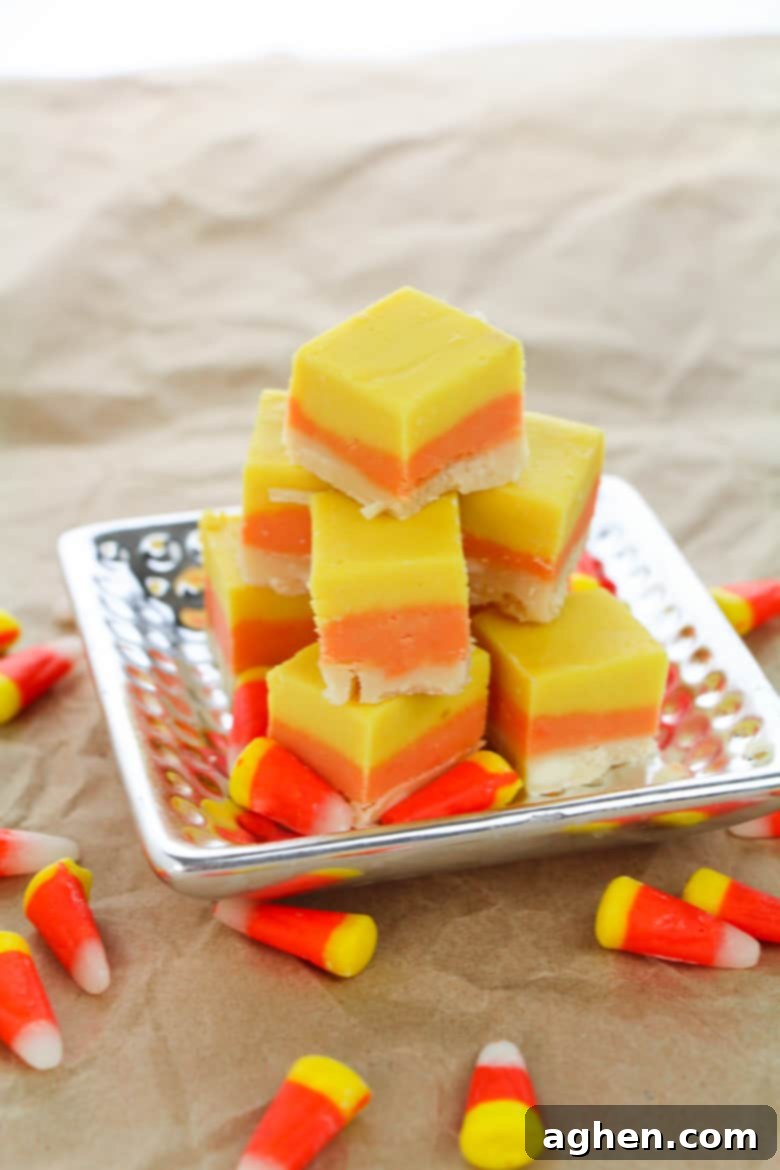
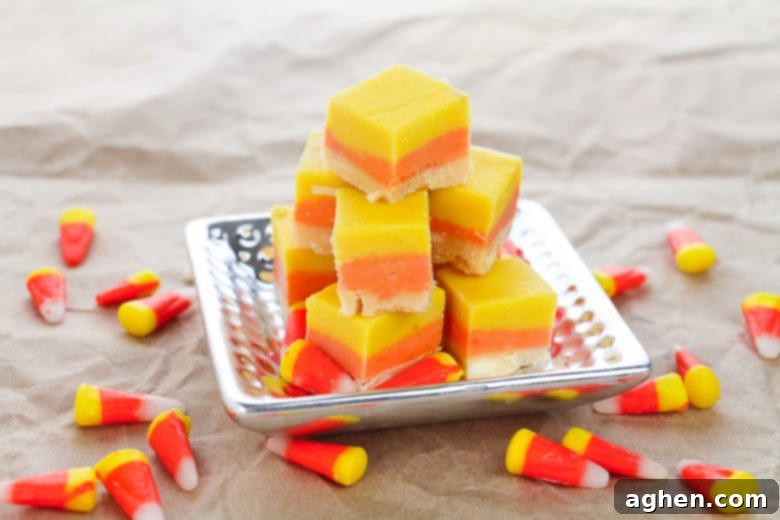
As the leaves change and a crisp chill fills the autumn air, there’s one holiday that brings out the inner child in all of us: Halloween! And what better way to celebrate than with a treat that perfectly captures the spirit of the season? We’re thrilled to share our incredibly easy and visually stunning **Candy Corn Fudge**. This no-bake, 4-ingredient white chocolate fudge recipe is specifically designed to mimic the iconic look of everyone’s favorite striped Halloween candy – candy corn!
Whether you’re planning a spooky Halloween party, searching for a fun and simple activity to do with the kids, or simply craving a festive dessert that’s both impressive and delicious, this layered fudge is an absolute winner. Its vibrant layers of yellow, orange, and white are instantly recognizable and guaranteed to impress your guests and family alike. And here’s a little secret: while it looks just like candy corn, it doesn’t actually *taste* like actual candy corn. This is fantastic news for those who appreciate the aesthetic but not the distinct flavor of the classic candy. (But don’t worry, true candy corn enthusiasts, we’ve included special tips below on how to infuse your fudge with that authentic candy corn taste if you desire!)
Why This Candy Corn Fudge is Your Go-To Halloween Dessert
Halloween is a season for creativity, costumes, and, of course, indulging in delicious treats. This Candy Corn Fudge distinguishes itself as an ideal dessert for a multitude of compelling reasons, making it a staple for your autumn celebrations:
- **Effortless Preparation:** Perhaps its biggest appeal is the sheer simplicity. Requiring only four basic ingredients and absolutely no baking, this recipe is incredibly straightforward. It’s a perfect project for novice bakers, busy parents, or anyone looking to create a show-stopping dessert without the stress of complex techniques.
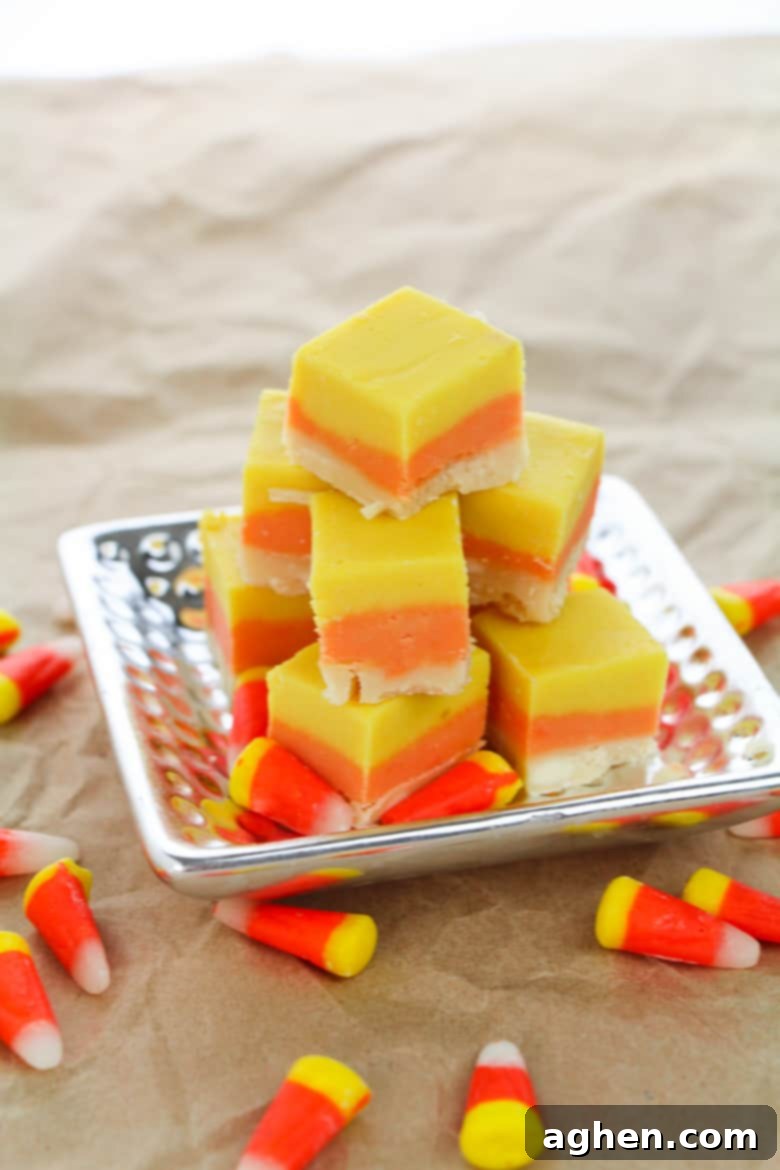
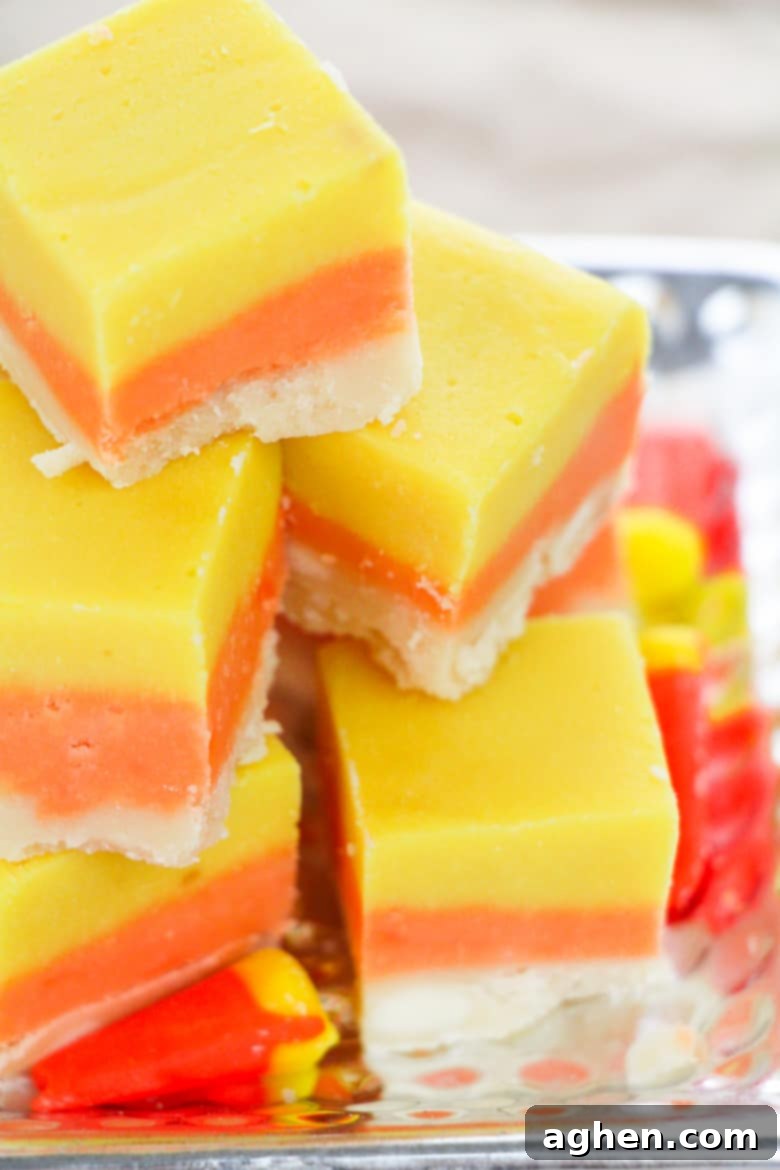
- **Visually Captivating:** The distinct and vibrant layers of white, orange, and yellow instantly evoke the beloved candy corn motif. This striking appearance makes the fudge a fantastic centerpiece for any Halloween spread, a charming and thoughtful homemade gift for friends and neighbors, or a delightful surprise in a school lunchbox.
- **Universally Appealing Flavor:** Unlike actual candy corn, which often divides opinions, this fudge boasts a creamy, rich white chocolate flavor that almost everyone adores. It’s smooth, sweet, and melts in your mouth, offering a delightful and comforting taste that perfectly contrasts its playful appearance.
- **Kid-Friendly Fun:** The layering process is simple and engaging enough for children to safely participate in, making it a wonderful family activity during the Halloween season. Kids will love helping measure, stir (under supervision), and especially watching the vibrant colors come together to form their favorite candy look!
- **Versatile for Any Occasion:** Whether you’re hosting a large Halloween bash, enjoying a small family gathering, or simply want a special treat to enjoy at home, this fudge fits seamlessly into any scenario. It’s easy to prepare in advance, simple to transport, and stores beautifully, offering maximum convenience.
For those who love candy corn and easy recipes, you might also enjoy these tasty candy corn cake mix cookies, which are another fantastic, simple, and festive option for Halloween!
Key Ingredients for Your Layered Fudge Perfection
This recipe proudly features its simplicity, requiring just four core ingredients to create a stunning, flavorful, and perfectly textured fudge. Understanding each component will help ensure your success. Here’s a closer look at what you’ll need and why each element is crucial:
This section provides detailed notes on each ingredient and includes valuable substitution options. For all precise measurements and comprehensive instructions, please refer to the complete printable recipe card located at the end of this post.
- White Candy Melts: (Shop on Amazon) These form the essential base for your pristine white fudge layer. Candy melts are specially formulated to melt smoothly and maintain their color and consistency, making them ideal for fudge where a clean finish is desired. They are designed to harden well and provide a stable structure for your layered creation.
- Substitution: High-quality white chocolate chips or finely chopped white chocolate bars can be used as an alternative. If you choose this option, it’s vital to use gel-based food coloring (not liquid food coloring, as it can cause chocolate to seize) to achieve vibrant, consistent orange and yellow hues for your other layers.
- Orange Candy Melts: (Shop on Amazon) These provide the quintessential orange hue for the middle layer of your candy corn fudge. Utilizing pre-colored candy melts significantly simplifies the process, eliminating the need for separate coloring and guaranteeing a perfect, bright orange shade every time.
- Substitution: If working with white chocolate, you will need orange gel food coloring. Begin with a very small amount and gradually add more, stirring continuously, until you reach your desired vibrant orange shade.
- Yellow Candy Melts: (Shop on Amazon) Crucial for the vibrant, sunny yellow layer that forms the base of your candy corn design. Just like the orange melts, these make achieving the correct, bright yellow color quick, easy, and consistent, contributing to the overall visual appeal.
- Substitution: Similarly, if using white chocolate, incorporate yellow gel food coloring. Exercise caution with the amount to ensure you get a true yellow without it appearing greenish.
- Sweetened Condensed Milk: This “magic” ingredient is the secret to achieving creamy, perfectly set fudge. It serves a dual purpose by providing both the necessary sweetness and the vital liquid component that binds the melted chocolate into a luscious, smooth fudge texture. It’s crucial to use *sweetened condensed milk*, not evaporated milk, as they are entirely different products with distinct consistencies and sugar content.
Essential Supplies for Smooth Fudge Making
Having all your necessary tools and equipment ready before you begin will make the candy corn fudge-making process even more enjoyable and efficient. Here’s a detailed list of what you’ll need and why each item is important:
- 9×5 Loaf Pan: This particular size is ideal for creating neat, thick, and well-defined layers of fudge that perfectly resemble the classic candy corn shape. Using a pan of this dimension ensures that your fudge slices will have a satisfying height and a beautiful color separation.
- Parchment Paper or Aluminum Foil: Absolutely essential for lining your loaf pan. This non-stick barrier ensures that your set fudge can be easily lifted out of the pan without sticking or breaking, making both removal and clean-up a breeze. Remember to leave a generous overhang on the sides to create convenient “handles.”
- Microwave-Safe Bowls (preferably 3 individual bowls): You’ll need separate bowls for melting each distinct color of candy melts (white, orange, and yellow). Using individual bowls prevents any accidental color mixing and allows you to melt each batch efficiently without waiting.
- Spatula or Offset Spatula: These tools are perfect for smoothly stirring the melted ingredients until well combined and, more importantly, for gently spreading each fudge layer evenly into the prepared pan. An offset spatula, with its angled blade, is particularly useful for achieving a perfectly smooth and flat surface on each layer.
- Sharp Knife and Cutting Board: Once your fudge is fully set, a very sharp knife is crucial for achieving neat, precise, and clean cuts. A dull knife can drag the fudge, smudging the beautiful layers. A sturdy cutting board provides a stable surface for slicing.
How to Make Layered Candy Corn Fudge: Step-by-Step
Creating this visually stunning layered fudge is much simpler than its impressive appearance might suggest! The core technique involves working in distinct layers, allowing each to set just enough before carefully adding the next. You will build your fudge by starting with the white layer, followed by the orange, and finally the yellow layer, perfectly replicating the iconic candy corn gradient.
General Steps for Each Fudge Layer:
- Melt: Gently and carefully melt the specific color of candy melts until smooth.
- Stir: Thoroughly combine the melted candy melts with the appropriate portion of sweetened condensed milk.
- Spread: Delicately spread the prepared fudge mixture evenly into your lined baking dish.
- Refrigerate: Chill the newly spread layer for approximately 30 minutes to allow it to set firm enough to support the subsequent layer without any mixing or bleeding of colors.
Detailed Instructions for a Perfect Batch:
-
Prepare Your Pan: Line a 9×5-inch loaf pan with parchment paper. Ensure the paper overhangs generously on the sides; these will serve as convenient “handles” for easy removal of the fudge block once it’s set. Lightly spray the parchment paper with a nonstick cooking spray to prevent any sticking. Set the prepared pan aside.
-
Melt the White Layer: In a microwave-safe bowl, place your white candy melts (or white chocolate chips if substituting). Microwave on medium power for 30-second intervals, stirring thoroughly after each interval. Continue this process until the melts are completely smooth and fully melted. Be extremely careful not to overheat the chocolate, as this can cause it to seize and become unusable.
-
Mix the White Fudge: Stir in 3 to 4 tablespoons of sweetened condensed milk into the melted white candy melts. The exact amount can be adjusted slightly to your preference – using more condensed milk will result in a slightly softer, creamier fudge texture, while less will yield a firmer consistency. Mix until the mixture is thoroughly combined, smooth, and lump-free.
-
Spread the White Layer: Carefully pour the white fudge mixture into your prepared loaf pan. Use an offset spatula or the back of a spoon to gently spread it evenly across the bottom of the pan, creating a smooth, flat, and uniform layer.
-
Chill the White Layer: Cover the pan tightly with plastic wrap and transfer it to the refrigerator. Chill for at least 30 minutes. This chilling period is critical to allow the white layer to set firm enough to support the subsequent orange layer without any mixing or bleeding of colors.
-
Repeat for the Orange Layer: Once the white layer is firm to the touch, repeat steps 2-4 using your orange candy melts and another 3 to 4 tablespoons of sweetened condensed milk. Gently spread this vibrant orange mixture evenly and carefully over the chilled white layer. Be mindful not to press too hard, which could disturb the layer beneath.
-
Chill the Orange Layer: Return the pan to the refrigerator for another 30 minutes, covered, allowing the orange layer to set completely firm before moving on.
-
Repeat for the Yellow Layer: Finally, repeat steps 2-4 for the last layer, using your yellow candy melts and the remaining 3 to 4 tablespoons of sweetened condensed milk. Carefully spread this bright yellow fudge mixture evenly over the chilled orange layer, again, being gentle to maintain distinct lines.
-
Final Chill: Once all three beautiful layers are in place, cover the pan tightly with plastic wrap and refrigerate for a minimum of 2-3 hours. For the absolute best results and the cleanest slices, chilling the fudge overnight is highly recommended to ensure it is completely set and firm throughout.
-
Slice and Serve: When the fudge is fully set, use the parchment paper overhangs to carefully lift the entire block out of the pan. Place it onto a clean cutting board. For the best presentation and perfectly crisp, clean lines, use a very sharp knife. For even cleaner cuts, wipe the blade clean with a damp cloth after each slice. You can cut the fudge into traditional squares, or for an extra authentic candy corn effect, try slicing it into charming triangles! Serve and delight in this festive, homemade Halloween treat.
Recipe Tips and Creative Variations
While this candy corn fudge recipe is absolutely fantastic as is, here are some expert tips to perfect your batch and creative ideas for variations to suit any taste, dietary preference, or specific Halloween occasion:
- Enhance the Flavor Profile: For a subtle yet delightful boost in flavor, consider adding a single drop of clear vanilla extract or even a hint of almond extract to each fudge layer. Using clear extract is important to maintain the vibrant and distinct colors of your fudge without clouding them.
- Achieve Perfectly Clean Cuts: The secret to perfectly smooth edges and distinct, unsmudged layers lies in using a very sharp knife. For even cleaner results, try running your knife under hot water for a few seconds, wiping it completely dry, and then making your cut. Repeat this hot-water-and-wipe process after each slice. This keeps the knife warm and prevents sticking. As an extra touch for presentation, try slicing your homemade fudge into triangles to mimic the exact shape of candy corn!
- Coloring with White Chocolate Chips: If you choose to use white chocolate chips or chopped white chocolate instead of pre-colored candy melts, you’ll need to add coloring. It is absolutely crucial to use **gel-based food coloring**. Liquid food colorings contain water, which can cause melted chocolate to seize and become thick and unusable. Gel colors are highly concentrated, deliver incredibly vibrant orange and yellow hues, and will not alter the smooth texture of your chocolate. Add a tiny drop at a time until you achieve your desired shade.
- Embrace the Candy Corn Taste (or not!): As we’ve mentioned, this fudge *looks* exactly like candy corn but typically carries a creamy white chocolate flavor, not the specific taste of candy corn. If you are a true candy corn connoisseur and wish to infuse that distinct flavor:
- **Fold it in:** Chop up some actual candy corn pieces into small bits and gently fold them into one or all of your fudge mixtures (white, orange, or yellow) just before spreading.
- **Top it off:** For both visual appeal and a burst of flavor, press whole or additional chopped candy corn pieces onto the top yellow layer while it is still slightly soft, just before the final extended chill. This ensures they adhere nicely.
- Involve the Kids for Fun: This is an incredibly rewarding recipe for children to help with! They can assist with safe tasks such as measuring ingredients, gently stirring the melted mixtures (under close adult supervision), spreading the layers with a spatula, and even artistically arranging candy corn pieces on top. It’s a great way to create lasting Halloween memories.
- Adjusting Pan Sizes: Yes, you can certainly experiment with different pan sizes! While a 9×5-inch loaf pan is recommended for ideal thick layers, you can use an 8-inch baking pan or a small rectangular Pyrex dish. Just be aware that using a larger pan will result in thinner fudge layers. This might mean you need to adjust the chilling times slightly, potentially requiring less time for each layer and for the final set.
Storage and Make-Ahead Tips
One of the many wonderful qualities of fudge is its excellent storage capability, making it a fantastic make-ahead option for any party, event, or simply for enjoying over an extended period.
- Room Temperature Storage: To maintain its optimal creamy texture and flavor, store your candy corn fudge in an airtight container at room temperature. When stored correctly, it will remain fresh and delicious for up to two weeks. Always ensure it’s kept away from direct sunlight or any heat sources, which could cause the fudge to melt or become excessively soft.
- Refrigeration: While not strictly necessary for basic storage, if your kitchen environment is particularly warm or humid, or if you simply prefer a firmer fudge texture, you can certainly store the fudge in the refrigerator. If refrigerated, it’s a good idea to bring the fudge to room temperature for approximately 15-20 minutes before serving. This allows the texture to soften slightly and the flavors to fully develop, ensuring the best eating experience.
- Freezing for Long-Term Storage: For extended preservation, fudge freezes beautifully! To freeze, wrap the entire block of fudge (or individual pieces, if preferred) tightly in multiple layers of plastic wrap, then place it inside an airtight freezer-safe container or a heavy-duty freezer bag. It can be stored in the freezer for up to 2-3 months without losing quality. When you’re ready to enjoy it, thaw the fudge overnight in the refrigerator, and then let it sit at room temperature for a short while before serving.
- Excellent Make-Ahead Option: This candy corn fudge is an ideal candidate for preparing well in advance of your event. You can comfortably make a batch several days, or even weeks, before your Halloween party or gathering. This flexibility significantly reduces stress on the day of your event, allowing you to focus on other preparations.
Frequently Asked Questions About Candy Corn Fudge
Yes, absolutely! While a 9×5-inch loaf pan is recommended for yielding perfectly thick and distinct layers, you can certainly adapt the recipe to an 8-inch baking pan or a small rectangular Pyrex dish. Keep in mind that using a larger pan will result in thinner fudge layers, which might require slightly less chilling time per layer and for the final set. You may also want to slightly increase the recipe quantities if you want similar thickness in a larger pan. Adjust your chilling times and ingredient amounts accordingly.
For those who truly love the distinct and unique flavor of actual candy corn, there are a couple of excellent ways to incorporate it into your fudge! You can try finely chopping some actual candy corn pieces and gently folding them directly into one or all of the fudge layers (white, orange, or yellow) while you are mixing with the sweetened condensed milk. Alternatively, for a beautiful visual and an added textural pop, you can place whole pieces of candy corn or additional chopped pieces on top of the yellow layer as it begins to set, just before the final, long chill. This ensures they adhere nicely to the fudge surface.
If you opt to use white chocolate chips or chopped white chocolate instead of the pre-colored candy melts, it is absolutely crucial to use **gel-based food coloring**. Liquid food colorings contain water, which is an enemy to melted chocolate; even a tiny amount can cause the chocolate to seize and become clumpy, thick, and unusable. Gel colors, on the other hand, are highly concentrated, deliver incredibly vibrant hues, and will not affect the delicate texture of your melted chocolate. Add a tiny drop at a time until you achieve your desired bright orange and yellow shades.
This candy corn fudge is a superb make-ahead treat, offering wonderful convenience for your holiday preparations! You can comfortably prepare it up to two weeks in advance if it is stored properly in an airtight container at room temperature. For even longer-term storage, the fudge freezes exceptionally well for up to 2-3 months without any significant loss of quality or flavor. Just be sure to wrap it very tightly to prevent freezer burn. This fantastic flexibility makes it absolutely perfect for getting a stress-free head start on your Halloween party preparations or ensuring you have treats ready for any impromptu gathering.
More Spooktacular Halloween Treats to Try
If you’ve enjoyed making this festive and easy fudge, you’re in for more fun! Explore these other fantastic Halloween recipes to keep the spooky spirit and delicious treats flowing throughout the season:
- Bloody Halloween Bark Candy – A delightfully creepy and delicious chocolate bark with a ghoulish twist that’s perfect for a themed party.
- Halloween Trifle – An incredible dessert, especially perfect for creatively using up any leftover Halloween candy bars, making it both tasty and practical.
- Frankenstein Lollipops – Adorably spooky and super easy to make with just a few simple ingredients and Jolly Ranchers.
- Mummy Rice Krispies Treats – A beloved classic treat dressed up for Halloween with just 3 ingredients and minimal effort!
- Halloween Chex Mix – A perfectly balanced savory and sweet snack mix, ideal for munching during a scary movie marathon or serving at a party.
Can’t get enough Halloween goodies? Be sure to take a peek at all 50+ of our Halloween recipes for even more inspiring and delicious ideas to make your holiday season extra special!
Printable Recipe Card: Candy Corn Fudge
★★★★★
Candy Corn Fudge
Author: Jaclyn
15
4
4 15
This easy 4-ingredient candy corn fudge has the same look as candy corn, for a tasty Halloween treat!
30 pieces
Ingredients
- ¾ cup white chocolate chips or candy melts
- ¾ cup orange candy melts
- ¾ cups yellow candy melts
- 9-12 Tablespoons sweetened condensed milk divided
Instructions
-
Line a 9 x 5 baking dish with parchment paper, letting it overhang on the sides for easy removal. Lightly spray with nonstick cooking spray and set aside.
-
In a microwave-safe bowl, melt white candy melts (or white chips) in the microwave for 30 seconds and stir well. Heat in additional 15-second increments as needed, stirring well in-between each interval.
-
Stir in 3-4 Tbsp of sweetened condensed milk, to taste (the more you use, the softer the texture will be).
-
Spread the white mixture into prepared pan, using an offset spatula or back of a spoon to smooth.
-
Cover with plastic wrap and refrigerate for 30 minutes.
-
Repeat steps 1-5 with the orange candy melts: melt, add condensed milk, spread the orange mixture on top of white fudge layer, and refrigerate.
-
Repeat steps 1-4 for yellow candy melts: melt, add condensed milk, spread the yellow fudge mixture on top of orange fudge layer.
-
Refrigerate for 3 hours (or overnight) before removing from pan and cutting into squares.
Notes
Store in an airtight container at room temperature for up to two weeks.
Instead of colored candy melts you could use white chocolate chips and use gel based food coloring to color the white melted chocolate orange and yellow.
Fan of candy corn? Give this fun Halloween treat some candy corn flavor by placing pieces of candy corn on the top of the fudge as it starts to set or adding chopped pieces of candy corn to the fudge mixture.
Nutrition
Calories: 68kcal | Carbohydrates: 9g | Protein: 1g | Fat: 3g | Saturated Fat: 2g | Polyunsaturated Fat: 0.1g | Monounsaturated Fat: 1g | Cholesterol: 3mg | Sodium: 17mg | Potassium: 35mg | Fiber: 0.01g | Sugar: 9g | Vitamin A: 17IU | Vitamin C: 0.2mg | Calcium: 26mg | Iron: 0.02mg

Did You Make This Recipe?
Share it with me on Instagram @crayonsandcravings and follow on Pinterest @crayonsandcravings for even more!
Pin Recipe
Leave A Review
