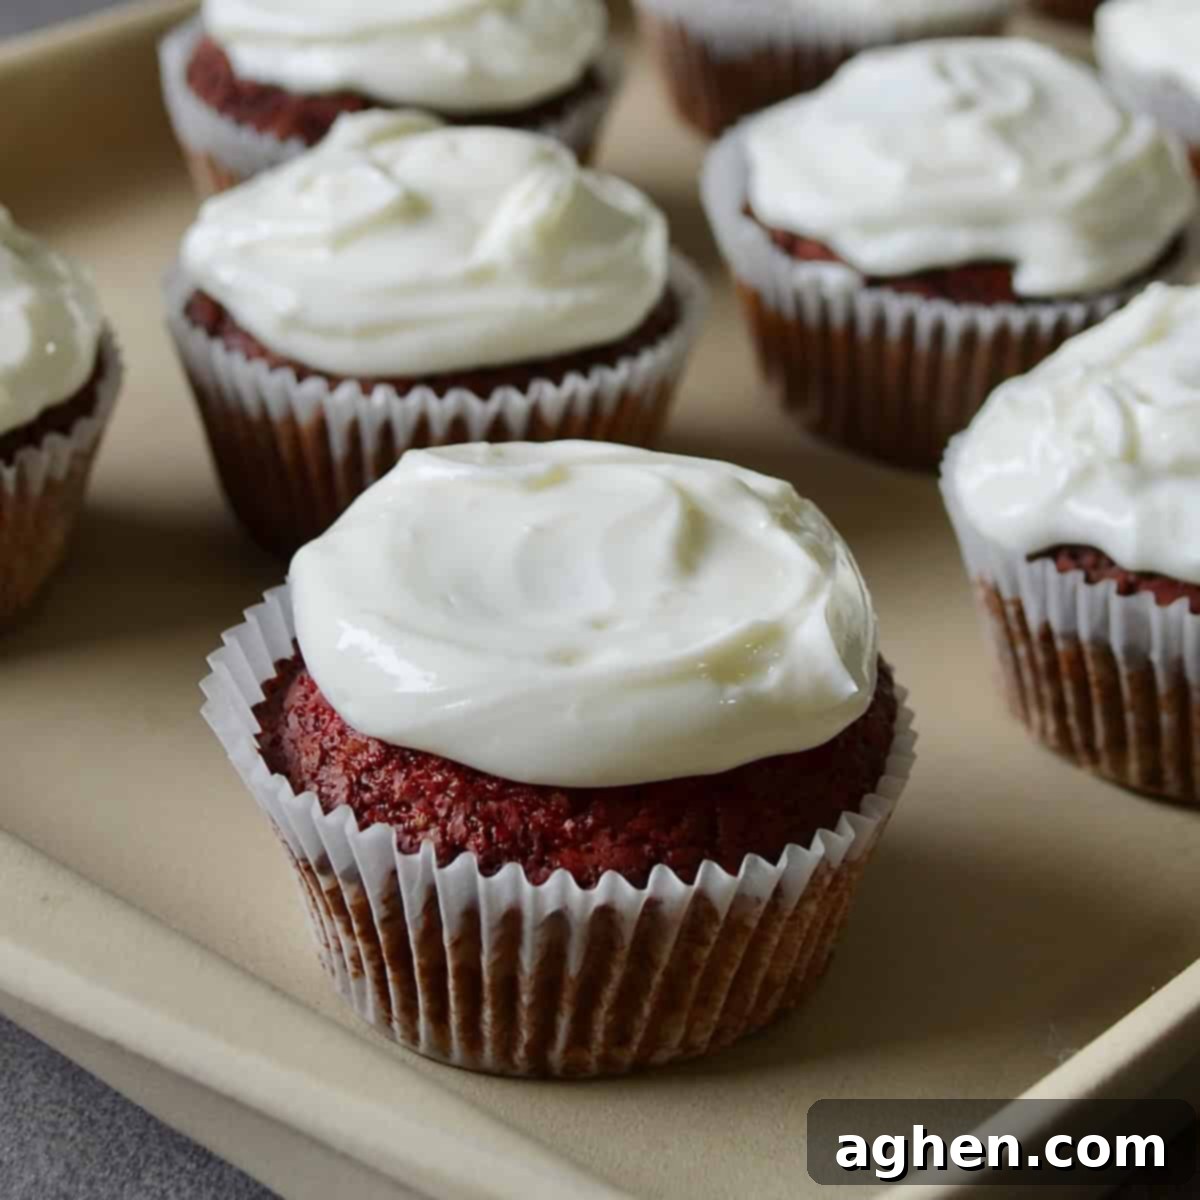
Indulge Guilt-Free: Delicious 4-Point Weight Watchers Red Velvet Cupcakes
Prepare to be amazed by these incredibly delicious and surprisingly healthy 4-point Weight Watchers Red Velvet Cupcakes! If you’ve been looking for a dessert that satisfies your sweet cravings without derailing your health goals, your search ends here. These homemade red velvet cupcakes are not just a recipe; they are your next delightful baking adventure, offering a soft, tender interior and that signature delicate red velvet flavor we all adore. You truly won’t believe how lightened-up they are, making them a perfect guilt-free treat for any occasion.
The magic of red velvet lies in its unique flavor profile: a subtle hint of cocoa, a distinct tanginess from buttermilk, and a touch of vanilla, all harmoniously blended. Our recipe carefully balances these elements to create a nuanced taste that is both comforting and sophisticated. Some red velvet cakes boast a more pronounced cocoa presence, and if that’s your preference, you can easily adjust the cocoa powder amount. This not only deepens the flavor but also intensifies the beautiful crimson hue of your cupcakes. The accompanying cream cheese icing is equally perfect, striking that elusive balance between sweet and tangy, complementing the cake’s delicate notes wonderfully.
What sets these apart as the best healthy cupcakes is how ingeniously they’ve been lightened without sacrificing taste or texture. We’ve made smart ingredient swaps in the batter, utilizing a light butter substitute and a cup-for-cup sugar replacement, which dramatically reduces the Weight Watchers points. Yet, when it comes to the iconic cream cheese icing, we opted for real powdered sugar, balancing its richness by incorporating nonfat Greek yogurt instead of a portion of the cream cheese. This innovative approach yields an icing that is wonderfully soft, creamy, and boasts a divine sweetness and tang, all while keeping the recipe perfectly on plan. It’s a testament that healthy eating doesn’t mean compromising on deliciousness.
While a grand red velvet cake is undeniably impressive, tackling a red velvet cupcake recipe offers a far simpler and more convenient baking experience. Cupcakes bake much faster, eliminating the stress of slicing perfectly even cake layers or frosting an entire multi-tiered creation. Furthermore, they come pre-portioned, making serving a breeze and helping with portion control – especially helpful when tracking Weight Watchers points. Whipping up the batter is quick and straightforward, and decorating them is as simple as swirling or smearing a spoonful of that irresistible cream cheese icing on top. They’re perfect for impromptu treats or planned celebrations!
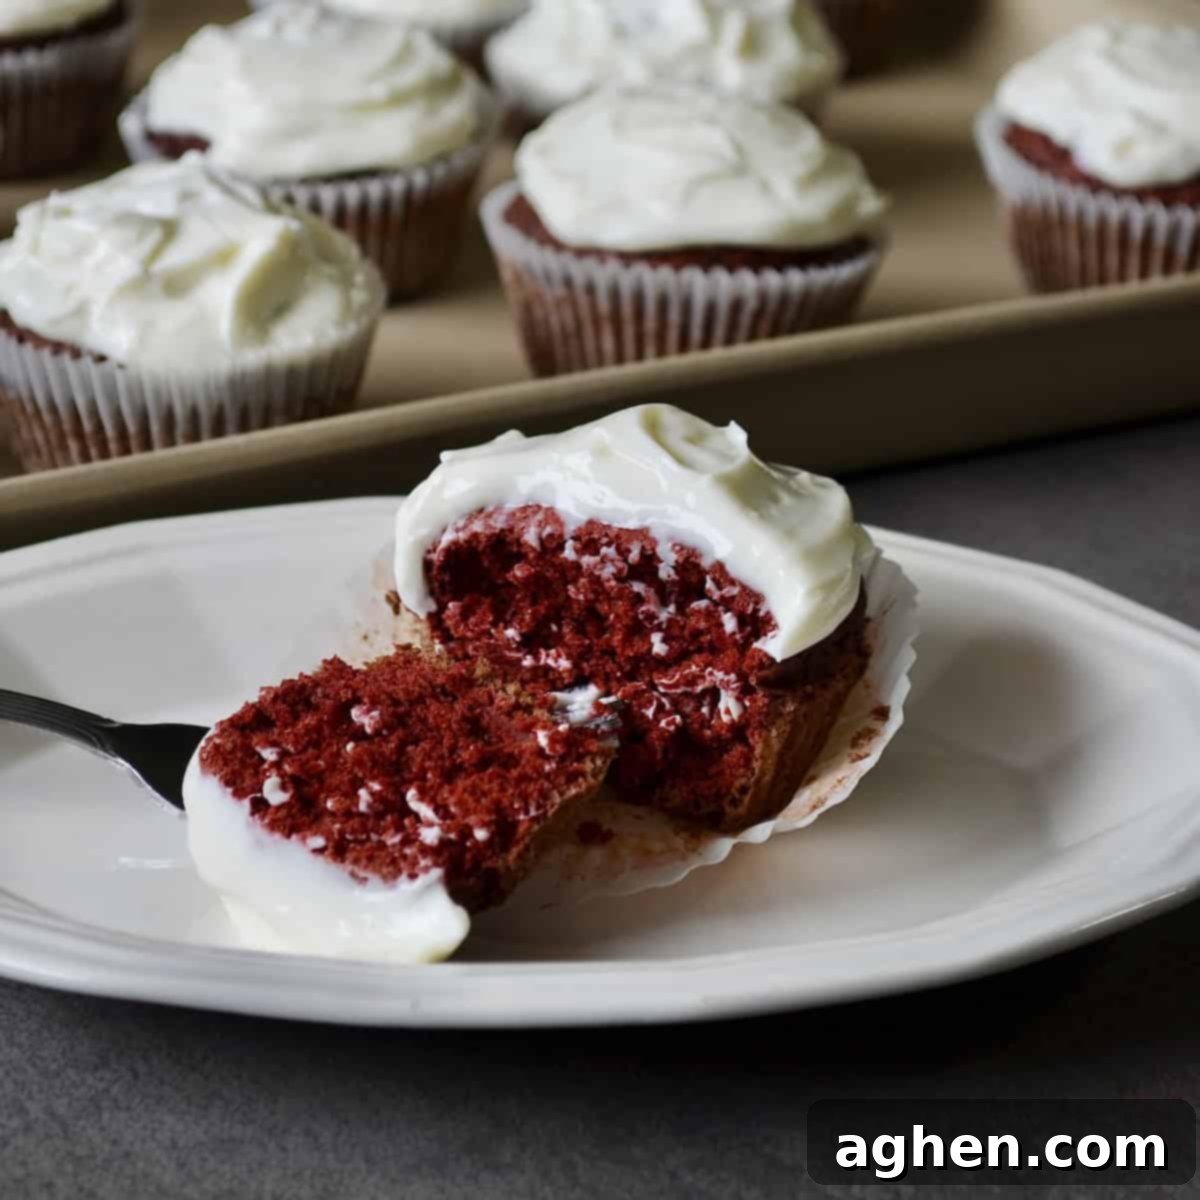
Why These Red Velvet Weight Watchers Cupcakes Will Be Your New Favorite
- Effortlessly Easy to Master: Baking doesn’t have to be an intimidating task! This recipe is designed with simplicity in mind, making it accessible for bakers of all skill levels. You can achieve fantastic results even if you don’t own an electric mixer, as a hand whisk and spatula will do the trick. The straightforward steps mean less time in the kitchen and more time enjoying your delicious creations.
- Unbelievably Fluffy and Moist Perfection: Experience cupcakes with an ideal consistency that will have everyone guessing they’re healthy. These beauties bake to form a delicate, barely-there crust on top, while the interior remains incredibly light, tender, and moist. The subtly tangy and sweet cream cheese icing provides the perfect textural and flavor contrast, elevating each bite into a truly delightful experience.
- Ideal for Celebrations and Special Occasions: These simple yet exquisitely scrumptious cupcakes are a showstopper for any celebration, big or small. Their vibrant, deep red color is naturally eye-catching, adding a festive touch to birthdays, holidays, or casual gatherings. Want to make them even more special? Experiment with elegant garnishes like chocolate shavings, fresh berries, or edible glitter. You can even adapt the icing color for specific holidays – think blue for the 4th of July, green for Christmas, or pastel shades for Easter!
- Perfectly Portioned for Weight Watchers: Each cupcake is a mere 4 Weight Watchers points, making it a fantastic choice for those managing their intake. The individual portions make tracking easy and help prevent overindulgence, allowing you to enjoy a satisfying dessert without guilt. It’s the ultimate smart swap for traditional high-calorie treats.
- A Crowd-Pleaser for All Ages: Red velvet is a universally loved flavor, and these cupcakes are no exception. Their classic appeal, combined with their lightened-up nature, means they’re a dessert everyone can enjoy, regardless of dietary preferences. They’re a fantastic way to introduce healthier baking to friends and family without them even knowing it!
Recipe Overview at a Glance
Get all the essential details for baking your batch of these delightful red velvet treats.
- Serving Size: 1 cupcake
- Number of Servings: 12 cupcakes
- Prep Time: Approximately 15 minutes (active preparation)
- Time to Cook: 18-20 minutes (baking time)
- WW Points Per Recipe: Each individual cupcake is 4 points, totaling 51 points for the entire batch. Click here to access the recipe directly on the WW app (a Weight Watchers login is required to view).
Essential Ingredients for Your Weight Watchers Red Velvet Cupcakes
Gathering your ingredients is the first step towards baking success. Here’s what you’ll need for both the lightened red velvet cake batter and the creamy, tangy icing. Opting for quality ingredients, especially fresh buttermilk and softened cream cheese, will make a noticeable difference in the final product.
For the Red Velvet Cake Batter
- ¼ cup Light butter substitute (such as “I Can’t Believe It’s Not Butter, Light,” which works wonderfully for reduced fat content)
- ¾ cup Monk fruit sweetener with erythritol (or any other cup-for-cup sugar substitute that you prefer for baking to keep it low point)
- 1 Large Egg (ensure it’s at room temperature for better emulsification with other ingredients)
- 1 tsp Vanilla extract (pure vanilla extract will always yield the best flavor)
- 1 ½ tsp White vinegar (crucial for activating the baking soda and contributing to the classic red velvet tang)
- 1 ½ – 2 ½ tbsp Unsweetened cocoa powder (adjust according to your desired depth of cocoa flavor and color intensity – more cocoa for a darker red and richer taste)
- Red food coloring, gel, liquid, or natural (use as needed to achieve your perfect shade of red. Gel food coloring provides the most vibrant results with less volume)
- ½ cup Low-fat 1% Buttermilk (provides that characteristic tang and moistness; room temperature is best)
- 1 ¼ cup All-purpose flour (sifting can help achieve a lighter texture)
- ¼ tsp Salt (enhances all the flavors in the cupcake)
- 1 ½ tsp Baking soda (the leavening agent that reacts with vinegar and buttermilk for lift)
For the Cream Cheese Icing
- 6 tbsp Powdered sugar (real powdered sugar gives the best texture and sweetness for the icing)
- ¾ cup Nonfat plain Greek yogurt (a brilliant swap to reduce fat and add a lovely tang while maintaining creaminess)
- 4 oz ⅓ less-fat cream cheese, softened (ensure it’s fully softened to avoid lumps and achieve a smooth, silky frosting)
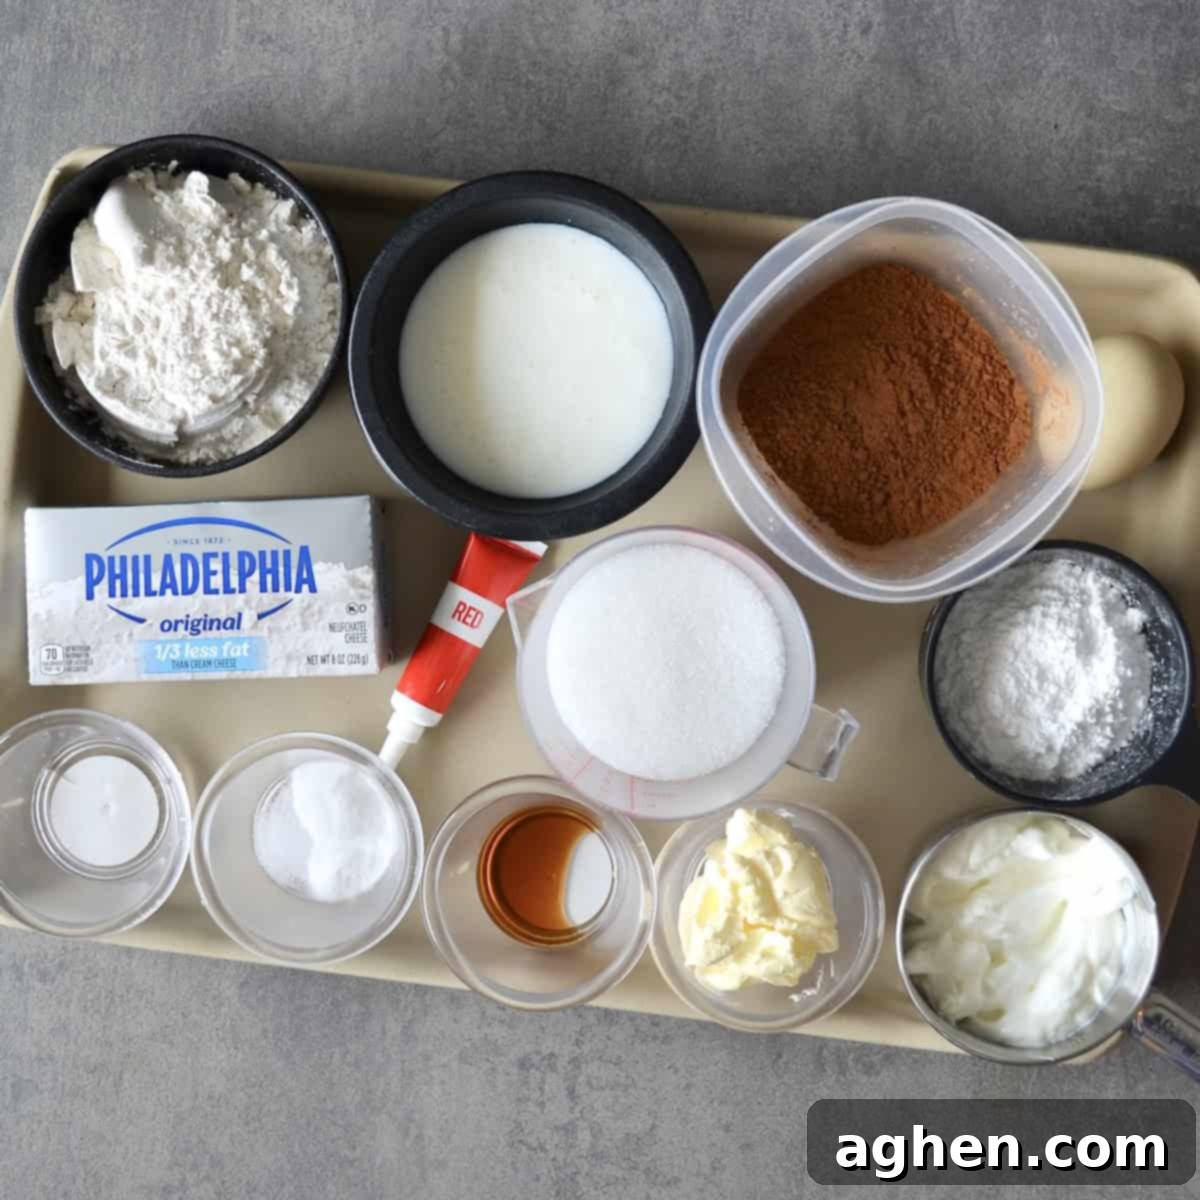
Step-by-Step Instructions for Crafting Your Weight Watchers Red Velvet Cupcakes
Follow these detailed steps to ensure perfectly baked and frosted red velvet cupcakes every time. Precision and care will lead to the best results!
- Prepare Your Oven: Begin by preheating your oven to 350°F (175°C). Proper preheating is essential for even baking and ensures the cupcakes rise correctly from the start. Line a 12-cup muffin tin with paper liners, or grease and flour the tin thoroughly if not using liners.
- Cream Wet Ingredients: In a large mixing bowl, combine the light butter substitute and the monk fruit sweetener. Beat them together until the mixture is light and fluffy, and thoroughly combined. Next, crack in the egg and mix until it’s fully incorporated and there are no visible lumps. This creaming step is vital for a tender cupcake texture.
- Craft the Cocoa & Color Paste: In a separate, smaller bowl, whisk together the unsweetened cocoa powder, vanilla extract, low-fat buttermilk, and white vinegar to form a smooth paste. At this stage, incorporate your red food dye. If using gel food dye, you’ll need less for a vibrant color compared to liquid dye. Remember that the color often mutes slightly during baking, so aim for a shade that’s a bit brighter than your desired final result. This paste is where the classic red velvet flavor and color truly come alive.
- Combine Wet and Dry: Add the prepared cocoa paste and the remaining dry ingredients (all-purpose flour, salt, and baking soda) to the butter mixture. Using a paddle attachment on a stand mixer or a rubber spatula if mixing by hand, gently mix the ingredients just until the batter comes together and is smooth. Crucially, avoid overmixing, as this can develop the gluten in the flour too much, leading to tough, dry cupcakes. Mix only until the streaks of flour disappear.
- Fill Muffin Cups: Once your batter is smooth and the color is evenly distributed throughout, spoon the batter evenly into the 12 prepared muffin cups. I personally find that using paper liners, lightly sprayed with non-stick spray, works best for easy release. Alternatively, you can bake them directly in a greased and floured muffin tin. Ensure the cups are filled about two-thirds full to allow for proper rising.
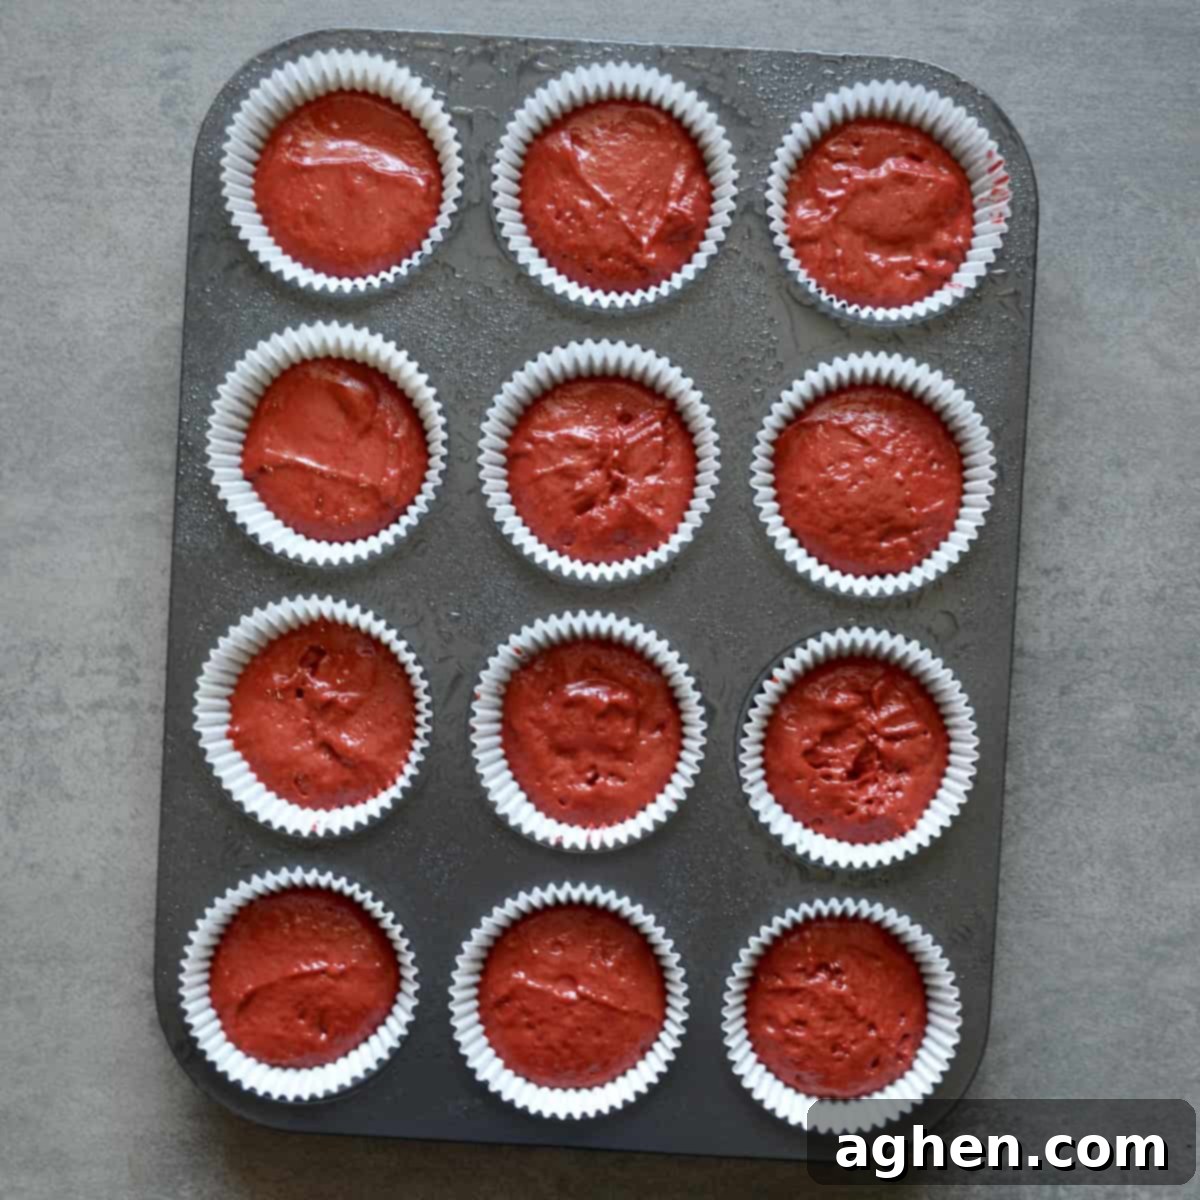
6. Bake to Perfection: Place the muffin tin in your preheated oven and bake for 18 to 20 minutes. You’ll know they’re ready when the tops spring back gently when lightly pressed with your finger. A wooden skewer or toothpick inserted into the center should also come out clean. Once baked, remove the cupcakes from the oven and let them cool in the muffin tin for a few minutes before transferring them to a wire rack to cool completely. This cooling process is essential before frosting to prevent the icing from melting.
7. Prepare the Cream Cheese Icing: While the cupcakes are cooling, it’s time to prepare that irresistible cream cheese icing. In a medium bowl, combine the powdered sugar, nonfat plain Greek yogurt, and softened ⅓ less-fat cream cheese. Beat with an electric mixer or whisk vigorously by hand until the mixture is completely smooth, creamy, and free of lumps. The key here is well-softened cream cheese. Once prepared, refrigerate the icing for approximately 30 minutes. This chilling time allows the icing to firm up slightly, making it much easier to pipe or spread evenly onto the cooled cupcakes.
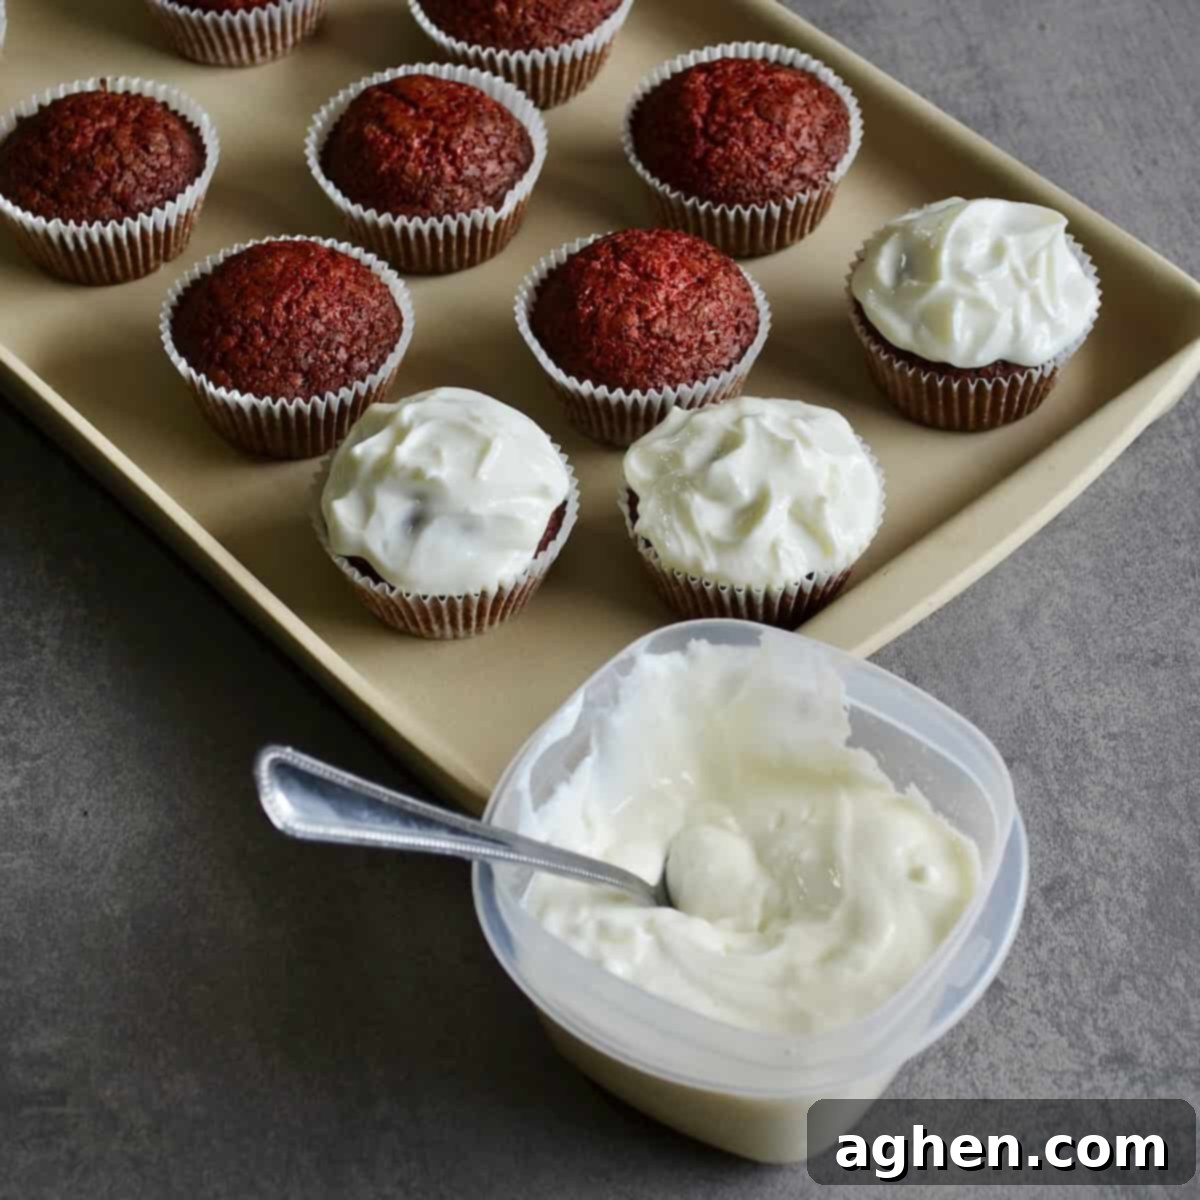
8. Decorate and Serve: Once the cupcakes are completely cool and the icing has chilled, it’s time for the final, fun step: decoration! Evenly divide the icing among the 12 cupcakes. I find that a small spoonful per cupcake provides a perfect balance of cake to frosting. If you prefer a more generous swirl of frosting, you might consider increasing the icing recipe by 50%. You can use a knife, an offset spatula, or a piping bag to apply the icing. For a classic touch, sprinkle a few red velvet crumbs (if you trimmed any off the tops) or a light dusting of cocoa powder on top. Now, they are ready to be enjoyed!
The Allure of Red Velvet: What Makes it Unique?
Red velvet cake is more than just a red-colored chocolate cake; it’s a culinary icon with a distinctive history and flavor profile. Its origins are somewhat debated, but it rose to prominence in the early 20th century. Traditionally, its unique characteristics include a specific combination of ingredients that create a memorable taste and texture:
- Subtle Cocoa Flavor: Unlike a rich chocolate cake, red velvet features a lighter cocoa presence, often enhanced by natural cocoa’s reaction with acids, which historically produced a reddish-brown hue.
- Buttermilk and Vinegar: These acidic ingredients are crucial. They react with baking soda to provide a tender crumb, a distinctive tang, and contribute to the cake’s signature moisture.
- Vibrant Red Color: Modern red velvet largely owes its striking color to food coloring, though historically, non-Dutched cocoa’s anthocyanins reacting with acid might have contributed a reddish tint.
- Cream Cheese Frosting: The indispensable partner to red velvet cake, this tangy, sweet, and creamy frosting perfectly complements the cake’s flavor, creating a harmonious balance that defines the dessert.
Understanding these elements helps appreciate the careful balance achieved in this Weight Watchers-friendly version, ensuring you get all the classic appeal with fewer points.
Healthier Baking: Smart Swaps for Weight Watchers
Achieving a delicious dessert that aligns with Weight Watchers principles involves strategic ingredient substitutions. In this red velvet cupcake recipe, every swap is designed to reduce points without compromising on taste or texture:
- Light Butter Substitute: By opting for a light butter substitute, we significantly reduce the saturated fat and calorie content compared to traditional butter. Brands like “I Can’t Believe It’s Not Butter, Light” are formulated to perform similarly to butter in baking, ensuring your cupcakes remain moist and flavorful.
- Monk Fruit Sweetener with Erythritol: This natural, zero-calorie sugar substitute allows us to maintain the desired sweetness without adding any points from sugar. It’s a cup-for-cup replacement, making it incredibly easy to use in recipes, and it bakes well, contributing to a tender crumb.
- Low-Fat Buttermilk: While buttermilk is essential for flavor and texture, choosing a low-fat (1%) version helps keep the fat content down without sacrificing the crucial acidity needed for the cake’s rise and tang.
- Nonfat Plain Greek Yogurt in Frosting: This is a game-changer for the cream cheese icing. By replacing a portion of the full-fat cream cheese with nonfat Greek yogurt, we drastically cut down on fat and calories while boosting protein. The natural tang of Greek yogurt also harmonizes perfectly with the cream cheese, maintaining the iconic flavor profile of the frosting.
- ⅓ Less-Fat Cream Cheese: Even for the cream cheese component, choosing a reduced-fat option further supports the goal of creating a lighter dessert. When combined with Greek yogurt, it creates a wonderfully rich yet healthier frosting.
These thoughtful substitutions ensure that each 4-point cupcake is not just a treat, but a smart choice that fits seamlessly into your Weight Watchers journey.
Creative Variations and Smart Substitutions
This recipe provides a fantastic base, but don’t hesitate to get creative! Here are several ways you can customize your Weight Watchers Red Velvet Cupcakes to suit your taste or dietary needs:
- Red Velvet Cupcakes with Buttercream Frosting: If cream cheese frosting isn’t your favorite, or you’re looking for a different flavor profile, a classic buttercream frosting is an excellent alternative. Both vanilla buttercream and a subtle chocolate buttercream are absolutely delicious with red velvet cake. Just be mindful that traditional buttercream might increase the Weight Watchers points, so consider lighter versions made with less butter and more artificial sweeteners if you need to keep points low.
- Exciting Mix-ins and Garnishes: Elevate your cupcakes by adding special ingredients to the batter or as a decoration on top! For an extra layer of flavor and texture, try folding in white chocolate chips, finely chopped pecans, or even mini chocolate chips into the batter before baking. After frosting, garnishing with fresh sliced strawberries, raspberries, or a dusting of shaved chocolate can add elegance and flavor.
- Natural Red Velvet Color with Beets: If you’re hesitant about using artificial red food dye, that’s completely understandable. There are natural food coloring options available, often derived from beet powder or beet juice concentrate. When using natural dyes, be aware that the resulting red might be more muted or have an earthy undertone. It’s wise to research reviews for natural food dyes, as their effectiveness can vary greatly. Start with a small amount and gradually add more until you reach your desired hue.
- Vegan Red Velvet Cupcakes (Plant-Based Friendly): To transform these into vegan delights, you’ll need to make a few key substitutions. Replace the egg with ¼ cup of unsweetened applesauce, which acts as a binder and adds moisture. For the buttermilk, simply add 1 ½ teaspoons of white vinegar to ½ cup of your preferred plant-based milk (almond or oat milk work well), let it sit for 5-10 minutes until it curdles, then proceed. Ensure you use a vegan butter substitute in the batter. For the icing, opt for a vegan cream cheese alternative and ensure your Greek yogurt is a plant-based, nonfat variety.
- Save an Extra WW Point in the Frosting: For those strictly tracking points, you can further reduce the Weight Watchers points in the frosting by substituting the powdered sugar with a powdered monk fruit sweetener (or your preferred powdered sugar replacement). This simple swap can save you a point per cupcake, making it an even lighter treat without a significant flavor change.
- Mini Red Velvet Cupcakes: If you own a mini muffin pan, you can easily use this batter to create adorable, bite-sized mini cupcakes! These are fantastic for parties, kids’ treats, or when you just want a tiny taste of red velvet goodness. Remember to adjust the baking time – mini cupcakes will bake much faster, typically 10-12 minutes, so keep a close eye on them.
Expert Tips and Tricks for Your Best Red Velvet Cupcakes
Achieve bakery-quality results with these insider tips and tricks, ensuring your red velvet cupcakes are perfect every time.
- Proper Storage is Key: Since these are red velvet cupcakes with cream cheese frosting, refrigeration is absolutely essential for storage. Store them in an airtight container in the refrigerator, where they will stay fresh and delicious for three to five days. Once frosted, I do not recommend freezing them, as the cream cheese frosting’s texture can change upon thawing. However, you can certainly freeze the unfrosted cupcakes for up to 2-3 months. Simply thaw them at room temperature when ready to enjoy, and then prepare and apply the fresh cream cheese frosting.
- Avoid Overmixing the Batter: This is one of the most crucial baking tips for tender cupcakes. Over-mixing the cake mix can lead to a tough, dense, and chewy texture. The goal is to mix just until the dry ingredients are incorporated and no streaks of flour remain. Overworking the gluten in the flour or whipping too much air into the batter can negatively affect the final crumb. Rest assured, the combination of baking soda and vinegar provides plenty of leavening, so the cakes will rise beautifully without excessive mixing.
- Customizing Cocoa and Food Dye: Feel free to adjust the amount of cocoa powder and red food dye to your personal preference. If you desire a richer, more pronounced cocoa flavor, use the higher end of the recommended range (2 ½ tbsp of unsweetened cocoa powder). Be aware that more cocoa will result in a darker red hue. As for the food dye, there isn’t a strict “right” amount; it’s all about achieving your desired vibrancy. Remember that gel food dye is more concentrated than liquid dye, and the color tends to mellow slightly during baking, so aim for a slightly brighter batter than you want your final cupcakes to be.
- Maximize Every Bit of Batter and Frosting: When scooping the batter into the muffin cups, it might seem like there isn’t quite enough for 12 standard-sized cupcakes. However, diligent scraping of the bowl and careful, even distribution of the batter will yield precisely 12 perfectly portioned cupcakes. The same principle applies to the frosting. The recipe provides just enough for a nice, even spread across all 12. Make sure to scrape every last bit of that delicious icing from the bowl to ensure each cupcake gets its fair share!
- Bring Ingredients to Room Temperature: For the best results, ensure your egg, buttermilk, and especially the cream cheese for the frosting are at room temperature. This allows them to emulsify better, creating a smoother, more uniform batter and a lump-free, creamy frosting.
- Sift Dry Ingredients: While not strictly mandatory, sifting your flour, cocoa powder, salt, and baking soda together before adding them to the wet ingredients can prevent lumps and ensure a lighter, airier crumb in your cupcakes.
Essential Baking Tools for Success
Having the right equipment can make your baking experience smoother and more enjoyable. Here’s a quick list of what you’ll need for these Weight Watchers Red Velvet Cupcakes:
- Muffin tin (12-cup capacity)
- Paper cupcake liners
- Mixing bowls (at least two: one large for batter, one small for cocoa paste)
- Electric mixer (handheld or stand mixer) or a whisk for hand mixing
- Rubber spatula or spoon for mixing and scraping bowls
- Measuring cups and spoons
- Wire cooling rack
- Spoon or small offset spatula for frosting (or a piping bag if desired)
Frequently Asked Questions (FAQs)
Here are some common questions you might have about making and enjoying these red velvet cupcakes.
- Can I make these cupcakes ahead of time? Yes, you can! You can bake the unfrosted cupcakes a day in advance and store them in an airtight container at room temperature. Prepare the frosting on the day of serving and frost just before your event for the best freshness and appearance.
- Why is my red velvet not very red? The intensity of the red color depends heavily on the type and amount of food coloring used, as well as the cocoa powder. Gel food coloring provides a more vibrant hue than liquid. Also, if you use a higher quantity of cocoa, the color may appear darker. Add a bit more dye until you achieve your desired brightness, remembering it can mute slightly during baking.
- Can I use self-rising flour? No, this recipe specifically calls for all-purpose flour because it includes precise amounts of baking soda and vinegar for leavening. Using self-rising flour would alter the chemical balance and might result in cupcakes that don’t rise properly or have an off-texture.
- My cream cheese frosting is too thin/thick. What can I do? If your frosting is too thin, try chilling it longer in the refrigerator (30-60 minutes) or add a tiny bit more powdered sugar (or sugar substitute) if necessary. If it’s too thick, add a tiny splash of milk (dairy or non-dairy) or a bit more Greek yogurt, one teaspoon at a time, until you reach the desired consistency. Ensure your cream cheese was properly softened before mixing.
Discover More Delicious & Healthy Recipes
If you loved these Weight Watchers Red Velvet Cupcakes, be sure to explore these other fantastic recipes that keep health and flavor in perfect balance!
Red Velvet Banana Bread with Cream Cheese Icing
Mini Raspberry White Chocolate Cupcakes
Funfetti Cupcakes with Vanilla Pudding Icing
Weight Watchers Red Velvet Cupcakes
Ingredients
Red Velvet Cake Batter
- ¼ cup Light butter substitute, (I used I Can’t Believe It’s Not Butter, Light)
- ¾ cup Monk fruit sweetener with erythritol, (or other cup-for-cup sugar substitute)
- 1 egg
- 1 tsp vanilla extract
- 1 ½ tsp white vinegar
- 1 ½-2 ½ tbsp unsweetened cocoa powder, (It depends on how deep a cocoa flavor and color you want)
- as needed red food dye, I used gel dye
- ½ cup Low-fat 1% Buttermilk
- 1 ¼ cup all-purpose flour
- ¼ tsp salt
- 1 ½ tsp baking soda
Cream Cheese Icing
- 6 tbsp powdered sugar, sifted
- ¾ cup non fat plain greek yogurt
- 4 oz ⅓ less-fat cream cheese, softened
Instructions
-
Preheat the oven to 350°F. Line a 12-cup muffin tin with paper liners.
-
Mix the light butter substitute and the monk fruit sweetener in a large bowl until thoroughly combined and fluffy. Add the egg and mix until there are no lumps and the mixture is smooth.
-
In a separate small bowl, create a paste by whisking together the cocoa powder, vanilla extract, buttermilk, and white vinegar. Then, add the red food dye to this paste, adjusting the amount until you achieve your desired shade. Remember that the color will likely become a bit muted during baking, so aim for a slightly brighter hue now.
-
Add the entire cocoa paste mixture and the remaining dry ingredients (all-purpose flour, salt, and baking soda) to the butter mixture. Gently mix with a paddle attachment on low speed or a rubber spatula by hand. Mix just until the batter comes together and is smooth, being careful not to overmix, which can result in tough cupcakes.
-
Once the batter is smooth and the color is evenly distributed, scoop the batter evenly into the 12 prepared muffin cups, filling each approximately two-thirds full. You can lightly spray the paper liners with non-stick spray for extra assurance against sticking.
-
Bake the cupcakes for 18 to 20 minutes, or until the tops spring back when gently pressed with your finger and a toothpick inserted into the center comes out clean. Remove from the oven and allow the cupcakes to cool in the muffin tin for a few minutes before transferring them to a wire rack to cool completely.
-
To prepare the cream cheese icing, combine all of the icing ingredients (powdered sugar, nonfat plain Greek yogurt, and softened ⅓ less-fat cream cheese) in a bowl. Beat until smooth and creamy. Refrigerate the icing for about 30 minutes to allow it to firm up slightly while the cupcakes finish cooling.
-
Once the cupcakes are completely cool and the icing is chilled, it’s time to decorate! Evenly divide the icing between the 12 cupcakes. A small spoonful or a simple swirl per cupcake is usually sufficient. If you prefer a more generous amount of frosting, consider scaling up the icing recipe by 50% next time. Serve and enjoy!
Notes
Nutrition
Nutrition information is automatically calculated and should be used as an approximation. Individual results may vary based on specific brands and ingredient measurements.
