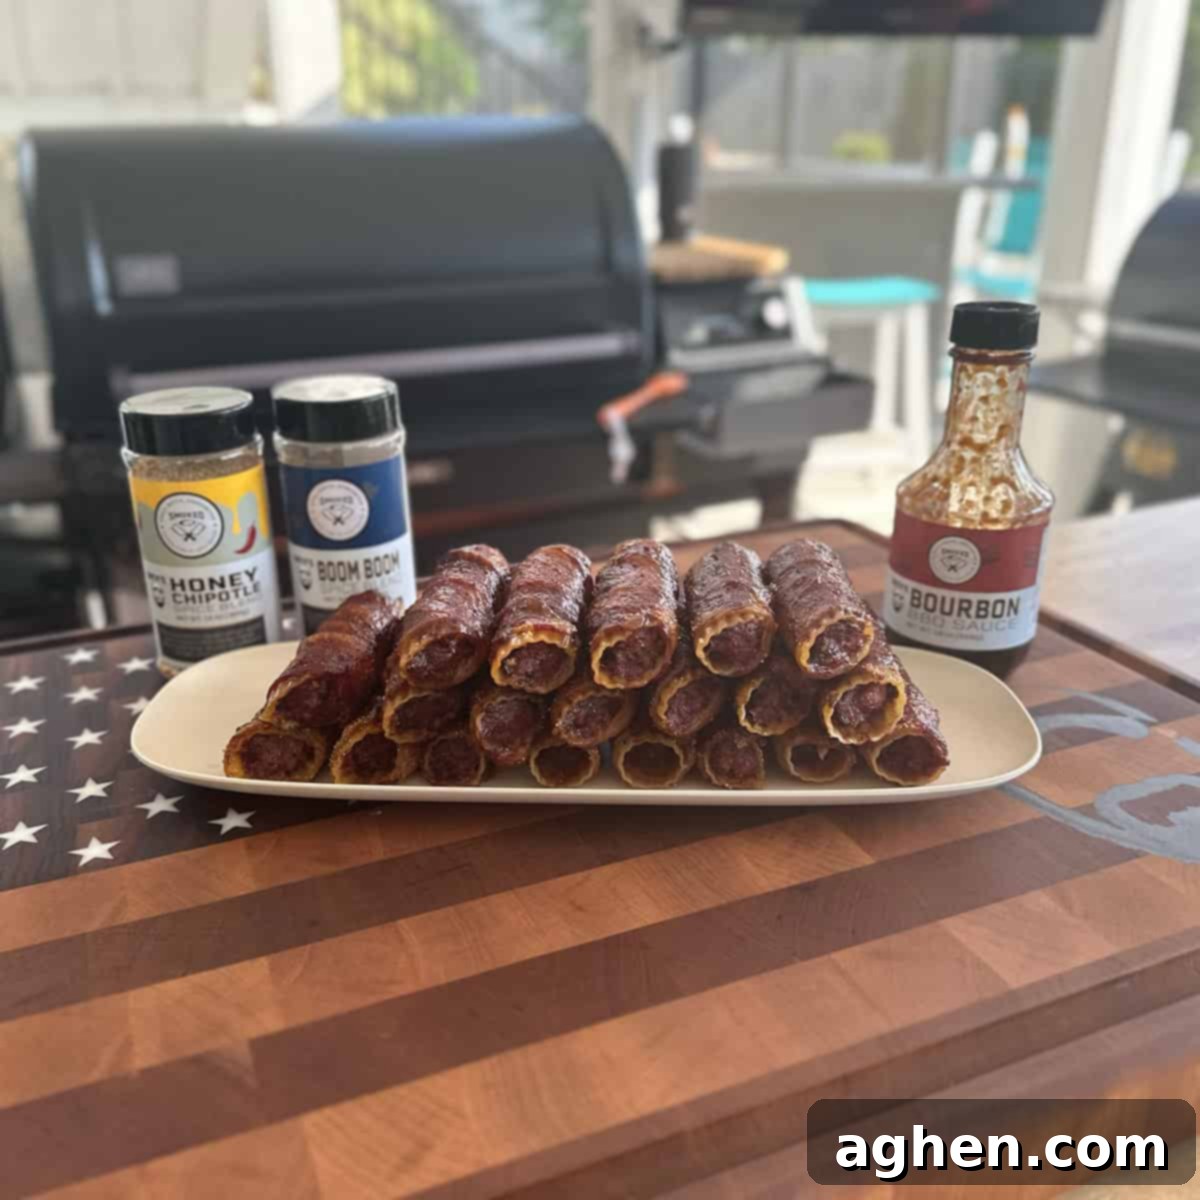
Irresistible Smoked Shotgun Shells: The Ultimate Tailgate & Party Appetizer Recipe
Smoked shotgun shells are undoubtedly my absolute favorite dish to prepare on the smoker, especially when gearing up for a lively tailgate party or any gathering. This recipe isn’t just a crowd-pleaser; it’s a culinary experience that combines savory meats, tender pasta, and the smoky crunch of bacon into an unforgettable bite. Every element works in harmony, delivering a flavor punch that leaves everyone craving more. And let’s be honest, few things can truly elevate a dish quite like a perfectly crispy, flavor-packed bacon wrap.
While this particular recipe was crafted and perfected on my robust Traeger Timberline XL, don’t feel limited by specific equipment. I’ve often brought these delectable treats to life on my more portable Traeger Ranger, powered conveniently by a truck bed generator right at the tailgate. The key, regardless of your smoker setup, is to ensure these shells are generously infused with that quintessential smoke flavor. That deep, aromatic smoke is what truly elevates these shotgun shells from merely delicious to absolutely extraordinary.
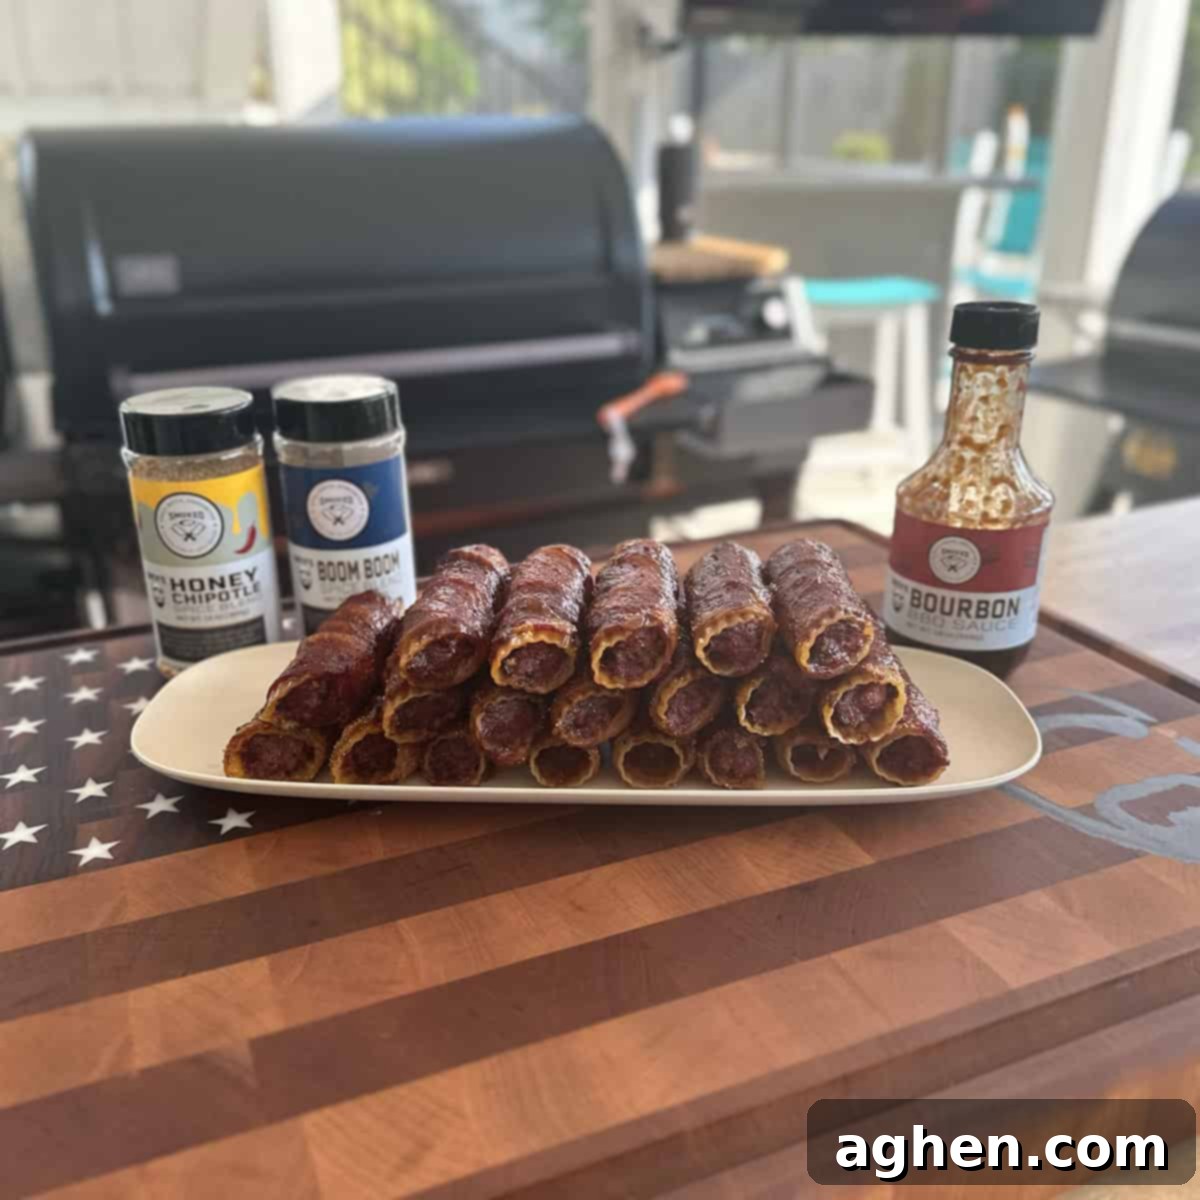
Why You Need to Try This Smoked Shotgun Shells Recipe
If you’re looking for a dish that combines convenience, incredible flavor, and crowd-pleasing appeal, smoked shotgun shells are your answer. Here’s a closer look at what makes this recipe a must-try for your next event:
- Effortless Early Prep: One of the standout advantages of this recipe is the ability to prepare it almost entirely the night before. This foresight is a game-changer when you’re hosting, allowing you to maximize your time entertaining friends and family instead of being stuck in the kitchen. The overnight rest in the refrigerator serves a dual purpose: it allows the flavors of the meat filling and bacon to meld beautifully, and critically, it softens the manicotti shells. This means you can entirely skip the traditional step of boiling the pasta, saving you time and effort on event day. The bacon fat renders and seeps into the pasta, tenderizing it perfectly for smoking, creating a wonderfully chewy yet firm texture that holds up to the hearty filling. This smart prep means less stress and more enjoyment on the day of your party.
- Bacon: The Ultimate Flavor Enhancer: Is there really any debate? Bacon brings an unparalleled depth of salty, savory, and smoky flavor to any dish it graces. In this recipe, it’s not just a wrapper; it’s an integral component that caramelizes on the smoker, providing a crispy texture and a rich, irresistible aroma. It transforms humble ground meats and pasta into a gourmet delight, making every bite an explosion of taste and texture. The rendered bacon fat helps infuse moisture and richness into the pasta and meat, while its crispy exterior adds a satisfying crunch that beautifully contrasts with the soft interior.
- Feeds a Crowd with Ease: Hosting a large group? Smoked shotgun shells are incredibly scalable. Whether you’re making a dozen for a small family gathering or a hundred for a huge tailgate party, the preparation process remains straightforward. Having them prepped and ready in the fridge means less running around on the day of your event. Simply grab them, apply the final seasoning, and toss them on the smoker. It’s a low-stress way to impress a large number of guests with minimal last-minute fuss, ensuring everyone gets a taste of this delicious, hearty appetizer or main. They are also easy to serve, requiring minimal cutting once cooked, making them perfect finger food.
Essential Ingredients for Perfect Smoked Shotgun Shells
Crafting these smoky, savory delights requires a selection of quality ingredients that work together to create a harmonious flavor profile. Each component plays a vital role in achieving the perfect balance of texture and taste, ensuring every shotgun shell is a culinary masterpiece.
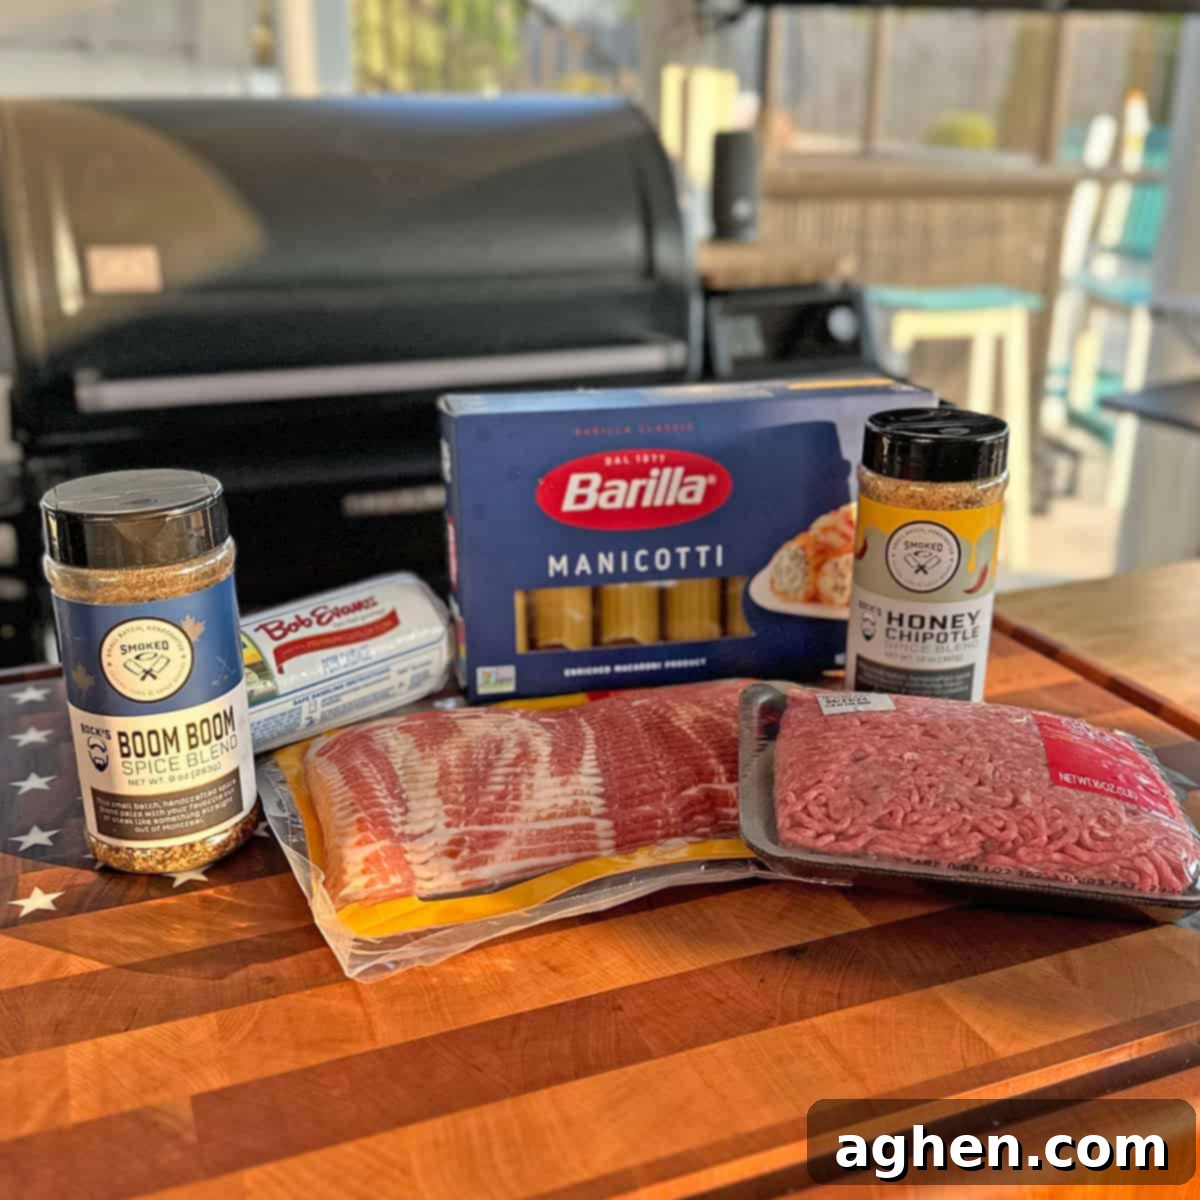
- 1 package of Manicotti pasta shells: These large, tubular pasta shells are the ideal vessel for holding the rich, flavorful meat filling. Their sturdy structure stands up well to the smoking process, absorbing the bacon fat and smoke flavor beautifully without becoming mushy. Opt for standard manicotti shells, as their size and shape are perfect for stuffing and wrapping.
- 1 lb 80/20 ground beef: The 80% lean, 20% fat ratio for ground beef is crucial here. The fat content ensures the filling remains moist and incredibly flavorful during the long smoking process, preventing it from drying out while contributing to the overall richness of the dish. This balanced fat content provides a succulent texture that pairs wonderfully with the sausage.
- 1 lb Sage Pork Sausage: Introducing sage pork sausage adds another layer of depth and savory complexity to the filling. The distinct herbal notes of sage complement the other ingredients perfectly, and the higher fat content of the sausage further enhances the juiciness and flavor of the meat mixture. You can choose a mild or slightly spicy sage sausage based on your preference.
- 1 package of Original Bacon: While thick-cut bacon might seem appealing for its texture, regular cut bacon is the best choice for this recipe. Its longer strips allow for complete coverage of the manicotti shell, minimizing exposed pasta that could remain hard. Moreover, its thinner nature makes it pliable and easy to wrap securely around the stuffed pasta, ensuring it cooks evenly and crisps up perfectly.
- 1 tbsp Smoked Q Rock’s Boom Boom Spice Blend: This Montreal Steak seasoning-inspired blend is specifically chosen to season the ground beef and sausage filling. Its robust mix of coriander, caraway, black pepper, and other herbs and spices infuses the meat with a bold, aromatic flavor that truly elevates the core of the shotgun shells. It provides a savory foundation that perfectly complements the smoky elements.
- 2 tbsp Smoked Q Rock’s Honey Chipotle Spice Blend: Applied generously to the bacon-wrapped shells before smoking, this honey-forward spice blend introduces a fantastic sweet and smoky element. The chipotle provides a subtle heat and a rich, earthy smokiness, while the honey caramelizes with the bacon fat, creating a delectable glaze that locks in moisture and adds incredible depth to the exterior of the shells. This balance of sweet and heat is absolutely irresistible.
- 2 tbsp Smoked Q Rock’s Bourbon BBQ Sauce: The final touch, this Bourbon BBQ sauce is basted onto the shells towards the end of the smoking process. Its tangy, sweet, and smoky profile ties all the flavors together, adding a perfect glaze that caramelizes slightly, enhancing the bacon’s crispness and delivering a universally loved finish that appeals to all ages. The bourbon notes add a subtle sophistication without being overpowering.
Step-by-Step Instructions for Smoking Shotgun Shells
Follow these detailed steps to create perfectly smoked shotgun shells that will be the highlight of any gathering. The process is straightforward, but attention to detail will ensure the most delicious results.
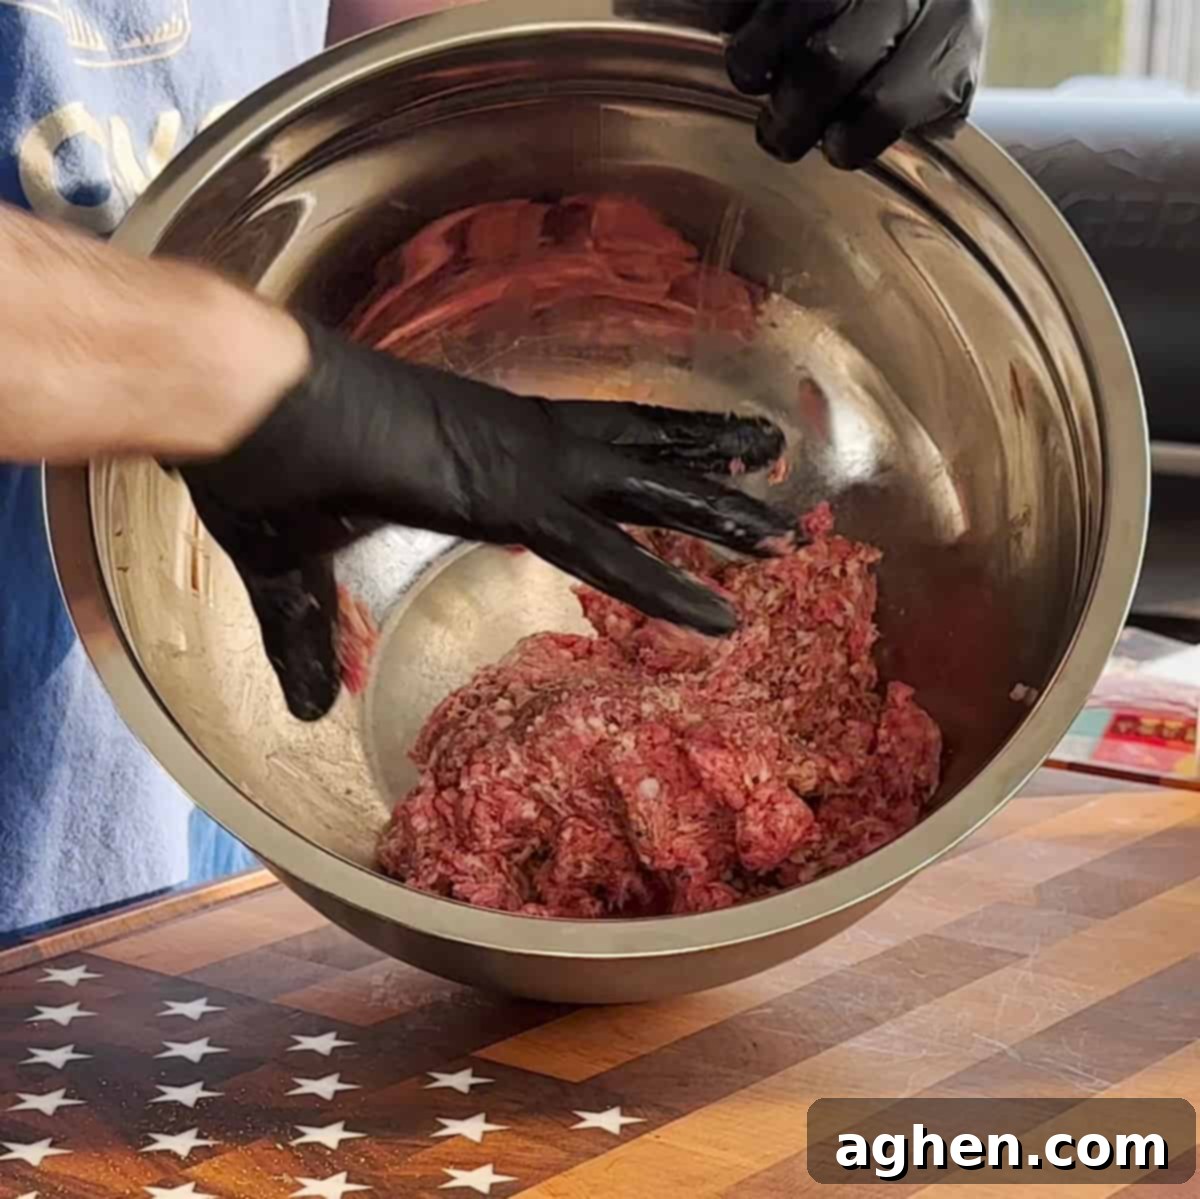
1. Prepare the Savory Meat Filling: Begin by combining the 80/20 ground beef and the sage ground sausage in a large mixing bowl. This combination ensures a juicy and flavorful filling. Add the full tablespoon of Smoked Q Rock’s Boom Boom Spice Blend. Using your hands, thoroughly mix the ingredients until they are well combined. Be careful not to overmix, as this can make the meat tough. The goal is an even distribution of seasoning throughout the meat, ensuring every bite is packed with flavor. This foundational step is crucial for building the rich internal flavor of your shotgun shells.
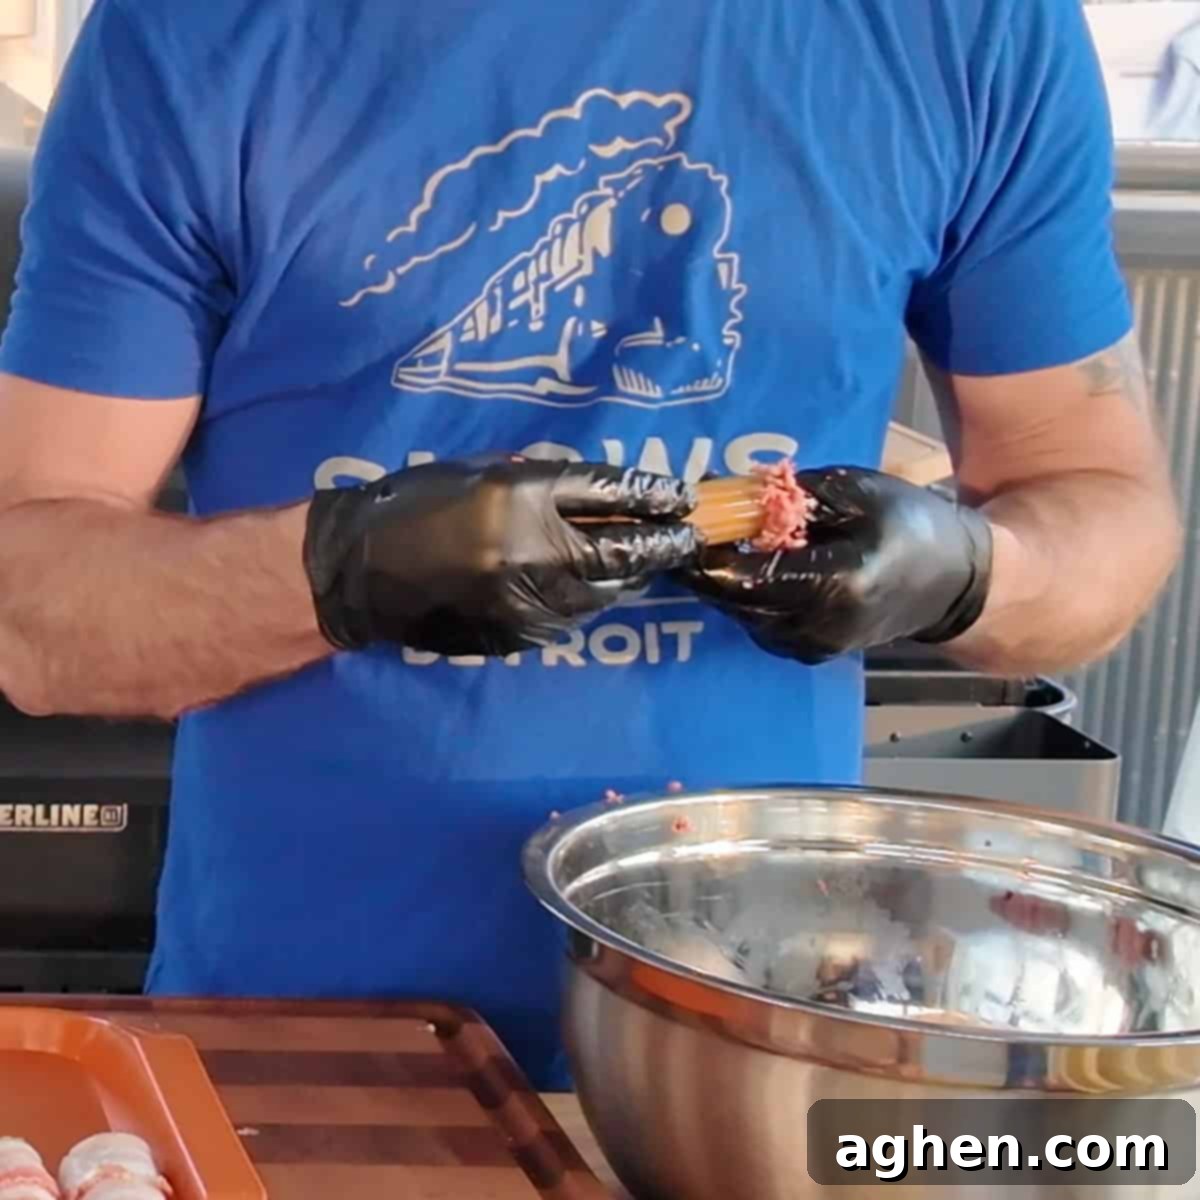
2. Expertly Stuff the Manicotti Shells: Now comes the fun part – stuffing the pasta! While some recipes suggest a piping bag for this step, I find it incredibly simple and efficient to do it by hand. Roll up your sleeves and take a portion of the meat mixture, pressing it firmly into each manicotti shell until it’s completely filled. Ensure the filling is packed densely, without leaving any air pockets, to create a uniform and substantial interior. Don’t worry about being overly neat; a rustic look is part of the charm. This hands-on approach offers better control and eliminates the need for extra equipment to clean, making your prep even easier.
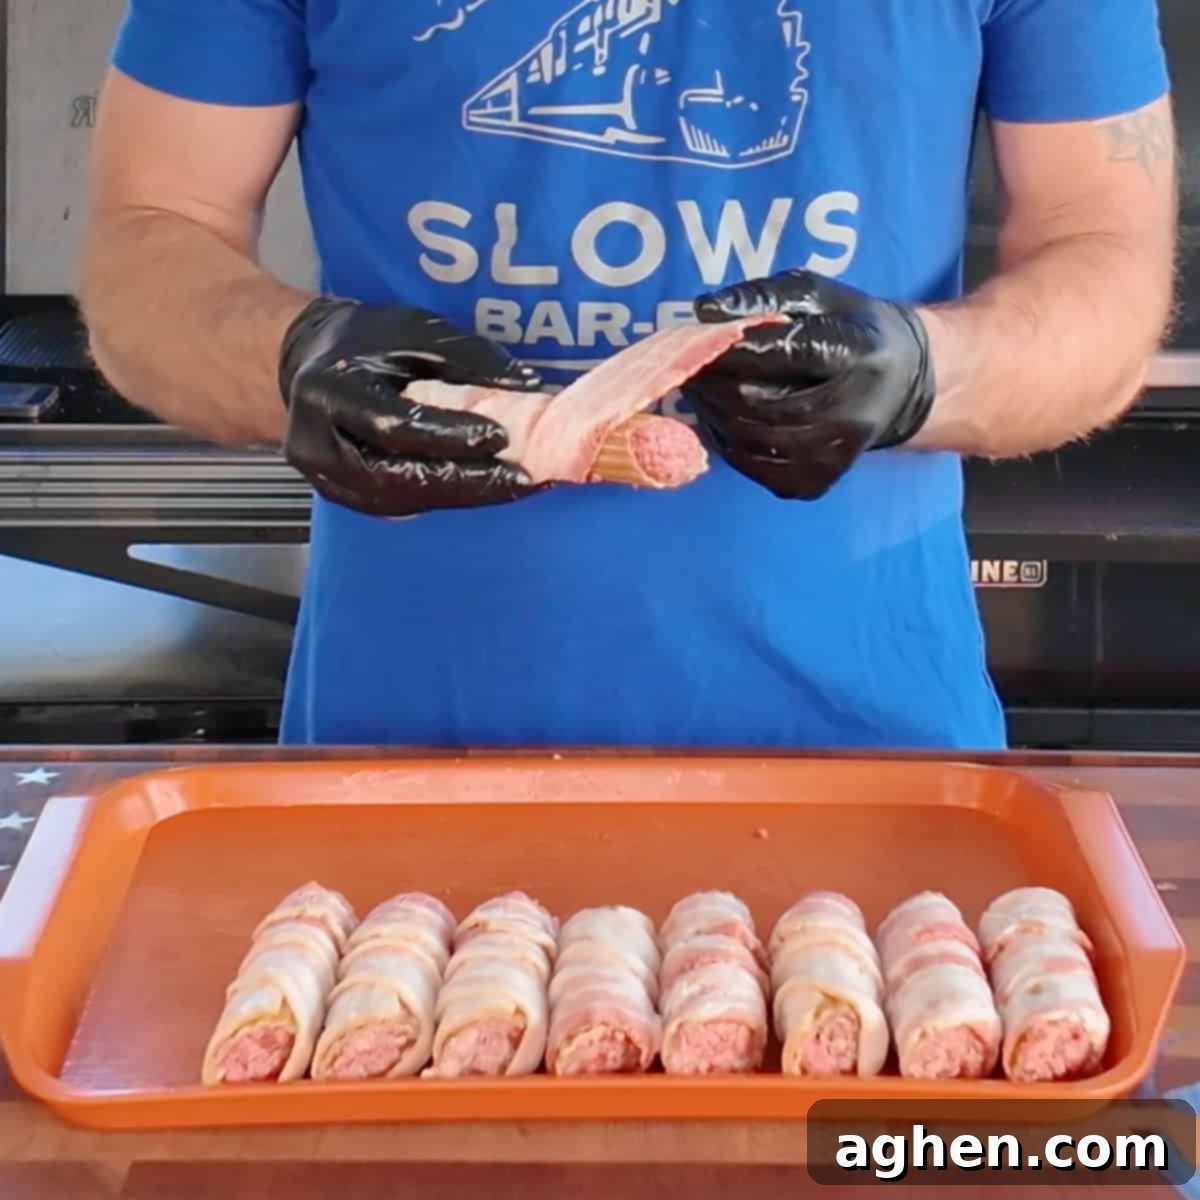
3. Wrap Each Shell in Bacon: This is a critical step for both flavor and texture. Take a strip of regular-cut bacon and carefully wrap it around each stuffed manicotti shell. It’s essential to wrap as much of the pasta shell as possible, ideally with a slight overlap, to ensure full coverage. Since we are not parboiling the pasta, any exposed sections of the manicotti might remain hard after smoking. The bacon not only infuses the pasta with its delicious fat and flavor but also helps to tenderize the shell and create that desirable crispy exterior. Aim for a snug but not overly tight wrap.
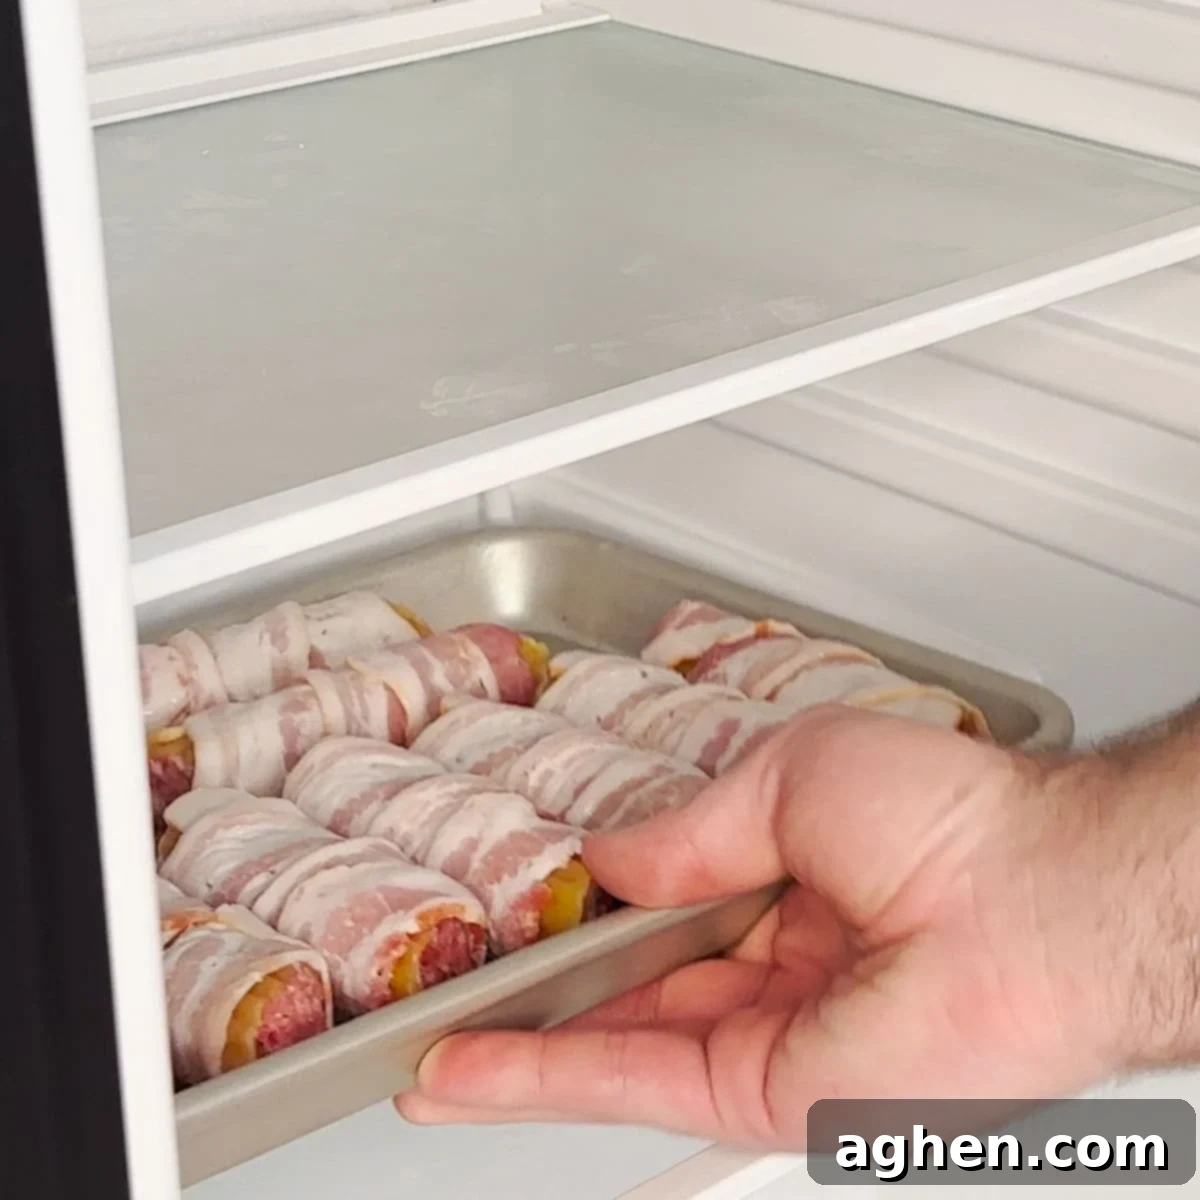
4. Overnight Refrigeration for Maximum Tenderness: Do not skip this step! Place all the bacon-wrapped, stuffed shells on a baking rack (to allow air circulation) and transfer them to the refrigerator overnight (at least 8-12 hours). This extended chill time is paramount. As the shells rest, the fat from the bacon slowly renders and seeps into the dry pasta, softening it thoroughly from the inside out. This natural tenderization process eliminates the need for pre-boiling and allows the pasta to cook to a perfect al dente texture on the smoker, fully saturated with rich, smoky flavor. This also gives the flavors more time to meld together.
5. Preheat Your Smoker to Perfection: The ideal smoking temperature for these shotgun shells is 300°F (149°C). I’ve experimented with various temperatures, and 300°F on my Traeger Timberline XL consistently delivers the best results. This temperature is low enough to slow-cook the meat filling and pasta to tender perfection, allowing ample time for smoke infusion, while being just high enough to crisp up the bacon to a delightfully chewy-yet-crunchy texture. Get your smoker to this stable temperature before proceeding to ensure even cooking from the start.
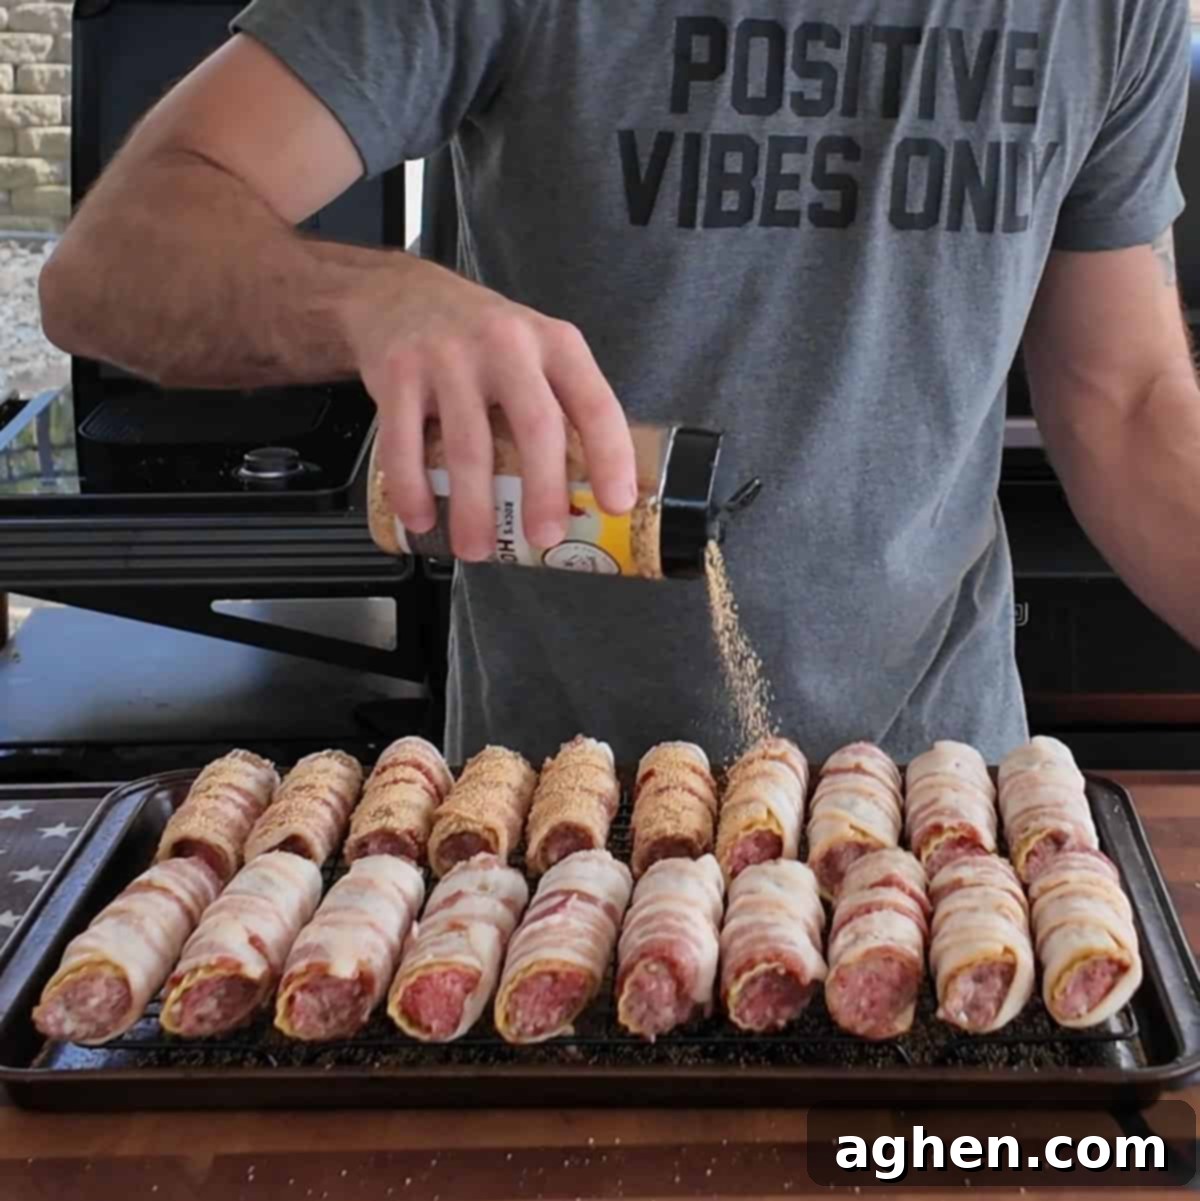
6. Season and Smoke for Rich Flavor: As your smoker reaches the target temperature, arrange the chilled, bacon-wrapped shells on baking racks, ensuring there’s a little space between each for even cooking and smoke penetration. Before placing them in the smoker, apply a generous, heavy dose of Smoked Q Rock’s Honey Chipotle Spice Blend to all sides of the shells. This provides a fantastic outer crust and a sweet-smoky kick. Place them on the preheated smoker and let them cook for approximately 45 minutes. Monitor the bacon for visual cues – it should be rendering, crisping, and turning a beautiful golden-brown color, indicating they are well on their way to doneness. An internal temperature of 160-165°F (71-74°C) is ideal for the meat.
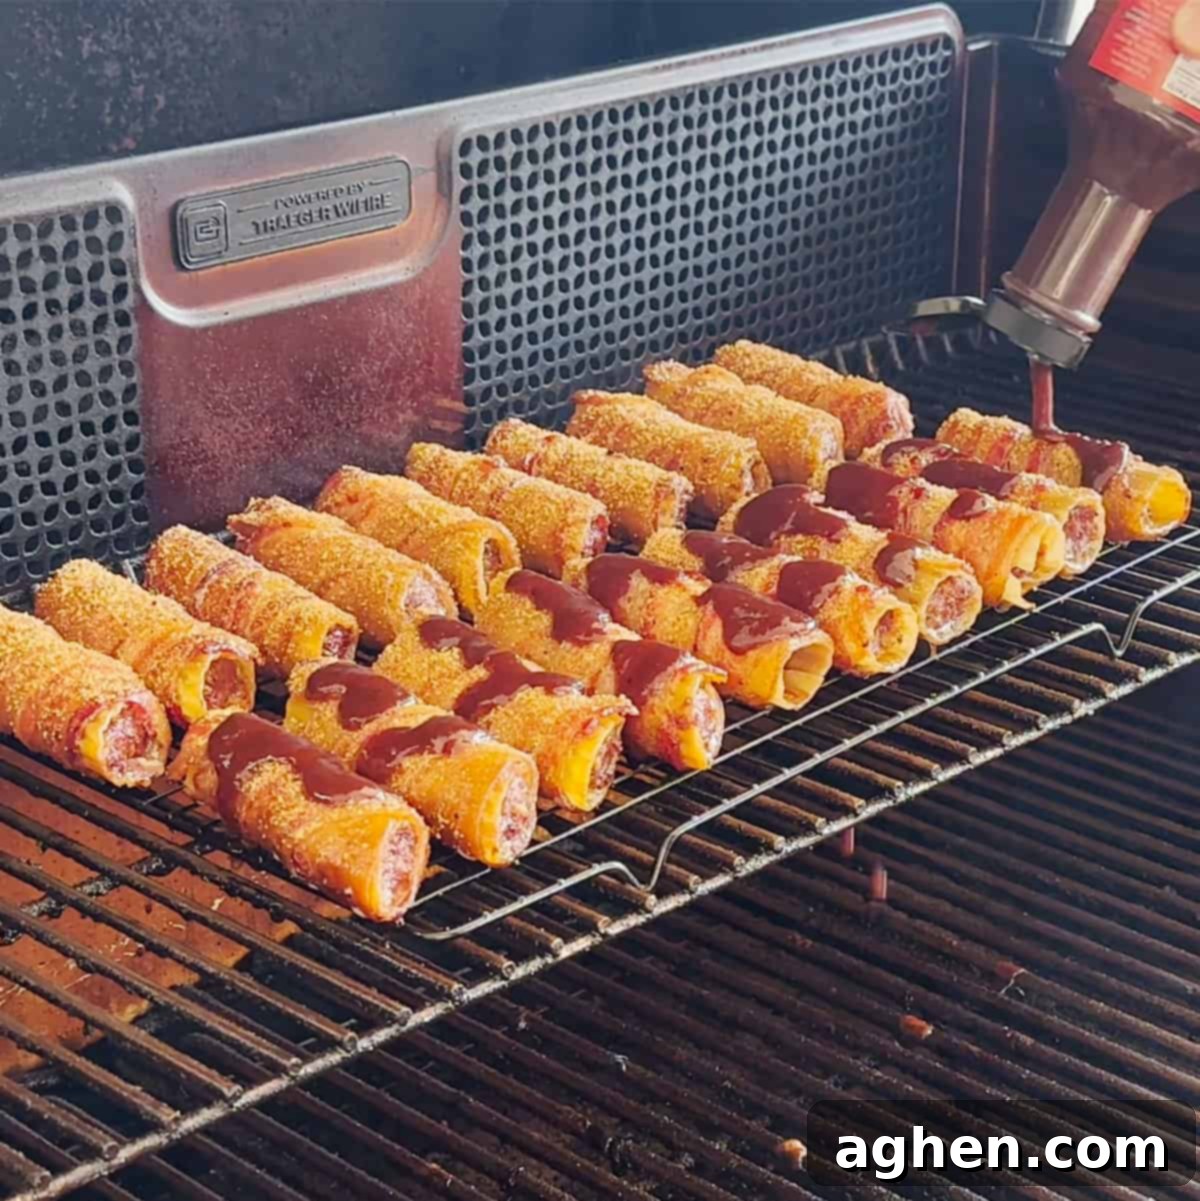
7. Glaze with BBQ Sauce and Finish Smoking: After the initial 45 minutes, it’s time for the finishing touch. Carefully baste each shotgun shell with a generous layer of Smoked Q Rock’s Bourbon BBQ Sauce. This creates a glossy, flavorful glaze that caramelizes beautifully. Return the sauced shells to the smoker for an additional 10-15 minutes. This allows the BBQ sauce to set, deepen in flavor, and form a sticky, sweet, and tangy coating that perfectly complements the smoky bacon and savory filling. This final step truly locks in the irresistible BBQ flavor.
8. Rest, Slice, and Serve: Once finished, carefully remove the smoked shotgun shells from the smoker. Allow them to rest for 5-10 minutes. This crucial resting period allows the juices to redistribute, ensuring maximum moisture and flavor, and prevents the filling from spilling out when cut. After resting, slice each shell into thirds. This makes them ideal for serving as individual bites, perfect for appetizers or side dishes, and easy for guests to enjoy. Serve warm and watch them disappear! Enjoy this truly satisfying and crowd-pleasing smoked delicacy.
Creative Variations and Substitutions for Smoked Shotgun Shells
One of the most exciting aspects of this smoked shotgun shells recipe is its incredible versatility. While the core recipe is a proven winner, don’t hesitate to get creative and customize it to your taste or what you have on hand. Experimentation can lead to delightful new favorites, ensuring you can tailor this dish to any occasion or preference.
Alternate Rubs for Diverse Flavor Profiles: The choice of rub can dramatically alter the final taste of your shotgun shells, allowing you to explore a range of delicious profiles. If you’re looking to switch things up from the Smoked Q Rock’s blends, consider these fantastic alternatives that offer different flavor dimensions:
- Meat Church Honey Hog: For a sweeter, pork-focused profile with a hint of savory. It creates a beautiful bark and caramelization, perfect for a slightly more candied bacon finish.
- Heath Riles Honey Chipotle: Similar to our suggested blend, but with Heath Riles’ signature balance of sweet heat and robust flavor. This is an excellent choice if you’re a fan of complex, smoky spice.
- Killer Hogs Steak Rub: If you prefer a bolder, more peppery, and garlic-forward profile, this rub will give your beef and bacon a robust kick. It’s fantastic for those who appreciate a strong, savory punch.
- Heath Riles Sweet BBQ Sauce: For a richer, stickier finish, you could swap out or add this sauce for an extra layer of classic BBQ flavor. Its sweetness and tang will build a phenomenal glaze.
Unleash Your Imagination with Filling Substitutions and Variations: The manicotti shells are a blank canvas for your culinary creativity. The beauty of this recipe lies in how easily you can customize the filling, allowing you to cater to different tastes or dietary needs. While the 80/20 ground beef and sage pork sausage combination is fantastic, consider these exciting possibilities:
- Spicy Chorizo: For those who love a bit of heat and a rich, smoky paprika flavor, substituting some or all of the ground meat with chorizo will add an incredible zest and a vibrant color to the filling.
- Exotic Game Meats: Elevate your shotgun shells with more unique proteins. Venison or elk, mixed with a little fattier pork or beef for moisture, can offer a leaner yet incredibly flavorful and sophisticated twist that will impress any guest.
- Poultry Options: Ground chicken or turkey (preferably thigh meat for moisture) can be used for a lighter version, though you might want to add a bit more cheese or butter to keep them from drying out due to lower fat content.
- Cheese Blends: Integrate different cheeses into your meat filling for added creaminess and flavor. A mix of shredded cheddar, Monterey Jack, pepper jack for a kick, or even smoked gouda would melt beautifully and complement the savory meats.
- Vegetable Additions: Finely diced bell peppers, onions, mushrooms, or jalapeños can be mixed into the meat for added texture, freshness, and a gentle crunch. Ensure they are finely chopped so they cook through thoroughly within the shell.
This recipe is truly limited only by your imagination, so feel free to experiment with different meats, cheeses, vegetables, and seasonings to discover your own signature smoked shotgun shell creation!
Pro Tips and Tricks for Making Perfect Smoked Shotgun Shells
Achieving perfectly tender, flavorful, and crispy smoked shotgun shells is easy with a few insider tips and tricks. These pieces of advice are designed to ensure your culinary efforts yield the most delicious results every time, turning you into a smoked shotgun shell master.
- The Essential Overnight Refrigeration: I’ve mentioned this before, but it bears repeating as it’s arguably the single most important step for success. The overnight rest in the refrigerator (8-12 hours) is non-negotiable. This period allows the raw, dry manicotti pasta to slowly absorb moisture and, more importantly, fat from the bacon and meat filling. This natural process tenderizes the pasta without the need for parboiling, resulting in a perfectly cooked, al dente texture that’s infused with rich flavor directly from the smoker. Skipping this step often leads to hard or chewy pasta, which is far from ideal.
- Maintain Optimal Fat Content in the Filling: Depending on the type of meat you choose for your filling, smoked dishes can sometimes turn out dry. To counteract this, it’s vital to keep the filling high in both fat and flavor. This is precisely why I advocate for using 80/20 ground beef. Its fat content keeps the mixture moist and juicy during the long smoking process. Furthermore, incorporating sage pork sausage, which is inherently rich in fat, further ensures a succulent and flavorful core for each shotgun shell. Don’t be afraid of a little fat; it’s your friend for tender, moist results on the smoker!
- Stick with Regular Cut Bacon: While thick-cut bacon offers a luxurious feel in many dishes, it can present challenges when wrapping manicotti shells. I’ve found that regular old bacon is consistently the best choice for this recipe. Its strips are typically long enough to provide complete coverage around the entire pasta shell, minimizing exposed areas that could remain hard. Moreover, regular bacon is thinner and more pliable, making it easier to manipulate and wrap tightly and securely around the cylindrical shells. This ensures an even cook, consistent crispness, and full flavor infusion without being overly greasy.
- Don’t Rush the Smoke: Patience is key in smoking. While 300°F is a moderate smoking temperature, resist the urge to crank it up higher to speed things along. The slower cook allows the smoke to penetrate deeply into the pasta and meat, building layers of complex flavor. It also gives the bacon time to render properly and crisp up without burning, achieving that perfect balance of chewy and crunchy.
- Monitor Internal Temperature (Optional but Recommended): For ultimate peace of mind, especially if using different meat combinations, you can use a reliable meat thermometer. Aim for an internal temperature of 160-165°F (71-74°C) for the meat filling to ensure it’s fully cooked and safe to eat. Insert the probe into the center of a shell, avoiding direct contact with the pasta or bacon.
- Experiment with Wood Pellets/Chips: The type of wood you use for smoking will impart distinct flavors. For smoked shotgun shells, popular choices like hickory for a strong, classic BBQ flavor, pecan for a nutty and sweet smoke, apple for a mild fruity sweetness, or cherry wood for a slightly sweeter and beautiful reddish hue, all work exceptionally well, allowing you to customize the smoke profile.
By following these tips, you’ll be well on your way to creating smoked shotgun shells that are not only delicious but perfectly cooked and incredibly impressive, making you the star of any tailgate or gathering!
Smoked Shotgun Shells
Equipment
-
1 Traeger Timberline XL
-
1 Baking Rack
-
1 Basting Brush
Ingredients
- 1 package Manicotti pasta shells
- 1 lb 80/20 ground beef
- 1 lb Sage pork sausage
- 1 package Original Bacon
- 1 tbsp Smoked Q Rock’s Boom Boom Spice Blend
- 2 tbsp Smoked Q Rock’s Honey Chipotle Spice Blend
- 2 tbsp Smoked Q Rock’s Bourbon BBQ Sauce
Instructions
-
To get started, I placed the 80/20 ground beef and the sage ground sausage into a large bowl before adding Smoked Q Rock’s Boom Boom Spice Blend and mixing it together with my hands.
-
In this step, I keep it simple by rolling up my sleeves and stuffing all these shells by hand. There are other recipes out there that suggest a piping bag, but really this step is not as difficult as it seems and the piping bag is just an extra step that I don’t find that I need.
-
For this final prep step, it is important to wrap as much of the shell as possible. Since I don’t part boil the pasta, any exposed part will still be hard after smoking.
-
This step is the important one. I have tried placing them in the fridge for varying times, but the best results have been from placing them in the fridge overnight to really soften up the pasta shells as the fat from the bacon sinks in.
-
I’ve run this recipe at multiple temps, but I’ve found that running my Traeger Timberline XL at 300º slow cooks the filling and pasta, while keeping the bacon chewy yet crunchy.
-
As the smoker comes to temp, I place all the shells on baking racks before I apply a heavy dose of my Smoked Q Rock’s Honey Chipotle Spice Blend to all the shells wrapped in bacon. Then I placed them on the smoker for 45 minutes, checking doneness by the look of the bacon.
-
After 45 minutes, I basted on some Smoked Q Rock’s Bourbon BBQ Sauce and let them smoke for another 10-15 minutes to finish these off.
-
After resting for 5-10 minutes, I slice them into thirds to serve. Enjoy!!!
Nutrition
Nutrition information is automatically calculated, so should only be used as an approximation.
