Guilt-Free Indulgence: The Ultimate 5-Point Weight Watchers Tiramisu Recipe
Prepare to delight your taste buds with this incredibly satisfying and surprisingly light Weight Watchers Tiramisu, a truly decadent dessert that clocks in at just 5 WW points per serving. If you’ve been diligently following a healthy eating plan and thought that the classic, creamy layers of tiramisu were off-limits, get ready to reconsider! With a few smart, low-point modifications, this tiramisu cake recipe transforms into a guilt-free treat, perfect for any occasion – from casual family dinners to elegant holiday gatherings.
Tiramisu, the beloved Italian dessert whose name playfully translates to “pick me up” or “cheer me up,” traditionally combines robust espresso-soaked ladyfingers, a rich and velvety mascarpone cheese mixture, and a dusting of cocoa powder. While the original version is undeniably delicious and a staple in Italian cuisine, it often comes with a hefty calorie and fat count, making it a challenge for those managing their intake. Our Weight Watchers friendly version ingeniously captures all the authentic flavors and luxurious texture you crave, but with significantly fewer points, allowing you to enjoy this timeless classic without compromise. This recipe stands as a delicious testament that you don’t have to sacrifice flavor, satisfaction, or elegance when making healthier choices in your diet.
This versatile dessert proves its worth throughout the year, effortlessly adapting to any season. During the height of summer, it’s a perfectly chilled, no-bake delight. This means you won’t need to turn on your oven, keeping your kitchen cool while you prepare a refreshing treat. It’s an ideal choice for hot days when you desire something light, cool, and utterly delicious. As the temperatures drop and the colder months arrive, its elegant presentation and comforting, rich flavors make it a true showstopper on holiday dessert tables or at intimate gatherings with loved ones. Its sophisticated appearance, often associated with gourmet patisseries, cleverly conceals its actual simplicity, especially when you take advantage of the convenience of pre-made ladyfinger biscuits!
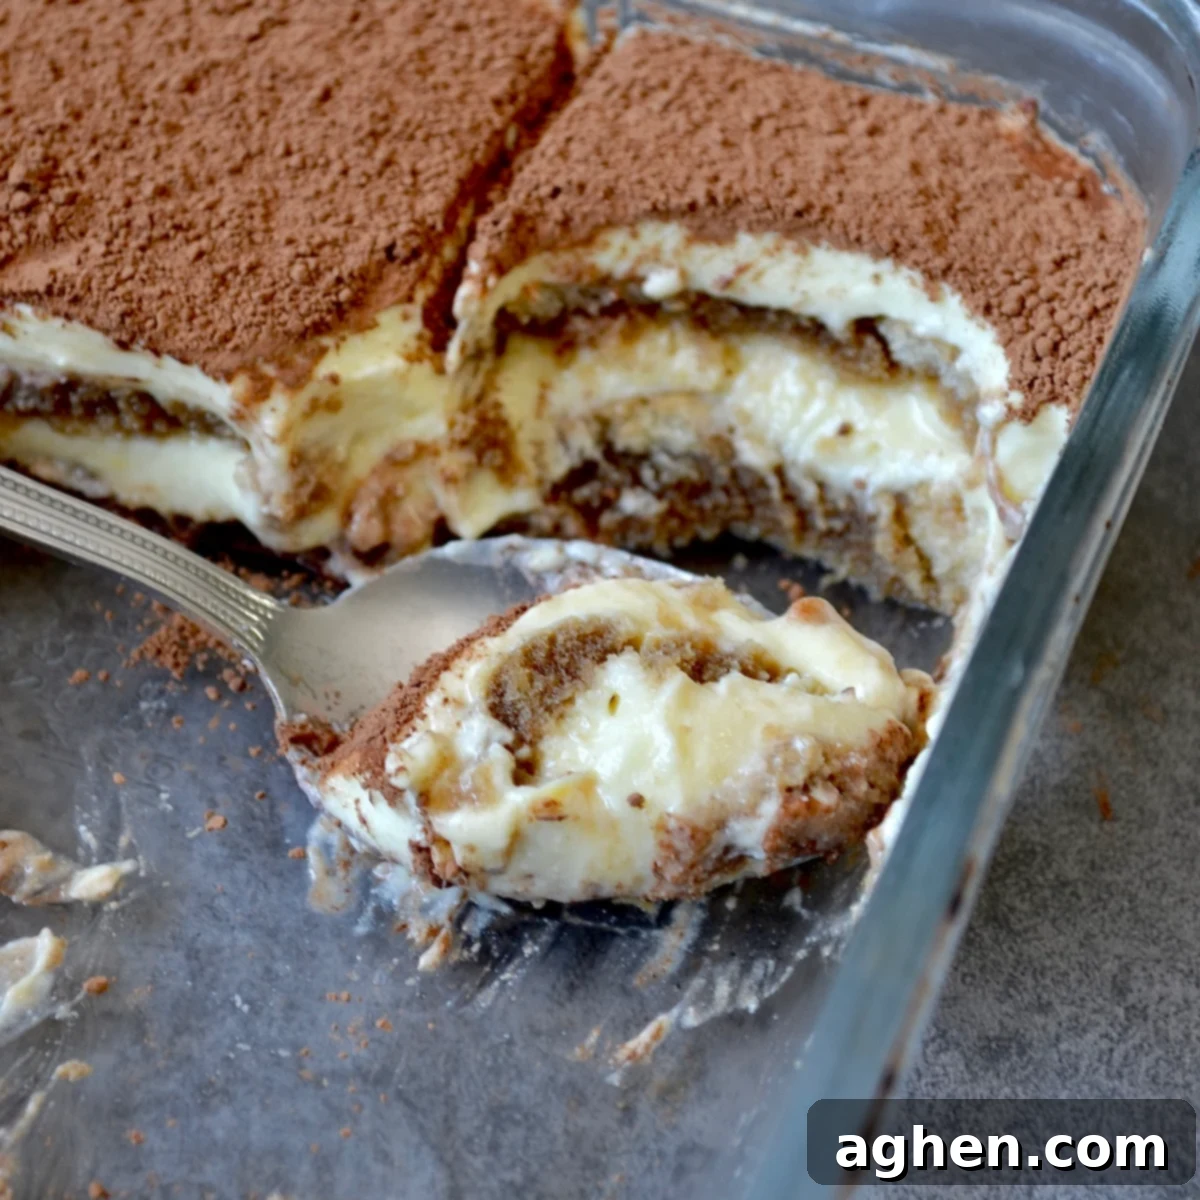
The true beauty of this Weight Watchers tiramisu recipe lies in its minimal effort for a maximum flavor payoff. The secret to its lighter profile is a luscious, yet guilt-free, filling. This creamy concoction is expertly crafted from a sugar-free Jello vanilla pudding mix, airy fat-free whipped topping, and creamy part-skim ricotta cheese. This clever combination works wonders, delivering an unbelievably rich, smooth texture and a delightful, subtle cheesy undertone that perfectly complements the robust coffee and bittersweet cocoa flavors. It provides the characteristic creaminess of traditional tiramisu without the high saturated fat content.
Rest assured, we haven’t compromised on the core elements that define and distinguish tiramisu. The essential delicate ladyfingers, robust espresso (or very strong coffee), and a generous, elegant dusting of unsweetened cocoa powder remain central to this recipe. By skillfully lightening up the creamy filling, we are able to keep these traditional components more aligned with the authentic tiramisu experience you know and love, ensuring every bite is reminiscent of the classic. We guarantee that once you give this innovative recipe a try, it will quickly become a cherished favorite in your recipe collection, a dessert you’ll want to prepare and share time and time again for its exquisite taste and health-conscious design.

Why You’ll Absolutely Love This WW-Friendly Tiramisu Recipe
- Effortlessly Easy Tiramisu Creation: Forget the daunting reputation of classic tiramisu. This recipe is meticulously designed for maximum simplicity without sacrificing flavor or elegance. With clear, concise, step-by-step directions and accompanying illustrative photos, even the most novice home cook or those new to Weight Watchers cooking can confidently achieve a stunning, homemade tiramisu with absolute ease. There’s no baking involved, which not only streamlines the preparation process but also keeps your kitchen pleasantly cool, making it ideal for any time of year. It truly is a dessert that anyone, regardless of their culinary skill level, can master and proudly present.
- Incredibly Light Yet Deeply Satisfying Taste: Experience the epitome of balance between indulgence and lightness with every spoon. This dessert, expertly crafted with airy fat-free whipped topping and delicate, coffee-infused ladyfingers, boasts a wonderfully light and refreshing texture that won’t leave you feeling overly full or weighed down. Yet, despite its feather-light feel, it’s packed with a rich tapestry of flavors – a truly decadent and satisfying treat that perfectly quells even the most persistent sweet cravings without the guilt often associated with traditional, high-calorie desserts. It’s the ideal way to enjoy a sweet moment while staying perfectly on track with your healthy eating and Weight Watchers goals.
- Ricotta: The Smart, Low-Point Mascarpone Alternative: The culinary genius behind this recipe’s Weight Watchers friendliness lies in our clever and effective substitution of part-skim ricotta cheese for the high-point mascarpone traditionally found in tiramisu. Mascarpone, while incredibly delicious, is notoriously high in fat and, consequently, very high in WW points. Part-skim ricotta, on the other hand, offers a remarkably similar creamy texture and a delightful, mild, and fresh cheesy undertone that beautifully complements the sweeter and bolder elements of the dessert, all while keeping the point value significantly lower. This smart swap allows you to luxuriate in that characteristic tiramisu creaminess and depth of flavor without derailing your healthy eating plan. You get all the indulgence with a fraction of the guilt!
Recipe Snapshot: Quick Guide to Your WW Tiramisu
- Serving Size: Each slice is approximately 116g, designed for a satisfying portion.
- Yields: This recipe generously produces 9 individual slices, perfect for sharing or meal prepping.
- Active Preparation Time: You’ll only need about 30 minutes of hands-on time to assemble this delightful dessert.
- Resting Time: A minimum of 3 hours in the refrigerator is required for proper setting and flavor infusion. For optimal firmness and deeply developed flavors, overnight chilling is highly recommended.
- WW Points Per Serving: A remarkable 5 WW points per slice, making it a truly guilt-free indulgence. The entire recipe totals approximately 47 points. (Click here to view this recipe directly in the WW app – please note, a Weight Watchers login is required for access).
Essential Ingredients for Your Low-Point Tiramisu
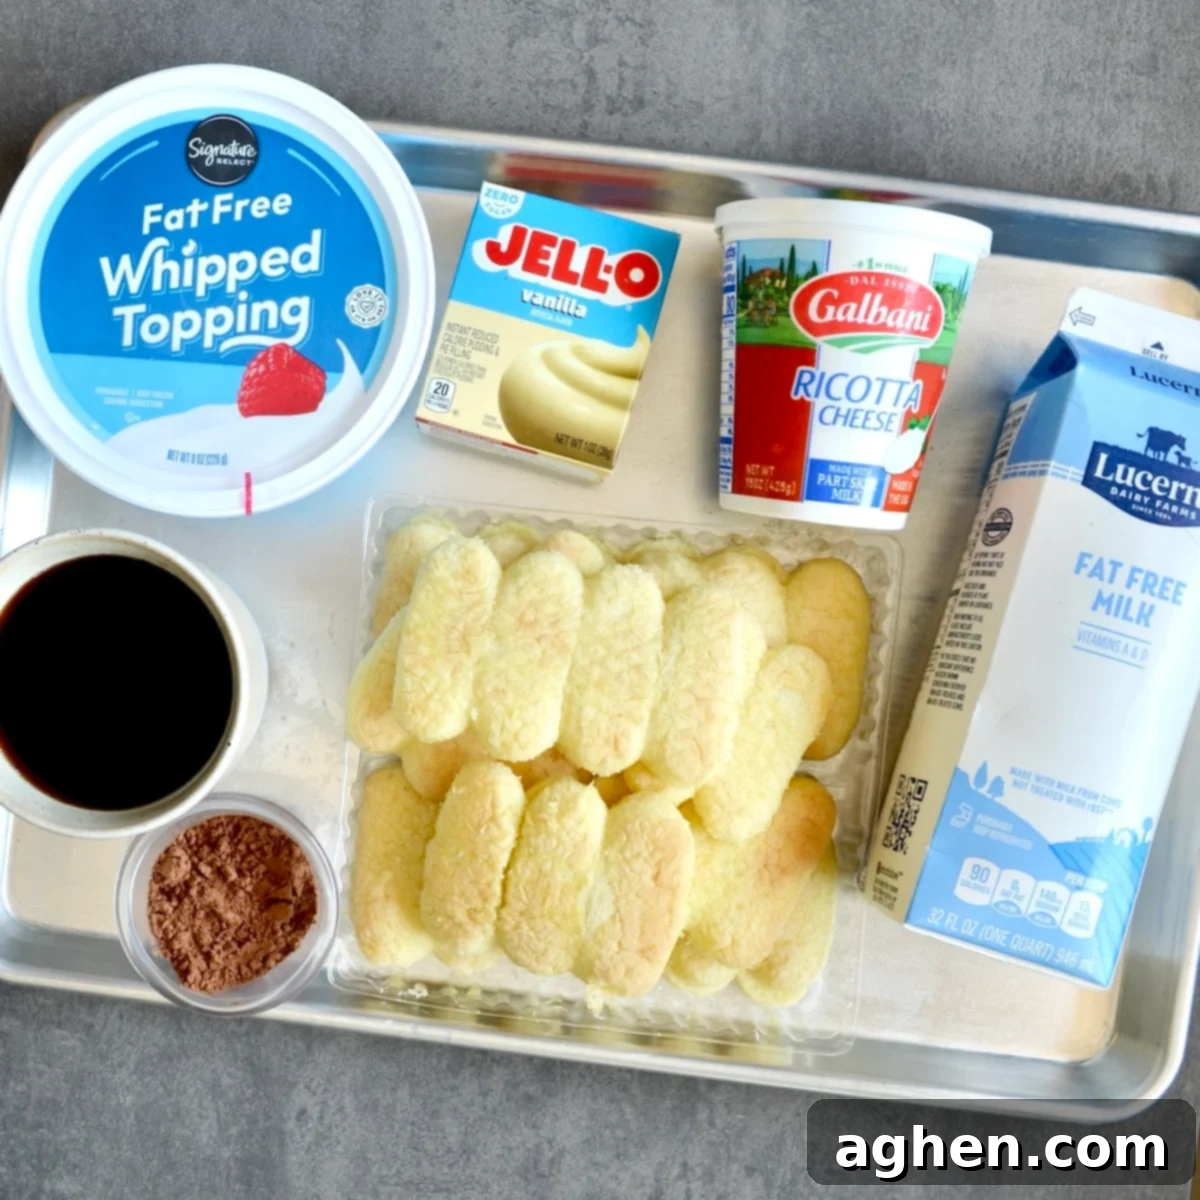
Gathering the right ingredients is the fundamental first step to creating this delightfully lightened-up tiramisu. Each carefully selected component plays a crucial role in delivering the authentic taste and luxurious texture you expect from a classic tiramisu, all while meticulously adhering to Weight Watchers guidelines.
- 1 cup Fat-free milk: This provides the essential liquid base for our pudding mixture, ensuring a smooth and creamy consistency without introducing unnecessary fat.
- 1 package sugar-free Jello vanilla pudding mix: A true star ingredient for both sweetness and structure. It allows us to create a thick, flavorful, and stable filling base without the added sugars found in traditional pudding mixes.
- ¾ cup Part-skim ricotta cheese: Our clever and effective substitute for high-fat mascarpone. This cheese offers a wonderfully creamy texture and a mild, fresh, and slightly tangy flavor that contributes significantly to the richness of the filling while keeping the Weight Watchers points impressively low.
- 8 oz container Fat-free cool whip: This ingredient is vital for adding a delightful lightness and airy volume to the filling. It creates a fluffy, indulgent mouthfeel without the heavy cream typically used, making the dessert feel much lighter.
- 2 tbsp Unsweetened cocoa powder: Essential for the characteristic tiramisu dusting. It provides a beautiful aesthetic contrast and a crucial slightly bitter note that balances the sweetness of the creamy filling, enhancing the overall flavor profile.
- 15 Ladyfingers (biscuits or cake): These delicate, sponge-like biscuits form the structural foundation of tiramisu, soaking up the coffee beautifully. The exact quantity needed may vary slightly depending on the brand, size, and thickness of the ladyfingers you purchase, so be prepared to adjust as necessary to fit your pan.
- 6-8 oz Espresso or very strong brewed coffee, cooled: This is truly the soul of tiramisu, infusing the ladyfingers with that signature deep, aromatic coffee flavor. It is absolutely vital that the coffee is completely cooled before use; hot coffee will quickly disintegrate the delicate ladyfingers, leading to a soggy and unappealing dessert. The strength of the coffee is also paramount for an authentic taste.
Step-by-Step Instructions: Crafting Your Perfect WW Tiramisu
Follow these straightforward instructions precisely to assemble your delicious, low-point Weight Watchers Tiramisu. The process is designed to be easy and enjoyable, ensuring a beautiful, flavorful, and satisfying dessert every time.
- In the clean bowl of a stand mixer fitted with a whisk attachment, or using a large mixing bowl with an electric hand mixer, combine the sugar-free Jello vanilla pudding mix and the fat-free milk. Beat on medium speed for about 2-3 minutes, or until the mixture is completely smooth and a visibly thick, uniform pudding has formed. Next, gently fold in the entire container of fat-free whipped topping and the part-skim ricotta cheese. Mix carefully on low speed or by hand with a spatula until all ingredients are just combined and no streaks remain. Be careful not to overmix, as vigorous beating can sometimes cause the ricotta cheese to “break” down or the mixture to become thinner. A few very small, fine lumps from the ricotta are perfectly normal and will contribute to the dessert’s delightful texture.
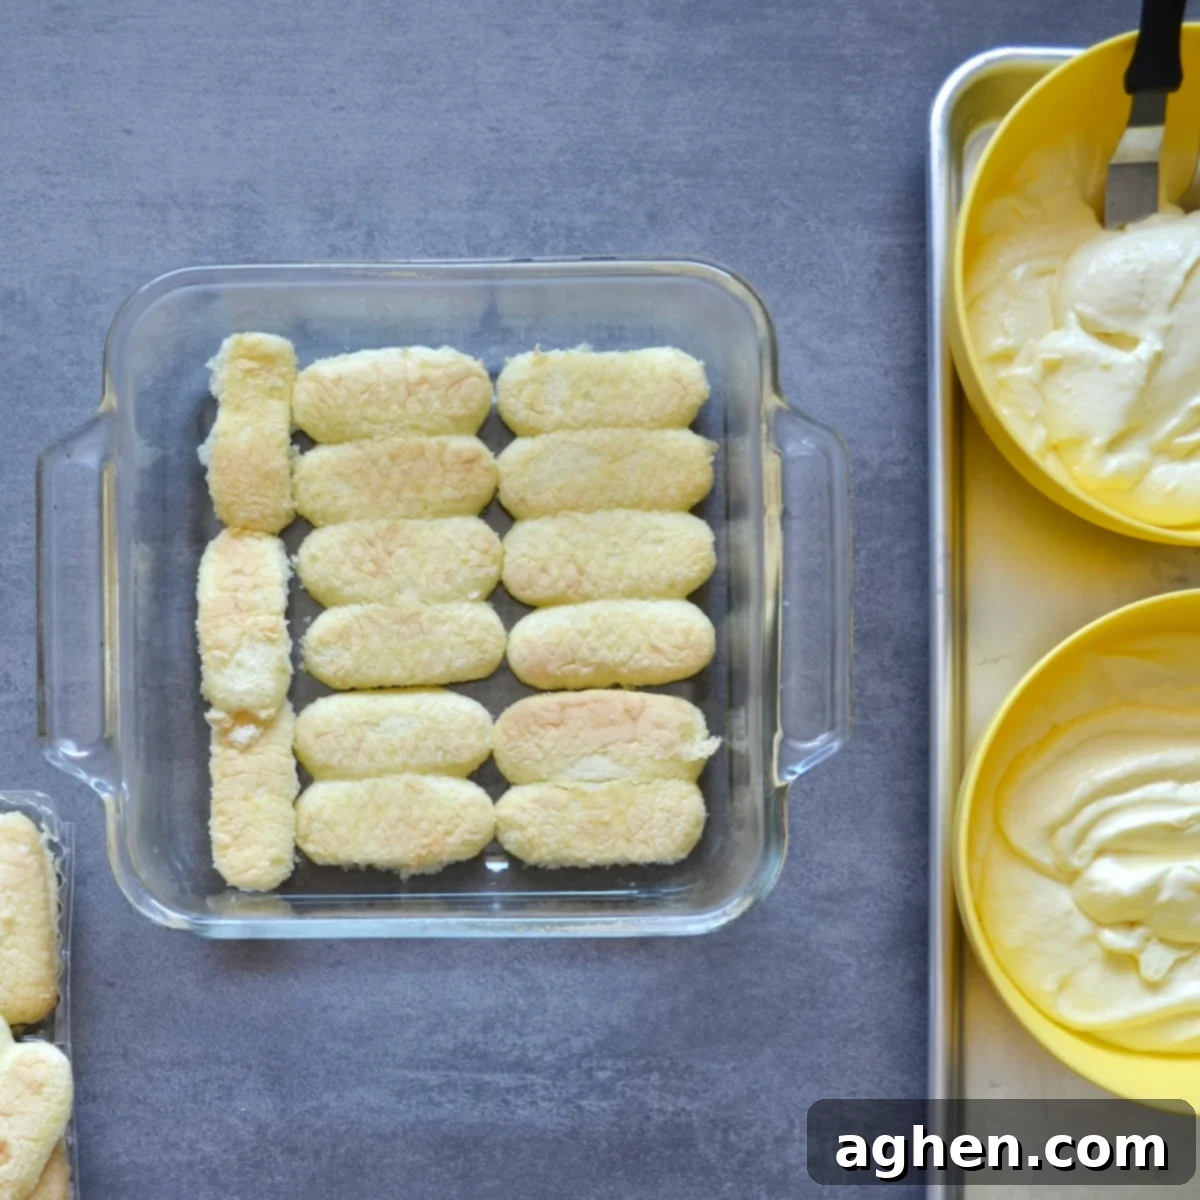
- Begin the assembly process by meticulously arranging a single, even layer of ladyfingers on the bottom of an 8×8 inch square baking pan. Depending on the specific brand and size of your ladyfingers, you may find it necessary to cut them in half lengthwise or trim them slightly to fit snugly and cover the entire base of the pan. The primary goal here is to create a solid, continuous foundation for your tiramisu. Don’t stress if the fit isn’t absolutely perfect; the creamy filling will wonderfully cover any minor gaps or imperfections.
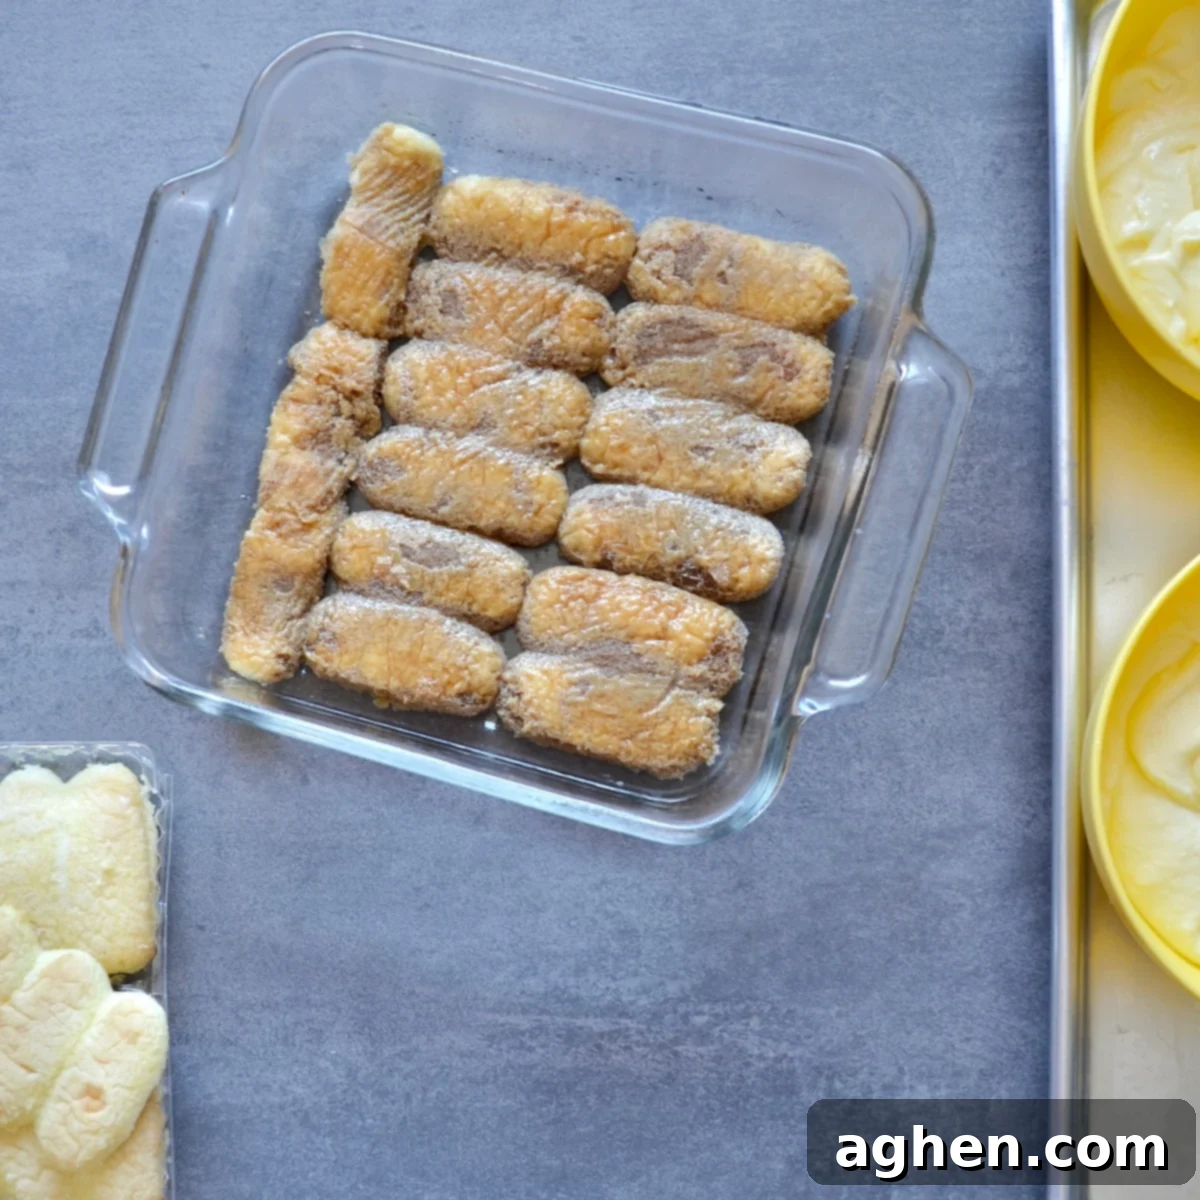
3. Now, it’s time to infuse the ladyfingers with that iconic coffee flavor, ensuring your cooled espresso or very strong brewed coffee is ready. The temperature of the coffee is crucial; it must be completely cooled to prevent the ladyfingers from quickly disintegrating and becoming soggy. If you are using softer, more cake-like ladyfingers, lightly brush the cooled espresso or coffee over their surfaces using a pastry brush for controlled absorption. For firmer, more biscuit-like ladyfingers, you can quickly dip each biscuit into the espresso for just a second or two on each side before arranging them in the pan. The key is to moisten them thoroughly without saturating them. Over-soaking will lead to a watery and unappealing tiramisu texture.
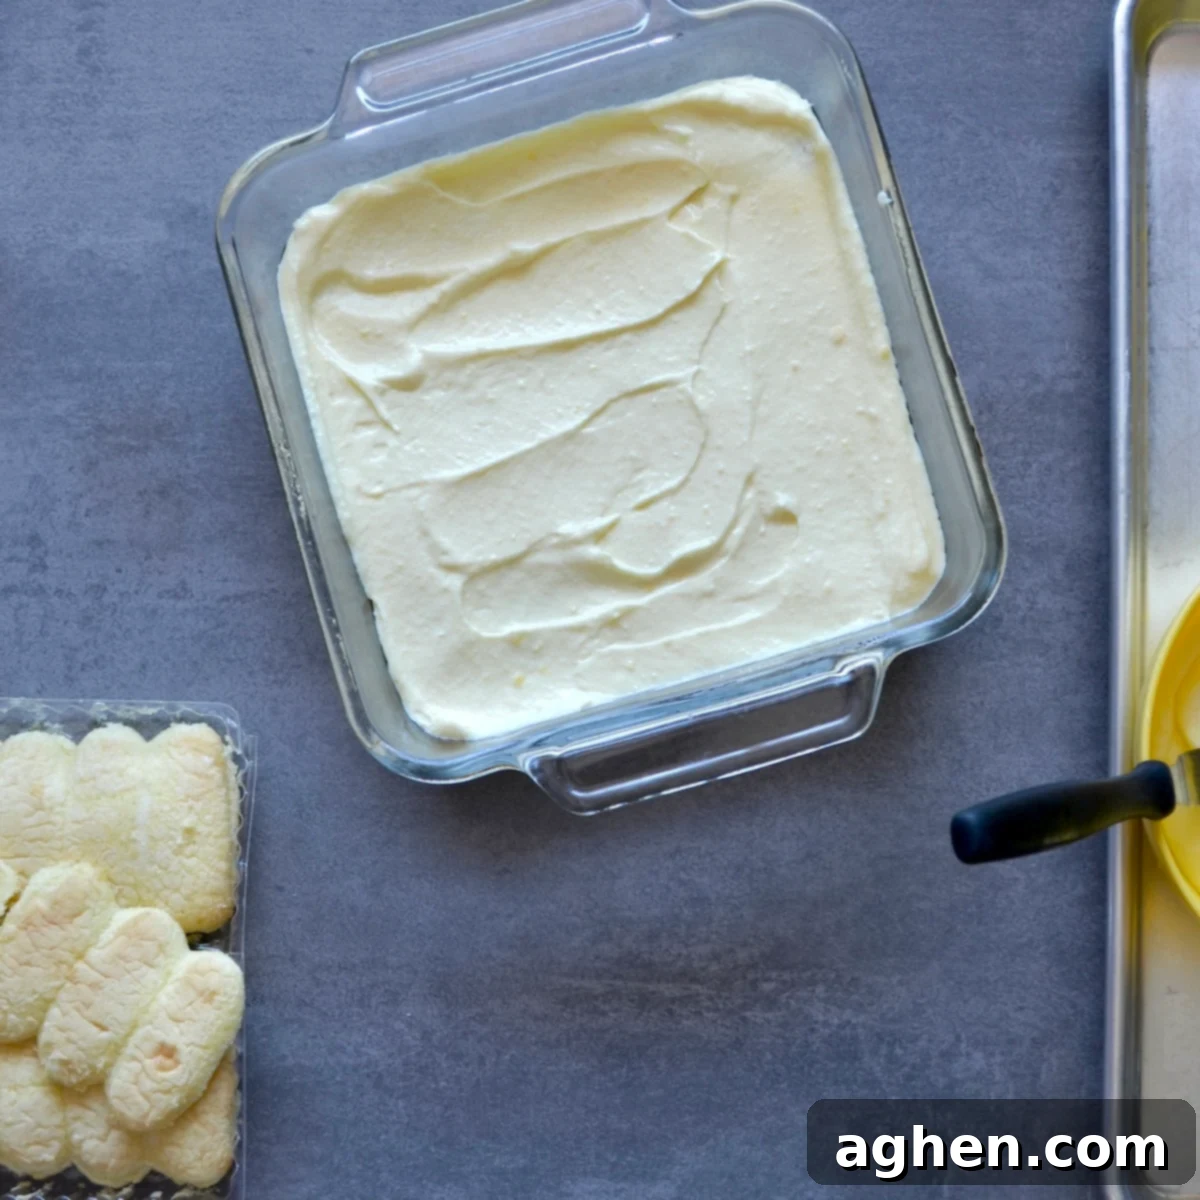
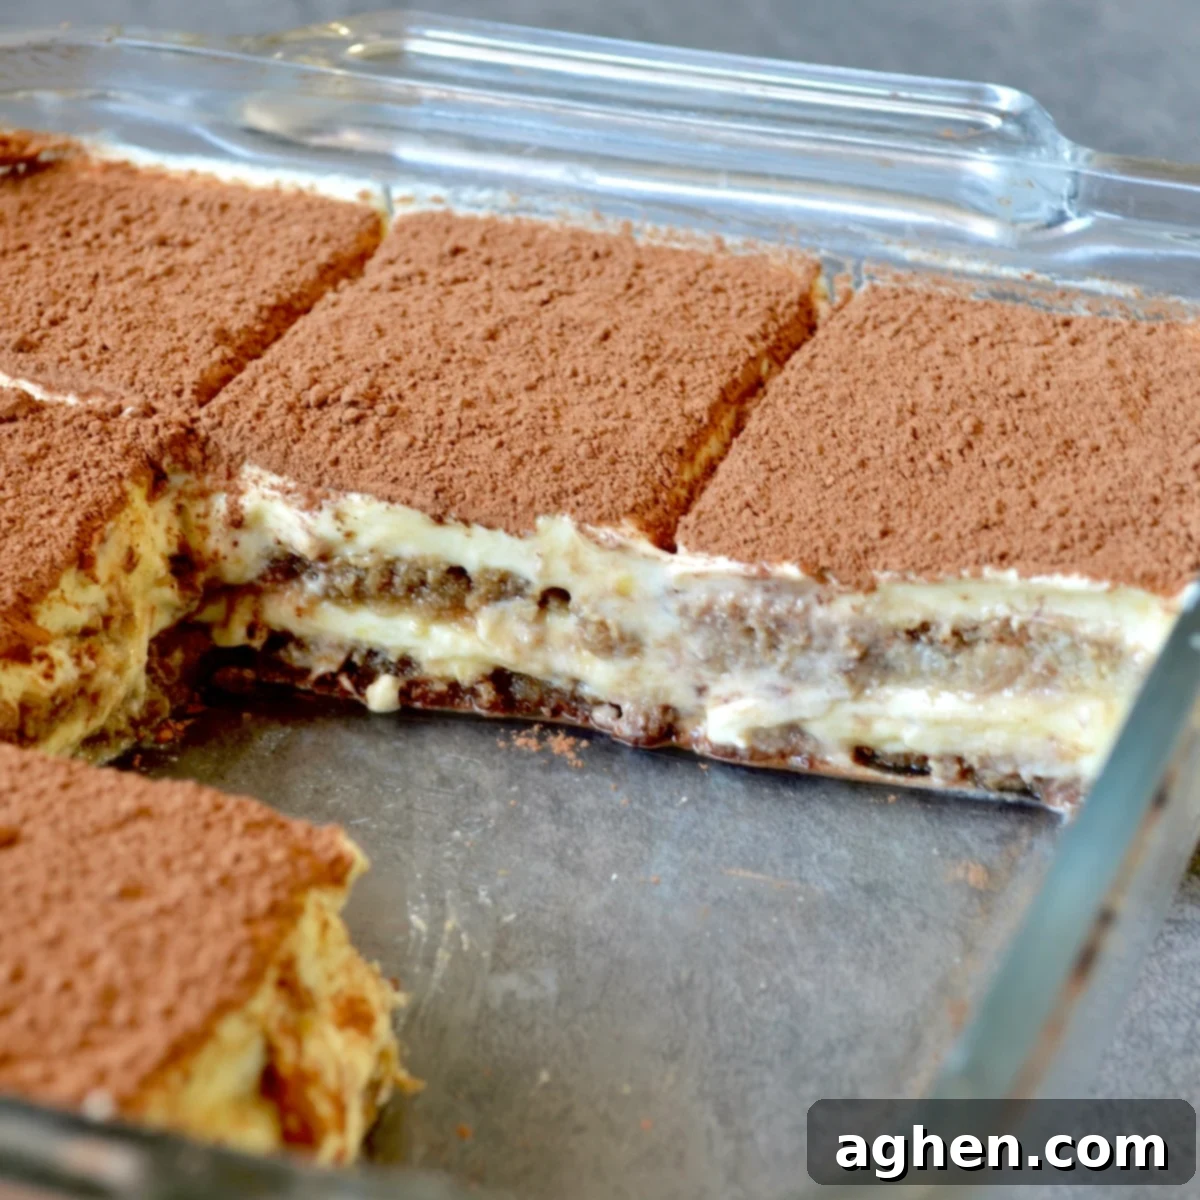
4. Carefully spread precisely half of your prepared creamy ricotta filling evenly over the first layer of espresso-infused ladyfingers. Use an offset spatula or the back of a spoon to gently smooth out the filling, ensuring it covers all the biscuits from edge to edge to create a uniform, continuous layer. This step establishes the first luscious creamy stratum of your tiramisu.
5. Repeat the entire layering process to build the second and final tier of your tiramisu. Start by adding the next layer of ladyfingers, carefully soaking them with the remaining cooled espresso using the technique appropriate for their firmness. Then, gently and evenly spread the remaining ricotta filling over the top, taking care to create a smooth and appealing surface. This meticulous layering creates a beautiful cross-section when the dessert is eventually served.
6. To finish your masterpiece, generously dust the entire top surface with unsweetened cocoa powder. This not only provides a beautiful, classic aesthetic but also delivers a crucial slightly bitter contrast that perfectly balances the sweetness of the creamy filling. Once dusted, carefully transfer your tiramisu to the refrigerator to set. It requires a minimum of 3 hours to firm up properly and allow all the delightful flavors to meld and deepen. For the absolute best results – a perfectly set dessert with deeply developed, harmonious flavors and an ideal, firm yet tender texture – we strongly recommend chilling it overnight. This extended resting period is truly what transforms a good tiramisu into an unforgettable one, ensuring every slice is a sheer delight.
Creative Variations & Smart Substitutions for Your Tiramisu
While this Weight Watchers Tiramisu recipe is absolutely delightful as it is, you can easily customize it to suit your specific taste preferences, dietary needs, or to simply experiment with new flavors. These creative variations and smart substitutions offer exciting ways to make the recipe uniquely yours.
- Tiramisu with Cream Cheese: For those who appreciate a slightly tangier and perhaps a bit denser creamy filling, you can substitute a portion of the part-skim ricotta cheese with softened, light cream cheese (Neufchâtel cheese is an excellent lower-fat option that works wonderfully here). Begin by whipping the cream cheese first until it’s light and perfectly smooth, then proceed with the recipe as normal, combining it with the pudding mix and whipped topping. This variation introduces a subtly different, yet equally delicious, texture and flavor profile that might just become your new favorite twist.
- Fruity Tiramisu with Strawberries: Transform your classic tiramisu into a bright, vibrant, and refreshingly summery dessert by incorporating fresh strawberries. Simply layer thinly sliced strawberries in between the creamy filling layers for delightful bursts of sweet and tart flavor that beautifully cut through the richness. For an even more intense and cohesive strawberry experience, consider soaking your ladyfingers in a light strawberry sauce or syrup (ensuring it’s sugar-free or low-sugar to maintain the low-point status) instead of the traditional espresso or coffee. This fruity version is particularly refreshing and perfect for warmer weather gatherings.
- Alternative Biscuits or Cakes: If traditional ladyfingers are difficult to find in your local grocery store, or if you simply wish to try a different texture, several other options can work beautifully as the base for your tiramisu. Consider using light angel food cake, a spongy pound cake (cut into slices), or even classic vanilla wafers. Each of these alternatives will impart a slightly different texture and flavor to the finished dessert, offering a unique experience. Just remember that the Weight Watchers points for each alternative biscuit or cake type will vary, so be sure to accurately account for these changes in your personal point calculations.
- Bright & Zesty Lemon Tiramisu: For a truly unique and exhilaratingly refreshing twist that moves away from the traditional coffee and cocoa, try a lemon-infused tiramisu. This vibrant version completely transforms the flavor profile. To create it, you’ll skip the espresso and cocoa entirely. You can keep the lightened-up creamy filling and ladyfingers, but instead of coffee, dip the ladyfingers in a light lemon syrup or a simple mixture of lemon juice and water with a touch of your preferred sweetener. In between the creamy layers, spread some sugar-free lemon curd and generously sprinkle fresh lemon zest for an intense, bright, and zesty citrus flavor that is absolutely perfect for spring or summer celebrations.
- Cocoa Powder Considerations: This recipe calls for readily available unsweetened cocoa powder, which provides a classic bittersweet finish. However, for a visually richer, darker color and a slightly less acidic flavor profile (often described as smoother or more mellow), you can opt for Dutch-processed cocoa powder. Dutch-processed cocoa has been treated with an alkali, neutralizing its acidity. Either option will work wonderfully for dusting the top and adding that essential chocolatey flourish that tiramisu is known for.
- Add a Hint of Liqueur (Optional Indulgence): For those who enjoy a touch of sophistication and are not strictly adhering to zero alcohol, a small amount of coffee liqueur (such as Kahlúa) or a splash of rum can be artfully added to the espresso for soaking the ladyfingers. This will deepen the flavor complexity and add a boozy kick. Remember to account for the additional Weight Watchers points that adding alcohol will contribute to each serving.
Expert Tips & Tricks for the Perfect WW Tiramisu
Achieving a perfect tiramisu, especially a delicious lightened-up version that adheres to Weight Watchers guidelines, often comes down to paying attention to a few key details. Keep these expert tips and tricks in mind to ensure your Weight Watchers friendly tiramisu is a resounding success every single time you make it:
- Master the Coffee Soak Technique: The quality and, crucially, the temperature of your coffee are paramount for authentic tiramisu flavor. Always use freshly brewed espresso or exceptionally strong coffee. If your coffee is too weak or diluted, the ladyfingers will absorb a bland, watery liquid instead of the rich, aromatic flavor that truly defines tiramisu. Furthermore, ensure the coffee is completely cooled before you even think about soaking the ladyfingers; hot or even warm coffee will quickly cause the delicate biscuits to disintegrate, resulting in a soggy, unappealing dessert. A quick dip – often just one second per side – is usually sufficient for most ladyfingers to absorb enough liquid without becoming oversaturated.
- Gentle Mixing for a Creamy Filling: When it comes to combining the part-skim ricotta cheese with the prepared pudding and whipped topping, adopt a gentle hand or use a low speed on your stand or hand mixer. Overwhipping the ricotta can unfortunately cause it to “break” or separate, which releases excess liquid and can make your creamy filling grainy or watery instead of perfectly smooth and luscious. A few very small, fine lumps of ricotta within the mixture are perfectly acceptable and can even add a pleasing textural dimension; the ultimate goal is a well-combined, thick, and homogenous mixture, not necessarily a completely smooth, emulsified one like traditional mascarpone.
- Embrace the Importance of Chilling Time: Patience truly is a virtue when crafting tiramisu! While a minimum of 3 hours of chilling time in the refrigerator is essential for the dessert to adequately set, for the absolute best results in terms of both profound flavor development and structural integrity, we cannot recommend highly enough that you aim to let your tiramisu rest in the refrigerator overnight. This extended chilling period allows the ladyfingers to fully soften to perfection, enables all the coffee and filling flavors to meld deeply and harmoniously, and ensures the entire dessert firms up beautifully, leading to impeccably clean slices and an utterly unforgettable taste experience.
- Cover to Prevent Unwanted Odors: When chilling your tiramisu, particularly during the recommended overnight period, make it a point to cover the baking pan tightly with plastic wrap or aluminum foil. This crucial step prevents the delicate flavors of your dessert from absorbing any unwanted odors or tastes from other foods in your refrigerator, thereby keeping its exquisite and subtle flavors pure and untainted.
- Serve at the Optimal Temperature: Tiramisu is unequivocally best served well-chilled. To ensure the freshest taste, the firmest slices, and the most enjoyable texture, remove your tiramisu from the refrigerator just moments before you plan to serve it.
- Dusting for Visual and Flavor Impact: Never underestimate the power of the final cocoa dusting! A generous and even layer of unsweetened cocoa powder, applied just before serving, not only adds a beautiful, classic visual appeal to your tiramisu but also provides that crucial, slightly bitter contrast that elegantly balances the inherent sweetness of the creamy filling, culminating in a perfectly harmonious bite.
Discover More Delicious WW-Friendly Desserts
If you absolutely loved indulging in this Weight Watchers Tiramisu and are keen to explore more delightful, health-conscious treats that don’t compromise on flavor, be sure to check out these other fantastic recipes:
- Double Chocolate Espresso Oatmeal Muffins: A perfect breakfast or snack with a rich coffee and chocolate kick.
- Chocolate Banana Icebox Cake: Another fantastic no-bake option that’s creamy, fruity, and light.
- Coconut Raspberry Chocolate Cake: An elegant and flavorful cake that proves healthy can be delicious.
Weight Watchers Tiramisu

Equipment
-
8 x 8 inch pan
Ingredients
- 1 cup Fat-free milk
- 1 package sugar-free Jello vanilla pudding
- ¾ cup Part-skim ricotta cheese
- 8 oz container Fat-free cool whip
- 2 tbsp Unsweetened cocoa powder
- 15 Ladyfingers (biscuit or cake), (The amount needed may vary depending on the brand you use. I used Safeway/Signature Select)
- 6-8 oz Espresso or very strong brewed coffee, cooled
Instructions
-
In the bowl of a stand mixer, mix the pudding mix and milk until a smooth pudding forms. Add the whipped topping and ricotta cheese; mix until combined.
-
To assemble the cake, start with a layer of ladyfingers on the bottom of the 8 x 8 square pan. The ladyfingers I used were a bit smaller and cut in half lengthwise, so it might take a different amount than the exact product you are using.
-
For soft ladyfingers, use a pastry brush to brush/soak the espresso or coffee into the ladyfingers. Hard ladyfingers can be held and dunked into the espresso. Add half of the ricotta filling over the top and spread it evenly.
-
Repeat the process, adding the next layer of ladyfingers, soaking them, and then adding the remaining ricotta filling.
-
Dust the top with cocoa powder and transfer the tiramisu to the refrigerator to set for 3 hours or until it has properly firmed up — preferably overnight if you have the time.
Notes
Nutrition
Nutrition information is automatically calculated, so should only be used as an approximation.
Additional Info
