Easy Edible Pirate Treasure Chest Treats: A No-Bake Recipe for Adventure!
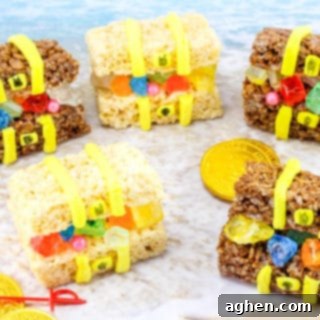
Ahoy, mateys! Prepare to embark on a culinary adventure with these incredibly fun and easy-to-make edible pirate treasure chest treats. They are the perfect addition to any pirate-themed party, a delightful snack for Talk Like a Pirate Day, or simply a creative activity for a rainy afternoon. Imagine the delight on children’s faces as they discover these sweet chests, overflowing with edible jewels and gold!
Whether you’re planning a grand pirate birthday bash for your child or just looking for a unique and enjoyable treat to celebrate a themed day, this edible treasure chest recipe is guaranteed to be a total hit. These treats combine the beloved crunch of Rice Krispies Treats with the vibrant appeal of various candies, making them not only delicious but also visually stunning. Get ready to sail the sweet seas of creativity!
Unearthing the Perfect Party Treat: Why These Pirate Treasure Chests Are a Hit
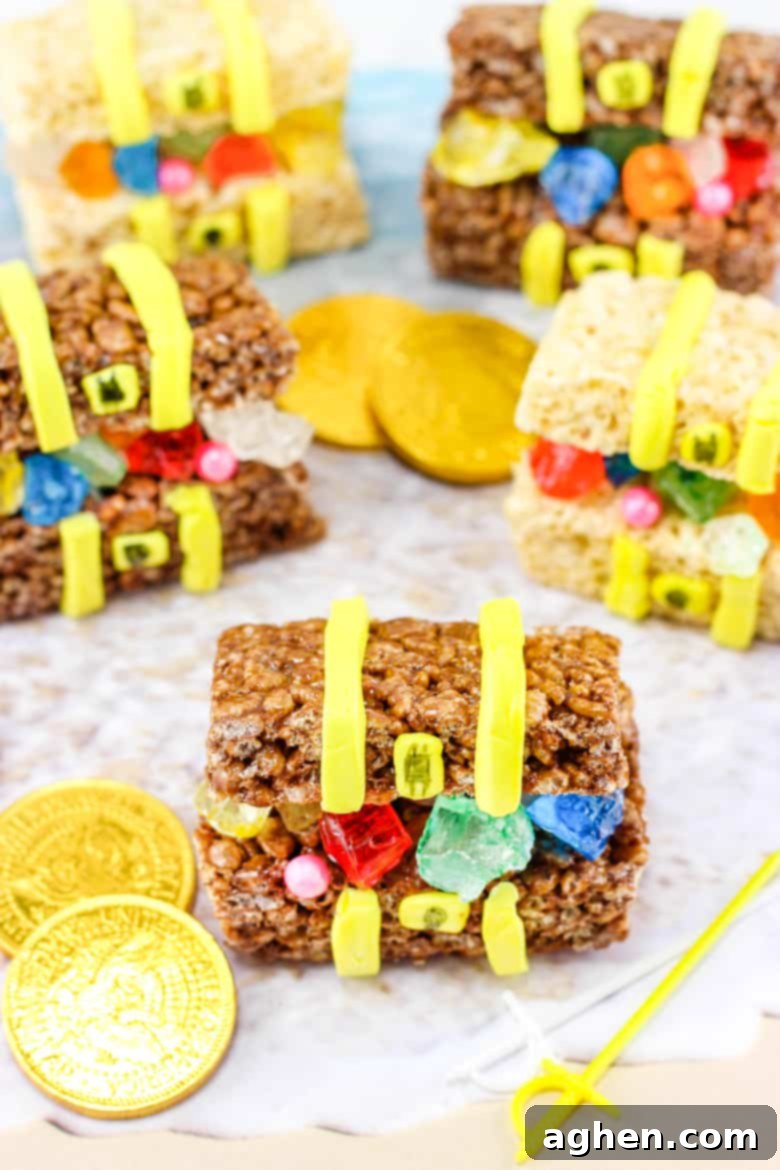
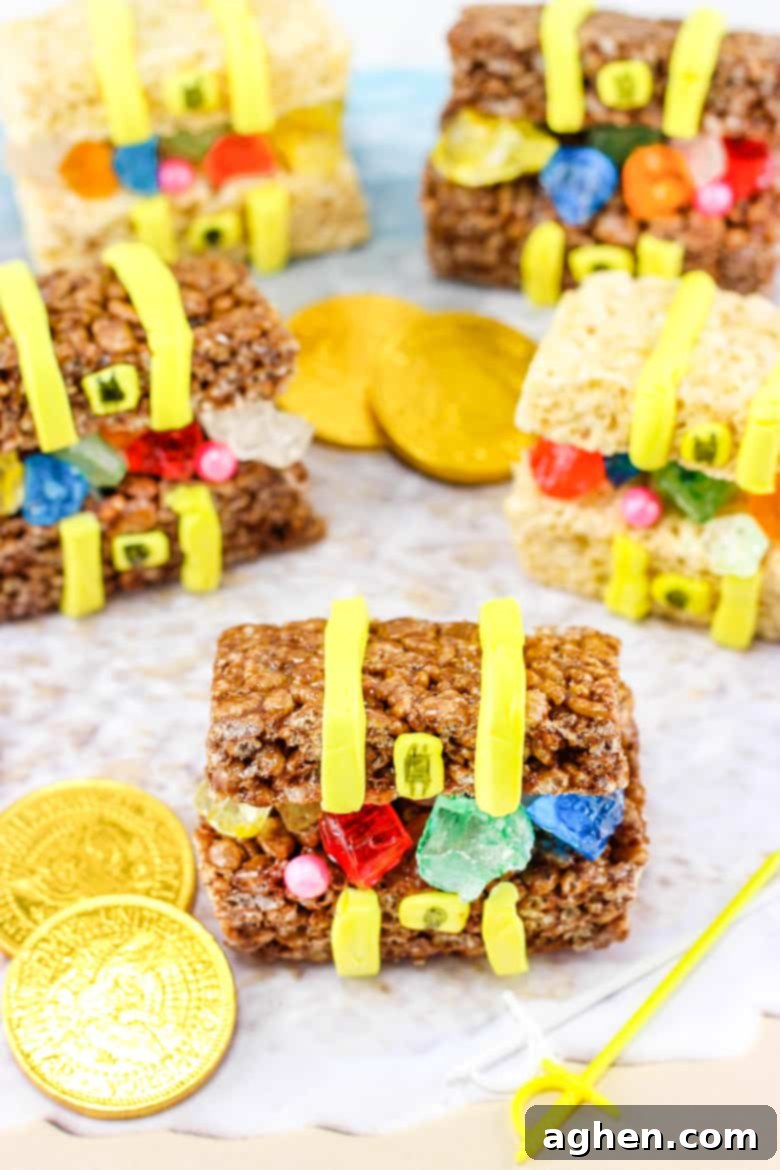
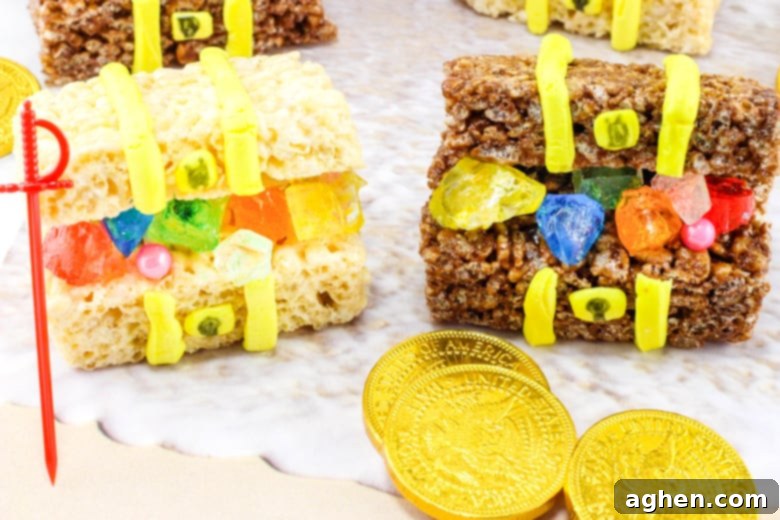
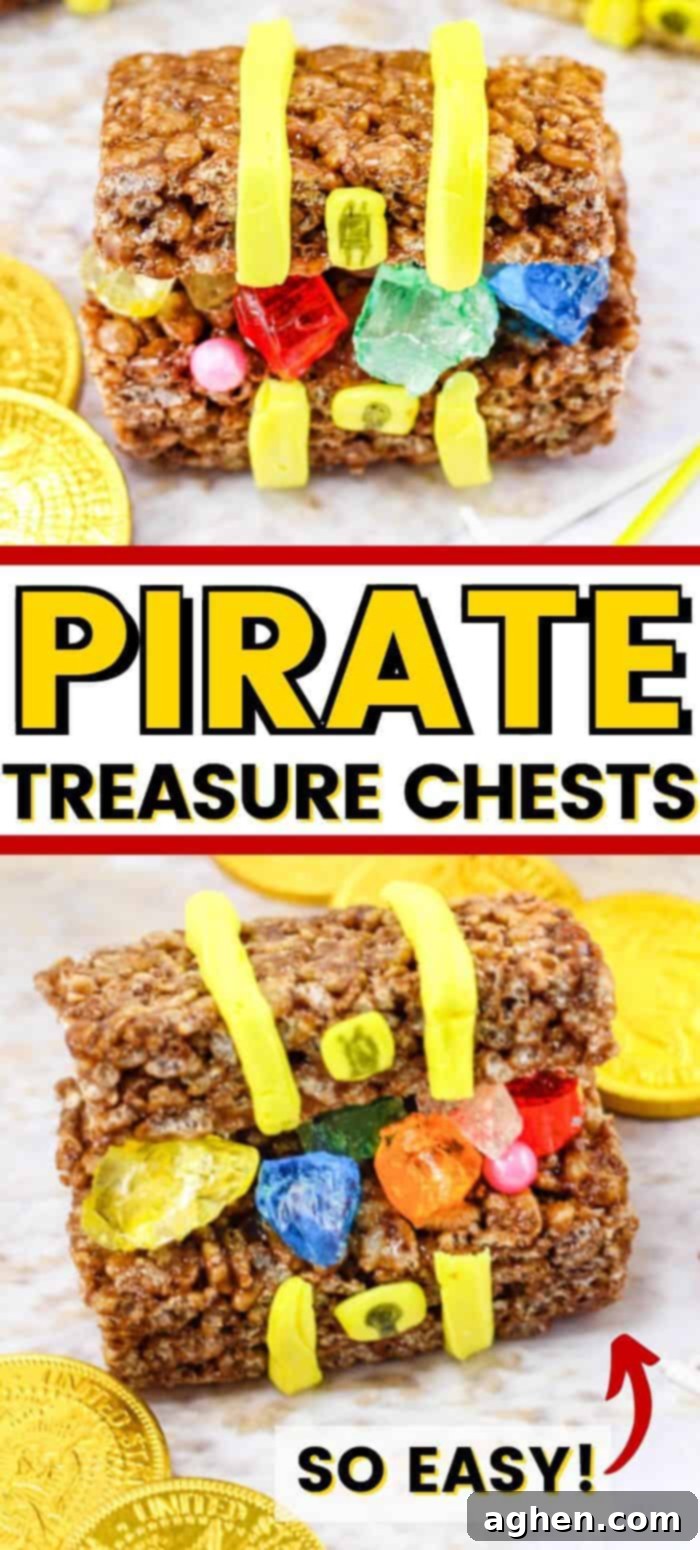
Just look at these edible treasure chests – aren’t they absolutely captivating? The intricate details, from the taffy “bands” to the sparkling candy “jewels,” make them look far more complicated than they actually are to create. That’s the secret! These delightful pirate chests are crafted using pre-made, store-bought Rice Krispies Treats, which means absolutely no baking is required. This makes the entire process incredibly straightforward, perfect for busy parents or anyone looking for a quick yet impressive dessert option.
Of course, if you’re a fan of baking from scratch and prefer to whip up your own batch of Rice Krispies Treats, you can certainly go that route. Either method works beautifully, but for speed and convenience, a nice shortcut like using premade treats is always a winner in our book. You also have the flexibility to choose between classic Rice Krispies Treats for a golden-brown chest or Cocoa Krispies Treats for a darker, more rustic wooden chest appearance. Or why not both, to offer a variety of “wood” finishes for your pirate loot? The possibilities are as vast as the ocean!
Gather Your Booty: What You’ll Need for Your Edible Treasure Chests
Creating these charming edible pirate treasure chests is surprisingly simple, especially when you have all your “booty” gathered before you begin. The key is a mix of readily available ingredients that come together to form a visually stunning and delicious treat. Here’s a closer look at the supplies that will transform ordinary snacks into extraordinary pirate treasures:
The Foundation: Rice Krispies Treats
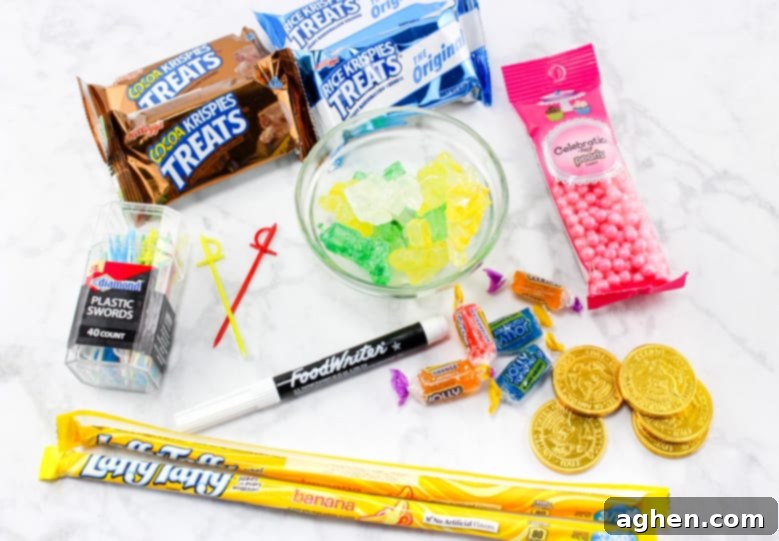
- Rice Krispies Treats (or Cocoa Krispies Treats): These form the body of your treasure chests. Pre-made, individually wrapped treats are a huge time-saver. You’ll need two treats per chest. Opt for classic Rice Krispies Treats for a lighter wood look, or Cocoa Krispies Treats for a darker, aged wooden chest effect. You can even mix and match for variety! If you prefer a homemade touch, you can certainly make your own batches and cut them into rectangular shapes once cooled.
The Treasure Chest Details: Taffy and Edible Pen
- Laffy Taffy Rope (banana flavor recommended): This flexible candy is perfect for creating the decorative “metal bands” and the “lock” on your chests. The banana flavor often comes in a yellowish color, which closely resembles gold or aged brass, adding to the authentic pirate aesthetic. You can experiment with other colors if you desire a different look.
- Black Edible Pen: An edible food marker is essential for drawing the intricate details on your taffy lock, giving it a realistic, hand-drawn finish. Make sure it’s a food-grade pen, safe for consumption.
The Sparkling Loot: Candy Fillings
This is where you can truly let your imagination run wild and fill your chests with dazzling “treasure.” While you can use any small candies you prefer, here are some excellent recommendations to make your pirate chests truly sparkle:
- Rock Candy: Its crystalline structure makes it look like precious gems.
- Candy Pearls: These spherical candies resemble valuable pearls from the ocean deep.
- Jolly Ranchers: Their vibrant, translucent colors can mimic sparkling jewels like rubies, emeralds, and sapphires.
- Edible Gold Coins: Small chocolate coins wrapped in gold foil are a classic pirate treasure. Be sure to remove foil before serving to young children, or use flat, edible sugar coins.
- Colorful Sprinkles: A mix of gold, silver, and colorful sprinkles can add an extra layer of sparkle and texture to your treasure pile.
- Gummy Candies: Gummy worms or small fish-shaped gummies can represent mysterious sea creatures guarding the treasure.
Important Safety Note: While plastic gold coins and toy swords are fantastic for decorating a pirate party table, they should not be placed *inside* edible treats, especially if serving to younger children who might accidentally consume them. Always prioritize edible decorations when filling the chests.
Charting the Course: Step-by-Step Instructions to Build Your Treasure Chests
Now that you have all your supplies, it’s time to embark on the easy journey of assembling your edible pirate treasure chests. The process is straightforward and fun, making it a great activity to do with kids (with adult supervision for cutting).
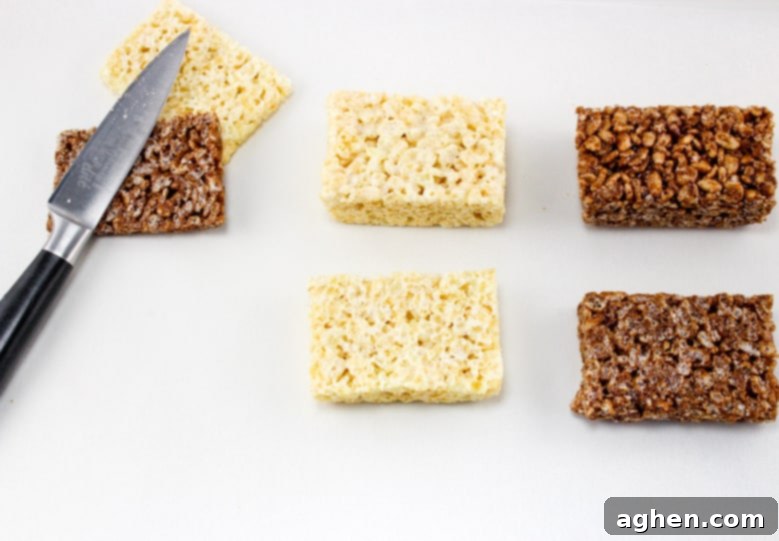
Step 1: Preparing Your Rice Krispies Treats
Begin by unwrapping all of your Rice Krispies Treats. For each treasure chest you plan to make, you will need two individual treats. Carefully pair them up, setting them side-by-side on your clean work surface. These two treats will become the bottom and top (or lid) of a single treasure chest.
Step 2: Trimming for Treasure Chest Shape
Next, you’ll need to give your treats their distinct chest shape. Take one treat from each pair and carefully trim approximately one-third off its height. This thinner piece will serve as the lid of your treasure chest. The remaining two-thirds of the treat will form the thicker, more substantial bottom of the chest. This trimming creates a visual distinction between the base and the opening lid, making your chests look more authentic and ready to hold their precious cargo.
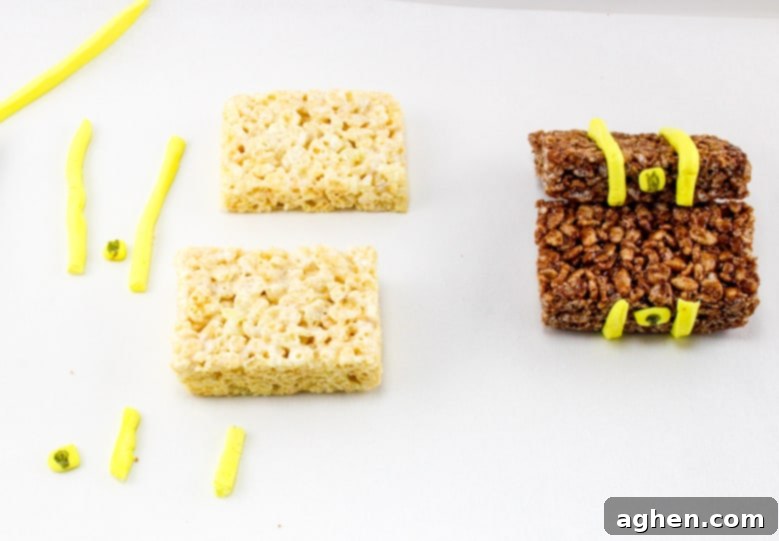
Step 3: Adding the Taffy “Bands” and “Lock”
Now, it’s time to add the decorative “metal bands” to your chests using the Laffy Taffy rope. Trim pieces of the taffy rope to fit across the top and bottom sections of each Rice Krispies Treat. Carefully press the taffy strips onto the treats, ensuring they adhere well and that the bands on the top and bottom halves will align when the chest is “closed.” Once the bands are in place, use more taffy to create a small, rectangular lock shape for each chest. Position each half of the lock between the taffy bands on both the top and bottom pieces of your treat. Finally, use your black edible pen to draw keyhole details and rivets on the taffy lock, bringing it to life with an authentic touch.
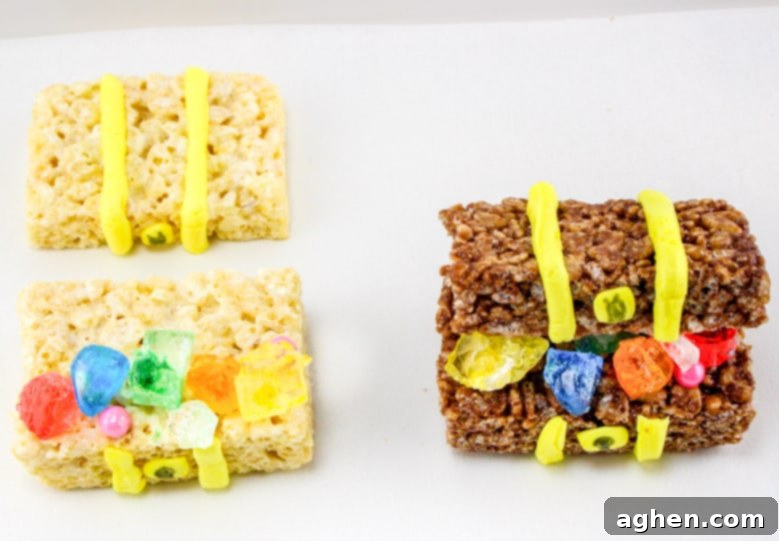
Step 4: Filling Your Chests with Edible Gold
With your chest bases ready and adorned, it’s time to fill them with glittering “treasure”! Arrange your chosen candies – rock candy, pearl candy, Jolly Ranchers, edible gold coins, or a mix of all – generously on top of the thicker, bottom halves of your Rice Krispies Treats. Don’t be shy; a bountiful display of candy makes the chests truly irresistible. Place the larger, more visually striking candies first, then fill in any gaps with smaller sweets, ensuring the treasure looks rich and overflowing.
Step 5: Assembling Your Open Treasure Chests
The final touch is to assemble your chests in an open, inviting position. Carefully place the trimmed top pieces onto the candy-filled bottom halves. The trick is to press down the backside of the top piece, positioning it so it appears hinged and wide open, proudly displaying the colorful candy treasure within. This presentation makes the edible pirate treasure chests look like they’ve just been discovered, revealing their valuable contents to eager adventurers. It’s an easy step that adds a huge wow factor!
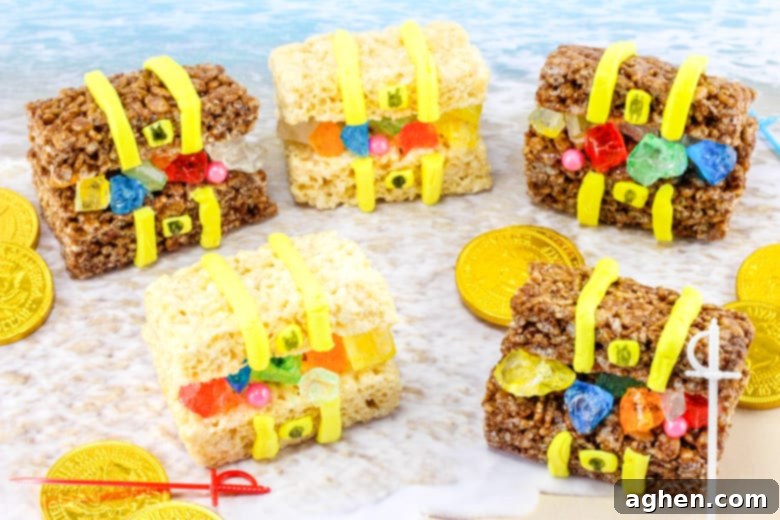
Easy as can be, right? And oh-so-charming! These treats are not just desserts; they’re an experience, transporting everyone to a world of high-seas adventure and hidden riches.
Yo Ho Ho and a Bottle of Fun: Tips for the Best Pirate Treats
To ensure your edible treasure chests are the talk of the town (or the ship!), here are a few extra tips and tricks:
- Work Smart with Taffy: If your Laffy Taffy rope feels too stiff, you can gently warm it in your hands or microwave it for a few seconds (literally 5-10 seconds on low power) to make it more pliable and easier to press onto the Rice Krispies Treats. This will help you achieve smoother, more seamless “metal bands.”
- Get Creative with Treasure: Don’t limit yourself to just the candies listed. Think outside the box! Small chocolate rocks, colorful jelly beans, or even fruit snacks can make excellent additions to your treasure hoard. The more variety in color and texture, the more appealing your chests will be.
- Safety First for Little Pirates: Always supervise young children when they are enjoying these treats, especially if you’ve included any smaller candies. For very young children, consider larger, easier-to-chew candies and avoid anything that could be a choking hazard.
- Storage Tips: These no-bake treats are best enjoyed fresh, but they can be stored in an airtight container at room temperature for 2-3 days. If you’ve used candies that might melt in heat, keep them in a cool spot.
Beyond the High Seas: Customization and Party Ideas
The beauty of these pirate treasure chests is their adaptability. You can easily customize them to fit any specific theme or occasion:
- Theme Variations: Instead of pirate chests, imagine mermaid treasure chests filled with shimmering blue and green candies, or dragon hoards overflowing with red and gold sweets. Simply change the colors of your taffy and candy to match your desired theme.
- Party Pairing: Serve these treats alongside other pirate-themed snacks like “seaweed” (green fruit leathers), “fish and chips” (goldfish crackers and potato chips), or “cannonball” meatballs. A full pirate feast will make your party unforgettable!
- Gift Ideas: These edible treasure chests also make charming party favors. Wrap them individually in clear cellophane bags with a ribbon and a personalized “thank you” tag for a memorable take-home treat that guests will adore.
Pirate Treasure Chests
Author: Jaclyn
Ingredients
- Rice Krispies Treats and/or Cocoa Krispies Treats unwrapped (2 per chest)
- Laffy Taffy Rope (banana flavor recommended for gold look)
- Black Edible Pen
- Assorted Candies (rock candy, edible pearls, Jolly Ranchers, chocolate coins for treasure)
Instructions
-
1. Unwrap all Rice Krispies Treats. For each treasure chest, pair two treats together. Trim approximately 1/3 off the top of one treat in each pair to create a thinner lid for the chest. The remaining thicker part will be the bottom of the chest.
-
Cut Laffy Taffy rope into thin strips to form the decorative metal bands on both the top and bottom pieces of each chest. Press the taffy firmly onto the treats, ensuring the bands align visually.
-
Fashion a small lock for each chest using additional taffy. Draw keyhole and rivet details onto the lock with your black edible pen. Press the halves of the lock between the taffy bands on both the top and bottom sections of your treats.
-
Generously fill the thicker bottom halves of the chests with your chosen candy “treasure” such as rock candy, edible pearls, and Jolly Ranchers, arranging them for an enticing display.
-
Place the trimmed top pieces onto the candy-filled bottom halves. Gently press down on the backside of the top piece to make it appear hinged and in an open position, proudly showcasing the sweet treasure inside.

Did You Make This Recipe?
Share it with me on Instagram @crayonsandcravings and follow on Pinterest @crayonsandcravings for even more!
Pin Recipe
Leave A Review
Pin This Swashbuckling Treat for Later!
Don’t let these fantastic edible pirate treasure chests sail away! Pin this recipe to your favorite Pinterest board so you can easily find it for your next pirate party, Talk Like a Pirate Day celebration, or anytime you’re craving a creative and delicious no-bake treat. Your future self (and your little pirates) will thank you!
Shop for Your Pirate Party Essentials!
Ready to gather all the supplies for your pirate-themed adventure? Check out these related products on Amazon to complete your party planning with ease. From pirate costumes to party decorations and all the candy treasures you could dream of, you’ll find everything you need to make your celebration a legendary one!
