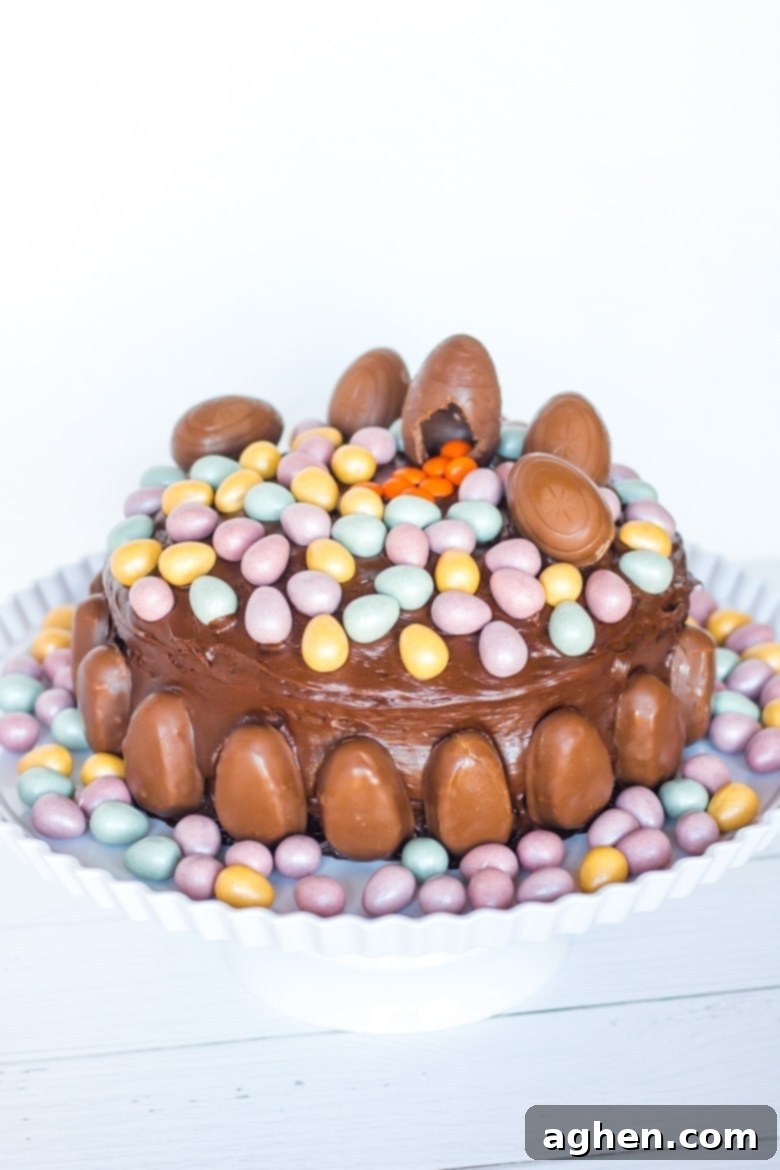
Easy Easter Candy Chocolate Cake: Your Ultimate Festive Holiday Dessert!
This is a sponsored post written by me on behalf of HERSHEY® for SheSpeaks. All opinions are 100% mine.
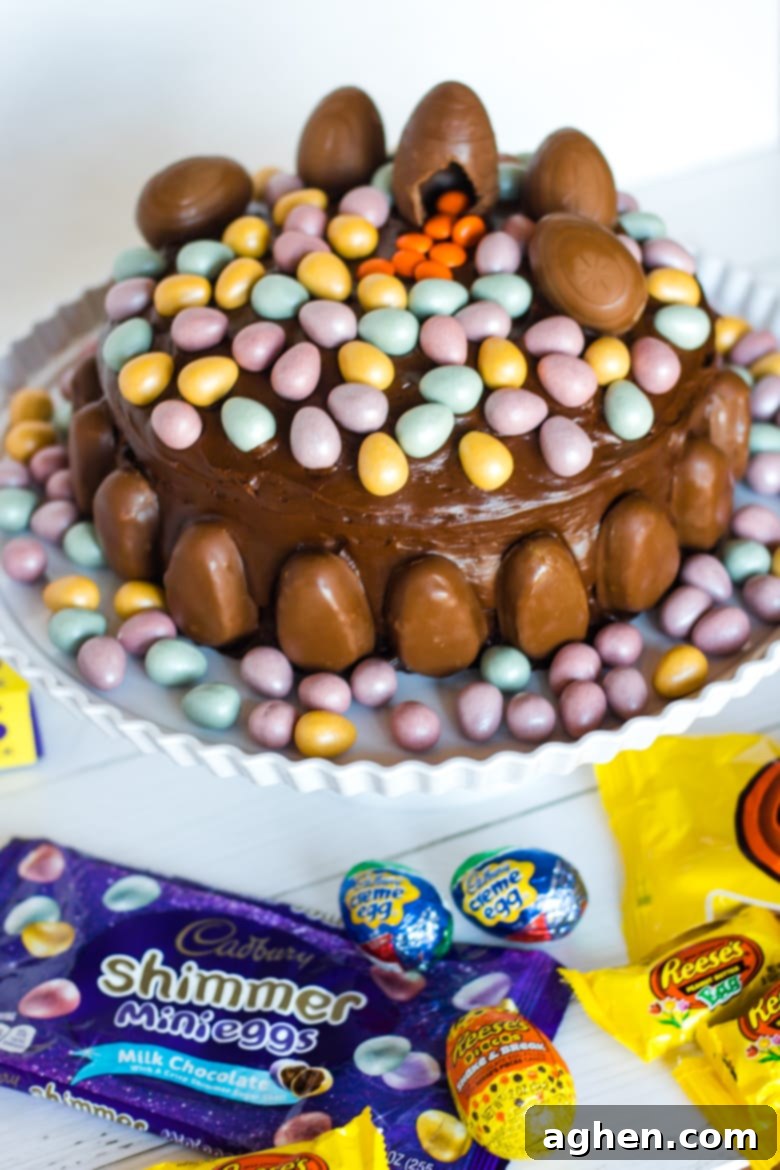
Easter is a time for joy, renewal, and, of course, indulging in delightful treats that bring smiles to everyone’s faces! This year, I envisioned an Easter dessert that would be not only incredibly delicious but also a true showstopper – a visually spectacular centerpiece for our holiday table. My answer to this sweet challenge? A rich, decadent chocolate layer cake, lavishly adorned with an abundance of our most beloved HERSHEY’S Easter candies: the creamy CADBURY Crème Eggs, the irresistible REESE’S© Milk Chocolate Eggs, and the charming, sparkling CADBURY Shimmer Mini Eggs. It’s a symphony of classic flavors and festive fun, making every single slice a pure delight and a celebration in itself!
If you’re already in the mood for more creative ways to use those fantastic mini eggs this season, you’ll love these other simple and tasty recipes: Easter Muddy Buddies, a quick and satisfying snack mix; Easter Bark, perfect for easy gifting or a colorful treat; and our adorable Birds Nest Cookies. You truly can’t go wrong with any of these three festive and incredibly tasty options, ensuring your Easter spread is full of sweet surprises!
Why This Easter Candy Cake Will Be Your New Holiday Tradition
When planning for Easter desserts, my philosophy is simple: create something extraordinary without the stress of complicated baking. This year, my mission was to go all-out with our Easter dessert spread, and honestly, what could be better than transforming a delicious cake into a vibrant, candy-covered wonderland? This approach guarantees not only a spectacular presentation that will gather gasps of admiration but also an unparalleled taste experience, all while keeping the actual baking process wonderfully straightforward and enjoyable.
For many of us, the arrival of these classic, perfectly egg-shaped treats is a quintessential part of the Easter season. It signals the blossoming of spring, the warmth of family gatherings, and the sheer joy of the holidays. Incorporating these beloved sweets, from the creamy Cadbury Eggs to the peanut-butter-filled REESE’S Eggs, directly onto a rich chocolate cake elevates it beyond a mere dessert. It becomes a playful, delicious masterpiece that embodies the spirit of Easter. The vibrant colors and iconic shapes of the candies instantly transform a simple chocolate canvas into a festive work of art, making it the ideal showstopper for any Easter brunch, dinner, or family gathering.
Gathering Your Sweetest Supplies: A Trip to Walmart for HERSHEY’S Easter Candy
The true brilliance of this Easter Candy Cake lies in its remarkable simplicity and the accessibility of its key ingredients. You absolutely don’t need to be a seasoned pastry chef to whip up something truly magical and impressive. To gather the heart of my confectionary masterpiece, I made a quick and easy trip to Walmart. It’s my go-to for finding all the essential HERSHEY’S Easter candies needed to bring this festive vision to life. This smart shopping strategy allowed me to minimize complex baking steps and instead focus my creative energy on the pure, unadulterated fun of decorating!
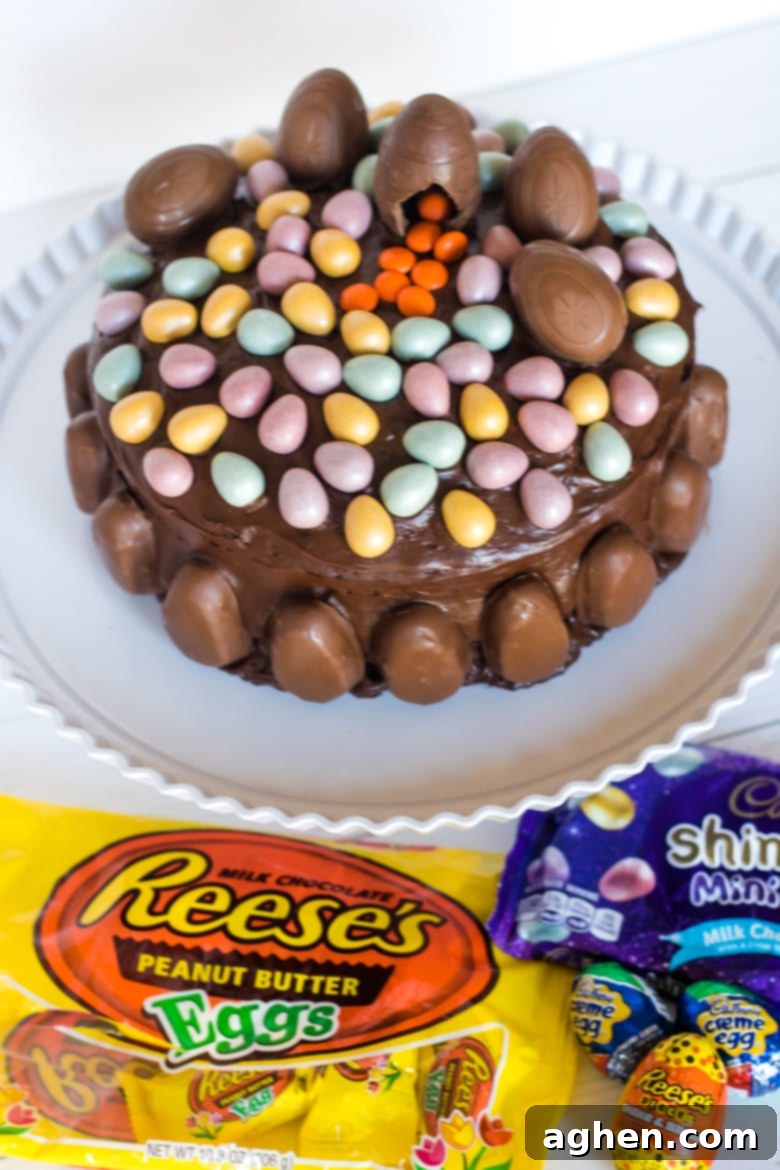
My shopping list was carefully curated to include a mix of classic Easter delights that appeal to everyone. I made sure to pick up plenty of CADBURY Crème Eggs, with their iconic creamy centers, and REESE’S Milk Chocolate Eggs, offering that perfect blend of peanut butter and chocolate – these are absolute staples for any Easter basket, and they make even better cake decorations! To infuse the cake with extra flair, vibrant spring colors, and varied textures, I also grabbed a few REESE’S Shake & Break Eggs and a generous bag of CADBURY Shimmer Mini Eggs. These shimmering mini marvels are not just incredibly delicious; their beautiful pastel hues and delicate crunchy shell perfectly complement the rich, moist chocolate cake, adding both visual appeal and a delightful textural contrast.

For ultimate convenience, don’t forget about Walmart Grocery Pickup! It’s an absolutely fantastic option if you’re pressed for time or simply prefer the ease of online ordering. You can effortlessly order your boxed cake mix, pre-made frosting, and all your cherished HERSHEY’S Easter candies online, then simply pick them up without even having to step out of your car. This streamlines your holiday preparations, making your festive baking experience even more stress-free and enjoyable!
Once all my sweet treasures were safely home, I was buzzing with excitement, eager to assemble this truly over-the-top Easter cake. And I must say, I was absolutely thrilled with the final result! It wasn’t just visually stunning and incredibly vibrant; the taste surpassed all expectations. Every single person at our gathering was literally begging for a second slice, which, as any baker knows, is the most wonderful compliment one can receive. This cake isn’t just a dessert; it’s a guaranteed hit!
If you’re searching for another fun and equally festive Easter cake idea that’s sure to impress your guests, make sure to explore this beautiful pink Easter cake roll. It’s another delightful and creative way to bring sweet joy to your spring celebrations!
How to Make an Easter Candy Cake: A Simple Step-by-Step Guide
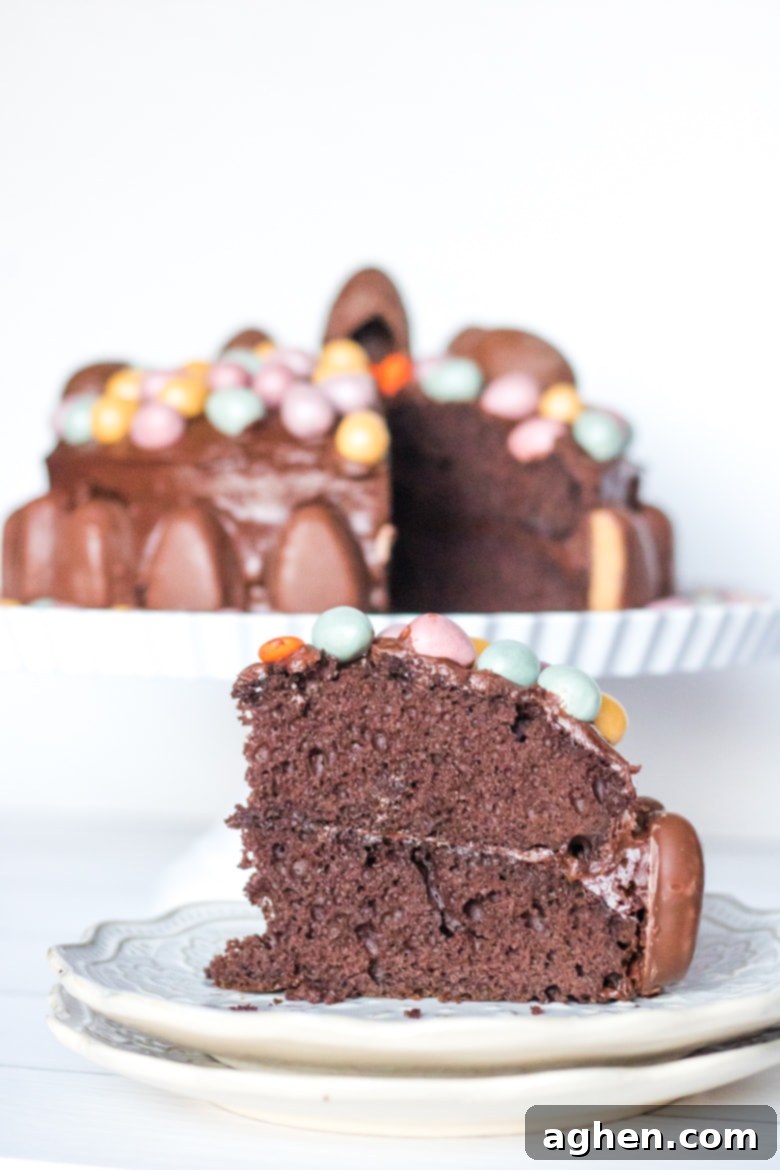
The thought of creating a showstopping Easter Candy Cake might seem daunting, but it’s actually surprisingly simple, thanks to a few clever shortcuts that save a significant amount of time and effort. By starting with a high-quality boxed chocolate cake mix and complementing it with ready-to-use whipped chocolate frosting, you create a dessert that is truly very easy to make, even for those new to baking. This approach ensures you get a consistently moist and flavorful cake every single time, allowing you to channel all your creative energy and excitement into the truly magical part: the decorating!
Honestly, the real “wow” factor and undeniable charm of this Easter cake stem entirely from its decorating! It’s in this creative stage that your personal touch truly shines through, transforming simple, humble cake layers into an unforgettable, festive, and candy-laden masterpiece that looks as good as it tastes.
Let’s Get Started: Preparing Your Cake Layers
Your journey to an incredible Easter cake begins with perfectly baked layers. Start by carefully following the instructions provided on your chocolate cake mix package to prepare two 8-inch or 9-inch round cake layers. To ensure a smooth release, meticulously grease and flour your cake pans, and for extra assurance, line the bottoms with a circle of parchment paper. Once your cake batter is mixed to perfection, divide it evenly between the two prepared pans. Bake according to the package directions, typically until a toothpick inserted into the center emerges clean and crumb-free. The delightful aroma of baking chocolate cake will quickly fill your kitchen, setting a wonderful tone for the festive creation to come!
Once your beautifully baked cakes are removed from the oven, resist the urge to handle them immediately. Allow them to cool in their pans for a crucial 10-15 minutes; this initial cooling period helps the cake layers to firm up and prevents them from breaking when inverted. After this, carefully invert them onto a wire cooling rack to cool **fully** to room temperature. This step is absolutely critical! Attempting to frost warm or even slightly warm cakes will inevitably lead to melted, sliding frosting and a messy, frustrating experience. Patience truly is a virtue here, ensuring your chocolate canvas is perfectly prepared for its sweet transformation!
Assembling and Frosting Your Decadent Chocolate Canvas
With your cake layers completely cooled, it’s time for the exciting assembly and frosting stage. Begin by selecting your serving platter or cake stand. Choose one that is not only sturdy but also complements the vibrant, festive look you’re about to create with your finished cake. Carefully place your first chocolate cake layer onto the stand, ensuring it’s perfectly centered. Using an offset spatula or a simple butter knife, spread a generous and even layer of your creamy whipped chocolate frosting over the top of this first cake layer. This luscious layer will serve as a delicious filling and also act as the adhesive to secure your second cake layer in place.
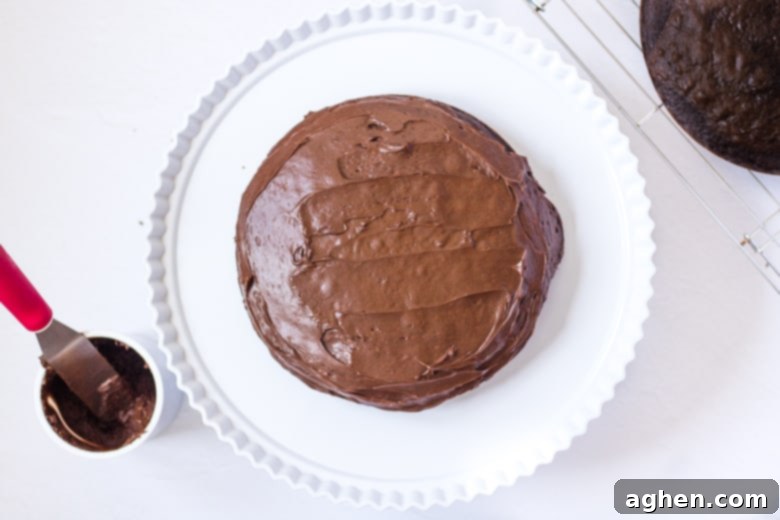
Now, carefully position the second cake layer directly on top of the first, aligning it as precisely as possible. This is where the true transformation begins! Apply the remaining chocolate frosting to generously cover both the top and the sides of the entire cake, using smooth, even strokes. Don’t feel pressured to achieve absolute perfection; a slightly rustic or textured frosting job can actually add to the cake’s charming, homemade appeal, especially since it will soon be adorned with an abundance of colorful candies. If you’re aiming for an exceptionally smooth finish, consider applying a thin “crumb coat” first, chilling the cake for about 15 minutes to set the crumbs, and then applying a final, thicker layer of frosting for that professional, flawless look.
The Grand Finale: Decorating with a Bounty of Easter Candies!
This is the moment your Easter Candy Cake truly springs to life! Gather all those beautiful HERSHEY’S Easter candies you thoughtfully collected. Your first step in decorating is to unwrap approximately 20 REESE’S Eggs. Arrange these iconic peanut butter and chocolate treats around the entire perimeter of the cake. Gently press them into the soft chocolate frosting at the base of the top cake layer, creating a delightful and edible border that is both visually appealing and incredibly delicious.
Next, to create that dramatic, overflowing candy effect that’s sure to “wow” your guests, take one REESE’S Shake & Break Egg. Carefully unwrap it and then gently poke a small hole or carefully crack it open. Position this cracked egg strategically on top of the cake, arranging it so that the vibrant REESE’S Pieces Candy inside appears to be spilling out onto the cake’s surface. This clever detail instantly creates a dynamic, playful focal point that immediately captures attention and signals that this cake is truly something extraordinary and fun!
Finally, utilize the remaining colorful CADBURY Crème Eggs and the sparkling CADBURY Shimmer Mini Eggs to further enhance and decorate the top of your cake. Arrange them artfully in the remaining open spaces. You can create charming patterns, group candies together for impact, or simply scatter them whimsically for a playful, festive look. The delightful variety of colors, shapes, and textures from these beloved HERSHEY’S candies will make your Easter cake pop with an abundance of festive cheer and irresistible appeal.
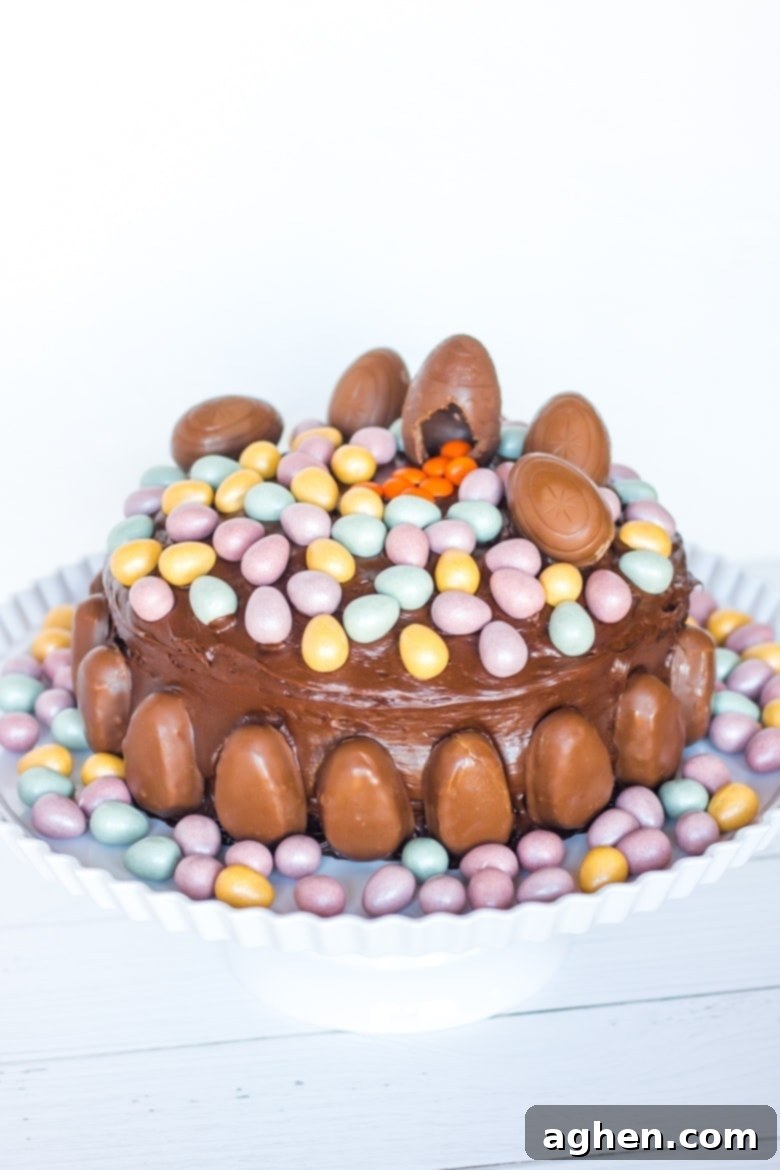
For an extra touch of festive charm, you can extend your candy decorations beyond the cake itself to your cake stand or serving platter. Simply sprinkle a handful of additional CADBURY Shimmer Mini Eggs around the base of the cake. I found this to be the perfect, effortless way to fill in any empty space, adding an extra layer of sparkle, color, and texture to the entire presentation. As an added bonus, my family absolutely loved having these extra mini eggs for snacking on before it was even time to cut the cake – a delightful pre-dessert treat!
Expert Tips for Success and Creative Variations
To ensure your Easter Candy Cake is an absolute triumph, consider these helpful tips and feel free to get creative with variations:
- Ensure Cakes are Fully Cooled: This golden rule of baking cannot be overstated! Attempting to frost cakes that are even slightly warm will inevitably lead to melted, sliding frosting and a less-than-perfect appearance. Absolute patience during the cooling process is key.
- Opt for Quality Frosting: While using store-bought frosting is a fantastic time-saver, selecting a good quality whipped chocolate frosting will make a significant difference in both the taste and texture of your finished cake.
- Chill for Cleaner Slices: For beautifully neat and clean slices, I highly recommend chilling your fully decorated cake for at least 20-30 minutes before serving. This allows the frosting and the candies to set firmly, making for a much smoother and more elegant cut.
- Explore Creative Candy Combinations: Don’t limit yourself to just the candies I’ve used! Feel absolutely free to experiment with other HERSHEY’S Easter candies or your family’s personal favorites. Small chocolate bunnies, miniature chocolate bars, colorful jelly beans, or even pastel-colored M&M’s could all work wonderfully to personalize your cake.
- Add Extra Sparkle with Sprinkles: For an even more dazzling effect, consider adding some Easter-themed sprinkles or edible glitter to the frosting before you begin placing the larger candies. This adds an extra layer of festive shimmer.
- Experiment with Different Cake Flavors: While a rich chocolate cake provides a classic and beloved base, this candy-laden masterpiece would also be incredibly delicious with a vanilla, funfetti, or even a light and zesty lemon cake base for a brighter spring flavor profile.
I sincerely hope that you and your family absolutely adore creating and devouring this eggstra fun, wonderfully festive, and undeniably delicious Easter candy cake. It’s truly a memorable and joyful way to sweeten your holiday celebration, creating cherished memories with every candy-topped bite!
More Delicious Easter Dessert Ideas to Explore
If your sweet tooth is still craving more inspiration for your Easter feast, dive into these other delightful and easy-to-make recipes. Each one is perfect for adding an extra touch of joy and deliciousness to your holiday table, ensuring there’s a treat for everyone to love!
- Easter Magic Cookie Bars: A truly decadent, layered bar cookie that’s packed with a delightful combination of chocolate, coconut, and other sweet delights.
- Easter Snack Mix (aka Bunny Bait): A fun, irresistibly sweet and salty mix that’s perfect for casual snacking, party favors, or even thoughtful little gifts.
- Peeps Twinkie Car: A super creative, whimsical, and playful treat that children (and adults!) will absolutely adore making and, of course, eating.
- Easter Poke Cake: A wonderfully moist cake that’s infused with delicious, colorful Jell-O or creamy pudding, making it perfectly refreshing for spring.
- Easter Oreo Truffles: Easy, no-bake truffles shaped like adorable little bunnies, these are always a true crowd-pleaser and a delightful bite-sized treat.
Easter Candy Cake
Author: Jaclyn
Ingredients
- 15.25 chocolate cake mix + ingredients called for on the box
- 1 tub whipped chocolate frosting
- 20 REESE’S Eggs
- 4 Cadbury Eggs
- 1 bag Cadbury Shimmer Mini Eggs
- 1 REESE’S Shake & Break Egg
Instructions
-
Prepare two 9 inch round cakes as directed on the cake mix package. Allow cakes to cool fully.
-
Place one layer on a cake stand or flat plate. Use an offset spatula or butter knife to top with chocolate frosting. Add the second layer of cake and continue frosting until the entire cake is covered (top and side).
-
Line the perimeter of the cake with REESE’S Eggs.
-
Top the cake with a REESE’S Shake & Break Egg cracked opened, and the REESE’S Pieces inside spilling out onto the cake. Use Cadbury Eggs and Cadbury Shimmer Mini Eggs to further decorate the top of the cake.
-
Slice, serve, and enjoy!

Did You Make This Recipe?
Share it with me on Instagram @crayonsandcravings and follow on Pinterest @crayonsandcravings for even more!
Pin Recipe
Leave A Review
Pin this Easter Candy Cake for Later!
