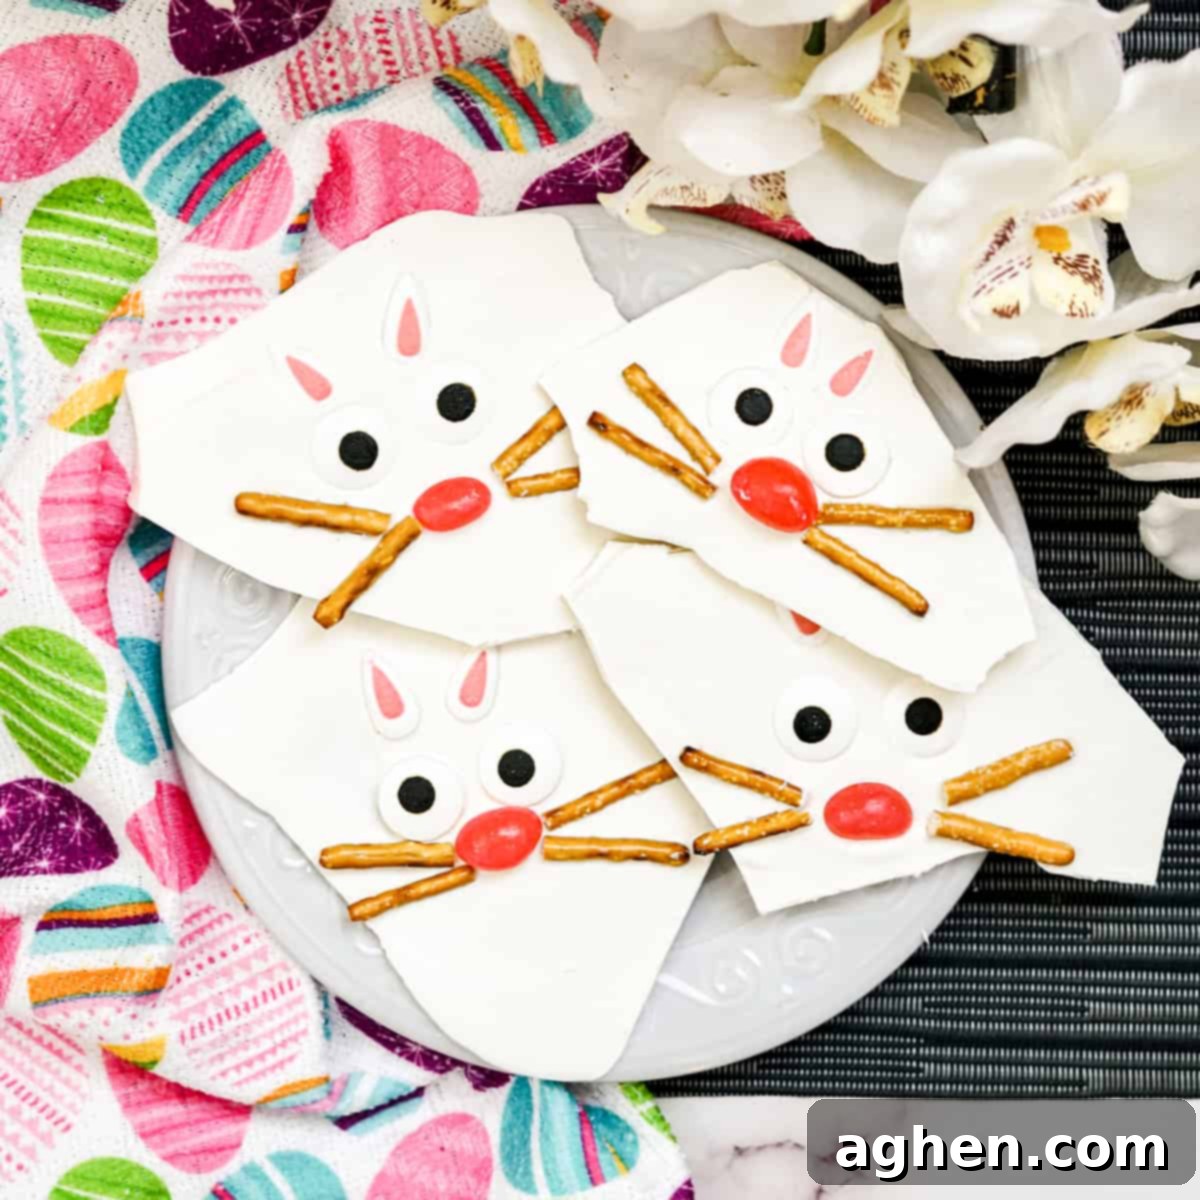
Easy No-Bake Easter Bunny Bark: A Fun & Adorable Holiday Treat
Get ready to hop into spring with an irresistibly cute and incredibly simple treat: Easter Bunny Bark! Forget the idea that chocolate bark is exclusively for Christmas. This vibrant, festive, and utterly adorable recipe is here to prove that Easter is the perfect time for a sweet, no-bake confection that brings smiles to everyone’s faces, especially the little ones.
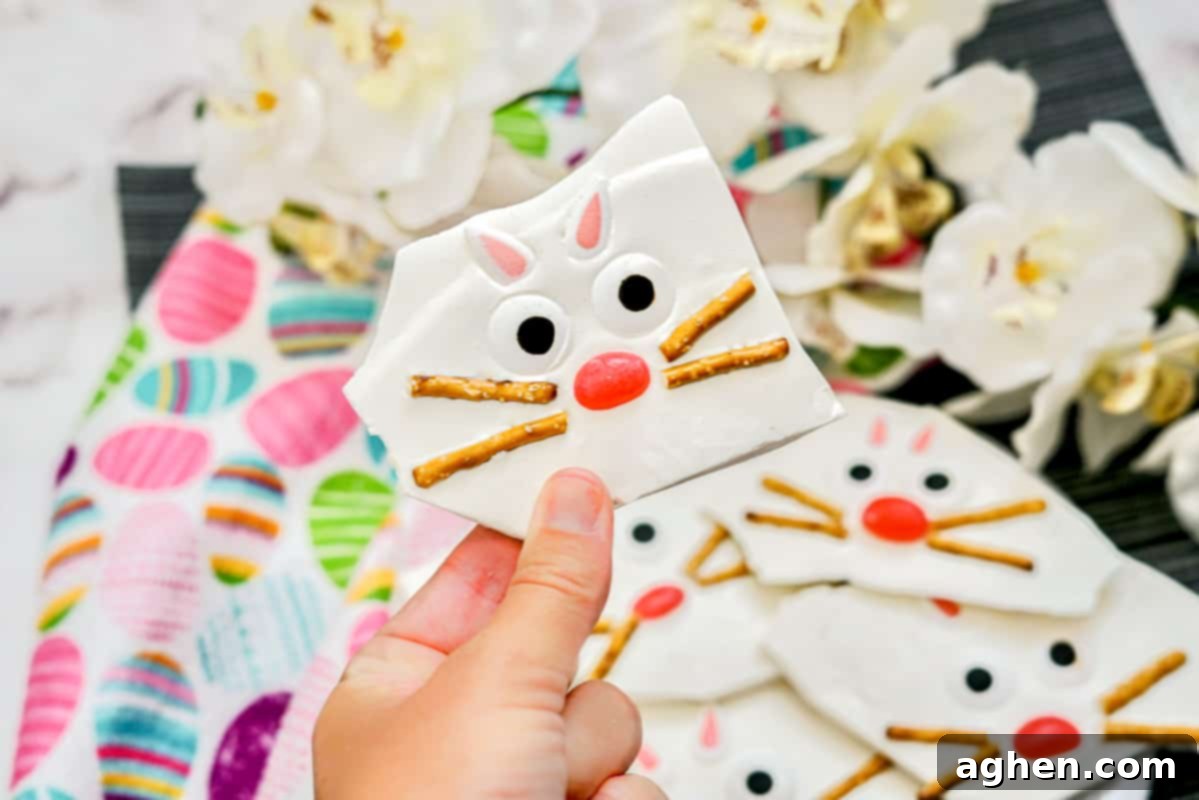
This Easter Bunny Bark isn’t just a dessert; it’s an experience. Made with creamy white chocolate melts, crunchy pretzels, sweet jelly beans, and charming candy eyes and ears, it transforms into a canvas for creating delightful bunny faces. It’s the ideal project for tiny hands in the kitchen, offering a fun, creative outlet that culminates in a delicious reward.
Much like our beloved Bunny Bait Snack Mix, refreshing Easter Bunny Punch, and whimsical Peeps Mobiles, this sweet Easter treat is guaranteed to be a hit at any Easter gathering or simply as a special snack for your family. Its charming appearance makes it a standout on any Easter dessert table, and its ease of preparation makes it a favorite for busy parents and aspiring young chefs alike.
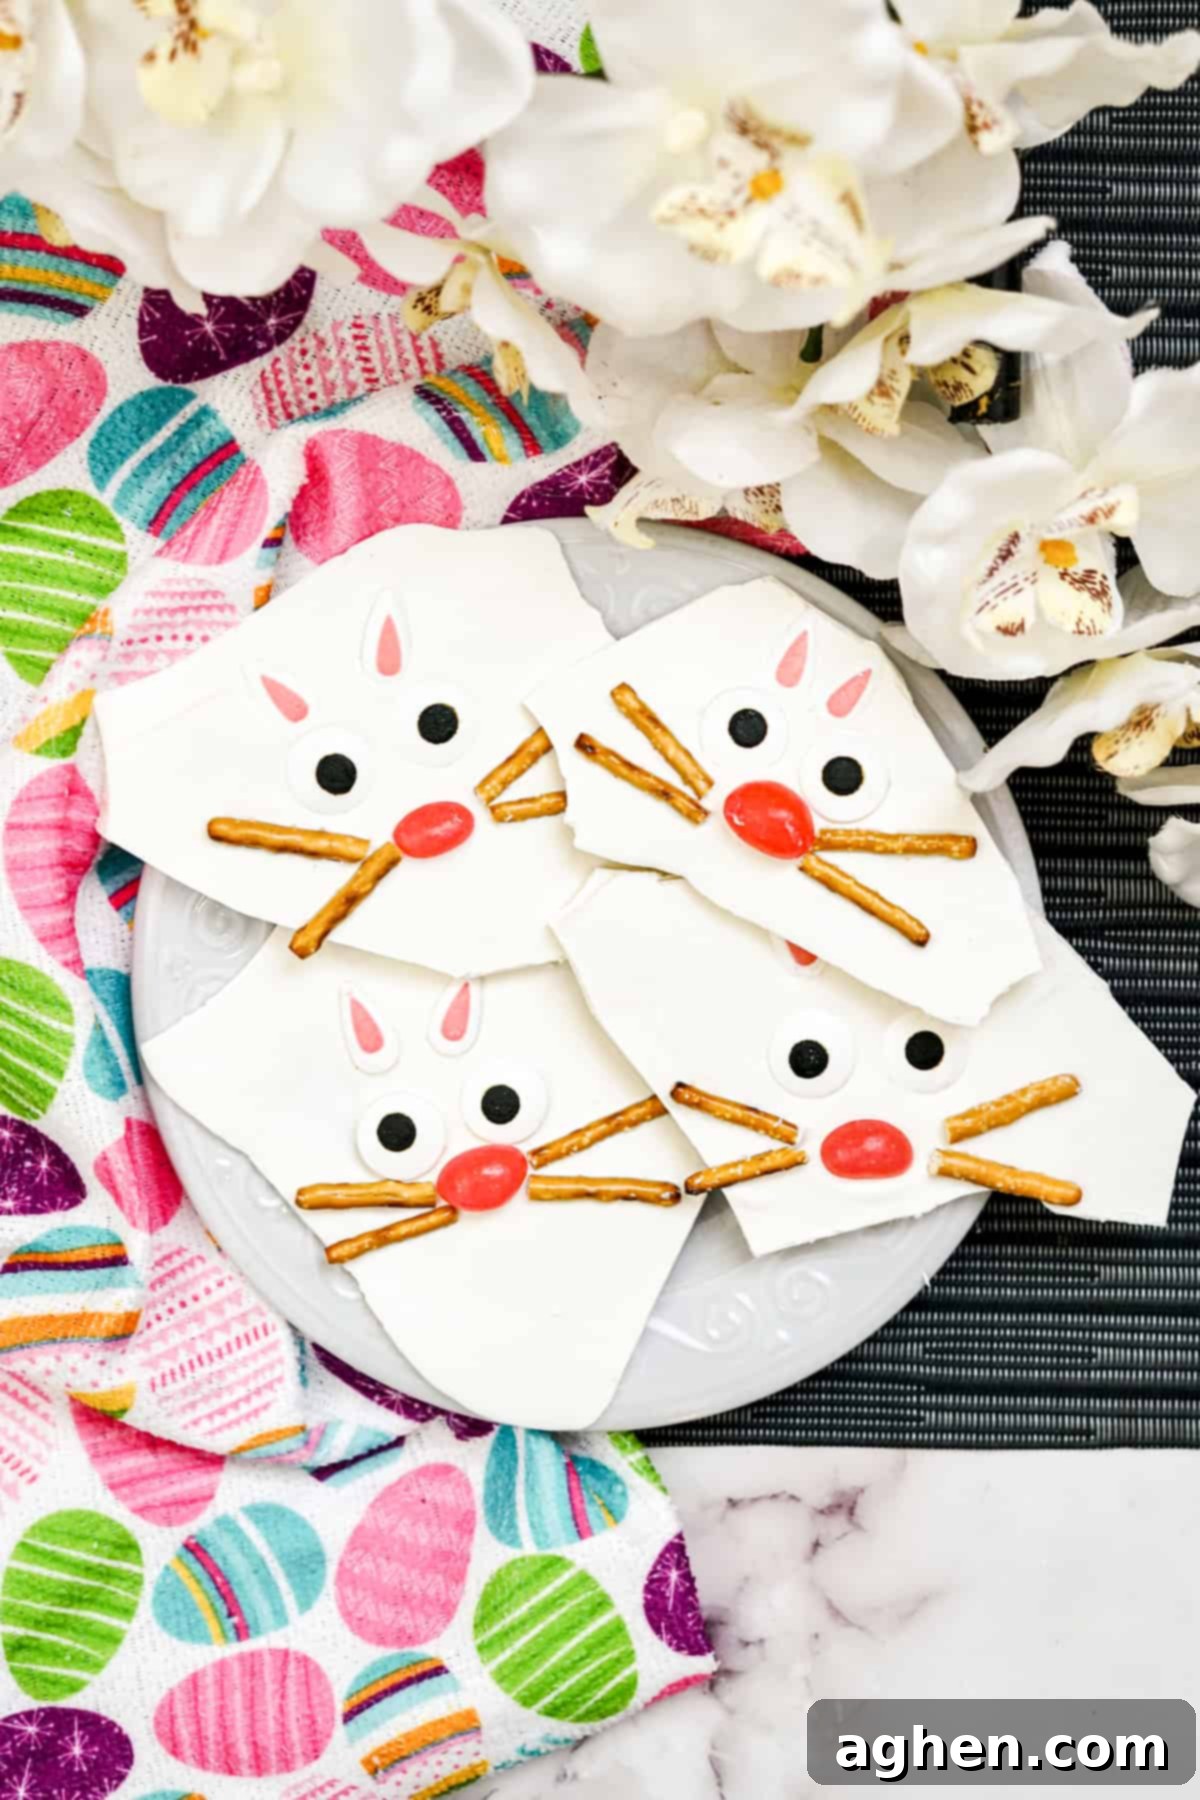
Why You’ll Love This Easy Easter Bunny Bark Recipe
There are countless reasons why this Easter Bunny Bark will become a new holiday tradition in your home:
- No-Bake Simplicity: No oven required! This recipe is perfect for hot days or when you just want a quick and easy dessert without the hassle of baking.
- Kid-Friendly Fun: Little hands will absolutely love helping to arrange the candies and pretzels to bring these cute bunny faces to life. It’s a fantastic activity for fostering creativity and getting children involved in the kitchen.
- Quick to Make: From start to finish, this treat comes together in a flash, making it ideal for last-minute party preparations or spontaneous sweet cravings.
- Totally Customizable: While we love the classic bunny look, you can easily swap out candies, colors, or add sprinkles to make it uniquely yours.
- Perfect for Gifting: Package pieces of this charming bark in cellophane bags with a ribbon for a thoughtful homemade Easter gift.
If you’re looking for another delightful bark variation, our Easter Bark recipe using saltine crackers offers a different twist. Or for a savory-sweet breakfast idea, try these cute Bunny Pancakes.
Gather Your Ingredients for Bunny Bark
This recipe calls for a handful of simple ingredients, readily available at most grocery stores. Here’s what you’ll need to create your adorable Easter Bunny Bark:
- White Candy Melts: These are crucial for the bright white base of your bunnies. You can usually find them in the baking or cake decorating aisle at stores like Walmart, or order them online here. If candy melts aren’t available, almond bark (vanilla flavored) makes an excellent substitute; just be sure to chop it into smaller pieces before melting for even consistency.
- Pretzel Sticks: These are cleverly broken in half to form the bunnies’ whiskers, adding a perfect salty crunch that balances the sweetness. Any standard pretzel stick will do.
- Pink Jelly Beans: These will serve as the cute little bunny noses. I often opt for Jelly Belly because their smaller size works wonderfully for the facial features. However, feel free to use your favorite brand of pink jelly beans. Alternatively, a single pink Easter M&M can also make a great nose.
- Candy Bunny Ears: These are the star of the show for giving your bunnies their distinctive look. Look for them in the baking or cake decorating sections of major retailers like Walmart, or conveniently purchase them online. If you can’t find pre-made candy ears, don’t worry! You can get creative and draw bunny ears directly onto the bark using edible markers after the bark has set.
- Candy Eyes: Essential for giving your bunnies their adorable, expressive faces! These edible candy eyes are typically found alongside other baking decorations and supplies, or you can easily order them online.
Step-by-Step Guide: How to Make Adorable Easter Bunny Bark
Creating this festive Easter Bunny Bark is incredibly straightforward. Just follow these simple steps:
- Prepare Your Workspace: Before you begin, line a baking sheet with wax paper or parchment paper. This is essential for easy removal and cleanup of your bark. Set it aside.
- Melt the Candy Melts: Place your white candy melts (or chopped almond bark) into a microwave-safe bowl. Microwave in short bursts, typically 30-second increments, stirring thoroughly between each interval. Continue until the candy is completely melted and smooth. This usually takes about 90 to 120 seconds in total, depending on your microwave and the quantity. Be careful not to overheat, as this can cause the chocolate to seize.
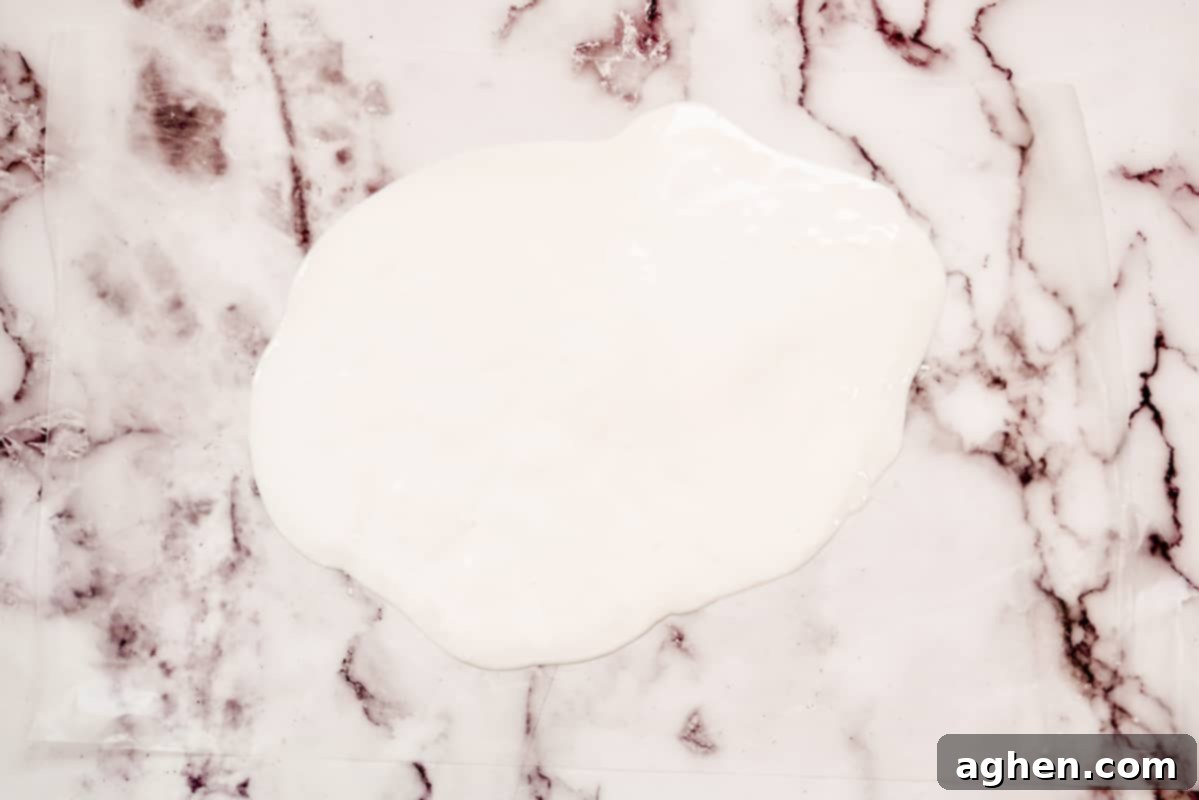
- Spread the Candy: Pour the melted white candy onto the prepared baking sheet. Use an offset spatula or the back of a spoon to spread it into an even layer, about ⅛ inch thick. You don’t need to cover the entire sheet; aim for a rectangle or square shape that allows you to create individual bunny faces.
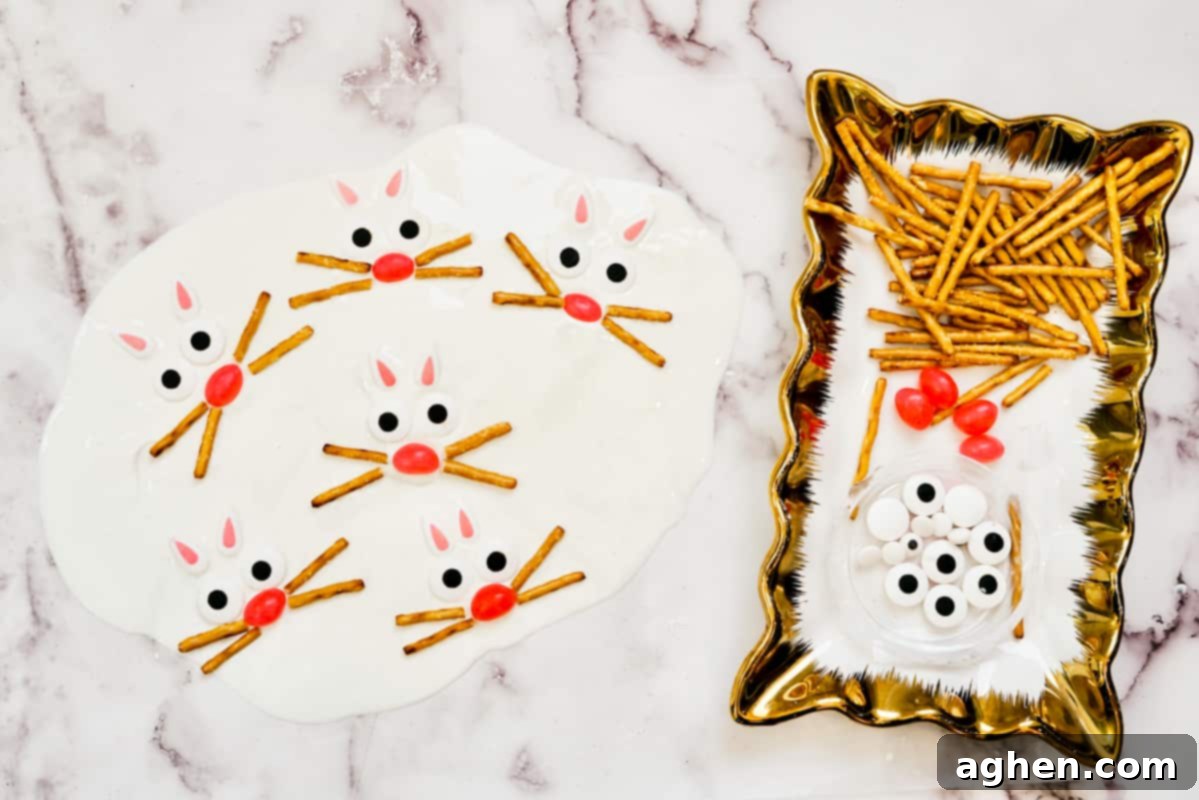
- Create Bunny Faces: This is where the fun begins! While the candy is still warm and soft (work quickly before it starts to set), gently press the candy ears, candy eyes, pink jelly beans (for noses), and broken pretzel stick halves (for whiskers) into the melted candy to create your adorable bunny faces. Arrange them in rows or a playful pattern across the bark.
- Chill to Set: Once all your bunny faces are complete, place the baking sheet in the refrigerator. Chill for approximately 60 minutes, or until the bark is completely firm and easily peels away from the wax paper.
- Break and Enjoy: Once fully set, remove the bark from the refrigerator. Carefully break it into individual pieces, separating each cute bunny face. Now it’s ready to serve and enjoy!
Expert Tips for Perfect Bunny Bark Every Time
- Don’t Overheat Chocolate: When melting candy melts, overheating can make them thick and difficult to spread. Always microwave in short increments and stir well. If they are too thick, you can add a small amount of vegetable shortening (like Crisco) or paramount crystals to thin them out, a teaspoon at a time.
- Work Quickly: The melted candy will start to set relatively fast. Have all your candy eyes, ears, jelly beans, and pretzels ready and organized before you start spreading the chocolate, so you can decorate without delay.
- Score for Clean Breaks: If you want more uniform pieces of bark, use a sharp knife to lightly score the still-soft, but beginning-to-set bark where you plan to break it. This creates guidelines for cleaner breaks once it’s fully hardened.
- Double the Recipe: This recipe makes about 6 delightful pieces of bark. If you’re hosting a larger gathering or simply want more to share (or keep!), it’s incredibly easy to double or even triple the ingredients and spread them out on a single larger sheet pan.
- Add Colorful Sprinkles: For an extra pop of color and festivity, sprinkle bright and colorful sprinkles into the empty spaces between your bunny faces before the bark sets. This adds a playful touch that kids adore.
- Experiment with Colors: While white chocolate creates a classic look, consider using pink candy melts or pastel-colored candy melts for a different base. This can add a wonderful springtime hue to your bark.
- Customize with Other Candies: Don’t limit yourself to just the suggested candies! Small M&Ms, mini marshmallows, or even chopped Easter-themed candies can be incorporated to add more texture and flavor.
Creative Variations to Try
While the classic Easter Bunny Bark is always a winner, here are some fun variations to explore:
- Chocolate Base Variations: Instead of white candy melts, you can use milk chocolate, dark chocolate, or even swirl different chocolates together for a marbled effect. Just ensure they are melted properly.
- Coconut Bunny Bark: Sprinkle shredded coconut over the melted white chocolate before adding the bunny features for a “fluffy” bunny texture and tropical flavor.
- Cookie Cutter Shapes: Before the bark fully sets, use Easter-themed cookie cutters (like egg, chick, or more bunny shapes) to cut out individual pieces instead of breaking them. This requires working very quickly.
- Nutty Bunny Bark: For those who enjoy a nutty crunch, sprinkle finely chopped almonds or pecans over the melted chocolate before placing the candy features.
- Peeps Bunny Bark: For an even more “bunny” theme, consider gently pressing whole Peeps into the melted chocolate before adding smaller candy details for eyes and whiskers directly onto the Peeps.
Storage Instructions
To keep your Easter Bunny Bark fresh and delicious, follow these storage guidelines:
- Room Temperature: Store your bark in an airtight container at room temperature for up to 5 days. Ensure it’s kept in a cool, dry place away from direct sunlight to prevent melting.
- Refrigeration: For longer storage, you can keep the bark in an airtight container in the refrigerator for up to two weeks. If storing in the fridge, allow it to come to room temperature for a few minutes before serving for the best texture and flavor.
Frequently Asked Questions (FAQs)
Q: Can I use regular white chocolate chips instead of candy melts or almond bark?
A: Yes, you can. However, white chocolate chips might be trickier to melt to a smooth, spreadable consistency and may not set as firm as candy melts or almond bark, which are designed for melting and coating. If using chips, add about a teaspoon of coconut oil or vegetable shortening per cup of chocolate chips while melting to help achieve a smoother consistency.
Q: How long does Easter Bunny Bark take to set?
A: In the refrigerator, this bark typically sets in about 60 minutes. If you’re in a hurry, you can put it in the freezer for about 15-20 minutes, but keep a close eye on it to prevent condensation.
Q: Can I make this bark ahead of time for Easter?
A: Absolutely! Easter Bunny Bark is a fantastic make-ahead treat. You can prepare it up to two weeks in advance if stored properly in an airtight container in the refrigerator.
Q: What if I can’t find candy bunny ears?
A: No problem! You have a few options: you can use two small white chocolate covered pretzels or marshmallow pieces for ears. Another creative solution is to draw bunny ears onto the set bark using edible food markers or use small, pointed pieces of white candy as a base. You could also pipe small ear shapes with white frosting and let them set before adding.
Q: My chocolate seized while melting. What went wrong?
A: Chocolate seizing (becoming thick and crumbly) usually happens due to two main reasons: overheating or exposure to even a tiny amount of water. To prevent this, melt chocolate in short bursts in the microwave, stirring often. Ensure your bowl and utensils are completely dry, as a single drop of water can ruin the texture.
Q: Is this recipe gluten-free or dairy-free?
A: The base recipe is not inherently gluten-free (due to pretzels) or dairy-free (due to white candy melts). To make it gluten-free, substitute with gluten-free pretzel sticks. For a dairy-free version, you would need to find dairy-free white chocolate melts or a suitable dairy-free white coating, and ensure all candies are dairy-free.
More Fun Easter Dessert Ideas
Looking for more delightful treats to celebrate Easter? Here are some other festive recipes to try:
- Peeps Houses
- Easter Candy Cake
- Carrot Patch Brownies
- Easter Cake Roll
- Flower Pretzel Bites
Easter Bunny Bark
Author: Jaclyn
15 minutes
1 hour
1 hour
15 minutes
6
servings
Saved!
Ingredients
- 1 White Candy Melts
- 12 Candy Eyes
- 12 Candy Bunny Ears
- 6 Pink Jelly Beans
- 12 Pretzel Sticks broken in half
Instructions
-
Line a baking sheet with wax paper or parchment paper and set it aside.
-
Add the white candy wafers to a microwave-safe bowl. Microwave in 30-second increments, stirring well between each, until melted (this should take 90-120 seconds total).
-
Spread the white melted candy onto the baking sheet in an even layer, about ⅛ inch thick. You will not cover the entire baking sheet.
-
Immediately press candy ears, candy eyes, jelly beans, and pretzels into the melted candy to create bunny faces.
-
Refrigerate bark until it is fully set, about 60 minutes. The bark is ready when it easily peels off the wax paper.
-
Once set, break the bark pieces to separate each bunny’s face.
Notes
Store bark in an airtight container on the countertop for up to 5 days or in the fridge for up to 2 weeks.
Nutrition
Serving:
1
g
|
Calories:
320
kcal

Did You Make This Recipe?
Share it with me on Instagram @crayonsandcravings and follow on Pinterest @crayonsandcravings for even more!
Pin Recipe
Leave A Review

Whether you’re looking for a quick activity with the kids, a charming addition to your Easter brunch, or a simple yet impressive homemade gift, this Easter Bunny Bark recipe is a perfect choice. It’s incredibly easy, endlessly customizable, and guaranteed to bring joy and sweetness to your holiday celebrations. Happy Easter and happy making!
