Easy Ladybug Oreos: Adorable Valentine’s Day Treats That Kids Will Love (No Baking Required!)
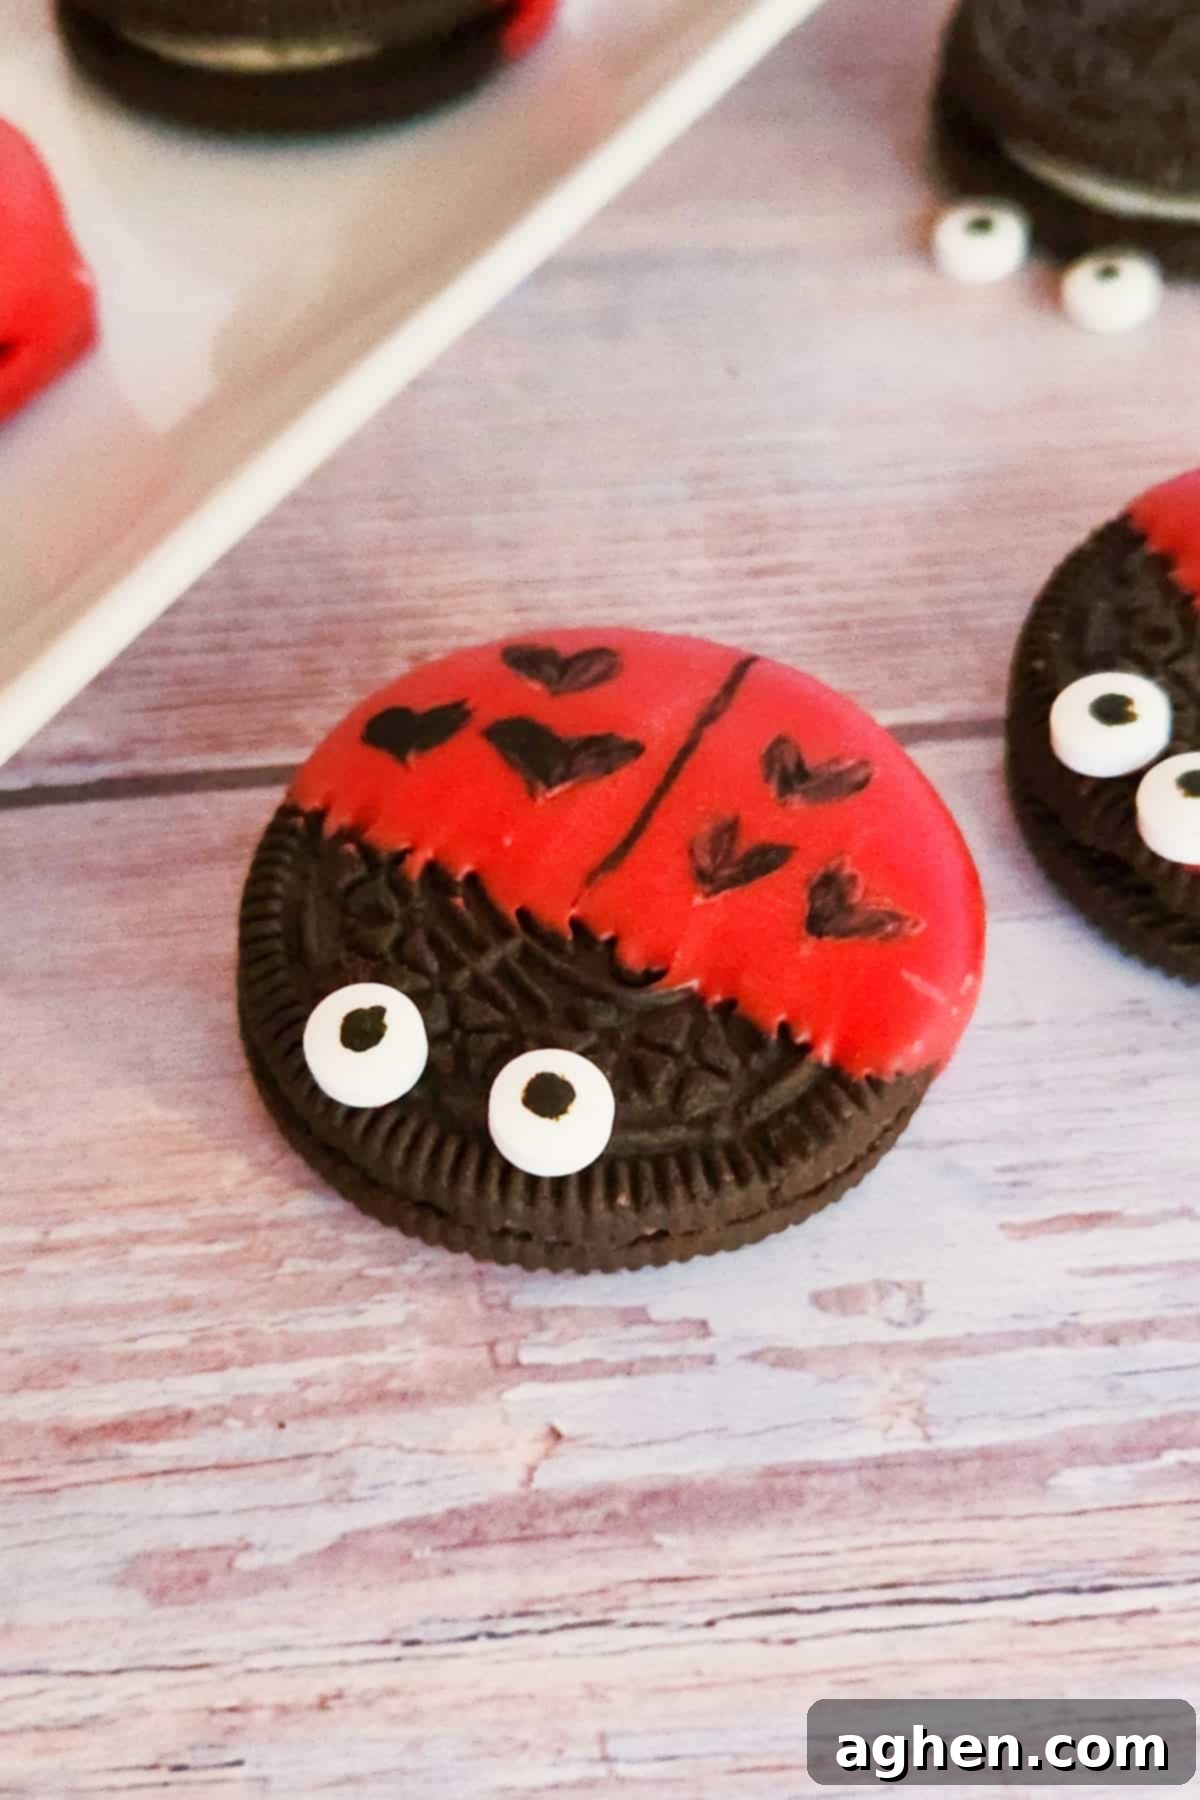
Get ready to sprinkle some cuteness and joy into your Valentine’s Day celebrations with these absolutely adorable Ladybug Oreos! If you’re searching for a simple, fun, and irresistibly charming treat that will capture the hearts of your little ones – and grown-ups too – look no further. These no-bake delights are incredibly easy to make, requiring absolutely no prior cookie-decorating experience, making them perfect for even the most novice bakers or busy parents.
With Valentine’s Day just around the corner, my kitchen is brimming with sweet ideas, and I’m thrilled to share this delightful recipe with you. It’s part of the 7th annual Good Cookies Food Bloggers’ Valentine’s Event, a wonderful initiative that supports a crucial cause, which I’ll tell you more about below.

When it comes to crafting cute and kid-friendly desserts, these Oreo love bugs are as straightforward as it gets. With just four basic ingredients and about half an hour of your time, you can whip up a batch of these festive Valentine’s Day ladybugs. Imagine the smiles when your kids discover one of these charming treats in their lunchboxes on February 14th!
They make fantastic classroom treats for Valentine’s Day parties, much like these equally delightful Butterfly Snack Bags. If your child’s school has specific requirements for packaged treats, these Love Bug Fruit Cups offer a healthy and compliant alternative. But the fun doesn’t stop with Valentine’s Day! These easy love bug Oreos are incredibly versatile. They’re an absolute hit as a cute party dessert for a ladybug-themed baby shower, a child’s birthday party, or any occasion that calls for a touch of whimsy. For a healthier, fruit-based option, you might also adore these Strawberry Ladybugs, featuring fresh strawberries and a hint of chocolate. Ready to bring these sweet, little ladybugs to life? Grab your favorite Oreo cookies, and let’s start decorating!
Be a Good Cookie: Supporting Cookies for Kids’ Cancer
Before we dive into the delicious details of this recipe, I want to take a moment to highlight a truly meaningful cause: the Good Cookies Valentine’s Event and Cookies for Kids’ Cancer. It’s a sobering fact that cancer remains the leading cause of death by disease among children in the U.S.
That’s why I’m proud to join forces with numerous other food bloggers in this collective effort to raise awareness and much-needed funds to support the fight against pediatric cancer. Every child deserves a chance at a healthy life, and research is vital to making that a reality.
Please consider joining us in making a significant difference by donating to Cookies for Kids’ Cancer!
A heartfelt thank you goes out to everyone who has already contributed. If you haven’t had the chance to donate yet, I encourage you to become a part of this incredible mission. Your contribution, no matter the size, helps tremendously. You can donate here today. Every little bit truly helps.
Essential Ingredients for Adorable Ladybug Oreo Cookies
This section provides a detailed look at the ingredients required, along with helpful notes and potential substitution options. For precise measurements and step-by-step instructions, please refer to the printable recipe card located at the conclusion of this article.
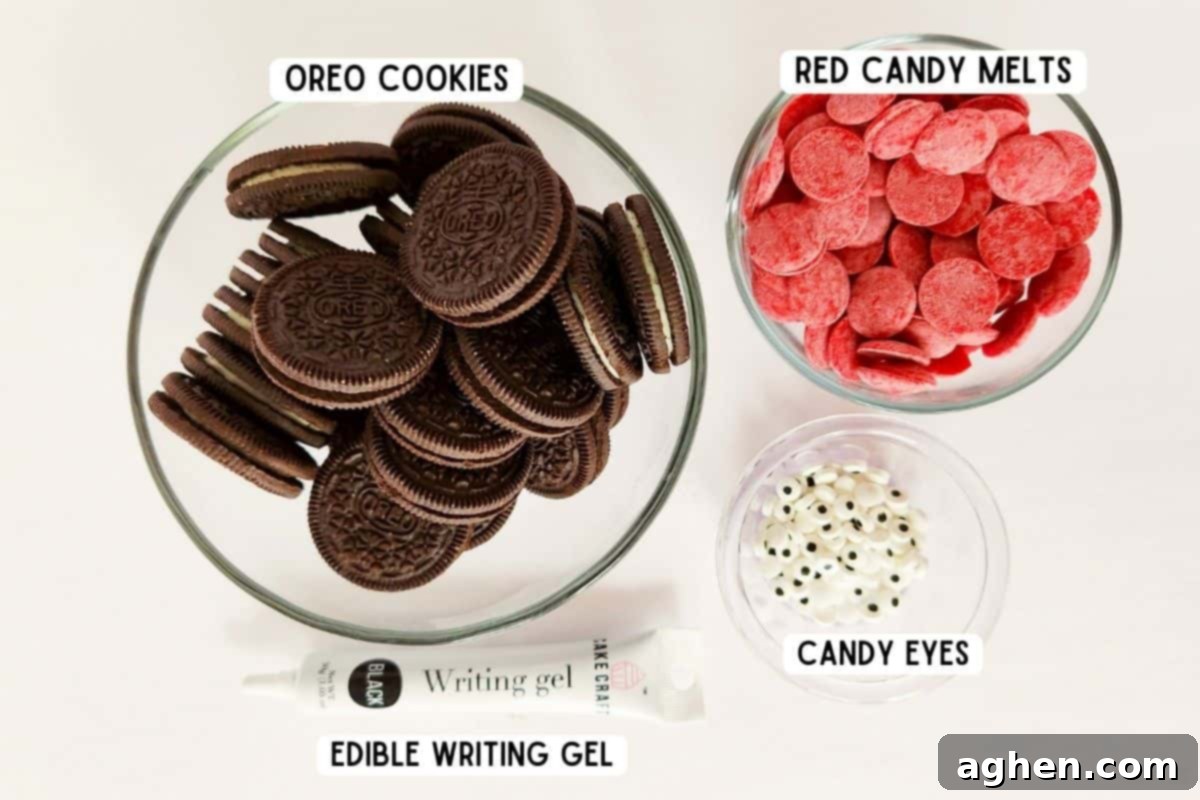
- Oreo Cookies: While I personally prefer classic Oreo cookies for their iconic flavor and texture in these “lovebug” treats, any brand of chocolate sandwich cookie will work wonderfully. Feel free to experiment with different varieties like Double Stuf or Mega Stuf Oreos for an extra creamy center, or even Golden Oreos if you want to create a different colored bug.
- Red Candy Melts: These are crucial for creating the vibrant ladybug shell. I typically use Wilton brand candy melts due to their consistent quality and easy melting properties. You can usually find them readily available in the baking or cake decorating aisle of most major grocery stores, craft stores, or online. Ensure they are fresh for optimal melting and smoothness.
- Black Edible Marker: This is a key tool for adding the distinctive ladybug line and heart-shaped spots. It’s paramount that you use an actual edible marker, designed specifically for food, to ensure safety and quality. These food coloring pens are commonly found in the cake decorating section of stores or can be purchased online. As an alternative, you can use black gel decorator icing, but be aware that it may not harden completely, potentially leading to smudges if the cookies are stacked or transported.
- Candy Eyes: These adorable little eyes bring your ladybugs to life! You’ll need two candy eyes per cookie, so plan accordingly (e.g., 30 eyes for 15 cookies). Like candy melts and edible markers, they are usually located in the cake decorating or baking aisle. If you can’t find them, a tiny dot of white icing with a smaller black dot can create a similar effect.
Tools and Equipment You’ll Need for Ladybug Oreo Decorating
To effortlessly create these charming ladybug cookies for your Valentine’s Day celebration or any special occasion, gather the following simple tools and supplies:
- Parchment Paper or Wax Paper: Essential for lining your cookie sheet, preventing the dipped Oreos from sticking as they set and making cleanup a breeze.
- Cookie Sheet: Provides a flat surface for your cookies to dry and harden evenly.
- Microwave-Safe Bowl: Used for melting the candy melts efficiently and safely.
- Red Candy Melts: Your primary decorative coating.
- Black Edible Marker: For drawing the iconic ladybug features.
- Candy Eyes: To give your ladybugs personality.
- Toothpick: A versatile tool for placing candy eyes and, if needed, for popping any air bubbles in the melted candy.
Step-by-Step Guide: How to Create Cute Ladybug Oreos
This detailed section provides step-by-step instructions, complete with photos, to guide you through the process of making these delightful treats. For the comprehensive, printable recipe, please refer to the recipe card found below.
Step 1: Prepare Your Workstation. Begin by grabbing a baking sheet and lining it completely with either parchment paper or wax paper. This crucial step prevents your dipped Oreo cookies from sticking to the tray as the candy coating hardens, ensuring they lift off easily and cleanly. Set the lined baking sheet aside.
Step 2: Melt the Candy Melts. Place your red candy melts into a clean, microwave-safe bowl. Microwave them for an initial 45 seconds. Carefully remove the bowl from the microwave and stir the candy melts thoroughly with a spoon or spatula. The stirring distributes the heat and helps prevent burning. Return the bowl to the microwave and continue heating in shorter 15-second intervals, stirring vigorously after each interval, until the candy is fully melted and achieves a perfectly smooth, fluid consistency. Be careful not to overheat the candy, as it can seize or become clumpy.
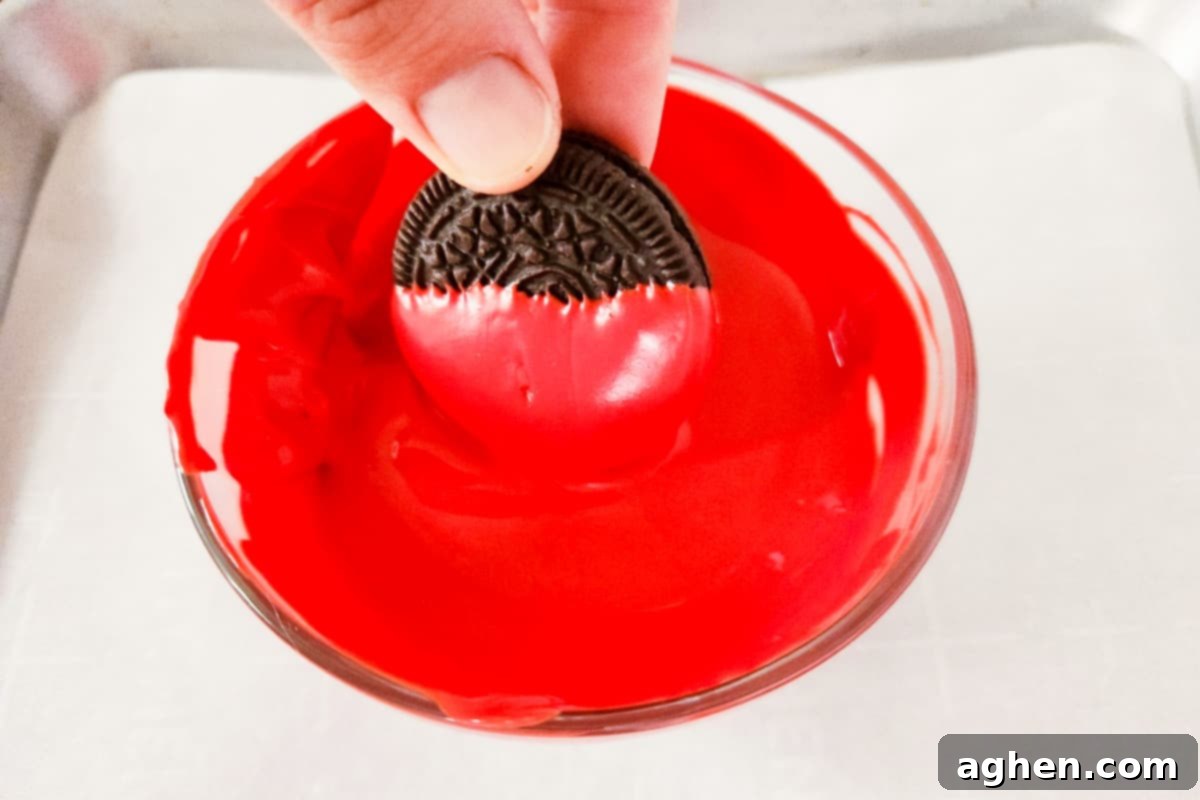
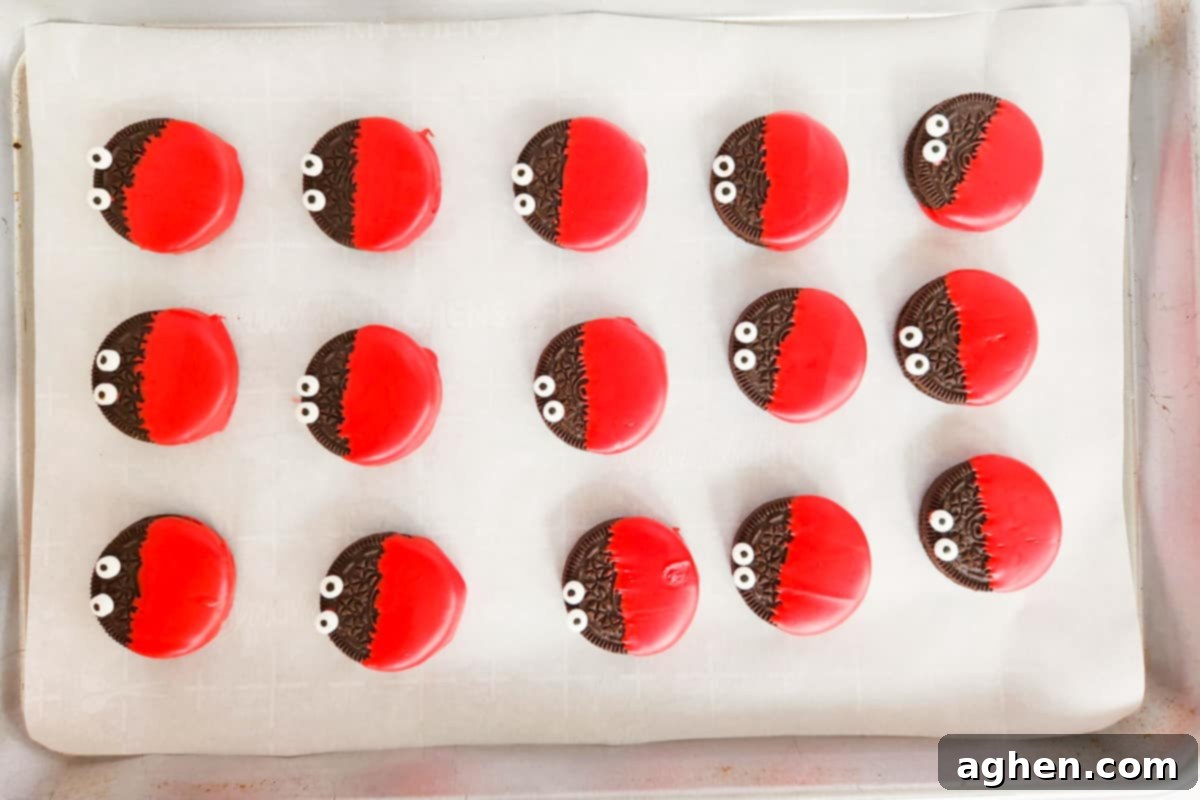
Step 3: Dip the Oreos. Take each Oreo cookie and carefully dip it into the melted red candy. You want to submerge a little more than halfway, leaving a small, crescent-shaped portion of the original black cookie exposed. This undipped section will cleverly serve as the head of your ladybug. After dipping, gently tap off any excess candy coating and place the dipped cookie onto your prepared, parchment-lined cookie sheet.
Step 4: Attach the Candy Eyes. While the red candy coating is still wet and pliable, dip the tip of a clean toothpick into a small amount of the melted red candy. Use this to place two tiny dots of candy on the top, undipped portion of each cookie – these will act as “glue” for the eyes. Immediately and gently press two candy eyes onto these red dots. This ensures the eyes adhere securely before the coating sets.
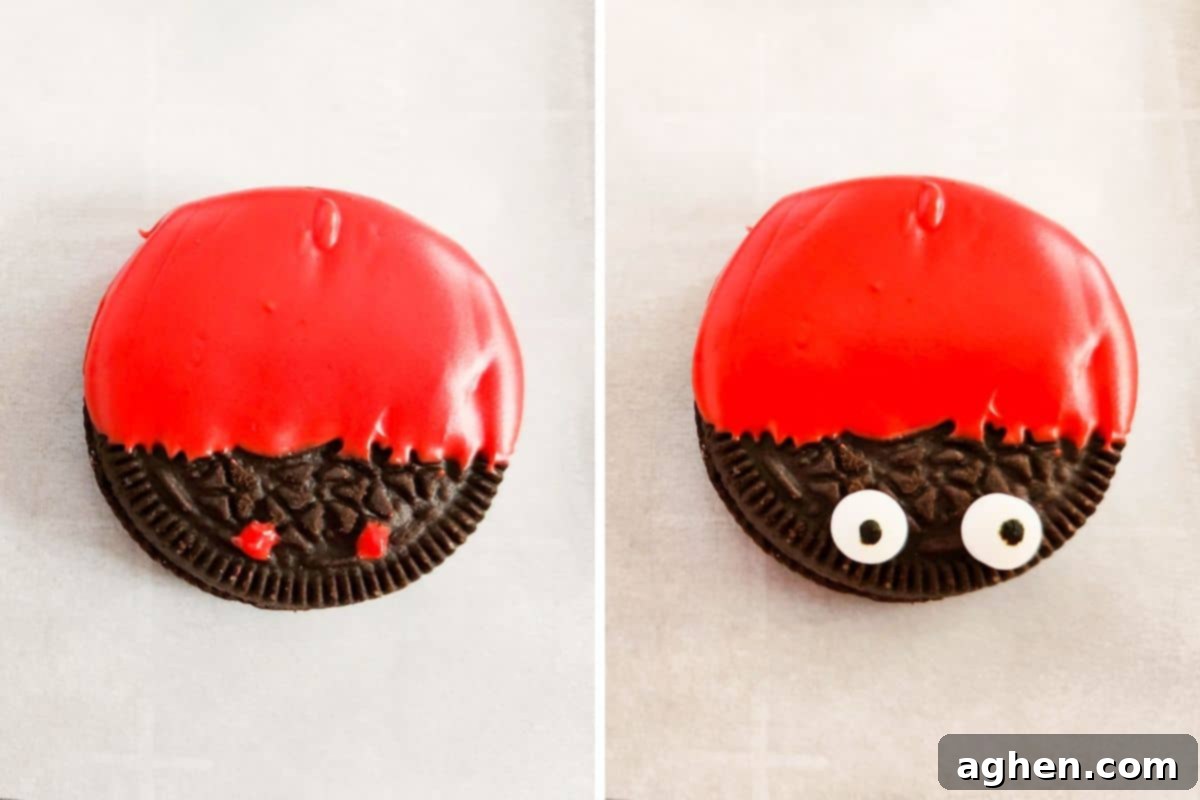
Step 5: Allow to Set. Once all your Oreos are dipped and have their eyes attached, let them rest undisturbed for approximately 15 minutes. This allows the red candy coating to completely harden and set. You’ll know they’re ready when the coating is firm to the touch and no longer tacky. If you’re in a hurry, you can carefully transfer the cookie sheet to the refrigerator for about 5-10 minutes to speed up the hardening process.
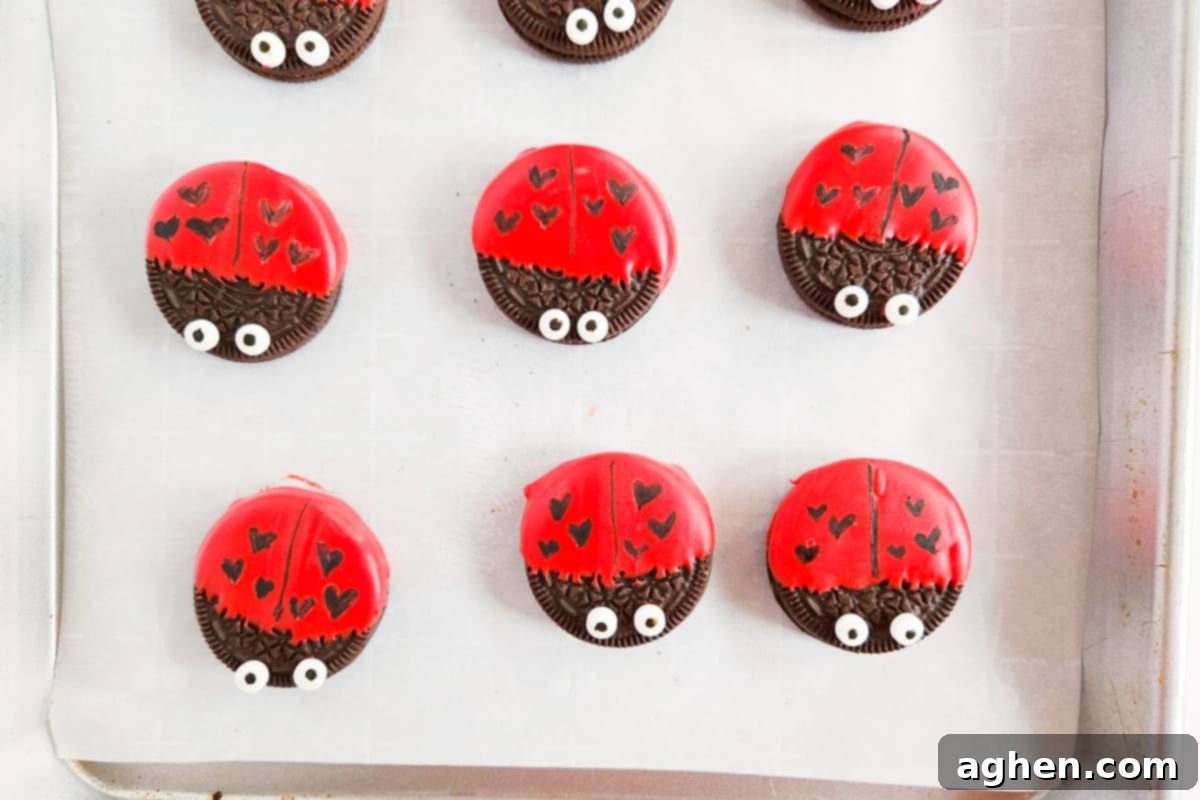
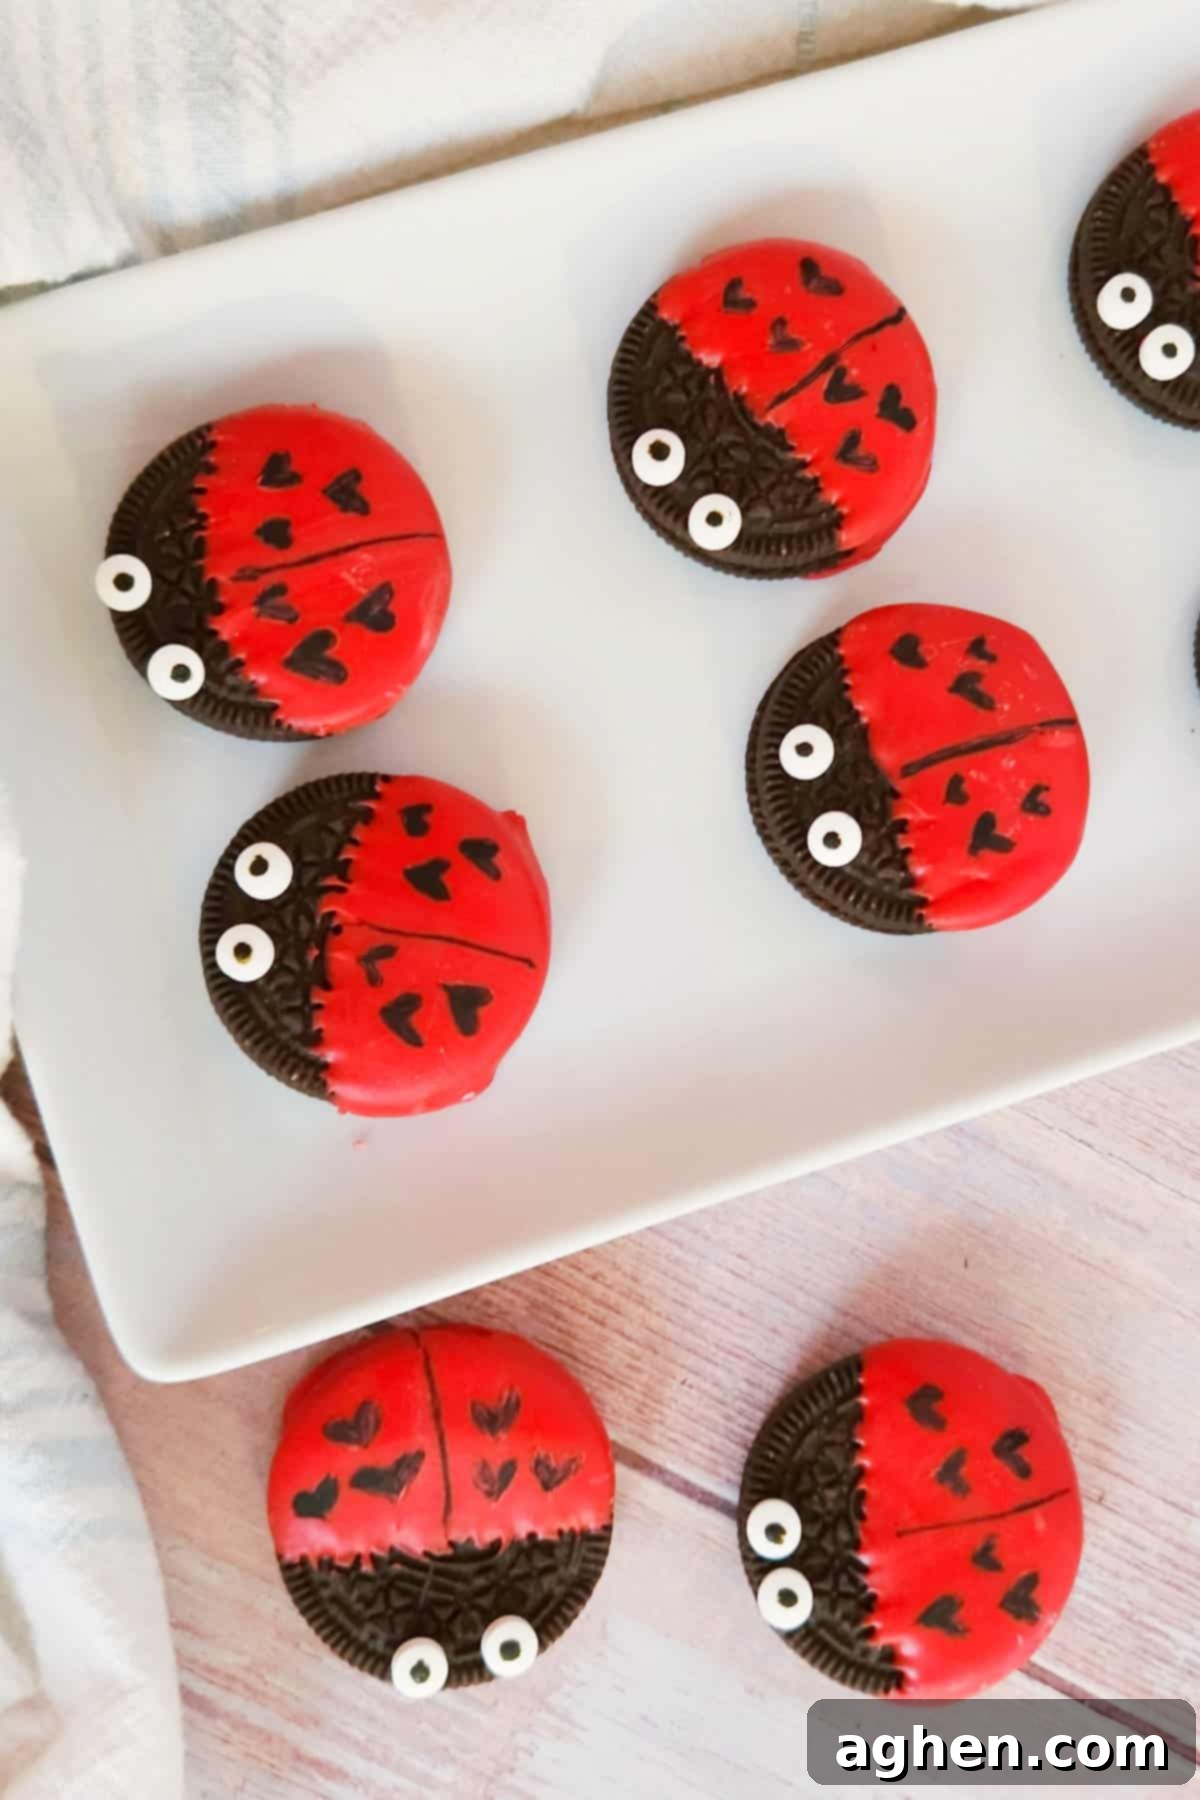
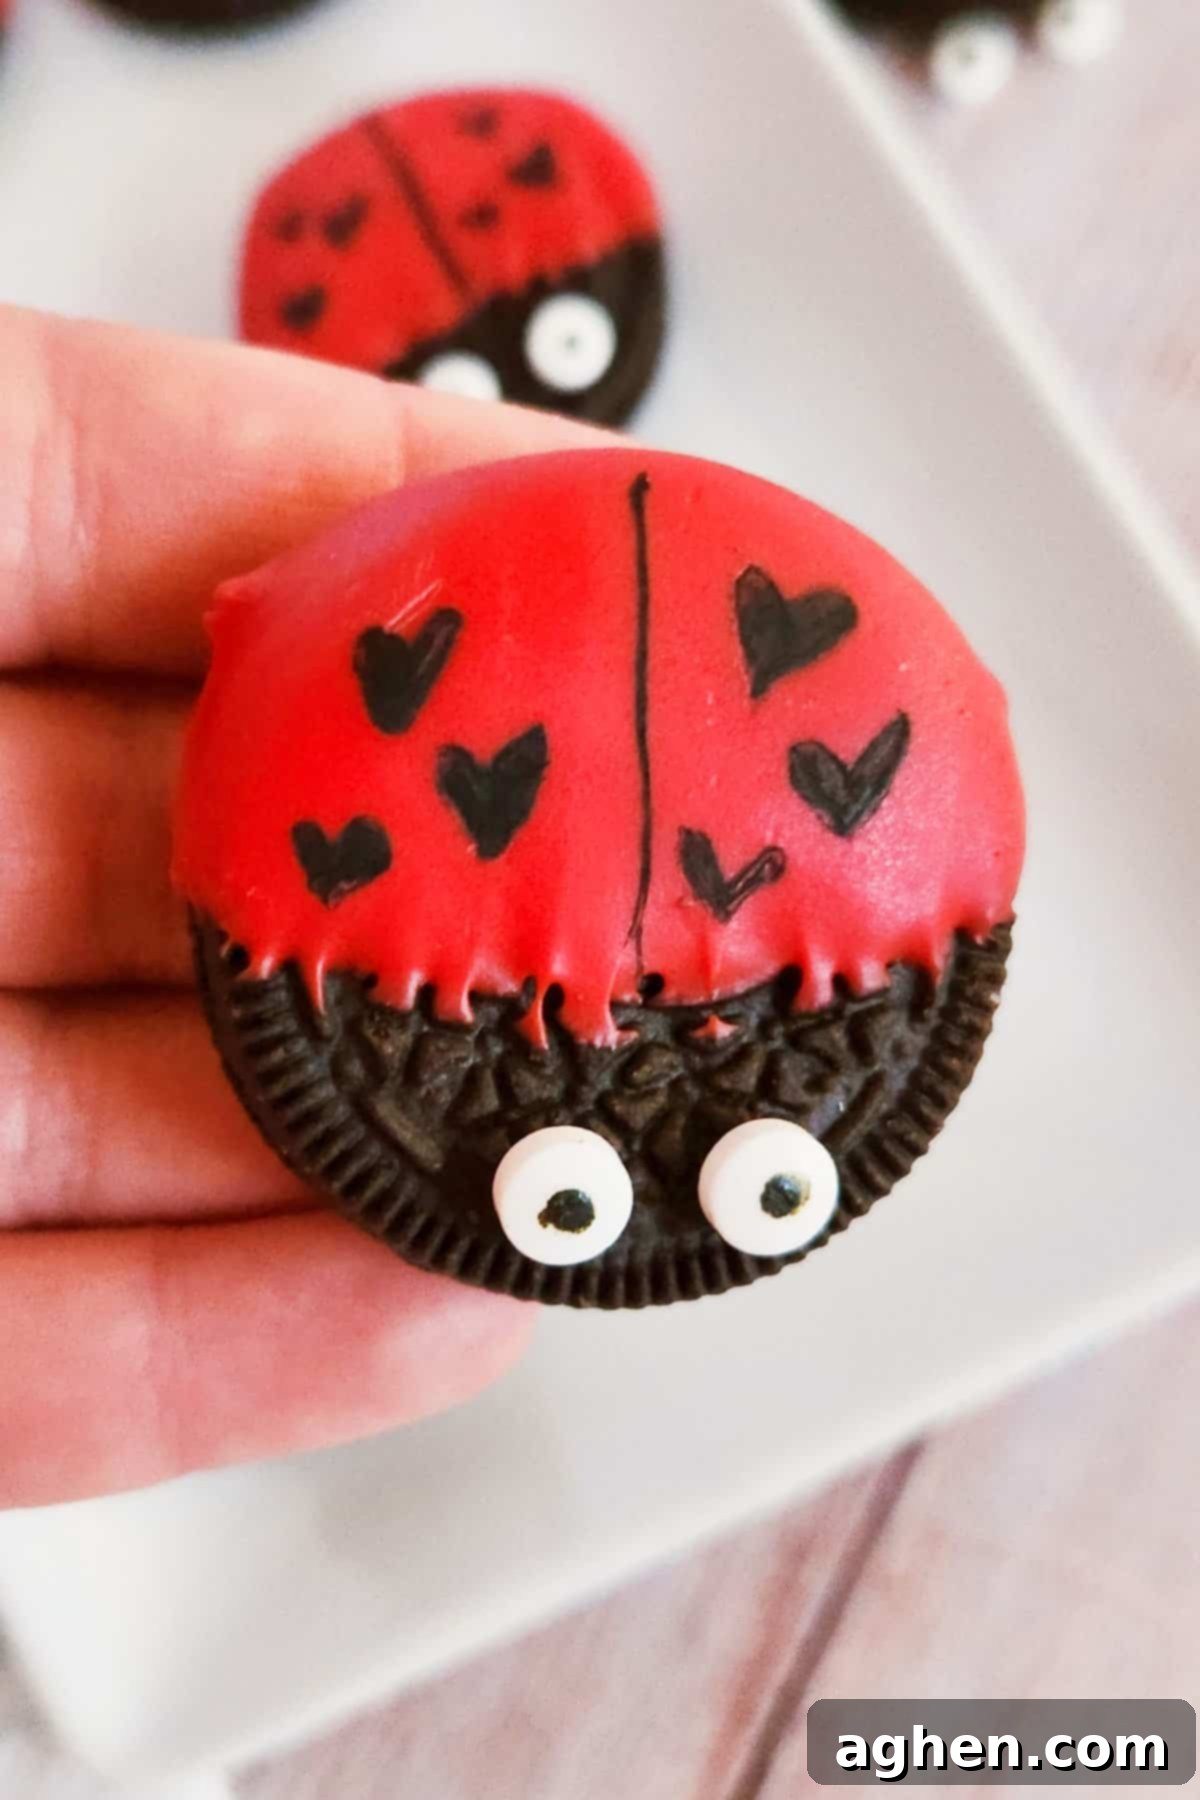
Step 6: Draw the Ladybug Details. After the candy coating has fully hardened, take your black edible marker. Carefully draw a straight line down the very center of the red-dipped portion of each cookie, from the “head” down to the bottom. This creates the ladybug’s distinct wing line. Next, use the same marker to draw a few charming little hearts on each side of this central line. These hearts will serve as your ladybug’s adorable spots, adding that final touch of Valentine’s Day magic. You can vary the size and placement of the hearts for a unique look on each cookie.
Proper Storage and Freezing Tips for Your Ladybug Oreo Treats
Ensuring your delicious Ladybug Oreos stay fresh and presentable is key! Here’s how to store them for maximum enjoyment:
Room Temperature Storage: For immediate enjoyment or consumption within a week, store your decorated Ladybug Oreos at room temperature. Place them in an airtight container to protect them from air and moisture, which can make the candy coating sticky or compromise the cookie’s freshness. Keep them away from direct sunlight or heat sources. They will maintain their quality and charm for about 5-7 days.
Refrigeration: If you’re looking to extend their shelf life beyond a week, or if you reside in a particularly warm or humid climate, refrigeration is an excellent option. Place the cookies in an airtight container and store them in the refrigerator for up to 3 weeks. The cooler temperature will help prevent the candy coating from becoming too soft or melting. Allow them to come to room temperature for a few minutes before serving for the best texture.
Freezing Instructions: These delightful cookies freeze exceptionally well, making them perfect for preparing ahead of time or enjoying later. Arrange the cookies in a single layer on a parchment-lined tray and freeze until solid (about 1-2 hours). Once frozen, transfer them to a freezer-safe container or a heavy-duty freezer bag, separating layers with parchment paper to prevent sticking. They can be stored in the freezer for up to 3 months. When you’re ready to enjoy them, thaw the cookies overnight in the refrigerator or at room temperature on a plate lined with a paper towel. The paper towel will absorb any condensation that forms during thawing, helping to keep the cookies crisp.
Expert Tips and Tricks for Perfect Ladybug Oreo Cookies
Achieving perfectly smooth and adorable Ladybug Oreos is simple with these helpful tips and tricks:
- Achieving the Right Candy Melt Consistency: If your melted red candy is too thick or isn’t completely smooth after microwaving, you can easily adjust its consistency. Add a teaspoon of coconut oil or vegetable shortening (like Crisco) to the melted candy and stir it in. This will thin the candy out, making it smoother and easier to dip your Oreos, resulting in a more even and professional-looking coating.
- Edible Marker Alternatives: If you find yourself without a black edible marker, don’t fret! You have a couple of excellent alternatives. You can melt a small amount of brown candy melts or dark chocolate chips. Transfer the melted chocolate to a piping bag with a very small, fine tip (or a small plastic baggie with a tiny corner snipped off). This allows you to carefully pipe on the central line and the ladybug spots. Another option is to use black royal icing, although, as noted, it won’t harden as firmly as the candy melts or marker.
- Eliminating Bubbles: Occasionally, small air bubbles might appear on your cookies after dipping them in the melted chocolate. To achieve a perfectly smooth finish, simply use a toothpick to gently pop any visible bubbles immediately after dipping and before the candy sets. Then, gently smooth out the surface if needed.
- Speeding Up the Hardening Process: If you’re short on time and need your cookies to set faster, you can place the dipped Oreos on their lined baking sheet into the refrigerator. Just 5-10 minutes in the chill will significantly accelerate the hardening process. Remember, always place the candy eyes *before* refrigerating, as they need the wet candy melt to adhere properly.
- Maximizing Your Oreo Supply: Have extra Oreo cookies left over after making your ladybugs? Don’t let them go to waste! Use them to create this incredibly easy Oreo fluff recipe, a delicious and creamy dessert that’s perfect for any occasion.
- Preparation is Key: Before you start dipping, make sure all your ingredients and equipment are laid out and ready. This includes having your candy eyes open and easily accessible, and your baking sheet lined. A well-organized workspace makes the process much more enjoyable and efficient.
Creative Additions and Variations for Your Oreo Love Bugs
While classic Ladybug Oreos are undeniably charming, these treats are incredibly adaptable! Here are some fun ways to customize your love bugs:
- Transform Them into Busy Bee Cookies: Easily switch up the theme by using yellow candy melts instead of red. Once the yellow coating has set, use your black edible marker to draw distinctive black stripes across the cookie, turning your ladybugs into adorable buzzing bees. You could even add tiny pretzel stick “antennae” for extra detail.
- Utilize Heart Sprinkles for Spots: Instead of hand-drawing the hearts, you can achieve a different texture and look by using small, heart-shaped sprinkles. While the red candy coating is still wet after dipping, carefully place a few heart sprinkles on each side of where the central line will go. This adds extra color, dimension, and a touch more sweetness to these cute cookies.
- Add Mini Chocolate Chips for Classic Spots: For a more traditional ladybug look with raised spots, try using mini chocolate chips. Before the red candy coating fully sets (but after it has firmed slightly), gently press mini chocolate chips onto the red surface to create the ladybug’s spots. You can use regular chocolate chips or even white chocolate chips for a contrasting effect.
- Explore Other Bug Themes: Get creative with different colored candy melts! Green candy melts could become a frog or caterpillar, blue for a butterfly (with piped wings), or even multi-colored for fantastical creatures. The possibilities are endless!
- Sparkle and Shine: For an extra festive touch, dust your wet candy-dipped Oreos with edible glitter or edible luster dust before they set. This will give your ladybugs a beautiful, shimmery finish.
Ladybug Oreos FAQ
Refrigeration is not strictly necessary for dipped Oreos if you plan on enjoying them within a week or two, especially in a cool, dry environment. However, if you live in a particularly warm or humid climate, or if you want to extend their freshness for a longer period, refrigeration can be beneficial. It helps to keep the candy coating firm and prevents it from becoming sticky or melting. Always store them in an airtight container to prevent them from absorbing odors or moisture from the fridge.
Dipped Oreos are quite durable! When stored properly in an airtight container, they will generally last for about 1-2 weeks at room temperature, maintaining their deliciousness and appearance. If stored in the refrigerator, their shelf life extends to approximately 3 weeks. For long-term storage, these cookies can be frozen in a freezer-safe container or bag for up to 3 months or even longer, ensuring you always have a sweet treat ready. Remember to thaw them gently for the best results.
While you can use regular chocolate chips (like milk, dark, or white chocolate) instead of candy melts, be aware that they melt and harden differently. Chocolate chips often require tempering to achieve a smooth, glossy, and snap-able finish without blooming (white streaks). If not tempered correctly, melted chocolate chips can be more challenging to work with for dipping and may not set as firmly or smoothly as candy melts. Candy melts are specifically formulated to melt easily and set quickly without tempering, making them much more beginner-friendly for projects like these Ladybug Oreos.
More Delicious Ideas for Valentine’s Day
If you’re still craving more sweet inspiration for February 14th, be sure to explore these other fantastic Valentine’s Day dessert ideas. They’re perfect for delighting your kids, your partner, or anyone special in your life!
- Heart Eye Emoji Oreos
- Valentine Heart Cookies
- Stained Glass Heart Cookies
- Valentine’s Day Cake Mix Cookies
- Valentine’s Day Fudge

Ladybug Oreos
Author: Jaclyn
Ingredients
- 15 Oreo cookies
- 1 cup red candy melts
- 30 candy eyes
- black edible marker
Instructions
-
Line a cookie sheet with wax or parchment paper to prevent sticking, and set it aside.
-
In a microwave-safe bowl, microwave the red candy melts for 45 seconds. Remove from the microwave and stir well. Continue to microwave in 15-second increments, stirring thoroughly after each, until the candy is fully melted and smooth.
-
Dip each Oreo cookie into the melted red candy, covering a little more than halfway. Place the dipped cookies onto the lined cookie sheet, leaving the undipped portion exposed as the “head” of the ladybug.
-
Use a toothpick to dab two small dots of the melted candy onto the undipped (head) portion of each cookie. Immediately press two candy eyes onto these red dots.
-
Allow the cookies to set for about 15 minutes at room temperature, or until the red candy coating has completely hardened. (You can also refrigerate for 5-10 minutes to speed this up.)
-
Once the coating is firm, use an edible black marker to draw a line down the center of the red area. Then, add a few small hearts or dots on each side of the line to create the ladybug’s spots.
Notes
Nutrition

Did You Make This Recipe?
I would absolutely love to see your adorable creations! Share them with me on Instagram @crayonsandcravings and be sure to follow on Pinterest @crayonsandcravings for even more delightful recipe ideas and inspiration!
Pin Recipe
Leave A Review

More Sweet & Creative Valentine’s Day Recipes from Our Friends
Discover an array of delectable treats from other talented food bloggers who participated in this wonderful event. Each recipe is perfect for celebrating Valentine’s Day with a touch of sweetness!
- Heart-Shaped Homemade Pop Tarts from Julie of The Little Kitchen
- Valentine Cupid Crunch from Jenn of Ever After in the Woods
- Easy Dark Chocolate Cherry Truffles from Audrey of That Recipe
- How to Make an Edible Valentine Gingerbread House from Jennifer of The Rebel Chick
- Peanut Butter Chocolate Parfaits from Stefanie of Stef’s Eats and Sweets
- Heart Shaped Chocolate Chip Cookies from Melissa of Persnickety Plates
- Round Up of Homemade Valentine’s Day Sweets and Treats from Lisa of Blogghetti
- Mini Skillet Cookie from Caroline of Caroline’s Cooking
- Easy Pink Cookie Recipe (Refined Sugar-free) from Shashi of Savory Spin
- Truffle Honey Goat Cheese Stuffed Rolls from Lisa of Taste Cook Sip
- Sweetheart Strawberry Brownies from Nicole of For the Love of Food
- Heart Shaped Pancakes from Sarah of TheGleasonCo
- Chubby Hubby Cookies from Rebecca of Sugar & Soul
- How to Make an Edible Valentine Gingerbread House from Jennifer of The Rebel Chick
- Heart-Shaped Reese’s Stuffed Cookie for Two from Erin of The Spiffy Cookie
- Heart-Melting Chocolate Espresso Cookies from Colleen of Faith, Hope, Love, & Luck Survive Despite a Whiskered Accomplice
