Mastering Rotisserie Chicken: Unlock Juiciness and Flavor with the Weber Grill Rotisserie
There’s an undeniable magic to grilling, especially when the weather beckons us outdoors. The tantalizing aroma of smoke, the satisfying sizzle of food, and the promise of a delicious meal cooked over an open flame—it’s an experience cherished by many. While I’ve experimented with countless dishes on my trusted Weber Grill, I’ve discovered a secret weapon that elevates poultry to an art form: the Weber Grill Rotisserie attachment. If you’ve ever dreamt of serving perfectly golden, irresistibly juicy, and tender rotisserie chicken right from your backyard, then you’re about to discover how this game-changing accessory can make that dream a delicious reality.

The allure of rotisserie chicken is universal. That succulent meat, bathed in its own juices, encased in a shatteringly crisp skin, is a culinary masterpiece. However, achieving this perfection on a standard grill can often be a frustrating endeavor, fraught with challenges like uneven cooking, dry spots, and charred exteriors. This is precisely where the Weber Grill Rotisserie attachment shines, transforming your ordinary grill into a professional-grade rotisserie oven. It’s not just an accessory; it’s an investment in superior flavor and an enhanced grilling experience.
Why the Weber Grill Rotisserie is a Game-Changer for Poultry
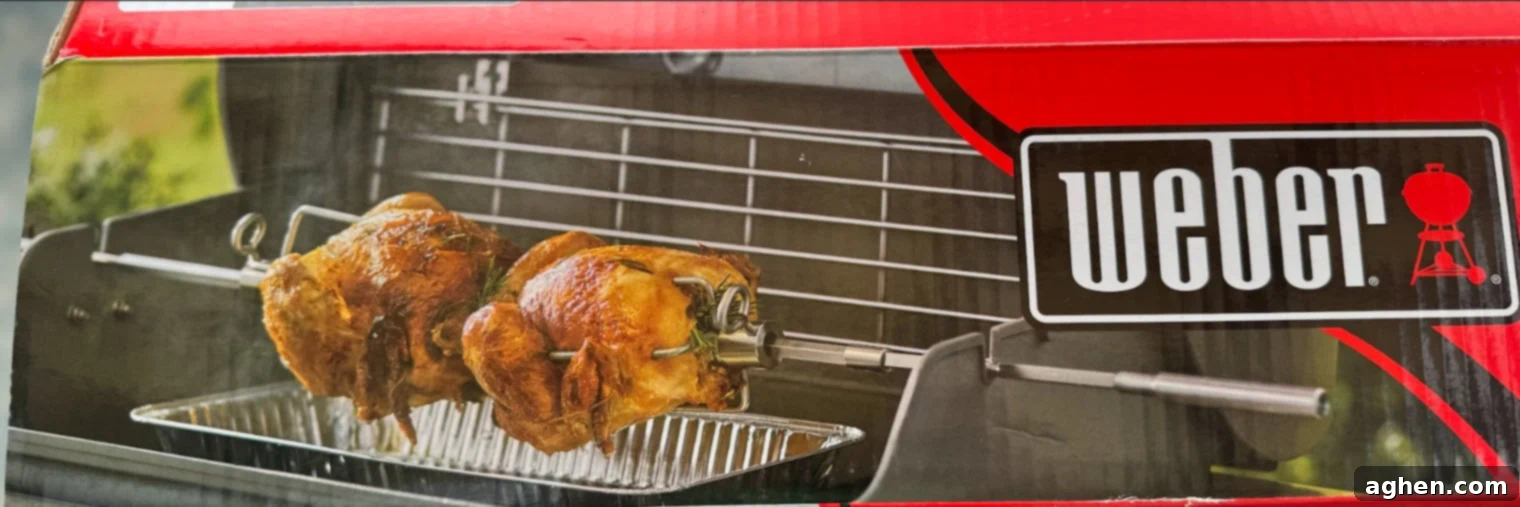
Imagine a chicken that bastes itself continuously, ensuring every inch of meat is infused with moisture and flavor. This is the fundamental principle behind rotisserie cooking, and the Weber attachment brings this sophisticated technique directly to your outdoor kitchen. Weber, renowned for its quality grilling equipment, offers a variety of rotisserie kits compatible with nearly all its gas, charcoal, and even some pellet smokers. Beyond Weber’s own offerings, several reputable off-brand attachments are also available, providing options for every budget and grill type.
One of the most appealing aspects is the straightforward installation. These rotisserie kits are designed for ease of use, typically involving a simple setup that takes mere minutes. When not in use, they can be easily dismantled and stored, freeing up your grill space for other cooking methods. This adaptability makes the Weber Grill Rotisserie a practical and versatile addition to any grilling enthusiast’s arsenal.

Components and How They Work Together
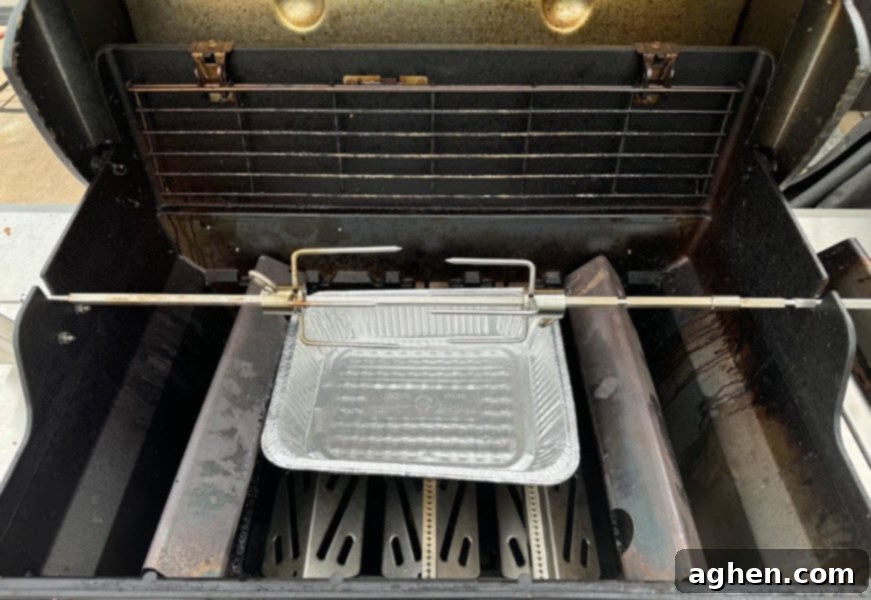
Once set up, you’ll wonder how you ever managed to grill chicken without it. The magic lies in the simple yet ingenious design of the rotisserie attachment. It typically consists of three primary components:
- The Spit Rod: A long, sturdy metal rod that passes through the center of your poultry or roast. It’s the core around which everything rotates.
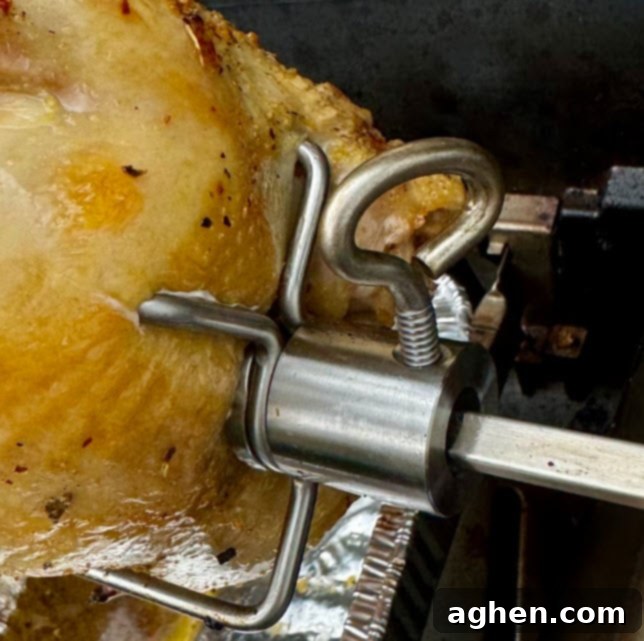
- Meat Forks (or Skewers): Two sets of adjustable forks with sharp prongs designed to firmly secure the meat onto the spit rod. Proper placement ensures the chicken remains stable and balanced throughout the rotation.
- The Electric Motor: This powerful, quiet motor is the heart of the system. It connects to one end of the spit rod and smoothly rotates the chicken at a constant, slow speed. This continuous rotation is key to achieving perfectly even cooking and that coveted crispy skin.
This constant rotation allows the chicken’s natural juices to continually baste the exterior, preventing dryness and contributing to an incredibly moist interior. Simultaneously, the radiant heat from the grill works uniformly on all sides, eliminating hot spots and ensuring a consistent, golden-brown finish that is the hallmark of expertly cooked rotisserie chicken.
Getting Started: Using Your Weber Grill Rotisserie for Perfect Results
Using the Weber Grill Rotisserie attachment is surprisingly simple, transforming a potentially complex cooking method into an effortless process. Here’s a step-by-step guide to help you achieve rotisserie perfection, guaranteeing tender, juicy meat every time:
1. Prepare Your Poultry for the Spit
- Choose Wisely: Select a chicken that fits comfortably on your spit rod and within your grill’s cooking chamber without touching the grates or hood. For most Weber rotisseries, a 3-5 pound chicken is ideal. Larger birds may require a larger grill or a specific heavy-duty rotisserie kit.
- Seasoning: Liberally season your chicken with your favorite rub, herbs, and spices, both inside the cavity and all over the exterior. Don’t be shy! For an even deeper flavor and enhanced moisture, consider brining your chicken beforehand (more on this in our bonus recipe section below).
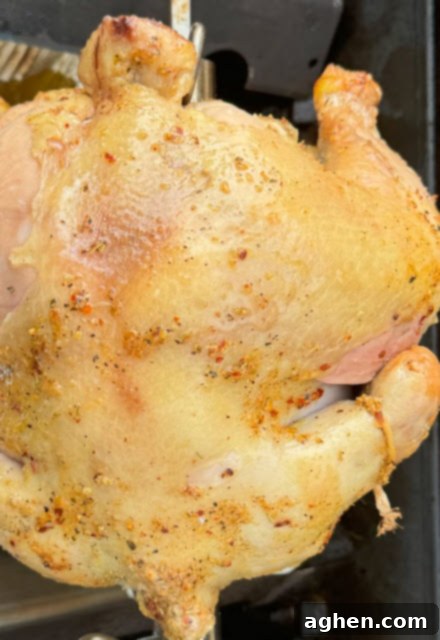
- Trussing: This is a crucial step often overlooked. Trussing involves tying the chicken with butcher’s twine to keep its wings and legs tucked close to its body. This not only creates a compact, uniform shape for even cooking but also prevents limbs from flopping around as it rotates, which can cause uneven browning or even dislodge the bird. Proper trussing ensures a smooth, balanced rotation.
2. Secure the Chicken onto the Spit Rod
- Center the Bird: Carefully slide the spit rod through the cavity of the trussed chicken, ensuring it’s as centered and balanced as possible. This balance is critical for the motor to operate smoothly and for the chicken to cook evenly.
- Use the Forks: Insert one meat fork firmly into one end of the chicken, pushing the prongs deeply into the breast meat. Slide the other fork onto the spit rod and secure it into the other end of the chicken. Tighten the thumbscrews on both forks to ensure the chicken is held snugly and won’t slip during rotation. A balanced chicken is vital for smooth operation and even cooking. Test its balance by holding the spit horizontally and checking if it sags on one side.
3. Set Up Your Grill for Indirect Heat
- Preheat: Preheat your Weber grill to a medium-high temperature, typically around 350-375°F (175-190°C). For gas grills, this usually means igniting the burners on the sides, leaving the central burners off. For charcoal grills, bank the coals on either side of the grill, creating a drip pan area in the center. This indirect heat setup is essential for slow, even roasting without burning the exterior.
- Drip Pan: Place an aluminum foil drip pan directly beneath where the chicken will rotate. This catches any drippings, preventing flare-ups and making cleanup easier. You can add a little water, wine, or broth to the drip pan for added moisture, creating a flavorful steaming effect, and to create a delicious base for gravy.
4. Mount the Spit and Start Roasting
- Insert the Spit: Carefully place the assembled spit rod with the chicken into the slots or brackets on your rotisserie attachment. Ensure the motor end is properly engaged with the drive mechanism.
- Connect the Motor: Plug in the electric motor and turn it on. Watch as your chicken begins its slow, mesmerizing rotation.
- Monitor and Cook: Close the grill lid to maintain a consistent temperature. The cooking time will vary depending on the size of your chicken, but expect around 1.5 to 2.5 hours for a 3-5 lb bird. Use a reliable meat thermometer to check for doneness; the thickest part of the thigh (without touching bone) should reach 165°F (74°C). The constant rotation means you don’t need to open the lid frequently to baste, keeping the heat inside and ensuring efficient cooking.
- Resting: Once cooked, remove the chicken from the spit and let it rest for 10-15 minutes before carving. This allows the juices to redistribute throughout the meat, ensuring maximum tenderness and flavor.

The Unbeatable Results: Juicy, Flavorful Perfection
As the chicken gracefully rotates, the internal juices are continuously redistributed, literally self-basting the meat. This constant motion, combined with indirect heat, ensures every part of the bird cooks evenly, resulting in an unparalleled succulence and tenderness. The skin, exposed to the consistent radiant heat, slowly renders its fat and crisps up to a beautiful golden-brown, offering a delightful contrast to the moist meat beneath. The smoky kiss from the grill adds a depth of flavor that oven-roasted chicken simply cannot achieve.
Trust me, once you experience the rich flavor and melt-in-your-mouth texture of rotisserie chicken prepared on your Weber Grill, you’ll be hard-pressed to cook it any other way. It’s a culinary revelation that transforms weeknight dinners and weekend gatherings into gourmet experiences, making you the undisputed grill master of your neighborhood.
Beyond Chicken: Unlocking the Versatility of Your Rotisserie
While rotisserie chicken is undoubtedly a star, the Weber Grill Rotisserie attachment is far from a one-trick pony. Its versatility extends to a wide array of other meats and poultry, opening up endless possibilities for delicious, rotisserie-style meals right in your backyard:
- Turkey: Perfect for smaller turkeys (up to 12-15 lbs, depending on your grill size), ensuring a moist and evenly cooked holiday bird with beautifully crisp skin, a stark contrast to often dry oven-roasted turkeys.
- Duck: The rotisserie is ideal for duck, allowing its abundant fat to render slowly and drip away, resulting in incredibly crispy skin and tender, rich meat.
- Pork Loin or Shoulder: Achieve beautiful crackling skin and juicy interiors with pork roasts. The slow rotation helps to tenderize the meat while developing a fantastic exterior crust.
- Leg of Lamb: Cooked to perfection, with a wonderfully caramelized crust and tender, flavorful meat throughout. A garlic-rosemary studded leg of lamb on the rotisserie is an impressive centerpiece.
- Beef Roasts: Even small beef roasts, like sirloin tip or eye of round, can benefit from the rotisserie’s even cooking, developing a uniform crust and preventing overcooking of edges.
For larger cuts, always ensure they are properly trussed and balanced on the spit, and remember to use a drip pan to manage fats and juices, preventing flare-ups and collecting flavorful drippings.
An Engaging and Rewarding Grilling Experience
Beyond the mouthwatering results, using the Weber Grill Rotisserie attachment adds an engaging and interactive dimension to your grilling endeavors. Watching the chicken slowly turn over the gentle flames is utterly mesmerizing, adding an exciting visual element to your outdoor cooking. It’s a focal point for conversation and admiration, making you feel like a backyard culinary showman. Plus, the intoxicating aroma of roasting meat wafting through the air is sure to draw envious glances (and perhaps a few unsolicited dinner invitations!) from your neighbors. It truly elevates the entire outdoor entertaining experience, creating memorable moments around the grill.
If you’re a devoted griller yearning for tender, juicy, and perfectly cooked meats with that distinctive rotisserie char and flavor, I wholeheartedly recommend investing in the Weber Grill Rotisserie attachment. It’s not just an accessory; it’s an upgrade that brings restaurant-quality meals to your home. Simple to install, easy to use, and delivering consistently superior results, it’s an affordable way to take your grilling game to the next level. Once you’ve experienced the difference, you’ll likely agree you’ll never want to grill without it. Happy grilling!

Bonus Recipe: Elevate Your Poultry with a Rosemary Garlic Brine
While the Weber Grill Rotisserie itself guarantees juicy results, taking an extra step like brining can elevate your poultry to an even higher plane of flavor and moisture. Brining shouldn’t be reserved just for special events or holidays; it’s a simple technique that yields incredible dividends whether you’re oven-roasting, grilling, or using your rotisserie attachment.
Brining works by allowing the meat to absorb moisture and flavor from a saline solution. The salt helps to denature the proteins in the meat, enabling them to retain more moisture during cooking, while the other ingredients infuse their aromatic compounds deep into the flesh. This creates a more flavorful, succulent, and forgiving piece of poultry. Here’s my go-to brine recipe; it’s incredibly easy and consistently garners rave reviews from guests.
Rosemary Garlic Brine
Ingredients*
- 1 gallon (approx. 3.8 liters) water
- ¾ cup kosher salt (do not substitute with table salt, which is much finer and saltier)
- ½ cup granulated sugar (helps with browning and balances saltiness)
- 2 tablespoons dried rosemary (or 4 sprigs fresh rosemary, bruised, for a fresher aroma)
- 1 tablespoon caraway seeds (adds a unique, warm, slightly peppery note that complements poultry beautifully)
- 1 tablespoon granulated garlic (or 4-5 cloves fresh garlic, smashed, for a stronger garlic punch)
- 2 teaspoons freshly ground black pepper
- Optional additions: 1 halved lemon or orange for citrus notes, a few bay leaves for herbal depth, a tablespoon of whole peppercorns for extra spice.
*These ingredient quantities are ideal for a standard-size roasting chicken (3-5 lbs). For larger poultry, such as a Thanksgiving turkey (12-15 lbs), you will need to significantly increase the volume of your brine. As a general rule, you might use three to five times the amount of each ingredient to ensure full submersion and adequate brining for a larger bird. Adjust liquid volume to ensure your bird is fully submerged.
Instructions:
- Combine Ingredients: In a large stockpot, combine the water, kosher salt, granulated sugar, dried rosemary, caraway seeds, granulated garlic, and black pepper. Stir well until the salt and sugar are completely dissolved. If using fresh rosemary or garlic cloves, add them now.
- Bring to a Simmer (Optional, but Recommended): For a more potent flavor infusion, bring the brine mixture to a gentle simmer over medium heat, stirring occasionally. Once simmering, remove it from the heat. This step helps to release the aromatics from the herbs and spices more effectively.
- Cool Completely: This is a crucial step for food safety. Allow the brine to cool completely to room temperature, and then refrigerate it until it is thoroughly chilled. Never place warm poultry into a warm brine, as this can encourage bacterial growth and compromise food safety.
- Brine the Chicken: Place your prepared chicken (it should be un-seasoned, as the brine will add plenty of salt and flavor) into a large, non-reactive container or a heavy-duty brining bag. Pour the chilled brine over the chicken, ensuring it is fully submerged. If needed, place a plate or a small weight on top to keep the chicken submerged beneath the liquid.
- Refrigerate: Cover the container or seal the brining bag and refrigerate for 4-12 hours. Smaller chickens require less time (4-6 hours), while larger birds can brine for up to 12 hours. Do not brine for too long, as the meat can become overly salty or develop a mushy texture.
- Rinse and Pat Dry: Before cooking, remove the chicken from the brine, discard the brine, and rinse the chicken thoroughly under cold running water, both inside and out. This removes any excess salt from the surface. Pat the chicken completely dry with paper towels. A dry skin is key to achieving that desirable crispy rotisserie crust.
- Cook as Desired: Proceed with seasoning (lightly, as the brine adds salt) and trussing your brined chicken before mounting it on your Weber Grill Rotisserie, or cook using your preferred method. Remember that brined poultry may cook slightly faster, so monitor internal temperatures closely.
With this simple brining step, combined with the magic of your Weber Grill Rotisserie, you’re not just cooking chicken; you’re crafting a culinary experience that will delight your senses and impress everyone at your table. Enjoy the journey to rotisserie perfection!
