DIY Kitchen Makeover: Achieve Luxurious Granite Countertops on a Budget with Peel and Stick Film
This comprehensive guide on updating our kitchen counters with peel and stick granite film was proudly sponsored by EZ Faux Décor. We’re excited to share our experience and show you how easy it is to achieve a high-end look for less.

From the moment we first stepped into our house, a vision of our dream kitchen began to take shape. However, reality often dictates a more measured approach, especially when faced with a kitchen that felt stuck in a time warp. Our countertops, a truly unfortunate speckled blue laminate, were the most glaring eyesore. Coupled with dated, off-white appliances, cabinets adorned with tacky gold and white handles, and walls covered in two conflicting styles of wallpaper, the room was a far cry from our personal style and desperately needed a modern touch.
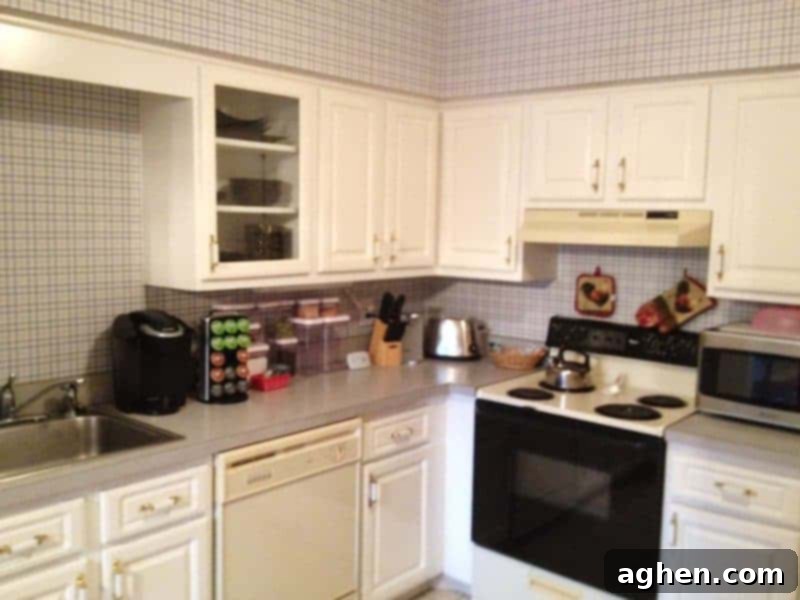
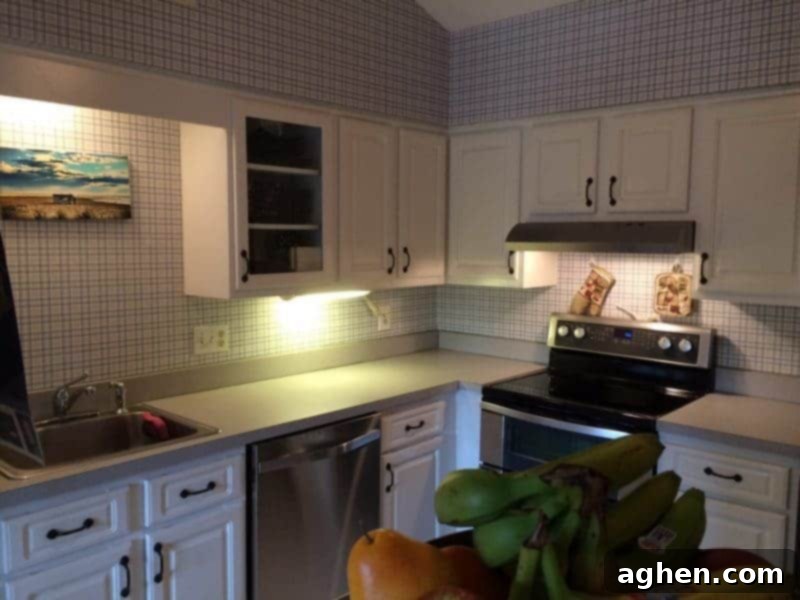
Three years passed, and while the dream remained, the budget for a full-scale renovation did not miraculously appear. Still, we were determined to make progress. Our kitchen makeover began incrementally. First, we swapped out the outdated cabinet handles for sleek, contemporary hardware, a small but impactful change. Next, we made a significant upgrade by replacing our old, tired off-white appliances with gleaming new stainless steel models. This instantly modernized the space, but the dreaded blue laminate countertops still loomed large, a constant reminder of the kitchen’s dated past.
While a luxurious granite or quartz countertop was always our ultimate goal, the cost implications were simply prohibitive for our current budget. We worried we’d be stuck with the unappealing blue laminate indefinitely. That was until I stumbled upon an incredible solution that promised a high-end look without the high-end price tag: EZ Faux Décor Granite Film. This discovery completely changed our renovation timeline and our expectations for what was possible.
EZ Faux Décor Granite Film: The Ultimate Affordable Countertop Solution
EZ Faux Décor Granite Film isn’t just a budget-friendly option; it’s a revolutionary product that has garnered attention on major networks like HGTV, The Rachael Ray Show, The Today Show, The DIY Network, and The Food Network. It offers an instant, stunning transformation, allowing you to achieve the opulent appearance of real granite, elegant marble, or sophisticated soapstone countertops at a mere fraction of the traditional cost.
Let’s talk numbers. Real granite countertops can easily cost upwards of $80 per square foot, a significant investment for any homeowner. In stark contrast, EZ Faux Décor Granite Film comes in at an incredibly affordable price point of around $4 per square foot. This represents colossal savings, making a dream kitchen accessible to a much wider audience.
Beyond its remarkable affordability, this innovative peel and stick film boasts impressive durability. It’s engineered to be stain-resistant, tear-resistant, and wear-resistant, ensuring it can stand up to the daily rigors of a busy kitchen. The film is available in an extensive range of colors and patterns, each meticulously designed to mimic the natural beauty of high-end stone. Whether you desire the classic veins of marble, the rich specks of granite, the smooth texture of soapstone, or even the sleek look of stainless steel, there’s a design to perfectly complement your aesthetic.
One of the most appealing aspects of EZ Faux Décor Granite Film is its DIY-friendly application. My husband and I, with no prior experience in countertop installation, were able to completely transform our kitchen counters in just a few hours one Saturday morning. It’s a project that genuinely empowers homeowners to take their kitchen updates into their own hands, yielding professional-looking results without the expense of professional installers.
What You’ll Need to Apply EZ Faux Décor Granite Film
Our EZ Faux Décor Granite Film kit was thoughtfully packaged with the essentials to get us started:
- Clear, step-by-step application instructions
- A specialized squeegee for smoothing out the film
- A sharp razor knife for precise trimming
In addition to the kit, you’ll need a few common household items to ensure a seamless application:
- A pencil for marking and measuring
- A ruler or tape measure for accurate cuts
- Sharp scissors for initial film cutting
- A spray bottle filled with water (this is crucial!)
- A hairdryer or heat gun for molding the film around edges and corners
Step-by-Step Guide: How to Apply Peel and Stick Granite Film
The success of your peel and stick granite film application largely depends on proper preparation and careful technique. Here’s a detailed breakdown of our process:
- Preparation is Key: We started by thoroughly cleaning our countertops, ensuring they were free of any grease, dirt, or debris. A clean, smooth surface is paramount for optimal adhesion. Once clean, we allowed the counters to dry completely.
- Measure and Cut: Using our ruler and pencil, we measured each section of our counter, cutting the film slightly longer and wider than the actual dimensions. This extra margin provides flexibility during application and allows for precise trimming later.
- The Wet Application Method: This is where the magic happens! Starting at one end of a counter section, we liberally sprayed the counter surface with water. The water acts as a temporary barrier, preventing the super-sticky film from adhering immediately and allowing for crucial repositioning.
- Peel and Position: We carefully peeled the backing off the film, exposing the adhesive side. Then, we gently placed the film onto the wet counter, making sure to align one edge perfectly. The wet surface allowed us to slide and adjust the film as needed.
- Smooth and Secure: Using the provided squeegee, we began smoothing the film from the center outwards, pushing out any water and air bubbles trapped underneath. The key is to apply firm, even pressure. If a bubble or wrinkle appeared, the wet surface allowed us to gently lift and re-position the film, re-squeegee, and continue. This repositioning capability was incredibly helpful and a true lifesaver for achieving a flawless finish.
- Tackling Challenging Areas: The Sink. The sink area proved to be the most intricate part of the installation. Our strategy was to cut a rough hole in the film that was slightly smaller than the sink and faucet opening. We then carefully applied the film around this area, leaving excess. Once the main body of the film was smoothed, we returned with the razor knife to meticulously trim around the sink basin and faucet, creating a clean, custom fit. Patience and a steady hand are essential here.
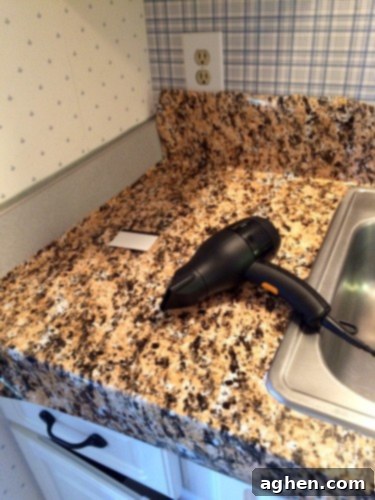
- Perfecting Corners and Edges with Heat: Corners and edges also presented their own set of challenges. This is where the hairdryer became our best friend. By gently heating the film with the hairdryer, we made it more pliable and easier to stretch and mold around curves and sharp angles. This technique helps achieve a crisp, seamless edge, preventing creases or lifting. Once heated and molded, we used the razor knife to trim off any excess film, creating a professional-looking finish.
Pro Tip: Use Caution Around Wallpaper!
During our installation, I had a little “oopsy” moment that turned into a valuable lesson, especially for those with wallpaper. Once the backing is removed, the film’s adhesive is incredibly strong and will stick to anything dry it comes into contact with (which is why spraying your counters with water is so crucial). I learned this the hard way when a few pieces of my wallpaper near the sink accidentally adhered to the film and tore off. Fortunately, I already had plans to remove the wallpaper, so the damage was temporary.
However, if you have wallpaper that you intend to keep, I highly recommend lightly misting it with water in any areas where the film might accidentally touch. This will provide the same temporary release effect, allowing you to reposition the film without damaging your wallpaper. A little foresight can save you a lot of headache!
The Finished Product: A Luxurious Transformation
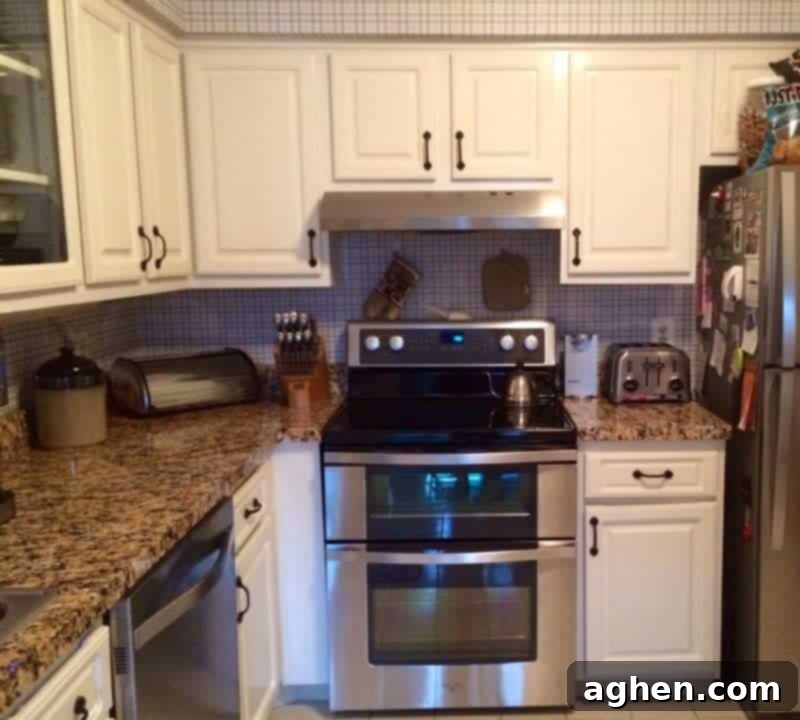
The reveal of our updated countertops was truly exciting. The finished product looks absolutely fantastic! Unless you inspect the counters up close with a critical eye, you would genuinely never guess that it isn’t real granite. The intricate pattern of the film is incredibly forgiving, cleverly camouflaging any seams where two pieces meet. The realistic texture and subtle sheen create an illusion of depth and luxury that completely transforms the kitchen’s aesthetic. After all, who gets close enough to microscopically inspect someone else’s countertops anyway? Nobody, that’s who!
The Verdict: Highly Recommended for Budget-Friendly Style
I am overwhelmingly pleased with the results achieved using EZ Faux Décor Granite Film, and I wholeheartedly recommend it to anyone looking to update their countertops without the substantial financial commitment of actual granite, marble, or quartz. This product is a game-changer for homeowners on a budget who refuse to compromise on style.
Furthermore, this film is an ideal solution for renters. Investing thousands into a property you don’t own simply doesn’t make financial sense, but living with an outdated kitchen doesn’t have to be your reality. EZ Faux Décor film offers a high-impact, low-commitment upgrade. What’s more, the film is completely removable, allowing you to easily take it off before moving out or if you simply decide to change your decor. It’s the ultimate flexible renovation tool.
If you’re still undecided, consider this: Order a sample pack of 6 varieties of EZ Faux Décor Granite Film here to see and feel the quality for yourself and envision how they would look in your own kitchen.
Leveraging the EZ Faux Décor How-To Video Library
I cannot stress enough how invaluable EZ Faux Décor’s extensive library of “how-to” videos was to our project’s success. Watching these detailed demonstrations beforehand provided us with immense confidence and prepared us for every step of the installation process. We knew exactly what to expect, how to handle common challenges, and the best techniques to ensure a professional finish. These videos are an absolute must-watch for anyone considering tackling granite film installation.
I strongly recommend dedicating time to watch these helpful videos; they demystify the process and equip you with all the knowledge you need to achieve stunning results.
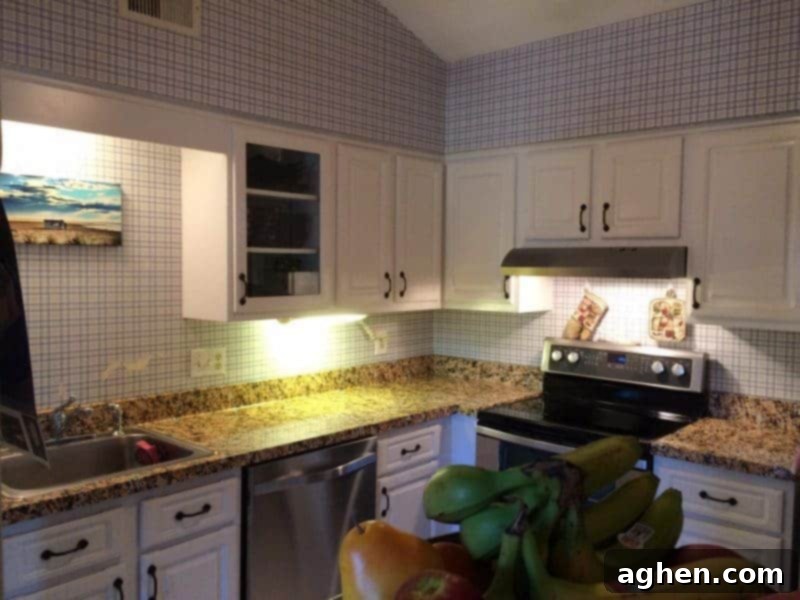
With our countertops beautifully updated, our kitchen transformation is far from over. Next on our agenda is the daunting task of wallpaper removal – a project I’m dreading but know will make a monumental difference. Following that, we’ll paint the room to create a fresh, cohesive look, and then dive into organizing our pantry and kitchen cabinets. I eagerly anticipate the day this room is completely reimagined, reflecting our style from floor to ceiling.
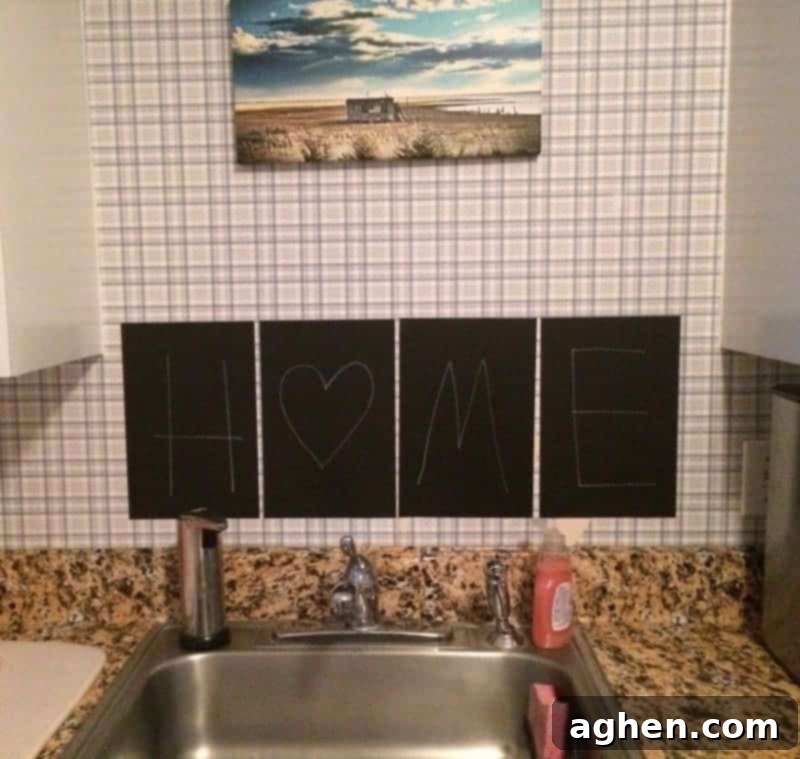
Until then, I’m attempting to camouflage the unfortunate wallpaper tears above the sink with a few chalkboard decals I had on hand. It’s a temporary fix, and I’m still deciding how I feel about it, but it adds a touch of personality while we await the next phase of our budget-friendly kitchen transformation!
