Ultimate Smoked Chili Recipe: A Flavorful Weber Kettle Masterpiece
If you’ve ever thought about elevating your chili game, then diving into the world of smoked chili is an absolute must. There’s a profound depth of flavor that only a smoker can impart, transforming a beloved comfort food into an extraordinary culinary experience. This isn’t just another chili recipe; it’s an adventure for your taste buds, promising rich, smoky notes that will keep you coming back for more. While this article shares my personal favorite recipe, the beauty of smoked chili lies in its versatility. You can easily adapt your own tried-and-true chili recipe to the grill, infusing it with that irresistible smoky kick that makes all the difference.
For those eager to explore more delicious possibilities with your Weber Kettle, don’t miss our extensive Kettle Grill recipe collection. It’s packed with ideas to help you maximize your grilling adventures!
Why You Should Try Weber Kettle Smoked Chili
Cooking chili on a Weber Kettle adds a unique dimension that traditional stovetop methods simply can’t replicate. The gentle, consistent heat combined with the aromatic wood smoke creates an unparalleled flavor profile. Here’s why this particular smoked chili recipe stands out and why you need to try it:
- Unforgettable Flavors: Prepare for a chili experience like no other. This smoked chili recipe is crafted to deliver bold, robust, and incredibly complex flavors. Each spoonful will have you pondering, “What incredible ingredient am I tasting?” The secret lies in a carefully selected blend of ingredients that build layers of umami and depth: the savory tang of Worcestershire sauce, the rich saltiness of soy sauce, the crispy, rendered goodness of bacon, the sweetness and char of fire-roasted tomatoes, and a surprising, yet crucial, hint of coffee. Yes, coffee! It adds a dark, earthy note that deepens the overall richness without making the chili taste like coffee. These ingredients work in harmony to create a chili that truly sings.
- Effortlessly Delicious: Don’t let the idea of smoking intimidate you. This chili recipe is surprisingly simple to smoke, making it accessible even for novice pitmasters. The process involves placing a Dutch oven filled with your chili mixture onto your Weber Kettle, closing the lid, and letting the magic happen. The indirect smoking setup allows for a hands-off approach, freeing you up to enjoy other activities while your chili slowly simmers and absorbs all that wonderful smoky essence. A quick check and stir every 15 minutes, adding more briquettes and wood as needed to maintain a consistent smoke, is all it takes for a phenomenal meal in just two hours.
- An Enjoyable Cooking Journey: While this chili recipe boasts a generous list of ingredients, each one plays a vital role in crafting its exceptional taste. The process of preparing, combining, and adjusting these ingredients is not just cooking; it’s an immersive and enjoyable experience. From the initial browning of the meats to the slow simmer on the grill, you’ll find satisfaction in layering the flavors, tasting as you go, and fine-tuning the balance to your preference. We’ve meticulously designed this recipe to be straightforward and uncomplicated, ensuring that every step is a pleasure, culminating in a dish that will impress everyone at your table.
Ingredients For Weber Kettle Smoked Chili
Crafting the perfect smoked chili starts with a thoughtfully curated list of ingredients. This recipe balances hearty meats, aromatic vegetables, a complex array of spices, and essential liquids to create a truly memorable dish. Gather these components before you begin, ensuring everything is prepped and ready for a seamless cooking process. The detailed list of ingredients can be found in the recipe card below, but here’s a quick overview of what makes this chili so special:
Directions For Making Weber Kettle Smoked Chili
Follow these steps carefully to achieve a wonderfully smoky and flavorful chili. The key to this recipe lies in the preparation before the smoking process and then allowing the Weber Kettle to work its magic. Remember, patience is a virtue, especially when it comes to infusing that perfect smoky flavor.
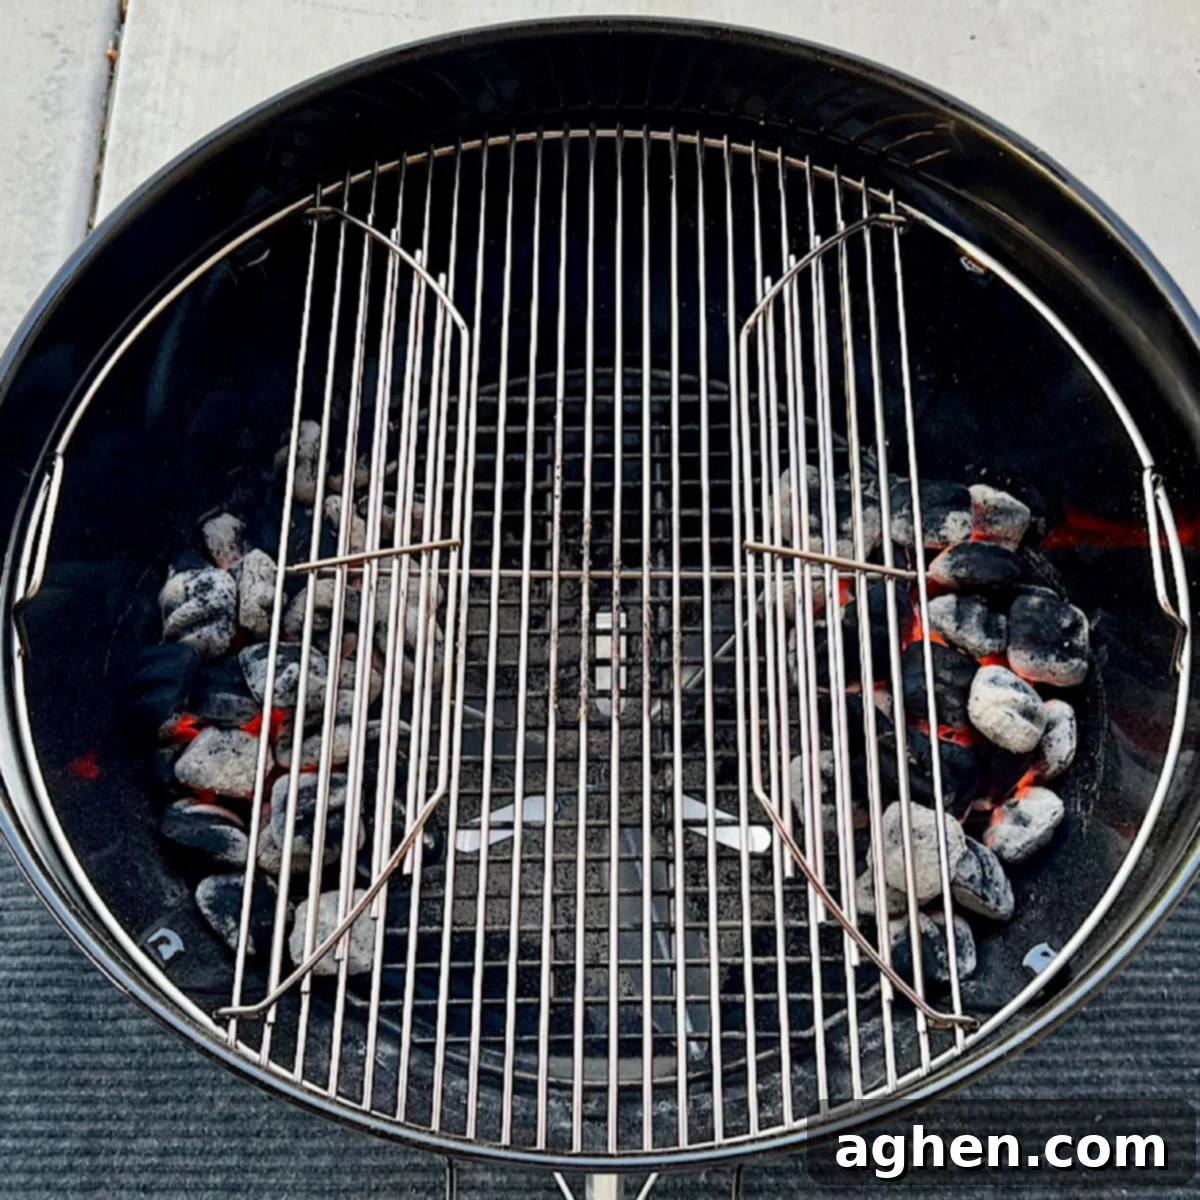
1. Set up your Weber Kettle for indirect smoking – Achieving the perfect smoked chili begins with setting up your grill correctly. Fill your charcoal chimney fire starter with charcoal briquettes and ignite them. Once they are fully lit and covered in a light grey ash, carefully empty the chimney into the center of your charcoal grate. Using long tongs, strategically move the hot charcoal to form two equal piles on opposite sides of the Weber Kettle, leaving the center clear. This creates an indirect cooking zone where your Dutch oven will sit. To enhance the smoke flavor, add three additional charcoal briquettes and two small pieces of wood (or wood chips that have been soaked in water) to each pile. Continue to replenish briquettes and soaked wood as needed throughout the cooking process to maintain a consistent, rich smoke. This ensures your chili absorbs maximum smoky goodness.
2. Prepare the meat – Properly preparing the meat is crucial for both flavor and texture. Begin by mixing the baking soda and cornstarch together. This secret technique, often called “velveting,” tenderizes the beef chuck, resulting in incredibly succulent pieces in your final chili. Massage this mixture thoroughly into the beef chuck chunks and set them aside. In a sturdy Dutch oven (which will later go on the grill), cook the bacon until it’s wonderfully crispy. Remove the bacon with a slotted spoon and set it aside, reserving the rendered bacon fat in the Dutch oven. Sauté the ground beef in this flavorful bacon fat for about 5 minutes, breaking it up as it cooks. Next, add the treated beef chuck, soy sauce, garlic powder, onion powder, and a generous amount of salt and pepper to the ground beef. Continue to sauté until all the meat is well browned, developing deep, rich flavors. Remove the entire meat mixture from the Dutch oven and set it aside.
3. Sauté the vegetables – With the flavorful fond left in the Dutch oven, add a tablespoon of olive oil. Sauté the chopped yellow onion, green bell pepper, and minced garlic until the vegetables are softened and fragrant, about 5-7 minutes. This step builds a foundational layer of aromatic flavor for your chili. Once the vegetables are tender, return the previously cooked meat mixture (but not the crispy bacon yet!) to the Dutch oven with the sautéed vegetables. Mix everything thoroughly to combine.
4. Add the spices to the meat and vegetable mixture – With the Dutch oven still on low heat, it’s time to introduce the heart of your chili’s flavor: the spices. Add all the chili powder, cumin, cayenne, dried minced onion, garlic powder, oregano, and smoked paprika to the meat and vegetable mixture. Stir vigorously until all the spices are evenly distributed and fully incorporated. Heating the spices gently at this stage helps to “bloom” their flavors, releasing their full aromatic potential before the liquids are added.
5. Add the bulk ingredients – Now, with the spice base established, it’s time to add the bulk liquid and solid ingredients. Keep the Dutch oven on low heat as you gradually add each component, stirring well after each addition: beef broth, instant ground coffee, fire-roasted tomatoes, fire-roasted diced green chilies, kidney beans (in chili sauce), soy sauce, tomato paste, tomato sauce, and Worcestershire sauce. Finally, stir in the crispy cooked bacon you set aside earlier. Bring all these ingredients together to a gentle, low simmer in the Dutch oven, allowing the flavors to begin marrying.
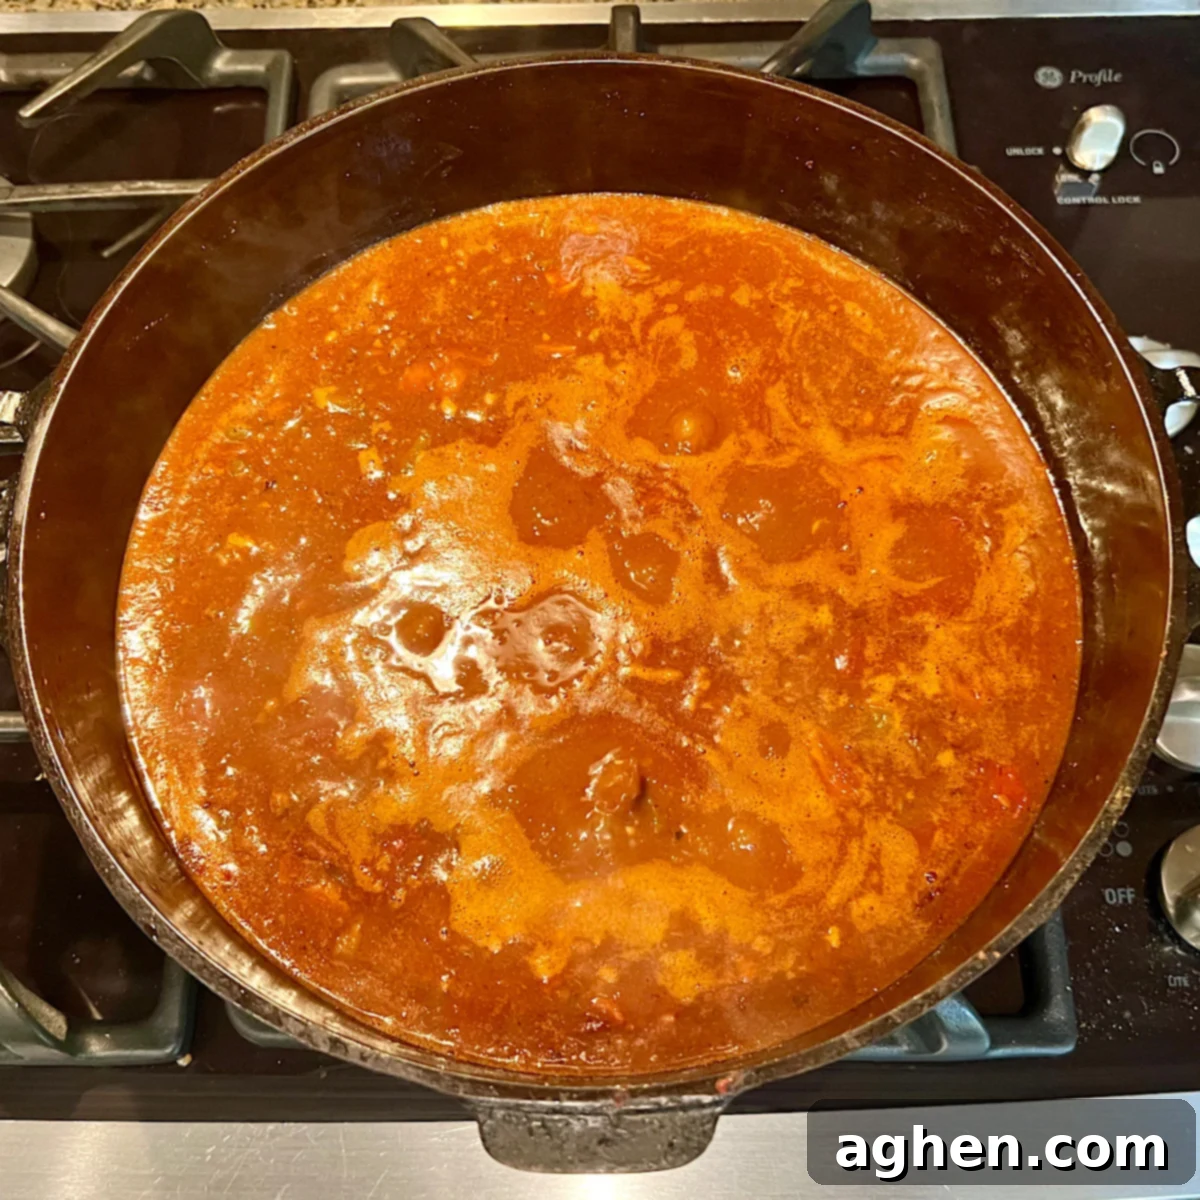
6. Taste for seasoning and adjustments – This is arguably one of the most critical steps in the entire chili-making process. Before it goes onto the smoker, take a moment to taste your chili. This is your opportunity to truly customize the flavor profile to your liking. Does it need more heat? Add a pinch more cayenne. Could it use more depth? A dash more Worcestershire or soy sauce might do the trick. Perhaps a touch more salt or another spice? Don’t be shy; adjust any of the spices or bulk ingredients until you are absolutely satisfied with the taste. Remember, this is *your* chili, so make it perfect for *you*!
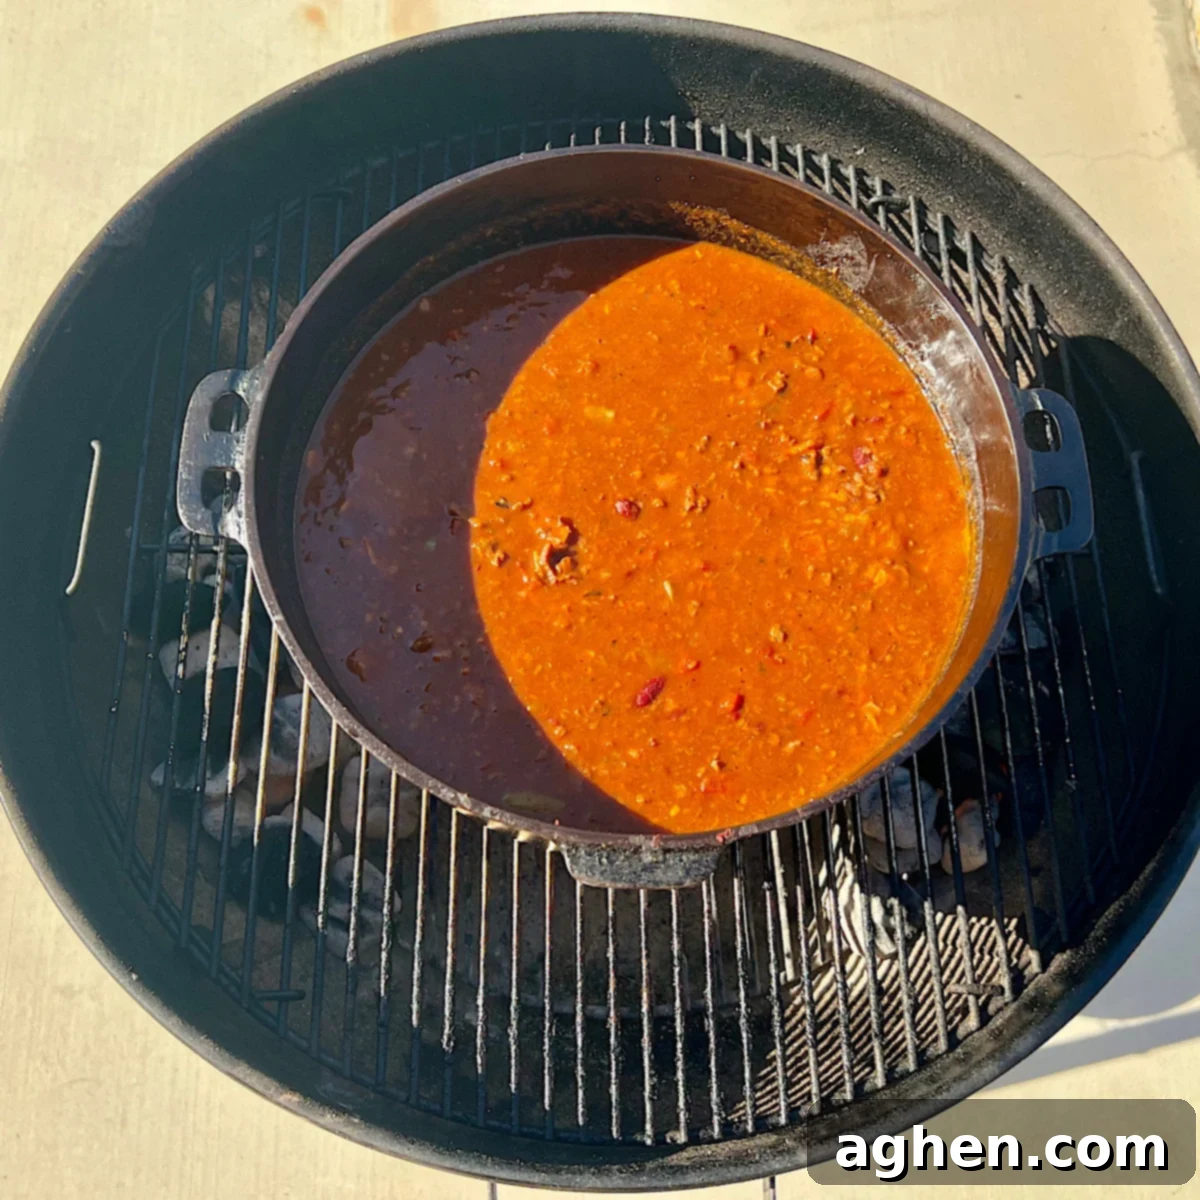
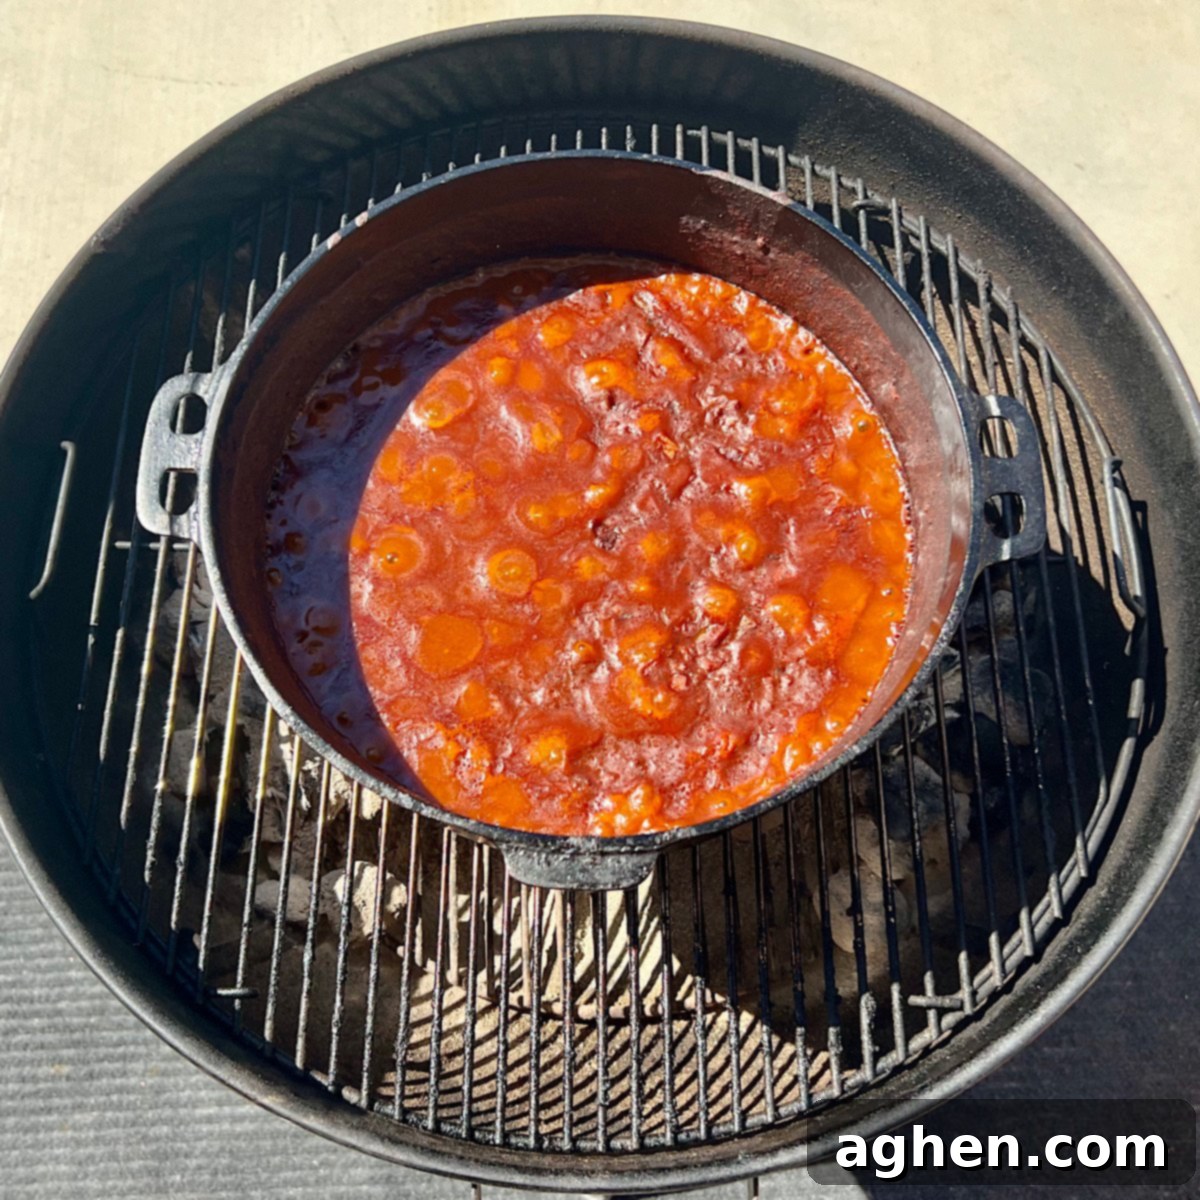
7. Transfer the chili to the Weber Kettle – Carefully place the uncovered Dutch oven directly onto the grill grate of your pre-heated Weber Kettle. Position it in the center, equidistant between the two piles of charcoal and wood, ensuring it’s in the indirect heat zone. Close the lid of the Weber Kettle to trap the smoke and heat. Allow the chili to smoke for two hours. During this time, make sure to stir the chili every 15 minutes. This regular stirring prevents sticking, ensures even cooking, and allows every part of the chili to absorb that glorious smoky flavor.
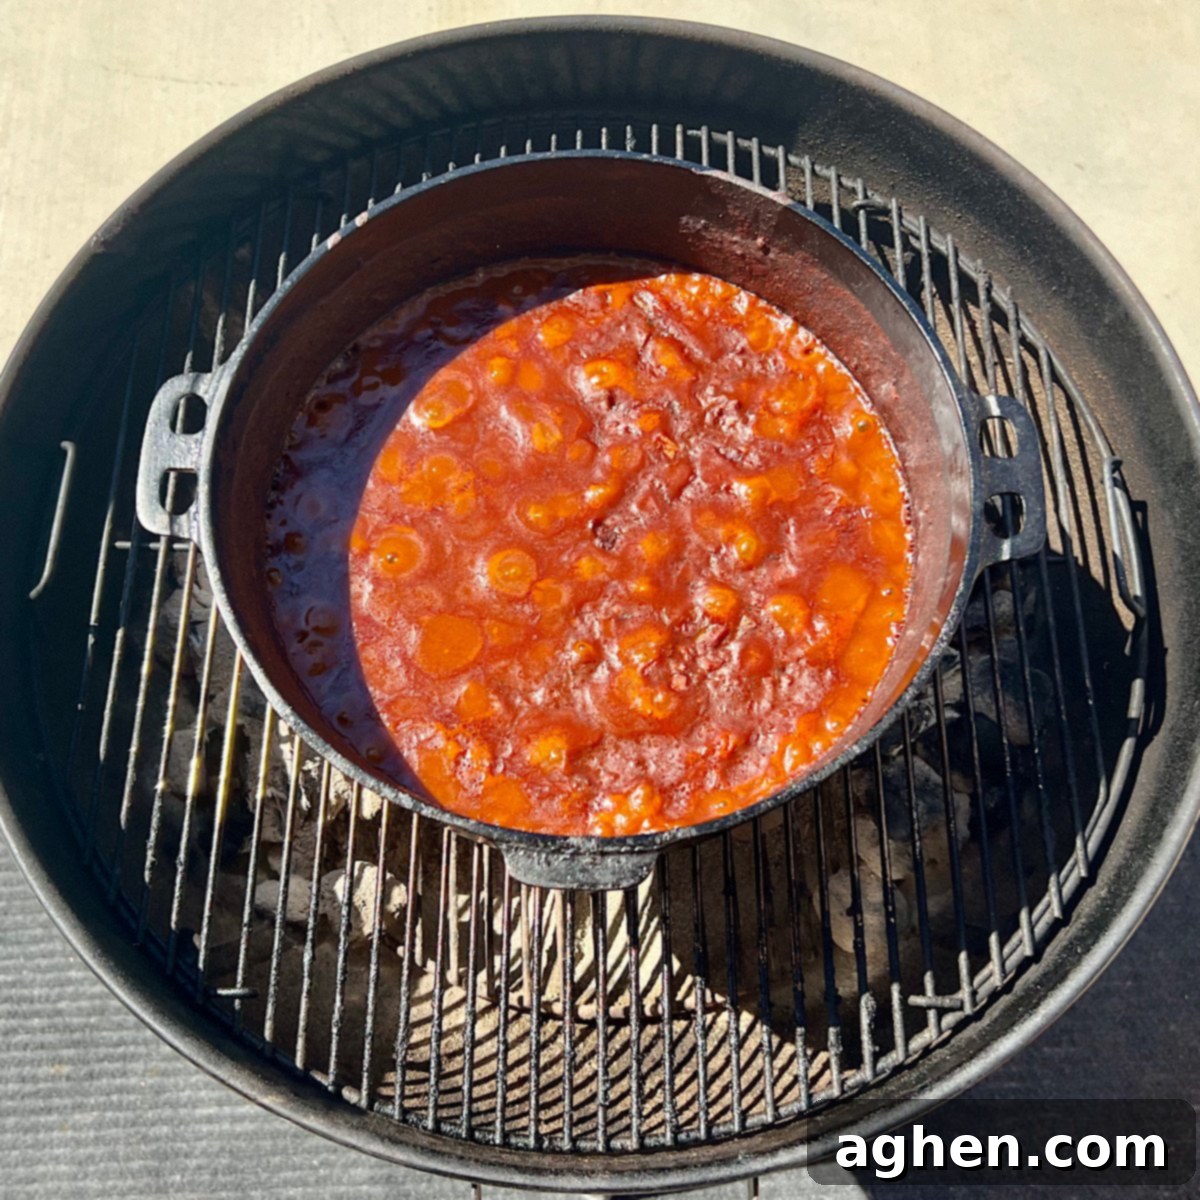
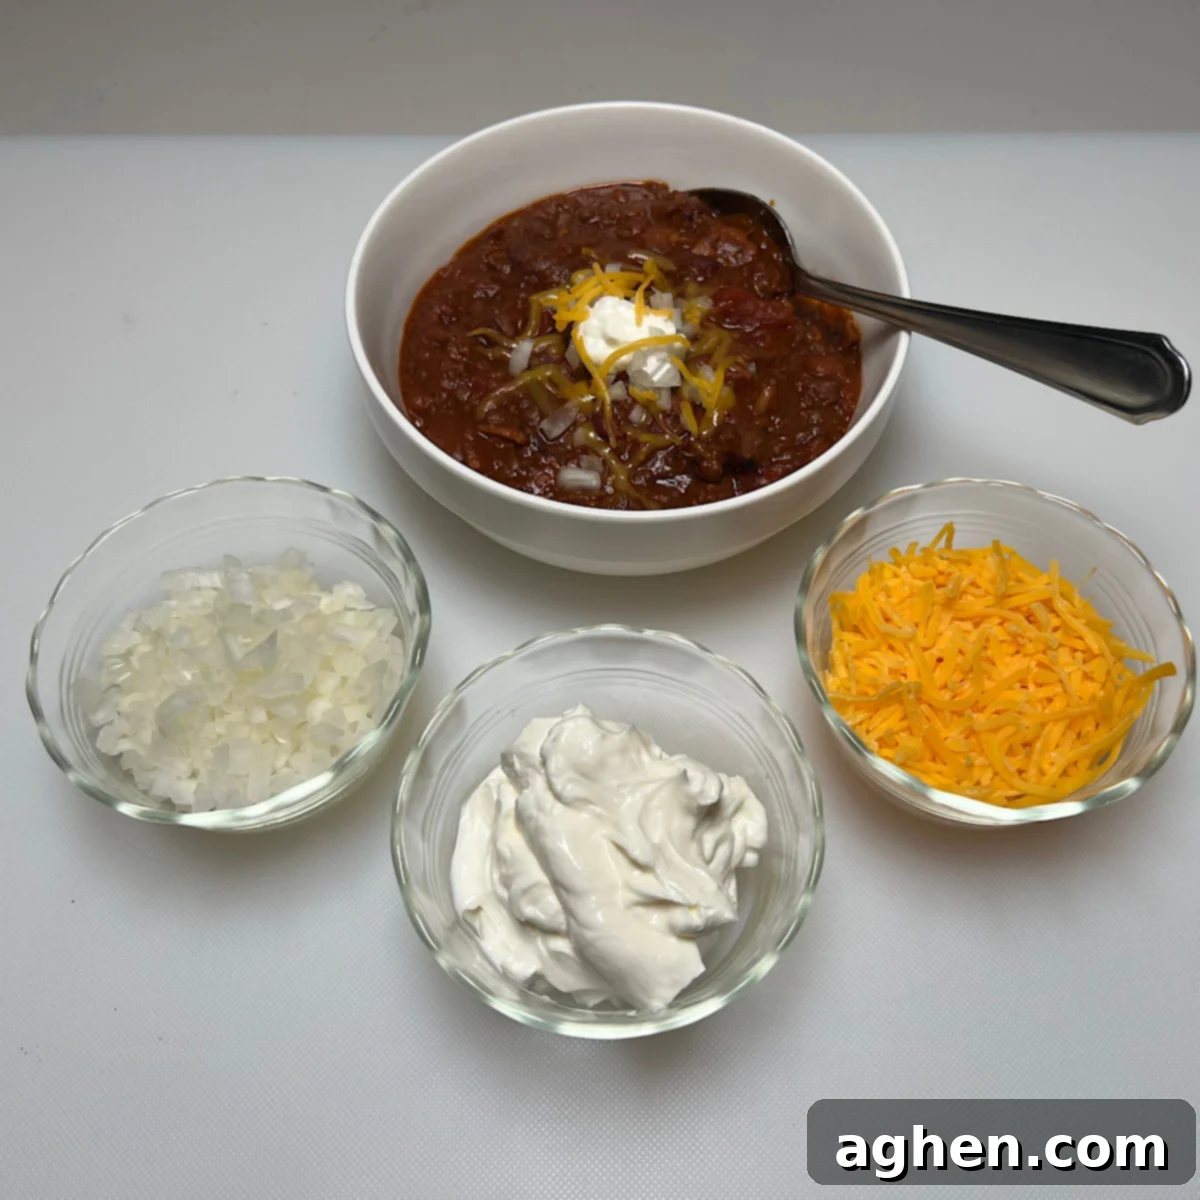
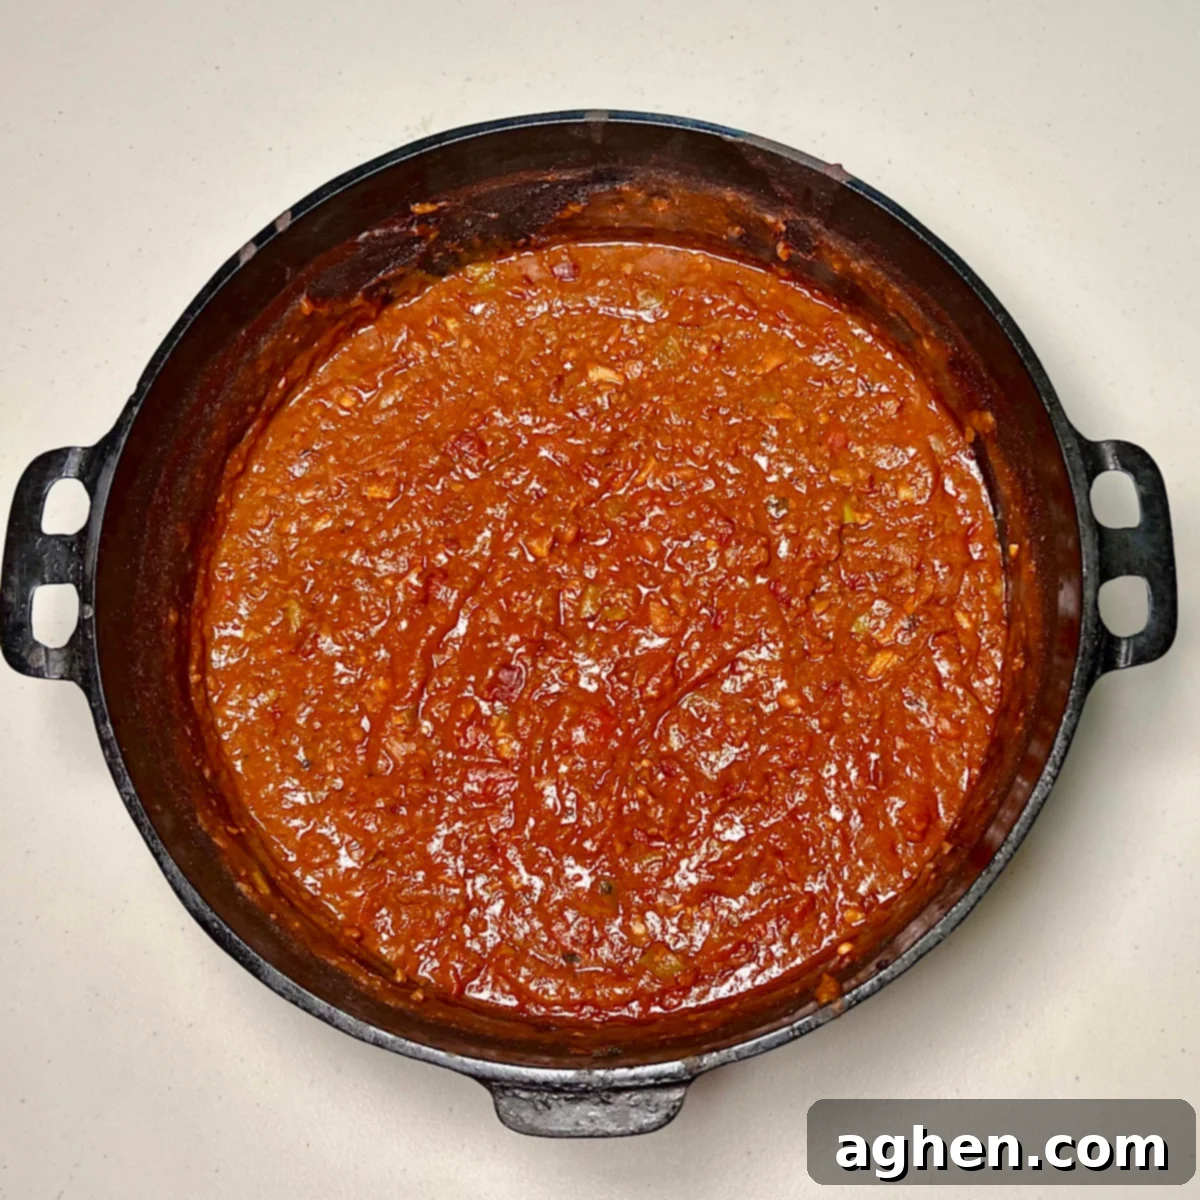
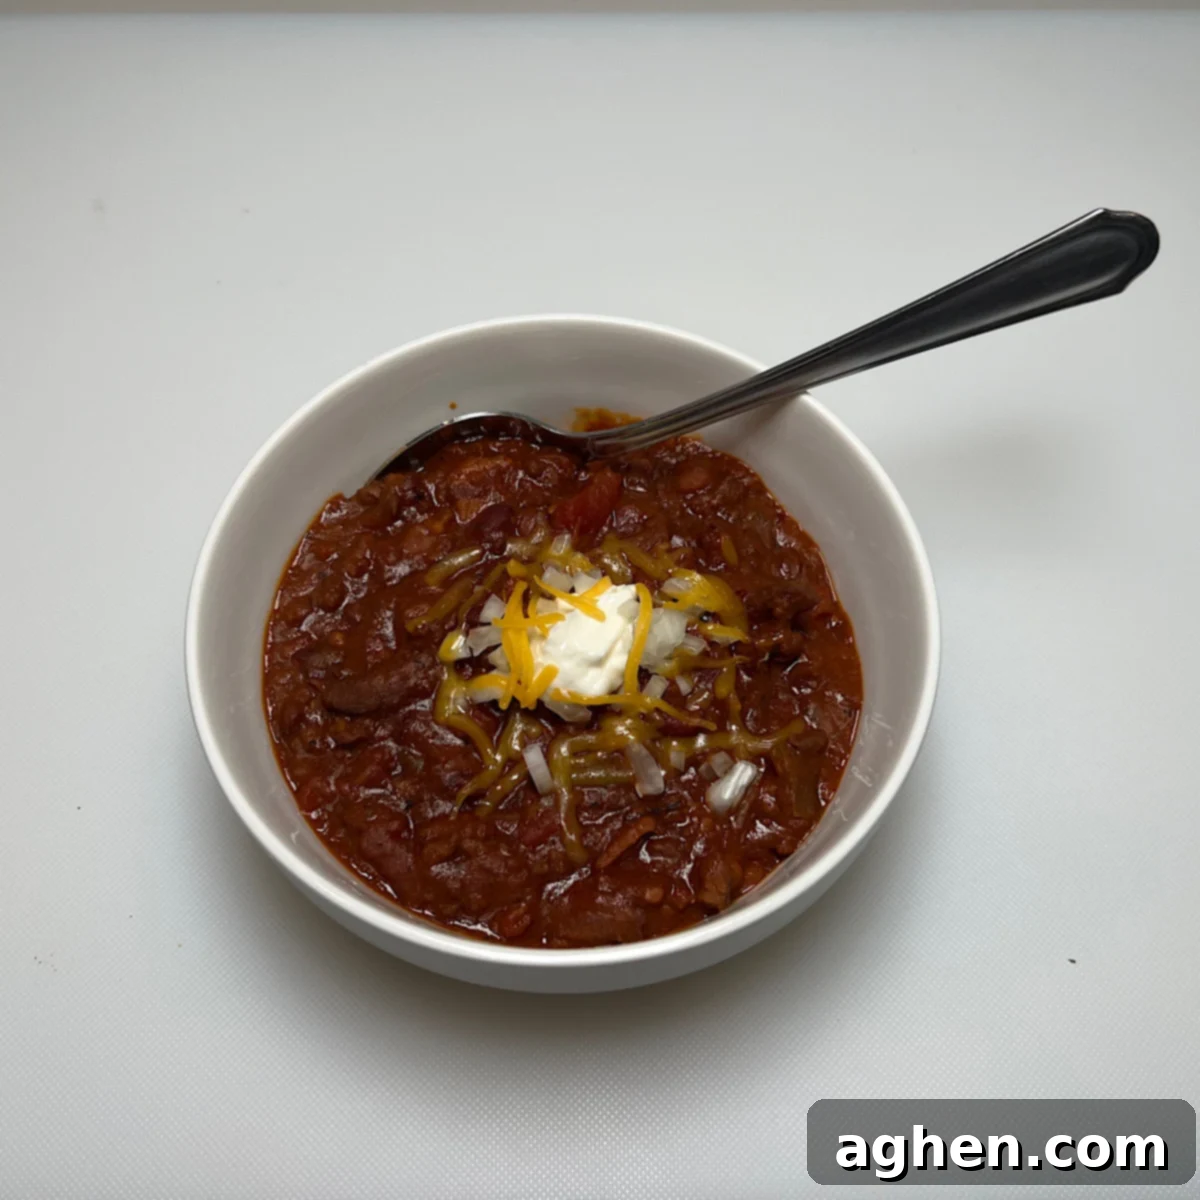
8. Take the smoked chili off the Weber Kettle – After two hours of slow smoking, your chili will have transformed, boasting incredible depth and a rich smoky aroma. Carefully, and with the aid of sturdy oven mitts, remove the Dutch oven from the Weber Kettle. The chili is now ready to be enjoyed! Spoon generous portions into bowls and serve immediately. Offer a variety of your favorite toppings to let everyone customize their perfect bowl. Get ready for rave reviews!

Variations And Substitutions For Weber Kettle Smoked Chili
One of the most appealing aspects of chili is its inherent flexibility. It’s a dish that truly invites creativity and personal touches. This recipe, while fantastic as is, can be easily adapted to suit your preferences or what you have on hand. Don’t hesitate to experiment with these suggested variations and substitutions to make this smoked chili uniquely your own:
- Beef chuck – For the beef chuck, you have a wide array of excellent alternatives that will still yield tender, flavorful results. Consider cuts like sirloin for a leaner option, short rib for extra richness and fall-apart tenderness, round steak, rump roast, flank steak, or even tri-tip. If you’re feeling adventurous or hunting season is upon you, any game meat like venison or elk would also be a magnificent substitute, lending a unique, earthy flavor to the chili.
- Ground beef – The ground beef component is equally adaptable. Swap it out for ground pork, which offers a slightly sweeter flavor, or ground lamb for a more gamey, Mediterranean twist. Ground game meats are also excellent here. For lighter alternatives, ground chicken or turkey can be used, though you might want to add a bit more fat to the pan. For an extra layer of flavor, try bulk Italian sausage (mild or spicy) or even breakfast sausage for a truly unique savory profile.
- Vegetables – The vegetable base can be expanded significantly beyond the onion, bell pepper, and garlic. Introduce carrots or celery for added sweetness and texture, corn for a burst of juicy kernels, green beans, mushrooms for an umami boost, peas, or various types of squash. Even asparagus, if chopped finely, can add a fresh dimension. Furthermore, the world of peppers and chilies is vast – experiment with poblano peppers for mild heat, jalapeños for a kick, or even canned chipotle peppers in adobo for a deep, smoky heat.
- Herbs and spices – This list truly could go on forever, as chili is incredibly forgiving when it comes to seasoning. Feel free to use anything you like! Think bay leaves for aromatics, a touch of cocoa powder for depth, smoked salt for an extra smoky layer, or even a pinch of cinnamon for warmth. Just be mindful of the heat level; if adding fresh or dried hot chilies, start small and taste as you go to avoid an overwhelmingly spicy chili that “blows your head off.”
- Kidney beans – While kidney beans are classic, many other types of beans work beautifully in chili. Black beans offer an earthy flavor and creamy texture, pinto beans are wonderfully traditional, white beans or cannellini beans provide a milder, buttery counterpoint, and red beans are another fantastic hearty option. Even black-eyed peas can be used for a slightly different texture and flavor.
- Toppings – The toppings are where the chili truly shines for individual customization. Go beyond the basics with an extensive selection: shredded cheddar, Monterey Jack, or a spicy pepper jack cheese; finely diced red or white onion for a sharp crunch; a dollop of cool sour cream or Greek yogurt; fresh or pickled green chilies; crispy corn chips or Fritos for texture; diced green onion or chives for freshness; and thinly sliced jalapeños (fresh or pickled) for an extra kick. Avocado slices, fresh cilantro, or a squeeze of lime juice also make fantastic additions.
Tips And Tricks For Weber Kettle Smoked Chili
Mastering smoked chili on your Weber Kettle is all about understanding a few key principles and techniques. These tips and tricks will help ensure your chili is not just good, but truly exceptional, brimming with smoky flavor and perfect texture:
- Use a Dutch oven – While you can smoke chili in various heat-proof containers, a Dutch oven is highly recommended for the best results. Its heavy cast-iron construction ensures incredibly even heat distribution, completely surrounding your chili with consistent warmth from the Weber Kettle’s fire. This even heating prevents hot spots and ensures the chili simmers gently, allowing flavors to meld beautifully. Furthermore, the material of a Dutch oven is excellent at absorbing and retaining the smoky aromas, infusing them deeply into every component of your chili. If you don’t have a Dutch oven, a very large cast iron skillet or another heavy, oven-safe pot can work, but a Dutch oven truly is king for this application.
- Taste the chili as you put it together – This is perhaps the most important tip for any cooking, and especially for chili. Throughout the preparation process, from browning the meat to adding the spices and liquids, you’ll have multiple opportunities to taste what you’re cooking. Don’t be afraid to sample frequently! This allows you to check the flavor profile and adjust seasonings and ingredients to your exact preference. A little more salt, a dash of heat, or an extra spoonful of an ingredient can make all the difference in achieving a perfectly balanced chili that truly satisfies your palate. Your vigilance in tasting will undoubtedly lead to a more pleasing final product.
- Let it smoke – The magic of smoked chili comes from allowing ample time for the smoke to penetrate the dish. Because the Dutch oven is left uncovered on the Weber Kettle, the chili is constantly exposed to the aromatic wood smoke, which it readily absorbs. This low and slow cooking, combined with the continuous smoke, doesn’t just cook the chili; it transforms it. The longer the chili simmers and smokes on the Weber Kettle, the more deeply the individual flavors will meld together and intensify, creating a complex, layered taste experience that can’t be rushed. Aim for the full two hours of smoking, or even longer if you desire an even deeper smoky flavor and richer consistency. Just be sure to stir regularly and monitor your heat to prevent the chili from burning at the bottom!
Weber Kettle Smoked Chili

Equipment
-
1 Weber Kettle Grill
-
1 Charcoal Chimney Fire Starter
-
Charcoal briquets
-
Wood chunks soaked in water for smoking
-
1 Dutch Oven, oven-proof
-
1 Aluminum Drip Pan disposable
Ingredients
Meat
- 8 ounces bacon, chopped
- 1 pound beef chuck, cut into small chunks
- 1 pound ground beef
Seasoning for the meat
- 1/2 teaspoon baking soda
- 1 teaspoon cornstarch
- 2 tablespoons soy sauce
- 2 tablespoons garlic powder
- 2 tablespoons onion powder
- 1 teaspoon each salt & pepper
Vegetables
- 1 tablespoon olive oil
- 1 yellow onion, chopped
- 1 green bell pepper, chopped
- 2 tablespoons garlic
Spices
- 1 tablespoon cayenne
- 3 tablespoons chili powder, McCormick is best
- 3 tablespoons cumin
- 3 tablespoons dried minced onion
- 3 tablespoons garlic powder
- 3 tablespoons oregano
- 3 tablespoons smoked paprika
Bulk ingredients
- 32 ounces beef broth
- 2 tablespoons instant ground coffee
- One, 14.5 ounce can fire-roasted tomatoes
- Two, 4 ounce cans fire-roasted diced green chilies
- Two, 14 ounce cans kidney beans in chili sauce
- 1/4 cup soy sauce
- One, 7 ounce can tomato paste
- One, 8 ounce can tomato sauce
- 1/4 cup Worcestershire sauce
Instructions
-
Set up your Weber Kettle for indirect smoking – Fill your charcoal chimney fire starter with charcoal briquettes, and when ready, empty the chimney in the center of the charcoal grate. With tongs, move the charcoal to both sides of the Weber Kettle, creating two equal piles. Add three more charcoal briquets and two small pieces of soaked wood or wood chips to each pile. Add more briquets and soaked wood or wood chips as needed to maintain the maximum smoke.
-
Prepare the meat – Mix the baking soda and cornstarch together, massage into the beef chuck pieces, and set aside. In a Dutch oven, cook the bacon until crispy; remove and set aside. Sauté the ground beef in the bacon fat for 5 minutes. Add and thoroughly mix in the beef chuck, soy sauce, garlic powder, onion powder, and salt and pepper, and sauté until well browned. Remove the meat mixture from the Dutch oven and set aside.
-
Sauté the vegetables – Add the olive oil to the Dutch oven and sauté the onion, green bell pepper, and garlic. Add the meat mixture (not the bacon yet) to the vegetables in the Dutch oven and thoroughly mix.
-
Add the spices to the meat and vegetable mixture – With the Dutch oven on low heat, add all of the spices to the meat and vegetable mixture in the Dutch oven and thoroughly mix together.
-
Add the bulk ingredients – With the Dutch oven on low heat, add all the bulk ingredients to the Dutch oven one at a time and thoroughly mix together, including the cooked bacon. Bring all the ingredients to a low simmer in the Dutch oven.
-
Taste for seasoning and adjustments – This is a very important step in the chili cooking process. This is where you make the chili taste just how YOU like it. Taste the chili, and add any of the spices and bulk ingredients to the chili you want until you are satisfied that you like the taste of your chili.
-
Transfer the chili to the Weber Kettle – Place the uncovered Dutch oven directly on the grill grate of your Weber Kettle, equidistant between the two piles of charcoal and wood. Close the lid and smoke for two hours, stirring the chili every 15 minutes.
-
Take the smoked chili off the Weber Kettle – Carefully and with oven mitts, remove the Dutch oven from the Weber Kettle. Spoon the chili into bowls and serve with your favorite toppings.
Nutrition
Nutrition information is automatically calculated, so should only be used as an approximation.
