Magical Unicorn Cheesecake Recipe: The Ultimate Funfetti Dessert for Any Party
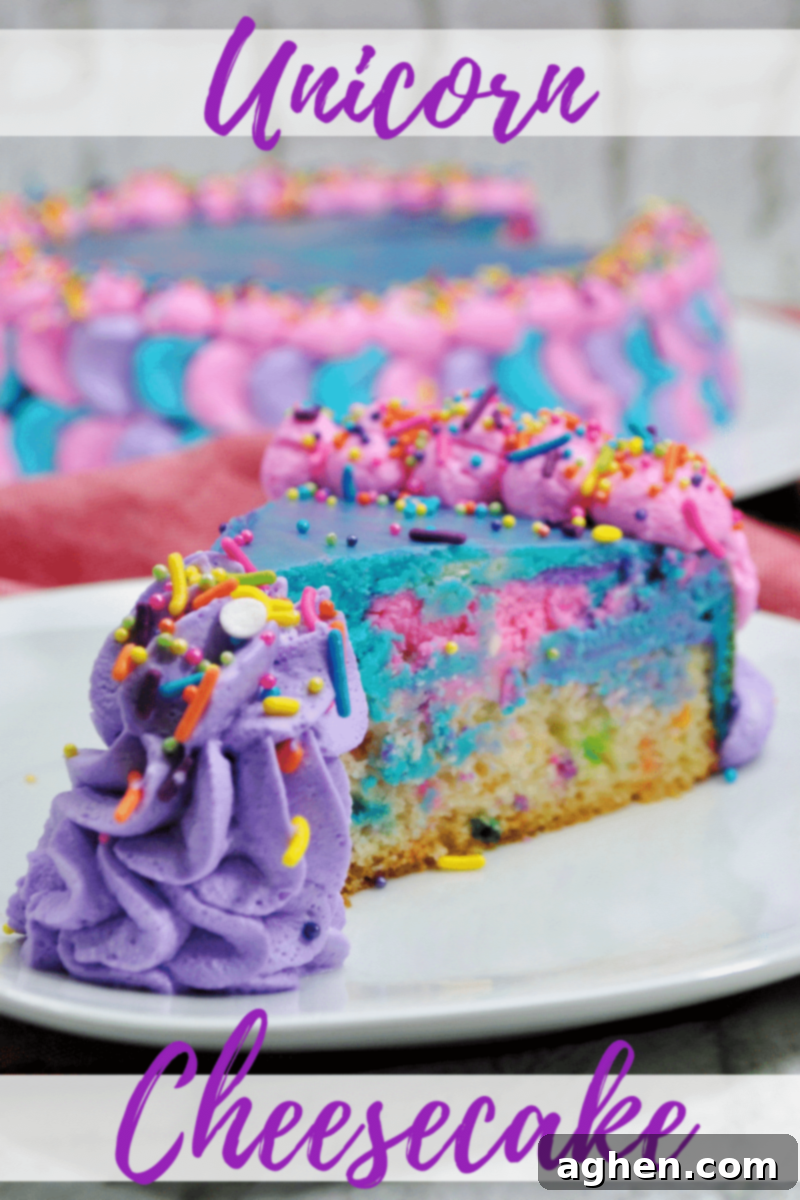
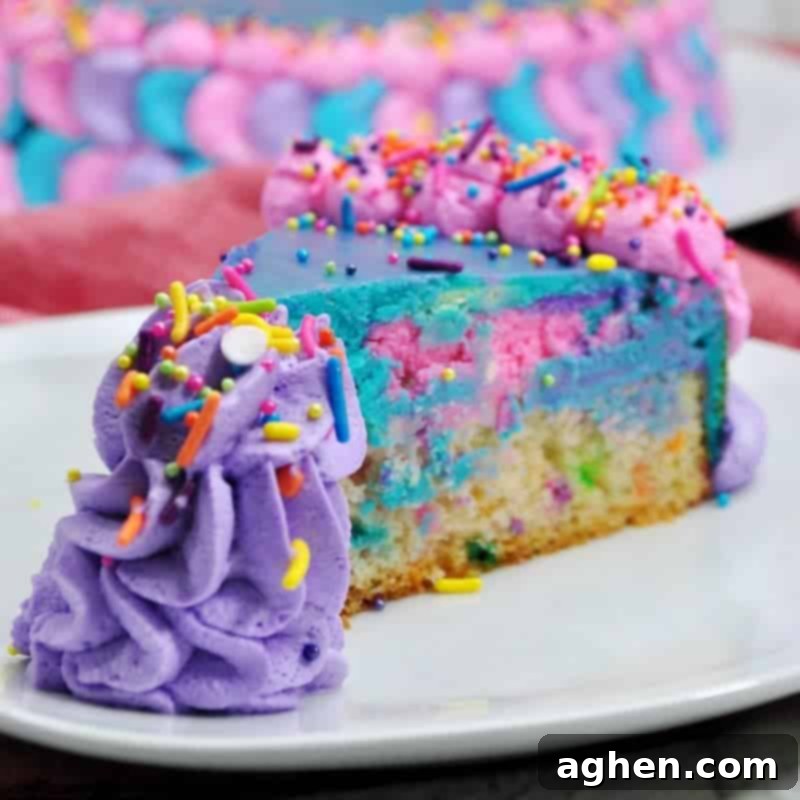
Prepare to be utterly enchanted by this show-stopping Unicorn Cheesecake! More than just a dessert, this creation is a vibrant, whimsical experience that promises to delight both the eyes and the taste buds. Combining the playful charm of a moist funfetti cake with the rich, creamy indulgence of a classic cheesecake, it’s truly the perfect centerpiece for any unicorn-themed party, birthday celebration, or even just a magical treat on a cozy night in. Each slice reveals layers of dazzling color, making every bite an adventure.
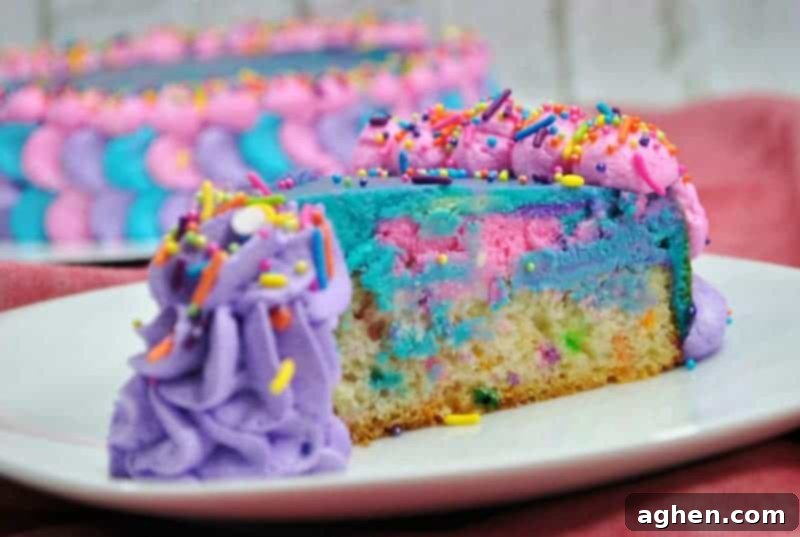
If you’re on the hunt for a truly special dessert that will make any unicorn enthusiast’s dreams come true, your search ends here. This isn’t just a cake; it’s a statement piece that will be remembered long after the last vibrant slice is devoured. Its vivid colors and delightful flavors make it an unforgettable addition to any gathering, bringing a smile to everyone’s face, from toddlers to adults.
Whether it’s for a festive slumber party, a memorable birthday bash, or simply a fun girls’ night in, this enchanting unicorn-themed dessert is guaranteed to be a huge hit. It seamlessly blends the comforting familiarity of cake with the sophisticated texture of cheesecake, offering a unique dessert experience that stands out from the crowd.
Looking for more whimsical unicorn fun? Don’t miss this delightful unicorn snack idea to complete your party spread!
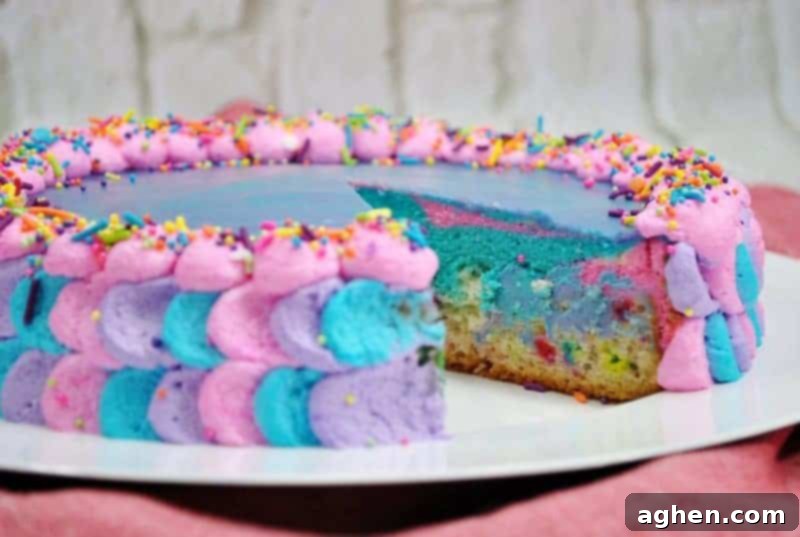
This unicorn cake transcends ordinary desserts by offering both stunning visual appeal and an absolutely incredible taste experience. Imagine sinking your teeth into a moist, tender layer of funfetti cake, bursting with colorful sprinkles, immediately followed by a thick, velvety layer of rich and creamy cheesecake. This cheesecake isn’t just plain; it’s swirled with vibrant hues of purple, pink, and blue, creating a mesmerizing rainbow effect within each slice. But the magic doesn’t stop there. The entire creation is crowned with a vibrant, cloud-like whipped cream topping, artfully swirled with various pastel colors, and finished with a cascade of whimsical unicorn sprinkles. It’s a dessert that is as fantastical and beautiful as the mythical unicorn itself, promising a truly magical moment for every guest.
The secret to this dessert’s universal allure lies in its harmonious blend of textures and flavors. The light, airy funfetti cake provides a delightful textural contrast to the dense, luxurious cheesecake. Each bite offers a playful crunch from the sprinkles, a smooth creaminess from the cheesecake, and a delicate sweetness from the perfectly whipped topping. This carefully crafted combination ensures a truly sensational and memorable experience, making it more than just a cake – it’s an edible work of art designed to bring joy and wonder to any celebration.
Craving even more unicorn magic for your meals? Make your breakfast extraordinary with this amazing Unicorn Bread! It’s a fantastic way to start any day with a sprinkle of joy.
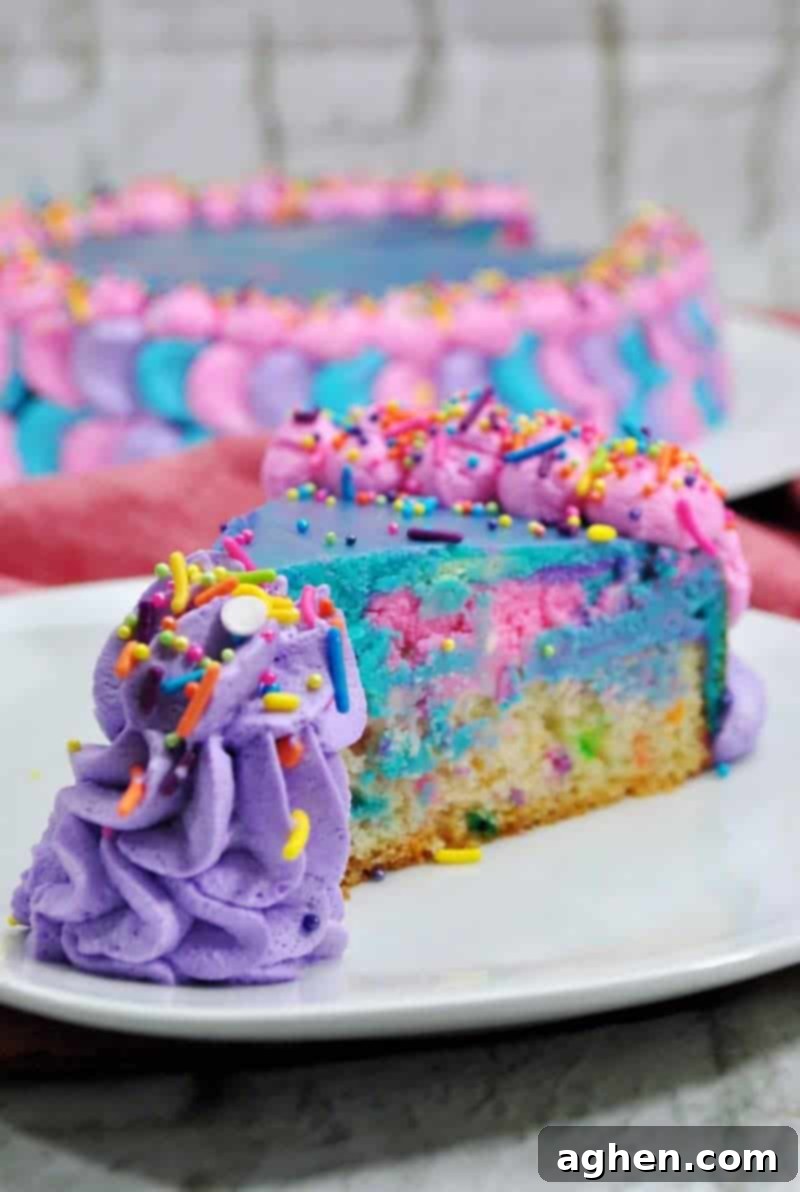
One thing is absolutely certain: any unicorn lover, regardless of age, will be utterly captivated by this exquisite unicorn cheesecake. Its enchanting appearance and delectable taste make it an instant favorite, ensuring that it will be the undisputed highlight of any dessert table. Prepare for gasps of delight and plenty of picture-taking when you present this magnificent creation!
Crafting Your Unicorn Cheesecake: Essential Supplies and Smart Preparation Tips
Let’s be upfront: creating this majestic unicorn cheesecake isn’t one of those “whip it up in five minutes” dessert recipes. This delightful funfetti-cheesecake hybrid requires a bit of time, patience, and effort, but the journey is part of the fun! However, we can wholeheartedly guarantee that every moment spent crafting this dessert will be incredibly rewarding. The end result is a true masterpiece – a cake that is as much a feast for the eyes as it is for the palate! The impressive visual impact alone is worth the extra dedication.
To ensure a smooth and enjoyable baking process, start by meticulously gathering all your ingredients and necessary supplies. Having everything organized and within reach before you begin will significantly streamline your baking experience and prevent any last-minute scrambling. You’ll need everything detailed in the comprehensive recipe card below, in addition to the following essential tools that will help you achieve cheesecake perfection.
Essential Baking and Decorating Supplies:
- 9-inch Springform Pan: This specialized pan is absolutely crucial for this recipe. Its removable sides allow for easy, damage-free removal of your delicate cheesecake and cake layers, preserving their beautiful structure and ensuring a flawless presentation.
- Parchment Paper: Essential for preventing the cake and cheesecake from sticking to the bottom of the pan. Cutting a circle of parchment paper to fit the base ensures a clean release and makes transferring the finished cheesecake much easier.
- Non-Stick Cooking Spray: Provides an extra layer of insurance against sticking. Lightly coating the sides of the springform pan will help the cheesecake release cleanly without tearing.
- Icing Spatula: This versatile tool is perfect for a variety of tasks, from gently smoothing out the cheesecake batter in the pan to artfully applying the whimsical whipped cream topping with precision and ease, creating those signature petal effects.
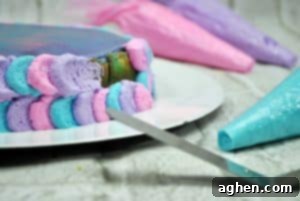
- 3 Piping Bags: Indispensable for creating the colorful, swirled whipped cream design on top. Having separate bags for each color (purple, pink, and blue) makes the decorating process much cleaner, more efficient, and prevents colors from bleeding together prematurely.
- Large Mixing Bowls: You’ll need several sturdy mixing bowls for preparing different batters and for dividing and coloring your cheesecake and whipped cream mixtures. Glass or metal bowls are often preferred, especially for chilling whipped cream.
- Electric Mixer (Stand or Handheld): Absolutely vital for achieving the light, fluffy consistency of the funfetti cake batter, the smooth and creamy texture of the cheesecake batter, and the stiff peaks required for the whipped cream topping.
- Wire Rack: A cooling rack is essential for allowing your cake and cheesecake to cool properly and evenly after baking. This prevents condensation from forming on the bottom and ensures the layers set correctly.
- Gel Food Coloring: Unlike liquid food coloring, gel colors provide intense, vibrant hues without adding excess moisture to your batters, which is important for maintaining the correct consistency of both the cheesecake and the whipped cream.
Crafting the Perfect Unicorn Sprinkles: Your Magical Finishing Touch
The sprinkles are a key element that truly brings the “unicorn” magic to life! They add that essential sparkle, pop of color, and playful texture that defines this whimsical dessert. While we chose to create our own custom blend by combining several different varieties of sprinkles for a truly unique and personalized look, you have a couple of fantastic options. Crafting your own allows for a bespoke mix of colors, shapes (like stars, pearls, and jimmies), and textures, making your cheesecake truly one-of-a-kind and reflecting your personal style.
However, if you’re short on time, prefer a simpler approach, or are looking for a cohesive professional finish, you can just as easily purchase pre-made unicorn sprinkles. Many reputable brands offer fantastic, ready-to-use mixes that feature the classic pastel pinks, purples, and blues, often with iridescent, pearlescent, or glittery accents that perfectly capture the ethereal essence of a unicorn. These pre-blended options save time and ensure a consistent theme. Some excellent choices to consider for instant magic include these enchanting sprinkle mixes or these whimsical alternatives, both readily available. Whichever route you choose, make sure your sprinkles are vibrant and plentiful to create that ultimate magical and festive finishing touch!
More Unicorn Party Delights to Explore: Extend the Magic!
If you’re planning a full-fledged unicorn celebration, why stop at just cheesecake? We have a collection of other fantastic unicorn-themed ideas that will complete your magical party spread and immerse your guests in a world of enchantment from start to finish. These recipes are not only fun to make but also incredibly delicious to eat, ensuring your dessert table is as diverse as it is delightful. Expand your menu with these easy-to-make and visually stunning treats:
- Unicorn Jello Cups: Layers of vibrant, fruity Jello for a light, refreshing, and jiggly treat that kids absolutely adore.
- Unicorn Cheesecake Bars: A convenient, shareable, and equally festive version of cheesecake, perfect for a crowd, with all the signature unicorn flair.
- Funfetti Cake Batter Blondies: Chewy, sweet, and incredibly moist blondies packed with colorful sprinkles – a fun and easy twist on classic cake batter flavor.
- Unicorn Pudding Parfaits: Easy-to-assemble individual parfaits with colorful pudding layers, a perfect grab-and-go dessert that looks stunning.
- Unicorn Cookies: Adorable, decorated cookies in various shapes (like unicorns or stars) that are always a crowd-pleaser and offer a creative outlet.
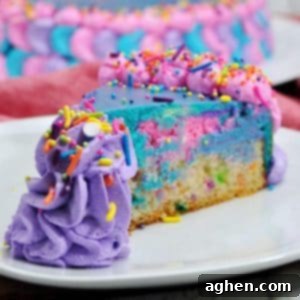
Unicorn Cheesecake
Author: Jaclyn
Equipment
-
Wilton Icing Colors, Set of 12
-
Sweets Indeed Candy Sprinkles – Purple Pink and Blue
-
Wilton Disposable 16-Inch Decorating Bags
-
Parchment Paper Liners for 9 in. Cake Pan
-
Rachael Ray Oven Lovin’ 9-Inch Springform Pan
-
OXO Good Grips Offset Icing Spatula
Ingredients
For the Whipped Topping
- 2 cups heavy whipping cream cold, for best results
- 4 Tablespoons confectioners sugar
- gel food coloring in vibrant purple, pink, and blue hues
- unicorn sprinkles
For the Cheesecake
- 1 cup granulated sugar
- 2 tsp vanilla extract
- gel food coloring purple, pink, and blue, for vibrant layers
- 24 ounces cream cheese softened to room temperature
- 3 large eggs
- ¼ cup sour cream
For the Cake Base
- 15.25 ounces Funfetti cake mix plus any additional ingredients specified on the box (e.g., eggs, oil, water)
- 3 Tablespoons unicorn sprinkles
Instructions
-
1. Prepare Your Oven: Begin by preheating your oven to a precise 350°F (175°C). An accurately preheated oven is key for ensuring your cake bakes evenly and achieves the correct texture.
-
2. Prep the Springform Pan: Take your 9-inch springform pan. Line the bottom with a carefully cut circle of parchment paper, which is essential for easy removal of your finished cake. Then, lightly coat both the parchment paper and the sides of the pan with non-stick cooking spray. This dual approach ensures your funfetti cake base won’t stick, making for a flawless foundation. Set the prepared pan aside.
-
3. Mix the Funfetti Cake Batter: In a large mixing bowl, prepare the Funfetti cake mix according to the specific instructions provided on its package. This usually involves adding eggs, oil, and water. Once the batter is smooth and well-combined, gently fold in an additional 3 tablespoons of unicorn sprinkles. This significantly boosts the funfetti effect and adds extra sparkle and crunch to your cake base, enhancing its playful character.
-
4. Bake the Funfetti Cake Layer: Pour the prepared Funfetti batter into your springform pan, filling it approximately halfway. Bake in the preheated oven for 23 to 25 minutes. To confidently check for doneness, insert a toothpick into the very center of the cake; if it comes out clean or with a few moist crumbs, the cake is perfectly baked. Carefully remove the pan from the oven and allow the cake to cool in the pan on a wire rack for 10 minutes. This initial cooling period is important before adding the delicate cheesecake layer on top.

-
5. Prepare the Cheesecake Batter: While your funfetti cake layer is cooling, begin preparing the rich and creamy cheesecake batter. In a large bowl, using an electric mixer (either stand or handheld), beat the softened cream cheese and granulated sugar together until the mixture is light, fluffy, and completely smooth, with absolutely no lumps. This step is critical for a silky and crack-free cheesecake. Next, add the eggs one at a time, beating just until each egg is combined before adding the next. Be careful not to overmix at this stage, as incorporating too much air can cause cracks in your baked cheesecake. Finally, gently stir in the sour cream and vanilla extract until everything is just combined and homogenous.
-
6. Color the Cheesecake Batter: Divide the prepared cheesecake batter evenly into three separate bowls. Now, unleash your creativity by adding gel food coloring to each bowl: dye one portion a vibrant purple, another a lovely pastel pink, and the final portion a bright sky blue. Gently stir each color until it’s uniform and streak-free. Remember that gel food colorings are preferred as they provide intense color without thinning the delicate cheesecake batter, ensuring its perfect consistency.
-
7. Layer the Cheesecake onto the Cake: With the funfetti cake still in the springform pan and partially cooled, begin to add your colored cheesecake batters. Alternating between the purple, pink, and blue, scoop generous spoonfuls of each color onto the top of the funfetti cake. You can arrange them in a random marbled pattern or simply dollop them for a striking, vibrant, patchy effect. If desired, use an icing spatula or the back of a spoon to gently smooth out the top surface, or swirl the colors together slightly for a more artistic and blended unicorn look.
-
8. Bake and Chill the Cheesecake: Carefully place the springform pan back into the preheated oven. Bake for 60 to 70 minutes. The cheesecake should appear mostly set around the edges but with a slight, gentle wobble in the very center when you lightly shake the pan. Once baked, remove the pan from the oven and let it cool completely on a wire rack for at least 60 minutes. After this initial cooling, transfer the pan to the refrigerator. This extended chilling period is absolutely crucial for the cheesecake to firm up properly, for the flavors to meld beautifully, and to prevent cracking. Chill for at least 4 hours, or ideally, overnight, for the best texture, stability, and ease of handling.

-
9. Release the Cheesecake: Once the cheesecake is thoroughly chilled (this step is paramount for success!), carefully open the springform pan latch and gently remove the outer ring. You may need to run a thin, warm knife around the edge of the cheesecake first if it appears stuck, but the extensive chilling should help it pull away cleanly from the sides. It is absolutely essential not to attempt to remove the cake from the pan until it has completely chilled and set – rushing this step can easily lead to cracks or a collapsed cheesecake.
-
10. Prepare the Whipped Topping: In a well-chilled large mixing bowl (using a chilled whisk or mixer attachment is also highly recommended for best results), combine the cold heavy whipping cream, vanilla extract, and confectioners’ sugar. Beat the mixture on medium speed until stiff peaks form. Be careful not to overbeat, as heavy cream can quickly turn into butter if agitated too much. Stiff peaks mean the cream holds its shape firmly when the whisk is lifted.
-
11. Color the Whipped Topping: Divide the prepared whipped topping into three separate bowls. Allocate a larger portion (about twice as much as the other two) to one bowl, which will be prominently featured as pink. Use your chosen gel food coloring to dye this largest portion a beautiful, vibrant pink. Dye the remaining two smaller portions a lovely blue and purple. Stir gently until the colors are fully incorporated and streak-free, taking care not to deflate the whipped cream.
-
12. Decorate the Cheesecake with Whipped Topping: Scoop each color of whipped topping into its own piping bag. If you have different piping tips, you can experiment, or simply snip the end of each bag to create a round opening. Begin piping a row of dots or small rosettes around the entire side of the cheesecake, alternating between all three colors to create a stunning rainbow effect. Then, using a small offset icing spatula or the back of a spoon, gently spread these dots horizontally to create a beautiful, “petal” or “ruffle” look. Repeat this process, working your way up until the entire side of the cheesecake is covered in colorful, feathery swirls, mimicking a unicorn’s mane.

-
13. Final Touches and Sprinkles: Pipe additional dots or small swirls of pink whipped topping along the very top edge of the cheesecake to create a delicate and decorative border. Finally, generously sprinkle your chosen unicorn sprinkles over the top, allowing them to cascade slightly over the sides. This adds the ultimate magical sparkle, a delightful textural contrast, and truly brings the unicorn theme to life.
-
14. Final Chill Before Serving: To allow the whipped topping to fully set and ensure the cheesecake is perfectly firm, easy to slice, and at its prime texture, place the fully decorated cheesecake back into the refrigerator for at least an additional 30 minutes before serving. This brief final chill will greatly enhance the overall eating experience.
Notes for Achieving Unicorn Cheesecake Perfection
For a perfectly smooth and crack-free cheesecake, ensuring your cream cheese is fully softened to room temperature is paramount. This allows it to mix without lumps and incorporate other ingredients smoothly and evenly. Also, a common pitfall to avoid is overmixing the cheesecake batter once the eggs are added; mix just until combined to prevent too much air from being incorporated, which can lead to unsightly cracks during the baking and subsequent cooling process. Slow and steady mixing is key here for a dense, creamy result.
While not explicitly listed in the recipe, baking your cheesecake in a water bath can significantly reduce the risk of cracks and ensure a super creamy texture. To do this, wrap the bottom of your springform pan tightly with several layers of heavy-duty foil (to prevent water from seeping in). Place the wrapped pan in a larger roasting pan, then fill the roasting pan with about an inch of hot water before placing it in the oven. This creates a moist baking environment, preventing the cheesecake from drying out too quickly.
Nutrition Information (Per Serving)

Did You Make This Magical Recipe?
We absolutely love seeing your culinary creations! If you’ve tried your hand at making this enchanting Unicorn Cheesecake, we’d be thrilled if you shared your masterpieces with us on Instagram. Tag us @crayonsandcravings and use the hashtag #UnicornCheesecake to join our community of magical bakers! For even more delightful recipe ideas, baking tips, and whimsical food inspiration, be sure to follow us on Pinterest @crayonsandcravings. Happy baking, and we can’t wait to see your unicorn magic!
Pin Recipe
Leave A Review
Pin This Magical Unicorn Cheesecake for Later!
