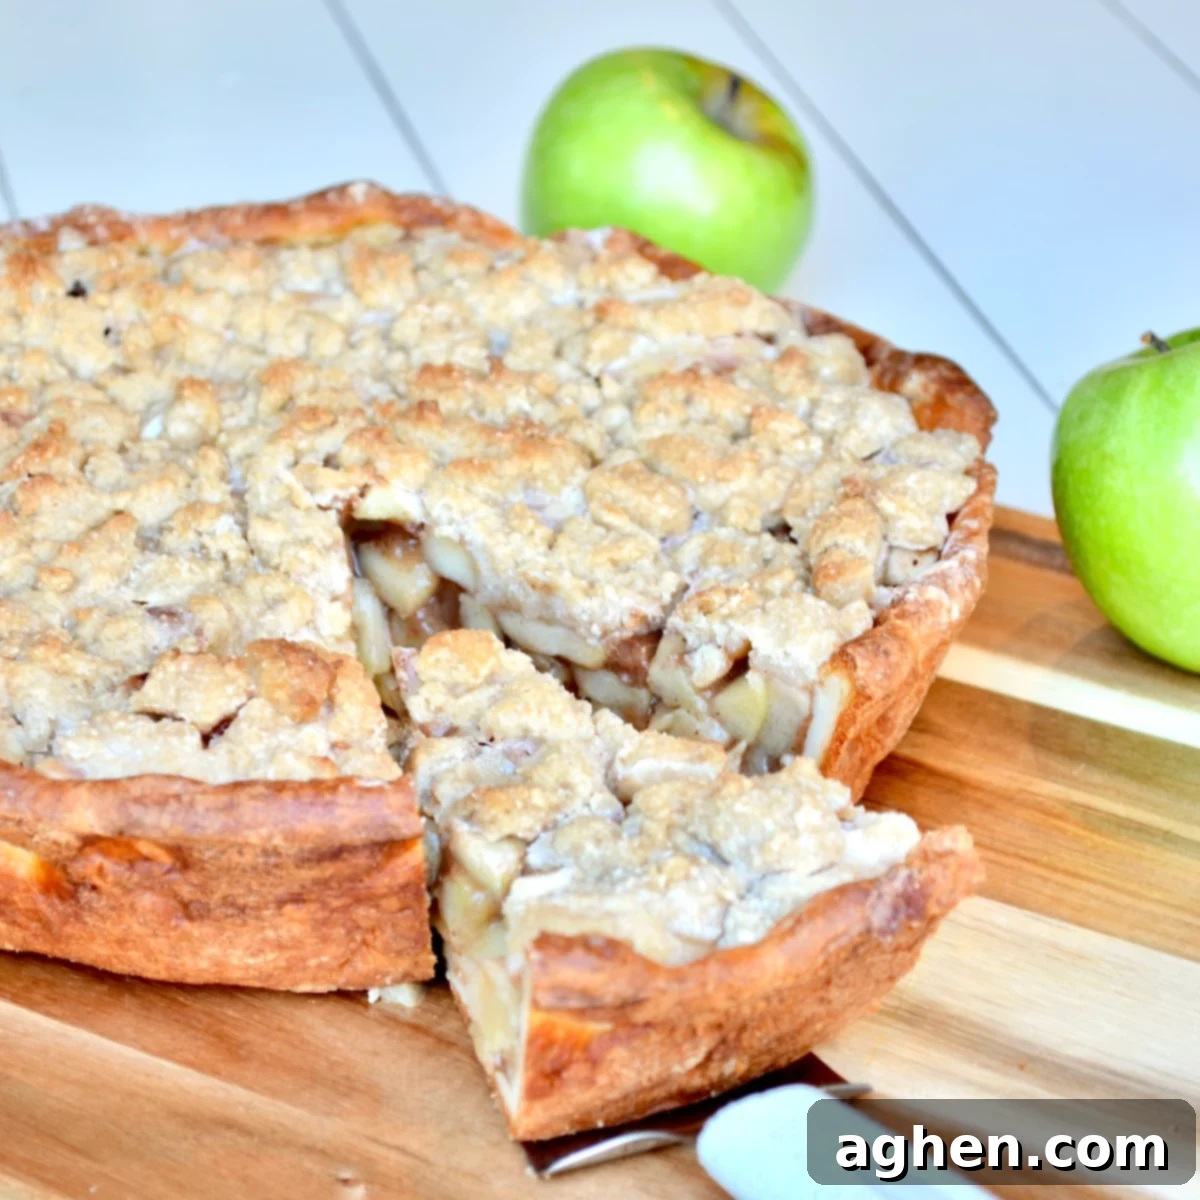
Irresistible & Light: Your Guide to a 3-Point WW-Friendly Dutch Apple Pie
Prepare to be absolutely delighted by this incredible 3-point WW-friendly Dutch Apple Pie. It masterfully combines classic flavors with a healthier approach, proving that you don’t have to sacrifice taste to stay on track with your wellness goals. This recipe is designed to impress, offering a delightful blend of textures and spices that will make it a staple in your kitchen.
If the concept of a Dutch apple pie is new to you, get ready for a truly exceptional dessert experience. Unlike traditional double-crust apple pies, the Dutch variety features a heavenly, buttery streusel-like crumb topping that is utterly divine. This topping isn’t just delicious; it also simplifies the baking process significantly. Because the topping replaces the top crust, there’s less dough to prepare and roll out, making this recipe more accessible even for novice bakers. For our lightened-up version, we’ll create just enough homemade crust to form the base, providing a perfect foundation for the generous apple filling.
And speaking of the filling, it’s bursting with the vibrant, perfectly tender Granny Smith apples. These apples are carefully prepared to achieve that ideal balance of sweetness and tartness, a hallmark of a truly great apple pie. Infused with warming spices like cinnamon and nutmeg, every bite is a comforting embrace. This Dutch apple pie is a dessert lover’s dream, versatile enough to be enjoyed any time of year, but it truly shines during the festive holiday seasons. If you appreciate comforting yet health-conscious dessert recipes, be sure to explore my dessert recipe collection, where you’ll find an abundance of sweet treats, all designed to be low in points so you can savor them without guilt.
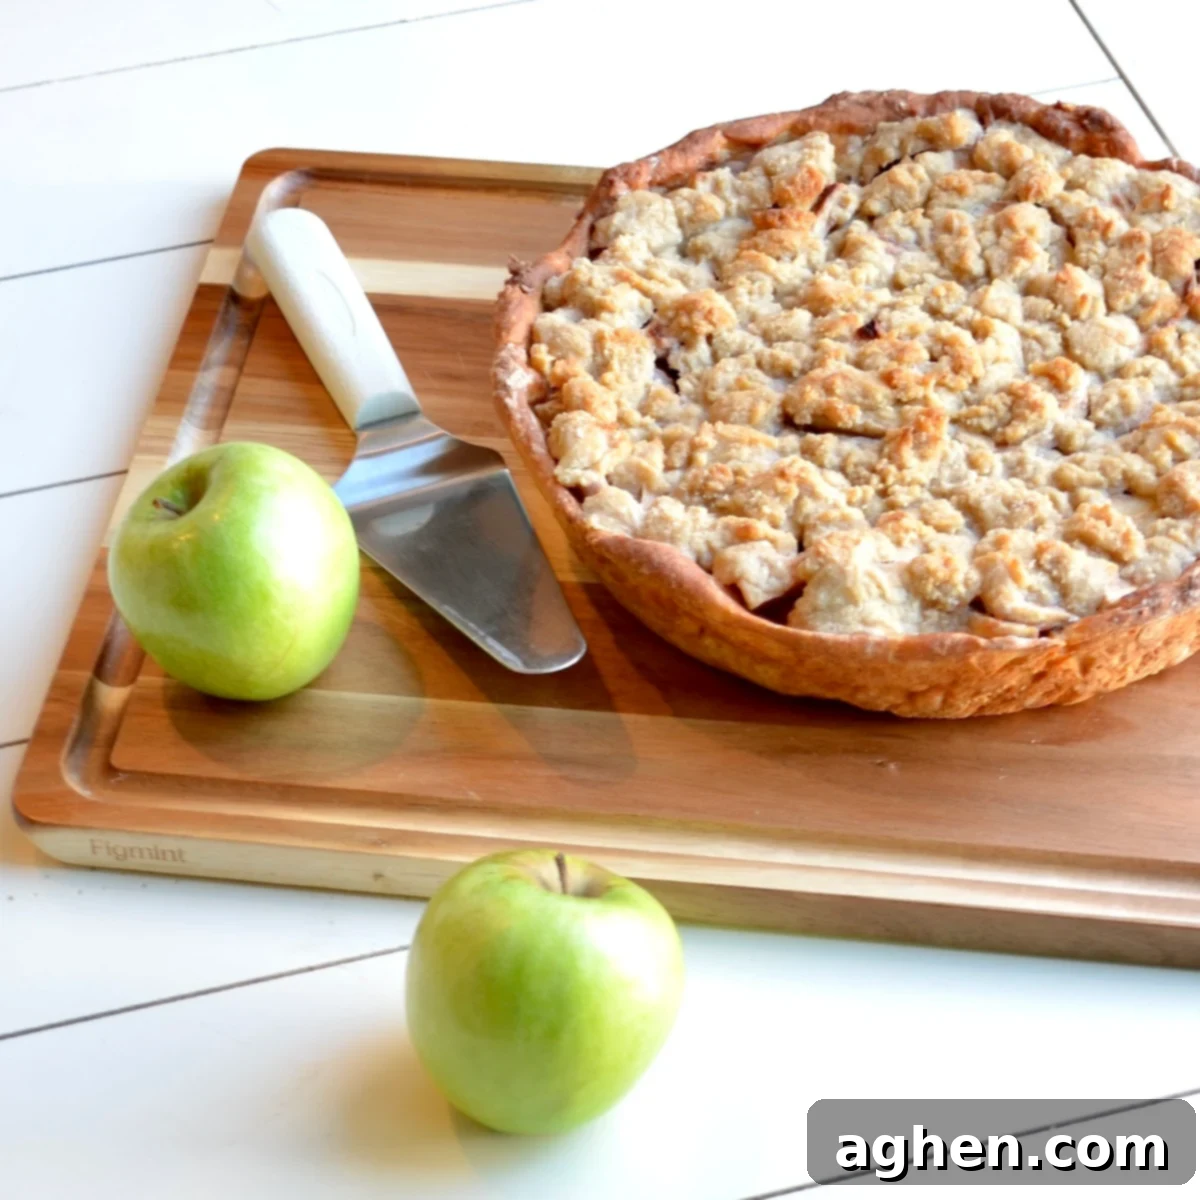
Why This WW Dutch Apple Pie Will Be Your New Favorite
- It’s Incredibly Delicious! This pie is a true show-stopper, combining a lightened-up, tender crust with a perfectly spiced, cinnamon-infused apple filling, all crowned with a golden, buttery crumble topping. The harmony of these elements creates a dessert that’s rich in flavor and texture, guaranteed to satisfy even the most discerning palates. You’ll be amazed that something so delightful can also be Weight Watchers-friendly.
- Remarkably Low in Fat: One of the standout features of this recipe is its impressive nutritional profile. Believe it or not, each generous serving contains only 3.4 grams of fat, which is significantly lower than the fat content found in many traditional apple pie recipes. This makes it an excellent choice for those looking to enjoy a classic dessert without the heavy guilt, fitting perfectly into a balanced lifestyle.
- Foolproof Apple Filling: Say goodbye to watery or undercooked pie fillings! The secret to our perfectly textured apple filling lies in partially cooking it on the stovetop before baking. This crucial step helps to release excess moisture from the apples, ensures the flour thickens properly without a raw taste, and pre-softens the apples for an ideal, tender bite. The result is a consistently thick, flavorful filling every single time.
- Easy to Make: With a crumb topping that’s simpler than rolling out a full top crust, and a crust made from just a few ingredients, this recipe streamlines the baking process. It’s an approachable recipe for bakers of all skill levels, allowing you to create a magnificent pie with less fuss.
- Perfect for Any Occasion: Whether it’s a cozy family dinner, a festive holiday gathering, or a potluck with friends, this Dutch apple pie is a crowd-pleaser. Its comforting flavors and impressive presentation make it suitable for any event, earning you rave reviews.
Recipe Overview & Key Nutritional Information
Understanding the details of this recipe makes planning and tracking your intake simple. Here’s a quick look at what you can expect:
- Serving Size: One generous slice (approximately 252 g)
- Number of Servings: This recipe yields 8 delicious servings, making it perfect for sharing.
- Time to Cook: The total cooking time for this delightful pie is approximately 1 hour and 10 minutes.
- WW Points Per Serving: Each satisfying slice is just 3 WW points, with the entire pie totaling 27 points. You can easily view and track this recipe in the WW app by clicking here (a Weight Watchers login is required).
Essential Ingredients for Your WW Dutch Apple Pie
Crafting this incredible pie requires a thoughtful selection of ingredients, focusing on flavor and point-friendly alternatives. Here’s what you’ll need, broken down by component:
Apple Filling: The Heart of the Pie
The success of any apple pie lies in its filling. We’re using Granny Smith apples for their perfect balance of tartness and firm texture, which holds up well during baking. The sugar substitutes and spices ensure a sweet and aromatic experience without excess calories.
- 3 lbs Granny smith apples, peeled, cored, and uniformly sliced (or your preferred baking apples for a similar tart-sweet profile)
- 2 tbsp Fresh lemon juice, to brighten the apple flavor and prevent browning
- 1/3 cup Your preferred brown sugar substitute (ensure it’s a 1:1 ratio replacement for best results)
- 1/3 cup Your preferred granulated sugar substitute (again, a 1:1 ratio replacement is key)
- 1/4 cup All-purpose flour, to thicken the filling to a luscious consistency
- 1 1/2 tsp Ground cinnamon, for that classic warm apple pie spice
- 1/2 tsp Ground nutmeg, to complement the cinnamon beautifully
Crumb Topping: The Signature Finish
This buttery, crunchy streusel topping is what truly sets Dutch apple pie apart. We’re using light butter substitute and sugar alternatives to keep it low in points while maintaining its irresistible texture.
- 3/4 cup All-purpose flour, forming the base of your crumbly topping
- 1/4 cup Your preferred brown sugar substitute (use a 1:1 ratio replacement)
- 1/4 cup Your preferred granulated sugar substitute (use a 1:1 ratio replacement)
- 1/4 tsp Table salt, to balance the sweetness and enhance flavors
- 5 tbsp Light butter substitute, chilled and cut into small pieces, crucial for a good crumb texture
- 1/2 tsp Ground cinnamon, for an extra layer of warmth in the topping
Pie Crust: The Light Foundation
Our unique, low-point crust is made with self-rising flour and Greek yogurt, offering a surprisingly tender and sturdy base without the usual high fat content of traditional pie dough.
- 3/4 cup Self-rising flour, essential for the texture of this specific crust (see substitutions if you only have AP flour)
- 3/4 cup Nonfat plain Greek yogurt, providing moisture and structure while keeping points low
- 1 1/2 tsp Vegetable oil, to add a little richness and help with malleability
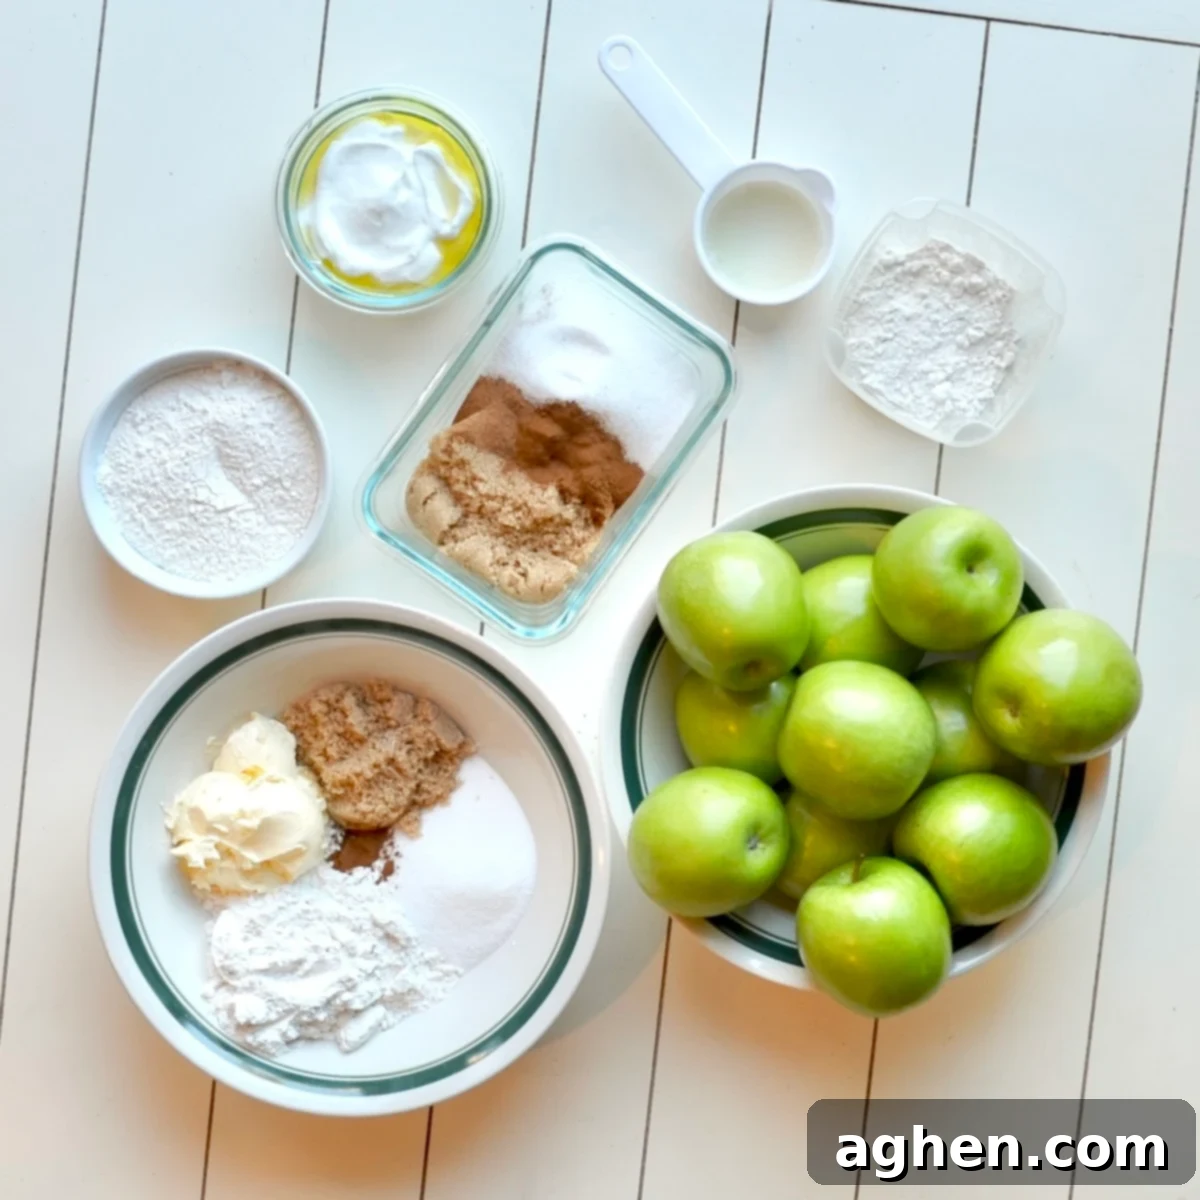
Step-by-Step Instructions for Crafting Your WW Dutch Apple Pie
Follow these detailed steps carefully to achieve a perfect, point-friendly Dutch apple pie:
- Preheat your oven to 375°F (190°C). Begin by preparing the pie crust. In a medium bowl, combine the self-rising flour, nonfat plain Greek yogurt, and vegetable oil. It’s a good idea to reserve a couple of tablespoons of the self-rising flour for dusting your work surface later. Start by adding slightly less Greek yogurt than the recipe calls for, then gradually add more if needed until a cohesive, soft dough forms. If the dough appears too dry and isn’t coming together, add a small splash of water (about a teaspoon at a time) to achieve the right consistency.
- Once the dough has formed, gently knead it within the bowl for about one minute until it becomes smooth and pliable. Avoid overworking the dough, as this can result in a tough crust. Transfer the dough to a piece of lightly floured parchment paper. Using a rolling pin, roll it out thinly into a circular shape, large enough to generously cover a 9.5-inch pie dish. If you find the dough is sticking, refer to our tips section for troubleshooting.
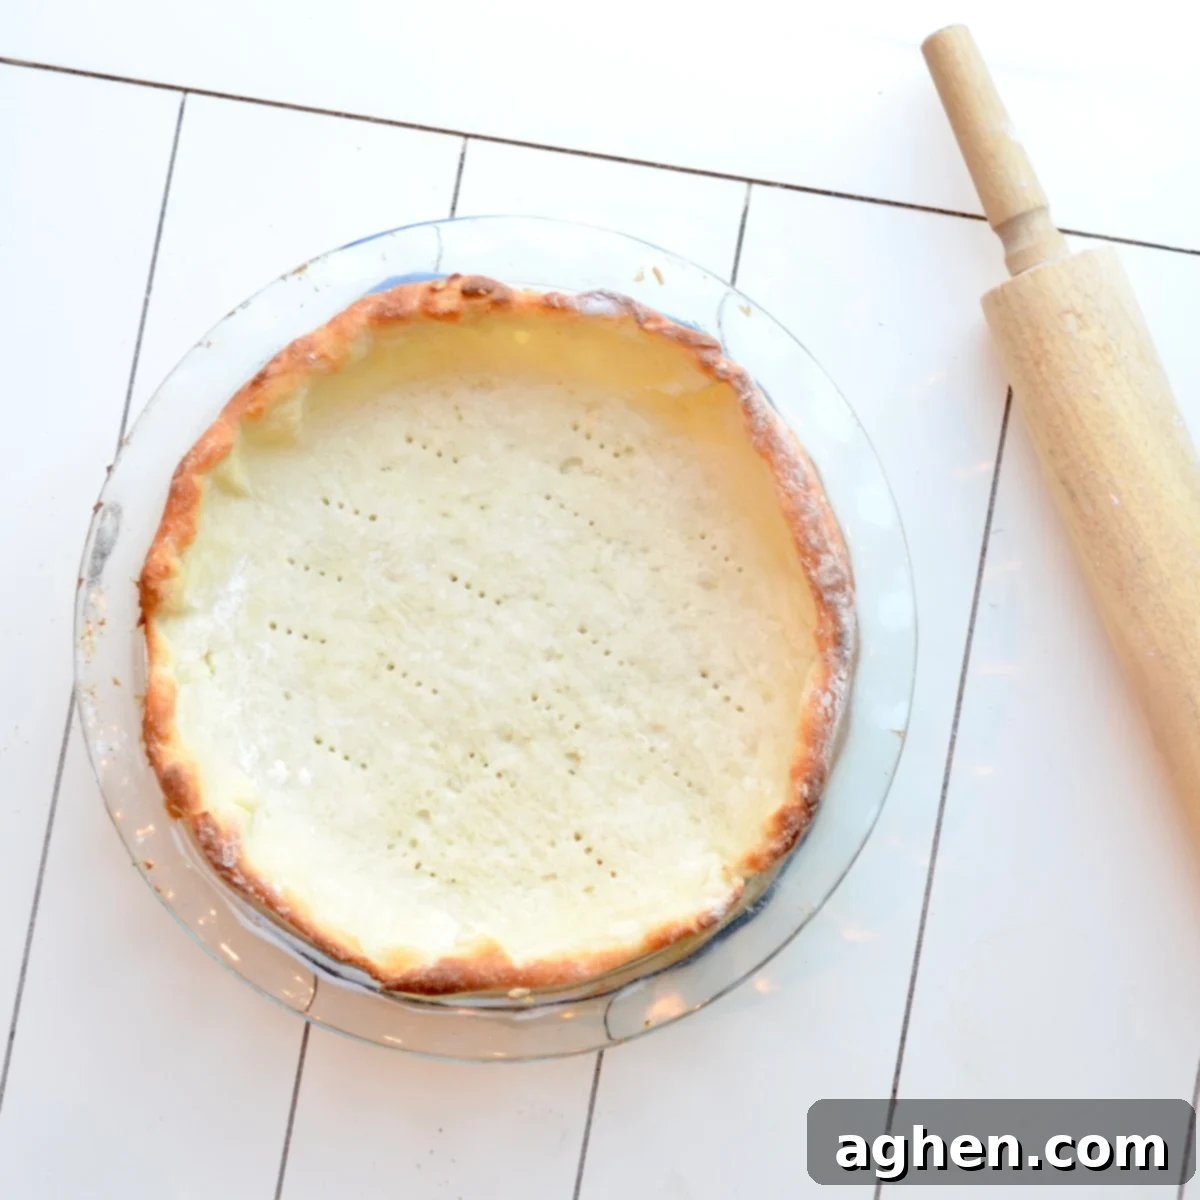
- Carefully transfer the rolled-out dough into a greased 9.5-inch pie dish. Gently peel away the parchment paper. To par-bake the crust, place a new piece of parchment paper directly over the dough and fill it with pie weights, such as dried beans or uncooked rice. Bake the pie shell for 15 minutes. After this initial bake, carefully remove the weights and parchment paper. Using a fork, gently poke several holes in the bottom of the crust to prevent it from puffing up. Return the crust to the oven and bake for an additional 5 minutes, or until the surface appears set and lightly golden. This par-baking step is crucial for preventing a soggy bottom crust.
4. Now, let’s prepare the delicious apple filling. Add the peeled and sliced Granny Smith apples to a large pot and place it over medium heat. Cook the apples for approximately 3 to 5 minutes, stirring occasionally, to allow some of their natural moisture to release. This step helps ensure the filling won’t be overly wet. Next, add the lemon juice, both brown and granulated sugar substitutes, all-purpose flour, ground cinnamon, and ground nutmeg to the pot with the apples. Continue to cook for a few more minutes, stirring constantly to prevent sticking and ensure all ingredients are well combined. This process helps eliminate any raw taste from the flour and gently softens the apples further. Before proceeding, taste the mixture and adjust the amount of cinnamon or sweetener according to your personal preference for a perfectly balanced flavor.
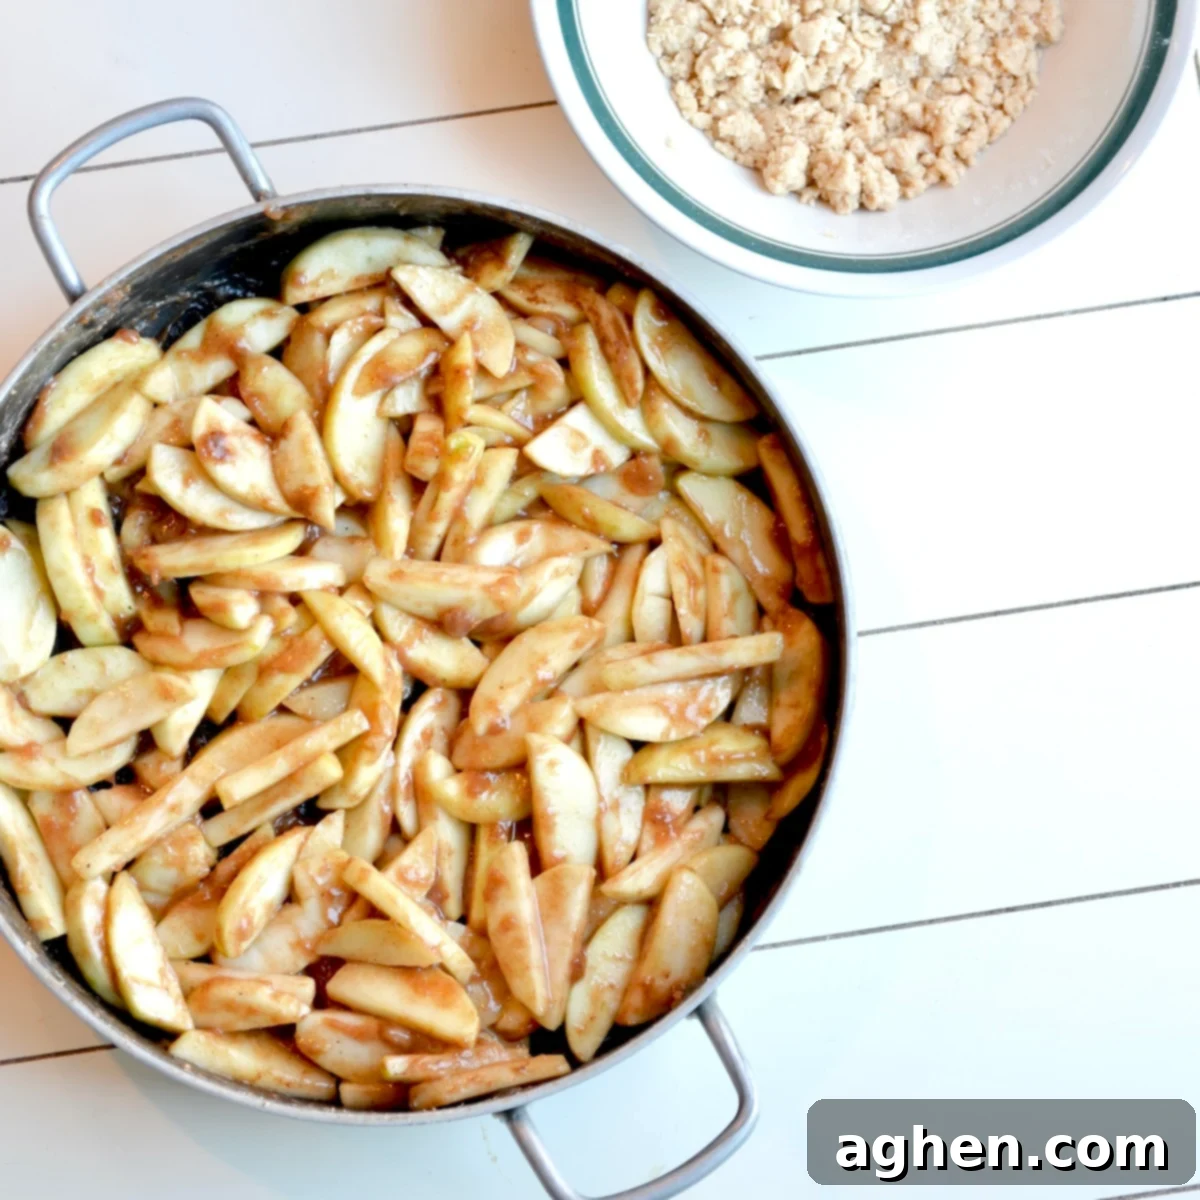
5. While the filling is cooling slightly, prepare your signature crumb topping. In a separate medium bowl, combine the all-purpose flour, brown sugar substitute, granulated sugar substitute, table salt, light butter substitute, and ground cinnamon. Using your fingertips or a pastry blender, work the ingredients together until a coarse, crumbly mixture forms. Be careful not to overmix, as this can lead to a dough-like consistency rather than distinct crumbs, which isn’t what we want for this topping. The goal is a mixture that resembles wet sand with some larger pea-sized crumbs.
6. Carefully transfer the prepared apple filling into the par-baked pie crust, spreading it evenly across the bottom. Then, generously sprinkle the crumb topping over the entire surface of the apple filling. At this point, the edges of your par-baked crust might already be sufficiently golden. To prevent them from over-browning during the final bake, wrap the edges of the pie with strips of aluminum foil or use a specialized pie crust shield. This protective measure will ensure a perfectly golden, not burnt, crust.
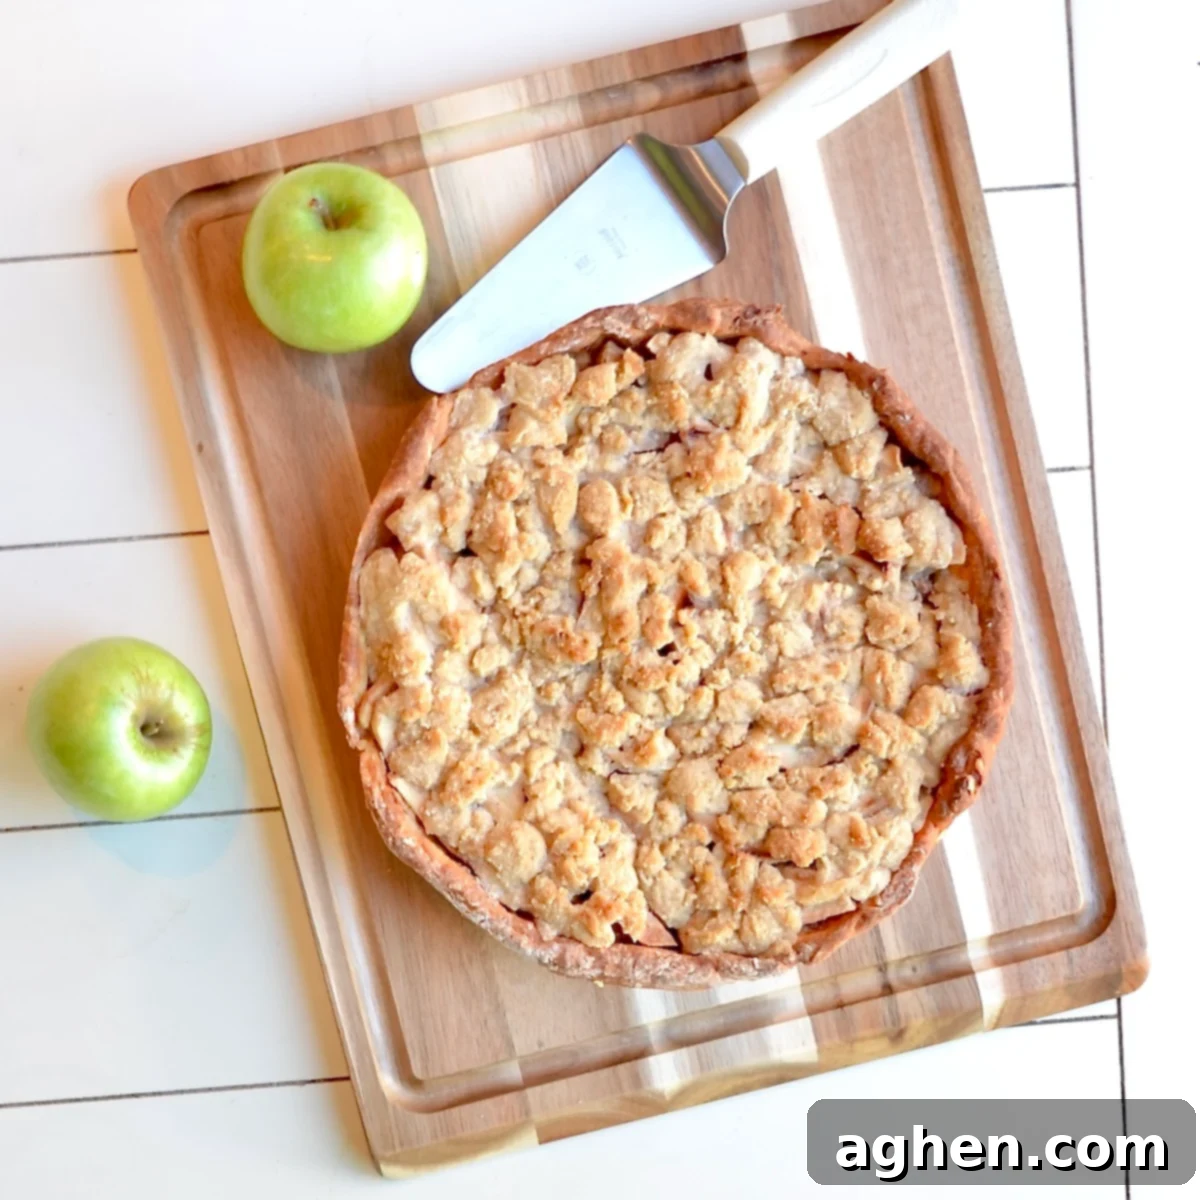
7. Place the pie in the preheated oven and bake for 40-50 minutes. The pie is ready when the apples feel fork-tender (you can test by gently inserting a knife into the center) and the crumb topping is beautifully golden brown and baked through. If you desire a deeper golden color or a crispier topping towards the end of baking, you can briefly broil the pie on a low setting for a minute or two, watching it very closely to prevent burning.
8. Patience is key for the perfect slice! Once baked, remove the pie from the oven and allow it to cool and rest for at least 1-2 hours on a wire rack before attempting to slice into it. This crucial resting period allows the filling to fully set, preventing it from being too runny when cut and ensuring clean, beautiful slices.
Creative Variations and Smart Substitutions
This recipe is wonderfully adaptable! Feel free to experiment with these variations to suit your taste or dietary needs:
- Real Sugar vs. Sweetener: While this recipe uses sugar substitutes for a lower point count, you can certainly use real brown sugar and granulated sugar if you prefer a traditional taste. Simply use the same amounts as specified for the sweeteners. Be mindful that using real sugar will increase the WW points per serving, so adjust your tracking accordingly.
- Dutch Apple Pie with Pre-Made Crust: To save a significant amount of time and effort, you can absolutely use a ready-made, store-bought pie shell. If you opt for this convenience, simply follow the recipe instructions for preparing the apple filling and the crumb topping, omitting the steps for making the homemade crust. Ensure the pre-made crust is suitable for a 9.5-inch pie dish.
- Dutch Apple Pie with Raisins or Other Dried Fruits: If you have a few extra points to spare and love a chewy texture, consider mixing some raisins, dried cranberries, or chopped dried apricots into the apple filling mixture. This adds a lovely burst of sweetness, additional flavor, and a pleasant textural contrast to the tender apples.
- Self-Rising Flour Alternative: Our crust recipe specifically calls for self-rising flour because it contains leavening agents that contribute to its unique texture. If you don’t have self-rising flour on hand, you can easily make your own. For every ¾ cup of all-purpose flour, simply whisk in 1 teaspoon of baking powder and ¼ teaspoon of table salt. This will create a suitable substitute for the self-rising flour required.
- Mini Dutch Apple Pies: For charming individual servings or enhanced portion control, transform this recipe into miniature pies! You can use standard muffin cups, lining them with small circles of dough, or individual ramekins. Using muffin cups will yield significantly more than 8 servings, which will naturally lower the points per serving even further. Adjust baking time as needed for smaller pies.
Expert Tips and Tricks for a Perfect Pie
Achieve baking success with these helpful hints and common troubleshooting advice:
- Preventing Over-Browning: If you notice the pie, particularly the crumb topping or the crust edges, getting too dark during baking before the apples are fully tender, simply tent the pie loosely with aluminum foil. This will shield it from direct heat and allow the interior to cook through without burning the exterior.
- Crust Dough Handling: The key to a tender crust is gentle handling. Be careful not to overmix or over-knead the crust dough. Excessive handling develops gluten, which can result in a tough, overly chewy crust after baking. You only need to mix it until the ingredients just come together, then knead very gently for about a minute until it’s smooth.
- Easy Dough Transfer: Rolling pie dough can be tricky, especially when transferring it without tearing. I highly recommend rolling your pie dough out between two pieces of lightly floured parchment paper or plastic wrap. Once rolled to the desired size, you can easily flip the dough (still on the parchment) into the pie dish, then simply peel away the top layer of parchment. This technique makes lifting and placing the delicate dough much simpler.
- The Importance of Par-Baking: Skipping the par-baking step for the crust can lead to a soggy or undercooked bottom, especially with the weight and moisture of the apple filling. This is why following the recipe’s suggestion to par-bake the crust with pie weights is crucial. The weights are also essential to prevent the crust from shrinking down the sides of the dish or puffing up excessively during its initial bake.
- Dealing with Sticky Dough: If your crust dough feels excessively sticky even after adding the recommended flour, and you’ve already reserved your rolling flour, there’s a quick fix. Lightly grease your hands and the dough with a small amount of avocado cooking spray. This will make it much easier to handle and roll out without adding a significant amount of extra flour. Additionally, ensuring your dough is well-chilled before rolling and using the two-parchment-paper method can greatly reduce stickiness. (If you do need to add more flour beyond this, remember to adjust your point calculation in the WW app if applicable).
- Know When Apples Are Cooked: To check if your apples are tender, carefully insert a thin, sharp knife into the center of the pie. If it slides in easily with minimal resistance, your apples are perfectly cooked.
- Storage and Reheating: Store any leftover pie loosely covered with plastic wrap or foil at room temperature for up to 2 days, or in the refrigerator for up to 4-5 days. For best results, reheat individual slices in the oven at 300°F (150°C) for about 10-15 minutes, or until warmed through and the topping is crisp again.
Serving Suggestions for Your Dutch Apple Pie
While this WW-friendly Dutch Apple Pie is absolutely divine on its own, a few simple additions can elevate your dessert experience:
- Lightened Whipped Topping: A dollop of sugar-free whipped cream or a light whipped topping is a classic pairing that adds a creamy texture without significantly increasing points.
- Low-Fat Vanilla Ice Cream: A small scoop of low-fat or sugar-free vanilla bean ice cream melts beautifully over a warm slice of pie, creating an irresistible hot-and-cold combination.
- Dusting of Cinnamon: For an extra touch of warmth and visual appeal, a light dusting of ground cinnamon over the top of each slice before serving is always a good idea.
- Fresh Berries: A side of fresh raspberries or blueberries can add a pop of color and a tart counterpoint to the sweet apple pie.
Explore More WW-Friendly Desserts
If you loved this healthy take on a classic, you’ll be thrilled to discover more delicious, low-point desserts:
Two-Ingredient Pie Crust Apple Pie
Weight Watchers-Friendly Apple Pie
Weight Watchers Apple Crisp
Weight Watchers Dutch Apple Pie
Equipment
-
9.5-inch pie dish
Ingredients
Apple Filling
- 3 lbs Granny smith apples (or preferred baking apples), peeled and sliced
- 2 tbsp Lemon juice
- 1/3 cup Preferred brown sugar substitute, use a 1:1 ratio replacement
- 1/3 cup Preferred granulated sugar substitute, use a 1:1 ratio replacement
- 1/4 cup All-purpose flour
- 1 1/2 tsp Ground cinnamon
- 1/2 tsp Ground nutmeg
Crumb Topping
- 3/4 cup All-purpose flour
- 1/4 cup Preferred brown sugar substitute, use a 1:1 ratio replacement
- 1/4 cup Preferred granulated sugar substitute, use a 1:1 ratio replacement
- 1/4 tsp Table salt
- 5 tbsp Light butter substitute
- 1/2 tsp Ground cinnamon
Pie Crust
- 3/4 cup Self-rising flour
- 3/4 cup Nonfat plain Greek yogurt
- 1 1/2 tsp Vegetable oil
Instructions
-
Preheat oven to 375F. Make the crust by mixing the three ingredients (reserve a couple of tablespoons of flour for rolling out). Start by adding slightly less Greek yogurt and adding more if needed until a dough forms. If dry, add a splash of water to bring the dough together.
-
Gently knead the dough in the bowl for about a minute until smooth, then transfer to a piece of lightly floured parchment paper and roll it out thinly, large enough to cover a 9.5-inch pie dish. (If sticky, refer to the tips section).
-
Transfer the rolled-out dough to a greased 9.5-inch pie dish and peel the parchment away. Put a new piece of parchment and fill it with pie weights (such as dried beans or rice). Bake the shell for 15 minutes, then remove the weights and parchment. Poke with a fork and bake for about 5 more minutes or until the surface is set.
-
To prepare the filling, add the apples to a large pot and cook over medium heat to release some of their moisture (about 3 to 5 minutes). Then, add the remaining ingredients and cook for a few more minutes, stirring constantly. This will help eliminate the raw taste of the flour and slightly soften the apples. Taste the mixture and adjust the cinnamon or sweetener according to your preference.
-
For the crumb topping, mix all of the ingredients with your hands until a crumbly mixture forms. You don’t want to overmix because a dough will form.
-
Transfer the apple filling to the empty crust and then sprinkle the crumb topping over the top. The crust edges will likely already be golden enough, so wrap the edges of the pie in foil or use a pie crust shield to protect them.
-
Bake the pie for 40-50 minutes, until the apples feel fork tender and the topping is baked through. If needed, you can broil on low at the end of baking to give the topping a deeper golden color.
-
Allow the pie to rest for 1-2 hours before slicing into it so it can set.
Notes
Nutrition
Nutrition information is automatically calculated, so should only be used as an approximation.
